
- 동영상 튜토리얼
배경지식
다음 예시를 생각해보자.
친구 A, B, C가 있다고하자. A는 C에게 하고 싶은 말이 있다. 그렇다면 A가 C에게 말하는게 빠를까 아니면 A가 B한테 말한 후 B가 C에게 말하는게 빠를까?
당연히 A가 C에게 말하는게 더 빠를 것이다. 단순히 생각해보면 A가 B에게 말하고 B가 다시 C에게 말한다면 전달 내용을 B가 기억(저장)해야하기 때문에 B를 통해 전달하는 것이 더 느리다.
ROS2는 A publisher와 C subscriber node가 서로 다른 processor에서 동작한다면 이처럼 A와 C는 B를 통해서 대화하고 있다고 보면 된다.
그렇다면 A와 C가 서로 직접접으로 대화 할 수 있게 하는 방법은 없을까?
당연히 똑똑한 ROS2 개발자들은 이를 염두해두고 ROS2를 개발했기 때문에 이렇게 빠르게 정보를 전달할 수 있는 방법이 존재한다.
바로 두개의 node를 동일한 processor내에서 처리함으로써 정보 교환시 따로 복사하지 않고 바로 전달할 수 있게 하는 방법이다.
이때 새로운 용어들이 등장하는데 이해하고 나면 어렵지 않으니 차근 차근 배워보자.
<용어 설명>
-
component: 제일 처음 배울 용어는 component이다.
component는 우리가 일전에 배운 node를 가리키는 말이다. 일반적인 node와 다르게 다른 node와 같은 processor내에 묶이는 구성원으로 사용될 수 있으므로 구성 요소(component)라는 이름이 붙였다. -
composable node: 뭔가 복잡해보이지만 component와 같은 의미를 갖는다. component node를 여러개 사용하여 밑에 배울 composition(구성)을 만들 것인데 이때 composition에 사용가능한 node라고 해서 composable(구성가능한)이라는 이름이 붙었다.
-
composition: 한개의 processor내에 composable node(=component)들로 이루어진 형태를 composition(구성)이라고한다. 한개의 processor내(한 composition)에서 node들간 통신을 하는 경우 데이터 복사과정이 없기 때문에 좀 더 빠르고 효율적인 통신이 가능하다.
요약해보자면,
composition은 composable한 node(=component)로 구성된다.
이 composition을 만들게 되면 node들간 빠른 통신이 가능하다.
왜 필요하지?
"아니, component(=composable node), composition같은 어려운 이름을 써서 왜 더 헷갈리게 할까?" 라는 생각이 드는가?
그럴 수 있다. 그런데 로봇개발은 상대적으로 우리가사용하는 PC보다 느린 컴퓨터에서 개발되므로 효율성이 굉장히 중요하다.
또한 로봇에서는 이미지 같은 방대한 데이터가 빠른 주기로 처리되야한다. 그렇기 때문에 이런 이미지를 불필요하게 복사하는 행위는 효율성을 떨어뜨릴 수 있다.
따라서 composition같은 개념을 도입해서 로봇이 좀 더 효율적으로 동작할 수 있게 해야한다.
준비물
- pub/sub node작성하는 실습 (링크)
실습
실습 1. 패키지 만들기
항상 해왔듯이 composition 구현 실습을 위한 작업공간과 패키지를 하나 만들자.
mkdir -p composition_ws/src
cd composition_ws/src
ros2 pkg create --build-type ament_cmake --license Apache-2.0 simple_composition
cd simple_compositon
code .
아직 우리는 component(=composable node)를 만들기 위해 어떤 dependency가 있는지 잘 모르겠으므로 패키지 만들때 따로 dependency를 추가해주지 않았다.
패키지내부 경로로 이동해서 visual code를 열어주자.
실습2. component(=composable node) 작성하기
실습 2.1. talker component 작성하기
먼저 우리 지난시간에 배웠던 talker를 component로 만들어볼 것이다.
지난 번 talker와 기능적인 면은 똑같지만 내부적으로 동작하는 방식이 다를 것이다.
실습 2.1.1. component node 코드 작성하기
-
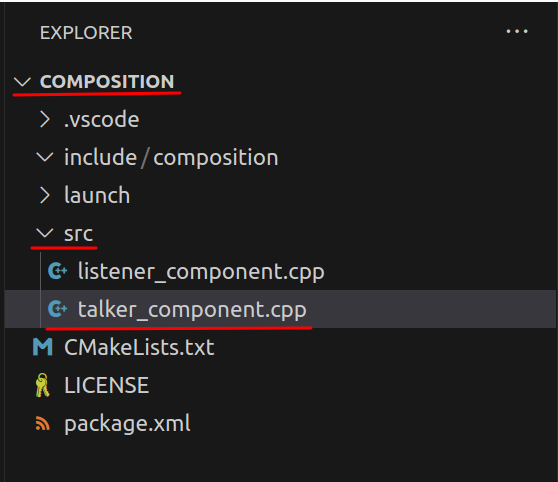
패키지 내 src폴더에 다음과 같이 talker_component.cpp라고 파일을 만들어준다.
-
talker_component.cpp에 다음과 같은 코드를 작성한다.
// Copyright 2016 Open Source Robotics Foundation, Inc.
//
// Licensed under the Apache License, Version 2.0 (the "License");
// you may not use this file except in compliance with the License.
// You may obtain a copy of the License at
//
//     http://www.apache.org/licenses/LICENSE-2.0
//
// Unless required by applicable law or agreed to in writing, software
// distributed under the License is distributed on an "AS IS" BASIS,
// WITHOUT WARRANTIES OR CONDITIONS OF ANY KIND, either express or implied.
// See the License for the specific language governing permissions and
// limitations under the License.

#include <chrono>
#include <iostream>
#include <memory>
#include <utility>

#include "rclcpp/rclcpp.hpp"
#include "std_msgs/msg/string.hpp"

using namespace std::chrono_literals;


namespace composition
{

// Create a Talker "component" that subclasses the generic rclcpp::Node base class.
// Components get built into shared libraries and as such do not write their own main functions.
// The process using the component's shared library will instantiate the class as a ROS node.

  class Talker : public rclcpp::Node
  {
    public:
      Talker(const rclcpp::NodeOptions & options)
      : Node("talker", options), count_(0)
      {
        // Create a publisher of "std_mgs/String" messages on the "chatter" topic.
        pub_ = create_publisher<std_msgs::msg::String>("chatter", 10);

        // Use a timer to schedule periodic message publishing.
        timer_ = create_wall_timer(1s, std::bind(&Talker::on_timer, this));
      }

      void on_timer()
      {
        auto msg = std::make_unique<std_msgs::msg::String>();
        msg->data = "Hello World: " + std::to_string(++count_);
        RCLCPP_INFO(this->get_logger(), "Our talker publishing: '%s'", msg->data.c_str());
        std::flush(std::cout);

        // Put the message into a queue to be processed by the middleware.
        // This call is non-blocking.
        pub_->publish(std::move(msg));
      }

    private:
      size_t count_;
      rclcpp::Publisher<std_msgs::msg::String>::SharedPtr pub_;
      rclcpp::TimerBase::SharedPtr timer_;
  };
}  // namespace composition

#include "rclcpp_components/register_node_macro.hpp"

// Register the component with class_loader.
// This acts as a sort of entry point, allowing the component to be discoverable when its library
// is being loaded into a running process.
RCLCPP_COMPONENTS_REGISTER_NODE(composition::Talker)
뭔가 어마어마하게 달라진거 같지만 주석을 제외하고 저번에 배운 talker.cpp코드와 상당히 유사한거 같다.
하나하나 살펴보자.
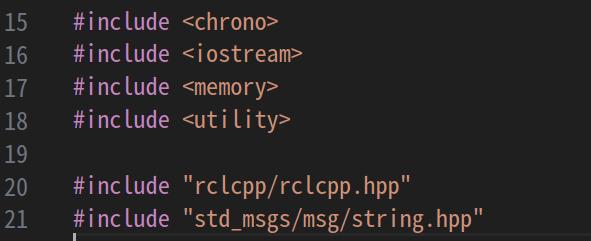
- 저번 talker.cpp에서 처럼 c++ 표준 라이브러리에서 헤더파일들을 포함시키고 있다. ros2 프로그램을 작성하기 위해 rclcpp와 std_msgs 패키지에서 헤더파일을 포함시키는 부분도 보인다.

- 좀 더 가독성 높은 시간 변수를 사용하기 위해 chrono_literals를 정의해준다.

- composition이라는 namespace 내에 Talker라는 class를 rclcpp::Node를 상속받아서 만들고 있다.
- 저번 Talker의 class와 다른 점은 rclcpp::NodeOptions 타입의 options을 생성할 때 인자로 받고 있다는 것이다.
- 이 options는 Node를 초기화할 때 입력값으로 사용되는데 이는 해당 Talker node가 composition을 구성하는 component가 될 때, 같은composition내 다른 component와 통신이 필요한 경우 데이터를 복사하지 않고 그대로 공유한다는 세팅을 내부적으로 해주기 위해 필요하다.
- 뭔가 어렵다고 생각하는 사람은 "아 그냥 내부적으로 통신하려면 이렇게 options를 node만들 때 추가해야하는 구나" 라고 받아드리면 된다.
- 좀 더 자세하게 알고 싶은 사람은 해당 링크에 가서 intra-process communication방식으로 node를 생성할 때 node option이 어떻게 생성되는지 살펴보기 바란다.
- intra-process communication링크
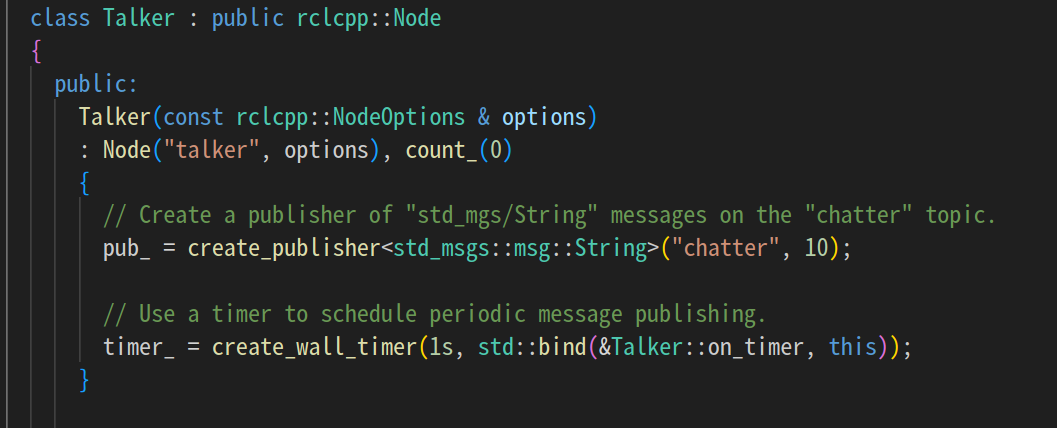
- Talker class의 생성자를 좀 더 자세히 살펴보면, publisher를 생성한다.
- 해당 publisher는 "chatter"라는 topic에 std_msgs::msg::String타입의 메세지를 발행한다.
- 발행해서 Queue에 저장되는 메세지수는 10개로 한다. (구독자가 소모하지 않으면 최대 쌓아둠)
- 1초에 1번씩 on_timer라는 함수를 호출하는 timer를 생성한다.
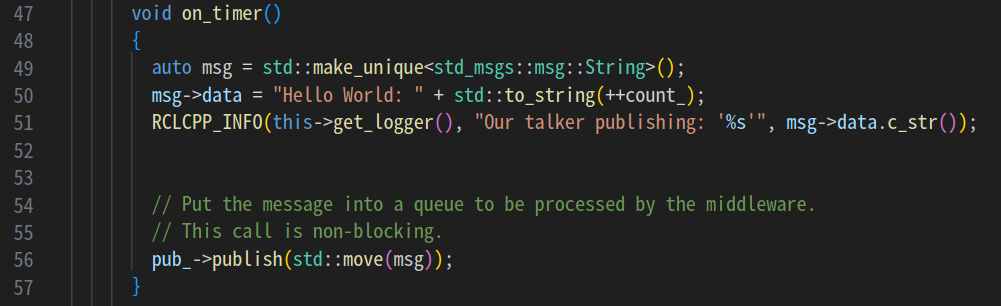
- timer에서 호출되는 callback, on_timer를 정의한다.
- 해당 callback 함수는 std_msgs::msg::String이라는 타입의 메세지를 정의한다.
- 해당 메세지변수 data에는 "Hello World"와 count변수를 조합한 문자열이 저장된다.
- "Our talker publishing: ~"라는 log를 출력한다.
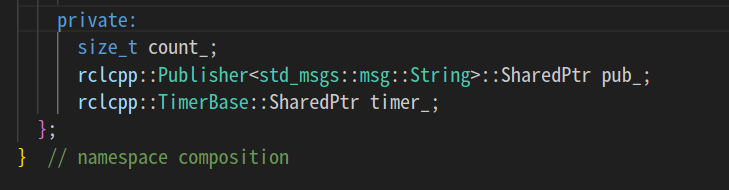
- 상단의 클래스 내부에서 사용된 변수들을 정의한다.
- count_: 이름 그대로 발행될 때마다 증가하는 카운터이다.
- pub_: 메세지 발생을 담당하는 퍼블리셔이다.
- timer_: 주기적인 행동을 담당하는 timer이다.

- 이부분이 일반 node와 크게 다른 점이다.
- 저번의 talker.cpp에서는 Talker class를 정의한 후 main함수에서 node를 만들어서 실행했었다.
- 그러나 component(=composable node)의 경우 rclcpp_components에서 register_node_macro.hpp 헤더파일을 포함시켜
- RCLCPP_COMPONENTS_REGISTER_NODE라는 매크로에 composition::Taker (여기서 composition은 namespace, Taker는 clas이름이다) 를 넣어주어 component를 등록한다.
- 이렇게 등록하게 되면 나중에 살펴보겠지만 composable node로써 launch파일에서 composition을 만들 때 사용가능하다.
- 참고로 매크로는 함수가 아닌 무언가를 반복하는 행위를 할 때 작성되어야 하는 텍스트(코드)뭉치를 짧게 정의해놓은 것이라고 이해하면 된다.
2.1.2. CMakeLists.txt 작성하기
다음과 같은 코드의 일부를 CMakeLists.txt에 적절히 복사 붙여넣기 한다.
find_package(rclcpp REQUIRED)
find_package(rclcpp_components REQUIRED)
find_package(std_msgs REQUIRED)

add_library(talker_component SHARED
  src/talker_component.cpp)
ament_target_dependencies(talker_component
  rclcpp
  rclcpp_components
  std_msgs)
rclcpp_components_register_nodes(talker_component "composition::Talker")
예시)
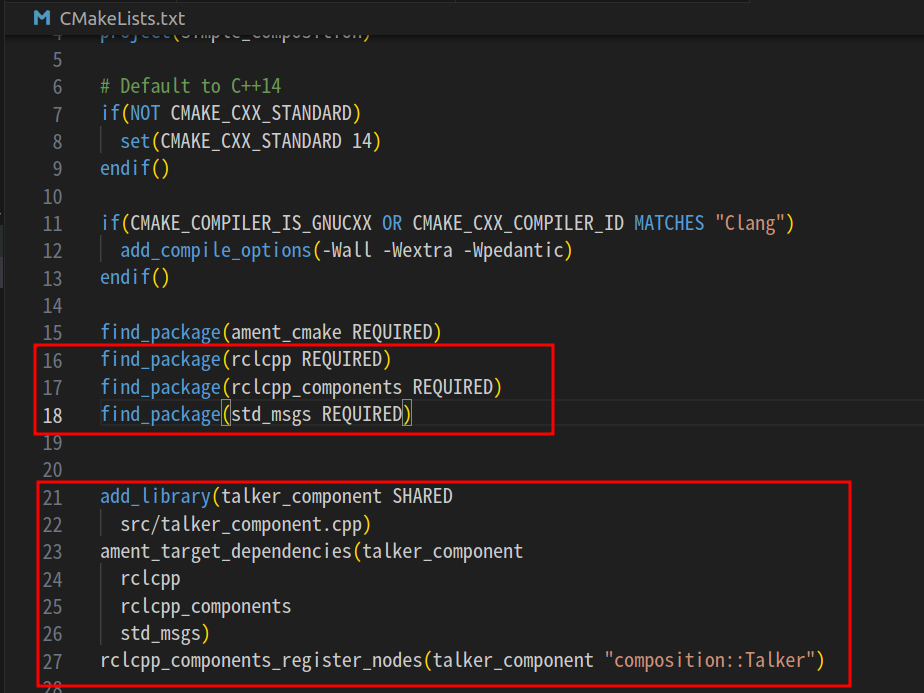
- rclcpp, std_msgs에 의존하므로 find_package를 통해 찾아준다.
- component를 등록하기 위해 매크로를 사용했으므로 매크로가 정의된 rclcpp_components패키지를 찾아준다.
- executable 대신 component는 library형태로 등록해야한다.
- 따라서 add_library에 library 이름, source코드 위치를 장석해준다.
- library의 dependency로는 rclcpp, rclcpp_components, std_msgs가 있으므로 추가해준다.
- "rclcpp_components_register_nodes 함수를 사용해서 talker_component라는 등록할 library(위의 add_library에서 설정한 이름과 같아야함)와 이 library내에 등록할 component의 이름"composition::Talker"를 인자로 넣어 component를 최종적으로 등록한다.
- composition::Talker는 우리가 cpp파일에 구현할 때 namespace이름 composition과 class 이름 Talker에서 온 것이다.
2.1.3. pakcage.xml 작성하기
CMakeLists.txt를 작성했으면 package.xml도 적절히 수정해주자.
다음과 같은 코드를 적절히 복사 붙여넣는다.
  <build_depend>rclcpp</build_depend>
  <build_depend>rclcpp_components</build_depend>
  <build_depend>std_msgs</build_depend>

  <exec_depend>launch_ros</exec_depend>
  <exec_depend>rclcpp</exec_depend>
  <exec_depend>rclcpp_components</exec_depend>
  <exec_depend>std_msgs</exec_depend>
예시)
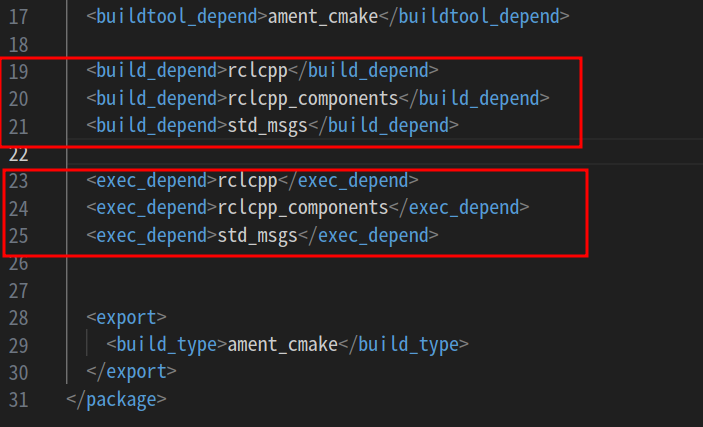
- build할 때 필요한 dependency로 rclcpp, rclcpp_components, std_msgs를 추가한다.
- 실행할 때 필요한 dependency로 rclcpp, rclcpp_components, std_msgs를 추가한다.
이대로 컴파일 해도 되지만 listener까지 작성하고 compile하도록 하자.
실습 2.2. listener component 작성하기
이제 listener를 component로 만들어보자.
기능은 일반적인 listener와 동일하고 내부적으로 통신한는 방식만 데이터 복사 없이 일어난다는 점이 다르다.
실습 2.2.1. component 코드 작성하기
- 패키지 내 src폴더에 다음과 같이 listener_component.cpp라고 파일을 만들어준다.
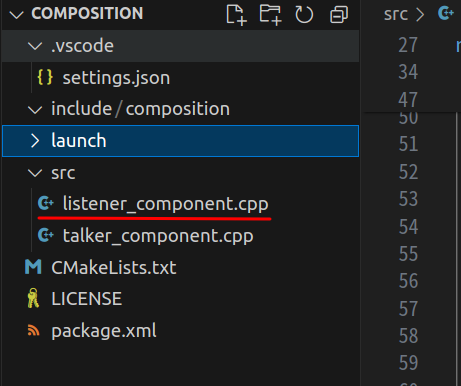
- listener_component.cpp에 다음과 같은 코드를 작성한다.
// Copyright 2016 Open Source Robotics Foundation, Inc.
//
// Licensed under the Apache License, Version 2.0 (the "License");
// you may not use this file except in compliance with the License.
// You may obtain a copy of the License at
//
//     http://www.apache.org/licenses/LICENSE-2.0
//
// Unless required by applicable law or agreed to in writing, software
// distributed under the License is distributed on an "AS IS" BASIS,
// WITHOUT WARRANTIES OR CONDITIONS OF ANY KIND, either express or implied.
// See the License for the specific language governing permissions and
// limitations under the License.


#include <iostream>
#include <memory>

#include "rclcpp/rclcpp.hpp"
#include "std_msgs/msg/string.hpp"

namespace composition
{


    class Listener : public rclcpp::Node
    {
        // Create a Listener "component" that subclasses the generic rclcpp::Node base class.
        // Components get built into shared libraries and as such do not write their own main functions.
        // The process using the component's shared library will instantiate the class as a ROS node.
        public:
            Listener(const rclcpp::NodeOptions & options)
            : Node("listener", options)
            {
            // Create a callback function for when messages are received.
            // Variations of this function also exist using, for example, UniquePtr for zero-copy transport.
            auto callback =
                [this](std_msgs::msg::String::ConstSharedPtr msg) -> void
                {
                RCLCPP_INFO(this->get_logger(), "Our listener heard: [%s]", msg->data.c_str());
                // std::flush(std::cout);
                };

            // Create a subscription to the "chatter" topic which can be matched with one or more
            // compatible ROS publishers.
            // Note that not all publishers on the same topic with the same type will be compatible:
            // they must have compatible Quality of Service policies.
            sub_ = create_subscription<std_msgs::msg::String>("chatter", 10, callback);
            }
        private:
            rclcpp::Subscription<std_msgs::msg::String>::SharedPtr sub_;
    };
}  // namespace composition

#include "rclcpp_components/register_node_macro.hpp"

// Register the component with class_loader.
// This acts as a sort of entry point, allowing the component to be discoverable when its library
// is being loaded into a running process.
RCLCPP_COMPONENTS_REGISTER_NODE(composition::Listener)
뭐가 많아 보인다. 하나하나 살펴보자.
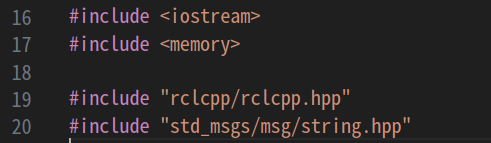
- 필요한 헤더파일을 inlcude한다.
- c++ 표준 라이브러리에서는 iostream과 memory를 include한다.
- ros2 프로그래밍을 위해 rclcpp.hpp와 string.hpp 헤더파일을 include한다.
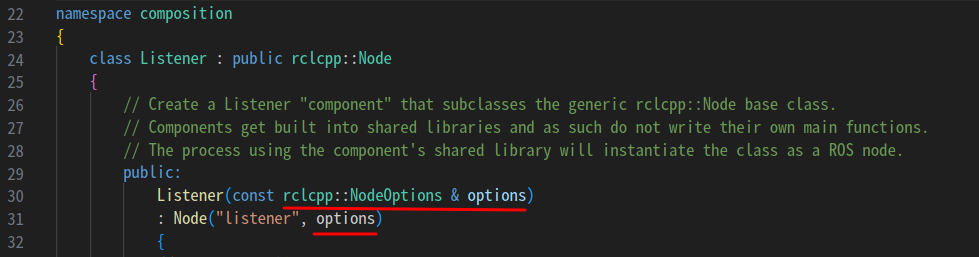
- talker_component.cpp에서와 마찬가지로 내부 통신 방법을 정해주기 위해 rclcpp::NodeOptions 타입의 options를 추가해준다.
- 이 options로 "listener"라는 node를 초기화해준다.
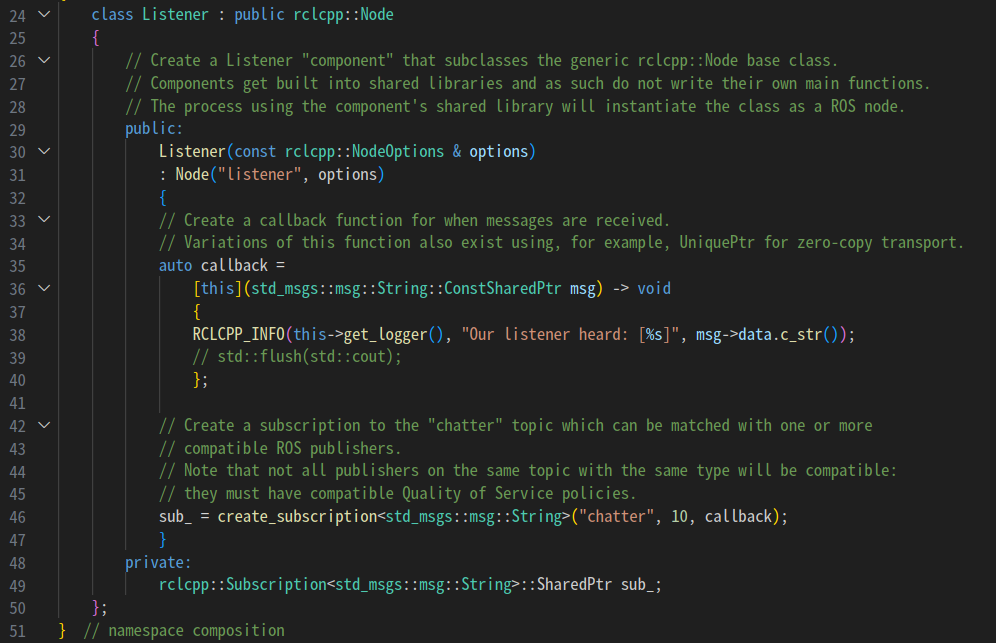
- lambda 표현을 통해 callback 함수를 정의한다.
- 이 callback함수는 msg라는 인자를 받아서 msg의 data에 저장되어 있는 값을 출력한다.
- lambda표현은 이렇게 간단한 함수를 정의할 때 사용하면 용이하다.
- 그리고 이 callback은 sub_변수에 subscription을 만들 때 같이 등록된다.
- 해당 subcription은 "chatter" topic에 들어오는 메세지를 구독한다.
- 메세지 타입은 std_msgs::msg::Sring을 사용한다.
- 상기 코드에 의하면 구독자는 최대 10개의 메세지를 저장해놓고 차례대로 꺼내 쓸 수 있다.
- private으로써 subscription, sub_을 정의한다.
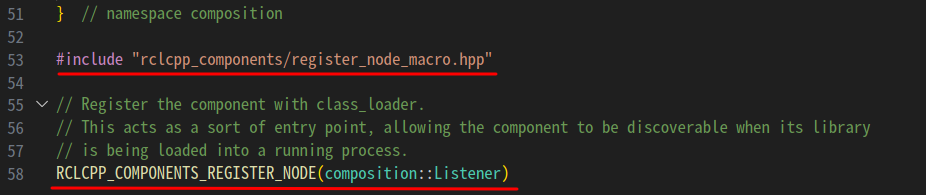
- talker_component에서와 동일하게 매크로를 사용하여 composition::Listener라는 component를 등록해주는 코드를 작성한다.
실습 2.2.2. CMakeLists.txt 작성하기
talker_component처럼 CMakeLists.txt에 library와 component를 추가하는 코드를 작성해주자.
add_library(listener_component SHARED
  src/listener_component.cpp)
ament_target_dependencies(listener_component
  rclcpp
  rclcpp_components
  std_msgs)
rclcpp_components_register_nodes(listener_component "composition::Listener")
예시)
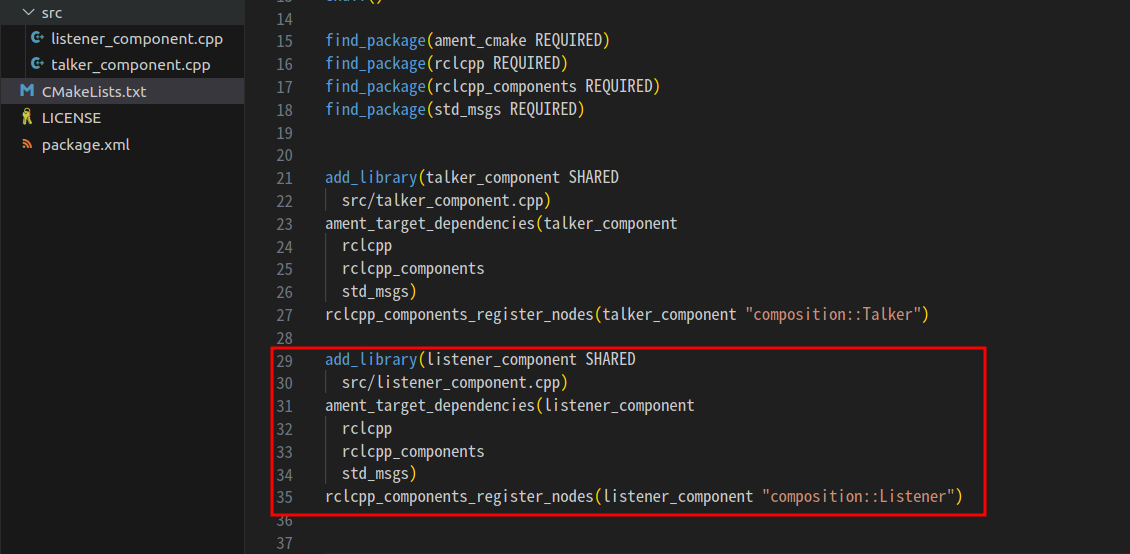
- listener_component라는 library를 추가한다.
- dependency는 rclcpp, rclcpp_components, std_msgs를 갖는다.
- listener_component라이브러리에 "composition::Listener"라는 component를 추가한다.
- "composition::Listener"는 listener_component.cpp파일에서 매크로를 통해 추가되었다.
추가로 install 경로에 해당 library들이 추가 될 수 있게 함수를 다음과 같이 추가한다.
install(TARGETS
  talker_component
  listener_component
  ARCHIVE DESTINATION lib
  LIBRARY DESTINATION lib
  RUNTIME DESTINATION bin)
예시)
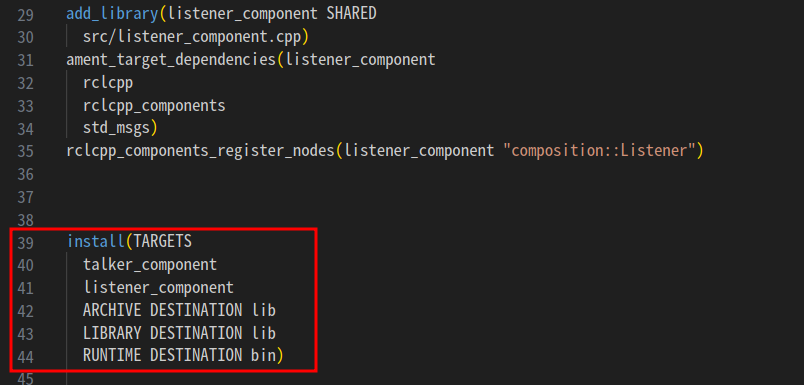
- talker_component와 listener_component가 추가된 것을 볼 수 있다.
- 이 library들은 ARCHIVE 키워드 통해서 정적 라이브러리 파일(.a)로 설치된다.
- LIBRARY 키워드를 통해 공유 라이브러리 파일(.so, .dll등)으로 설치된다.
- RUNTIME 키워드를 통해 실행파일(.bin)을 설치한다.
나중에 launch파일로 composition을 만들어서 실행하게 되면 .so 형태의 라이브러리 파일이 사용되는 것을 볼 수 있을 것이다.
실습 2.2.3. package.xml 작성하기
listener_component는 talker_component와 같은 dependency를 가지고 있으므로 딱히 추가할 dependency는 없다.
실습 2.2.4. launch파일로 composition 구성하기
자 이제 대망의 composition을 구성할 차례이다.
component들로 composition을 구성하는 방법은 여러 방법이 있지만 이번 실습에서는 가장 실요적인 launch파일로 composition을 구성하는 방법을 알아볼 것이다.
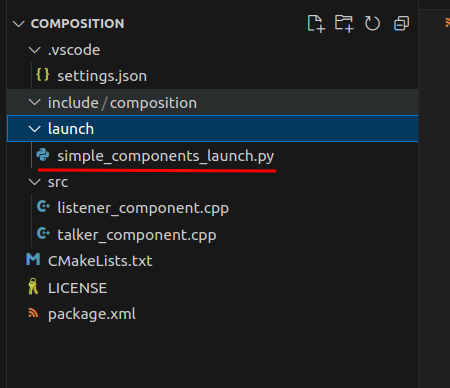
먼저 launch파일 경로를 만들어준다.
cd ~/composition_ws/src/simple_composition
mkdir launch
cd launch
code .
launch폴더 내부에 "simple_components_launch.py"를 만들어준다.
예시)
launch.py에 다음과 같은 코드를 작성한다.
# Copyright 2019 Open Source Robotics Foundation, Inc.
#
# Licensed under the Apache License, Version 2.0 (the "License");
# you may not use this file except in compliance with the License.
# You may obtain a copy of the License at
#
#     http://www.apache.org/licenses/LICENSE-2.0
#
# Unless required by applicable law or agreed to in writing, software
# distributed under the License is distributed on an "AS IS" BASIS,
# WITHOUT WARRANTIES OR CONDITIONS OF ANY KIND, either express or implied.
# See the License for the specific language governing permissions and
# limitations under the License.

"""Launch a talker and a listener in a component container."""

import launch
from launch_ros.actions import ComposableNodeContainer
from launch_ros.descriptions import ComposableNode


def generate_launch_description():
    """Generate launch description with multiple components."""
    container = ComposableNodeContainer(
            name='my_container',
            namespace='',
            package='rclcpp_components',
            executable='component_container',
            composable_node_descriptions=[
                ComposableNode(
                    package='simple_composition',
                    plugin='composition::Talker',
                    name='talker'),
                ComposableNode(
                    package='simple_composition',
                    plugin='composition::Listener',
                    name='listener')
            ],
            output='screen',
    )

    return launch.LaunchDescription([container])
코드를 살펴보자

- 먼저 composable node를 사용하기 위해 해당 node들을 담을 container가 필요하다.
- 이를 위해서 ComposableNodeContainer를 import한다.
- Composable node를 묘사하기 위해 launch_ros.descriptions에서 ComposableNode를 import한다.
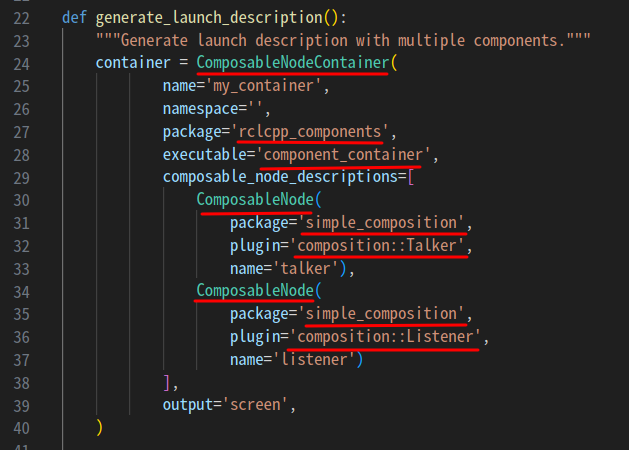
- composition을 만들기 위해서는 container가 필요하다. 이 container는 rclcpp_component pakcage에 구현되어 있는데 위와 같이 executable로 'component_container'를 사용하면된다.
- 그후 component로 사용할 plugin들을 ComposableNode로써 생성해주면된다.
- 해당 코드의 경우 composition::Talker와 composition::Listener가 사용되었다.
이렇게 component로 추가해놓은 talker와 listener를 사용해서 launch파일에서 composition을 구성했다.
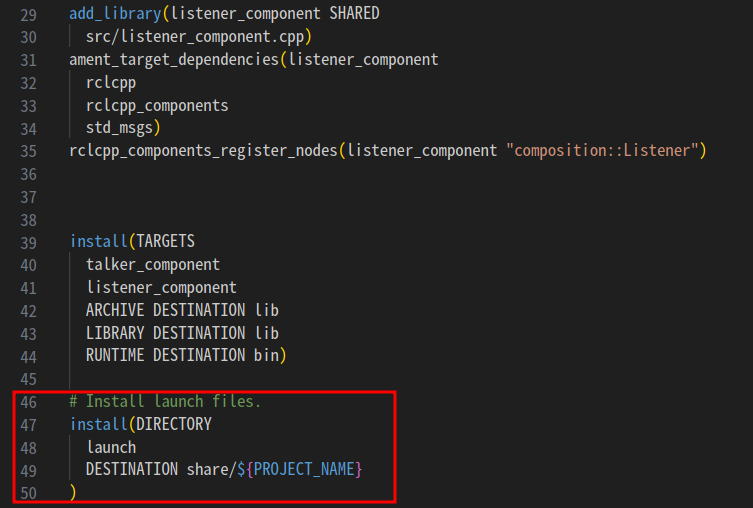
그럼 CMakeLists.txt에서 launch파일을 추가하고 compile해보자.
# Install launch files.
install(DIRECTORY
  launch
  DESTINATION share/${PROJECT_NAME}
)
예시)
실습3. 빌드 및 실행하기
파일들의 변경사항을 저장했는지 확인하고 빌드 및 실행해보자.
- colcon build
cd ~/composition_ws/
colcon build- 실행하기(다른 터미널 여는 것을 권장)
cd ~/composition_ws/
source install/setup.bash
ros2 launch simple_composition simple_components_launch.py
예시)
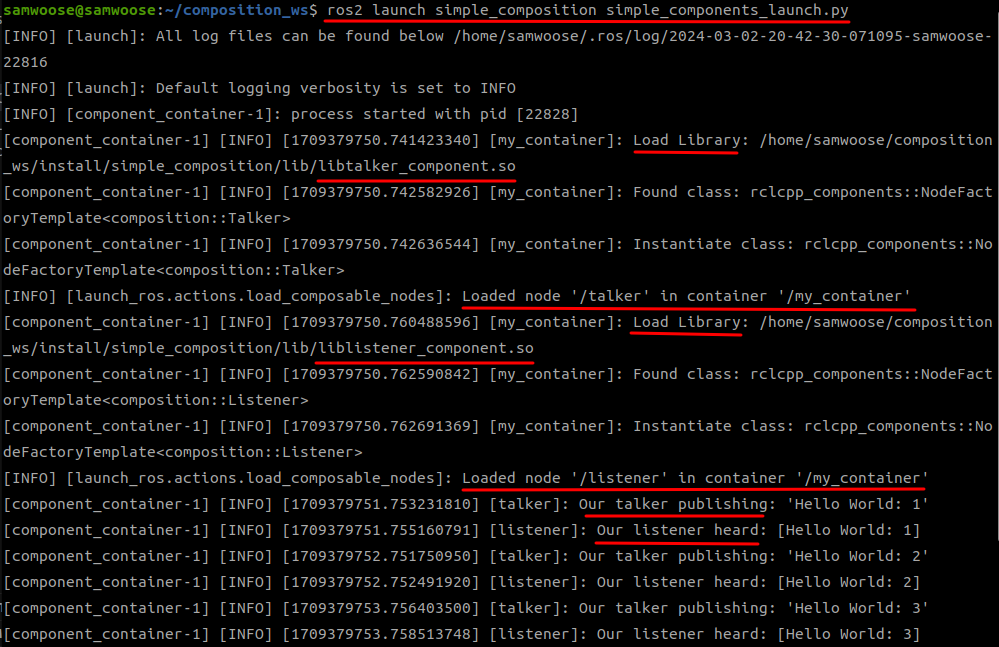
실행 예시를 보면 몇가지 주목 할만한 메세지들이 있다.
- libtalker_component.so와 liblilstener_component.so형태로 library가 load된 것을 확인할 수 있다.
- /talker와 /listener node는 /my_container에 node로 load된 것을 확인 할 수 있다.
- /talker는 "Our talker publishing~"하고 /listener는 "Our listener heard~"라고 동작하는 것을 확인 할 수 있다.
요약
오늘 내용은 새로운 개념을 배워야 하기 때문에 살펴볼게 정말 많았다.
그러나 핵심은 간단하기 때문에 두려워하지말자!
<핵심요약>
- component(=composable node)는 composition을 구성하는 node이다.
- composition을 사용하는 주된 이유는 방대한 양의 데이터(이미지 정보등) 복사 없이 효율적인 통신을 하기 위함이다.
- component node로 만들 때는 node를 정의할 때 NodeOptions가 필요했다.
- component를 만들기 위해서는 main함수 대신 component를 등록한다는 매크로가 필요하다.
- component를 library로 등록하기 위해 CMakeLists.txt와 package.xml를 적절히 수정해줘야한다.
- launch파일에서 component들로 composition을 구성하는 것이 가능하다.
요약해보니 6줄 밖에 안된다. 별거 없는 듯 하다.
앞으로 방대한 데이터의 교환이 필요할 때 composition을 통해 구현해보자.
대신 구현할 때 기본적인 composition구조를 갖추고 내부 상세 알고리즘을 작성하는 습관은 디버깅 지옥에 빠지는 것을 예방해주니 꼭 기억하도록 하자!
다음 시간에는 node 상태를 관찰하고 변경하는 lifecycle에 대해 배워볼 예정이다!
처음엔 어렵지만 많이 유용하니 꼭 공부해주길 바란다~!
질문하고 싶거나 인공지능 & 로봇 개발에 대해 다뤄줬으면 하는 주제를 댓글로 남겨주기 바란다~!
문의메일: irobou0915@gmail.com
오픈톡 문의: https://open.kakao.com/o/sXMqcQAf
참고 문헌:


오늘도 잘 보고 갑니다!!!