Web Data 크롤링과 시카고맛집분석

해당 글은 제로베이스데이터스쿨 학습자료를 참고하여 작성되었습니다
📌Web Data
- HTML과 XML 문서들의 구문을 분석하기 위한 파이썬 패키지
간단한 html 문법
- title : 제목(헤드라인)
- p : 문단
- a : 링크
- b : 볼드체
- i : 이탤릭체
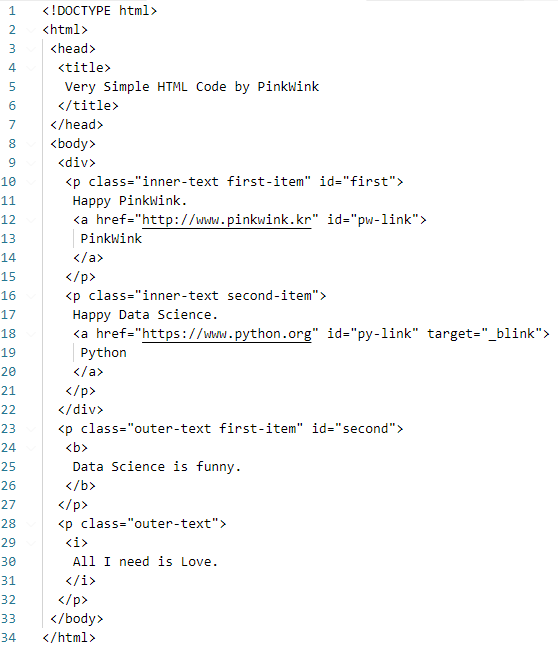
실습에 사용할 html코드
<!doctype html>
<html>
<head>
<title>Very Simple HTML Code by PinkWink</title> <!--제목-->
</head>
<body>
<div>
<p class="inner-text first-item" id="first"> <!--문단-->
Happy PinkWink. <!--텍스트-->
<a href="http://www.pinkwink.kr" id="pw-link">PinkWink</a> <!--링크-->
</p>
<p class="inner-text second-item"> <!--문단-->
Happy Data Science. <!--텍스트-->
<a href="https://www.python.org" target="_blink" id="py-link">Python</a> <!--링크-->
</p>
</div>
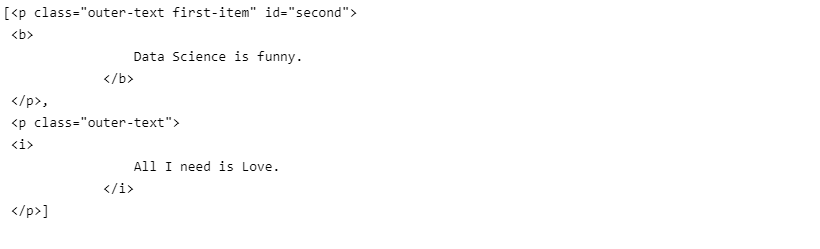
<p class="outer-text first-item" id="second"> <!--문단-->
<b> <!--볼드체(진하게)-->
Data Science is funny.
</b>
</p>
<p class="outer-text"> <!--문단-->
<i> <!--이탤릭체(기울이기)-->
All I need is Love.
</i>
</p>
</body>
</html>📌BeautifulSoup 기초
데이터 읽어오기
html파일 읽어오기
# %conda install -c anaconda beautifulsoup4
from bs4 import BeautifulSoup
page = open("../data/03. test_first.html", "r").read()
soup = BeautifulSoup(page, "html.parser")
print(soup.prettify())
태그 1개 확인
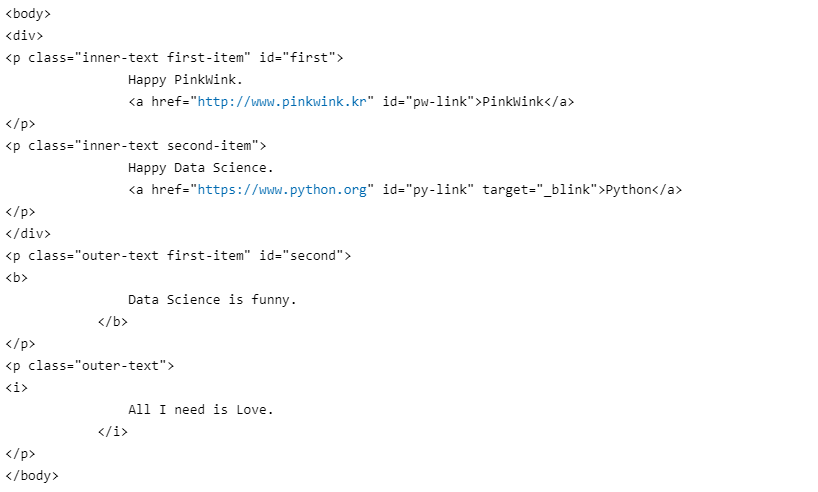
# head 태그 확인
soup.body
# 가장 첫번째 태그만 가져온다
soup.find("p")
# soup.p

태그 안의 속성값으로 조회
soup.find("p", class_="inner-text second-item")

id로 확인하기
# id는 고유값으로 하나만 존재한다
soup.find(id='second')

텍스트만 가져오기
# strip() : 좌우측의 공백제거
soup.find(id='second').text.strip()

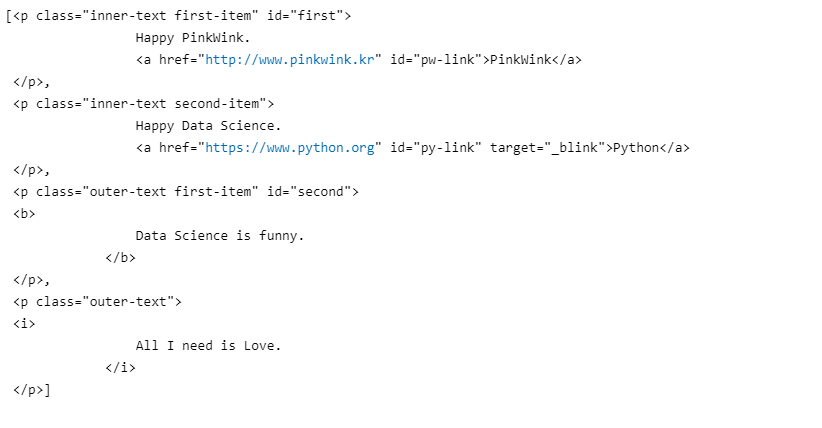
모든 태그 확인
soup.find_all("p")
해당 조건에 포함되는 모든 태그 확인
# 데이터가 컨테이너 구조로 저장되어 있다
soup.find_all("p", class_="outer-text")
각 데이터의 텍스트 출력
print(soup.find_all("p", class_="outer-text")[0].text)
print(soup.find_all("p", class_="outer-text")[1].get_text())
print("="*30)
for each_tag in soup.find_all("p"):
    print(each_tag.text)

a 태그에서 href 속성값 추출
links = soup.find_all('a')
for each in links:
    href = each['href']
    text = each.get_text()
    print(text + '=>' + href)

📌크롬개발자도구
- 개발을 도와주는 다양한 도구
- 해당 학습에서는 웹크롤링으로 활용한다
📌Beautifulsoup 예제
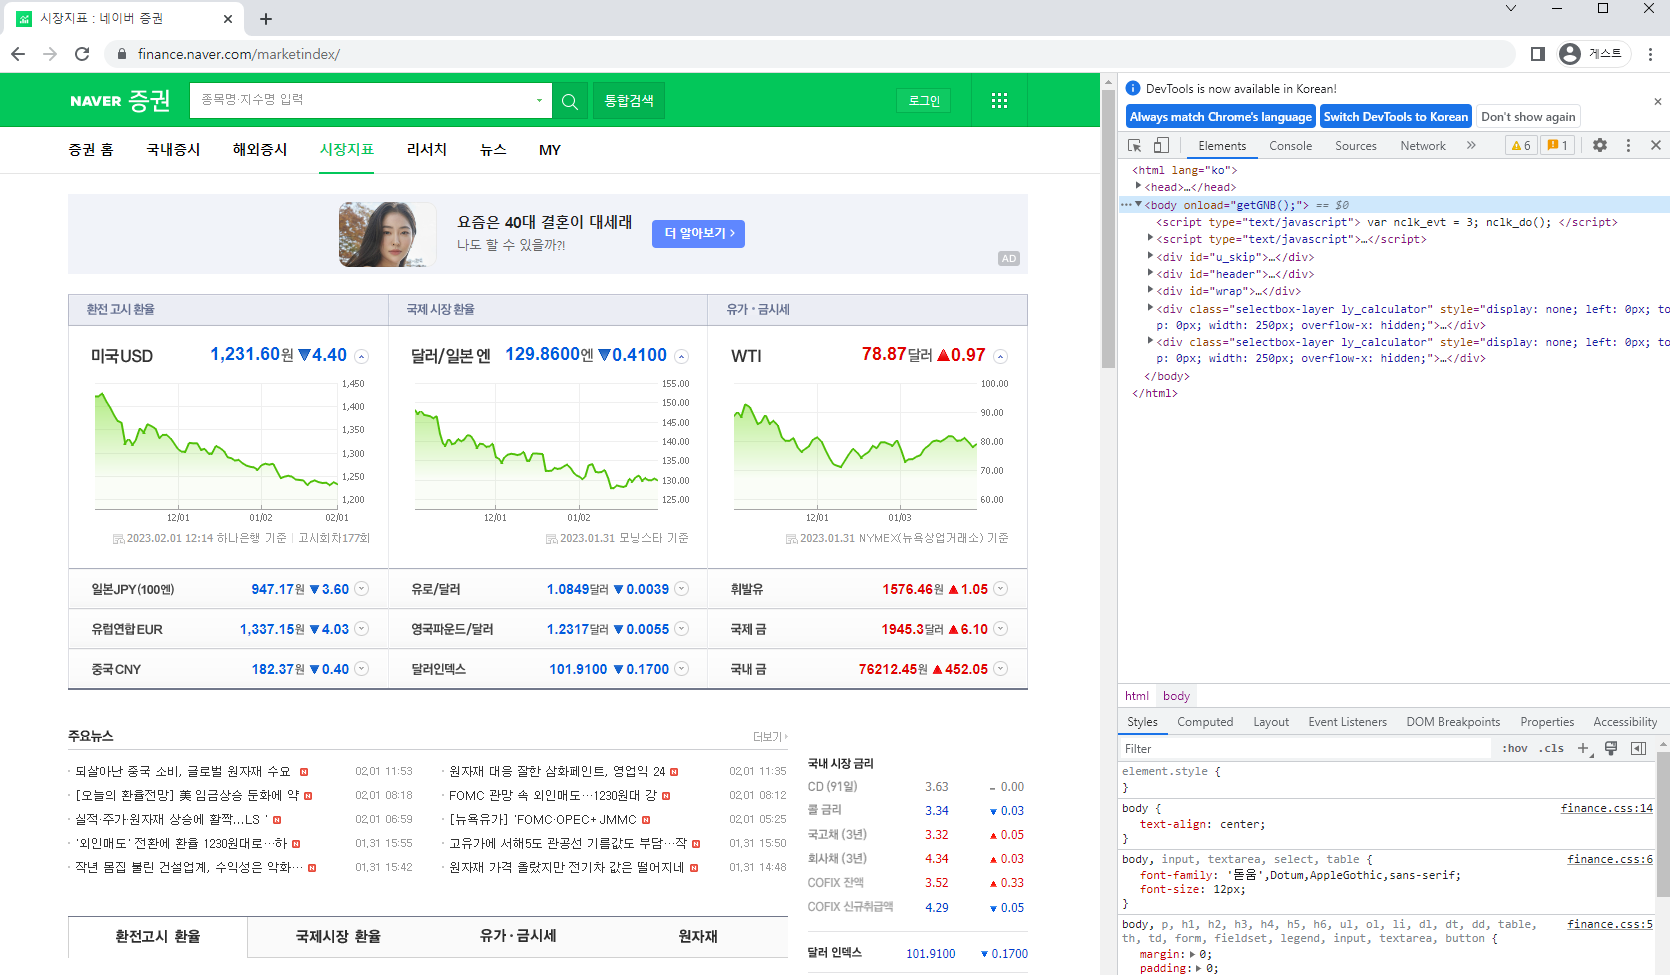
예제 1-1. 네이버금융 환율정보가져오기
- 페이지에 있는 모든 환율정보 가져오기
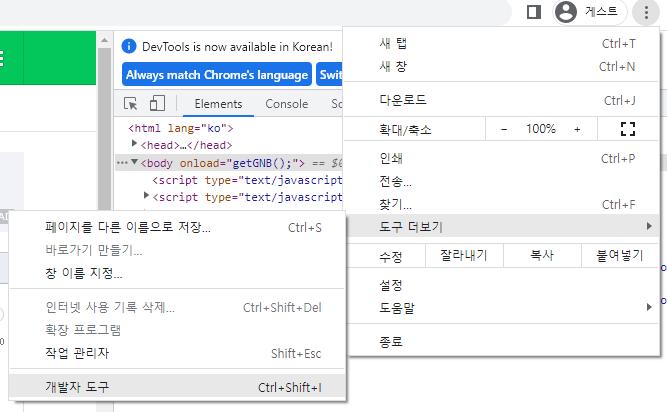
네이버금융 시장지표로 접속 후 개발자도구 열기
- 단축키 : ctrl shift i
- chrome 맞춤설정 및 제어 -> 도구 더보기 -> 개발자도구
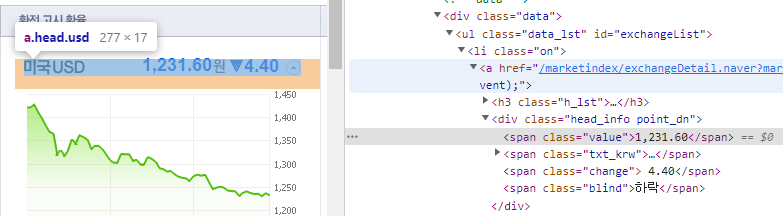
타겟의 위치 파악하기
- 단축키 : ctrl shift c
- 단축키를 누르고 원하는 대상 위에 커서를 올리면 크롬개발자도구에서 위치를 알 수 있다

파이썬에서 데이터 가져오기
from urllib.request import urlopen
from bs4 import BeautifulSoup
# 네이버금융 시장지표 정보 가져오기 url = 'https://finance.naver.com/marketindex/' page = urlopen(url) soup = BeautifulSoup(page, "html.parser") # html로 변환 print(soup.prettify())
# <span> 태그의 'value' 클래스 정보 모두 가져오기
soup.find_all("span", class_='value'), len(soup.find_all("span", 'value'))

# 네이버와 대조 결과 첫번째 데이터가 미국환율
soup.find_all("span", class_='value')[0].text,\
soup.find_all("span", class_='value')[0].string,\
soup.find_all("span", class_='value')[0].get_text()

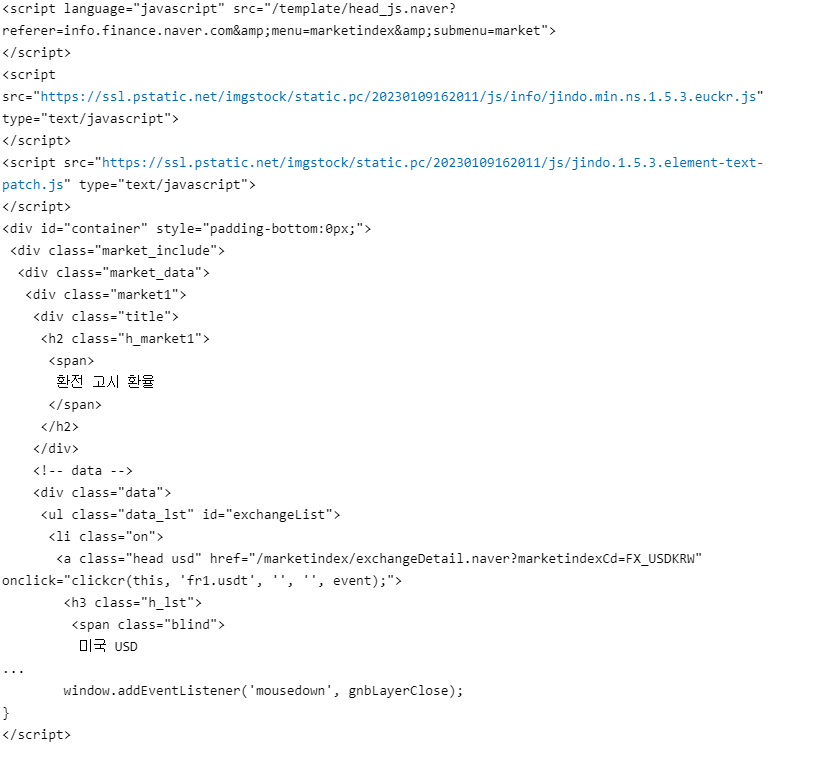
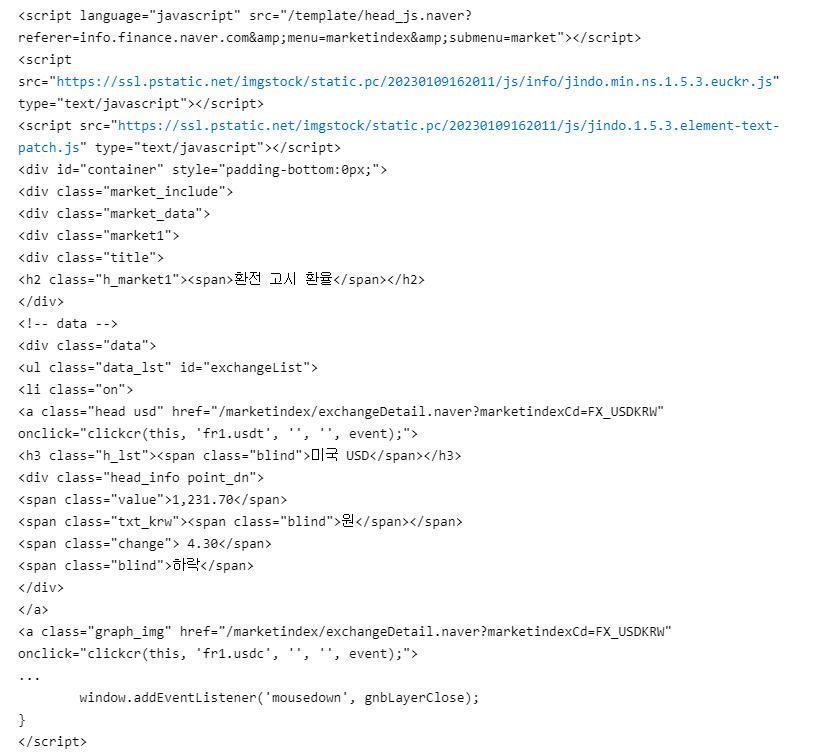
예제 1-2. 네이버금융 속성정보가져오기
- 환전고시환율의 속성정보(단체, 환율, 상승&하락, 링크)를 읽어온다

타겟위치 확인
환전고시환율은 div태그, class='market1'이고, 각 li태그마다 미국, 일본, 유럽, 중국의 정보를 가지고 있으며, 그 안의 span 태그에 속성정보들이 존재한다
파이썬에서 가져오기
# %conda install requests
import requests # from urllib.request import urlopen
from bs4 import BeautifulSoup
url = 'https://finance.naver.com/marketindex/'
response = requests.get(url)
soup = BeautifulSoup(response.text, 'html.parser')
soup
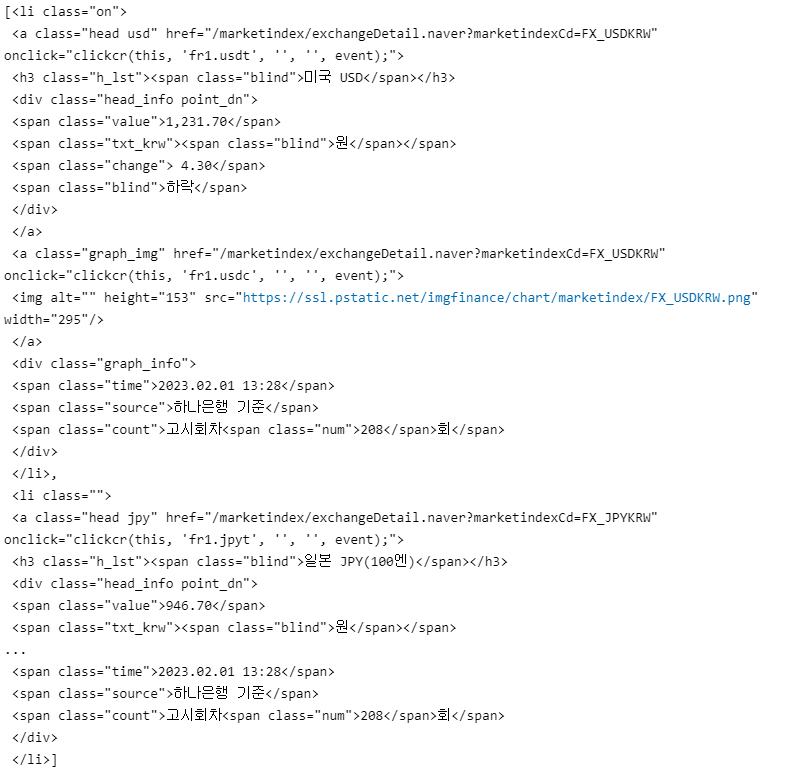
# 해당 페이지에 존재하는 모든 li태그를 가져왔다
# 원하는 목적에 가까워지려면 범위를 좁혀야한다
exchangeList = soup.select('li')
len(exchangeList)

select의 경로지정방식
- 태그 : 별도의표기없음
- class : .
- id : #
- 하위 : >
# 환전고시환율의 id=exchangeList를 이용하여 범위를 좁힌다
exchangeList = soup.select('#exchangeList > li')
exchangeList
속성정보가져오기
title = exchangeList[0].select_one(".h_lst").text
exchange = exchangeList[0].select_one(".value").text
change = exchangeList[0].select_one(".change").text
updown = exchangeList[0].select_one(".head_info.point_dn > .blind").text
link = exchangeList[0].select_one("a").get('href')
print(title, exchange, change, updown, link)

# 링크의 경우 전체주소가 나오지 않는 경우가 있다
# baseUrl를 지정해서 결합해주자
baseUrl = 'https://finance.naver.com'
link = baseUrl + link
print(title, exchange, change, updown, link)

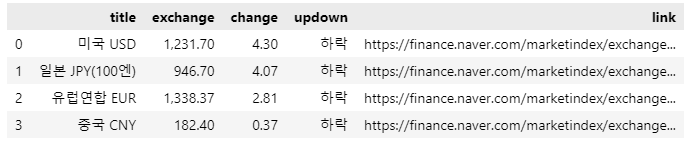
환전고시환율의 속성정보가져오기
# 4개 데이터 수정
import pandas as pd
exchange_datas = []
baseUrl = 'https://finance.naver.com'
for item in exchangeList:
    data = {
        'title' : item.select_one(".h_lst").text,
        'exchange' : item.select_one(".value").text,
        'change' : item.select_one(".change").text,
        'updown' : item.select_one(".head_info.point_dn > .blind").text,
        'link' : baseUrl + item.select_one("a").get('href')
    }
    exchange_datas.append(data)
df = pd.DataFrame(exchange_datas)
df.to_excel("./naverfinance.xlsx")
df

BeautifulSoup 예제 2. 위키피디아 여명의눈동자
- 주요인물 3명의 이름을 알아보자
학습내용
- 한글이 주소로 들어가는 경우, 인코딩문제로 한글로 출력되지 않는 경우가 있다
- urllib.parse.quote()를 이용하여 한글을 'UTF-8'로 변환시켜서 url(주소)에 추가해보자
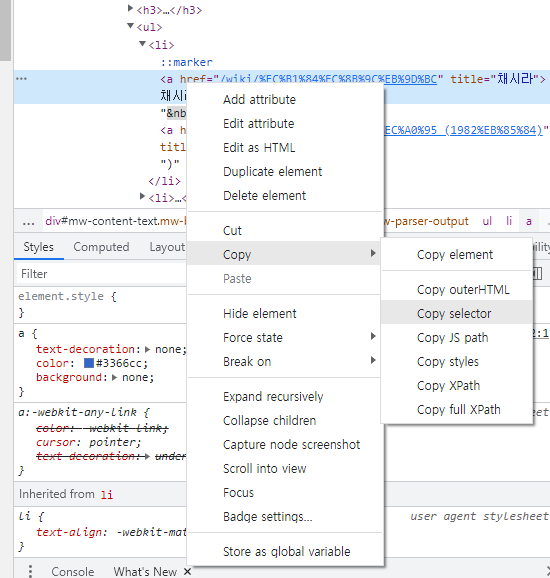
타겟위치 확인
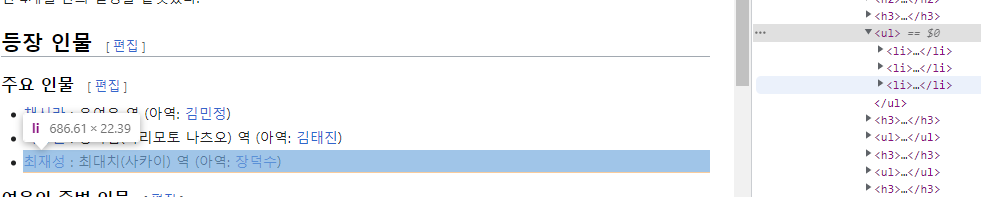
타겟의 위치를 확인하는 가장 쉬운 방법은 복사하는 것이다
파이썬 활용
import urllib
from bs4 import BeautifulSoup
from urllib.request import Request, urlopen
html = "https://ko.wikipedia.org/wiki/{search_words}"
req = Request(html.format(search_words=urllib.parse.quote('여명의_눈동자')))
response = urlopen(req)
soup = BeautifulSoup(response, "html.parser")
# :nth-child(12) : 상위 태그 밑에 같은 수준의 하위 태그 중 12번째
page = soup.select("div.mw-parser-output > ul:nth-child(12) > li")
page

for person in page:
    print(person.text)
📌시카고맛집데이터분석
- https://www.chicagomag.com/Chicago-Magazine/November-2012/Best-Sandwiches-Chicago/
- chicago magazine the 50 best sandwiches
최종목표
총 51개 페이지에서 각 가게의 정보를 가져온다
- 가게이름
- 대표메뉴
- 대표메뉴의 가격
- 가게주소
📌프로젝트 절차
- 메인 페이지 분석
- 하위 페이지 분석
- 지도시각화
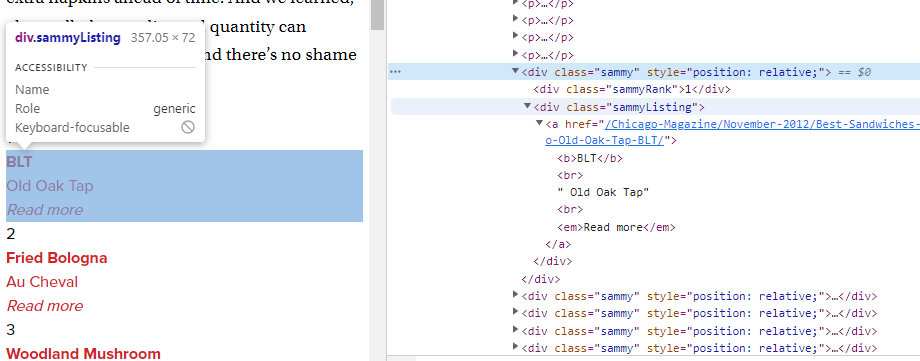
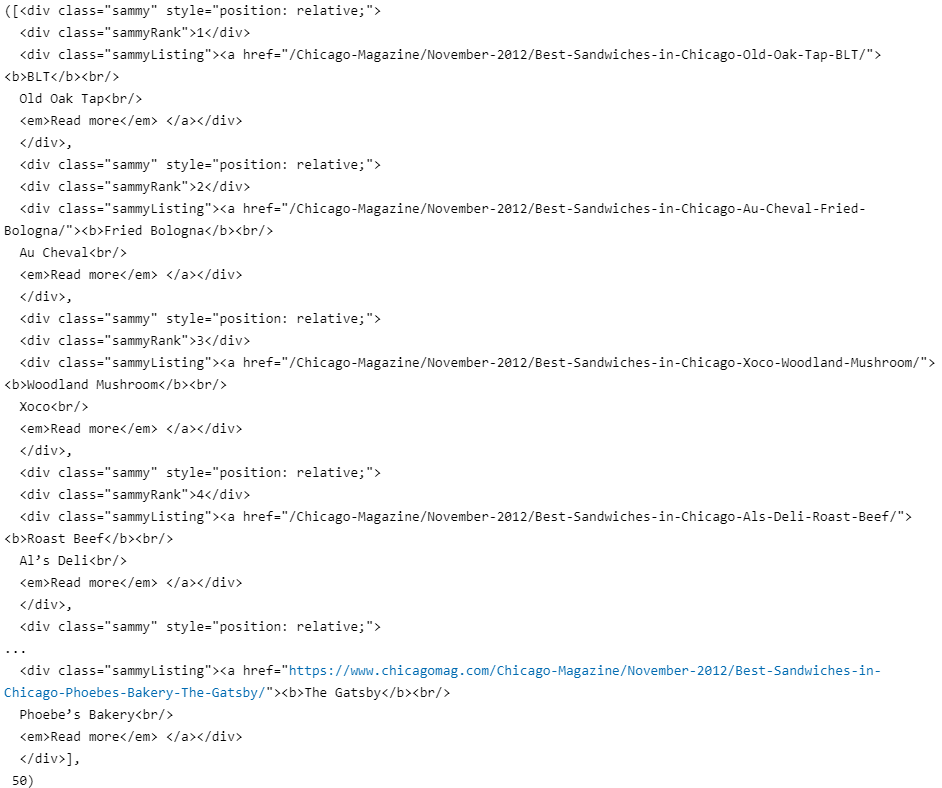
📌1. 메인 페이지 분석
타겟위치확인
- 사이트에 총 50개의 사이트가 존재하고, 각각에 링크가 설정되어있다
- 해당링크로 들어가면 원하는 정보가 담긴 사이트로 이동된다
- 사이트 링크는 div.sammy에 담겨있다

파이썬
페이지 접속
# !pip install fake-useragent
from urllib.request import Request, urlopen
from fake_useragent import UserAgent
from bs4 import BeautifulSoup
#
url_base = "https://www.chicagomag.com/"
url_sub = "Chicago-Magazine/November-2012/Best-Sandwiches-Chicago/"
url = url_base + url_sub
ua = UserAgent()
req = Request(url, headers={"user-agent": ua.ie})   # 임의의 사용자정보 전달
html = urlopen(req)
soup = BeautifulSoup(html, "html.parser")
print(soup.prettify())
샘플테스트
랭킹 전체 조회
soup.find_all("div", "sammy"), len(soup.find_all("div", "sammy"))
# soup.select(".sammy"), len(soup.select(".sammy"))
첫번째 랭킹 가져오기
tmp_one = soup.find_all("div", "sammy")[0]
tmp_one

데이터 가져오기
# 랭킹
tmp_one.find(class_="sammyRank").get_text()
# tmp_one.select_one(".sammyRank").text
# 메뉴와 카페
tmp_one.find("div", {"class":"sammyListing"}).get_text()
# tmp_one.select_one(".sammyListing").text
# 링크
tmp_one.find("a")["href"]
# tmp_one.select_one("a").get("href")
# '\n'을 기준으로 분할
import re
#
tmp_string = tmp_one.find(class_="sammyListing").get_text()
re.split(("\n|\r\n"), tmp_string)
print(re.split(("\n|\r\n"), tmp_string)[0]) # menu
print(re.split(("\n|\r\n"), tmp_string)[1]) # cafe


본문 적용
데이터프레임 생성을 위한 리스트 준비
from urllib.parse import urljoin
#
url_base = "http://www.chicagomag.com"
#
# 리스트로 하나씩 컬럼을 만들고, DataFrame으로 합칠 예정
rank = []
main_menu = []
cafe_name = []
url_add = []
#
list_soup = soup.find_all("div", "sammy")
#
# 랭킹수만큼 생성
for item in list_soup:
    rank.append(item.find(class_="sammyRank").get_text())
    tmp_string = item.find(class_="sammyListing").get_text()
    main_menu.append(re.split(("\n|\r\n"), tmp_string)[0])
    cafe_name.append(re.split(("\n|\r\n"), tmp_string)[1])
    url_add.append(urljoin(url_base, item.find("a")["href"]))   #url left join
데이터프레임 생성
# 데이터프레임으로 생성
import pandas as pd
#
data = {
    "Rank": rank,
    "Menu": main_menu,
    "Cafe": cafe_name,
    "URL": url_add,
}
#
df = pd.DataFrame(data)
df.tail()
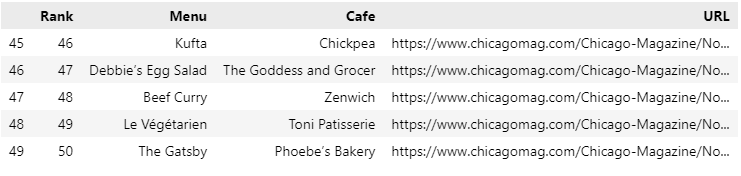
컬럼명 순서 변경
# 컬럼 순서 변경
df = pd.DataFrame(data, columns=["Rank", "Cafe", "Menu", "URL"])
df.tail()

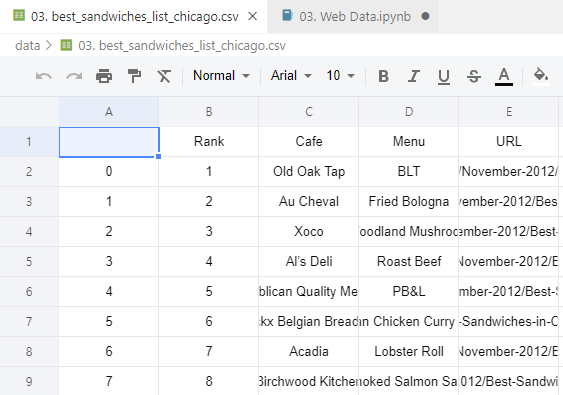
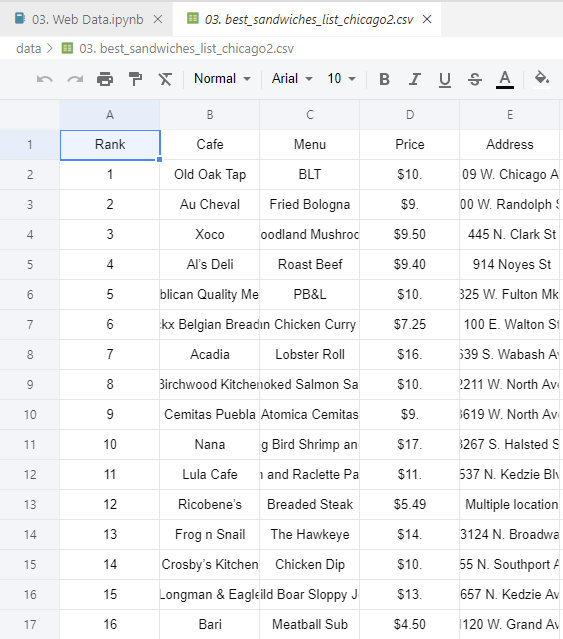
데이터 저장
# 데이터 저장
df.to_csv(
    "../data/03. best_sandwiches_list_chicago.csv", sep=",", encoding="utf-8"
)
📌2. 하위 페이지 분석
파이썬
메인페이지 저장 데이터 불러오기
import pandas as pd
from urllib.request import urlopen, Request
from fake_useragent import UserAgent
from bs4 import BeautifulSoup
#
df = pd.read_csv("../data/03. best_sandwiches_list_chicago.csv", index_col=0)
df.tail()

샘플테스트
하위 페이지 접속
req = Request(df["URL"][0], headers={"user-agent":ua.ie})
html = urlopen(req).read()
soup_tmp = BeautifulSoup(html, "html.parser")
soup_tmp.find("p", "addy") # soup_find.select_one(".addy")

데이터 확인
# regular expression
price_tmp = soup_tmp.find("p", "addy").text
price_tmp

필요 데이터만 추출
import re
price_tmp = re.split(".,", price_tmp)[0]
price_tmp
tmp = re.search("\$\d+\.(\d+)?", price_tmp).group()
price_tmp[len(tmp) + 2:]


본문 적용
데이터프레임 생성을 위한 리스트 준비
from tqdm import tqdm
#
price = []
address = []
#
for idx, row in tqdm(df.iterrows()):
    req = Request(row["URL"], headers={"user-agent":ua.ie})
    html = urlopen(req).read()
    soup_tmp = BeautifulSoup(html, "html.parser")
    gettings = soup_tmp.find("p", "addy").get_text()
    price_tmp = re.split(".,", gettings)[0]
    tmp = re.search("\$\d+\.(\d+)?", price_tmp).group()
    price.append(tmp)
    address.append(price_tmp[len(tmp)+2:])
데이터프레임 생성
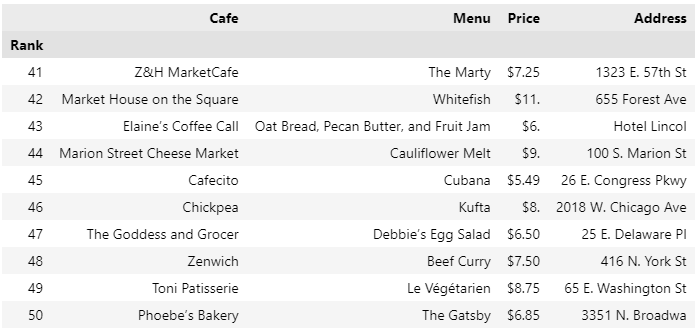
df["Price"] = price
df["Address"] = address
df = df.loc[:, ["Rank", "Cafe", "Menu", "Price", "Address"]]
df.set_index("Rank", inplace=True)
df.head()
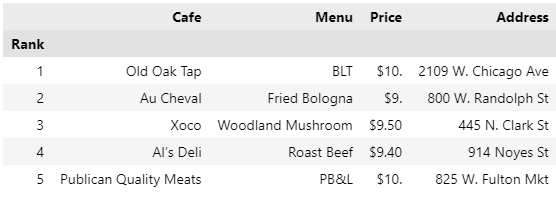
데이터 저장
df.to_csv(
    "../data/03. best_sandwiches_list_chicago2.csv", sep=",", encoding="UTF-8"
)
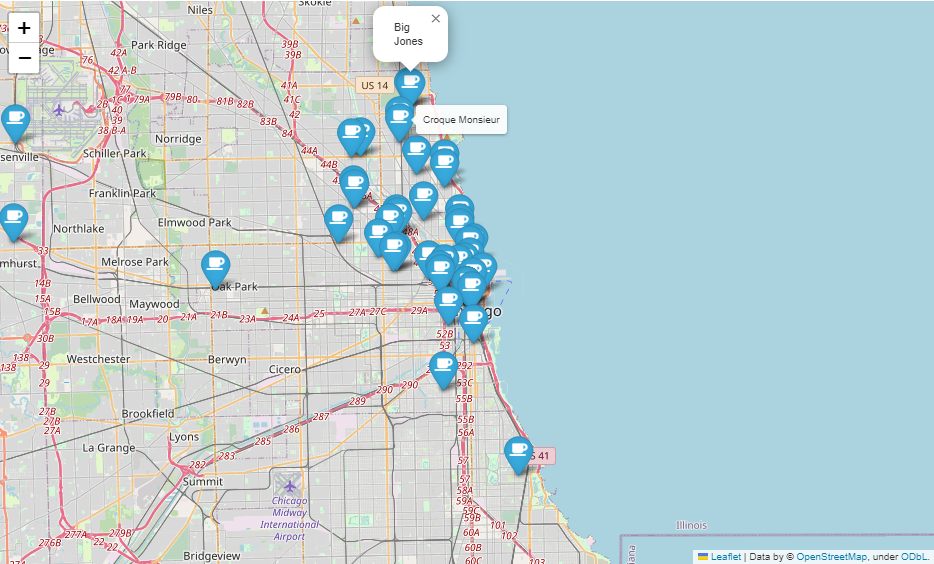
📌3. 지도시각화
데이터 불러오기
import folium
import pandas as pd
import numpy as np
import googlemaps
from tqdm import tqdm
df = pd.read_csv("../data/03. best_sandwiches_list_chicago2.csv", index_col=0)
df.tail(10)
구글맵스로 위도, 경도 정보 가져오기
gmaps_key = "Your_Geocoding API Key"
gmaps = googlemaps.Client(key=gmaps_key)
#
lat = []
lng = []
#
for idx, row in tqdm(df.iterrows()):
    if not row["Address"] == "Multiple location":
        target_name = row["Address"] + ", " + "Chicago"
        # print(target_name)
        gmaps_output = gmaps.geocode(target_name)
        location_ouput = gmaps_output[0].get("geometry")
        lat.append(location_ouput["location"]["lat"])
        lng.append(location_ouput["location"]["lng"])
        # location_output = gmaps_output[0]
    else:
        lat.append(np.nan)
        lng.append(np.nan)
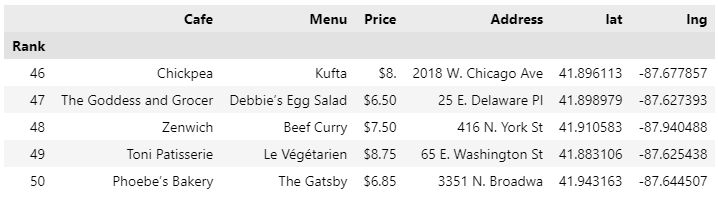
데이터프레임에 위도, 경도 추가
df["lat"] = lat
df["lng"] = lng
df.tail()
지도 시각화
mapping = folium.Map(location=[41.8781136, -87.6297982], zoom_start=11)
#
for idx, row in df.iterrows():
    if not row["Address"] == "Multiple location":
        folium.Marker(
            location=[row["lat"], row["lng"]],
            popup=row["Cafe"],
            tooltip=row["Menu"],
            icon=folium.Icon(
                icon="coffee",
                prefix="fa"
            )
        ).add_to(mapping)
mapping