Flutter path provider
-
Flutter Path provider는 이
미지를 저장해야 할 경로에 쉽게 접근할 수 있는 패키지이다. -
또한 운영 체제에 의해 삭제되지 않는다.
-
이 패키지는 우리 응용 프로그램의 데이터를 저장하는 데 사용할 수 있는 경로에 쉽게 접근할 수 있게 해준다.
Path
-
또한 path라는 패키도 설치해주어야한다. 언듯보면 비슷해보이지만
-
파일 경로 작업 프로세스를 단순화한 패키지이다.
-
가끔 수동으로 경로를 잡아야할 때가 있다. 파일을 만들던가 말이다. 이때 이 패키지는 경로를 쉽게 구성해 다양한 운영 체제에서 작동하게 해준 미친 패키지이다.
sqflite
-
마지막으로는 sqflite 패키지이다.
-
이 패키지는 SQL 명령을 이용해 장치에 데이터를 저장하게 해준다.
-
기본적으로 장치에 기본 SQL 데이터베이스를 생성하고 데이터베이스 내의 장소의 제목이나 좌표 같은 데이터를 저장하도록 도와준다.
-
참고로 여기서 DB란 앱이 실행되는 장치에서 로컬로 실행되는 데이터베이스이다.
-
share preference 참고로 이건 또다른 패키지이다.
sqflite 처럼 장치에 데이터를 저장할 수 있도록 해준다. -
차이점은 sqflite 패키지보다 좀 더 simple하다.
또 같은 기호를 가지고 단순한 키 값 쌍을 저장할 수 있다.
시작
-
우선 먼저 데이터를 저장할 수 있는, 또 운영 체제에 의해 삭제되지 않는 path를 설정해보자.
-
운영체제가 우리의 app에 할당하는 로컬 스토리지의 위치가 다르다.
하지만 우리는 하나의 code block을 가지고 여러 운영체제를 build 해야하기 때문에 따라서 path provider가 필요했던 것이었다.
패키지를 이용하면 앱이 실행 중인 운영체제를 위한 경로를 쉽게 설정할 수 있기 때문이다.
import 'package:path_provider/path_provider.dart' as syspaths;- 참고로 import 후
syspaths라는 명칭으로 alias를 설정해주는 것이 좋다. 왜냐하면 앞서 설치한 path 패키지와 이름이 출동할 가능성이 있기 때문이다.
path 가져오기
final appDir = syspaths.getApplicationDocumentsDirectory();- 요렇게 하면 해당 app이 돌아가는 운영체제의 app 위치를 알 수 있다.
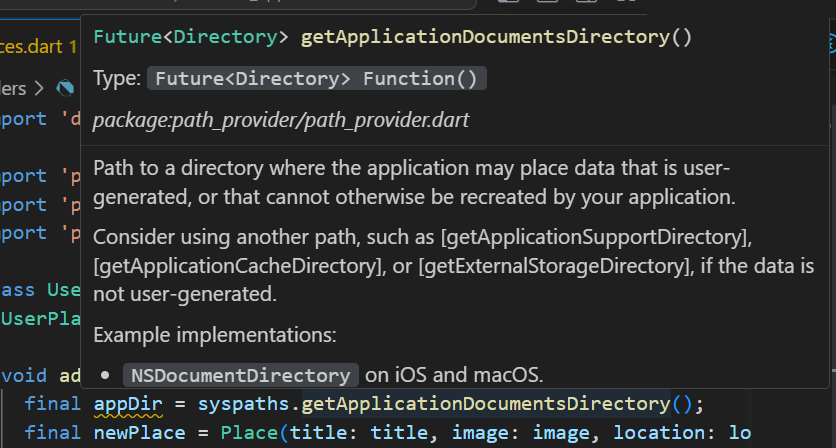
-
참고로 해당 메서드는 Future 객체로 Promise처럼 처리를 해주어야한다.
-
저장된 image의 최신 path를 가져오려면 image.copy 메서드를 사용하여 최신 경로를 가져와야한다.
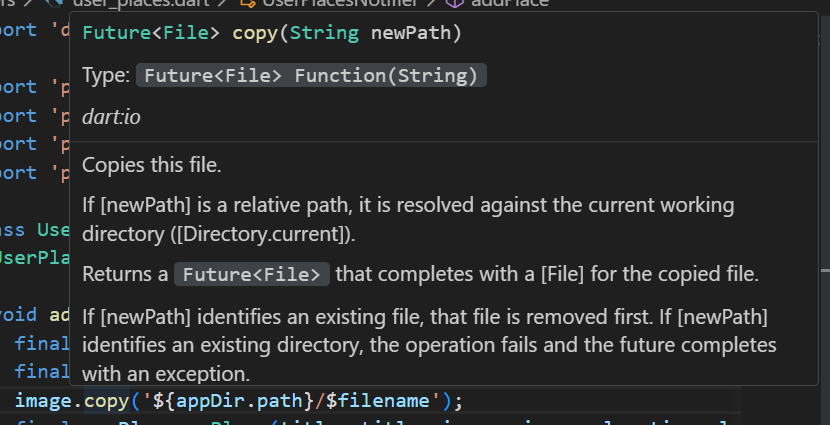
-
또한 copy 메서드를 사용해야하는 이유는 경로중 dispose 되었거나 handler가 dispose 된 경우 에러가 나기 때문이다. 참고로 copy 메서드 또한 Futrue 객체이다.
-
물론 copy 메서드에 들어갈 경로는 image 본인의 이름도 포함되어야한다.
void addPlace(String title, File image, PlaceLocation location) async {
    final appDir = await syspaths.getApplicationDocumentsDirectory();
final fliename = path.basename(image.path);- File 타입으로 넘어오는 image 변수의 path 속성에 접근하여 해당 파일의 이름을 가져온다.

sql문 작성
import 'package:sqflite/sqflite.dart' as sql;
import 'package:sqflite/sqlite_api.dart';- 이제 sql문을 작성해보자. 우선 2개의 패키지를 import 해와야하다. 첫째는 sqflite이고 둘째는 sqlite_api이다. 첫번째는 sq
flite이고 두번째는 그냥 sqlite이다. f의 유무의 차이가 있으니 주의하자.
getDatabasesPath()
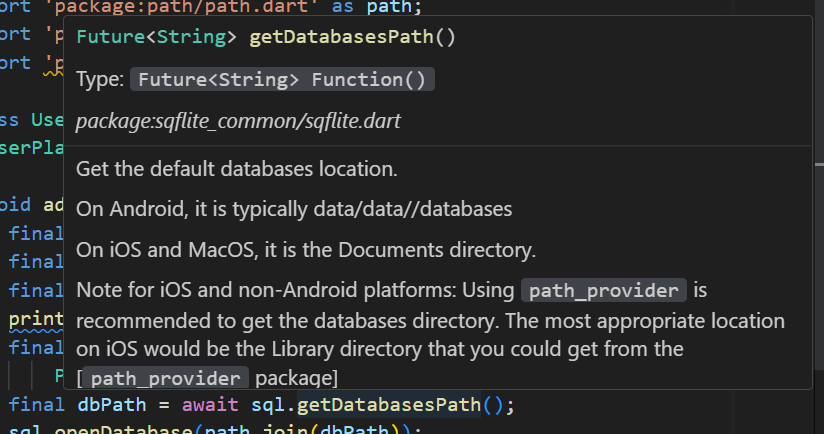
- 자세히 보면 경로만을 Future 객체로 반환해준다. 즉, 해당 메서드로만으로는 실제 DB에 접근이 불가능하다는 것이다.
왜? => .db로 끝나는 실제 db 경로를 반환하는 것이 아니기 때문이다.
그래서 우리는 실제 db 파일까지 해서 해당 경로를 하나의 String 값으로 합쳐서 반환해주는 path 패키지의 join 메서드를 사용할 것이다.
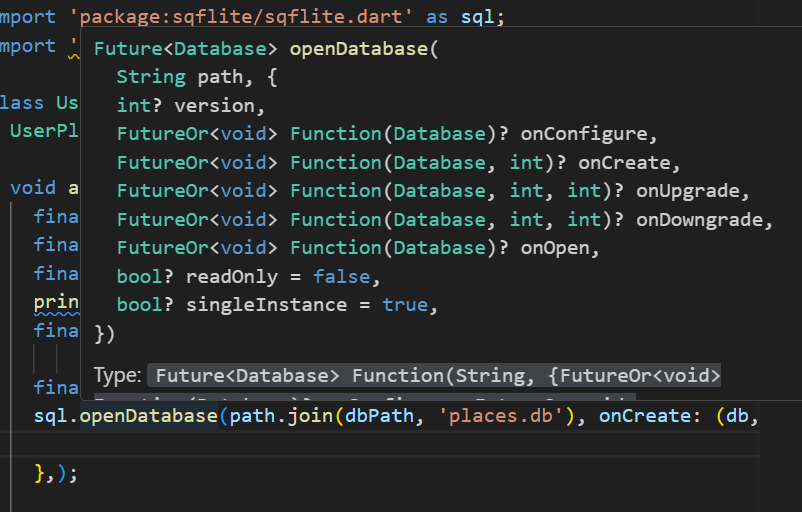
openDatabase
-
첫째 인자로는 경로를 받으며 여러 설정들을 할 수 있다. 그 중 onCreated 속성값은 해당 path에 db가 존재하지 않을 경우 db를 생성할 수 있는 함수를 설정해줄 수 있다.
-
그리고 위 사진에서 알 수 있듯 반드시 Future 객체로 반환해주어야한다.
-
그래서 Future 객체에 await 키워드를 걸어준 후 해당 결과값을 변수(
db)에 담아준다. -
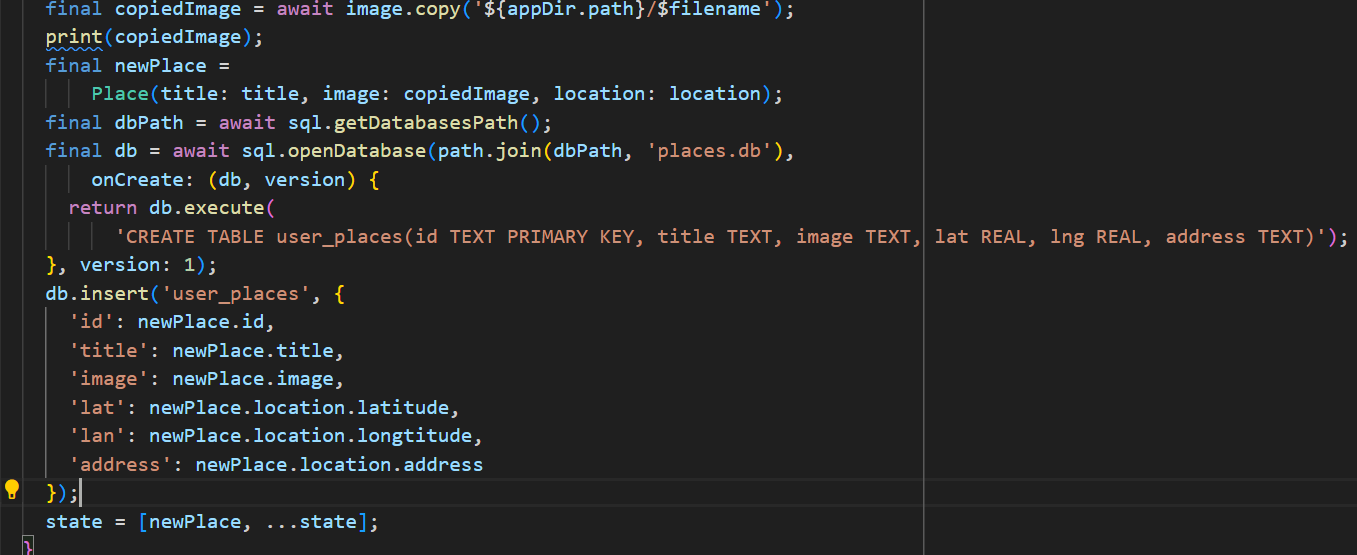
해당 변수에 접근 하거나 create 되었다면 해당 db에 접근하여 이제 비로소 query문을 사용할 수 있다.
-
그리고 이론적으로 쿼리를 변경할 때마다 version 증가해야한다.
데이터베이스 구조를 변경하면 새로운 데이터베이스 파일이 생성되기 때문이다.
query
-
자, 이렇게 insert를 했으면 당연 select를 해와야한다.
이는 app이 실행되었을 때 select 해오면 좋을 듯 하다. -
우선 코드의 중복을 막기위해 중복되는 코드(db에 연결)를 따로 빼주었다.
Future<Database> _getDatabase() async {
  final dbPath = await sql.getDatabasesPath();
  final db = await sql.openDatabase(path.join(dbPath, 'places.db'),
      onCreate: (db, version) {
    return db.execute(
        'CREATE TABLE user_places(id TEXT PRIMARY KEY, title TEXT, image TEXT, lat REAL, lng REAL, address TEXT)');
  }, version: 1);

  return db;
}- 그 후 db에 연결되면 query라는 메서드로 db에 접속하여 data를 가져오면 된다.
class UserPlacesNotifier extends StateNotifier<List<Place>> {
  UserPlacesNotifier() : super(const []);

  void loadPlaces() async {
    final db = await _getDatabase();
    final data = await db.query('user_places');
    final places = data
        .map(
          (row) => Place(
            id: row['id'] as String,
            title: row['title'] as String,
            image: File(row['image'] as String),
            location: PlaceLocation(
                latitude: row['latitude'] as double,
                longtitude: row['longtitude'] as double,
                address: row['address'] as String),
          ),
        )
        .toList();
    state = places;
  }
  ....
- 문제는 여기서 id를 자동으로 생성되도록 설정해두었다는 것이다.
import 'dart:io';

import 'package:uuid/uuid.dart';

const uuid = Uuid();

class PlaceLocation {
  const PlaceLocation(
      {required this.latitude,
      required this.longtitude,
      required this.address});

  final double latitude;
  final double longtitude;
  final String address;
}

class Place {
  Place({required this.title, required this.image, required this.location})
      : id = uuid.v4();

  final String id;
  final String title;
  final File image;
  final PlaceLocation location;
}- 그래서 이를 해결하기위해 id를 require하게 받지 않고 또 id가 null일 때 자동생성되도록 코드를 설정하였다.
class Place {
  Place({required this.title, required this.image, required this.location, String? id})
      : id = id ?? uuid.v4();

  final String id;
  final String title;
  final File image;
  final PlaceLocation location;
}- 이제 마지막으로 위 메서드(
db.query())가 끝난다면 해당 state를 main 에 붙여주기만 하면 된다.
FutureBuilder
- 이때 도움을 받을 수 있는 위젯이 바로 FutreBuilder위젯이다. 참고로 여기서 snapshot은 현재 state에 대한 정보를 갖고있다. 따라서 이 snapshow 키워드를 사용해서 현재 상태를 업데이트 하여 UI를 표출할 수 있다.
body: Padding(
        padding: const EdgeInsets.all(8.0),
        child: FutureBuilder(future: , builder:(context, snapshot) =>
        snapshot.connectionState==ConnectionState.waiting
        ? const Center(child: CircularProgressIndicator())
        : PlacesList(places: userPlaces)
      ),
),- 이제 그럼 future에 들어갈 변수를 생성하기 위해서는 ConsumerStatefulWidget으로 바꿀 필요가 있다.
ConsumerStatefulWidget
- ConsumerWidget에서 만약 당신이 Future 객체를 활용하여 위젯은 다시 build하고 싶다면 사용하여야하는 위젯이다.
class PlacesScreen extends ConsumerWidget {
const PlacesScreen({super.key});
Widget build(BuildContext context, WidgetRef ref) {
final userPlaces = ref.watch(userPlacesProvider);
return Scaffold(
appBar: AppBar(
title: const Text('Your Places'),
actions: [
IconButton(
icon: const Icon(Icons.add),
onPressed: () {
Navigator.of(context).push(
MaterialPageRoute(
builder: (ctx) => const AddPlaceScreen(),
),
);
},
)
],
),
body: Padding(
padding: const EdgeInsets.all(8.0),
child: FutureBuilder(
future: ,
builder: (context, snapshot) =>
snapshot.connectionState == ConnectionState.waiting
? const Center(child: CircularProgressIndicator())
: PlacesList(places: userPlaces),
),
),
);
}
}
import 'package:flutter/material.dart';
import 'package:flutter_riverpod/flutter_riverpod.dart';
import 'package:native_app/providers/user_places.dart';
import 'package:native_app/screens/add_place.dart';
import 'package:native_app/widgets/places_list.dart';
class PlacesScreen extends ConsumerStatefulWidget {
const PlacesScreen({super.key});
ConsumerState<PlacesScreen> createState() {
return _PlacesScreenState();
}
}
class _PlacesScreenState extends ConsumerState<PlacesScreen> {
late Future<void> _placesFutre;
void initState() {
super.initState();
_placesFutre = ref.read(userPlacesProvider.notifier).loadPlaces();
}
Widget build(BuildContext context) {
final userPlaces = ref.watch(userPlacesProvider);
return Scaffold(
appBar: AppBar(
title: const Text('Your Places'),
actions: [
IconButton(
icon: const Icon(Icons.add),
onPressed: () {
Navigator.of(context).push(
MaterialPageRoute(
builder: (ctx) => const AddPlaceScreen(),
),
);
},
)
],
),
body: Padding(
padding: const EdgeInsets.all(8.0),
child: FutureBuilder(
future: _placesFutre,
builder: (context, snapshot) =>
snapshot.connectionState == ConnectionState.waiting
? const Center(child: CircularProgressIndicator())
: PlacesList(places: userPlaces),
),
),
);
}
}