클래스형 컴포넌트
옛날에 만들어진 리액트 관련 라이브러리의 경우에 Hooks 지원이 아직 안되는 경우가 있을 수 있다. react-native관련 라우터 라이브러리인 react-native-navigation의 경우에도 클래스형 컴포넌트를 사용해야 할 일이 종종 있다.
hello.js 의 Hello 함수를 수정한다. 클래스형 컴포넌트를 사용하려면
{Component}를 import 해와야한다.
class Hello extends Component {
    static defaultProps = {
        name: '이름없음'
    }
    render() {
        const { color, isSpecial, name}  = this.props;
        return (
            <div style={color}>
                {isSpecial && <b>*</b>}
                안녕하세요 {name}
            </div>
        )
    }
}
예전에는 함수형 컴포넌트에서 상태를 관리할수가 없었는데, Hook의 출현으로 상태 관리가 가능해졌다. useEffect도 없었으니 렌더링 전후로 어떤 작업을 하고 싶어도 할수가 없었다. 그래서 사용한 것이 클래스형 컴포넌트이다.
이전에 만들었던 Counter 컴퍼넌트를 클래스형 컴포넌트로 만들자
Counter.js내용을 지우고 다시 작성한다.
class Counter extends Component {
    render() {
        return (
            <div>
                <h1>0</h1>
                <button>+1</button>
                <button>-1</button>
            </div>
        );
    }

}
아직 제대로 기능이 작동하지 않는다. 기존에 함수형 컴포넌트에서는 버튼을 클릭했을 때 특정 작업을 실행하고 싶다면 컴포넌트 안에서 기능을 선언 했지만, 클래스형 컴포넌트는 클래스 안에서 커스텀 메서드를 선언한다.
class Counter extends Component {

    handleIncrease() {
      console.log(this)
      console.log('increase');
    }

    handleDecrease() {
      console.log('decrease');
    }

    render() {
      return (
        <div>
          <h1>0</h1>
          <button onClick={this.handleIncrease}>+1</button>
          <button onClick={this.handleDecrease}>-1</button>
        </div>
      );
    }
  }
이와 같이 클래스 내부에 종속된 함수를 '메서드'라고 부른다. 클래스에서 커스텀 메서드를 만들게 될때에는 이름을 'handle뭐시기' 이름을 짓는데, 무조건적인 규칙은 아니니까 굳이 신경안써도 된다.
현재는 버튼을 클릭하면 콘솔창에 문구만 나타난다.
만약에 handleIncrease()를 아래와 같이 수정하면
 handleIncrease() {
 	  console.log(this);
      console.log('increase');
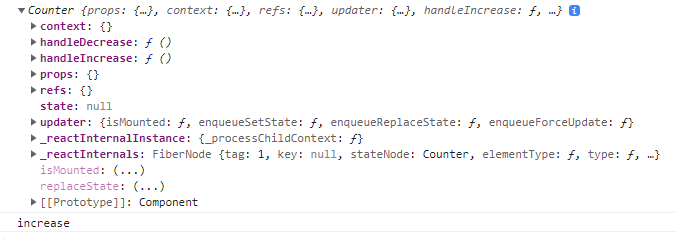
}console.log(this)의 값은 컴포넌트 인스턴스를 가르켜야하는데, 사실 undefined로 나온다. 그 이유는 handleIncrease 가 onClick으로 실행이 되는 순간 this와의 연결은 끊어지게 되고, 그 다음에는 this가 뭔지 모르게 된다.
이렇게 되는 이유는 우리가 만든 메서드를 버튼들의 이벤트를 등록하게 되는 과정에서 각 메서드와 컴퍼넌트 인스턴스의 관계가 끊어지기 때문이다.
이를 해결하기 위해서는 3가지 방법이 존재한다.
1. 클래스의 생성자 메서드 constructor에서 bind작업을 진행한다.
  constructor(props){
        super(props);
        this.handleIncrease = this.handleIncrease.bind(this);
        this.handleDecrease = this.handleDecrease.bind(this);
    }
handleIncrease메서드 위에 이와같은 constructor를 작성해주면, +버튼을 눌렀을때 this의 값으로 컴퍼넌트 인스턴스가 출력된다. 함수에 bind를 사용하면, 해당 함수에서 가르킬 this 를 직접 설정이 가능하다.

2.화살표 함수 문법 사용
handleIncrease와 handleDecrease메서드를 화살표 함수 문법으로 수정한다.
handleIncrease= () => {
      console.log(this);
      console.log('increase');
    }

    handleDecrease = () => {
      console.log('decrease');
}- onClick에서 새로운 함수를 만들어서 전달
이 방법은 별로 추천하지 않는다. 렌더링 할 때마다 함수가 새로 만들어지기 때문에 나중에 컴포넌트 최적화를 진행할 때 까다로워진다.
return (
  <div>
    <h1>0</h1>
    <button onClick={() => this.handleIncrease()}>+1</button>
    <button onClick={() => this.handleDecrease()}>-1</button>
  </div>
);
상태 선언하기
constructor 에서 상태 관리를 하는 방법을 알아보자.
  constructor(props) {
        super(props);
        this.state = {
            counter: 0
        }; //무조건 객체 헝태여야함.
    }
constructor를 다시 작성해서 props를 받아오고 초기값 counter를 0으로 설정하고 handleIncrease와 handleDecrease메서드 가 수행할 작업내용을 수정한다. 이때 업데이트 작업수행을 작성하기 위해서는 setState를 사용해야한다.
handleIncrease= () => {
      this.setState({
          counter:this.state.counter +1
      });

    }

    handleDecrease = () => {
      this.setState({
          counter:this.state.counter -1
      })
    }
그리고 초기숫자를 표시하는 곳도 수정을 해준다.
  render() {
      return (
        <div>
          <h1>{this.state.counter}</h1> /*초기값*/
          <button onClick={this.handleIncrease}>+1</button>
          <button onClick={this.handleDecrease}>-1</button>
        </div>
      );
    }
  }
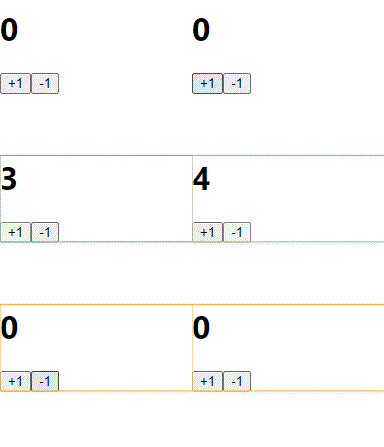
잘 작동한다.
constructor로 상태를 관리하는것 말고도 다른 방법이 존재한다.
state = {
	counter: 0
}
정식 자바스크립트 문법은 아니지만 babel 플러그인을 통해서 사용하는 것이다. create react-app으로 만든 프로젝트는 자동으로 이 문법이 적용되어있어서 사용이 가능하다.
만약에 state에 다른값이 들어있으면
class Counter extends Component {
    state = {
        counter : 0,
        fixed: 1,
    }
    handleIncrease= () => {
      this.setState({
          counter:this.state.counter +1
      });

    }

    handleDecrease = () => {
      this.setState({
          counter:this.state.counter -1
      })
    }

    render() {
      return (
        <div>
          <h1>{this.state.counter}</h1>
          <button onClick={this.handleIncrease}>+1</button>
          <button onClick={this.handleDecrease}>-1</button>
          <p>고정값:{this.state.fixed}</p>
        </div>
      );
    }
  }
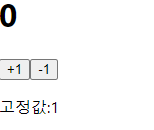
this.setState를 할 때 파라미터에 넣는 객체에 fixed 값을 넣어주지 않아도 값이 유지된다.
