이전까지 연습했던 프로젝트를 배포하는 작업을 진행한다.
사전 필요한 작업
- filezilla 다운로드 https://filezilla-project.org/download.php#close
- 가이바 회원가입하기 https://www.gabia.com
가이바는 도메인을 구입할 수 있는 사이트이다.
버킷 리스트 제작
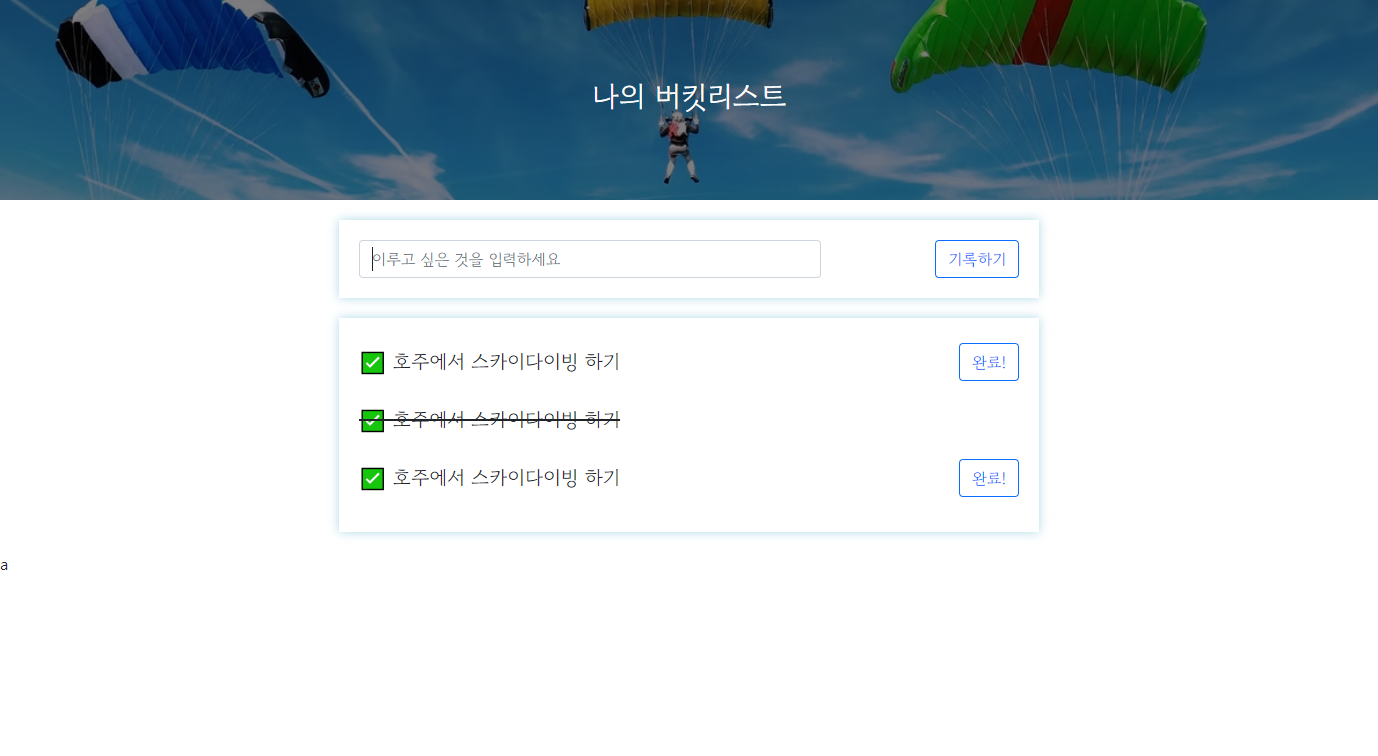
가운데 입력 창에 버킷리스트를 입력하고 "기록하기" 버튼을 누르면 아래의 표시 목록에 추가되고, "완료!"버튼을 누르면 목록 가운데에 가로로 줄이 그어진다.
Post연습 (기록하기)
요청 정보: URL : /bucket, 요청방식 = POST
클라이언트(ajax) -> 서버(flask) : bucket(텍스트)
서버(flask) -> 클라이언트(ajax) : 완료 메시지
서버에서는 한가지를 더 수행해야한다. -> 사용자로부터 보내진 bucket에 고유 번호를 설정해주는 것인데, 이것은 나중에 완료! 버턴으로 체크 완료를 했을 때 무슨 bucket 텍스트인지를 구분하게 해주는 지표 역할을 할 것이다.
서버
서버의 경우엔 클라이언트가 보낸 데이터를 mongoDB에 저장하는 작업을 진행한다
막 생성된 bucket의 id는 현재 mongoDB에 내장되어있는 데이터 리스트의 길이 + 1 이 되어야 한다.
bucket_list = list(db.becket.find({},{'_id': False}))
count = len(bucket_list) + 1@app.route("/bucket", methods=["POST"])
def bucket_post():
bucket_receive = request.form['bucket_give']
bucket_list = list(db.becket.find({},{'_id': False}))
count = len(bucket_list) + 1
doc = {
'num': count,
'bucket': bucket_receive,
'done': 0 //체크 여부
}
db.bucket.insert_one(doc)
return jsonify({'msg': '버킷리스트 등록완료!'})클라이언트
클라이언트는 입력한 텍스트를 서버에 전달하면 끝!
  function save_bucket() {
            let bucket = $('#bucket').val()
            $.ajax({
                type: "POST",
                url: "/bucket",
                data: {bucket_give:bucket},
                success: function (response) {
                    alert(response["msg"])
                    window.location.reload()
                }
            });
        }
등록이 되는지 확인해보자
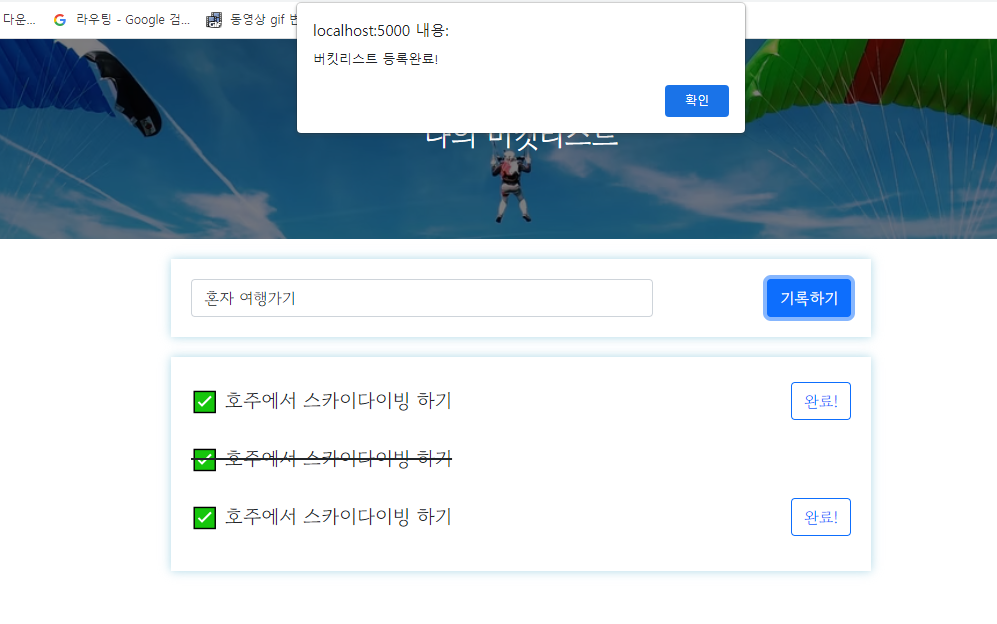
완료 문구 잘 나타나고
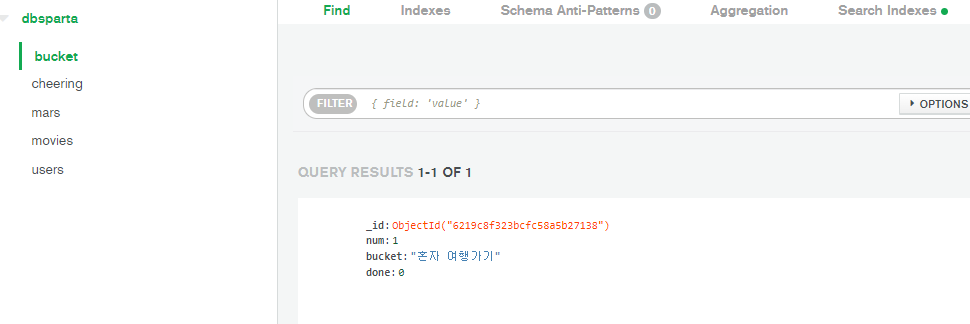
데이터 등록도 완료 되었다.
GET
요청 정보: URL : /bucket, 요청방식 = GET
클라이언트(ajax) -> 서버(flask) : (없음)
서버(flask) -> 클라이언트(ajax) : bucket_list 데이터
서버
mongoDB에 있는 bucket 데이터베이스의 파일을 전부 불러와서 클라이언트에게 전송한다!
@app.route("/bucket", methods=["GET"])
def bucket_get():
    bucket_list = list(db.bucket.find({}, {'_id': False}))
    return jsonify({'bucket': bucket_list})
클라이언트
클라이언트 측에서 서버가 보낸 데이터의 정보를 이용하여 dom을 생성하여 추가한다.
 function show_bucket() {
            $.ajax({
                type: "GET",
                url: "/bucket",
                data: {},
                success: function (response) {
                    let rows = response['bucket']
                    for (let i = 0; i < rows.length; i++) {
                        let bucket = rows[i]['bucket']

                        let temp_html = `
                         <li>
                             <h2>✅ ${bucket}</h2>
                             <button type="button" class="btn btn-outline-primary">완료!</button>
                         </li>
                        `;
                        $('#bucket-list').append(temp_html)
                    }

                }
            });
        }
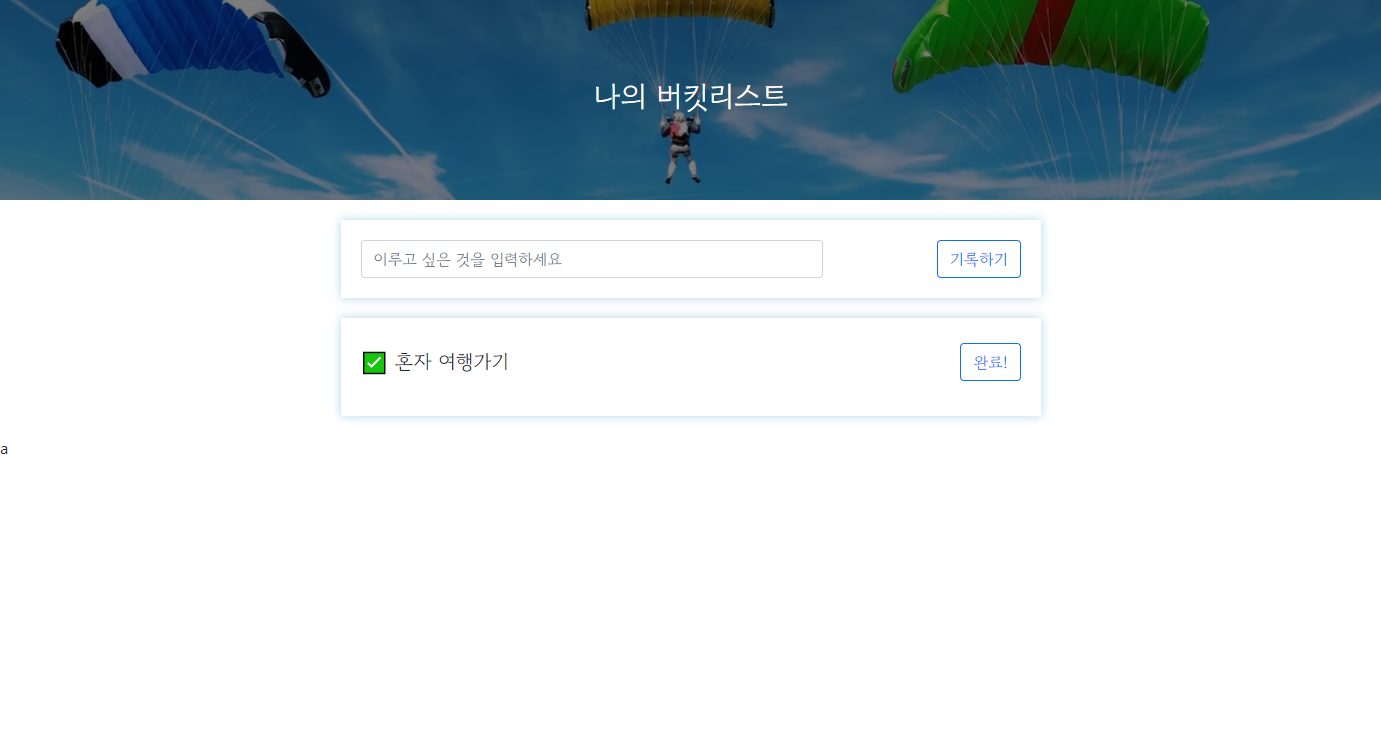
사용자가 추가한 bucketlist 목록이 나타났다.
하나 더 추가를 해보면
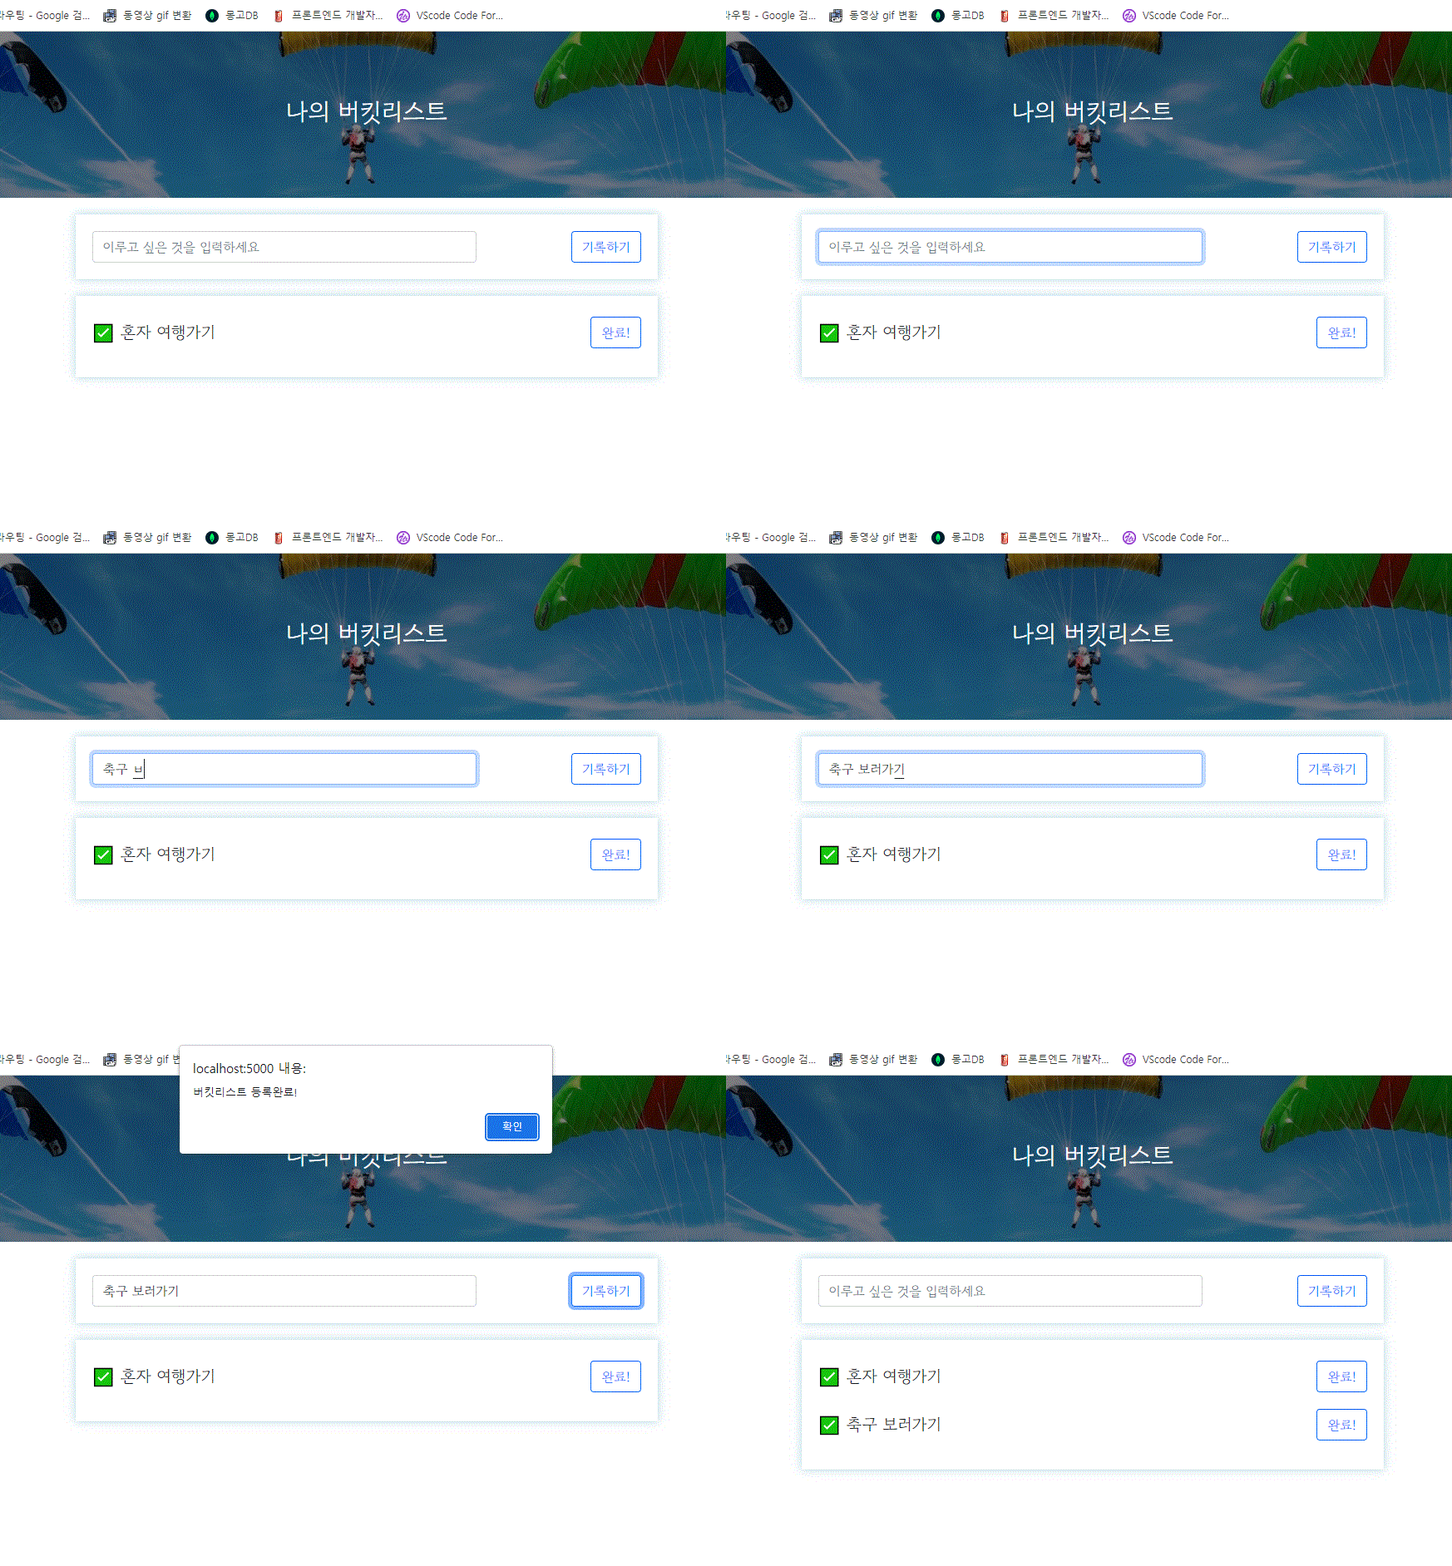
성공적으로 추가된 모습이다.
이렇게 하면 끝? 이 아니다.
"완료!" 버튼을 눌렀을 때 줄이 그어진 상태로 되어야하므로 완료 여부의 파악을 위한 done값을 제어하는 기능을 넣어야 한다.
db에서 num 과 done 값을 할당한 변수를 선언한다.
 let num = rows[i]['num']
 let done = rows[i]['done']
클라이언트에서 추가한 temp_html을 수정한다.
let temp_html = ``
                        if (done == 0){
                            temp_html = `
                             <li>
                             <h2>✅ ${bucket}</h2>
                             <button token interpolation">${num})" type="button" class="btn btn-outline-primary">완료!</button>
                               </li>
                            `
                        } else {
                            temp_html=`
                             <li>
                             <h2 class="done">✅ ${bucket}</h2>
                         </li>
                            `
                        }
$('#bucket-list').append(temp_html)done==0일때 즉, 완료하지 못했을 때는 완료 버튼이 같이 추가되고, 그 반대일 경우에는 완료버튼이 있을 필요가 없기 때문에 버튼을 제외한 채로 추가한다.
이제 완료 버튼을 누를 때 텍스트에 가운데 줄로 그어진 스타일로 수정해서 사용자에게 완료됨을 시각화해서 보여주는 작업을 해보자.
POST(완료하기)
요청 정보 : URL = /bucket/done, 요청방식 = POST
클라이언트(ajax) -> 서버(flask) : num(버킷 넘버)
서버(flask) -> 클라이언트(ajax) : 메시지 출력
서버
클라이언트에서 받은 버킷 넘버를 가진 db의 done값을 바꾼다.
@app.route("/bucket/done", methods=["POST"])
def bucket_done():
    num_receive = request.form['num_give']
    db.bucket.update_one({'num' : int(num_receive)}, {'$set' : {'done' : 1}})
    return jsonify({'msg': 'POST(완료) 연결 완료!'})
int(num_receive)로 작성한 이유는 db에서 값을 불러오면 숫자일지라도 문자열의 형태로 전송되기 때문에 int()를 사용해서 숫자로 변경을 해주어야 한다.
클라이언트
완료버튼이 눌러진 bucketlist 항목에 스타일을 수정한다.
bucketlist 항목을 구분하기 위해서 num이라는 항목을 추가했었다.
    function done_bucket(num) {
            $.ajax({
                type: "POST",
                url: "/bucket/done",
                data: {num_give: num},
                success: function (response) {
                    alert(response["msg"])
                    window.location.reload()
                }
            });
        }
근데 클릭해서 밑줄은 어떻게 생김? - 체크되었을 경우 show_bucket은 버켓리스트 텍스트를 감싸는 h2에 done이라는 클래스를 추가했고
이때 style에
.mybox > li > h2.done {
            text-decoration: line-through
        }
위의 내용을 추가 했기 때문에 done클래스가 붙으면 텍스트의 가운데 줄이 그어지는 것이다.
결과 화면
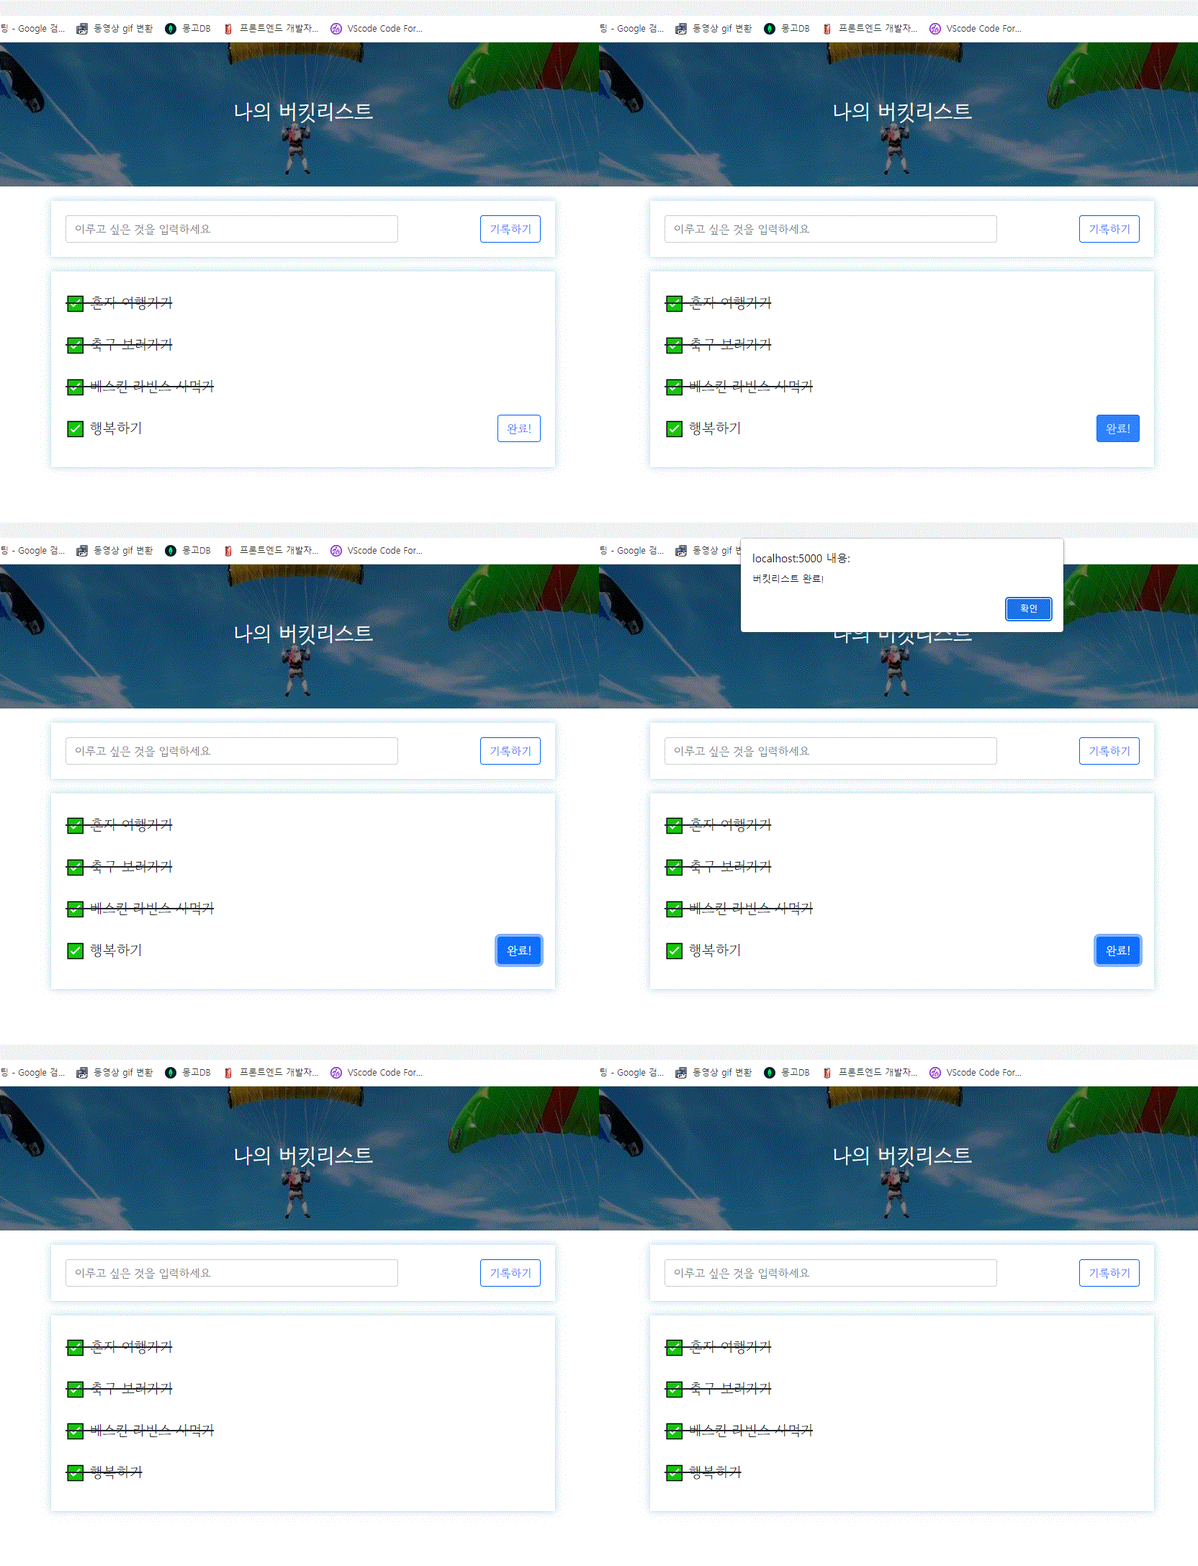
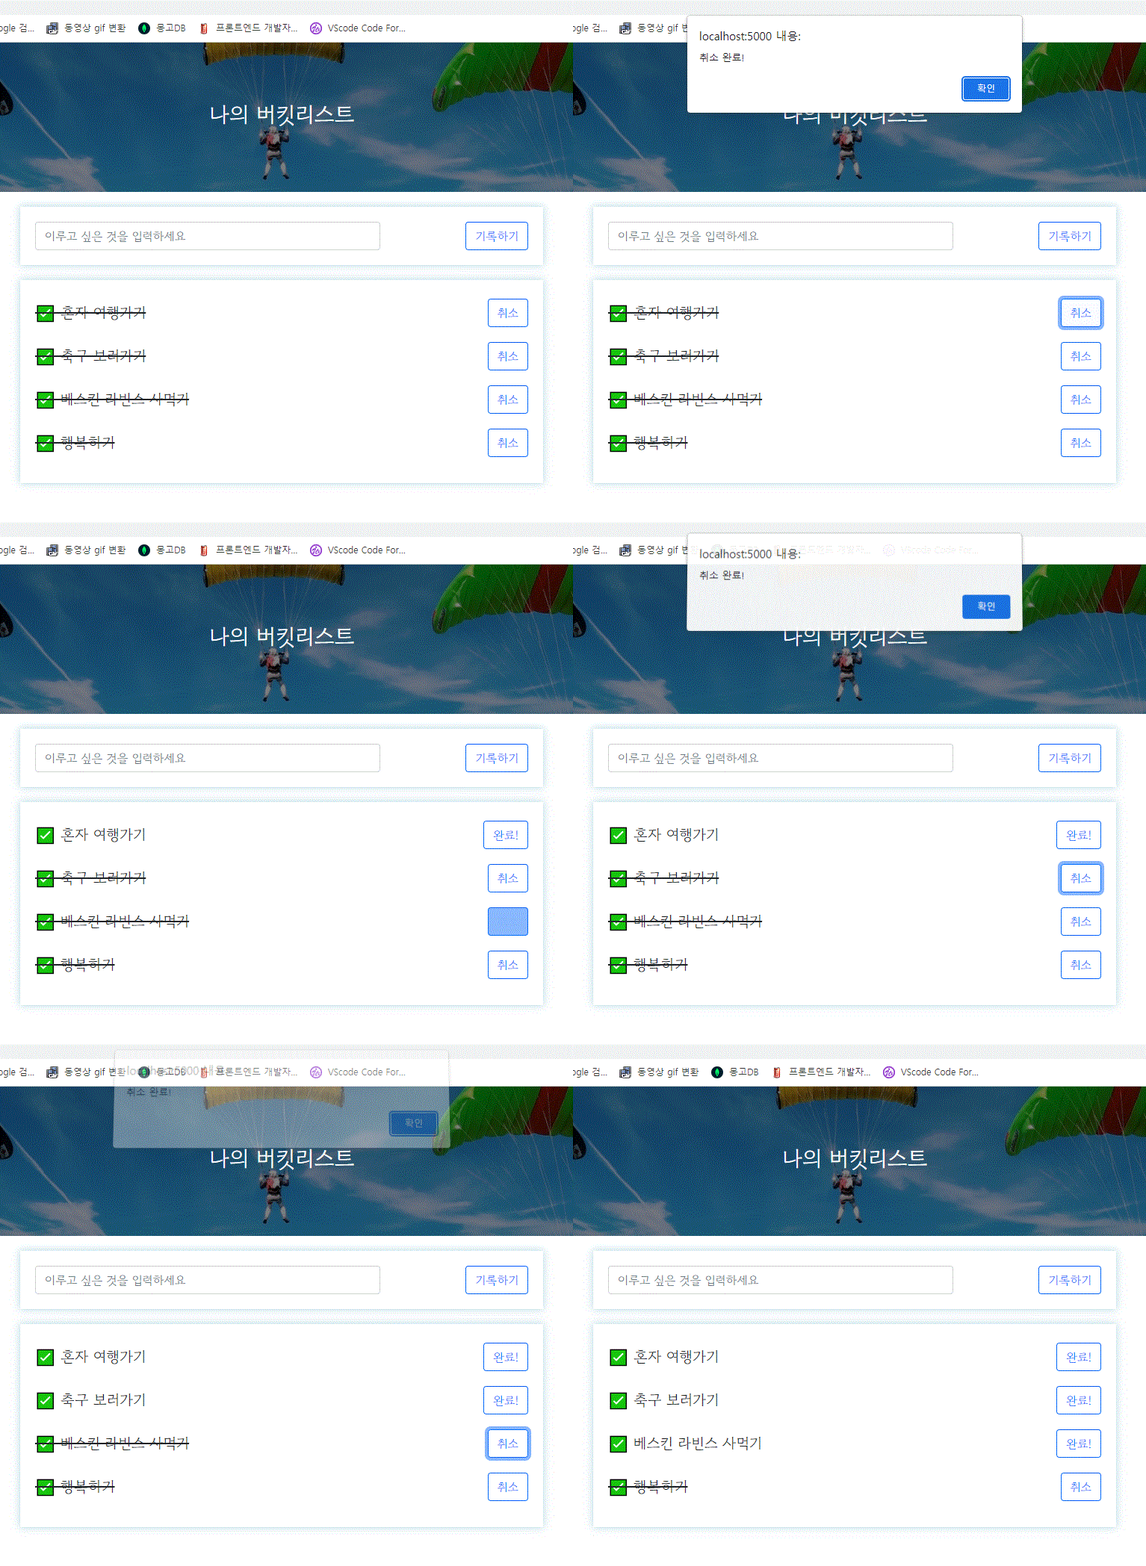
취소 버튼을 추가해서 원래대로 바꾸는 것도 추가 해봤다.
@app.route("/bucket/notdone", methods=["POST"])
def bucket_not_done():
    num_receive = request.form['num_give']
    db.bucket.update_one({'num': int(num_receive)}, {'$set': {'done': 0}})
    return jsonify({'msg': '취소 완료!'})
  function not_done_bucket(num) {
            $.ajax({
                type: "POST",
                url: "/bucket/notdone",
                data: {num_give: num},
                success: function (response) {
                    alert(response["msg"])
                    window.location.reload()
                }
            });
        }
show_bucket의 temp_html 수정
  if (done == 0){
                            temp_html = `
                             <li>
                             <h2>✅ ${bucket}</h2>
                             <button token interpolation">${num})" type="button" class="btn btn-outline-primary">완료!</button>
                               </li>
                            `
                        } else {
                            temp_html=`
                             <li>
                             <h2 class="done">✅ ${bucket}</h2>
                             <button token interpolation">${num})" type="button" class="btn btn-outline-primary">취소</button>
                         </li>
                            `
                        }
결과 화면
