2024.1.30 (화)
QT Creator (Linux)
Dial
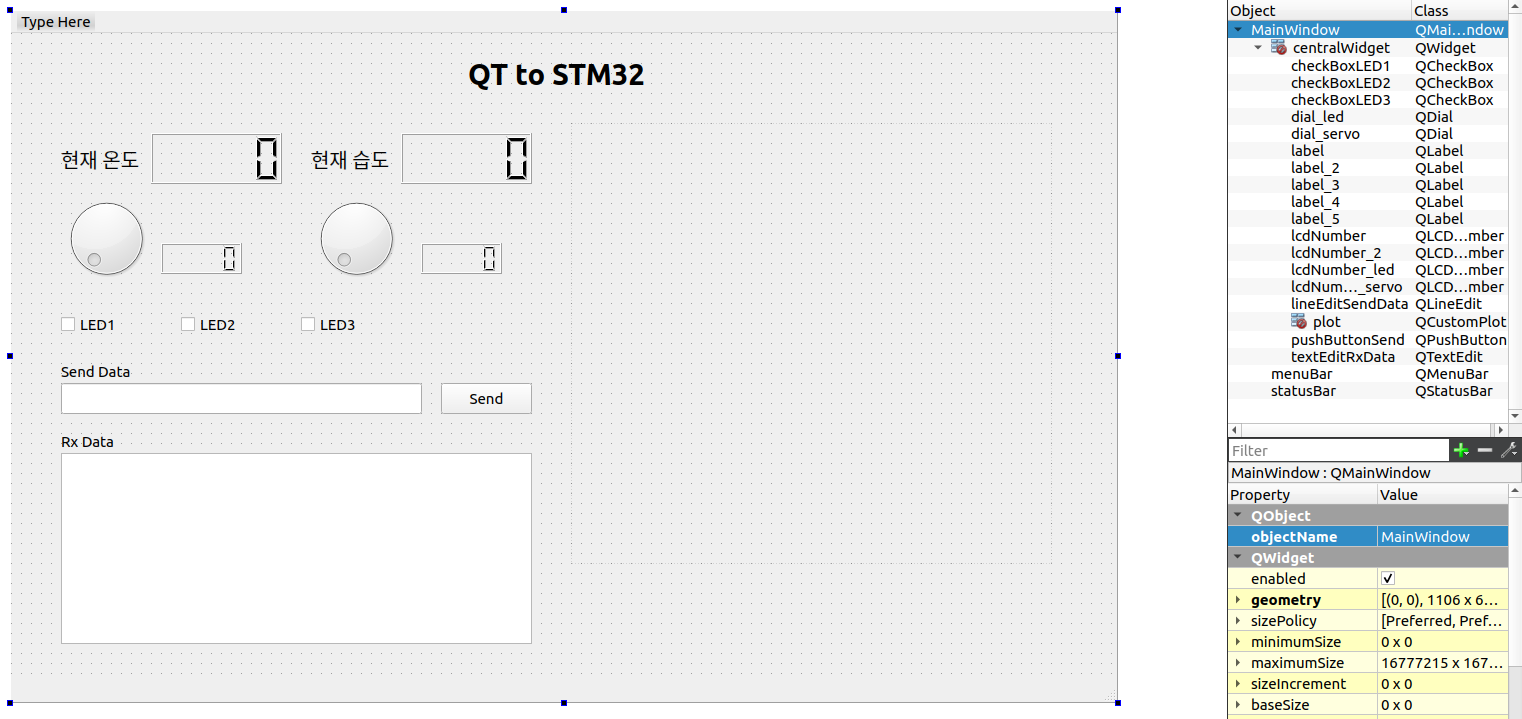
UI
Dial 2개와 LCD 2개를 추가한다
 dial 마우스 우클릭 > Go to slot > valueChanged(int) 메서드를 추가한다
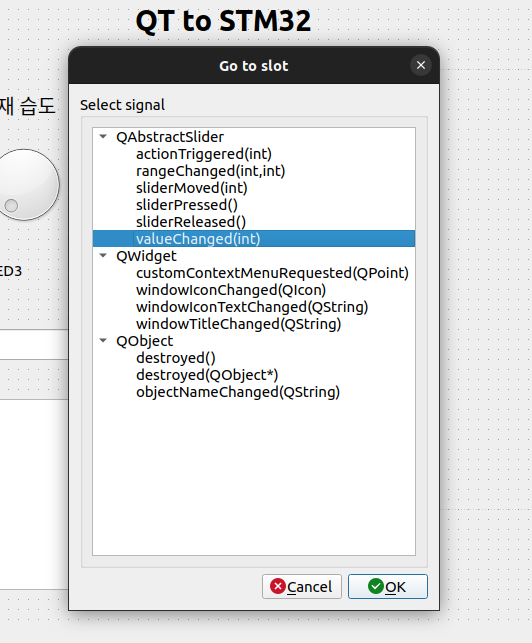 Led도 똑같이 마우스 우클릭 > Go to slot > valueChanged(int) 메서드를 추가한다
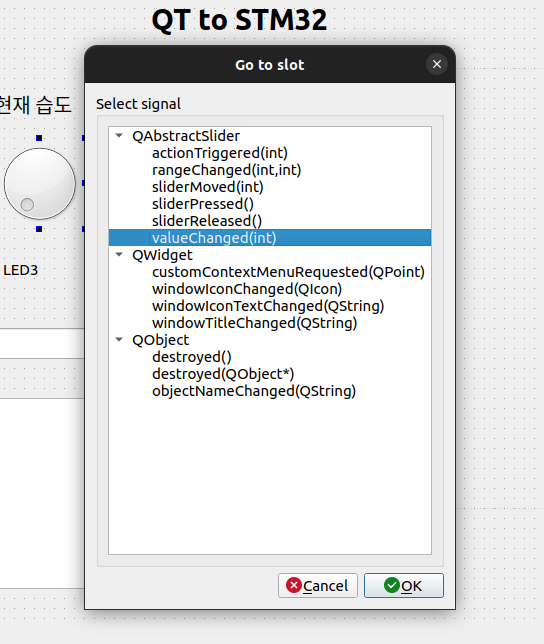
Code
- mainwindow.cpp
// SERVO: 999
void MainWindow::on_dial_servo_valueChanged(int value)
{
QByteArray servo_data = "SERVO:";
servo_data.append(QString::number(ui->dial_servo->value()));
ui->lcdNumber_servo->display(ui->dial_servo->value());
socket->writeDatagram(servo_data, QHostAddress("10.10.15.91"), 9999);
qDebug() << "servo data: " << servo_data << endl;
}
void MainWindow::on_dial_led_valueChanged(int value)
{
QByteArray led_data = "LED:";
led_data.append(QString::number(ui->dial_led->value()));
ui->lcdNumber_led->display(ui->dial_led->value());
socket->writeDatagram(led_data, QHostAddress("10.10.15.91"), 9999);
qDebug() << "led data: " << led_data << endl;
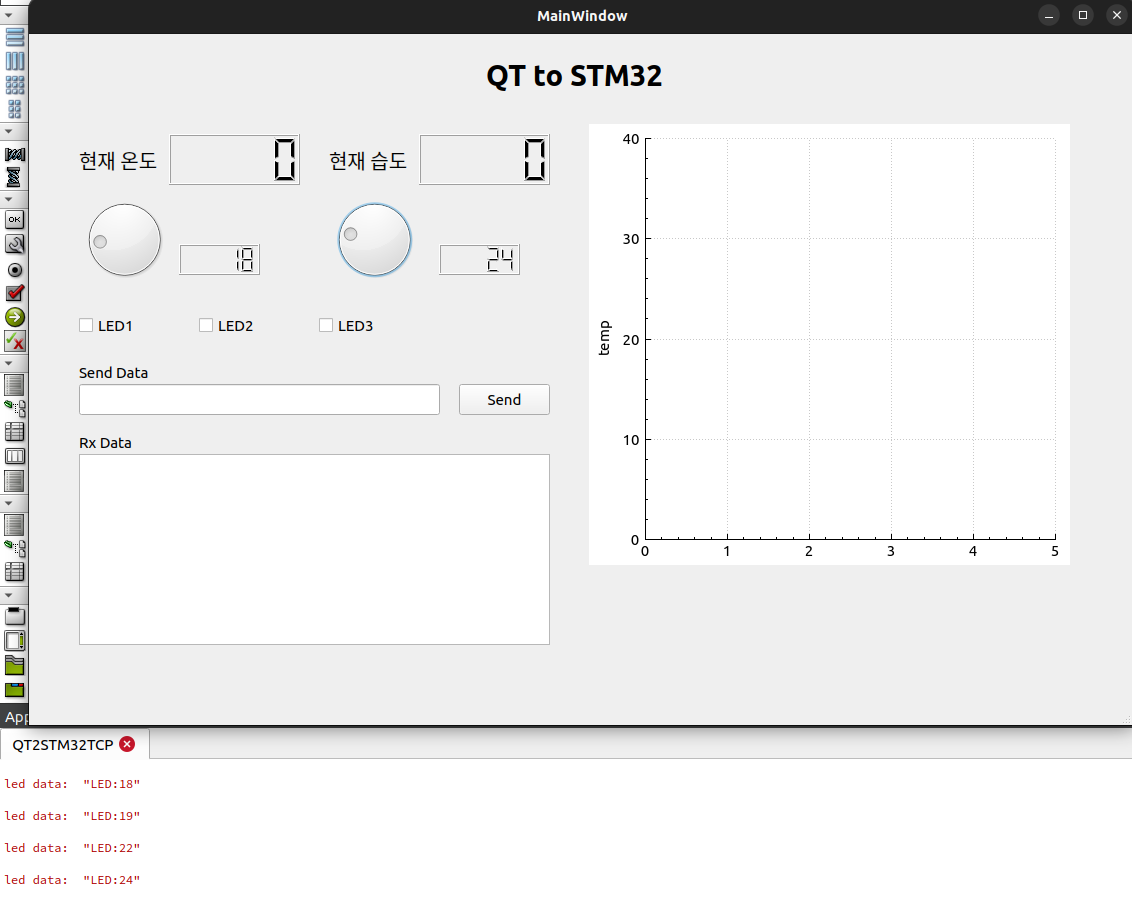
}Output
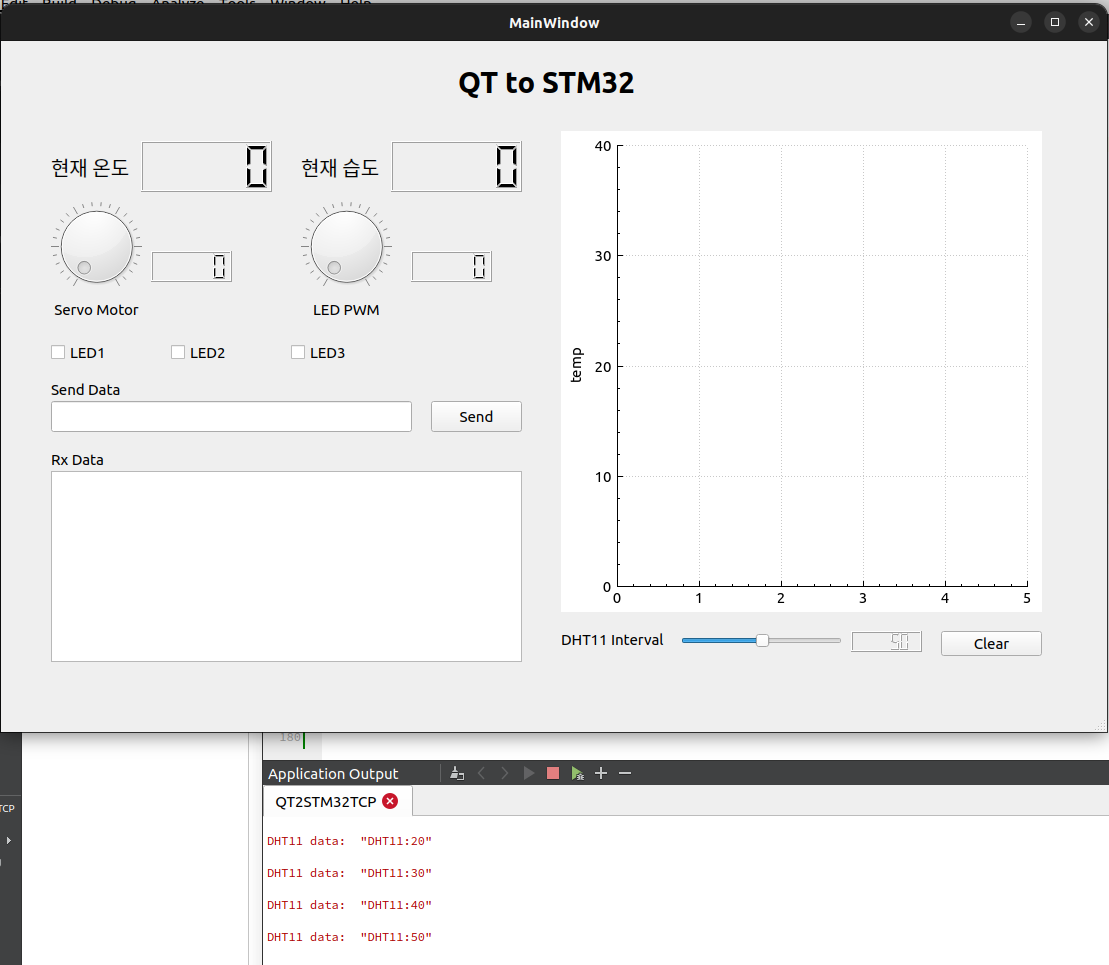
Slider
UI
Slider와 Clear 버튼 추가
Dial 눈금은 속성 맨 밑에 notchesVisible 체크 표시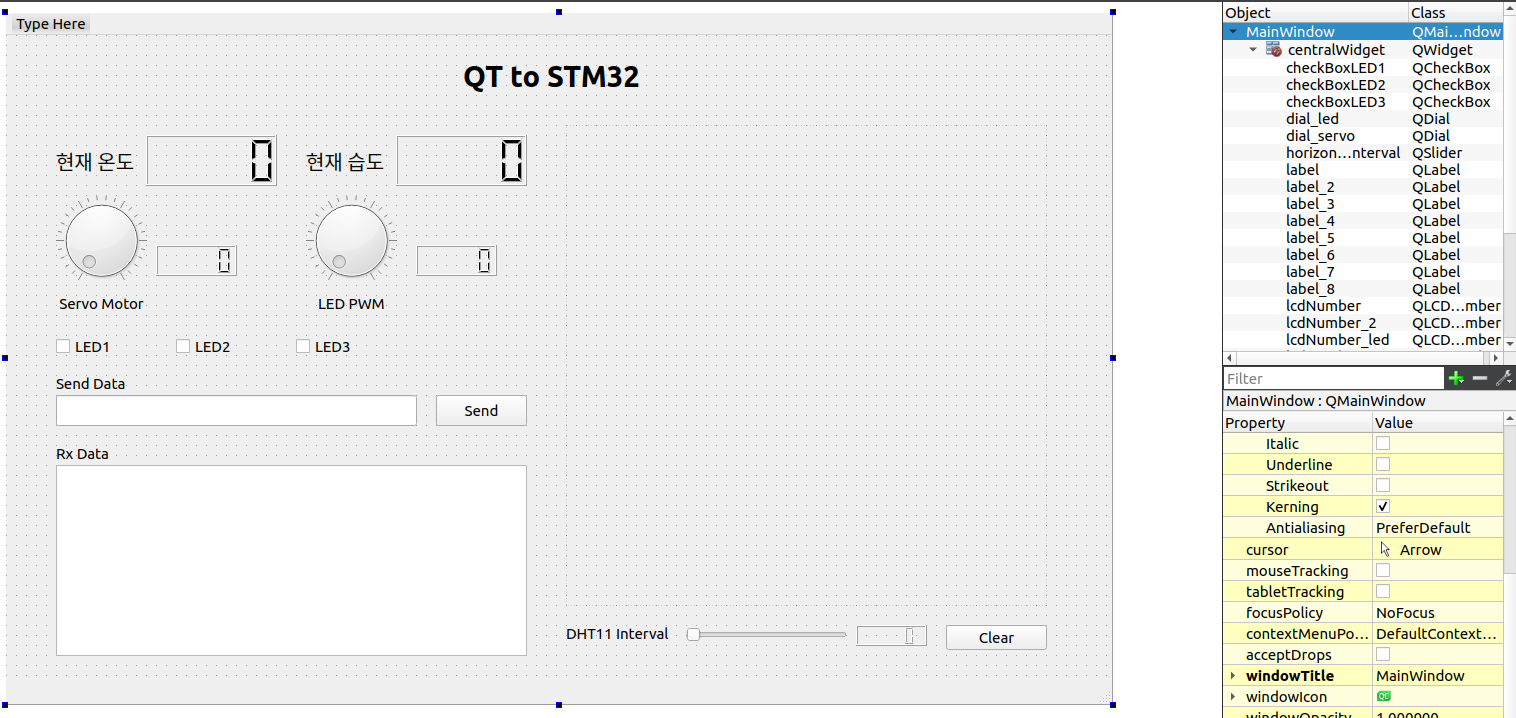 Slider 마우스 우클릭 > Go to slot > valueChanged(int) 메서드를 추가한다
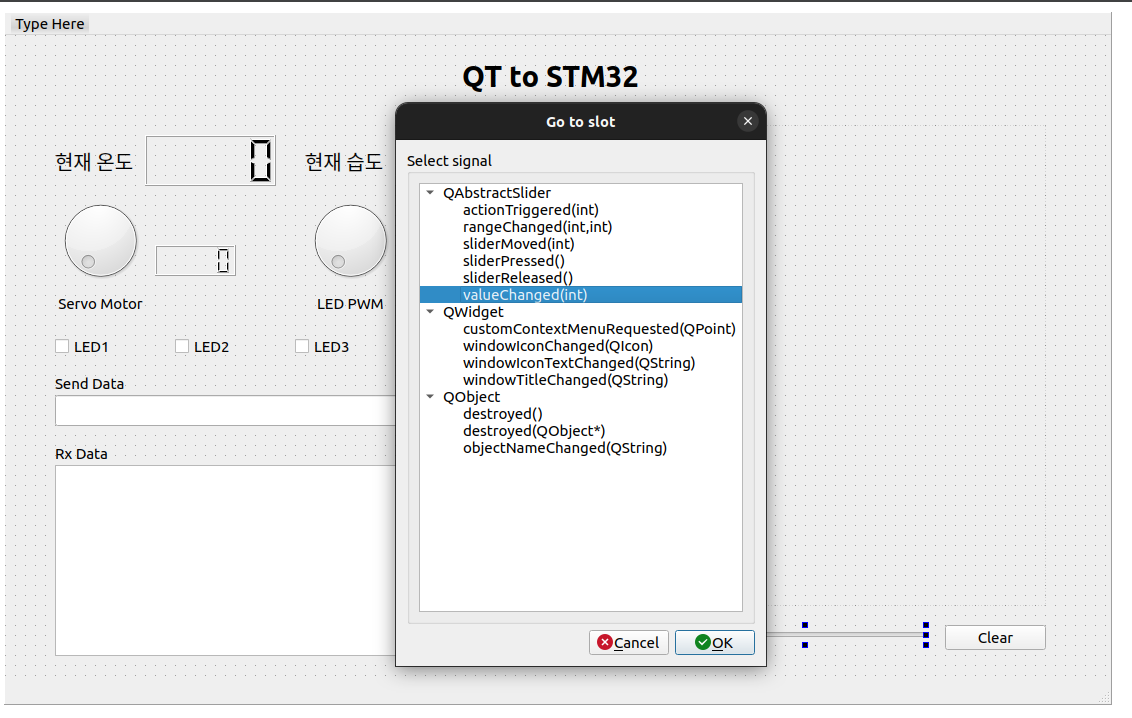
Code
void MainWindow::on_horizontalSlider_DHT11_Interval_valueChanged(int value)
{
    QByteArray interval_data = "DHT11:";

    interval_data.append(QString::number(ui->horizontalSlider_DHT11_Interval->value()));
    ui->lcdNumber_slider->display(ui->horizontalSlider_DHT11_Interval->value());
    socket->writeDatagram(interval_data, QHostAddress("10.10.15.91"), 9999);

    qDebug() << "DHT11 data: " << interval_data << endl;
}
Output
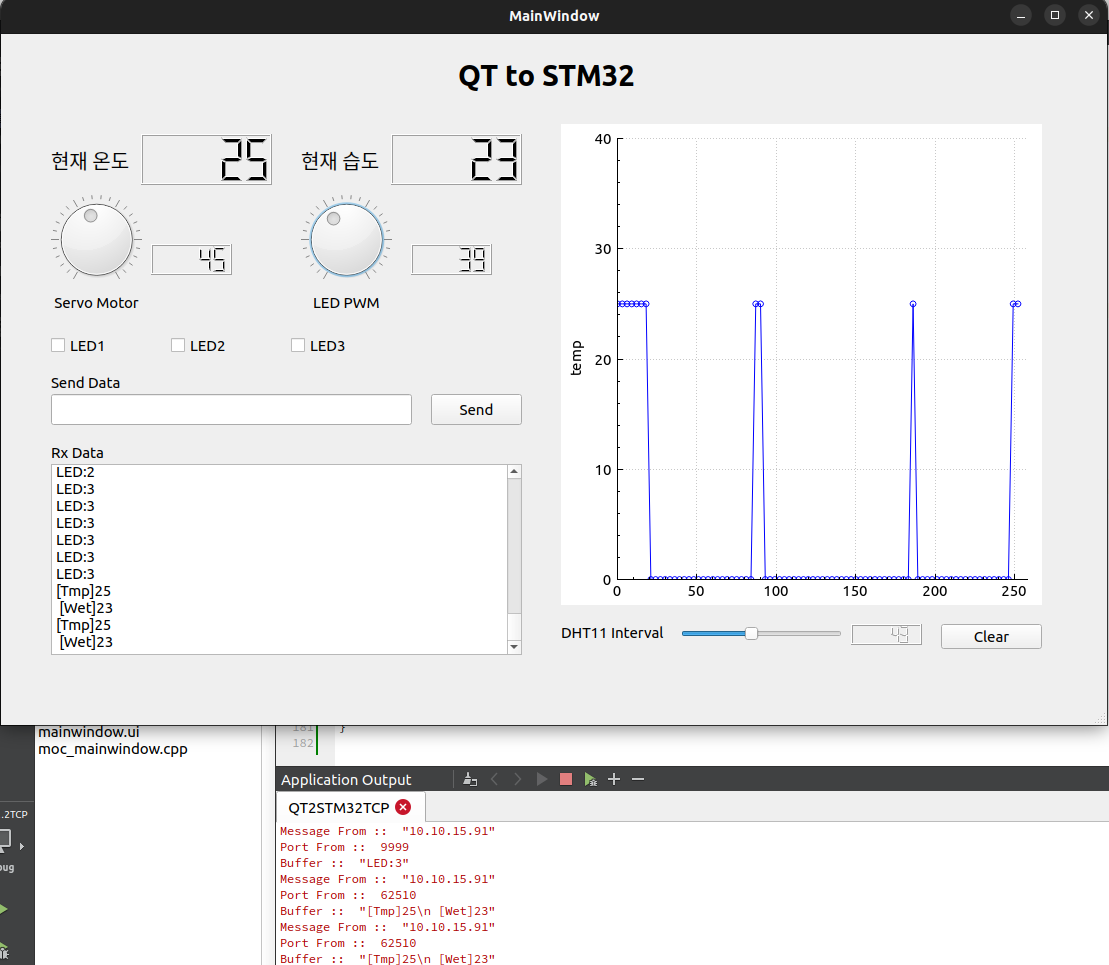
Dial, Slider, Clear 버튼 최종 결과
Output
Code
- mainwindow.cpp
#include "mainwindow.h"
#include "ui_mainwindow.h"
#include "qcustomplot.h"    // ADD_JM
#include <QDebug>           // ADD_JM   stdio.h와 비슷
#include <QString>          // ADD_JM   c++의 string을 진화시킨 것

MainWindow::MainWindow(QWidget *parent) :
    QMainWindow(parent),
    ui(new Ui::MainWindow)
{
    ui->setupUi(this);

// ------------ TCP Start
    // 1. socket을 생성
    socket = new QUdpSocket(this);
    // 2. IP, SW, PORT 번호 등록
    bool result = socket->bind(QHostAddress::AnyIPv4, 9999);
    qDebug() << result;     // qDebug --> c++의 cout
    if (result) {
        qDebug() << "PASS";
    }
    else {
        qDebug() << "FAIL";
    }
    // SIGNAL : event 발생
    // SLOT : INT service routine (함수)
    // connect : mapping (연결시켜 주는 것)
    // socket으로부터 읽을 data가 존재하면 나의(this) readyRead()를 호출하여라
    connect(socket, SIGNAL(readyRead()), this, SLOT(readyRead()));

    ui->plot->setInteraction(QCP::iRangeDrag, true);
    ui->plot->setInteraction(QCP::iRangeZoom, true);
    ui->plot->addGraph();
    //ui->plot->xAxis->setLabel("time(s)");
    ui->plot->yAxis->setLabel("temp");
    ui->plot->yAxis->setRange(0.0, 40.0);
    ui->plot->graph(0)->setScatterStyle(QCPScatterStyle::ssCircle);     //점찍는 스타일 결정.
    ui->plot->graph(0)->setLineStyle(QCPGraph::lsLine);                 //라인 스타일 결정.
    connect(ui->plot, SIGNAL(mouseDoubleClickEvent(QMouseEvent*)), SLOT(QMouseEvent*));
// ------------ TCP End
}

int time_ = 0;

void MainWindow::readyRead()
{
    QByteArray Buffer;
    double temp_digit;      // 온도값
    double hydr_digit;      // 습도값

    QHostAddress sender;    // 송신자의 IP
    quint16 senderPort;     // 송신자의 SW PORT

    Buffer.resize(socket->pendingDatagramSize());

    // 3. socket으로부터 data를 read
    socket->readDatagram(Buffer.data(), Buffer.size(), &sender, &senderPort);
    Buffer.chop(1);     // [Tmp] 25\n가 왔을 때 \n을 제거 (마지막 byte를 제거)
    ui->textEditRxData->append(Buffer);     // 창의 맨 끝에 붙여 넣기
    ui->textEditRxData->show();             // 창에 display

    // LCD 창에 출력
    // Buffer = Buffer.right(2);           // right(2) : [Tmp]25 맨 오른쪽부터 2자리를 자른다.
    // Buffer에는 25가 들어 있다. 25는 utf8 모드
    // temp_digit = Buffer.toDouble();     // Buffer에 있는 내용을 double로 변환
    temp_digit = Buffer.mid(5, 2).toDouble();
    ui->lcdNumber->display(temp_digit); // LCD 창에 출력

    hydr_digit = Buffer.right(2).toDouble();
    ui->lcdNumber_2->display(hydr_digit);

    qDebug() <<"Message From :: " << sender.toString();
    qDebug() <<"Port From :: "<< senderPort;
    qDebug() <<"Buffer :: " << Buffer;

    add_point(time_, temp_digit);
    time_+=3;
    ui->plot->xAxis->setRange(0, time_+3);
    plot();
}

void MainWindow::add_point(double x, double y){
    qv_x.append(x);
    qv_y.append(y);
}

void MainWindow::clear_data(){
    qv_x.clear();
    qv_y.clear();
}

void MainWindow::plot(){
    ui->plot->graph(0)->setData(qv_x, qv_y);
    ui->plot->replot();
    ui->plot->update();
}

MainWindow::~MainWindow()
{
    delete ui;
}

// 생성 경로 : send --> 마우스우클릭 --> go to slot --> click
void MainWindow::on_pushButtonSend_clicked()
{
    QByteArray Data;

    Data = ui->lineEditSendData->text().toUtf8();
    socket->writeDatagram(Data, QHostAddress("10.10.15.91"), 9999);
    // 10.10.15.91 : STM32 IP
}

void MainWindow::on_checkBoxLED1_stateChanged(int arg1)
{
     QString buffer;
     QByteArray SendData;

     buffer.sprintf("LED001\n");
     SendData = buffer.toUtf8();    // ascii는 utf8과 값이 동일하여 변환을 굳이 할 필요 없다 (한글은 꼭 해야 함)
     socket->writeDatagram(SendData, QHostAddress("10.10.15.91"), 9999);
}

void MainWindow::on_checkBoxLED2_stateChanged(int arg1)
{
    QString buffer;
    QByteArray SendData;

    buffer.sprintf("LED002\n");
    SendData = buffer.toUtf8();    // ascii는 utf8과 값이 동일하여 변환을 굳이 할 필요 없다 (한글은 꼭 해야 함)
    socket->writeDatagram(SendData, QHostAddress("10.10.15.91"), 9999);
}

void MainWindow::on_checkBoxLED3_stateChanged(int arg1)
{
    QString buffer;
    QByteArray SendData;

    buffer.sprintf("LED003\n");
    SendData = buffer.toUtf8();    // ascii는 utf8과 값이 동일하여 변환을 굳이 할 필요 없다 (한글은 꼭 해야 함)
    socket->writeDatagram(SendData, QHostAddress("10.10.15.91"), 9999);
}

// SERVO: 999
void MainWindow::on_dial_servo_valueChanged(int value)
{
    QByteArray servo_data = "SERVO:";

    servo_data.append(QString::number(ui->dial_servo->value()));
    ui->lcdNumber_servo->display(ui->dial_servo->value());
    socket->writeDatagram(servo_data, QHostAddress("10.10.15.91"), 9999);

    qDebug() << "servo data: " << servo_data << endl;
}

void MainWindow::on_dial_led_valueChanged(int value)
{
    QByteArray led_data = "LED:";

    led_data.append(QString::number(ui->dial_led->value()));
    ui->lcdNumber_led->display(ui->dial_led->value());
    socket->writeDatagram(led_data, QHostAddress("10.10.15.91"), 9999);

    qDebug() << "led data: " << led_data << endl;
}

void MainWindow::on_horizontalSlider_DHT11_Interval_valueChanged(int value)
{
    QByteArray interval_data = "DHT11:";

    interval_data.append(QString::number(ui->horizontalSlider_DHT11_Interval->value()));
    ui->lcdNumber_slider->display(ui->horizontalSlider_DHT11_Interval->value());
    socket->writeDatagram(interval_data, QHostAddress("10.10.15.91"), 9999);

    qDebug() << "interval data: " << interval_data << endl;
}

void MainWindow::on_pushButton_Clear_clicked()
{
    clear_data();
    time_ = 0;
}
Linux BSP
리눅스 가상환경 세팅
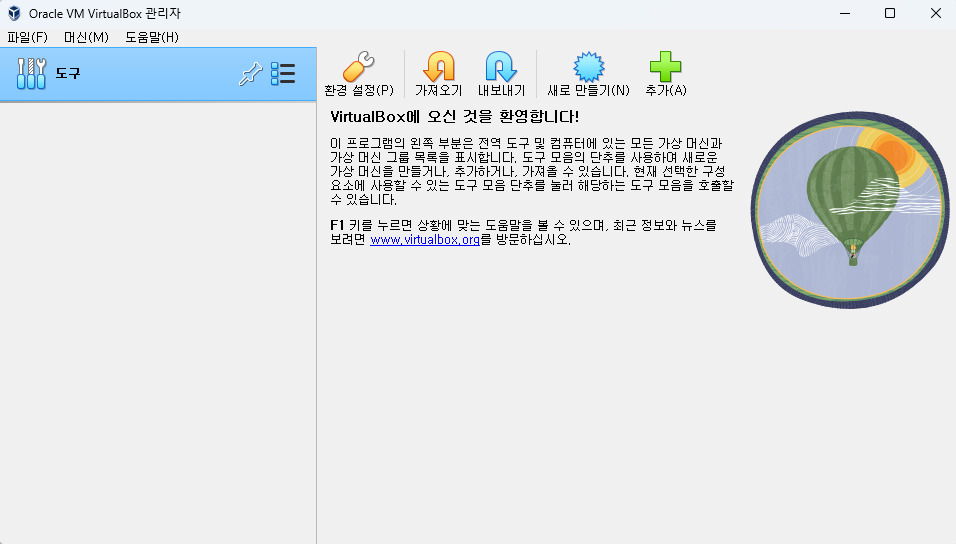
Virtual Box 다운로드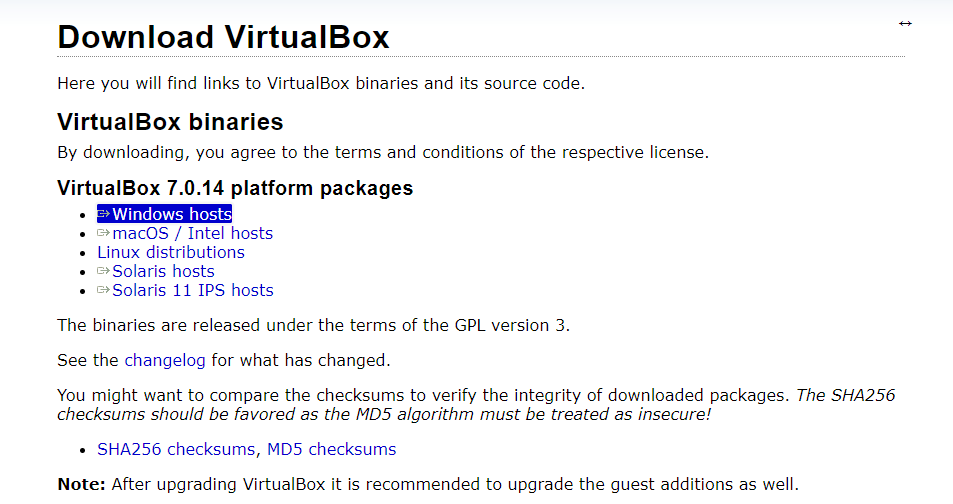 Extension Pack 다운로드
 가상환경 링크
Desktop image 다운받기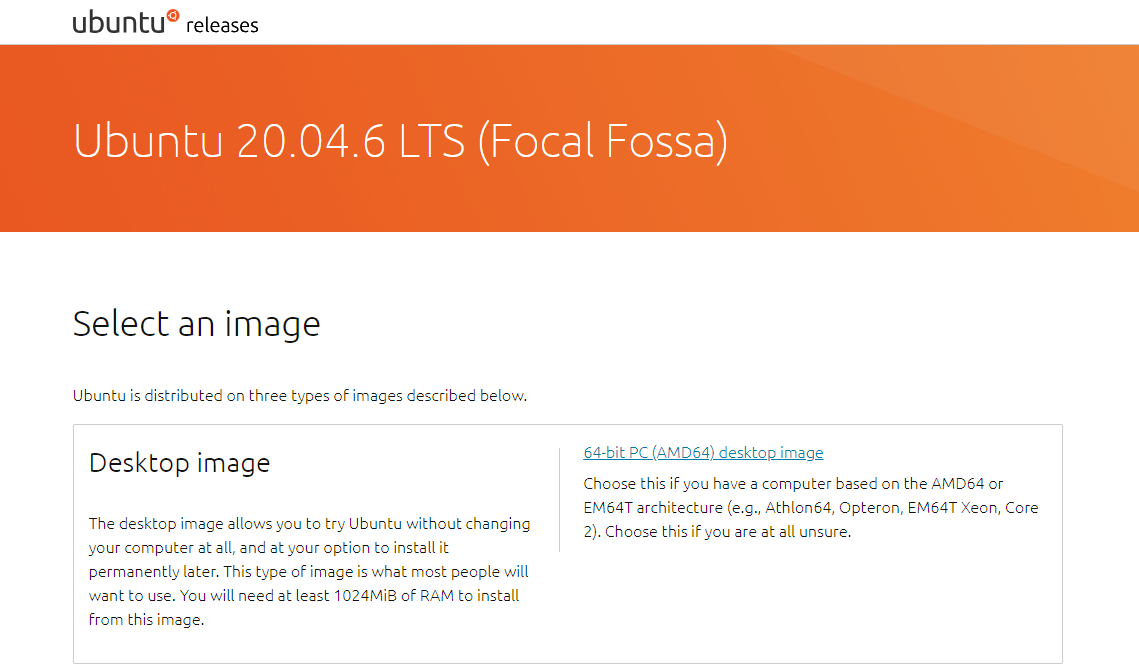 다운로드 링크
순서
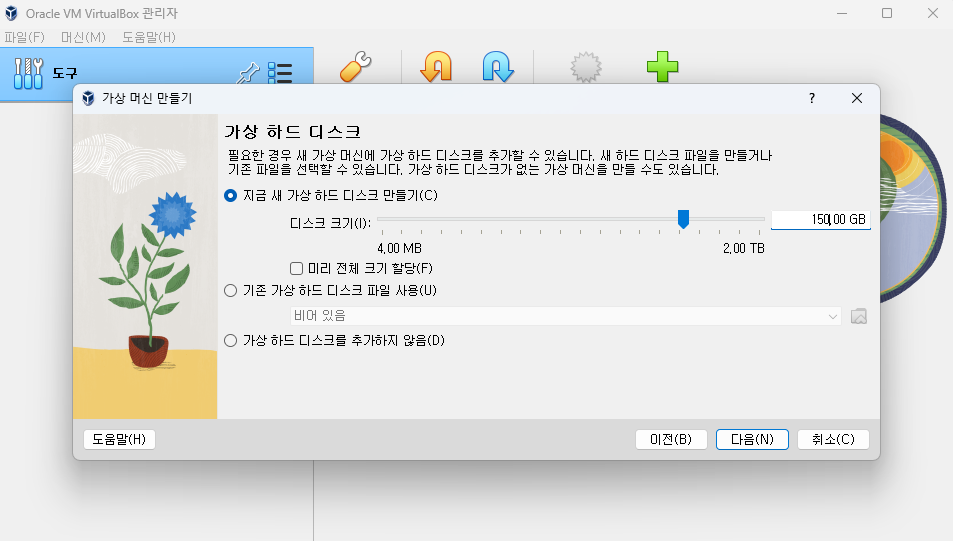
- 가상머신 새로 만들기
- 이름 : ubuntu20.04
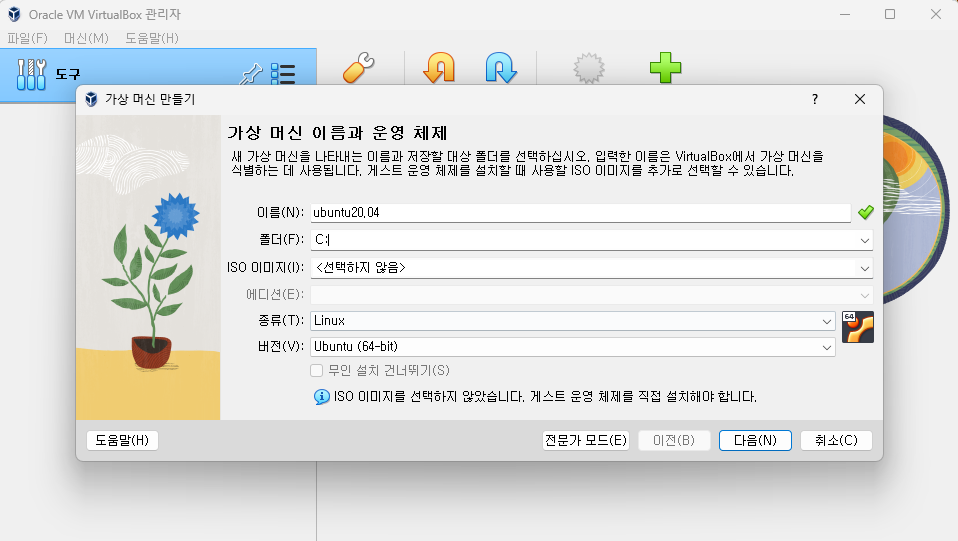
- 메모리 : 8192MB (우분투 실행 시에만 메모리를 잡음)
- 프로세서: 4개
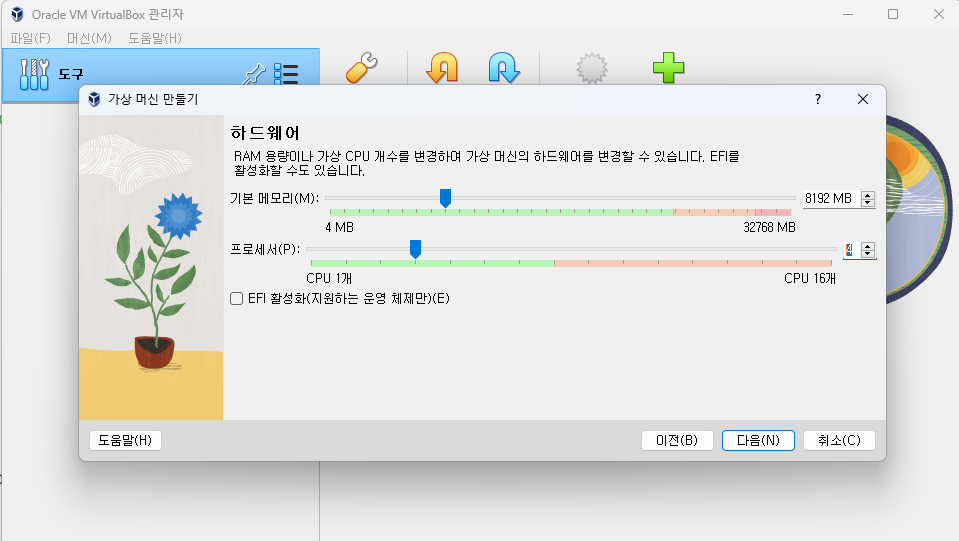
- 하드디스크 : 150Gb (최소 50gb 정도 잡으면 됨)
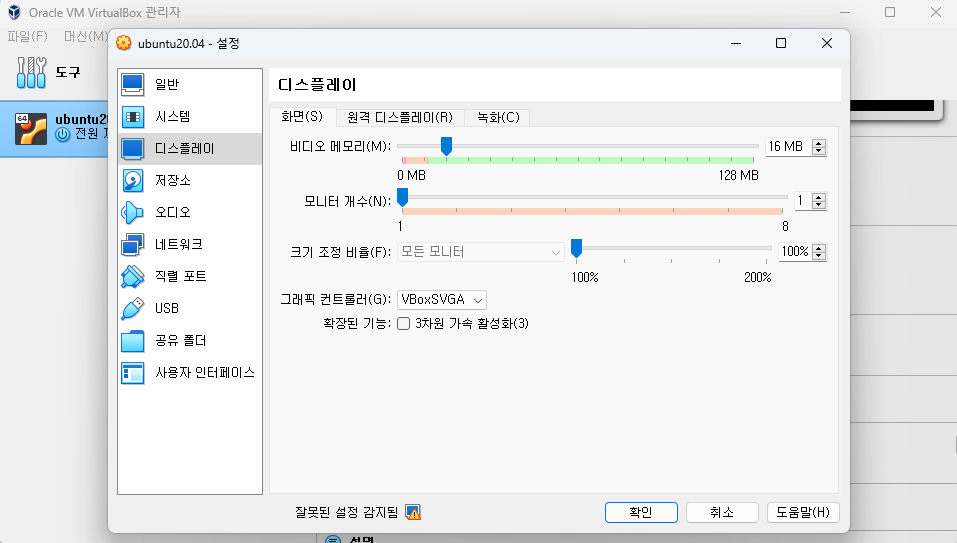
- 설정 -> 디스플레이 -> 그래픽컨트롤러 : VBoxSVGA
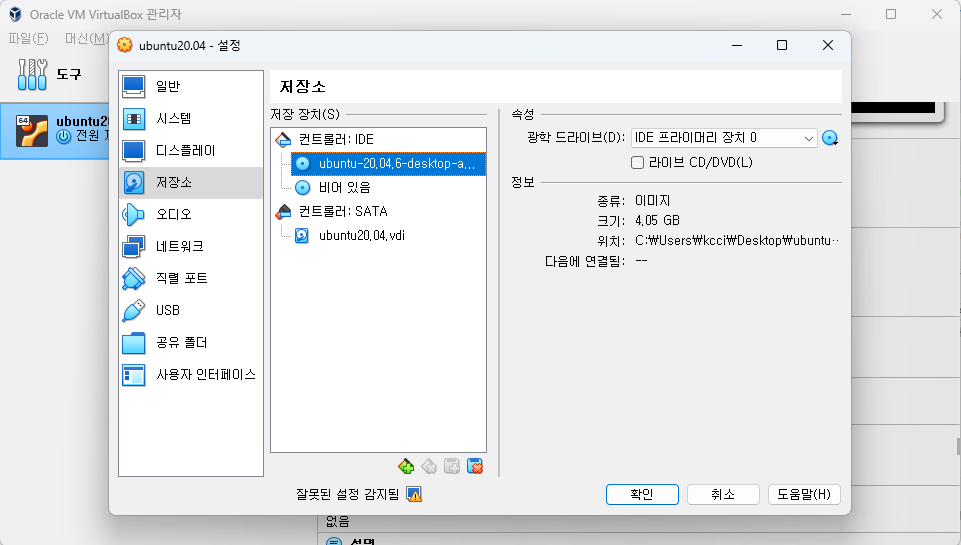
저장소 -> 광학 드라이버 -> ubuntu20.04.6.~.iso 선택
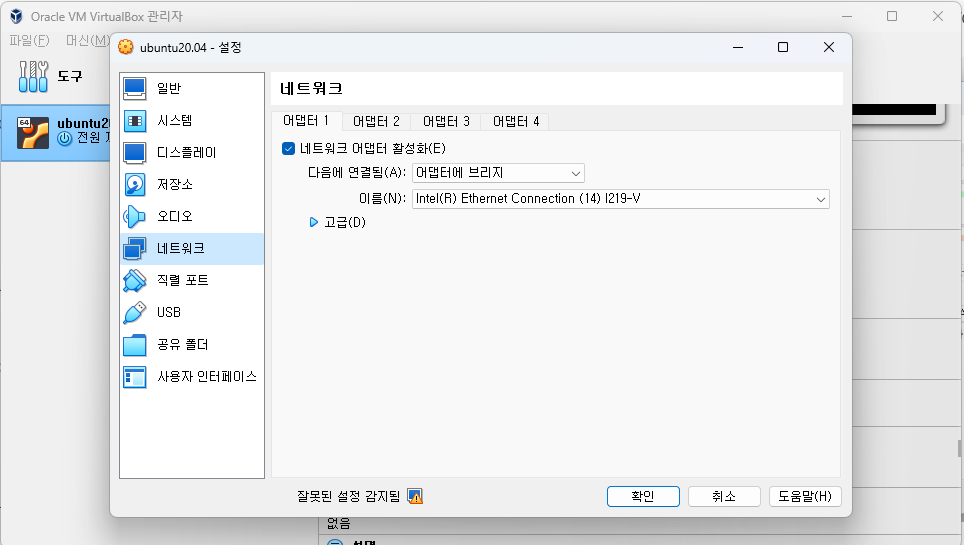
네트워크 -> 어댑터에 브리지 선택
7.시작 , 한국어 선택 , 우분투 설치 , 일반설치 , 설치중 업데이트 안함 체크 해제
이름 : ubuntu, 컴퓨터 이름 : ubuntuXX (01~23 : 윈도우 IP 끝번호) , 암호 설정 -> 설치 완료
8.재부팅 후 설정 -> 네트워크 -> ipv4 -> ip :10.10.141.xx (윈도우IP+30), 넷마스크 : 255.255.255.0 게이트웨이 : 10.10.141.254, DNS : 8.8.8.8
- $ sudo apt update ; sudo apt upgrade
- $ sudo apt install net-tools
- $ ifconfig ==> 설정 IP확인 및 인터넷 접속 확인
- ssh , samba 설치(첨부파일 참고)
ROS 수업용 패키지 먼저 설치(리눅스 BSP 수업 이후 진행할 패키지 의존성때문에 먼저 설치)
13. ROS 메뉴얼 https://emanual.robotis.com/docs/en/platform/turtlebot3/quick-start/#pc-setup
설치 버전 Noetic
14.이메뉴얼 참고하여 설치
3.1.2 (Install ROS on Remote PC) 부터 설치 후 종료
15.VirtualBox -> 파일 -> 가상머신 내보내기

I mean