[GKE] Migrating a Monolithic Website to Microservices on Google Kubernetes Engine
Google Skills
Course
Build a Website on Google Cloud
Lab
목록
- Deploy Your Website on Cloud Run
- Host a Web App on Google Cloud Using Compute Engine
- Deploy, Scale, and Update Your Website on Google Kubernetes Engine
- Migrating a Monolithic Website to Microservices on Google Kubernetes Engine ⬅️ 오늘의 Lab!
- Case Study: Hosting Scalable web apps on Google Cloud
- Build a Website on Google Cloud: Challenge Lab
🌠 Migrating a Monolithic Website to Microservices on Google Kubernetes Engine
개요
기존 모놀리식 애플리케이션을 Google Kubernetes Engine 클러스터에 배포한 다음 마이크로서비스로 분할해보자.
실습과정
1. Zone 설정

gcloud config set compute/zone (zone)2. 소스 저장소 클론

cd ~
git clone https://github.com/googlecodelabs/monolith-to-microservices.git
cd ~/monolith-to-microservices
./setup.sh
3. GKE 클러스터 생성
(1) Containers API 사용 설정

gcloud services enable container.googleapis.com➡️ Google Kubernetes Engine을 사용하기 위해 Containers API 사용 설정
(2) fancy-cluster 생성
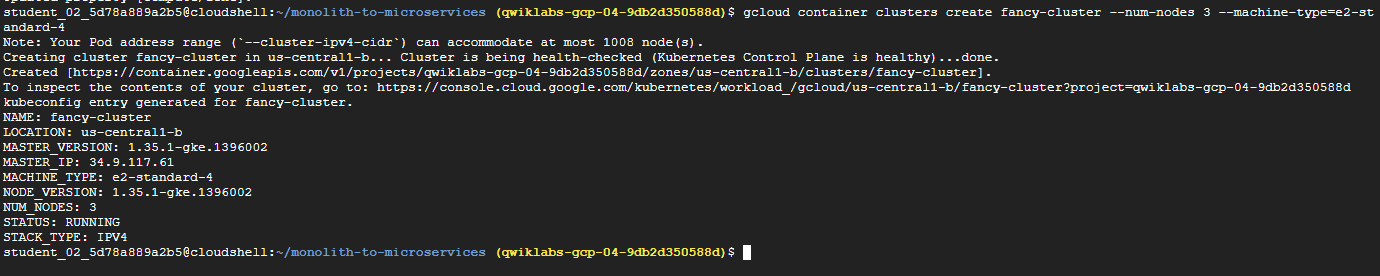
gcloud container clusters create fancy-cluster --num-nodes 3 --machine-type=e2-standard-4(3) 인스턴스 확인
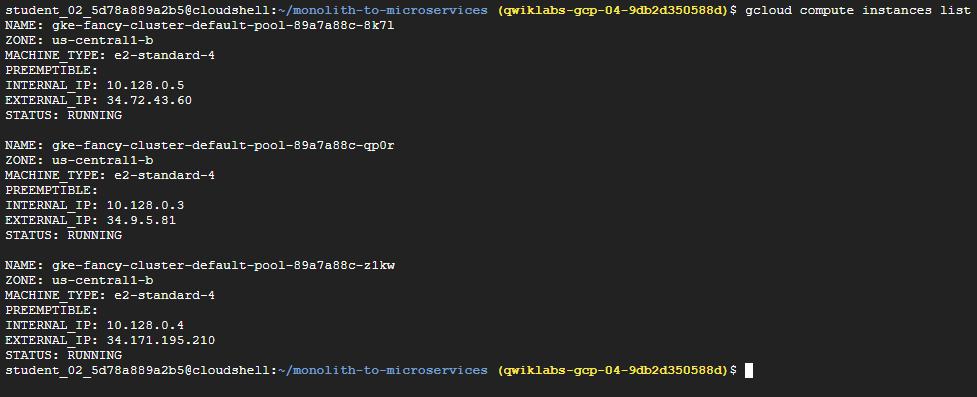
gcloud compute instances list4. 기존 모놀리식 배포
(1) GKE 클러스터에 배포
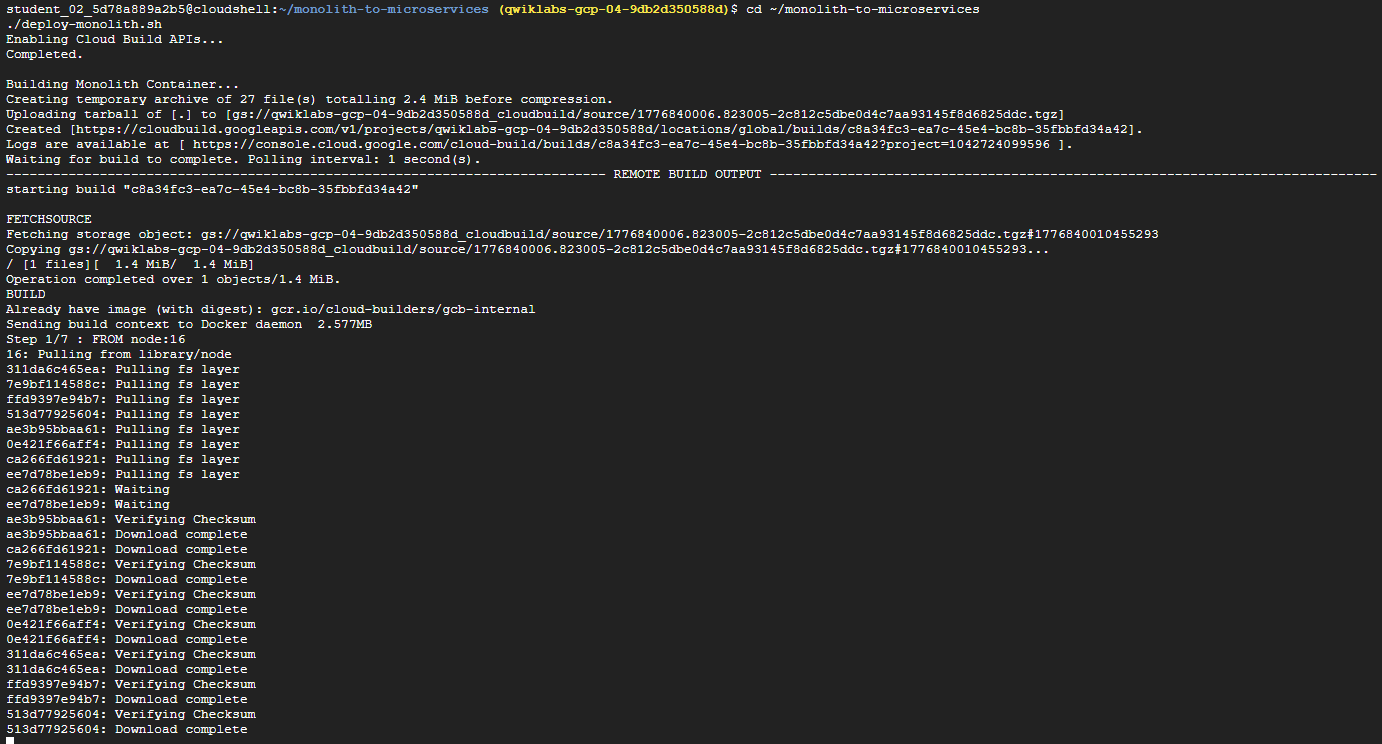
cd ~/monolith-to-microservices
./deploy-monolith.sh
(2) 모놀리식 액세스

kubectl get service monolith(3) 액세스 확인
http://{EXTERNAL-IP}로 접속 시 웹사이트가 뜨면 정상!
참고✨
GKE에서 실행되는 모놀리식 웹사이트의 각 서비스를 마이크로서비스로 분할하는 과정을 진행한다. 여기서는 비즈니스 도메인인 주문(Orders), 상품(Products), Frontend 중심으로 각 서비스를 분리해보자.
5. Orders 마이그레이션
(1) Orders 마이크로서비스 생성

cd ~/monolith-to-microservices/microservices/src/orders
gcloud builds submit --tag gcr.io/${GOOGLE_CLOUD_PROJECT}/orders:1.0.0 .
Output:

➡️ Docker 컨테이너를 빌드하고 Artifact Registry에 푸시
(2) Orders 애플리케이션 배포

kubectl create deployment orders --image=gcr.io/${GOOGLE_CLOUD_PROJECT}/orders:1.0.0(3) 배포 확인
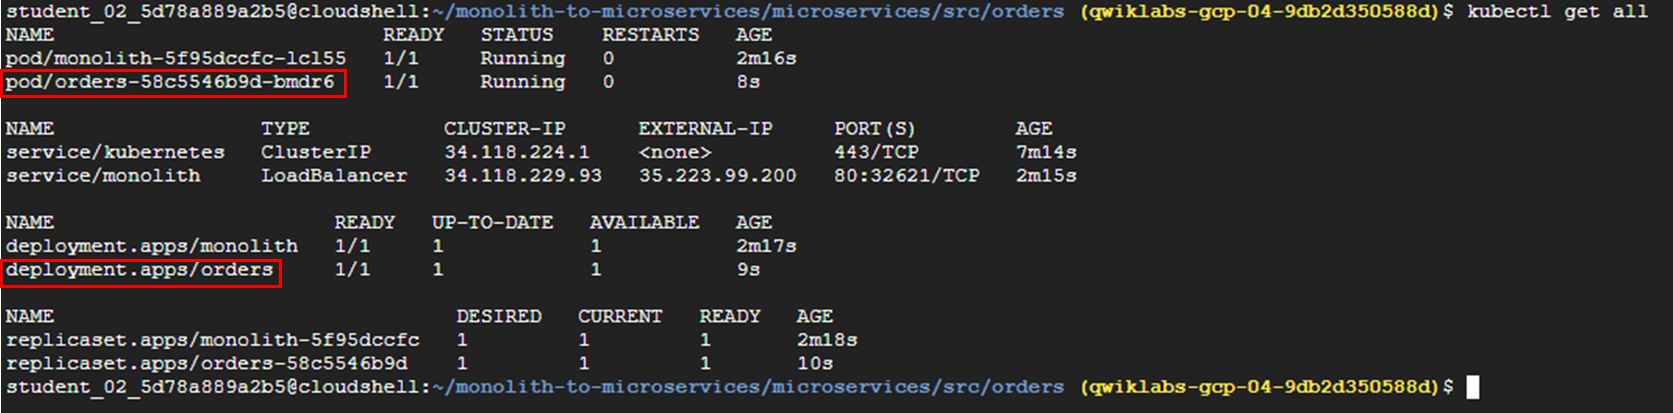
kubectl get all(4) 인터넷에 노출

kubectl expose deployment orders --type=LoadBalancer --port 80 --target-port 8081(5) 서비스 액세스 주소 확인

kubectl get service orders(6) 모놀리식 재구성

cd ~/monolith-to-microservices/react-app
nano .env.monolith

# AS-IS
REACT_APP_ORDERS_URL=/service/orders
REACT_APP_PRODUCTS_URL=/service/products

# TO-BE
REACT_APP_ORDERS_URL=http://<ORDERS_IP_ADDRESS>/api/orders
REACT_APP_PRODUCTS_URL=/service/products
(7) 모놀리식 컨테이너를 빌드
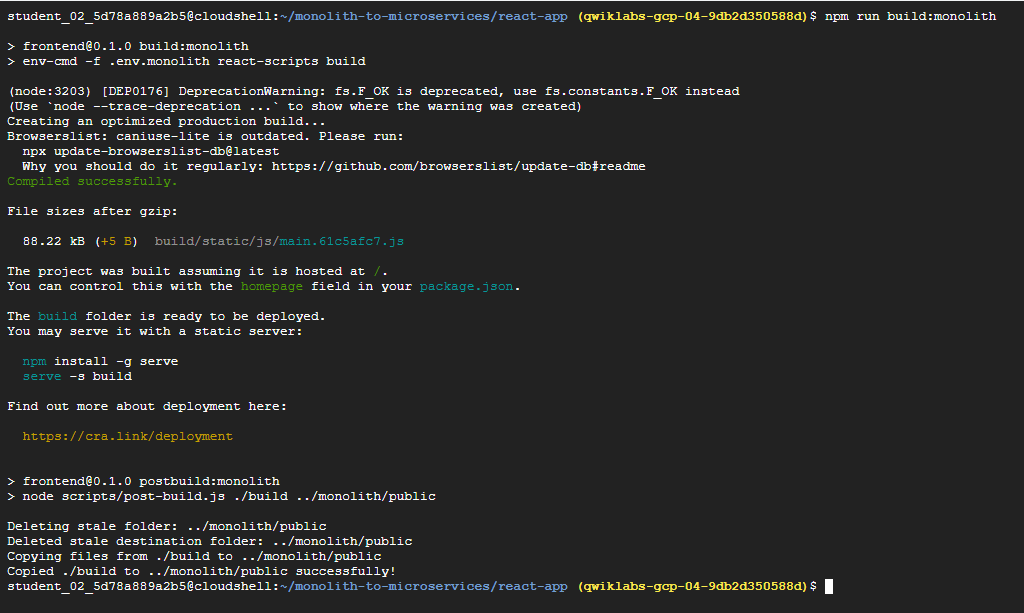
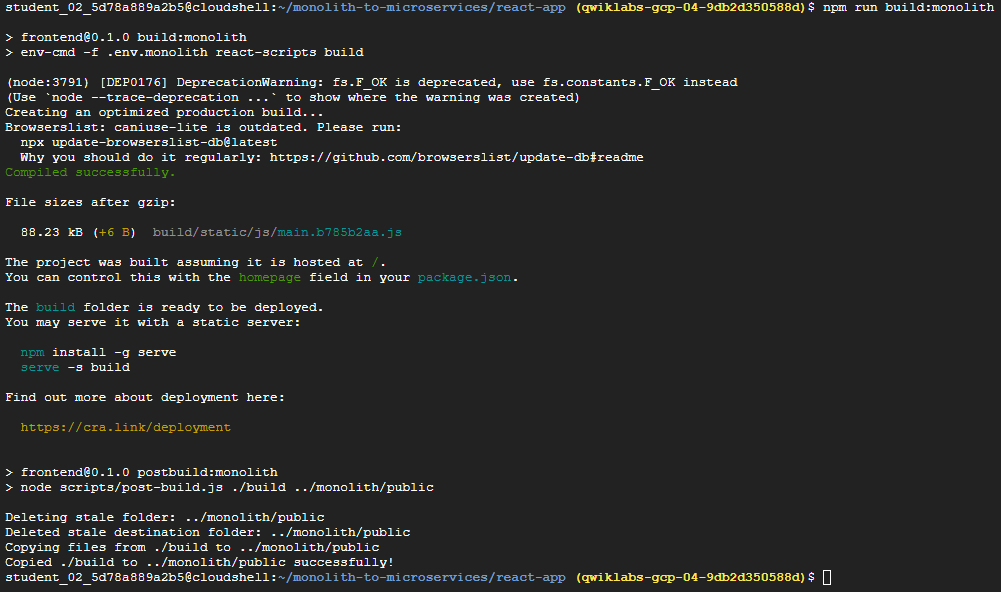
npm run build:monolith(8) Docker 컨테이너화
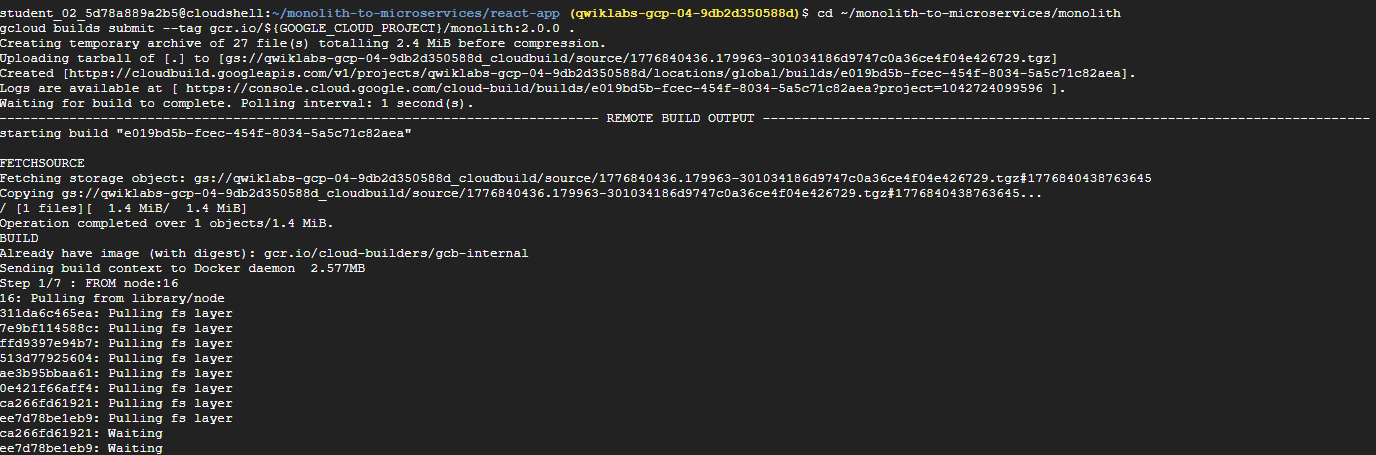
cd ~/monolith-to-microservices/monolith
gcloud builds submit --tag gcr.io/${GOOGLE_CLOUD_PROJECT}/monolith:2.0.0 .
(9) GKE에 배포

kubectl set image deployment/monolith monolith=gcr.io/${GOOGLE_CLOUD_PROJECT}/monolith:2.0.0(10) 배포 확인
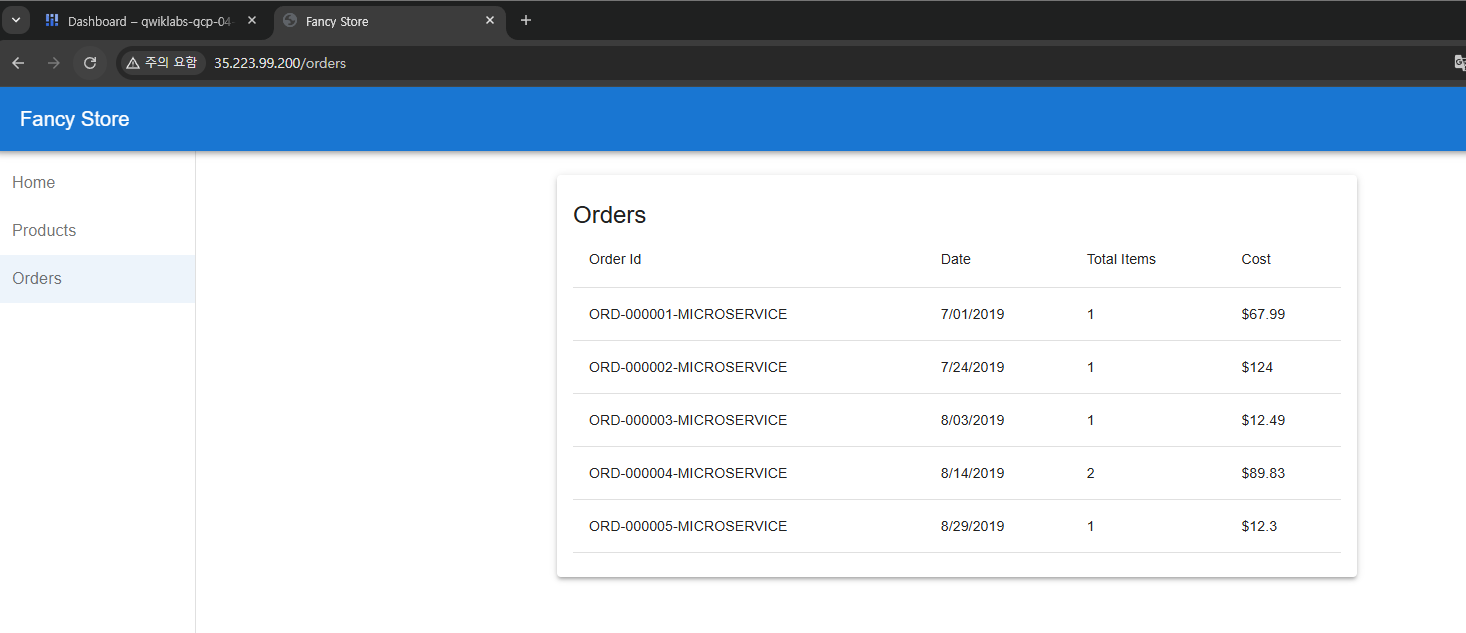
➡️ 브라우저에서 모놀리식 애플리케이션으로 이동하여 주문 페이지로 가서 애플리케이션이 이제 주문 마이크로서비스를 호출하는지 확인 (모든 주문 ID가 -MICROSERVICE라는 접미사로 끝나야 적용 완료)
6. Products 마이그레이션
(1) Products Docker 컨테이너 생성

cd ~/monolith-to-microservices/microservices/src/products
gcloud builds submit --tag gcr.io/${GOOGLE_CLOUD_PROJECT}/products:1.0.0 .
(2) GKE에 컨테이너 배포

kubectl create deployment products --image=gcr.io/${GOOGLE_CLOUD_PROJECT}/products:1.0.0(3) GKE 컨테이너 노출

kubectl expose deployment products --type=LoadBalancer --port 80 --target-port 8082(4) 외부IP 확인

kubectl get service products(5) 모놀리식 재구성

cd ~/monolith-to-microservices/react-app
nano .env.monolith

# AS-IS
REACT_APP_ORDERS_URL=http://<ORDERS_IP_ADDRESS>/api/orders
REACT_APP_PRODUCTS_URL=/service/products

# TO-BE
REACT_APP_ORDERS_URL=http://<ORDERS_IP_ADDRESS>/api/orders
REACT_APP_PRODUCTS_URL=http://<PRODUCTS_IP_ADDRESS>/api/products
(6) 모놀리식 구성 파일 재빌드
npm run build:monolith(7) Docker 컨테이너 생성

cd ~/monolith-to-microservices/monolith
gcloud builds submit --tag gcr.io/${GOOGLE_CLOUD_PROJECT}/monolith:3.0.0 .
(8) GKE에 컨테이너 배포

kubectl set image deployment/monolith monolith=gcr.io/${GOOGLE_CLOUD_PROJECT}/monolith:3.0.0(9) 배포 확인

➡️ 모든 제품 이름에 MS- 프리픽스가 있어야 성공!
7. Frontend 마이그레이션
(1) Microservices URL 구성파일을 마이크로서비스 코드베이스에 복사

cd ~/monolith-to-microservices/react-app
cp .env.monolith .env
npm run build
(2) Docker 컨테이너 생성

cd ~/monolith-to-microservices/microservices/src/frontend
gcloud builds submit --tag gcr.io/${GOOGLE_CLOUD_PROJECT}/frontend:1.0.0 .
(3) GKE에 컨테이너 배포

kubectl create deployment frontend --image=gcr.io/${GOOGLE_CLOUD_PROJECT}/frontend:1.0.0(4) GKE 컨테이너 노출

kubectl expose deployment frontend --type=LoadBalancer --port 80 --target-port 80808. 모놀리식 삭제

kubectl delete deployment monolith
kubectl delete service monolith
➡️ 모든 서비스가 마이크로서비스로 실행되기 때문에 불필요한 모놀리식(monolith) 애플리케이션을 삭제한다.
참고✨
실제 마이그레이션에서는 기존 도메인 이름이 애플리케이션의 새로운 프런트엔드 마이크로서비스를 가리키도록 DNS 변경 등도 해야한다.
9. 작업 테스트

kubectl get services체크리스트
✅ 모놀리식 서비스의 IP 주소가 더 이상 작동하지 않아야 한다.
✅ Frontend 서비스의 새 IP 주소가 새 애플리케이션을 호스팅해야 한다.
✅ Frontend의 외부 IP 주소로 접근 시 접속이 되어야 한다.
