Skeleton Code 살펴보기
- Django 의 Model 클래스 확인

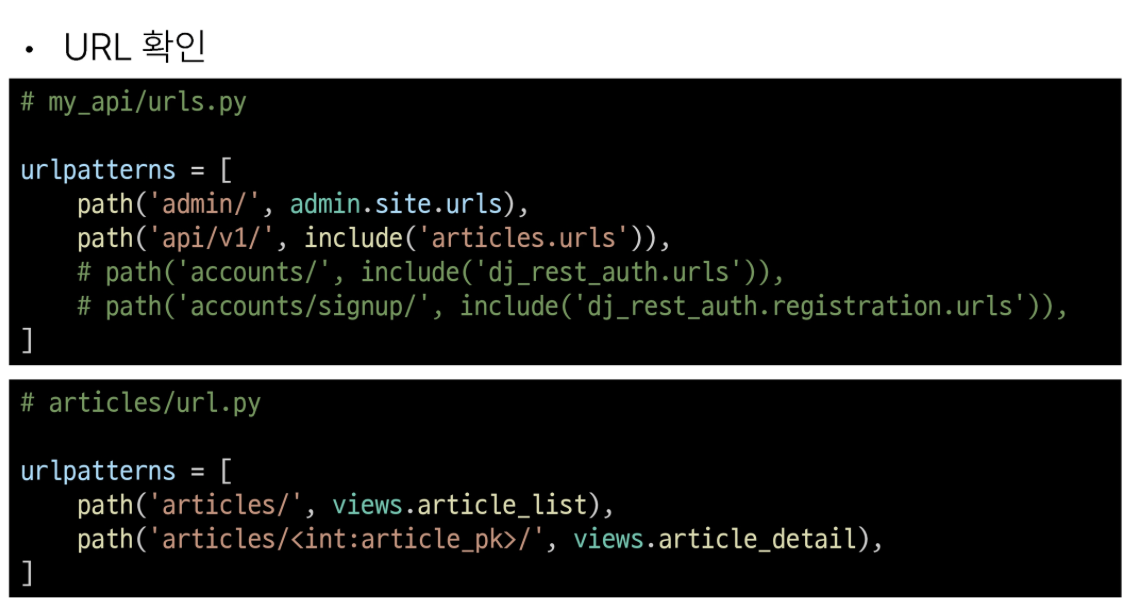
- URL 확인
- Serializers 확인

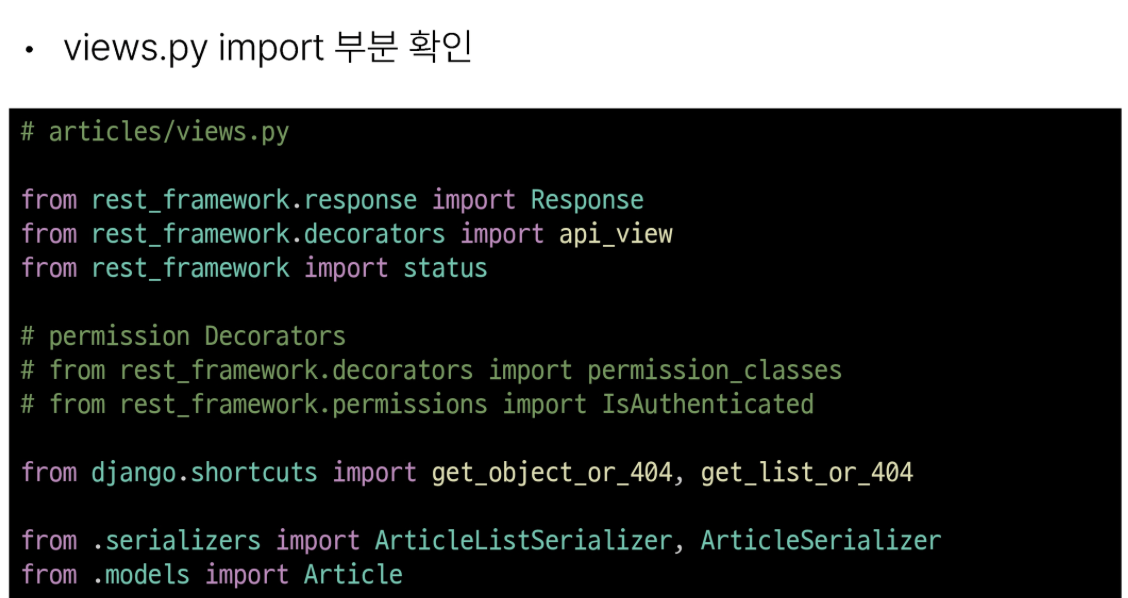
- views.py import 부분 확인
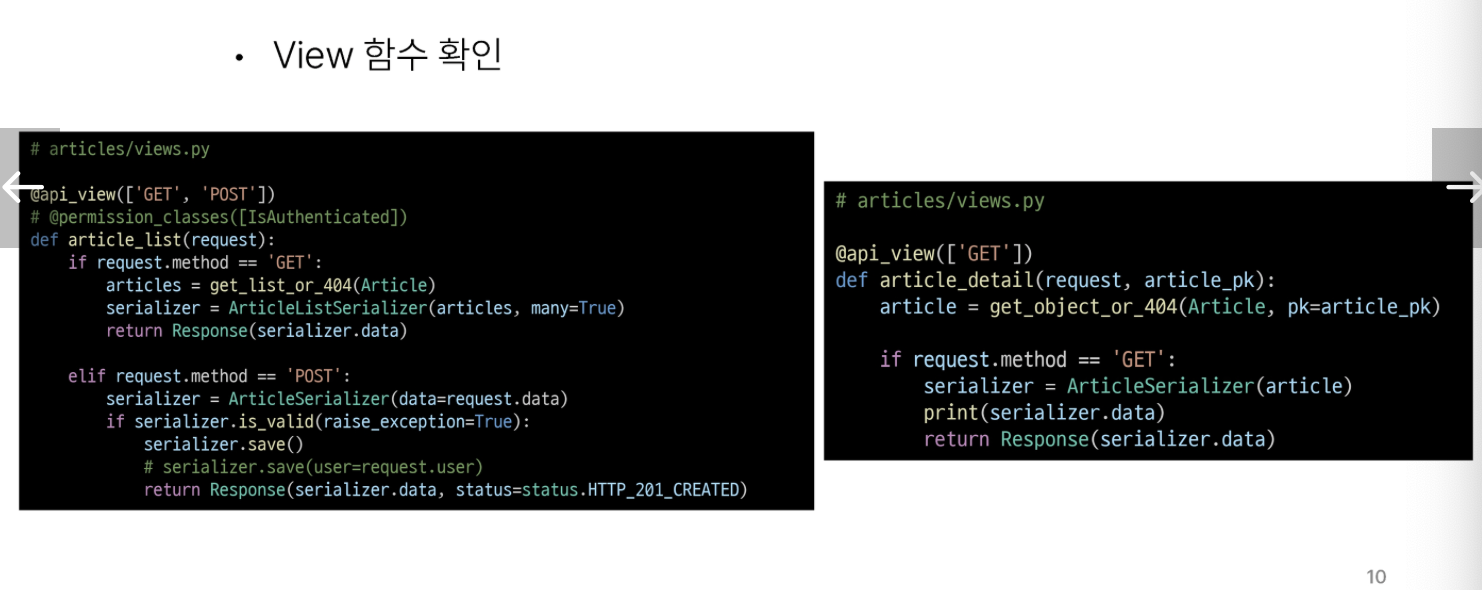
- View 함수 확인
Vue 프로젝트
- Pinia 와 Vue Router가 추가 되어있음
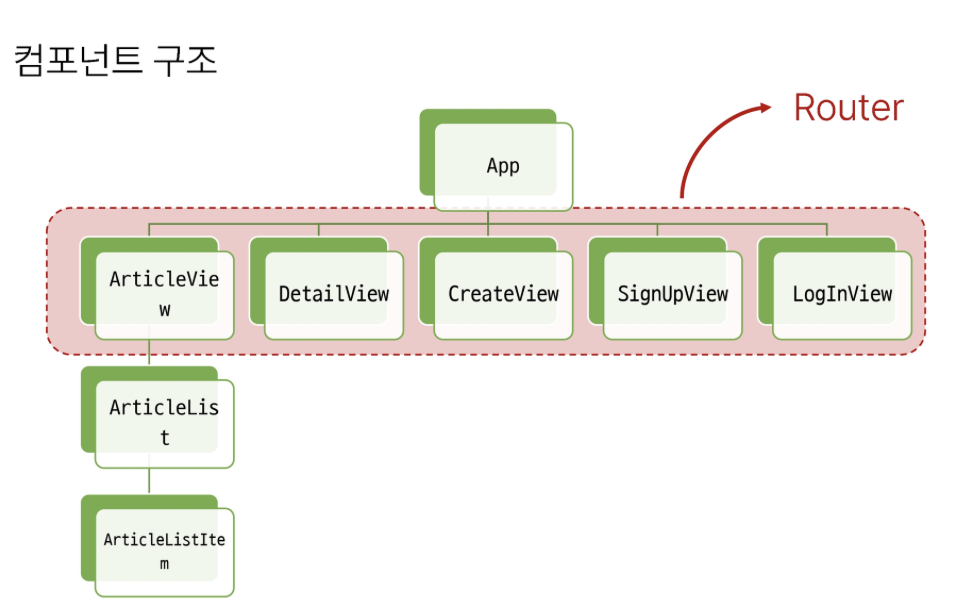
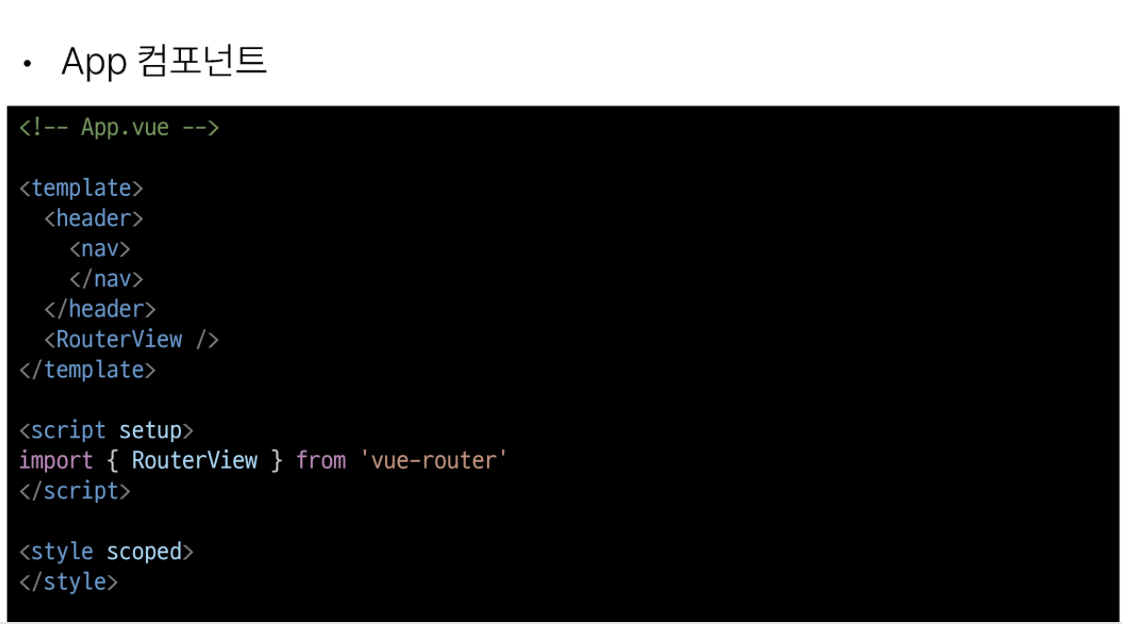
- App 컴포넌트
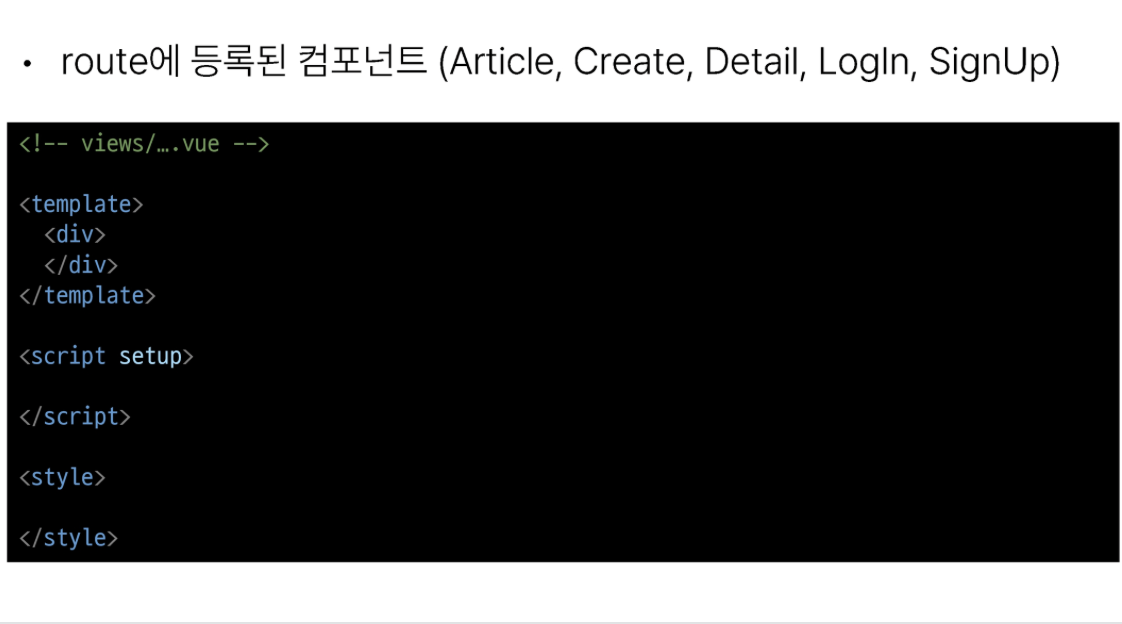
- route에 등록된 컴포넌트 ( Article, Create, Detail, Login, SignUp )
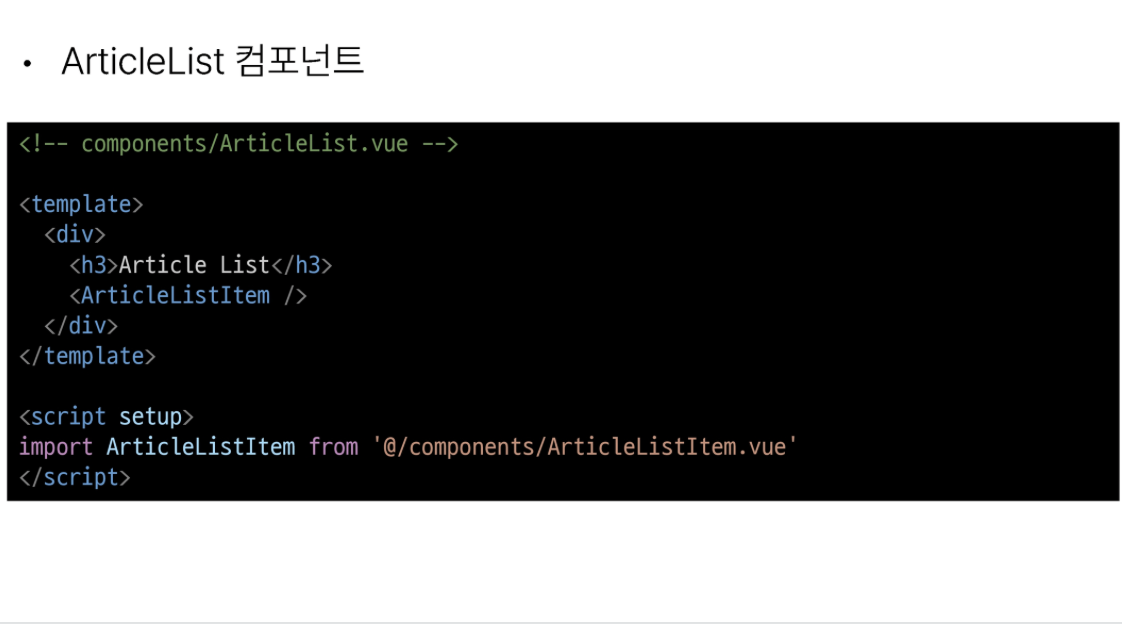
- ArticleList 컴포넌트
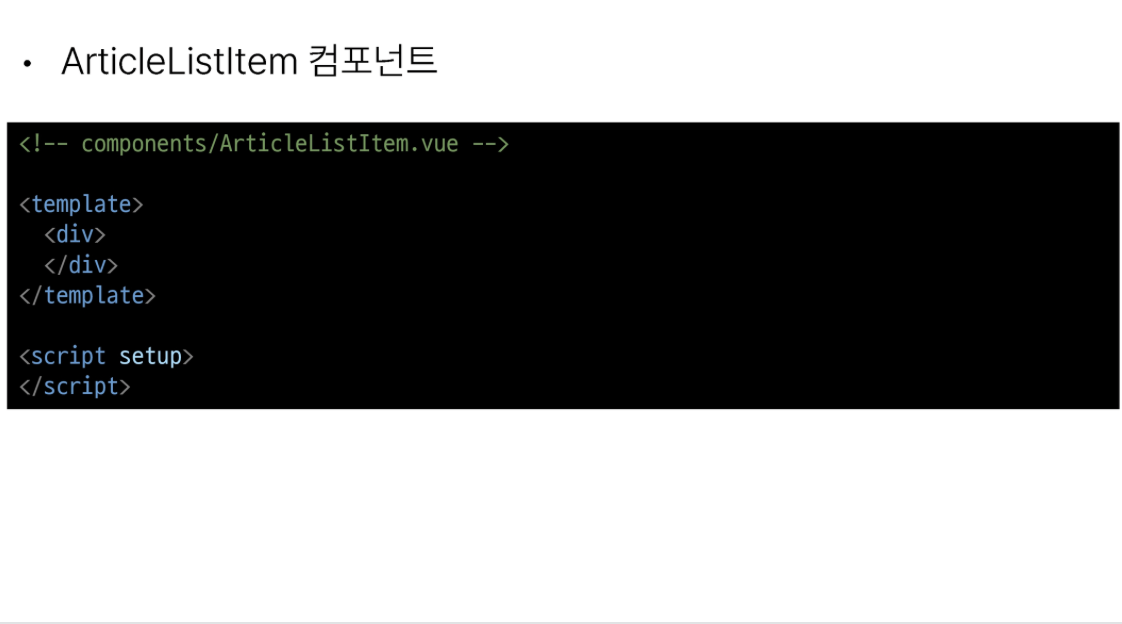
- ArticleListItem 컴포넌트
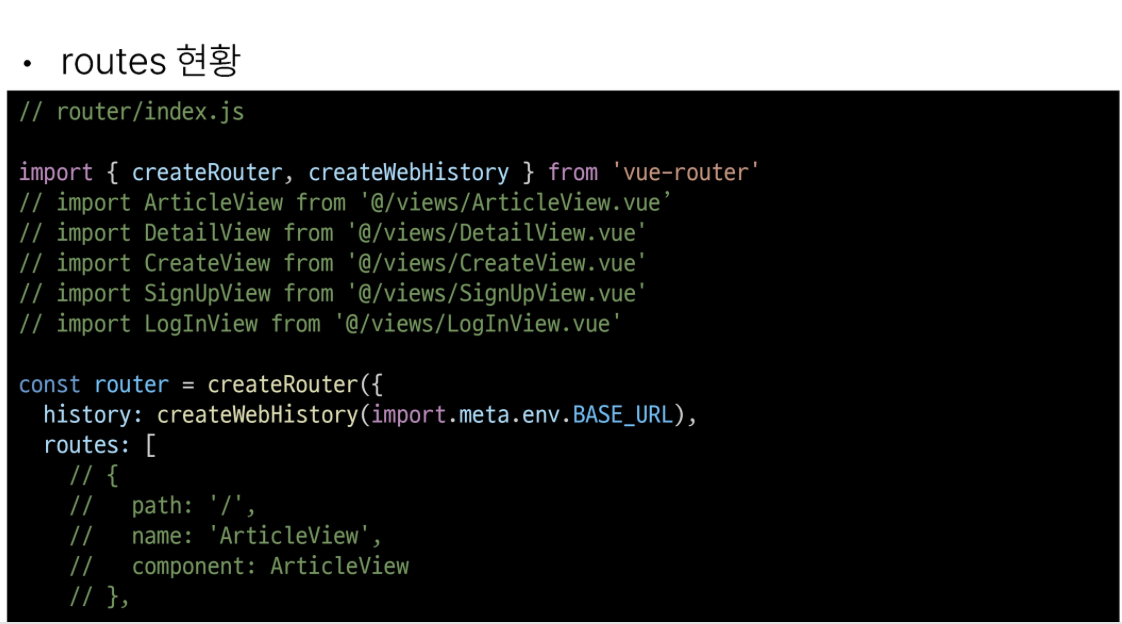
- routes 상태
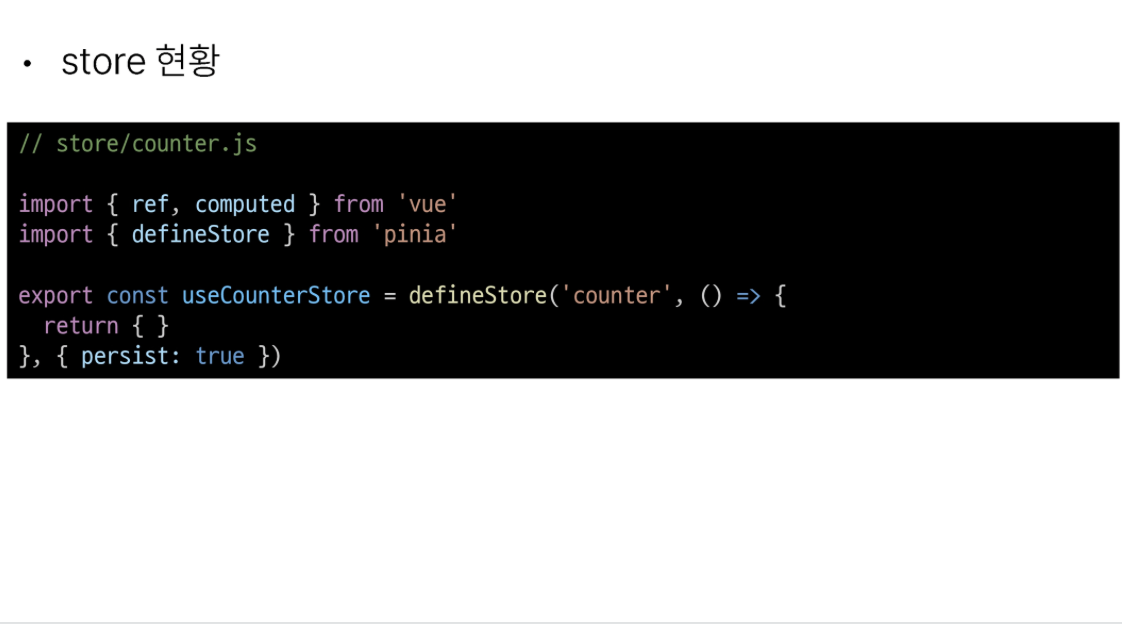
- store 상태
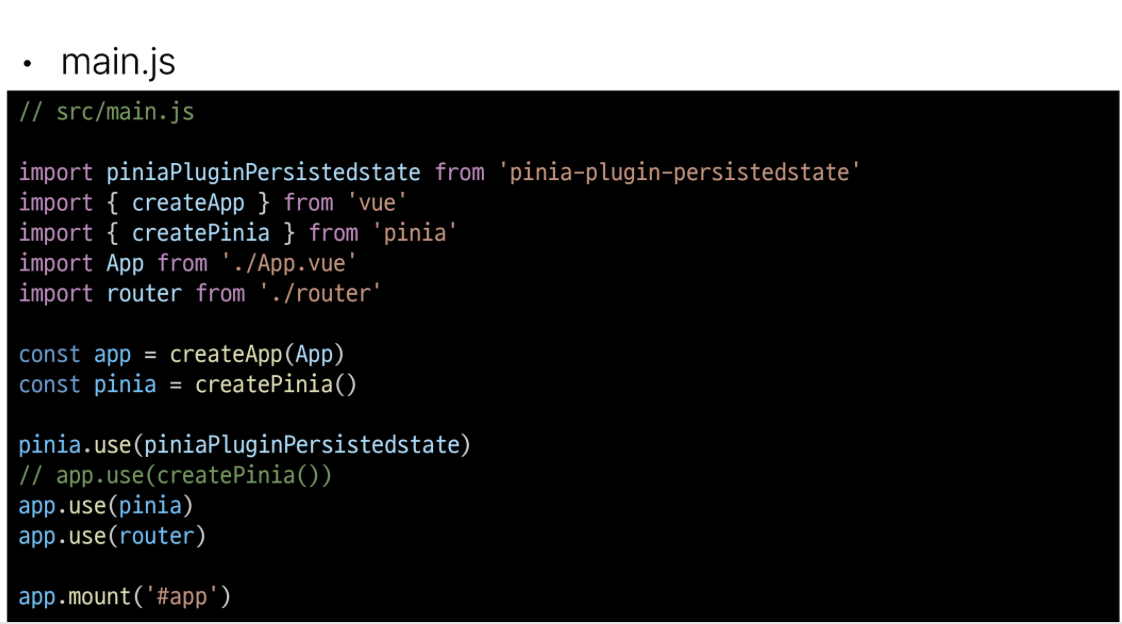
- main.js 상태
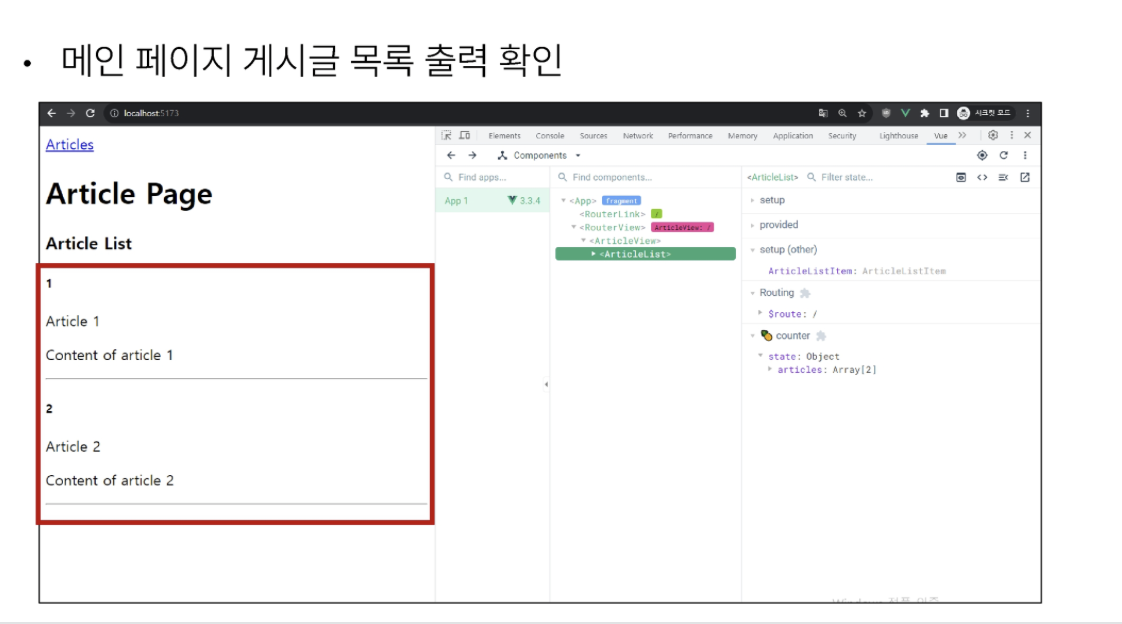
메인페이지 구현
- ArticleView 컴포넌트에 ArticleList 컴포넌트와 ArticleListItem 컴포넌트 등록 및 출력하기
- ArticleList와 ArticleListItem은 각각 게시글 출력을 담당
ArticleView route코드 -> App에 ArticleView 컴포넌트로 이동하는 RouterLink 작성 -> ArticleView 컴포넌트에 ArticleList 컴포넌트 등록 -> store에 임시 데이터 articles 배열 작성하기 -> ArticleList 컴포넌트에서 게시글 목록 출력 -> ArticleListItem 컴포넌트는 내려받은 props를 정의 후 출력 -> 메인 페이지 게시글 목록 출력 확인
- ArticleView route 코드 작성
// router/index.js

import ArticleView from '@/views/ArticleView.vue'

const router = createRouter({
	history: createWebHistory(import.meta.env.BASE_URL),
    routes: [
    {
    	path: '/',
        name: 'ArticleView',
        component: AritcleView,
    }
  ]
})- App에 ArticleView 컴포넌트로 이동하는 RouterLink 작성
<!--App.vue-->

<template>
	<header>
    	<nav>
        	<RouterLink :to='{name: 'ArticleView'}">Articles</RouterLink>
        </nav>
    </header>
   	<RouterView />
</template>

<script setup>
import { RouterView, RouterLink } from 'vue-router'
</script>- ArticleView 컴포넌트에 ArticleList 컴포넌트 등록
<!--views/ArticleView.vue-->

<template>
	<div>
    	<h1>Article Page</h1>
        <ArticleList />
    </div>
</template>

<script setup>
import ArticleList from '@/components/ArticleList.vue'
</script>- store에 임시 데이터 articles 배열 작성하기
//store/counter.js

export const useCouterStore = defineStore('counter', () => {
	const articles = ref ([
    	{id: 1, title : 'Article 1', content: 'Content of article 1' },
    	{id: 2, title : 'Article 2', content: 'Content of article 2' },
   ])
   return { articles }
}, { persist : true })- ArticleList 컴포넌트에서 게시글 목록 출력 ( store의 articles 데이터참조, v-for 사용)
<!-- components/ArticleList.vue -->

<template>
	<div>
    	<h3>Article List</h3>
        <ArticleListItem
        v-for="article in store.articles"
        :key='article.id'
        :article='article'
    />
    </div>
</template>

<scipt setup>
import { useCounterStore } from '@/stores/counter'
import ArticleListItem from '@/components/ArticleListItem.vue'

const store = useCounterStore()
</script>- ArticleListItem 컴포넌트는 내려받은 props를 정의 후 출력
<!--components/ArticleListItem.vue-->

<template>
	<div>
    	<h5>{{ article.id }}</h5>
        <p>{{ article.title }}</p>
        <p>{{ article.content }}</p>
        <hr>
     </div>
</template>

<script setup>
defineprops({
	article: Object
})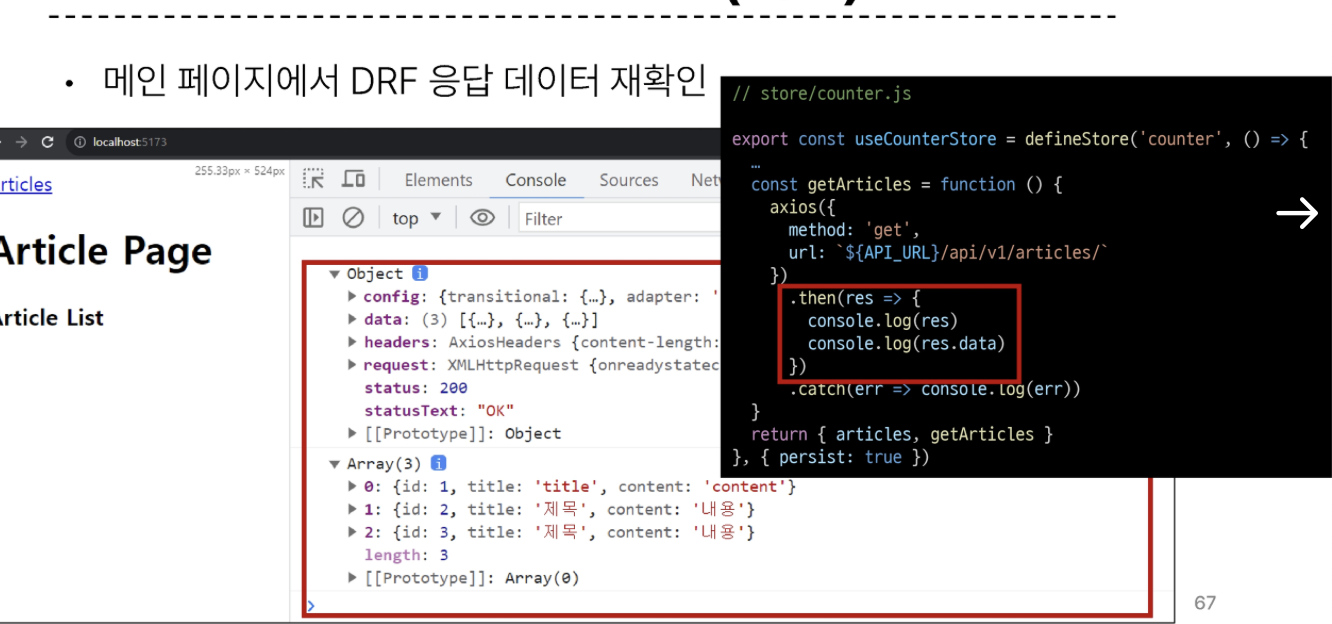
</script>- 메인 페이지 게시글 목록 출력 확인
- 임시 데이터가 아닌 DRF 서버에 직접 요청해 데이터를 응답 받아 store에 저장 후 출력하기
- DRF 서버로의 AJAX 요청을 위한 axios 설치 및 관련 코드 작성 -> 2. DRF 서버로 요청을 보내고 응답 데이터를 처리하는 getArticles 함수 작성 ->
- DRF 서버로의 AJAX 요청을 위한 axios 설치 및 관련 코드 작성
npm install axios
// store/counter.js

import { ref, computed } from 'vue'
import { defineStore } from 'pinia'
import axios from 'axios'

export const useCounterStore = defineStore('counter',() => {
	const articles = ref([])
    const API_URL = 'http://127.0.0.0.1:8000'
}, { persist: true })- DRF 서버로 요청을 보내고 응답 데이터를 처리하는 getArticles 함수 작성
// store/counter.js

export const useCounterStore = defineStore('counter', () => {

	const getArticles() = function () {
    	axios({
        	method: 'get',
            url: `${API_URL}/api/v1/articles/`
       })
       	.then(res => {
        	console.log(res)
            console.log(res.data)
        })
        .catch(err => console.log(err))
    }
    return { articles, API_URL, getArticles }
}, { persist: true })- ArticleView 컴포넌트가 마운트 될때 getArticles 함수가 실행되도록 함
- 해당 컴포넌트가 렌더링 될 때 항상 최신 게시글 목록을 불러오기 위함
<!-- views/ArticleView.vue -->

<script setup>
import { onMounted } from 'vue'
import { useCounterStore } from '@/stores/counter'
import ArticleList from '@/components/ArticleList.vue'


const store = useCounterStore()

onMounter(()=> {
	store.getArticles()
})
</script>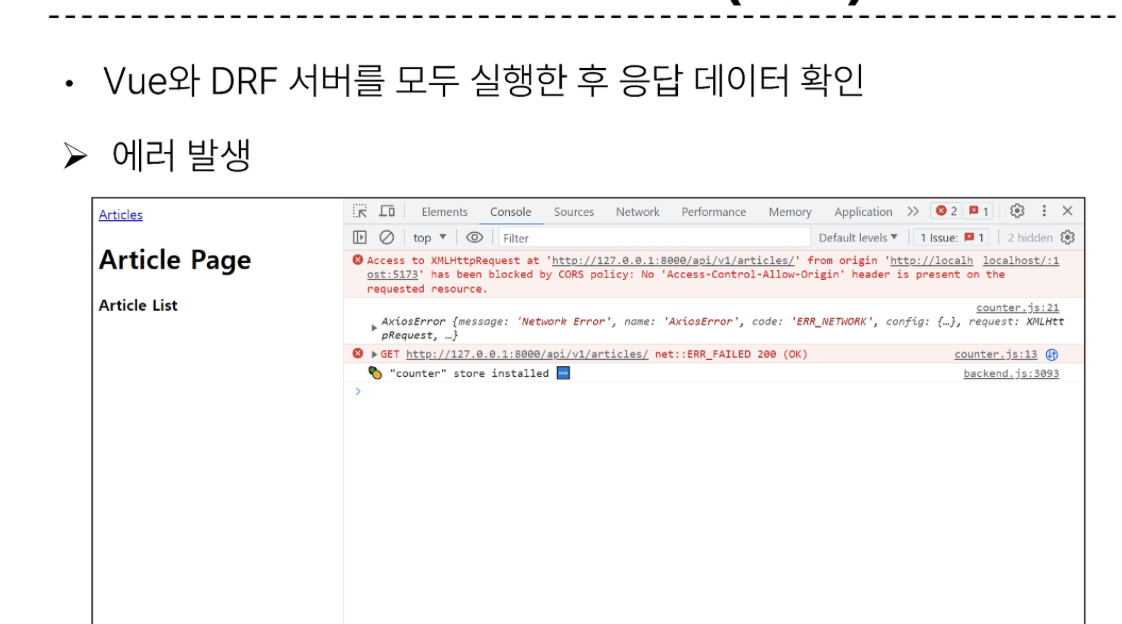
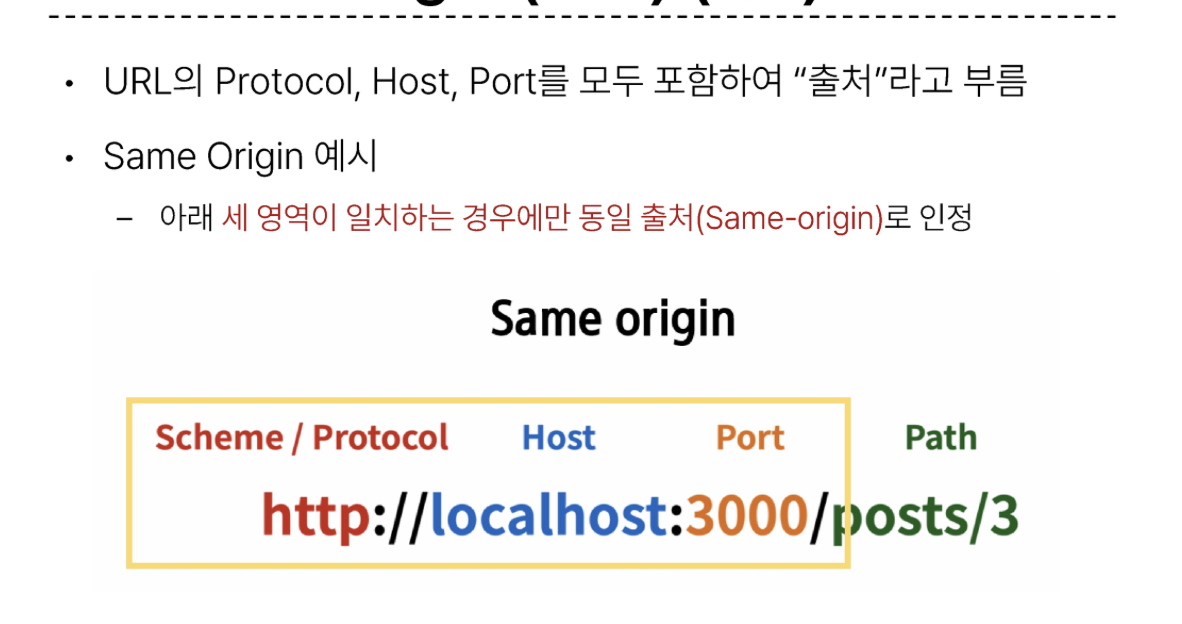
CORS Policy
-
SOP (Same-origin policy)
- 동일 출처 정책
-
웹 애플리케이션의 도메인이 다른 도메인의 리소스에 접근하는 것을 제어하여 사용자의 개인정보와 데이터의 보안을 보호하고, 잠재적인 보안 위협을 방지
-
잠재적으로 해로울 수 있는 문서를 분리함으로써 공격받을 수 있는 경로를 줄인다.
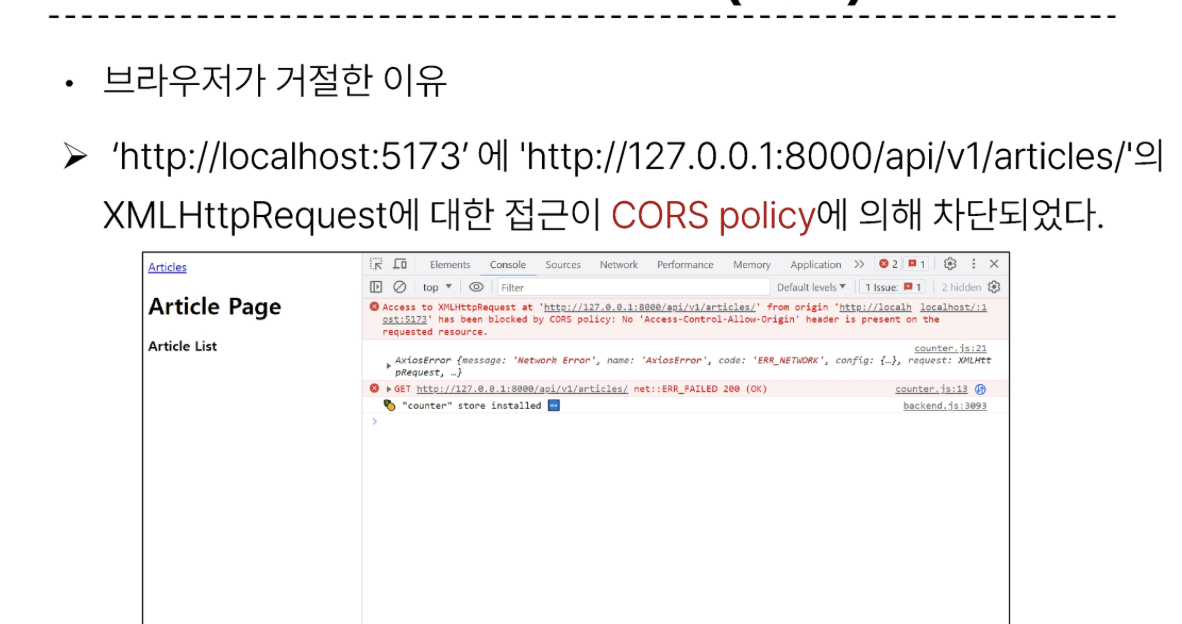
CORS (Cross-Origin Resource Sharing)
- 교차 출처 리소스 공유
- 특정 출처(Origin)에서 실행 중인 웹 애플리케이션이 다른 출처의 자원에 접근할 수 있는 권한을 부여하도록 브라우저에 알려주는 체제
- 만약 다른 출처의 리소스를 가져오기 위해서는 이를 제공하는 서버가 브라우저에게 다른 출처지만 접근해도 된다는 사실을 알려야 한다.
- CORS policy(교차 출처 리소스 공유 정책)
CORS Headers 설정하기
- Django에서는 django-cors-headers 라이브러리를 활용
- 손쉽게 응답 객체에 CORS header를 추가해주는 라이브러리
pip install django-cors-headers
#settings.py

CORS_ALLOWED_ORIGINS = [
	'http://127.0.0.1:5173',
    'http://localhost:5173',
]
Article CR 구현
- store에 게시글 목록 데이터 저장
// store/counter.js

export const useCounterStore = defineStore('counter', () => {
	...
    const getArticles= function () {
    	axios({
        	method: 'get',
            url: `${API_URL}/api/v1/articles/`
       })
       	.then(res => {
        	articles.value = res.data
       	})
        .catch(err => console.log(err))
    }
    return { articles, getArticles }
}, { persist: true })
단일 게시글 조회
DetailVue route 작성 -> ArticleListItem에 DetailView 컴포넌트로 가기 위한 RouterLink 작성 -> DetailView가 마운트 될때 특정 게시글을 조회하는 AJAX 요청 진행
- DetailVue route 작성
// router/index.js

import DetailView from '@/views/DetailView.vue'

const router = createRouter({
	history: createWebHistory(import.meta.env.BASE_URL),
    routes : [
    	{
        	path: '/',
            name: 'ArticleView',
            component: ArticleView
        },
        {
        	path: '/articles/:id',
            name: 'DetailView',
            component: DetailView
}...- ArticleListItem에 DetailView 컴포넌트로 가기 위한 RouterLink 작성
<!-- components/ArticleListItem.vue-->

<template>
	<div>
    	<h5>{{ article.id }}</h5>
        <p>{{ article.title }}</p>
        <p>{{ article.content }}</p>
        <RouterLink :to="{name: 'DetailView', params: {id: article.id} ">
        	[DETAIL][
       	</RouterLink>
    	<hr>
    </div>
</template>

<script setup>
import { RouterLink } from 'vue-router'

...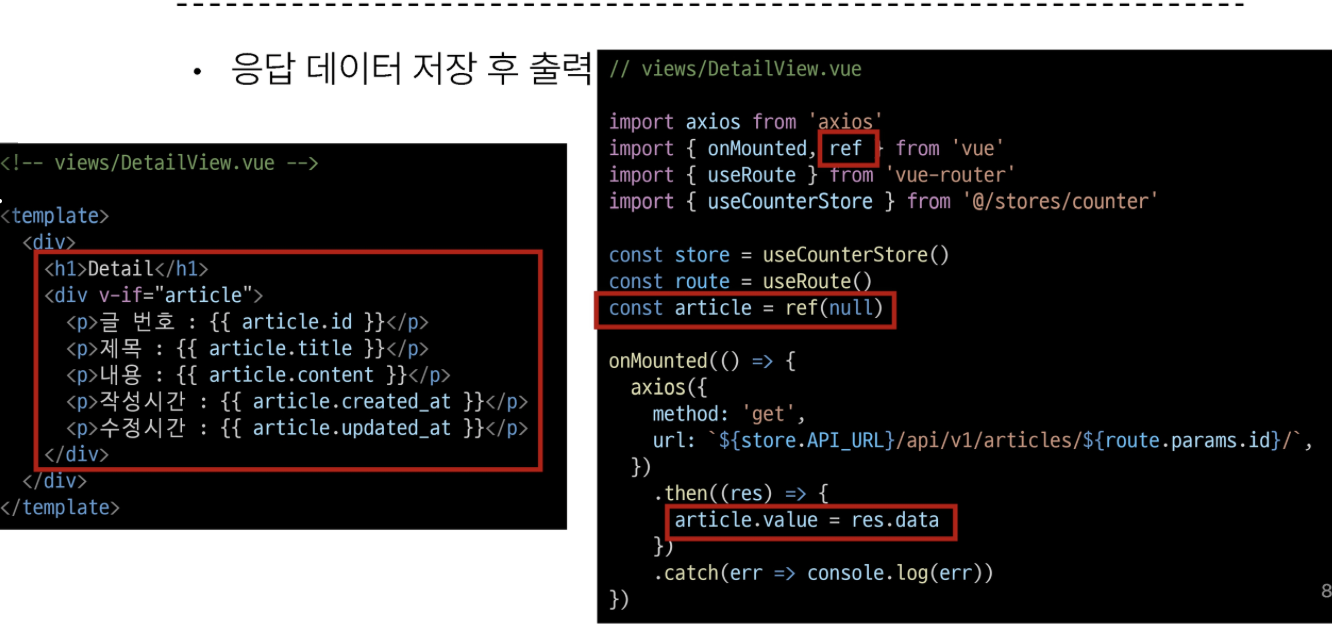
</script>- DetailView가 마운트 될때 특정 게시글을 조회하느 AJAX 요청 진행
// views/DetailView.vue

import axios from 'axios'
import { onMounted } from 'vue'
import { useRoute } from 'vue-router'
import { useCounterStore } from '@/stores/counter'

const store = useCounterStore()
const route = useRoute()

onMounted(() => {
	axios({
    	method: 'get',
        url: `${store.API_URL}/api/v1/articles/${route.params.id}/`,
    })
     .then((res) => {
     	console.log(res.data)
     })
     .catch(err => console.log(err))
})
게시글 작성
- CreateView 관련 라우트 작성
// router/index.js

import CreateView from '@/views/CreateView.vue'

const router = createRouter({
	history: createWebHistory(import.meta.env.BASE_URL),
    routes: [
    ...
    {
    	path:'/create',
        name: 'CreateView',
        component: CreateView
}- ArticleView에 CreateView 컴포넌트로 가기 위한 RouterLink 작성
<!-- views/ArticleView.vue -->

<script setup>
import { onMounted } from 'vue'
import { useCounterStore } from ..
import { RouterLink } from 'vue-router'
import ArticleList from '@/components/ArticleList.vue'
</script>
<!--views/ArticleView.vue-->

<template>
	<div>
    	<h1>Article Page</h1>
        <RouterLink :to="{ name: 'CreateView' }">
        	[CREATE]
        </RouterLink>
       	<hr>
        <ArticleList />
    </div>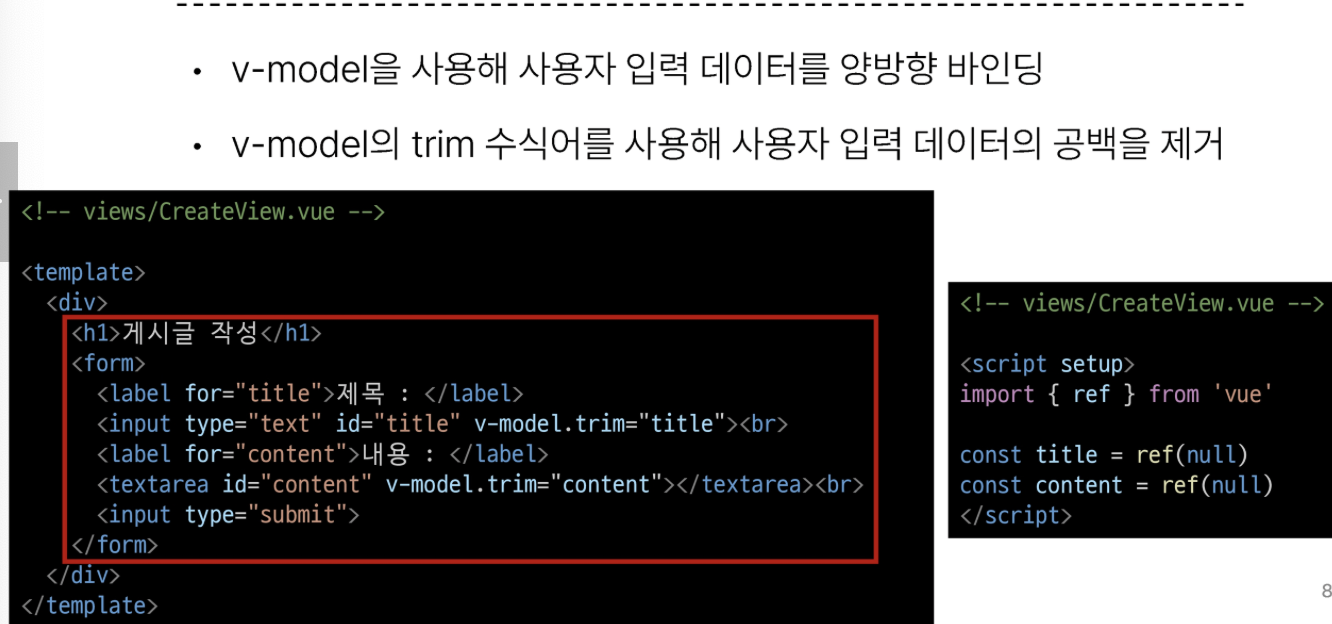
</template>- v-model을 사용해 사용자 입력 데이터를 양방향 바인딩
- v-model의 trim 수식어를 사용해 사용자 입력 데이터의 공백을 제거
<!-- views/CreateView.vue -->

<template>
	<div>
    	<h1>게시글 작성</h1>
        <form>
        	<label for='title'>제목: </label>
            <input type='text' id='title' v-model.trim='title'><br>
            <label for='content'>내용: </label>
            <textarea id='content' v-model.trim='content'></textarea><br>
            <input type='submit'>
        </form>
    </div>
</template>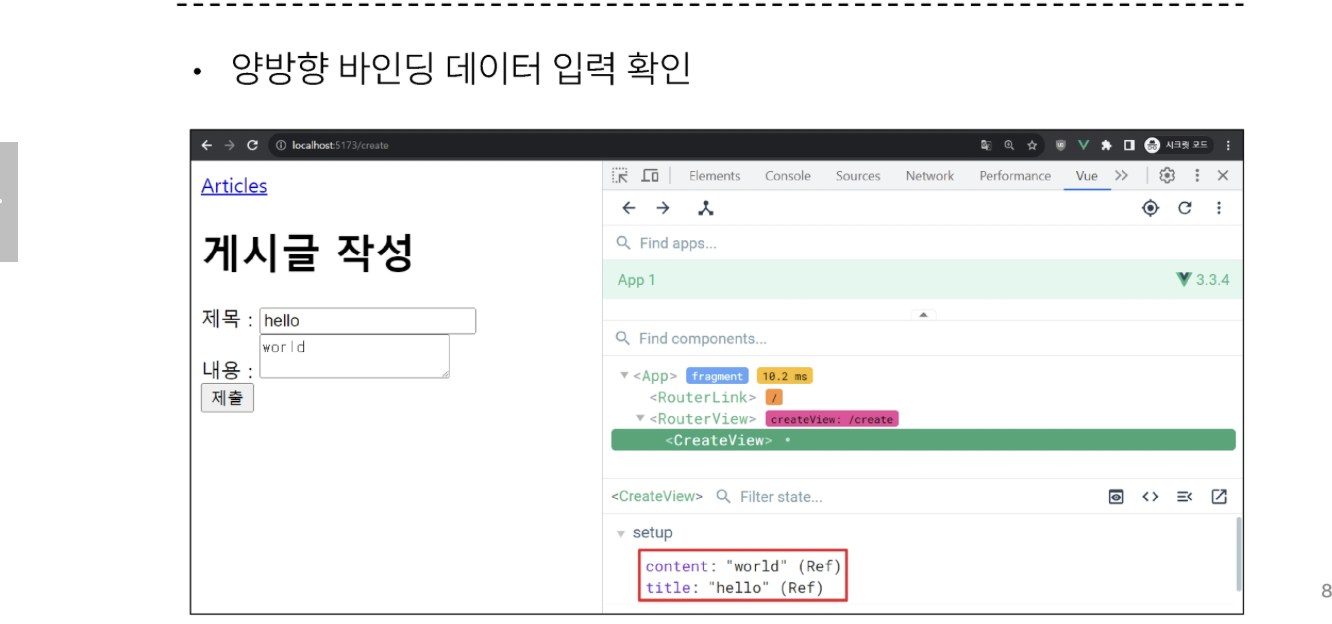
- 게시글 생성 요청을 담당하는 createArticle 함수 작성
- 게시글 생성이 성공한다면 ArticleView 컴포넌트로 이동
// views/CreateView.vue

const createArticle = function () {
	axios({
    	method: 'post',
        url: `${store.API_URL}/api/v1/articles/`,
        data: {
        	title: title.value,
            content: content.value
       },
     }).then(() => {
     	router.push({name: 'ArticleView' })
     }).catch(err => console.log(err))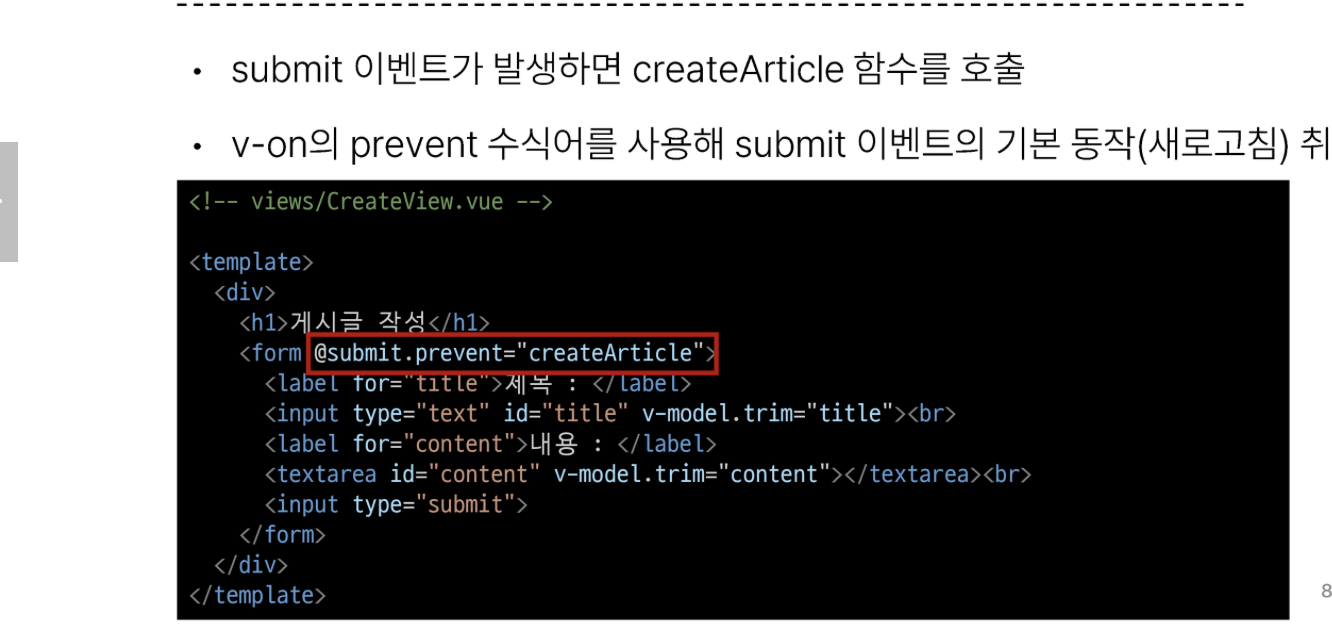
}- submit 이벤트가 발생하면 createArticle 함수를 호출
- v-on의 prevent 수식어를 사용해 submit이벤트의 기본동작(새로고침) 취소

새싹 BJY