학습한 내용
웹을 구성하는 종류
- HTML - 시각적인 정보 영역(설계 도면)
- CSS - 디자인적인 영역(인테리어 작업)
- Javascript - 기능적인 영역(지문인식 등의 기능)
레이아웃 종류
- 정적(Static) - 레이아웃이 고정되어 움직이지 않음.
- 동적(Liquid) - 브라우저 크기에 맞게 레이아웃 크기가 조정됨.
- 적응형(Adaptive) - 브라우저 크기에 맞게 레이아웃 종류가 변형됨.
- 반응형(Responsive) - 브라우저 크기에 맞게 레이아웃 크기와 종류가 변형됨.
레이아웃 종류 사이트
- 디비컷
- 지디웹
- awwwards(해외)
- Media Queries(해외)
- straightline(해외, 일본 사이트 많음)
개발 용어
-
프론트엔드 개발자(앞단) - 웹 사이트와 웹 서비스를 만듬. 예를 들어 서버 쪽과의 데이터 통신 연결 작업을 진행하거나, 버튼을 누르면 다양한 인터렉션 효과를 구현하는 개발자, 사용자가 보는 모든 화면의 페이지를 제작하는 사람.
-
백엔드 개발자(뒷단) - 사용자가 보지 못하는 뒤의 영역을 만듬. 예를 들어 로그인을 한다고 할 때, 등록된 아이디인지 비밀번호가 맞는지 확인 작업을 하거나, 고객 정보를 안전하게 보관하는 개발자.
웹사이트를 만들때 고려해야 할 사항들
- 크로스 브라우징 - 다양한 브라우저간의 호환성(종류, 버전 등)
- 웹 표준 - HTML 언어를 사용할 경우, 눈에 보이는 정보를 기입할 때, 정보에 성격에 맞는 정확한 태그를 사용해야함.
- 웹 접근성 - 장애인 분들이 이용하기에도 문제가 없이 웹 사이트를 구성함.
- FTP - 웹 사이트를 제작했을 때, 결과물을 사람들에게 공개하기 위해 서버에 올려서 통로 및 채널과 같은 역할을 담당하는 것.
- 라이브러리 - 웹 사이트를 제작할 때, 이미 다양한 효과들이 작동하는 기능들은 다른 개발자들이 만들어놨음. 다른 사람이 만든 기능의 결과물들을 라이브러리라고 함. 모든 기능을 0에서부터 시작할 필요는 없음.
웹사이트 개발 도구
- 비주얼 스튜디오 코드(VS Code) - 무료, 입문
- 서브라임 텍스트(Sublime Text) - 무료, 실습 이용
- 웹스톰(WebStorm) - 유료
- 크롬 브라우저 - 오류 검사나 개발 코드 확인할 때 유용
개발에 도움이 되는 사이트들
- 영상기반 -
- 생활코딩(유튜브) - HTML, CSS, JavaScript
- 얄팍한 코딩사전(유튜브) - 개발용어 입문
- thenewboston(유튜브, 해외) - HTML, CSS
- Wes Bos(유튜브, 해외) - JavaScript(JavaScript30 - 하루에 하나씩 기능을 만듬)
- edwith(사이트, 한글) - 영상 강의
- 텍스트 기반 -
- freecodecamp(사이트, 해외)
- w3schools(사이트, 해외) - 에디팅 도구 포함
- 모던 자바스크립트(사이트, 한글) - 입문X, 중급자용
개발에 도움이 되는 서브 사이트들
- statcounter(사이트, 해외) - 전세계 웹사이트 점유율 확인
- Can I use(사이트, 해외) - 크로스브라우징 지원 확인
- NULI (네이버 개발) - 웹사이트 개발 노하우 정리
- HTML validator - 웹표준, 접근성 문제 검토
- CodePen - 다른 사람이 만들어놓은 결과물을 공유하고 확인(좋음)
HTML5 문서 기본 틀
<!DOCTYPE html>
<html>
<head>
	<meta charset="utf-8">
	<title> 제목 </title>
</head>
<body> 내용 </body>
</html>
오늘의 head 태그
meta태그는 문서의 특성name태그는 서버에서 참조 가능한 정보 이름content태그는 정보의 값title태그는 웹 제목- 웹 아이콘인 파비콘은
link태그를 이용,rel,type태그로 속성을 설정함.
sizes태그로 크기를 변경하고,href태그를 이용 사진의 경로를 설정함
<head>
	<meta charset="utf-8">
	<meta name="description" content="Web Tutorial">
	<meta name="keywords" content="html, css, tutorial, web">
	<meta name="author" content="Kangsan Park">
	<title>HTML, CSS Tutorial</title>
	<link rel="shortcut icon" type="image/icon" sizes="32x32" href="favicon.ico">
</head>
오늘의 body 태그 1 - a
a태그는 하이퍼링크,href태그로 주소 설정함target태그를 이용하여_self태그는 현재 창,_blank태그는 새 창에서 염
<a href="https://www.naver.com/" target="_blank">네이버</a>
오늘의 body 태그 2 - img
- 이미지를 넣기 위한 태그
src태그로 경로를 설정하고,alt태그를 이용하여 이미지의 설명을 추가함width,height태그로 크기를 설정함
<img src="apple.png" alt="애플 이미지" width="150px" height="">
<img src="https://www.seekpng.com/png/detail/24-243121_apple-png-apple-clipart.png" alt="사과 이미지" width="150px" height="">
오늘의 body 태그 3 - h1,2,3,4,5,6
h1태그로 갈수록 중요도가 높고 글자 크기가 큼,
예시로h1태그는 기업명 또는 서비스명으로 거의 한번만 씀
<h1>Title</h1>
<h2>Title</h2>
<h3>Title</h3>
<h4>Title</h4>
<h5>Title</h5>
<h6>Title</h6>
오늘의 body 태그 4 - p
- 하나의 문단을 만들때
p태그를 씀
<p>Nice to meet you</p>
<p>Nice to meet you</p>
<p>Nice to meet you</p>
오늘의 body 태그 5 - span, mark
span태그는 css 스타일 적용하기 위한 태그mark태그는 글 배경색 적용. (기본 노란색 배경)
<p><span>동해물</span>과 백두산이 마르고 닳도록</p>
<p><mark>사과</mark>는 사과 나무에서 나는 열매이다.</p>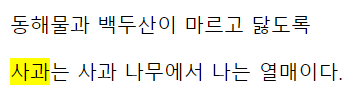
오늘의 body 태그 6 - ol, ul
- 둘다 목록을 만드는 태그,
ol태그는 순서가 있고ul태그는 순서가 없음
ol,ul태그 밑에는li태그만 들어갈 수 있음
	<ol>
		<li>메뉴1</li>
		<li>메뉴2</li>
		<li>메뉴3</li>
	</ol>

	<ul>
		<li>메뉴1</li>
		<li>메뉴2</li>
		<li>메뉴3</li>
	</ul>

	<ul>
		<li><a href="#">영화</a></li>
		<li><a href="#">부동산</a></li>
		<li><a href="#">음악</a></li>
	</ul>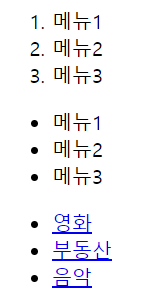
오늘의 body 태그 7 - button
- 버튼을 만드는 태그,
type태그로 버튼의 속성을 설정함 button태그는 단순한 클릭의 버튼,submit태그는 서버에 정보를 보내는 버튼
<button type="button">닫기</button>
<button type="submit">확인</button> 
오늘의 body 태그 8 - video
- 영상을 넣는 태그,
src태그로 영상의 경로를 설정 controls태그로 영상을 컨트롤하는 버튼 양식 추가autoplay태그로 영상 자동 재생(크롬에서는muted태그를 이용해 음소거해야 자동 재생)loop태그는 영상 자동 반복width,height태그로 크기 조절, 하나만 설정시 자동 설정
<video src="sample.mp4" controls
       autoplay muted
       loop
       width="400px"
       height="#">
</video>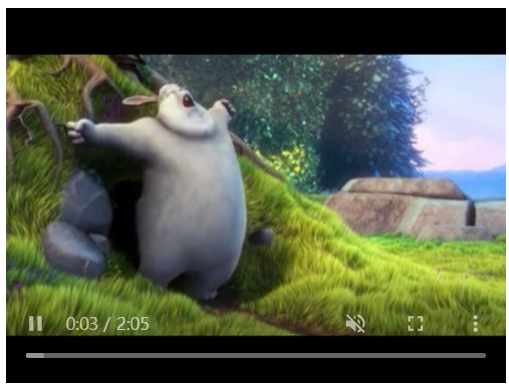
오늘의 body 태그 9 - iframe
- 유튜브 영상을 넣기 위한 태그, 보안상의 이슈로 실무에서는 잘 사용 안함.
<iframe width="200" height="200"
	src="https://www.youtube.com/embed/CqvfTItHF-s"
	title="YouTube video player"
	frameborder="0"
	allow="accelerometer; autoplay; clipboard-write; encrypted-media; gyroscope; picture-in-picture" allowfullscreen>
</iframe>
오늘의 body 태그 10 - audio
- 음성을 넣기 위한 태그, 비디오와 동일함.
- 크롬에서는 음성은 자동 재생 불가
<audio src="sample audio.mp3" controls
 		autoplay muted
 		loop>
</audio>
오늘의 body 태그 11 - 양식 태그(1)
-
form태그는 폼 양식을 설정하는 태그 -
label태그는 각각의 폼 양식에 이름을 붙이는 태그 -
for,id태그를 동일하게 설정하면, 클릭시 이동 -
type태그로 양식의 속성을 설정함(예시로password로 설정시 ●로 입력됨) -
placeholder태그 사용시 빈칸 폼 안에 설명을 위한 회색 글씨가 생성됨 -
minlength,maxlength태그로 길이 설정 가능 -
number태그 때,min,max태그로 숫자의 최소값과 최대값 설정 가능 -
upload태그 때,accept태그로 첨부 가능한 파일의 양식을 설정 가능 -
required태그로 폼 양식 때 반드시 입력 해야하는 필수값으로 선택 가능
<form method="post">

	<label for="name">이름</label>
		<input type="text" placeholder="이름을 입력하세요." id="name" minlength="2" maxlength="8" required>

	<label for="mail">이메일</label>
		<input type="email" placeholder="이메일을 입력하세요." id="mail" required>

	<label for="pw">비밀번호</label>
		<input type="password" placeholder="최소 6글자, 최대 12글자" id="pw" minlength="6" maxlength="12" required>

	<label for="num">숫자</label>
		<input type="number" placeholder="숫자만 입력" id="num" min="10" max="40" step="5">

	<label for="upload">파일 업로드</label>
		<input type="file" id="upload" accept="image/png, image/jpg, image/gif">

	<button type="submit">제출</button>

</form>
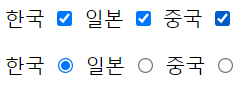
오늘의 body 태그 12 - 양식 태그(2)
checkbox태그를 이용, 체크 양식을 추가함radio태그를 이용, 단일 선택의 체크 양식을 추가함checked태그를 이용 시 기본 체크됨
<label for="n1">한국</label>
	<input type="checkbox" id="n1" name="country" value="한국">
	<label for="n2">일본</label>
	<input type="checkbox" id="n2" name="country" value="일본">
	<label for="n3">중국</label>
	<input type="checkbox" id="n3" name="country" value="중국">


<label for="n1">한국</label>
	<input type="radio" id="n1" name="country" value="한국" checked>
	<label for="n2">일본</label>
	<input type="radio" id="n2" name="country" value="일본">
	<label for="n3">중국</label>
	<input type="radio" id="n3" name="country" value="중국">
오늘의 body 태그 13 - 양식 태그(3)
textarea태그를 이용, 문의내용 등을 적는 폼 양식을 추가함cols태그로 가로 크기를,row태그로 세로 크기를 설정함
<label for="content">문의내용</label>
	<textarea id="content" cols="40" rows="8"></textarea>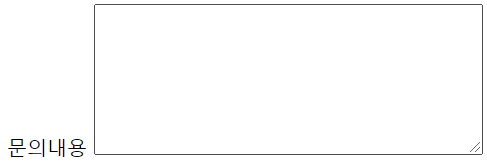
오늘의 body 태그 14 - 양식 태그(4)
select태그를 이용, 선택 가능한 폼 양식을 추가함select태그 밑에는option태그만 사용 가능,value태그로 선택 칸의 내용을 설정selected태그로 기본 선택이 되는 값을 선택 가능disabled태그로 다시 선택할 수 없는 값 설정 가능
<select name="job">
		<option selected disabled>직업을 선택해 주세요.</option>
		<option value="학생">학생</option>
		<option value="회사원">회사원</option>
		<option value="기타">기타</option>
</select>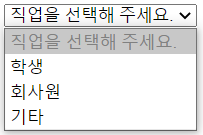
오늘의 body 태그 15 - 양식 태그(5)
-
table태그를 이용, 표를 만듬 (css를 이용해서 표 테두리 설정 가능) -
thead,tbody,tfoot의 순서로 표가 이루어짐 -
caption태그를 이용, 표 위 가운데 캡션을 추가함 -
tr(table row)태그는 가로줄 설정 -
th(table head)태그는 표의 제목 설정 -
td(table data)태그는 셀 내용 설정 -
rowspan태그를 이용해 세로셀 병합 가능 -
colspan태그를 이용해 가로셀 병합 가능
<table>
	<caption>상품 정보</caption>
	<thead>
		<tr>
			<th>상품</th>
			<th>색상</th>
			<th>가격</th>
		</tr>
	</thead>

	<tbody>
		<tr>
			<td>맥북 프로 16인치</td>
			<td>그레이</td>
			<td>3,000원</td>
		</tr>
		<tr>
			<td rowspan="2">아이패드 프로 12인치</td>
			<td>레드</td>
			<td>1,000원</td>
		</tr>
		<tr>
			<td>블루</td>
			<td>1,000원</td>
		</tr>
	</tbody>

	<tfoot>
		<tr>
			<td colspan="2">총 가격</td>
			<td>5,000원</td>
		</tr>
	</tfoot>
</table>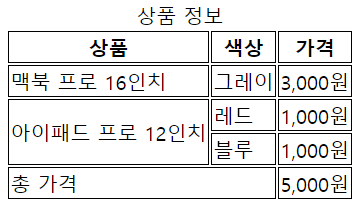
오늘의 body 태그 16 - 레이아웃 태그
- 웹을 구성할때, 위치에 따라 사용하는 태그가 달라짐.
주로,
header태그는 최상단nav태그는 상단 버튼main태그는 주 내용(본문)section태그는 관련있는 내용,article태그는 독립적인 내용aside태그는 본문 옆 내용,div태그는 관련없는 부가적인 내용footer태그는 최하단
<header>
	<nav>
		<ul>
			<li><a href="#">메뉴1</a></li>
			<li><a href="#">메뉴2</a></li>
			<li><a href="#">메뉴3</a></li>
		</ul>
	</nav>
</header>

<main role="main">
	<section>
		<h2>Service</h2>
	</section>

	<section>
		<h2>Portfolio</h2>
	</section>

	<article>
		<h2>Article title</h2>
		<p>Nice to meet you</p>
	</article>
</main>

<aside></aside>

<div></div>

<footer></footer>
Inline과 Block의 차이
-
Inline과 Block은 레이아웃의 개념으로 CSS로 설정함.
-
span태그는 Inline으로, 가로로 나열 및 크기 설정이 안됨 -
h1태그는 block으로, 세로로 나열 및 크기 설정이 됨
<span>Inline</span>
<span>Inline</span>
<span>Inline</span>

<h1>Block</h1>
<h1>Block</h1>
<h1>Block</h1>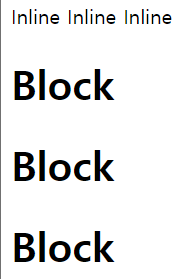
학습한 내용 중 어려웠던 점 또는 해결못한 것들
- 오늘 습득한 양식 태그의 종류가 좀 있기 때문에 혼자서 복습을 해야할 것 같음.
- 레이아웃 태그 중
section태그,article태그,aside태그,div태그의 구분이 아직 명확하지 않아, 조금 더 찾아봐서 이해해야 함. - inline과 block의 개념이 확실치 않아 찾아봐야 함.
해결방법
- 인터넷 검색을 통해 레이아웃 태그의 분류 의미를 알아냄.
section태그는 관련이 있는 내용들끼리,
article태그는 혼자서 독립될 수 있는 내용들끼리,
aside태그는 그냥 본문 옆에 있는 내용,
div태그는 위의 내용과 전혀 관련없는 별개의 내용으로 구분한다는 걸 깨달음. - 인터넷 검색을 통해 inline과 block은 css로 설정 가능한 레이아웃의 개념이며, 태그가 아닌 속성 개념임을 알아냄.
학습 소감
- 처음으로 HTML 태그의 공부를 시작했는데, 아는 내용도 있었지만 같이 실습을 통해 하나하나씩 만들어가는 재미가 있었음.
점점 배울 내용도 많아지고, 복습할 내용도 많아지겠지만, 내가 만드는 것에 대한 확신과 자신감을 가지고 앞으로도 더욱 노력해야겠음.