가시다님의 T101 [4기] 스터디 내용을 정리한 포스트 입니다.
블로그의 실습 내용들은 ‘테라폼으로 시작하는 IaC’ 책을 기준하여 정리하였습니다.
4. 프로바이더
실습: 단일 프로바이더의 다중 정의
리전을 다르게 구성한 동일 AWS 프로바이더를 aws_instance에 지정한다.
- main.tf
provider "aws" {
  region = "ap-southeast-1"
}

provider "aws" {
  alias = "seoul"
  region = "ap-northeast-2"
}

resource "aws_instance" "app_server1" {
  ami           = "ami-06b79cf2aee0d5c92"
  instance_type = "t2.micro"
}

resource "aws_instance" "app_server2" {
  provider      = aws.seoul
  ami           = "ami-0ea4d4b8dc1e46212"
  instance_type = "t2.micro"
  subnet_id =  "subnet-0f36c6347b49c5d4f"
}- 실행 후 결과
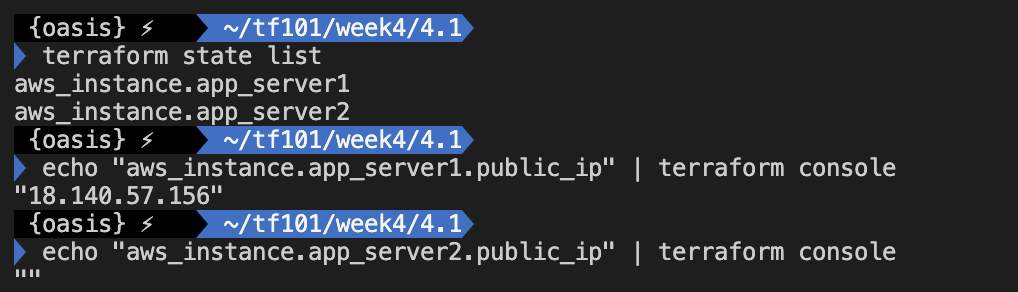
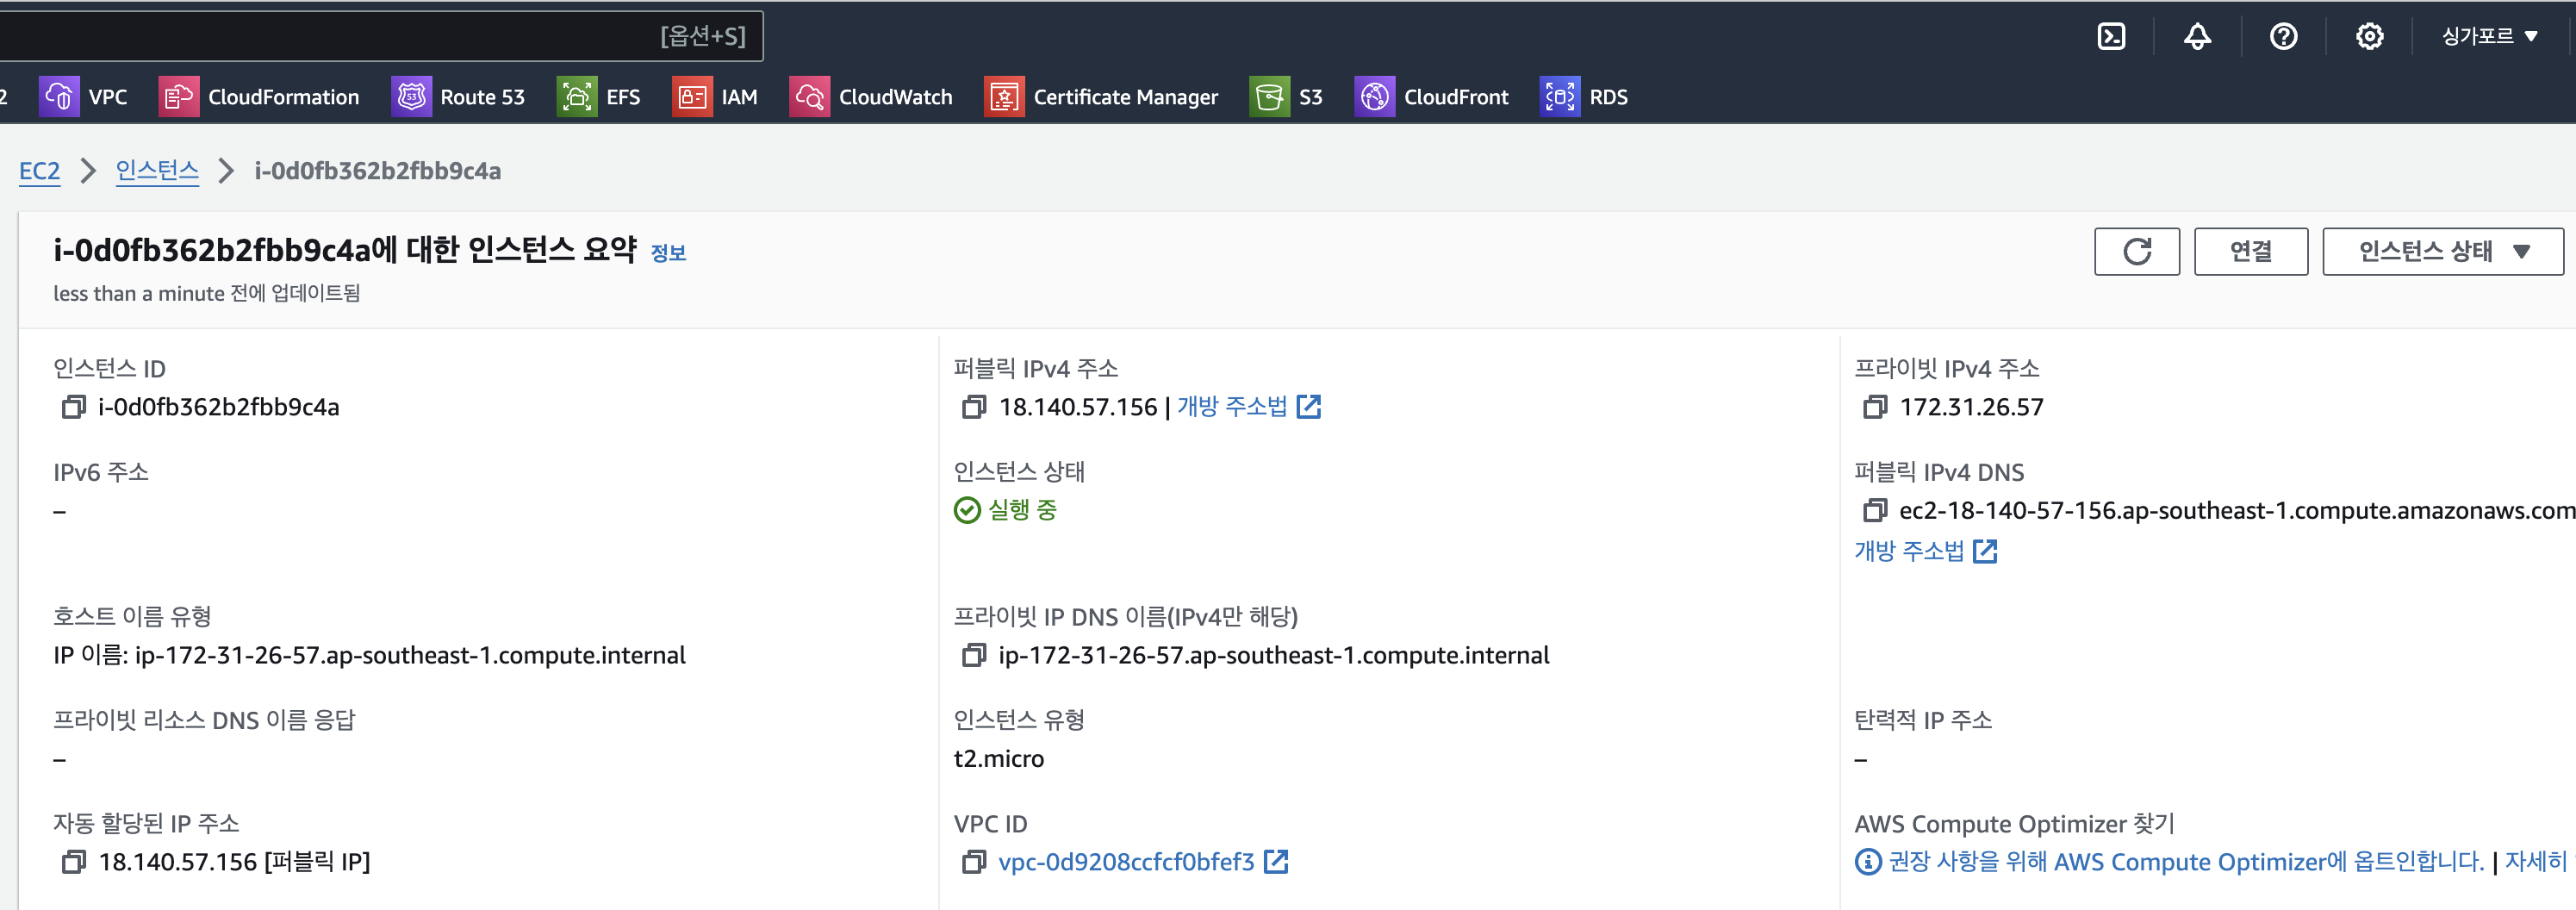
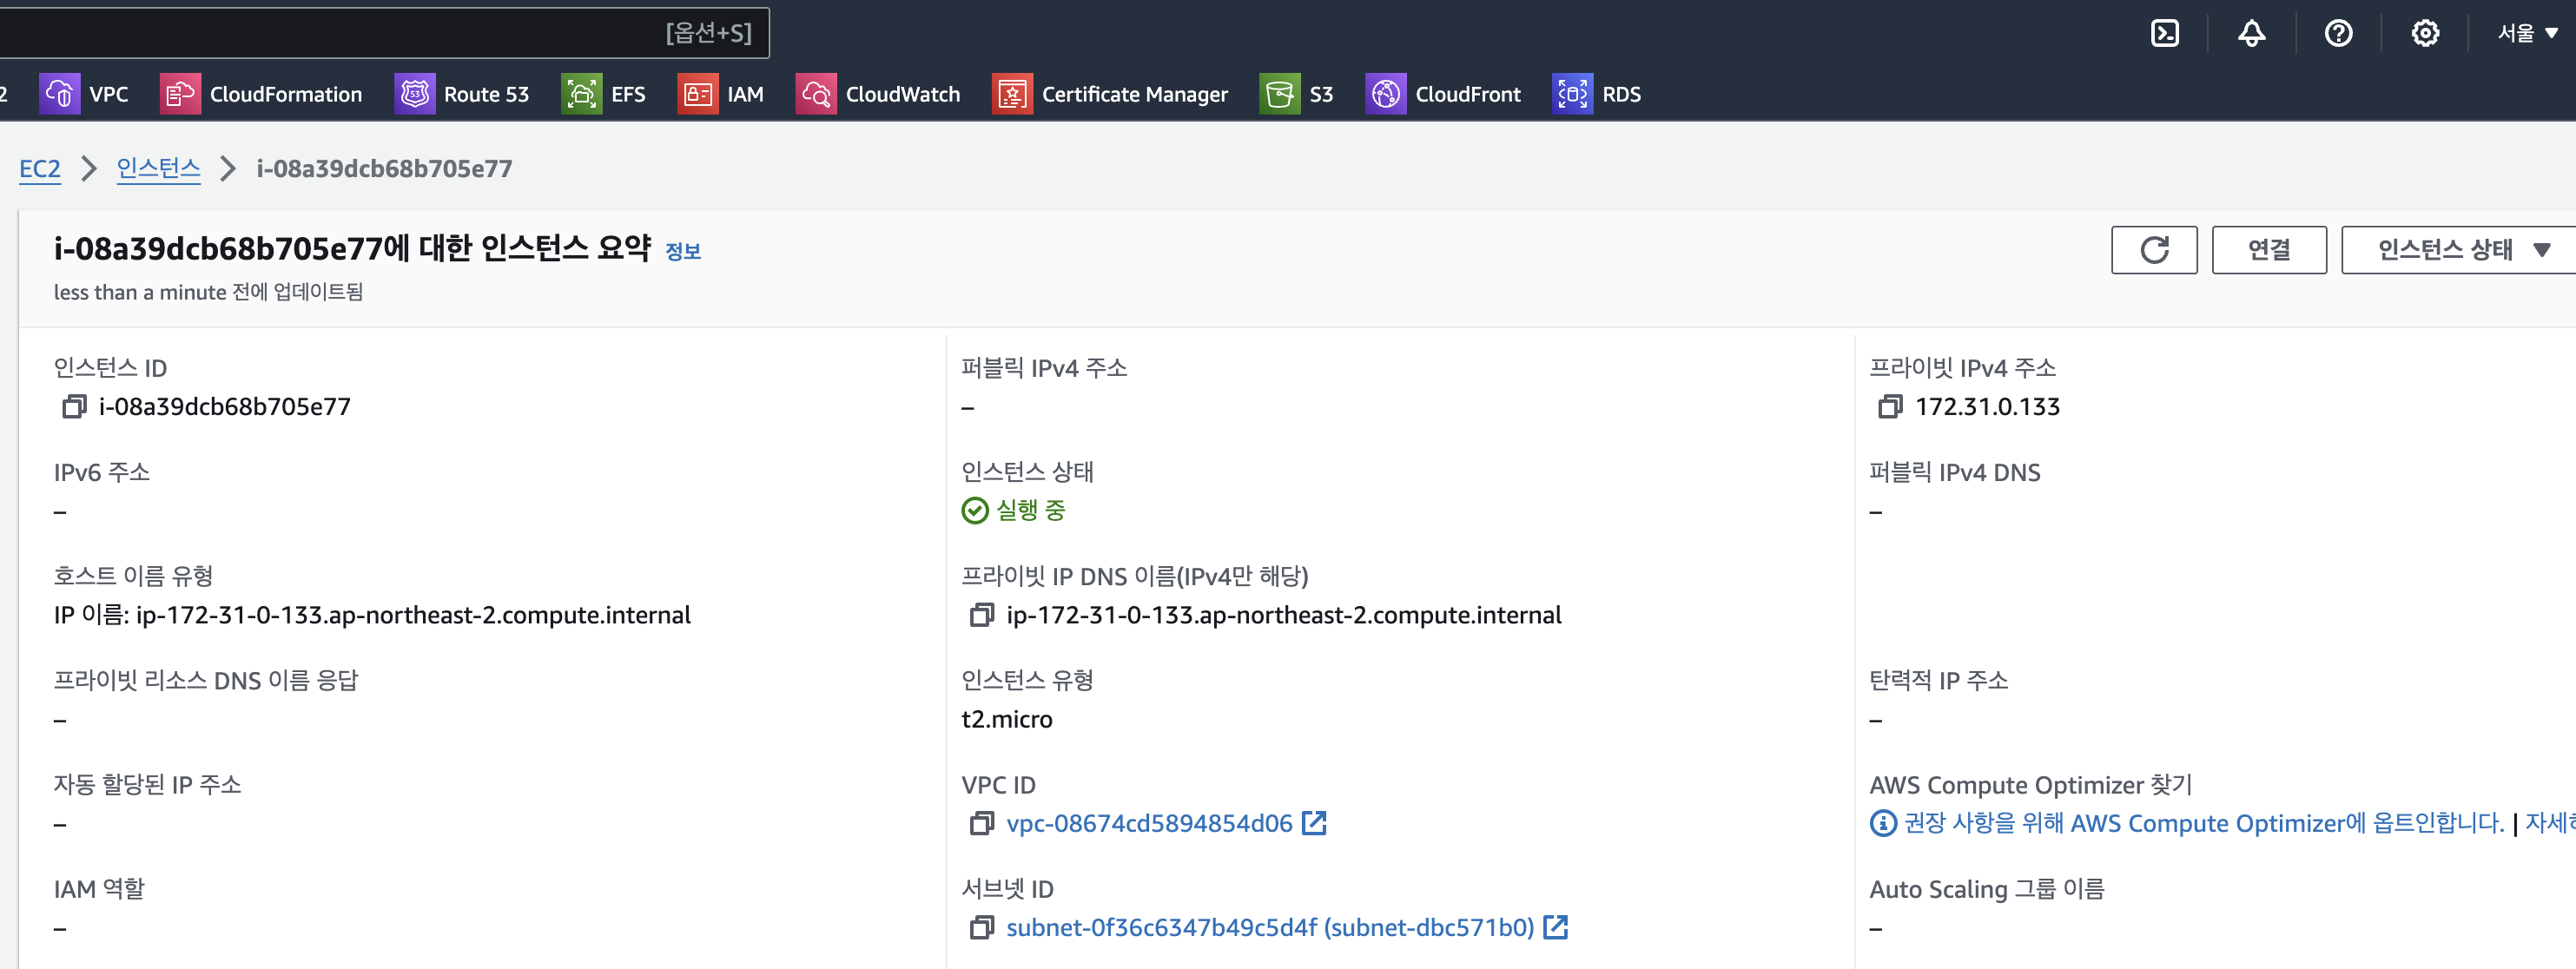
"ap-southeast-1"에 생성된 인스턴스
"ap-northeast-2"(aws.seoul)에 생성된 인스턴스
실습: 2개의 리전에 Ubuntu EC2 배포
- provider_data.tf 생성
terraform {
  required_providers {
    aws = {
      source = "hashicorp/aws"
      version = "5.56.1"
    }
  }
}

provider "aws" {
  # Configuration options
  region = "ap-northeast-2"
  alias = "region_1"
}

provider "aws" {
  # Configuration options
  region = "ap-southeast-1"
  alias = "region_2"
}

data "aws_region" "region_1" {
  provider = aws.region_1
}

data "aws_region" "region_2" {
  provider = aws.region_2
}

data "aws_ami" "ubuntu_region_1" {
  provider = aws.region_1

  most_recent = true
  owners      = ["099720109477"] # Canonical

  filter {
    name   = "name"
    values = ["ubuntu/images/hvm-ssd/ubuntu-focal-20.04-amd64-server-*"]
  }
}

data "aws_ami" "ubuntu_region_2" {
  provider = aws.region_2

  most_recent = true
  owners      = ["099720109477"] # Canonical

  filter {
    name   = "name"
    values = ["ubuntu/images/hvm-ssd/ubuntu-focal-20.04-amd64-server-*"]
  }
}- ec2.tf 생성
resource "aws_instance" "region_1" {
  provider = aws.region_1

  ami = data.aws_ami.ubuntu_region_1.id
  instance_type = "t2.micro"
  subnet_id = "subnet-0f36c6347b49c5d4f"
}

resource "aws_instance" "region_2" {
  provider = aws.region_2

  ami = data.aws_ami.ubuntu_region_2.id
  instance_type = "t2.micro"
}- 실행 후 결과
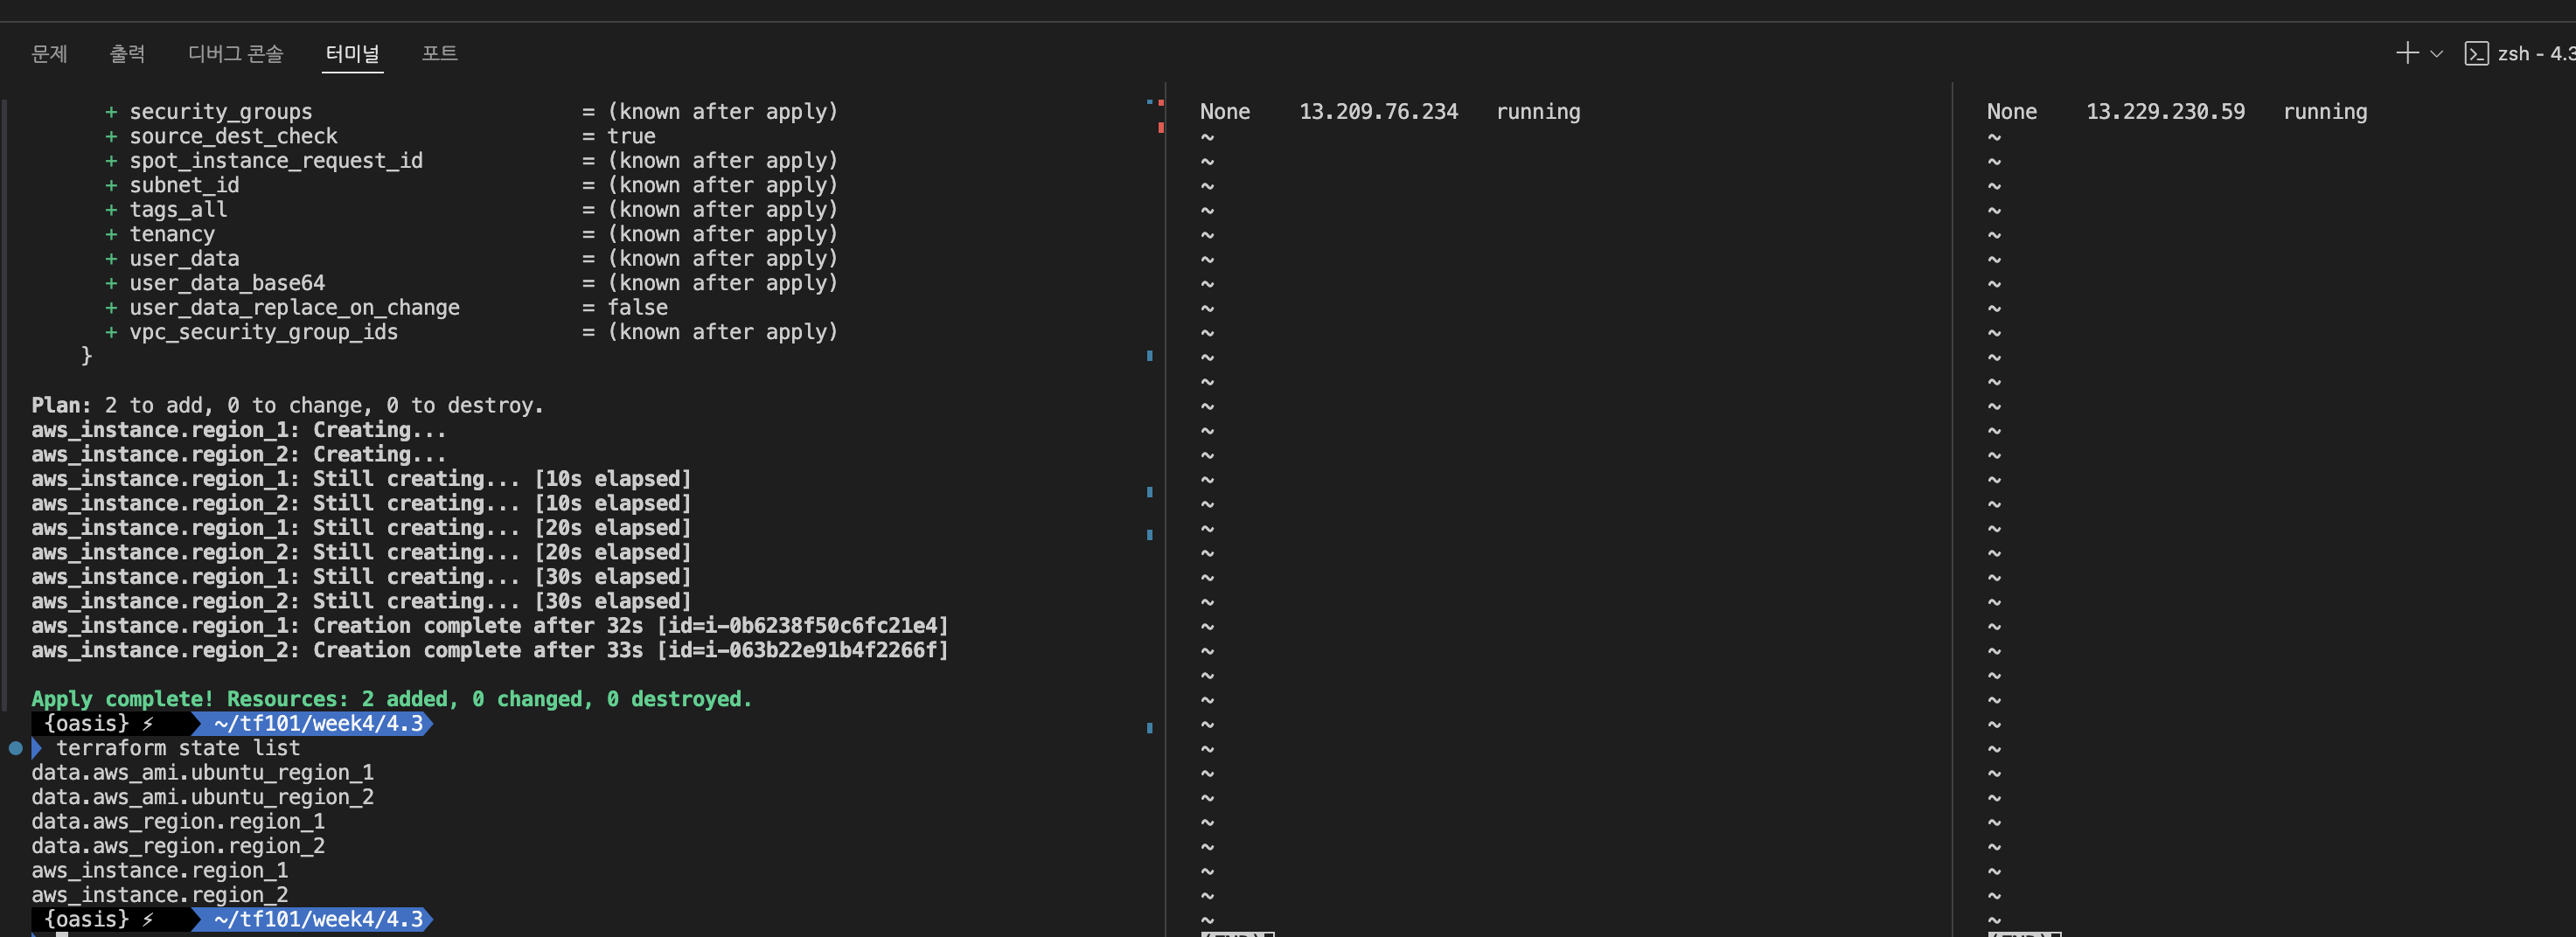
도전과제: 2개의 리전에 s3 배포
- provider_data.tf 생성
provider "aws" {
  region = "ap-northeast-2"
  alias = "region-1"
}

provider "aws" {
  region = "ap-southeast-1"
  alias = "region-2"
}

data "aws_region" "region-1" {
  provider = aws.region-1
}

data "aws_region" "region-2" {
  provider = aws.region-2
}- s3.tf 생성
resource "aws_s3_bucket" "region-1" {
  provider = aws.region-1
  bucket = "my-region1-bucket"

  tags = {
    Name        = "my-region1-bucket"
    Environment = "Dev"
  }
}

resource "aws_s3_bucket" "region-2" {
  provider = aws.region-2
  bucket = "my-region2-bucket"

  tags = {
    Name        = "my-region2-bucket"
    Environment = "Dev"
  }
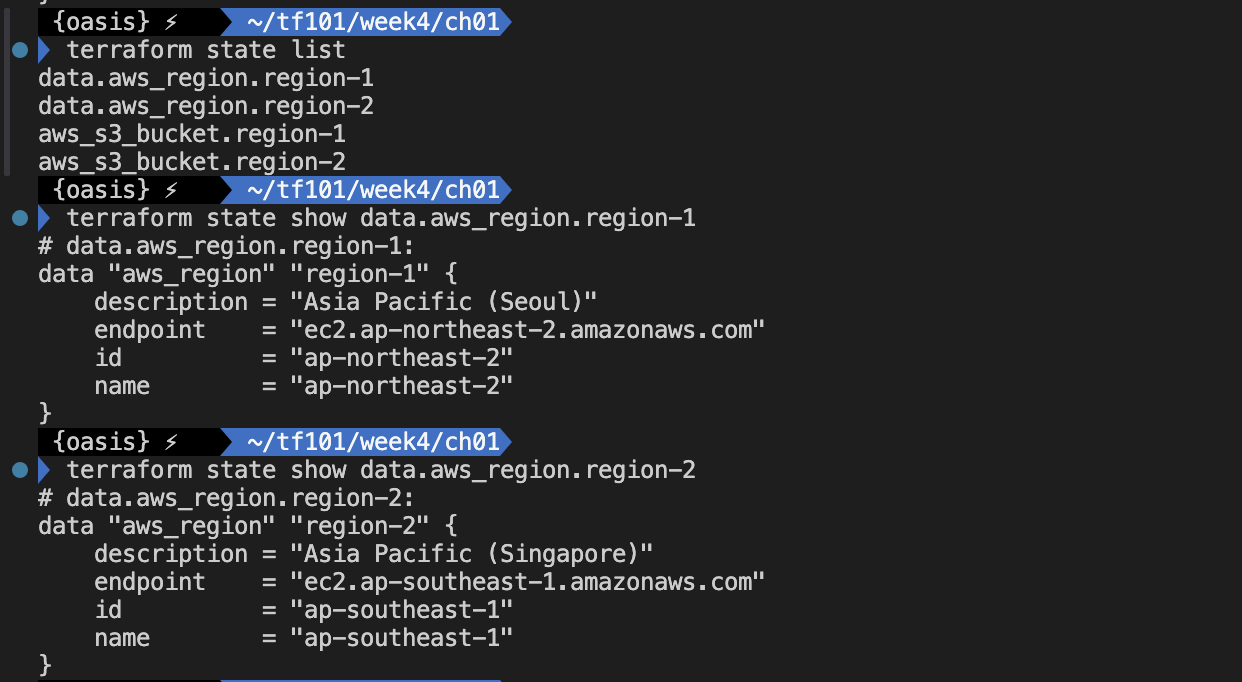
}- 실행 후 결과
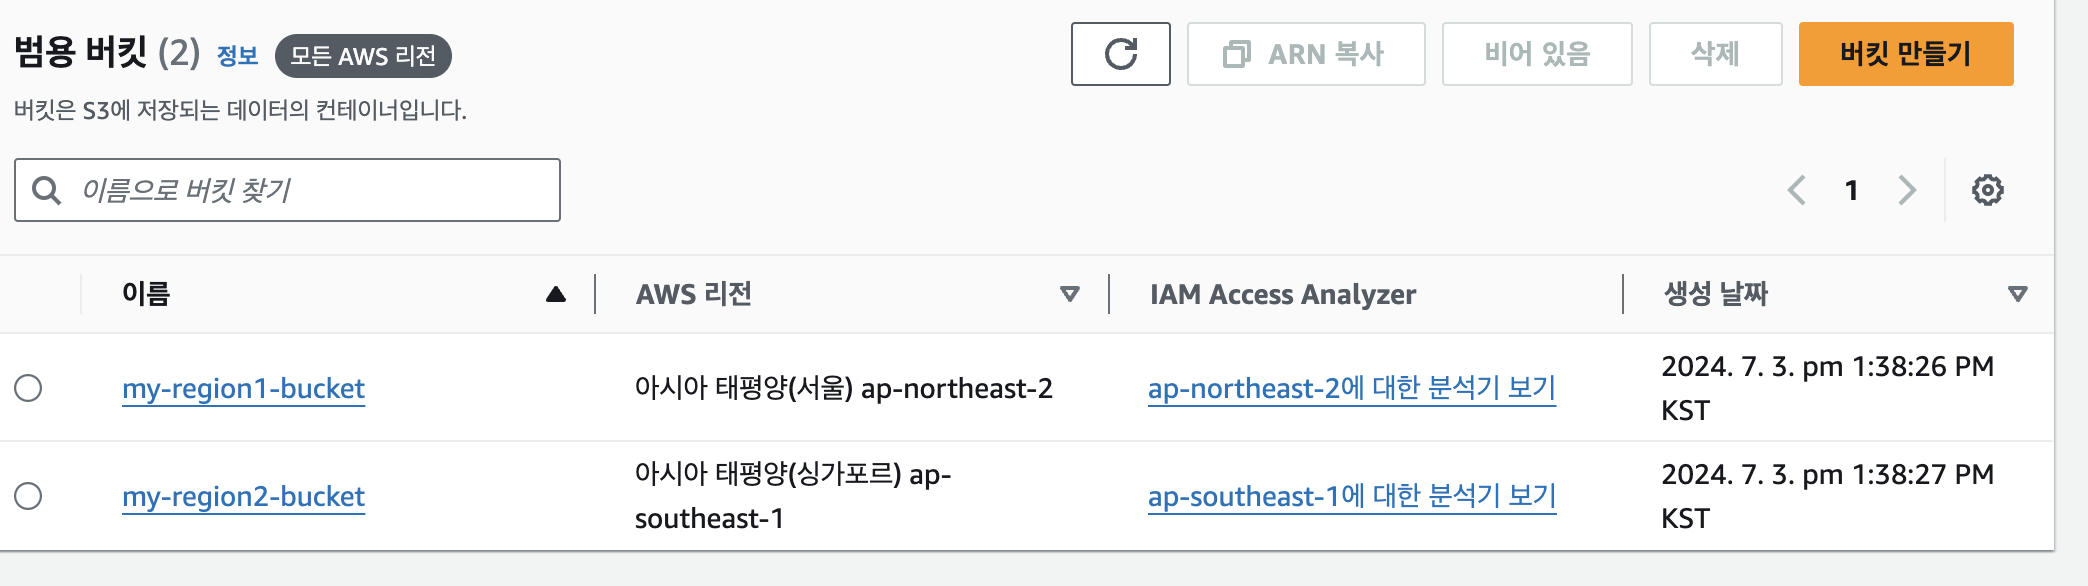
"ap-northeast-2", "ap-southeast-1" 2개의 리전에 각 1개의 s3 버킷이 생성되었다.
5. State
실습: State의 역할
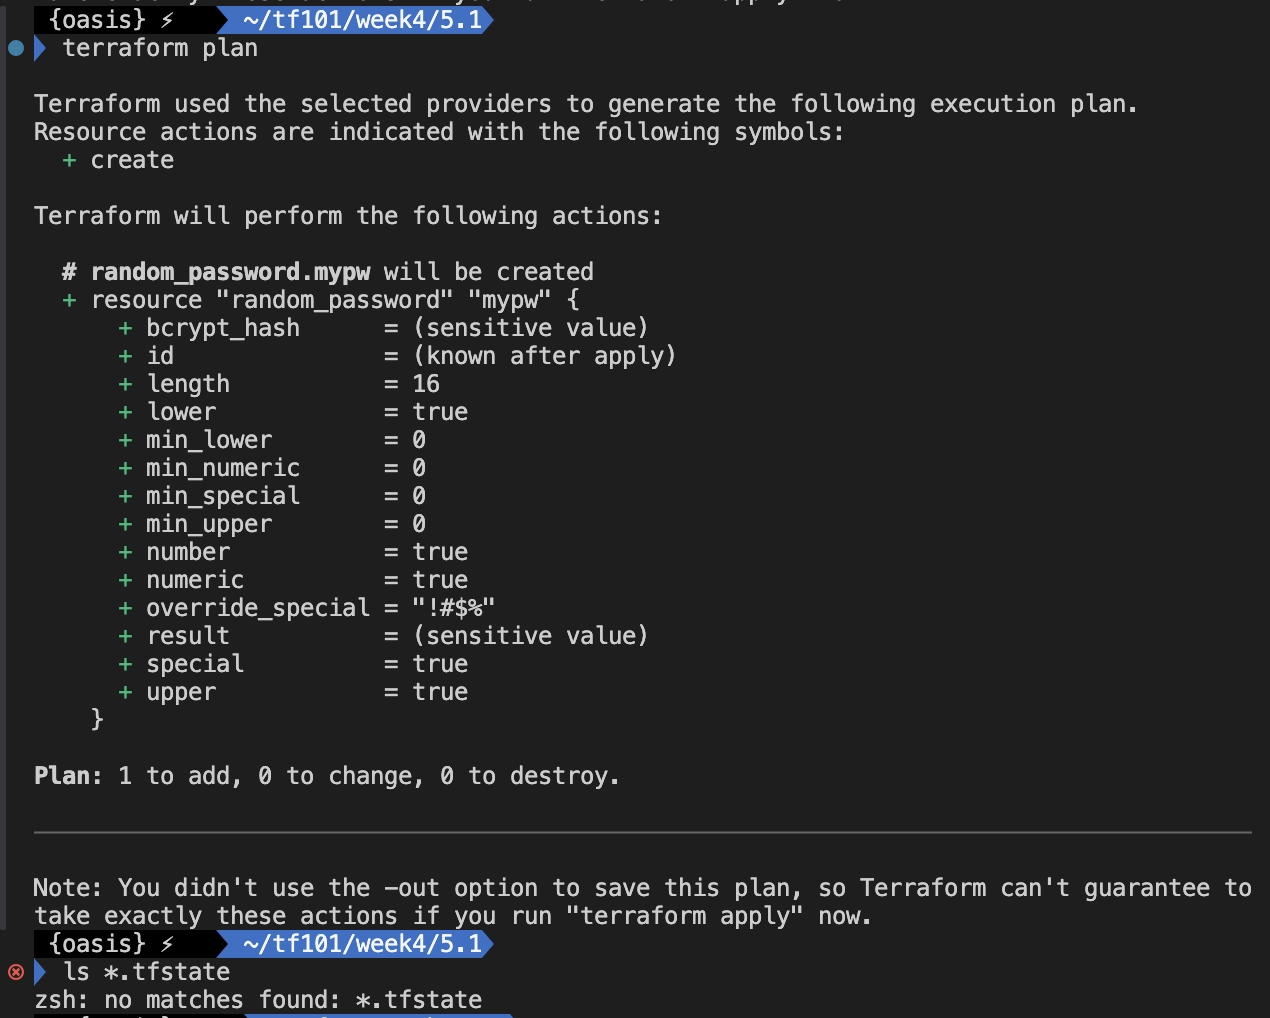
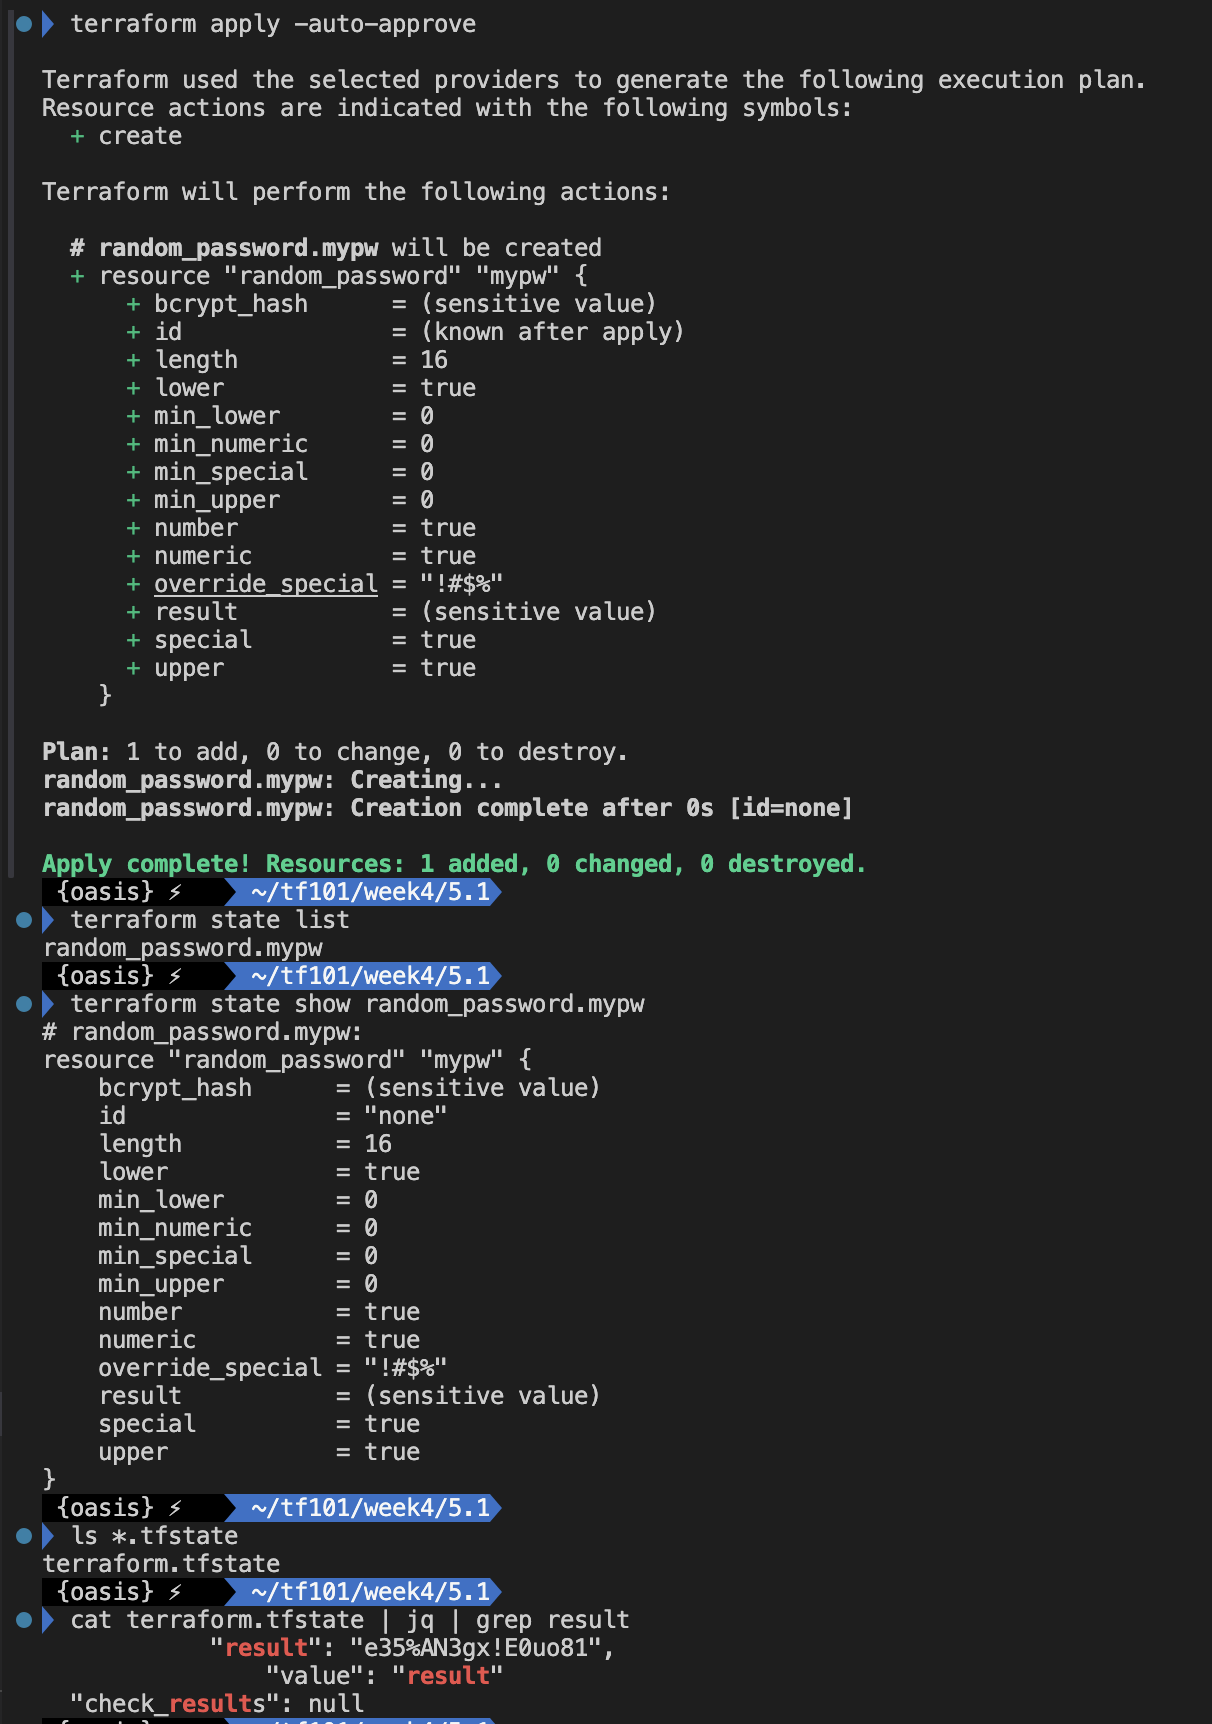
"random_password" 리소스를 사용하여 패스워드 생성한다.
수행후 생성된 tfstate의 속성과 인수를 확인해 본다.
- main.tf생성
resource "random_password" "mypw" {
  length           = 16
  special          = true
  override_special = "!#$%"
}- 실행 후 결과
terraform plan만 실행하면 tfstate 파일이 생성되지 않음
terraform apply를 실행하면 tfstate 파일이 생성됨
실습: State 유형별 실습
테라폼 구성에 추가된 리소스와 State에 따라 어떤 동작이 발생되는지 확인해 본다.
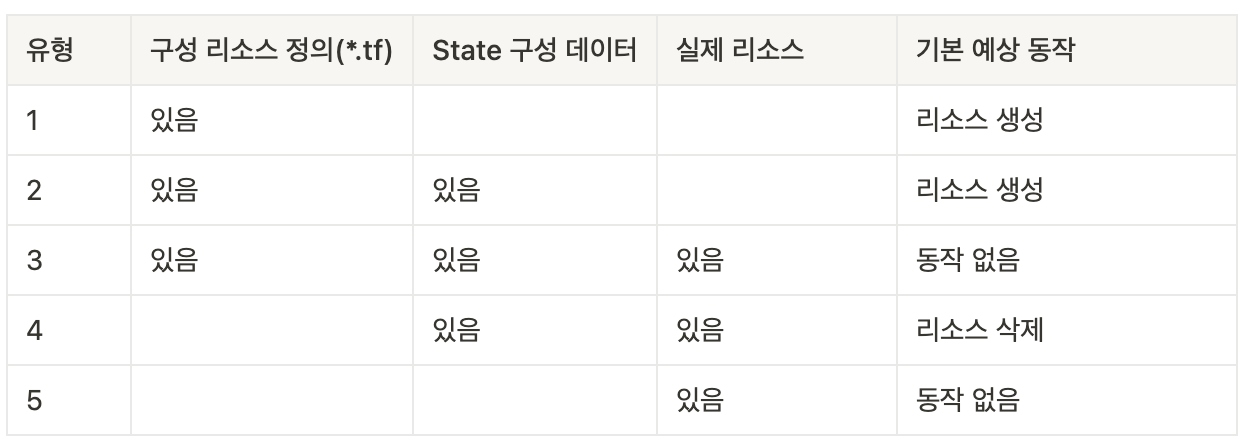
- 유형 1: 신규 리소스 정의 → Apply ⇒ 리소스 생성
locals {
  name = "mytest"
}

resource "aws_iam_user" "myiamuser1" {
  name = "${local.name}1"
}

resource "aws_iam_user" "myiamuser2" {
  name = "${local.name}2"
}
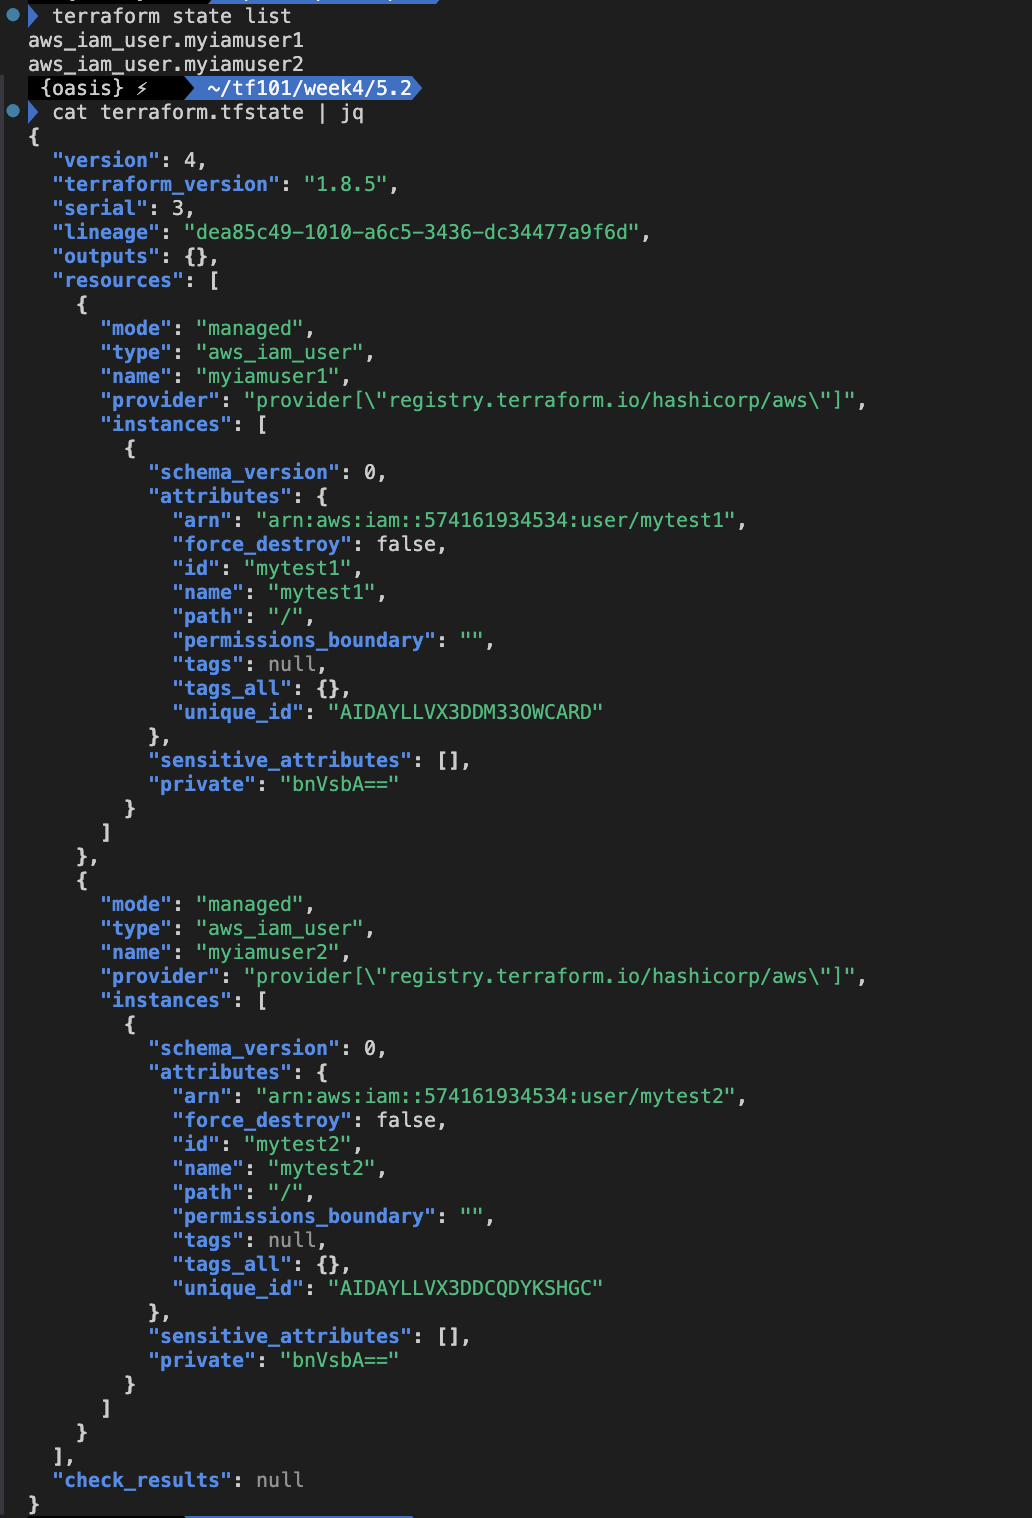
*유형 1 실행 결과
리소스 생성됨
- 유형 2: 실제 리소스 수동 제거 → Apply ⇒ 리소스 생성
- 리소스 수동 제거
aws iam delete-user --user-name mytest1
aws iam delete-user --user-name mytest2
aws iam list-users | jq
terraform state list
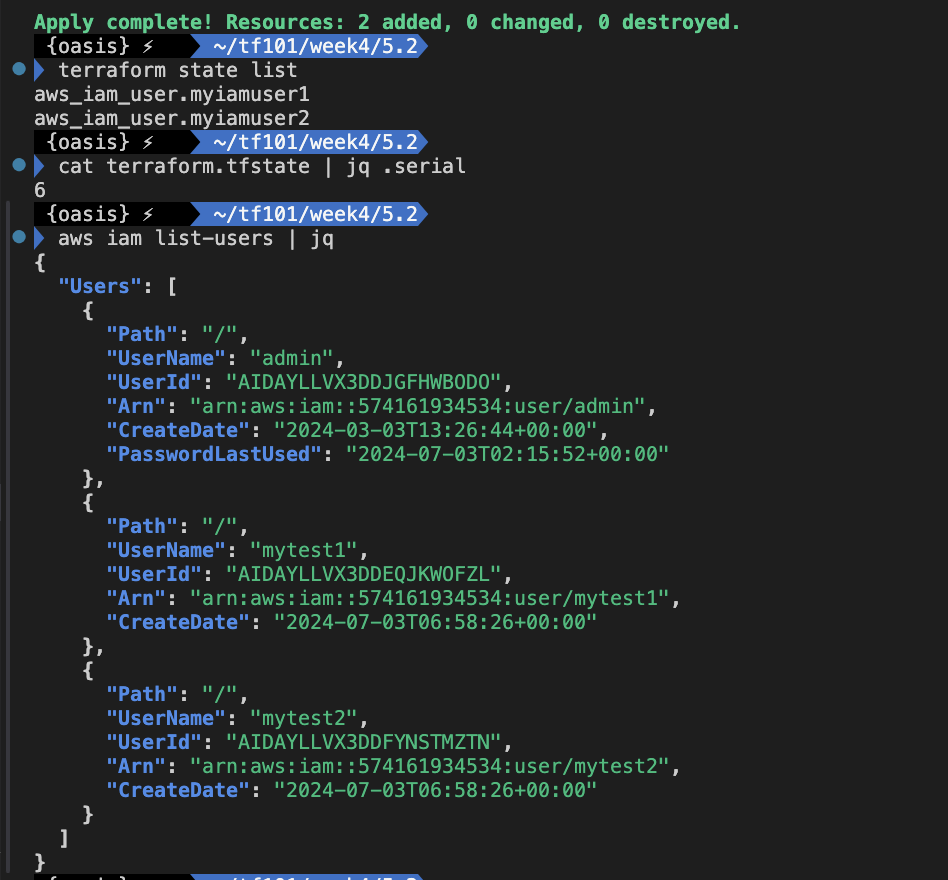
aws의 해당 리소스는 삭제되었으나 tfstate에는 정보가 남아 있는 상태
- main.tf apply 수행
locals {
  name = "mytest"
}
resource "aws_iam_user" "myiamuser1" {
  name = "${local.name}1"
}
resource "aws_iam_user" "myiamuser2" {
  name = "${local.name}2"
}
리소스가 생성되었음
-
유형 3: Apply → Apply ← 코드, State, 형상 모두 일치한 경우
변경없이 기존 상태에서 apply 수행
-
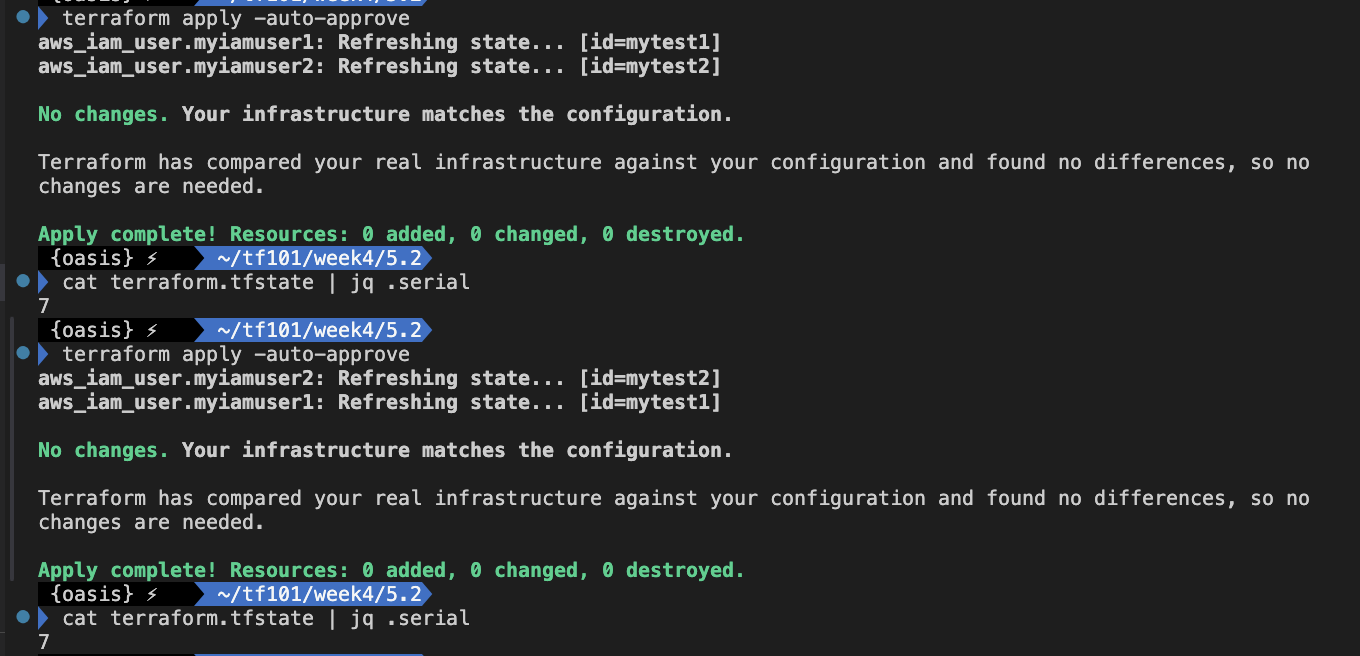
유형 3 결과 확인
리소스에 변경 없음
- 유형 4: 코드에서 일부 리소스 삭제 → Apply
main.tf 수정
resource.aws_iam_user.myiamuser2를 삭제함
locals {
  name = "mytest"
}

resource "aws_iam_user" "myiamuser1" {
  name = "${local.name}1"
}
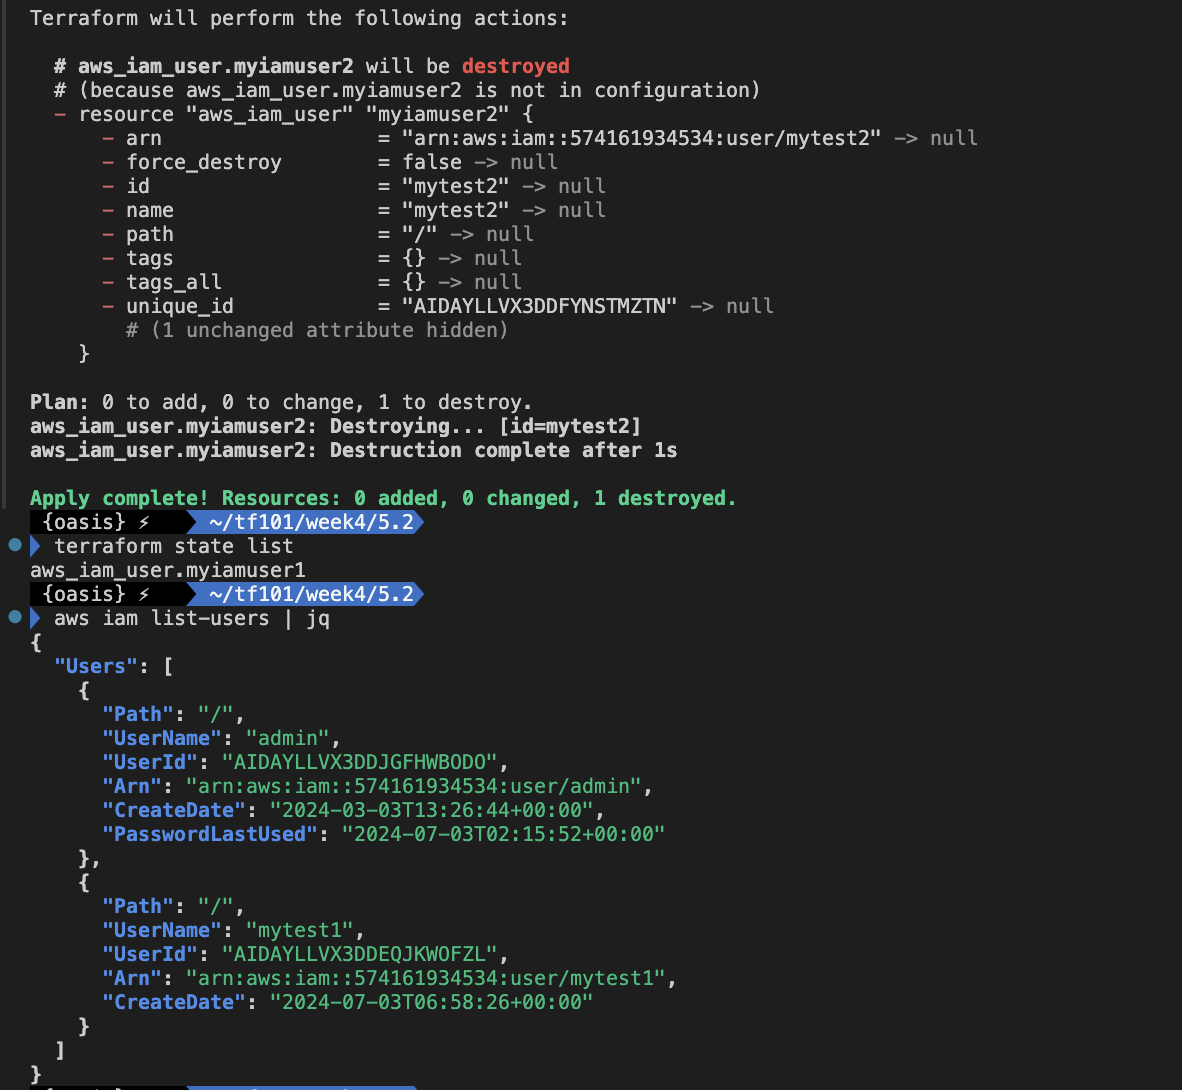
- 유형 4 결과 확인
myiamuser2 리소스 삭제됨
- 유형 6: 실수로 tfstate 파일 삭제 → plan/apply
# 실수로 tfstate 파일 삭제
terraform state list
aws_iam_user.myiamuser1

rm -rf terraform.tfstate*- 유형 6 결과 확인
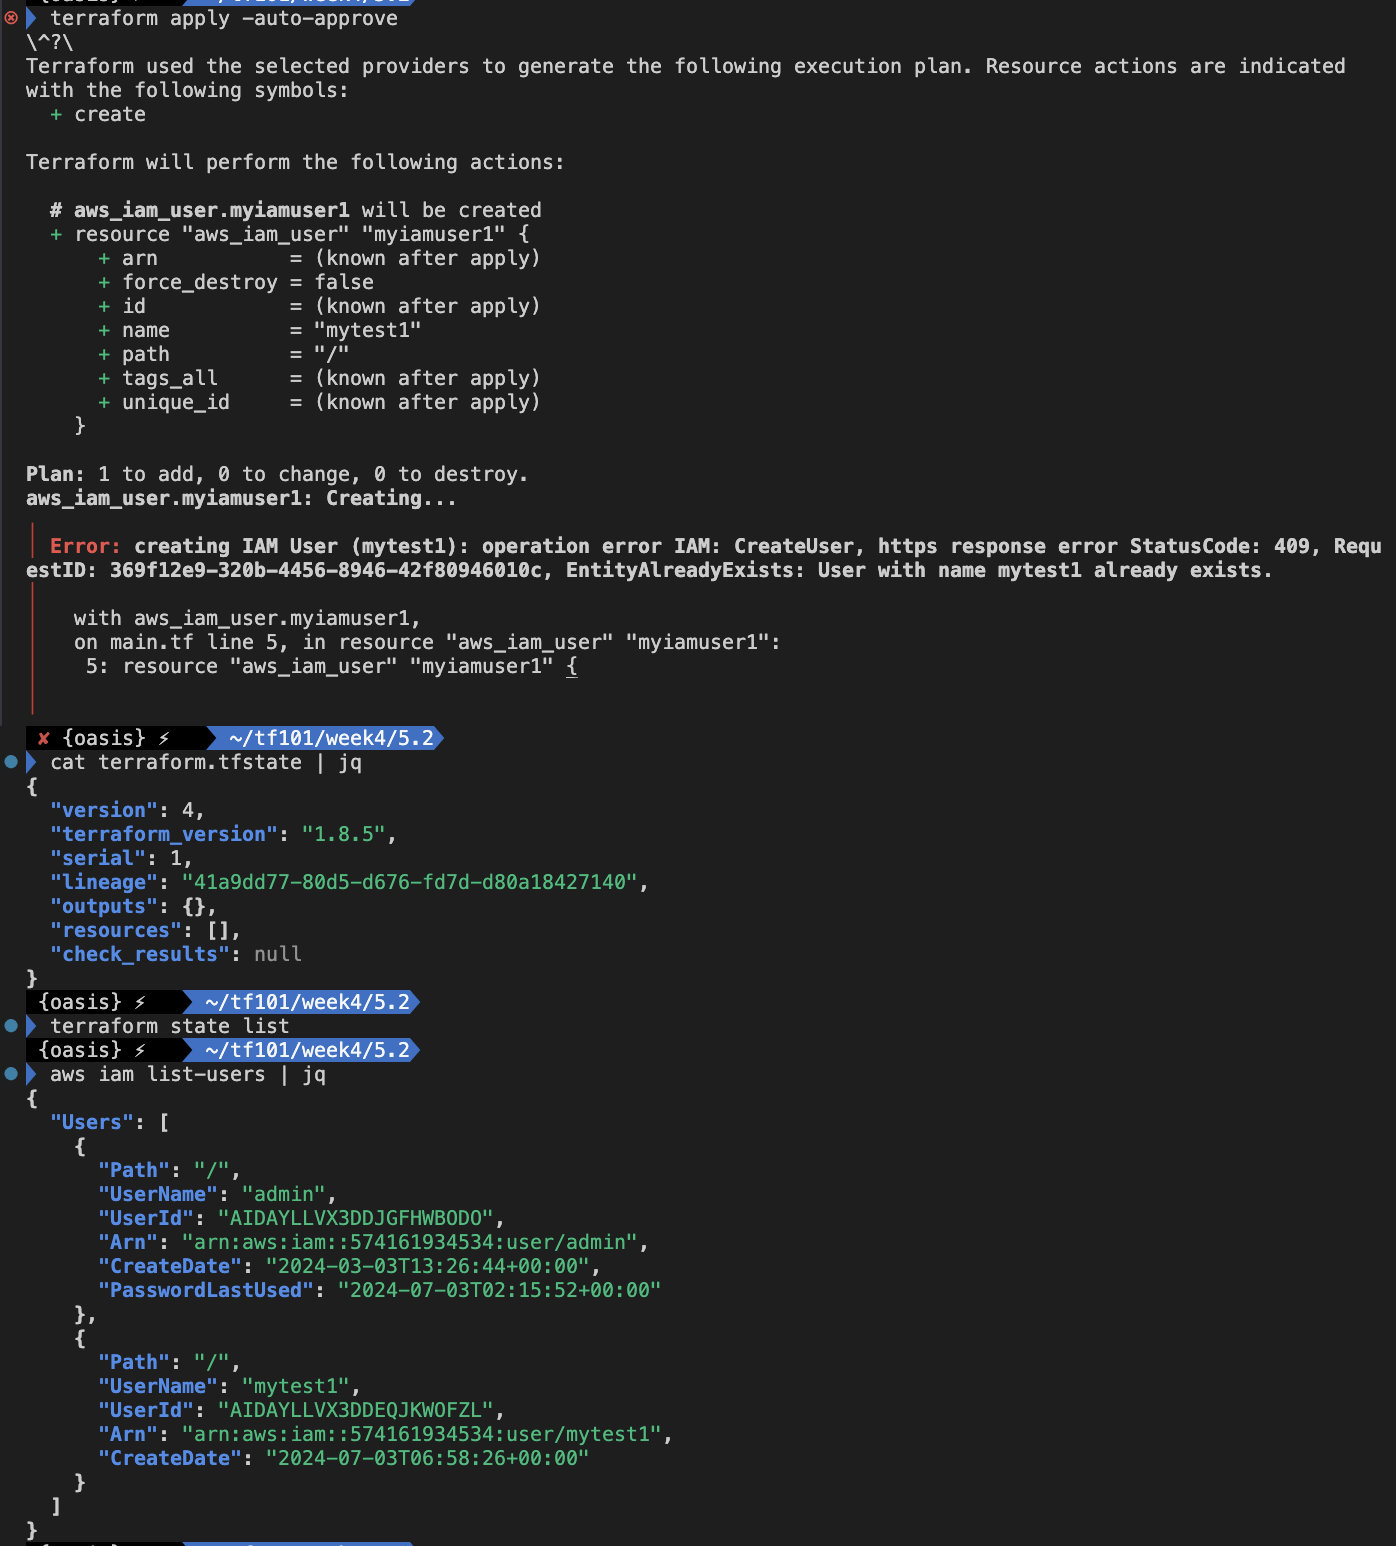
plan을 수행 시 main.tf의 리소스를 새로 생성되는 plan이 확인되며
apply 수행 시 생성하려는 유저가 이미 있다는 에러 메세지와 실행되지 않음
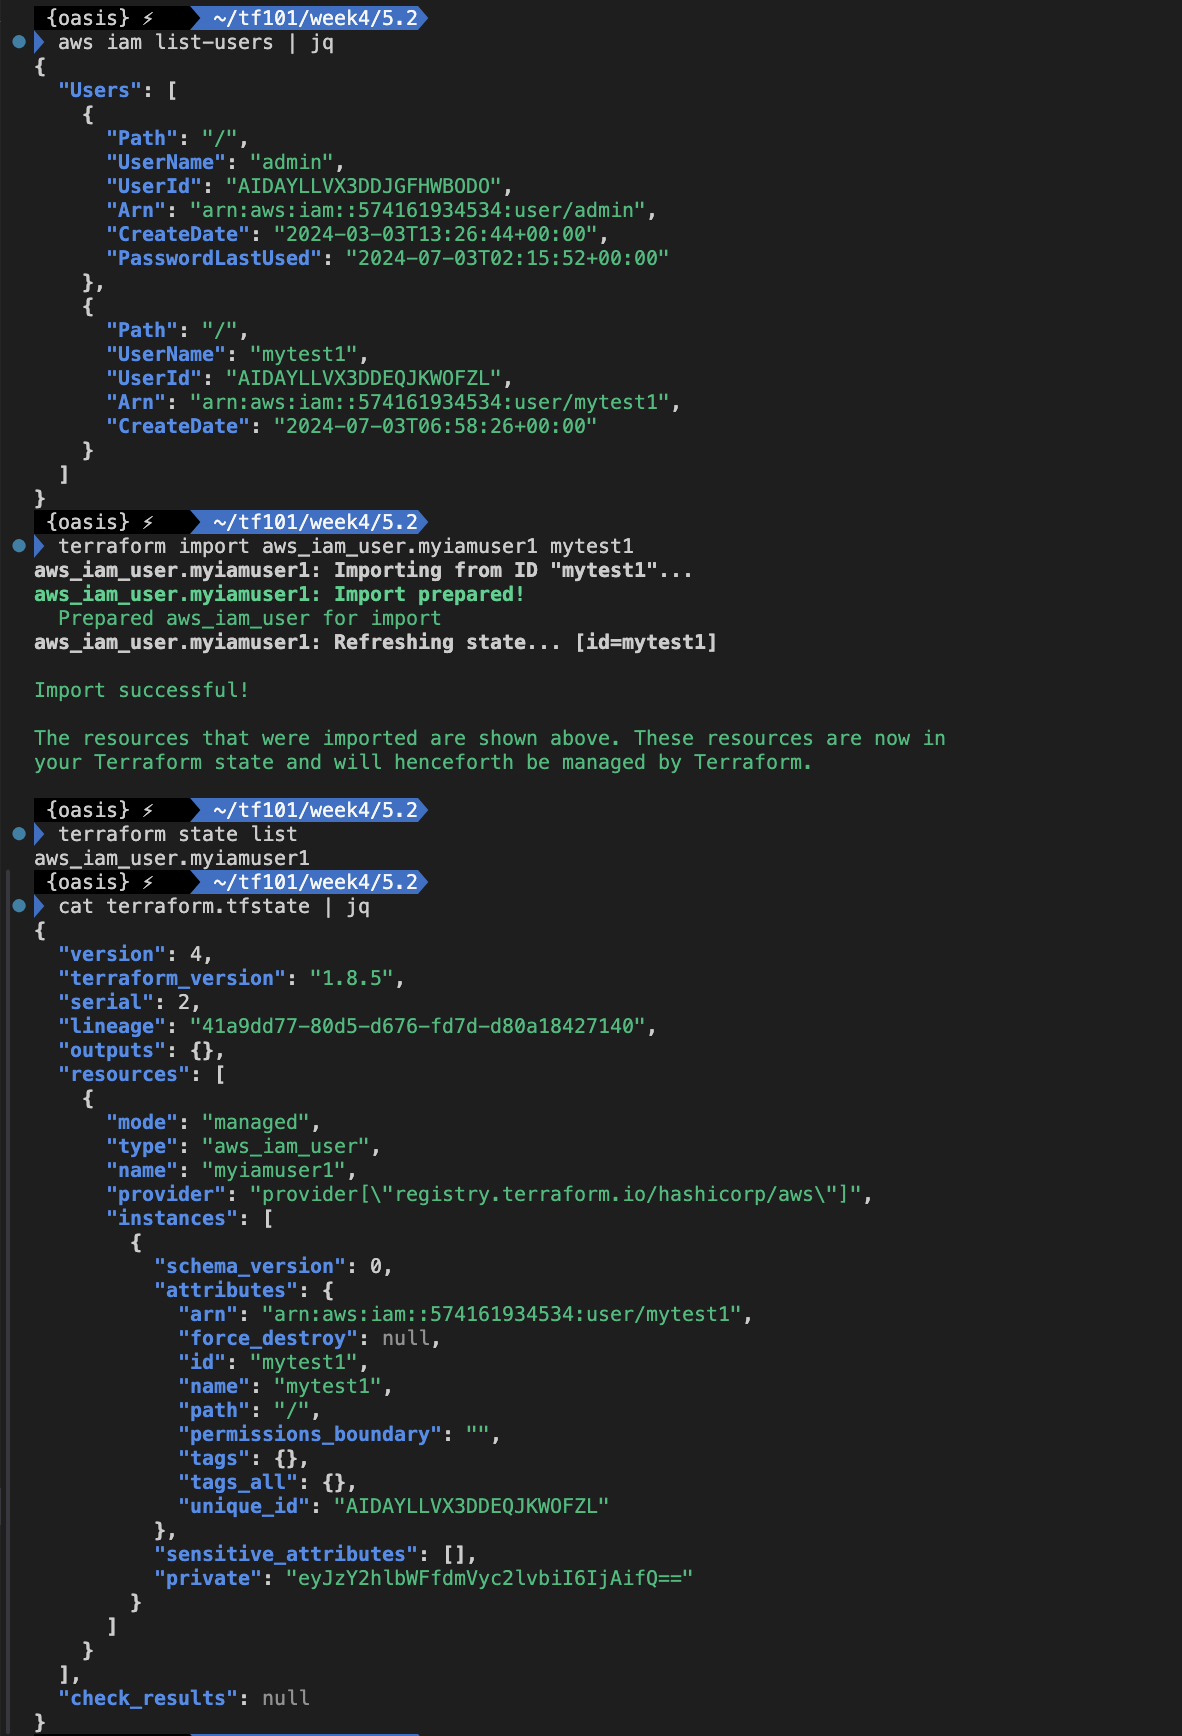
- 유형 7: 실수로 tfstate 파일 삭제 시 → import 로 tfstate 파일 복구
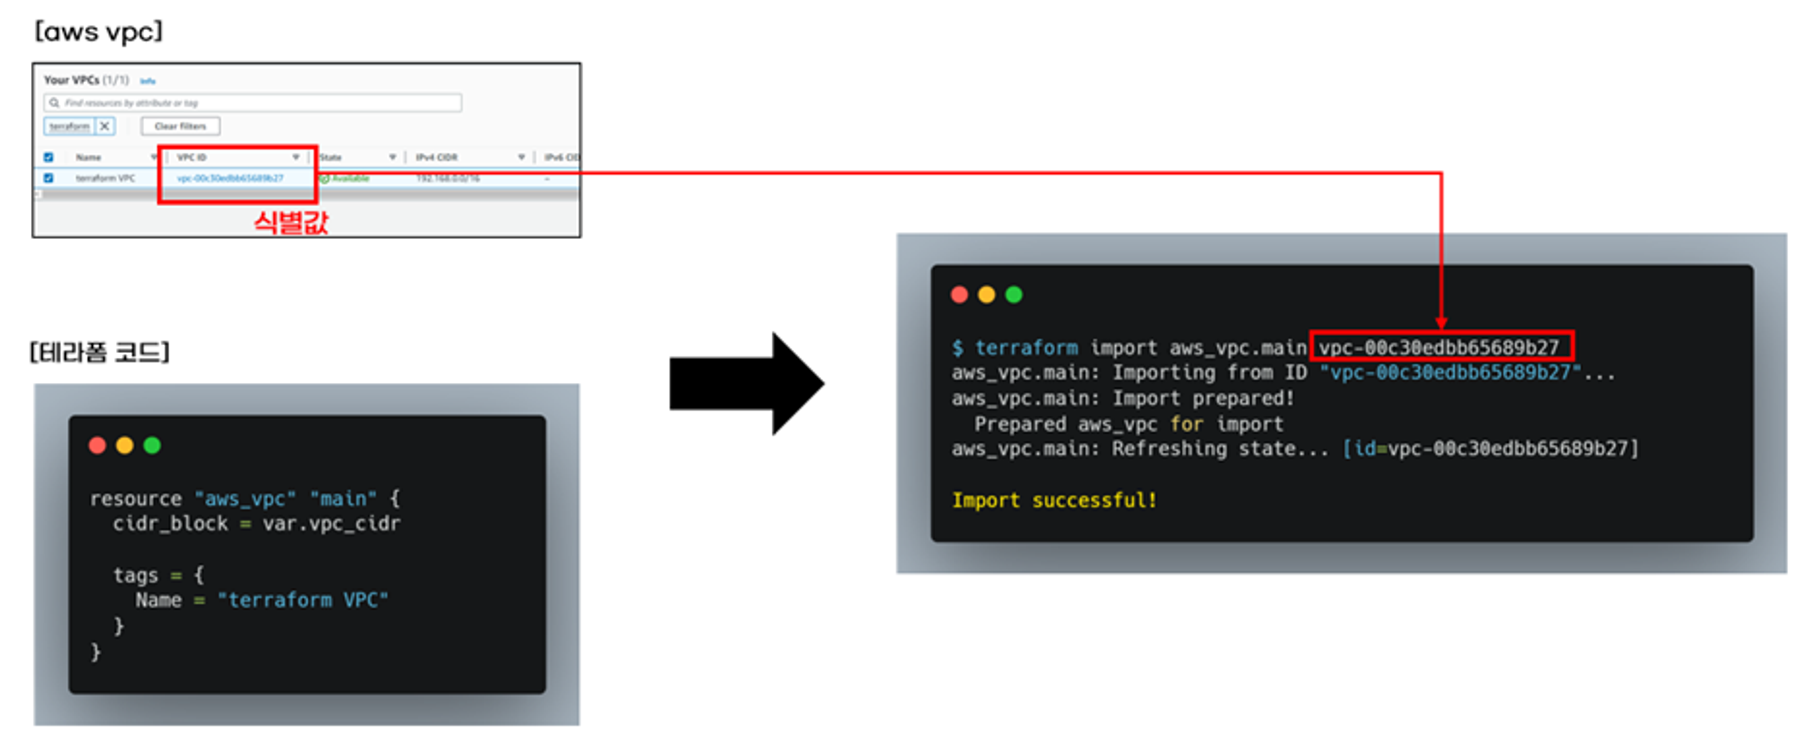
aws iam list-users | jq
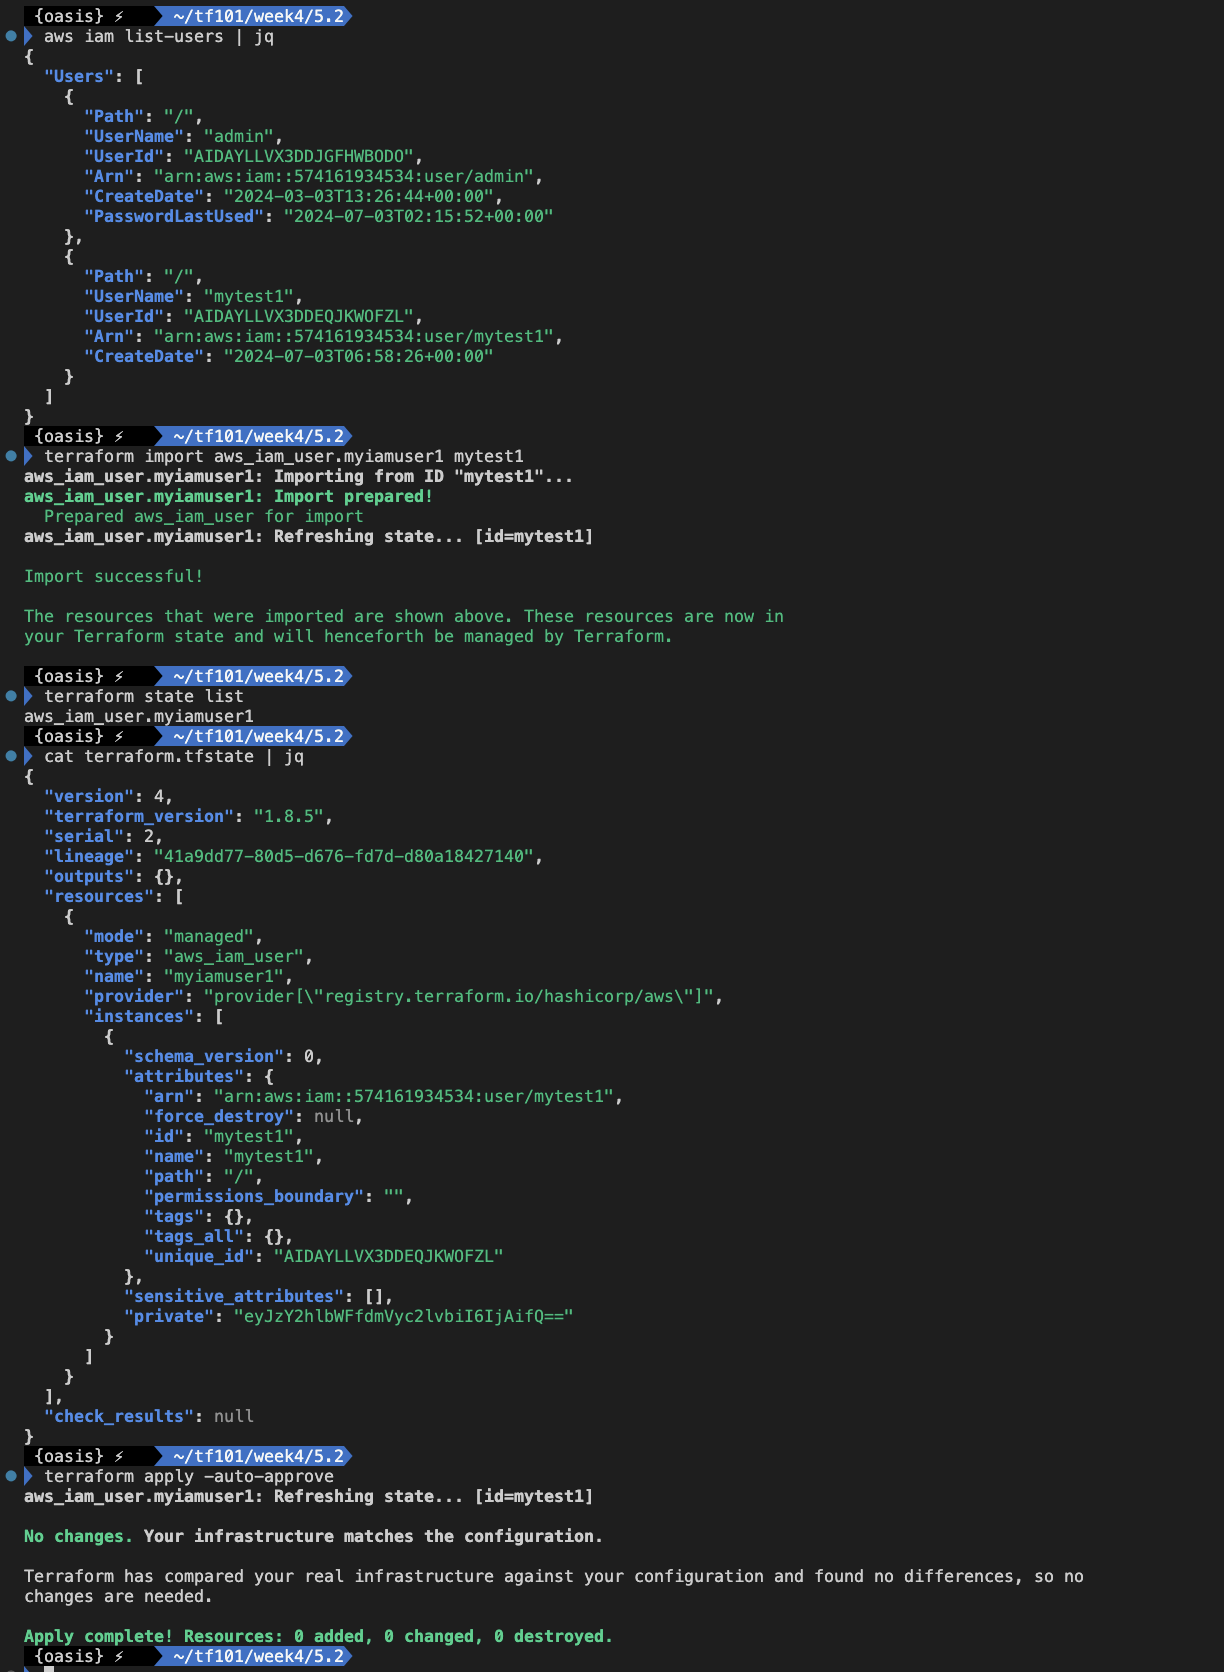
terraform import aws_iam_user.myiamuser1 mytest1- 유형 7 결과 확인
terraform import 명령어를 통해서 tfstate 파일이 생성됨
실습: Terraform Backend - AWS S3 + DynamoDB
- 사전 준비
# git clone
git clone https://github.com/sungwook-practice/t101-study.git example
cd example/state/step3_remote_backend/s3_backend
tree

# VSCODE에서 코드 파일들 확인 : main.tf, variables.tf , terraform.tfvars
## S3 버킷에 버저닝 활성화 <- 권장 옵션 설정

# terraform.tfvars 파일 내용 수정 : 각자 자신의 '닉네임' 추가하여 S3 버킷 이름 작성
bucket_name = "kgetall-hello-t1014-remote-backend"

# 생성
terraform init && terraform apply -auto-approve

# 확인
terraform state list
aws s3 ls- 2.테라폼 자원 배포 시 ‘리모트 백엔드 저장소’ 설정 사용
# VSCODE에서 provider.tf 코드 확인
cd ../vpc
ls
cat provider.tf

# VSCODE에서 provider.tf 수정
...
  backend "s3" {
    #bucket         = "<닉네임>-hello-t1014-remote-backend"
    bucket         = "gasida-hello-t1014-remote-backend"
    key            = "terraform/state-test/terraform.tfstate"
    region         = "ap-northeast-2"
    #dynamodb_table = "terraform-lock" 주석처리
  }
...

# 테라폼 초기화
terraform init
Initializing the backend...

Successfully configured the backend "s3"! Terraform will automatically
use this backend unless the backend configuration changes.
...

# tfstate 파일 로컬 확인
terraform apply --auto-approve
terraform state list
ls

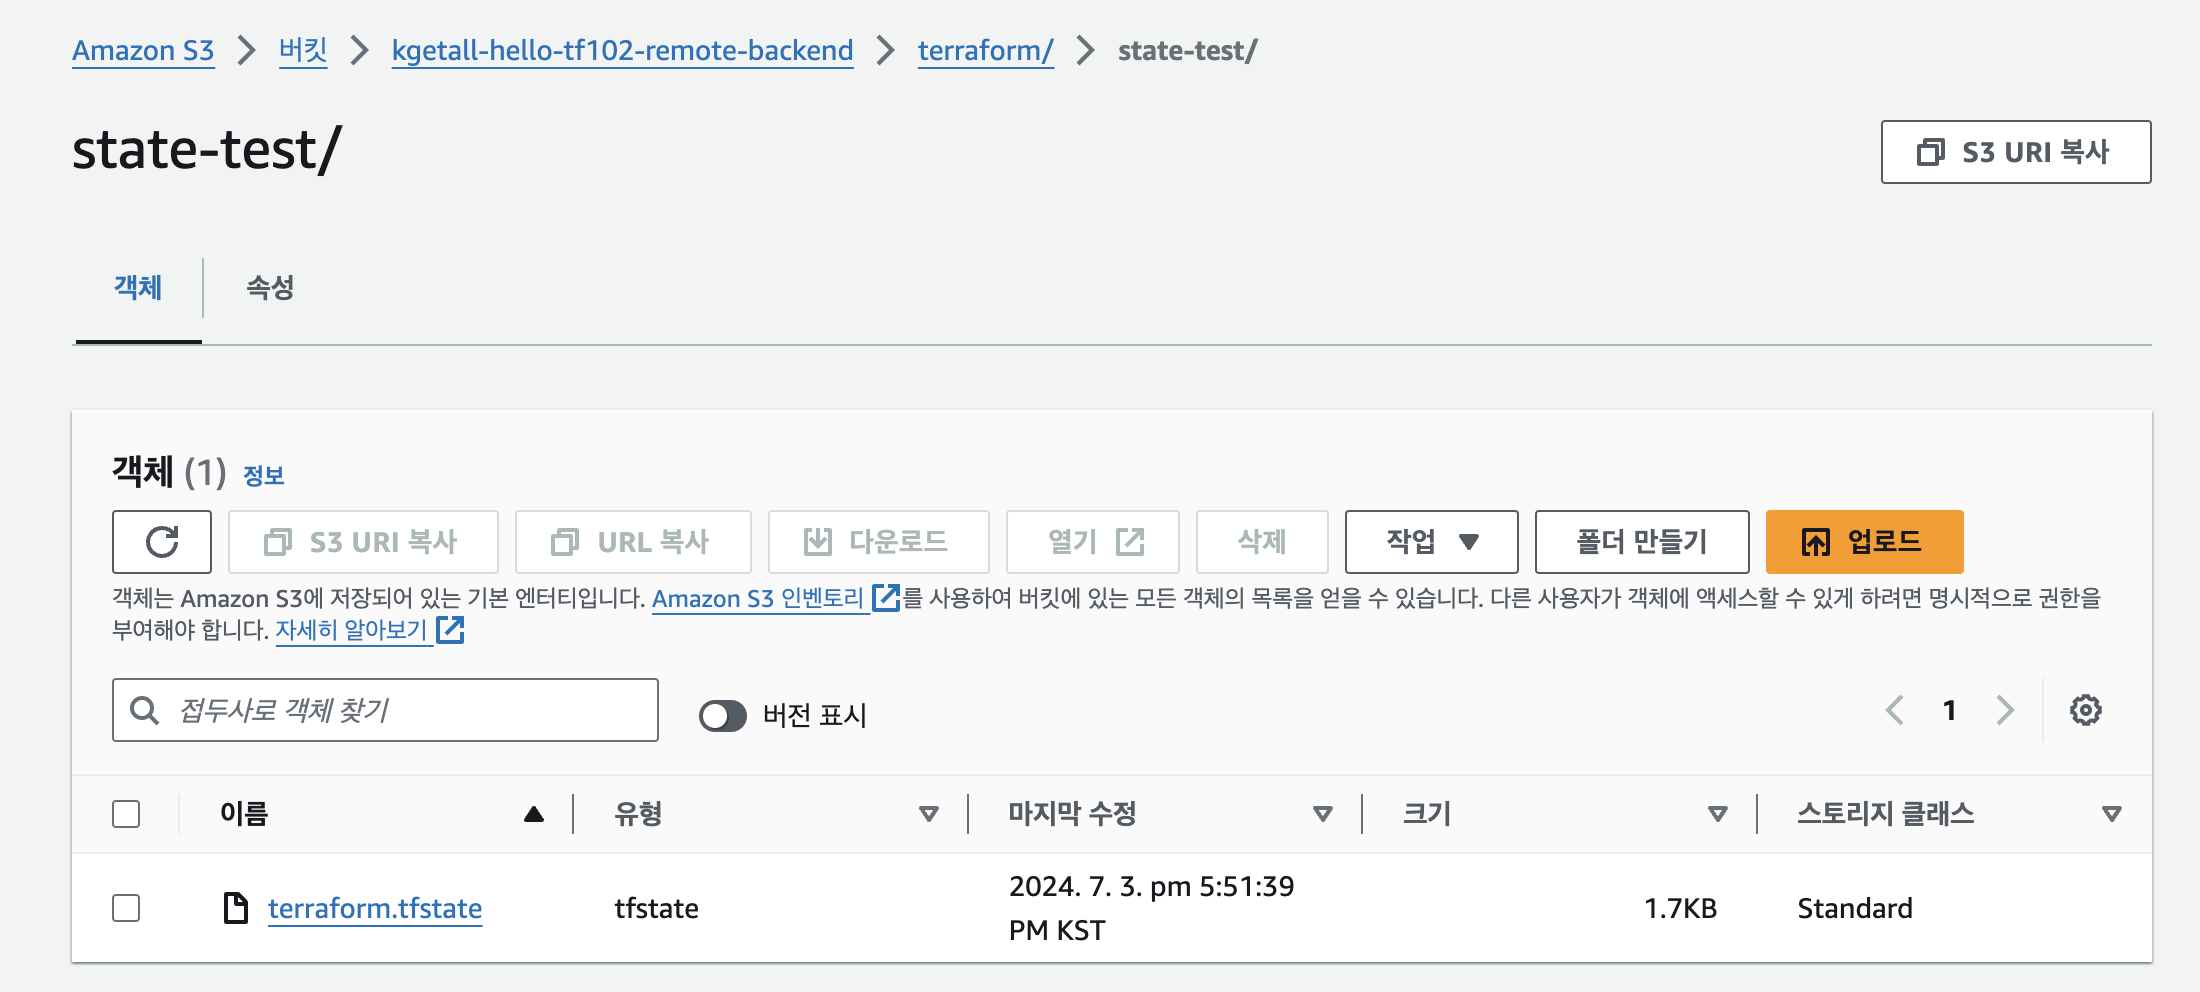
# AWS S3 버킷 내에 tfstate 파일 확인
MYBUCKET=kgetall-hello-t1014-remote-backend
aws s3 ls s3://$MYBUCKET --recursive --human-readable --summarize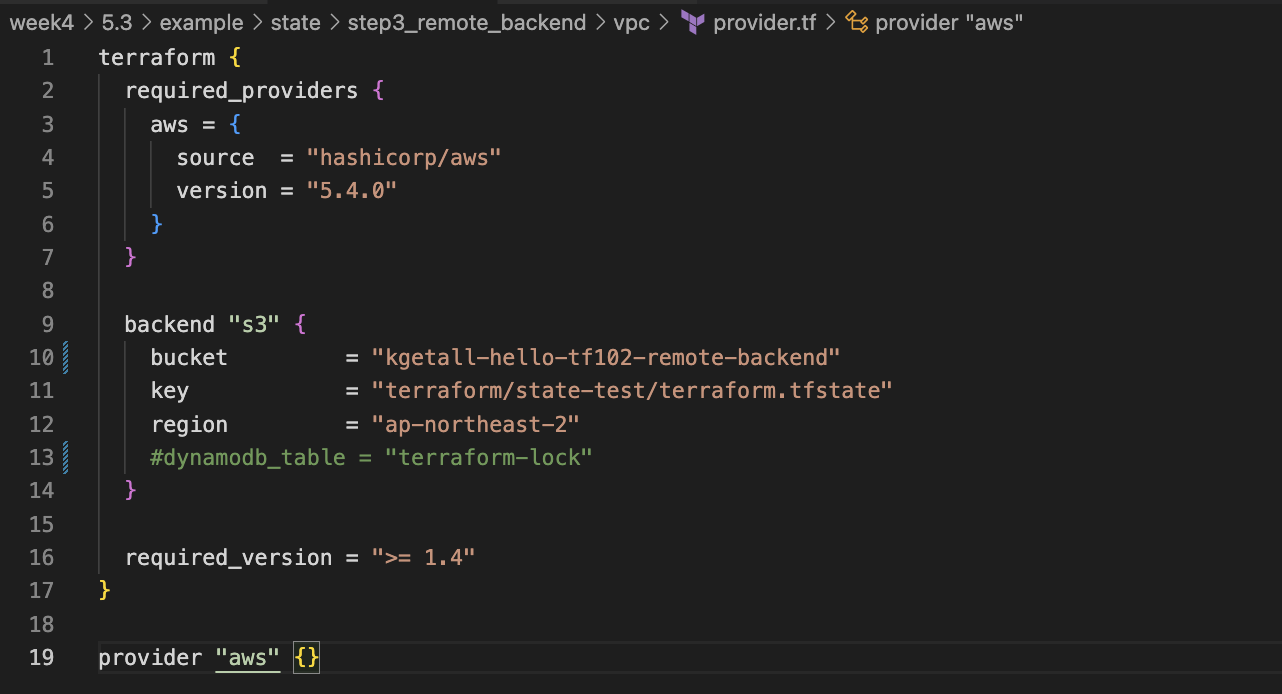
- 3.[사전 준비 2] Locking 을 위한 DynamoDB 활용을 위해 DynamoDB 생성
테라폼에서 DynamoDB 잠금을 사용하기 위해서는 LockID 라는 기본 키가 있는 테이블을 생성해야됨
# VSCODE에서 provider.tf 코드 확인
cd ../dynamodb
ls
cat main.tf

# 생성
terraform init && terraform apply -auto-approve

# 확인
terraform state list
terraform state show aws_dynamodb_table.terraform_state_lock

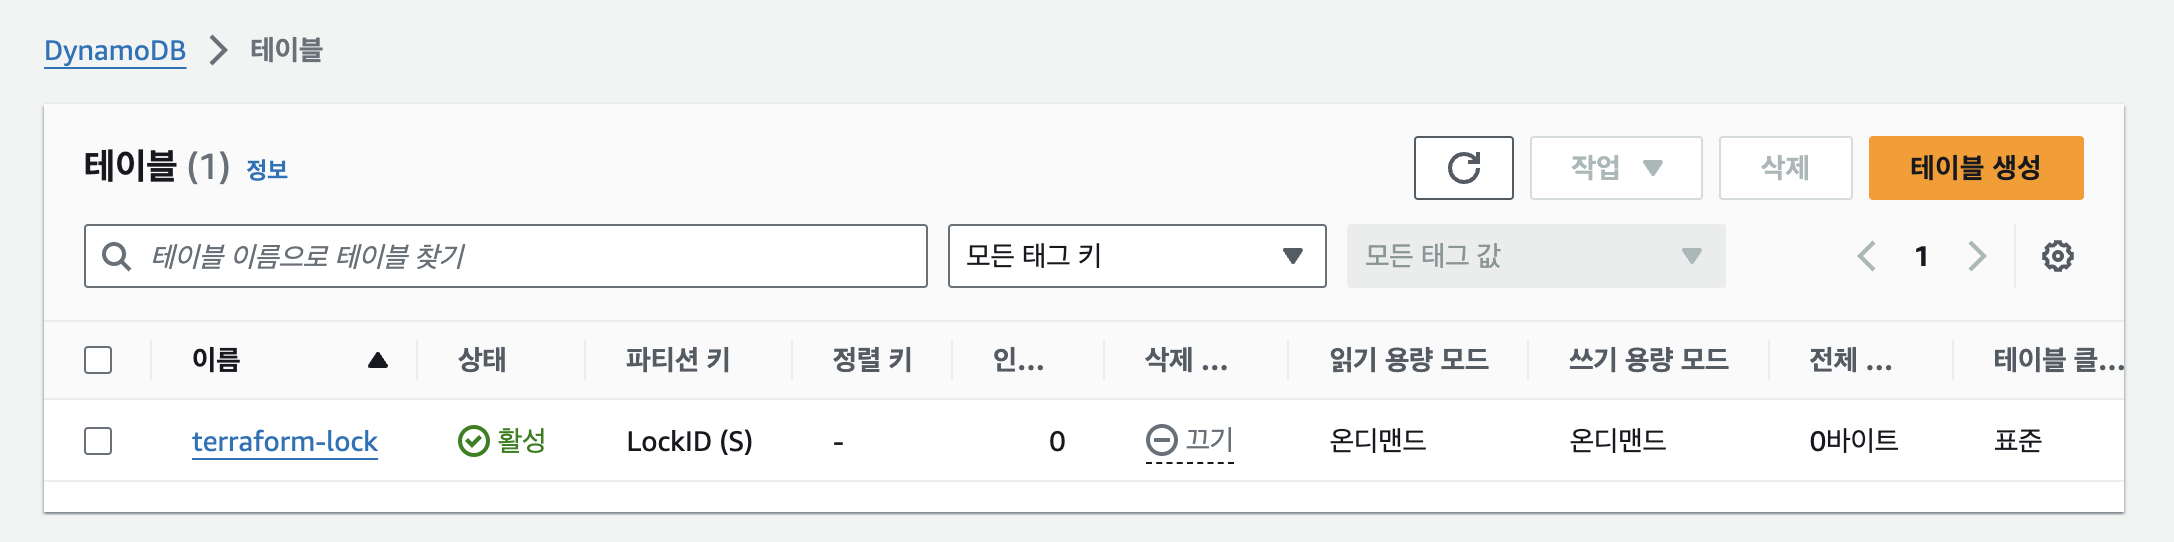
# DynamoDB 테이블 생성 확인
aws dynamodb list-tables --output text
TABLENAMES	terraform-lock

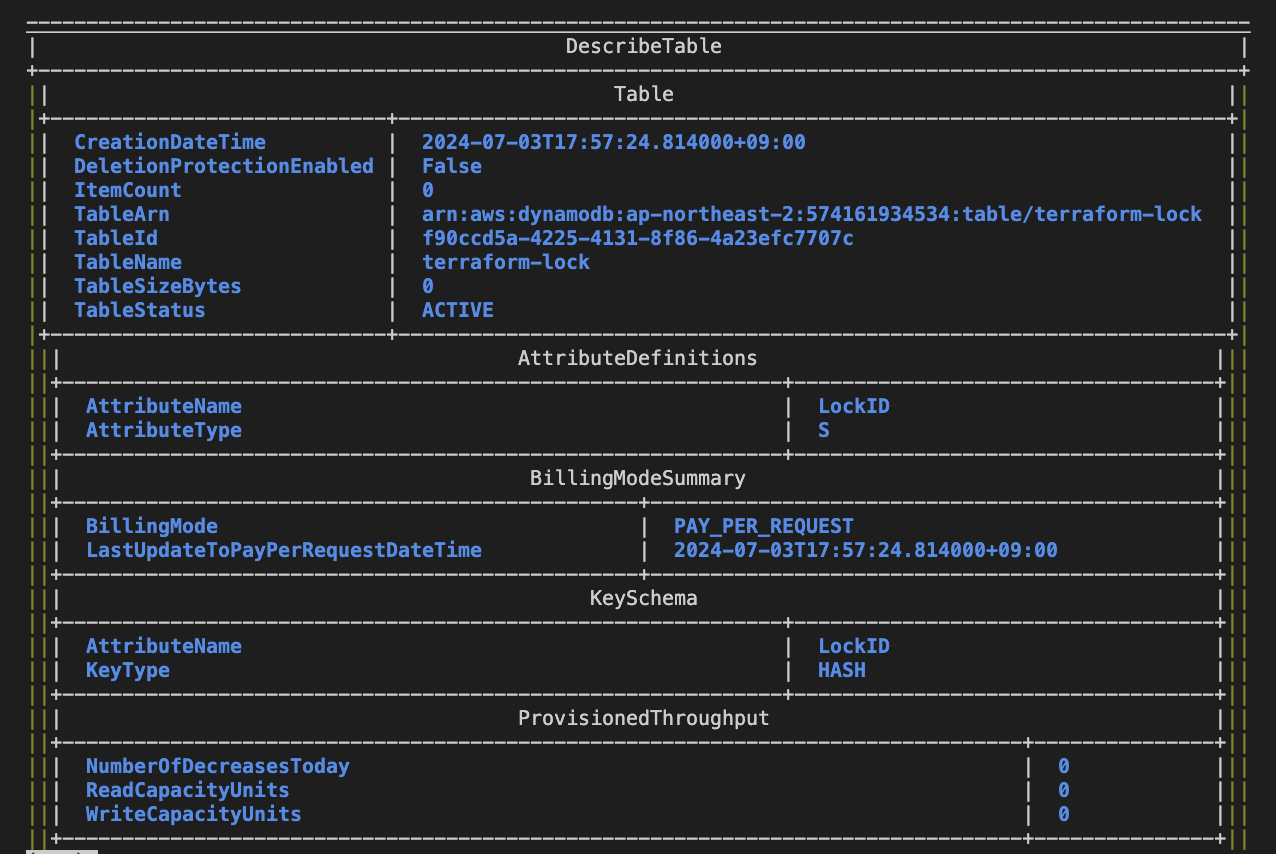
aws dynamodb describe-table --table-name terraform-lock | jq
aws dynamodb describe-table --table-name terraform-lock --output table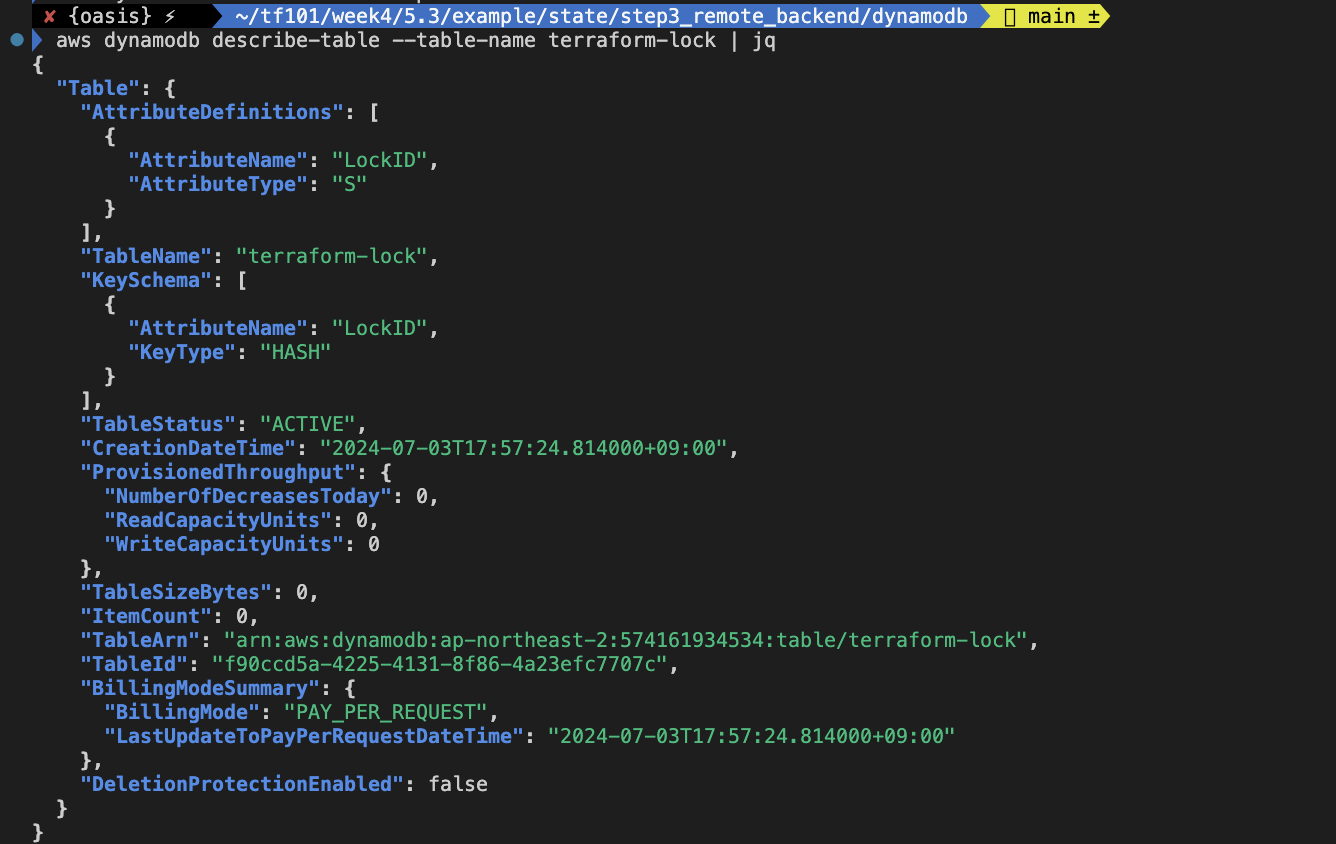
- 4.2번 테라폼 자원 배포에 백엔드 설정 수정 및 적용
# VSCODE에서 provider.tf 코드 확인
cd ../vpc
cat provider.tf

# VSCODE에서 provider.tf 수정 : dynamodb_table = "terraform-lock" 주석 제거
...
  backend "s3" {
    bucket         = "gasida-hello-t1014-remote-backend"
    key            = "terraform/state-test/terraform.tfstate"
    region         = "ap-northeast-2"
    dynamodb_table = "terraform-lock"
  }
...

# backend설정이 달라졌으므로 terraform init 으로 적용
# Reconfigure a backend, and attempt to migrate any existing state.
terraform init -migrate-state- VPC tag 수정 후 apply 와서 Locking 확인
# main.tf 수정 : '2' 추가
resource "aws_vpc" "main" {
  cidr_block = var.vpc_cidr

  tags = {
    Name = "terraform VPC 2"
  }
}

# apply 후 DynamoDB 테이블 확인
terraform apply
...
 Enter a value: <입력하지 않고 대기>

# 아래 LockID 정보 확인 후 apply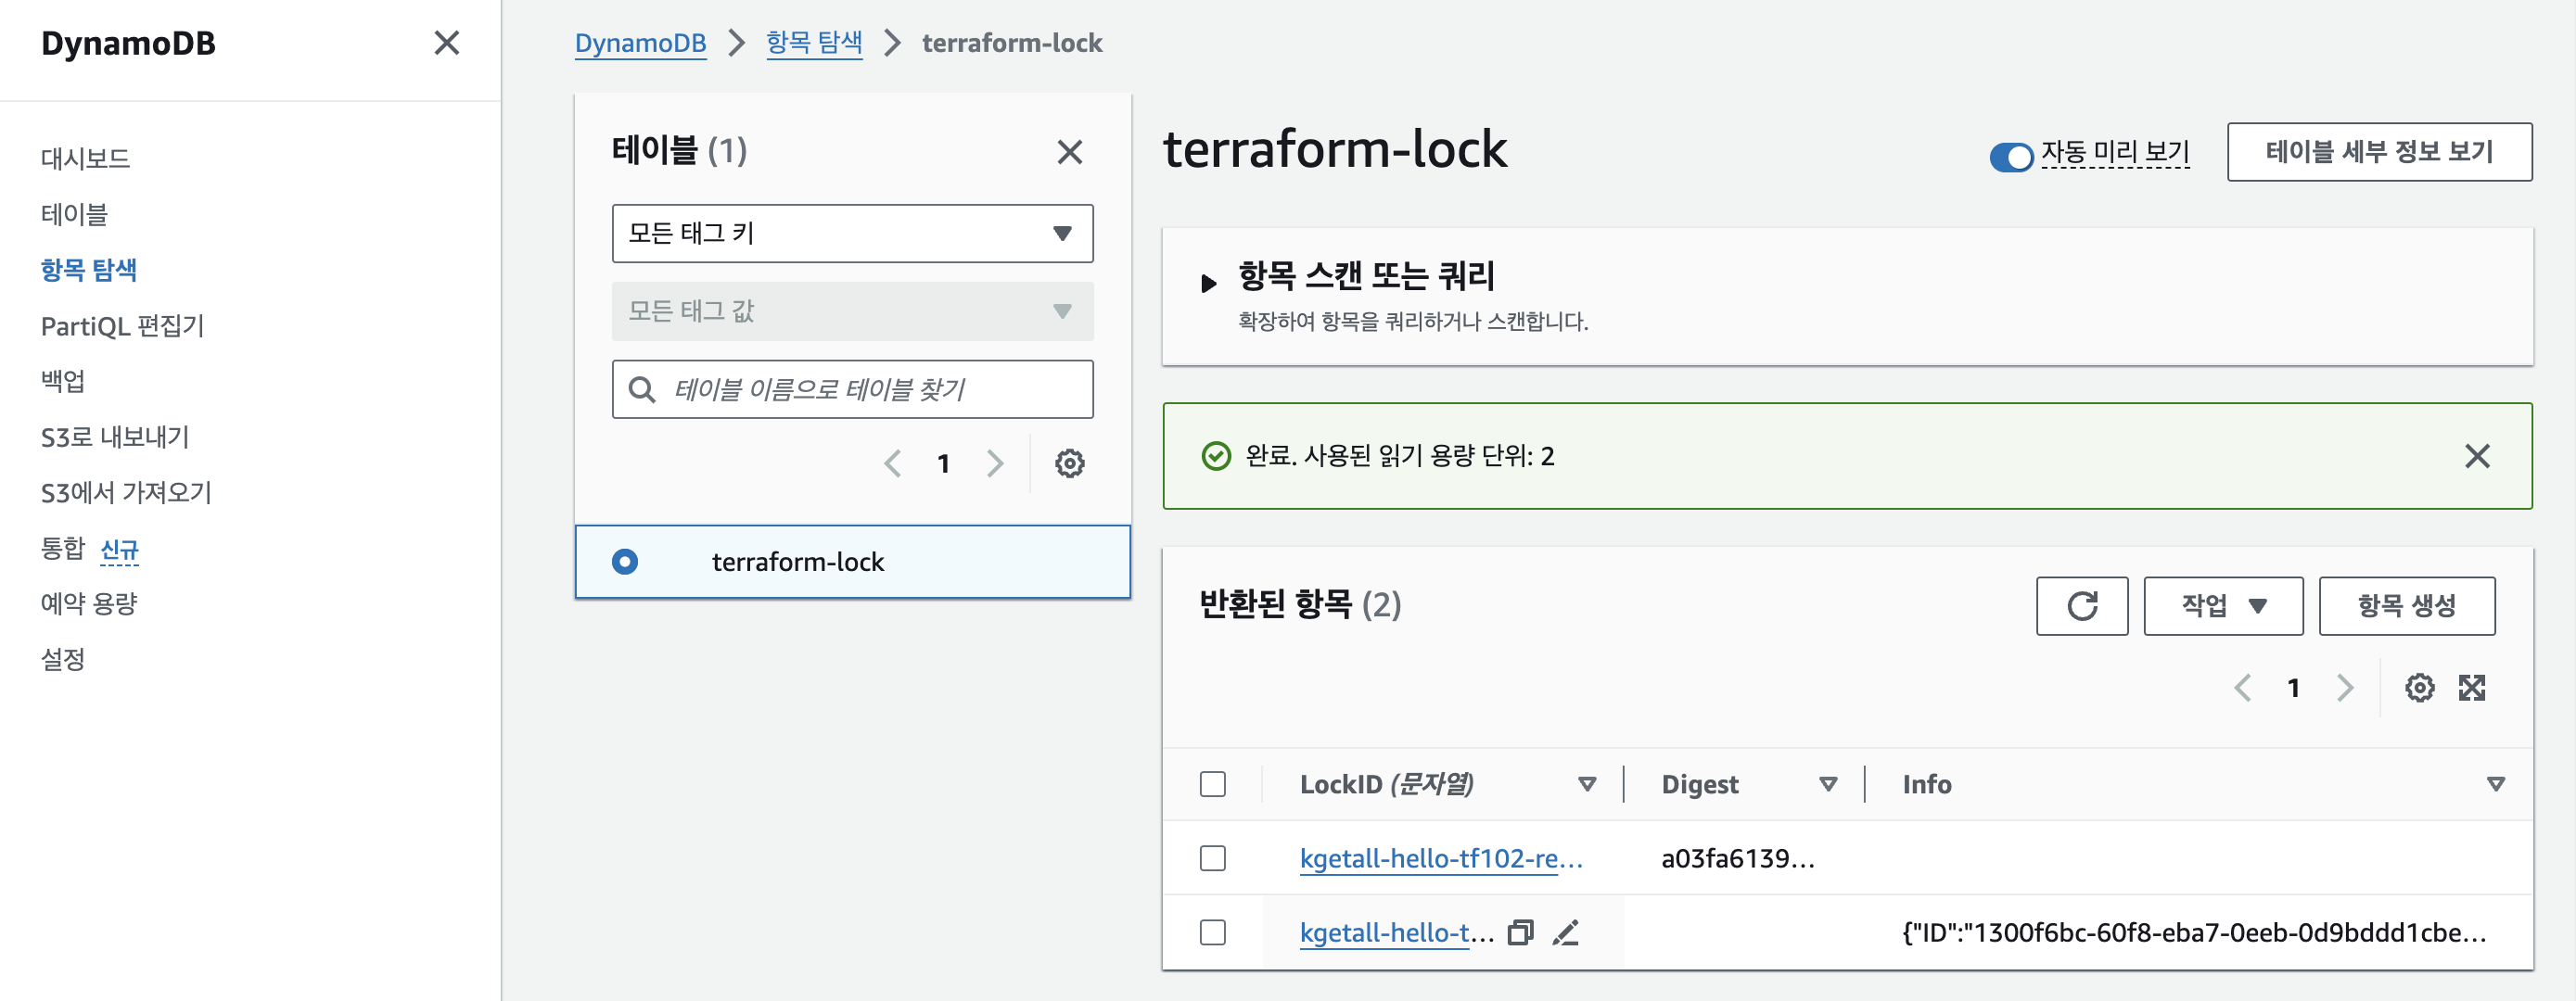
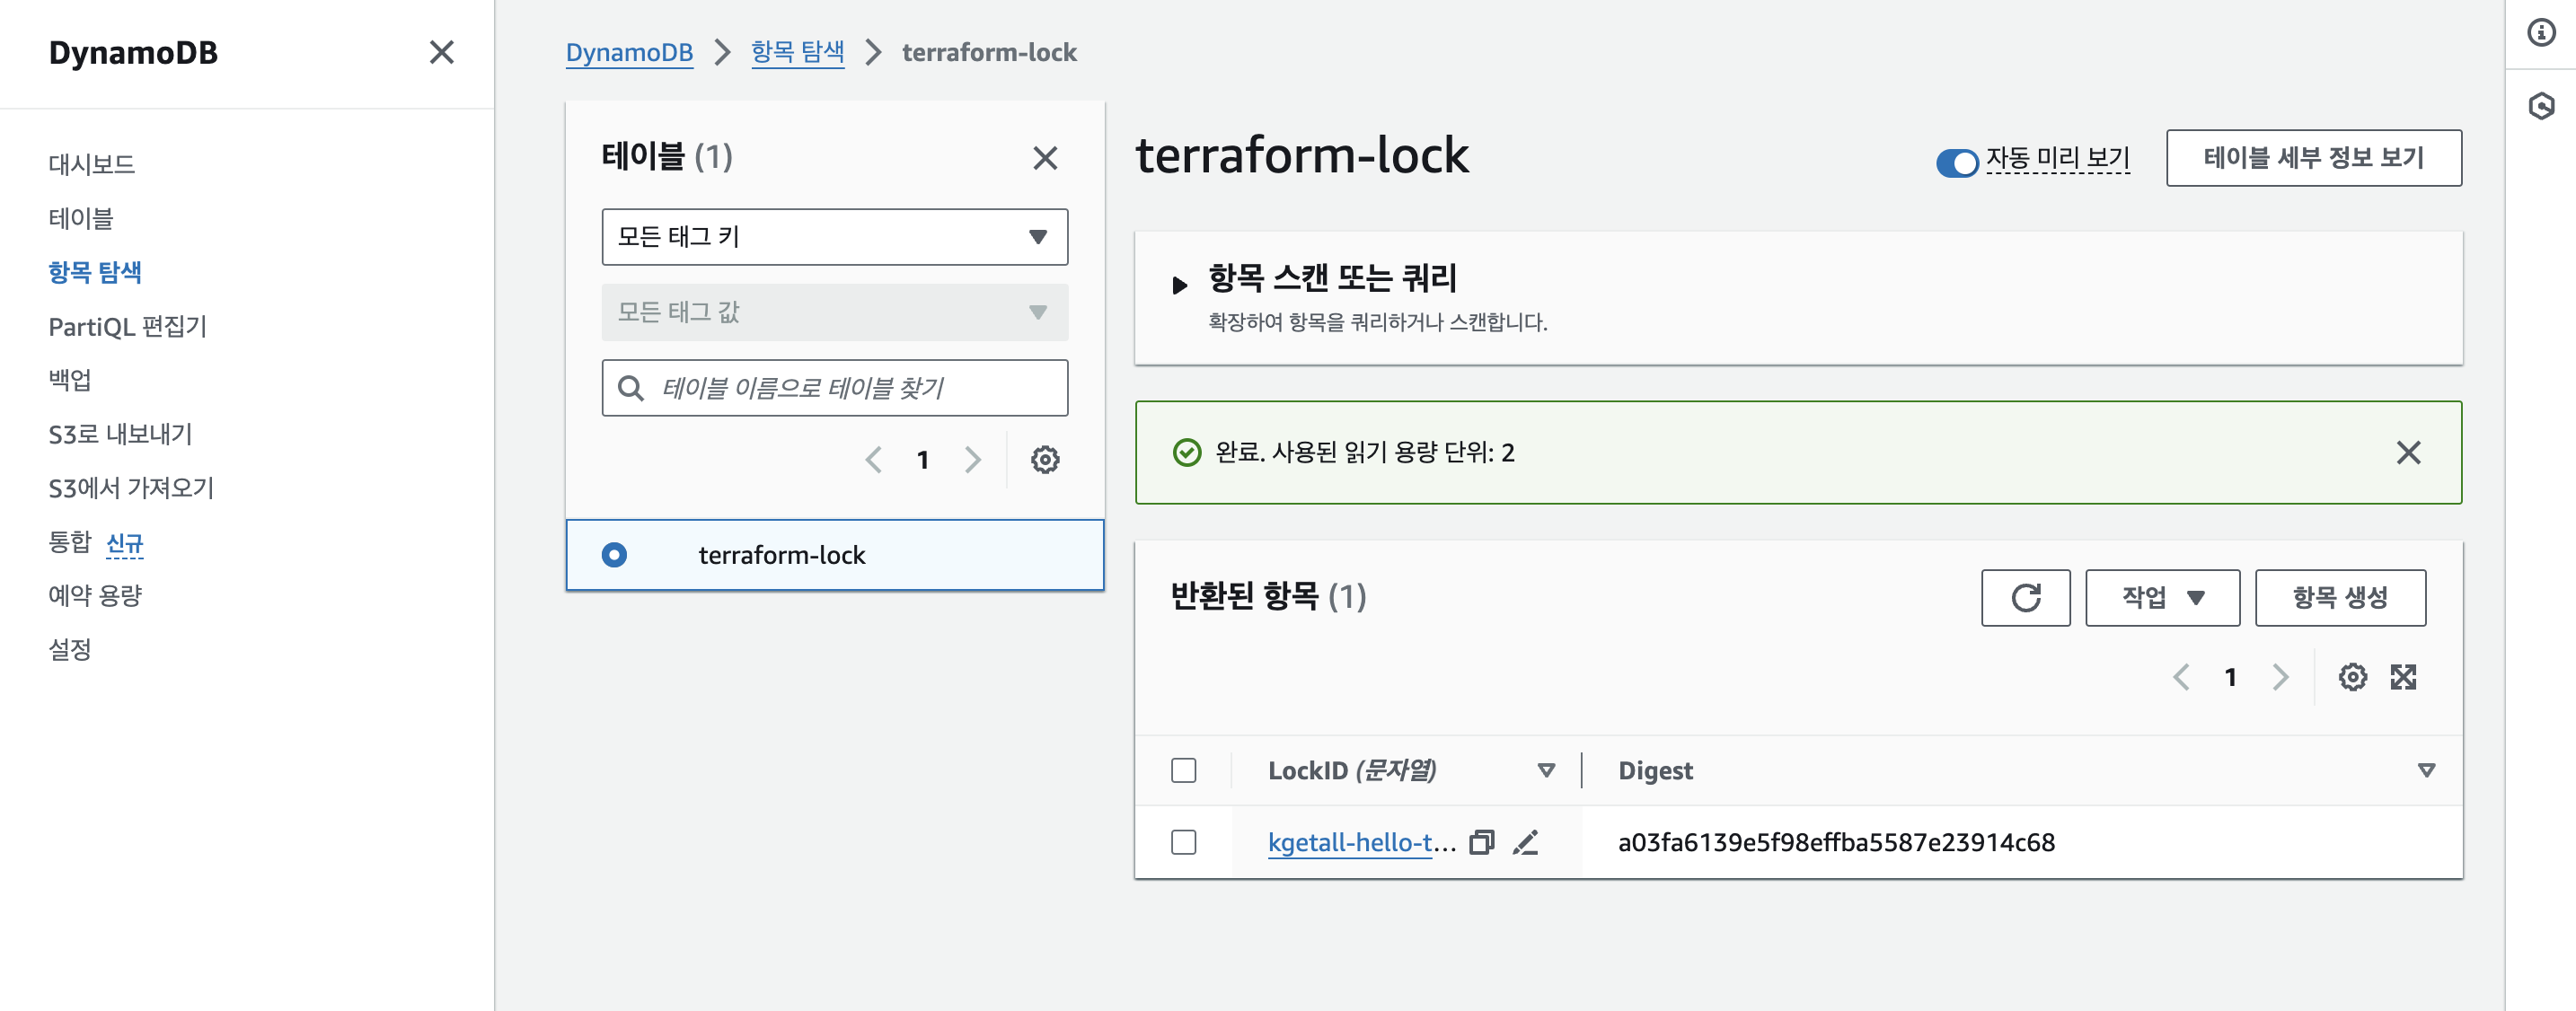
# apply 완료 후 다시 DynamoDB 테이블 확인 : item 없음 확인item이 없음
- S3 버저닝 정보 확인
# main.tf 수정 : '3' 추가
resource "aws_vpc" "main" {
  cidr_block = var.vpc_cidr

  tags = {
    Name = "terraform VPC 3"
  }
}

# apply
terraform apply -auto-approve

# S3 버킷에 파일 확인
aws s3 ls s3://$MYBUCKET --recursive --human-readable --summarize

# 버저닝된 파일 확인
aws s3api list-object-versions --bucket $MYBUCKET | egrep "Key|VersionId|LastModified"
            "Key": "dev/terraform.tfstate",
            "VersionId": "oyo59fIIQ239_tVTY88upFoVgnp630BC",
            "LastModified": "2022-10-23T08:54:04+00:00",
            "Key": "dev/terraform.tfstate",
            "VersionId": "vlOO1wCPEy3mzAOB7W76171u_i3WSG8r",
            "LastModified": "2022-10-23T08:53:04+00:00",
            "Key": "dev/terraform.tfstate",
            "VersionId": "ukF5F_CMKQhoF_jDGftbsMO0eNIGLmDV",
            "LastModified": "2022-10-23T08:51:55+00:00",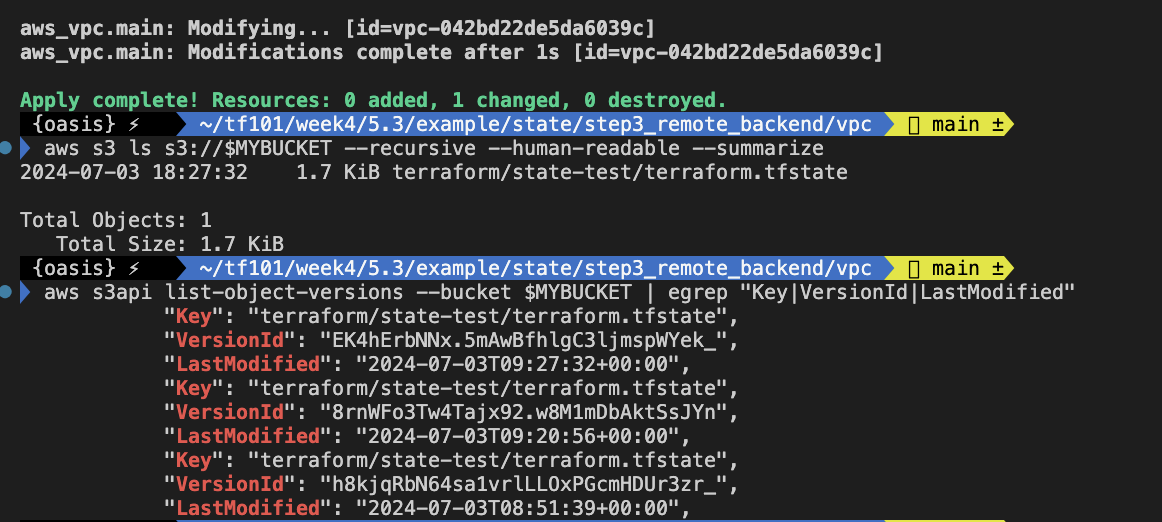
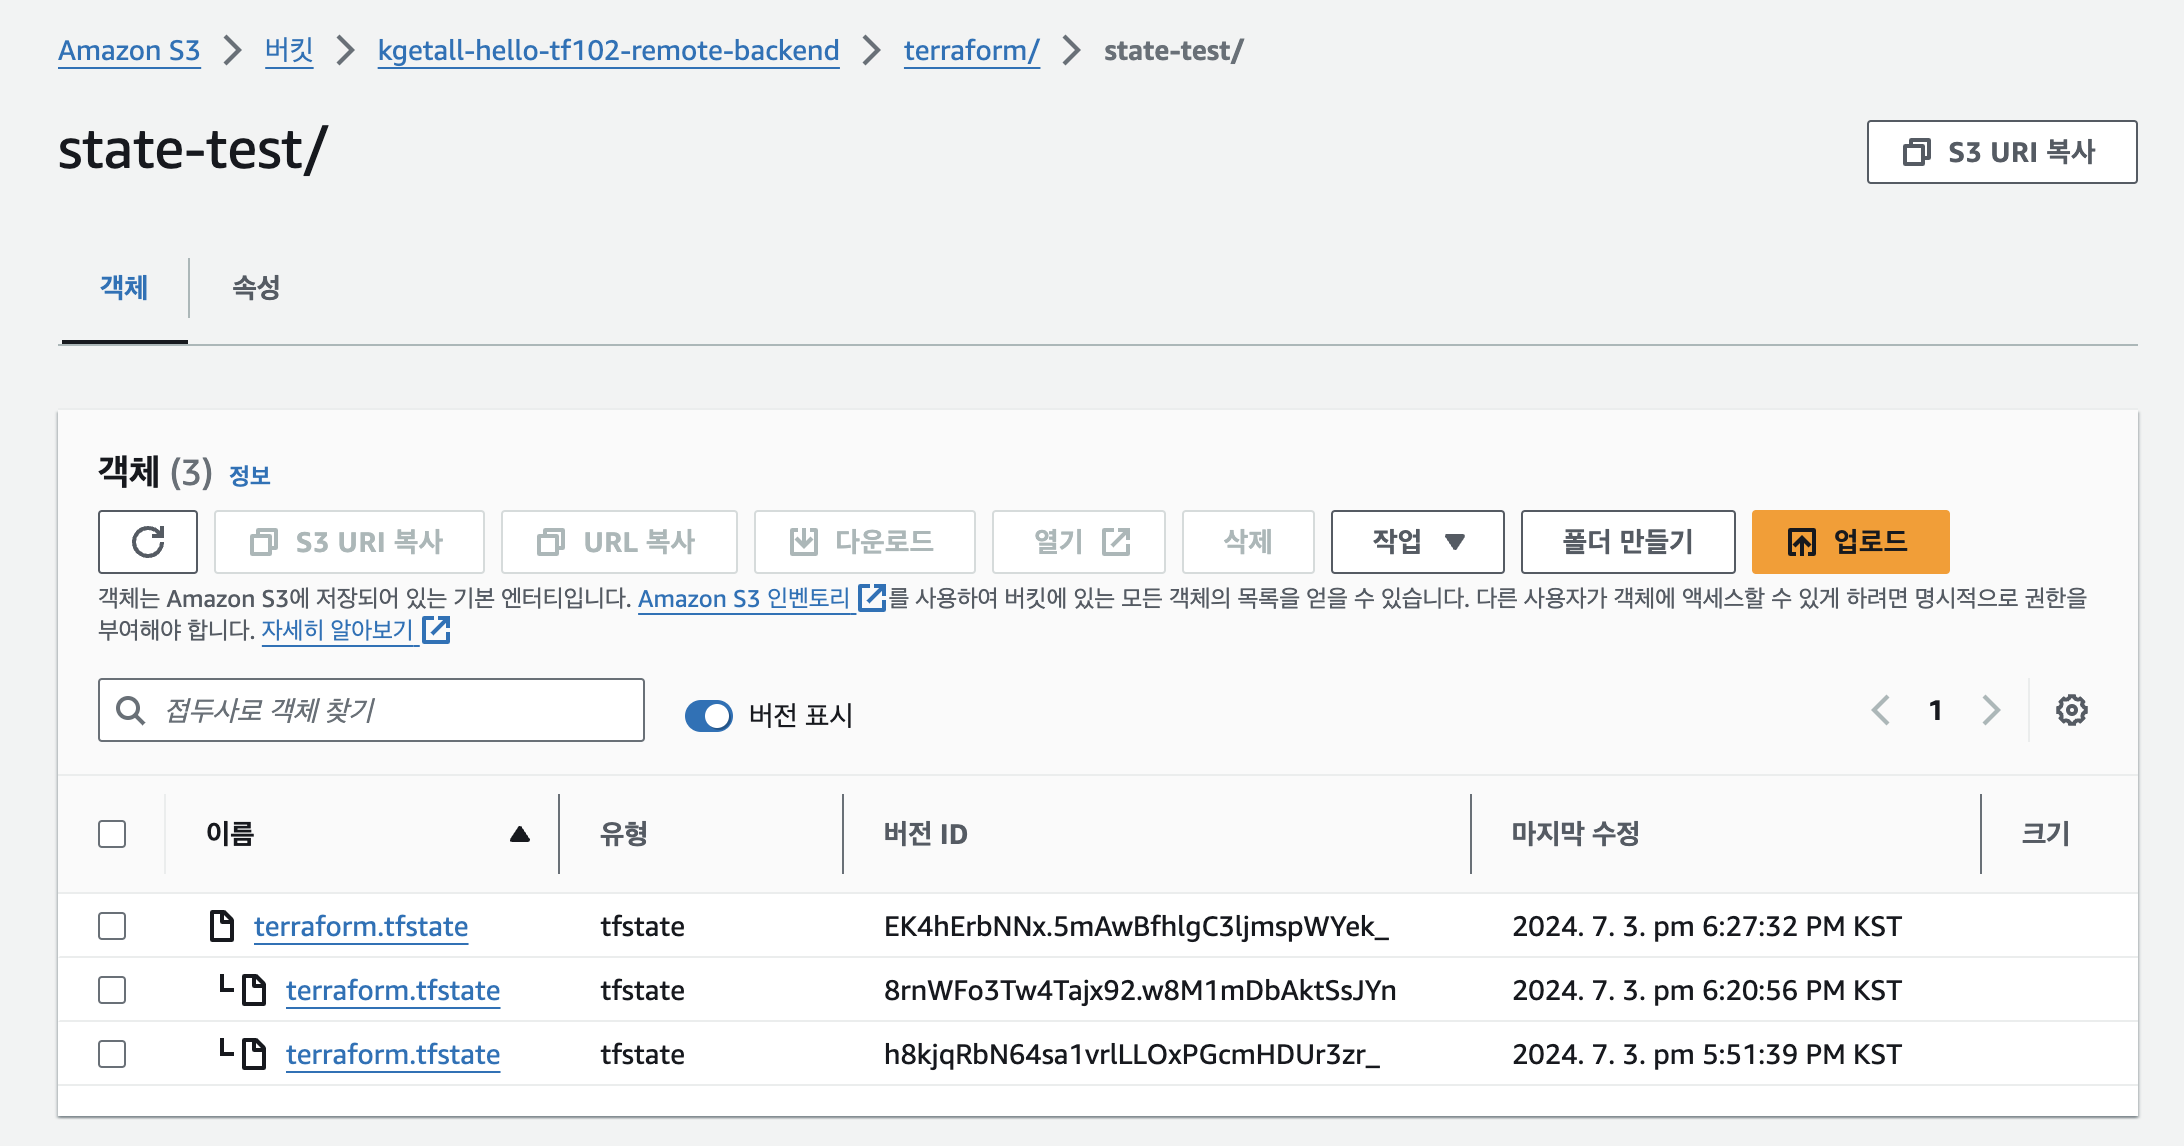
s3 버킷에 버전 표시 확인
- 실습 리소스 삭제
# 테라폼 배포 리소스 삭제 : 현재 vpc 디렉터리
terraform destroy -auto-approve

# DynamoDB 삭제
cd ../dynamodb
terraform destroy -auto-approve

# S3 삭제
cd ../s3_backend
terraform destroy -auto-approve

# S3 버킷에 객체 삭제
aws s3 rm s3://$MYBUCKET --recursive

# S3 버킷에 버저닝 객체 삭제
aws s3api delete-objects \
    --bucket $MYBUCKET \
    --delete "$(aws s3api list-object-versions \
    --bucket "$MYBUCKET" \
    --output=json \
    --query='{Objects: Versions[].{Key:Key,VersionId:VersionId}}')"

# S3 버킷에 삭제마커 삭제
aws s3api delete-objects --bucket $MYBUCKET \
    --delete "$(aws s3api list-object-versions --bucket "$MYBUCKET" \
    --query='{Objects: DeleteMarkers[].{Key:Key,VersionId:VersionId}}')"

# S3 삭제
terraform destroy -auto-approve
실습: 워크스페이스 생성
- main.tf 생성
resource "aws_instance" "mysrv1" {
  ami           = "ami-0ea4d4b8dc1e46212"
  instance_type = "t2.micro"
  subnet_id = "subnet-0f36c6347b49c5d4f"
  tags = {
    Name = "t101-study"
  }
}-
실행 및 확인
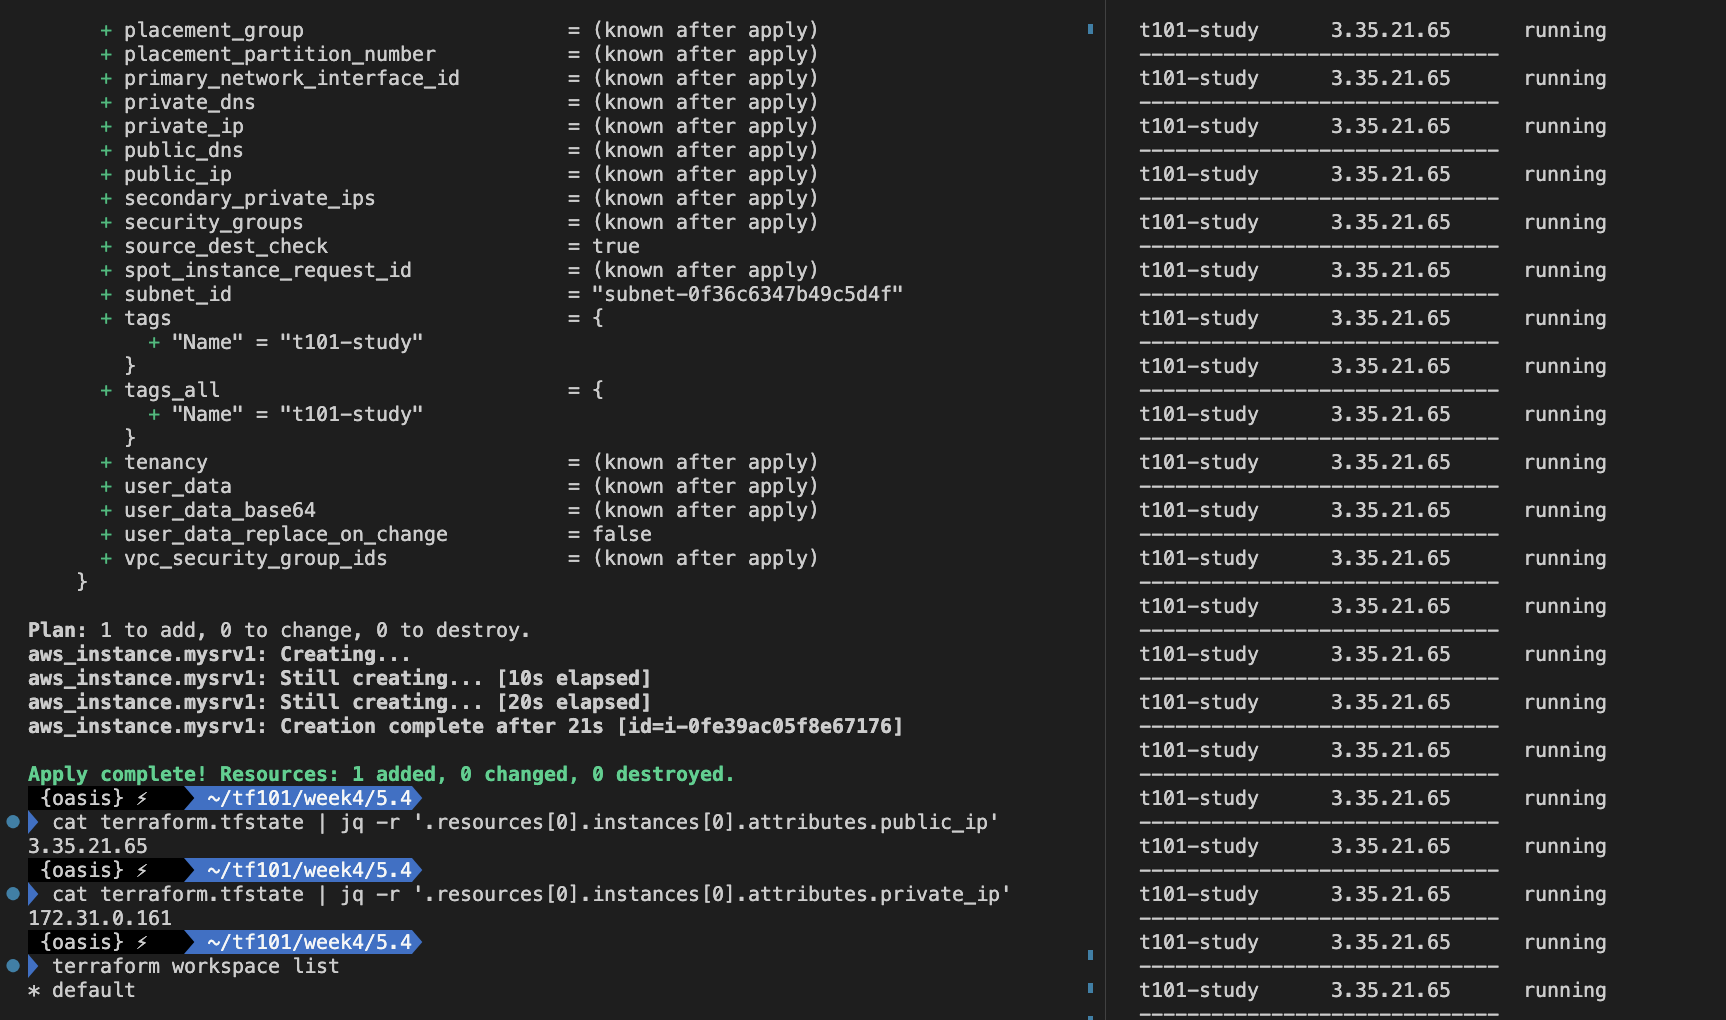
-
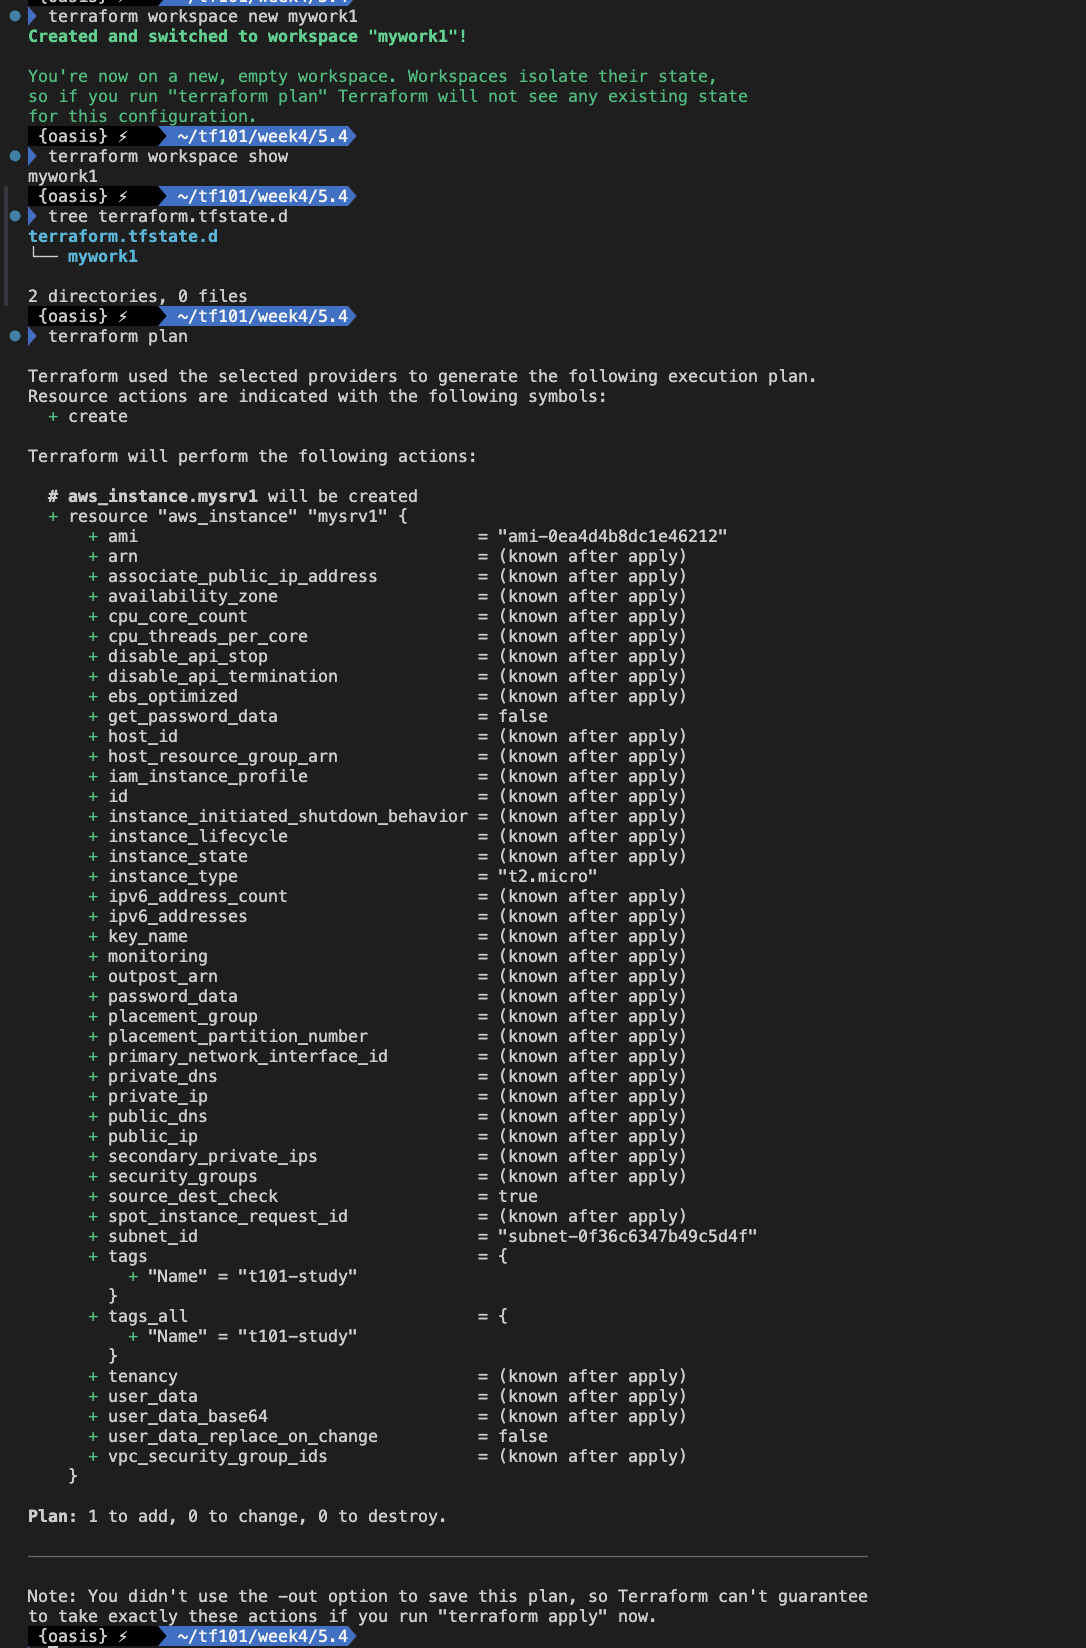
신규 워크스페이스 생성 및 확인
# 새 작업 공간 workspace 생성 : mywork1
terraform workspace new mywork1
terraform workspace show

# 서브 디렉터리 확인
tree terraform.tfstate.d
terraform.tfstate.d
└── mywork1

# plan 시 어떤 결과 내용이 출력되나요?
terraform plan

# apply 해보자!
terraform apply -auto-approve


# 워크스페이스 확인
terraform workspace list

#
cat terraform.tfstate | jq -r '.resources[0].instances[0].attributes.public_ip'
cat terraform.tfstate.d/mywork1/terraform.tfstate | jq -r '.resources[0].instances[0].attributes.public_ip'

# graph 확인
terraform graph > graph.dot


# 새 작업 공간 workspace 생성 : mywork2
terraform workspace new mywork2

# 서브 디렉터리 확인
tree terraform.tfstate.d
...

# plan & apply
terraform plan && terraform apply -auto-approve
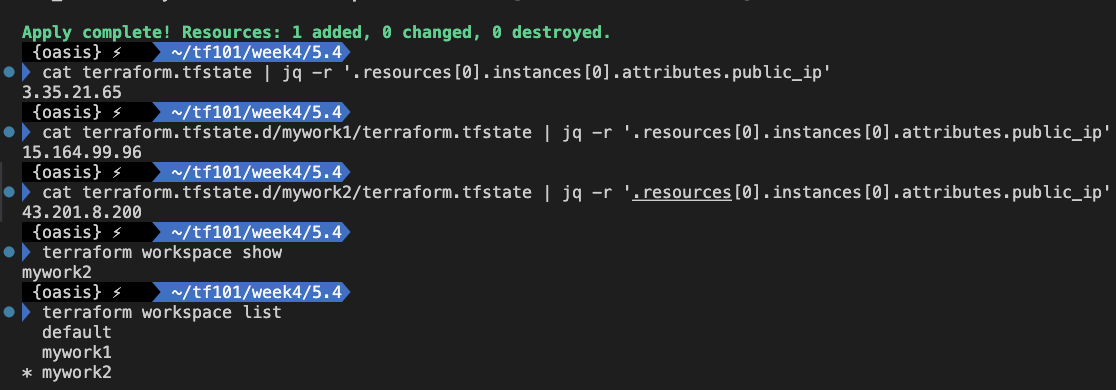
cat terraform.tfstate | jq -r '.resources[0].instances[0].attributes.public_ip'
cat terraform.tfstate.d/mywork1/terraform.tfstate | jq -r '.resources[0].instances[0].attributes.public_ip'
cat terraform.tfstate.d/mywork2/terraform.tfstate | jq -r '.resources[0].instances[0].attributes.public_ip'

# workspace 정보 확인
terraform workspace show
terraform workspace list

# 실습 리소스 삭제
terraform workspace select default
terraform destroy -auto-approve

terraform workspace select mywork1
terraform destroy -auto-approve

terraform workspace select mywork2
terraform destroy -auto-approve- 실행 및 확인
mywork1, mywork2 2개의 워크스페이스 생성되었고, default를 포함하여 각 워크스페이스마다 1개의 ec2 인스턴스가 실행되어 있음