가시다님의 T101 [4기] 스터디 내용을 정리한 포스트 입니다.
블로그의 실습 내용들은 ‘테라폼으로 시작하는 IaC’ 책을 기준하여 정리하였습니다.
6. Module
실습: 모듈화
- 자식 모듈과 루트 모듈을 만들고 루트 모듈에서 자식 모듈을 호출하여 결과를 확인해 봅니다.
- 자식 모듈과 루트 모듈은 아래 디렉터리 구조를 따른다.
- random_pet는 이름을 자동으로 생성하고, random_password는 사용자의 패스워드를 설정한다 - random_pet
- random_password는 random 프로바이더 리소스로 난수 형태로 패스워드를 만들 수 있다.
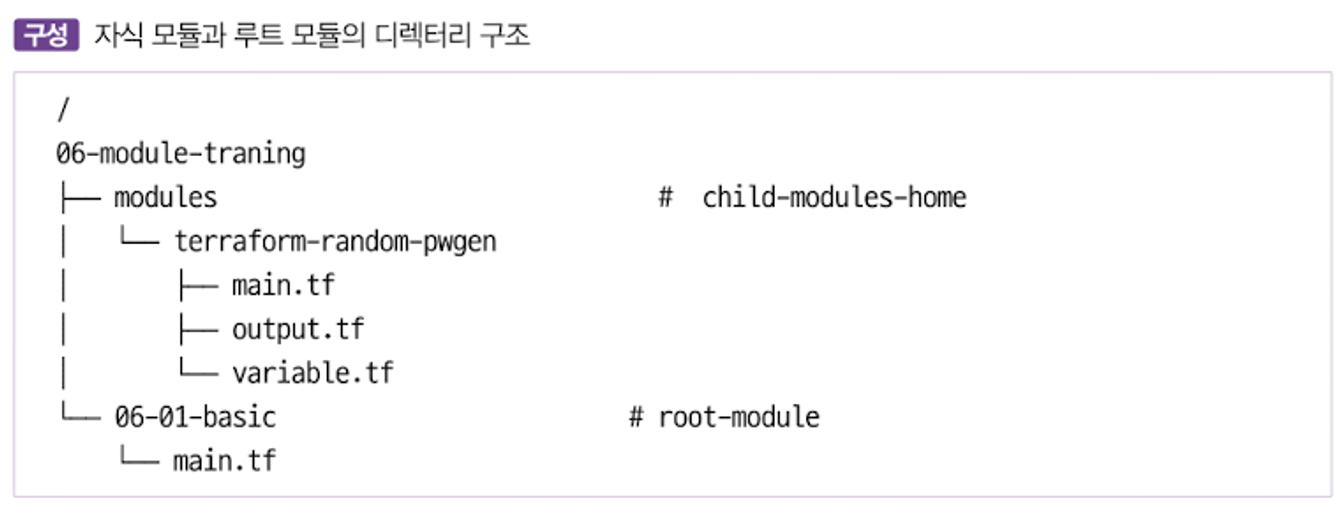
- 자식 모듈 - main.tf
resource "random_pet" "name" {
  keepers = {
    ami_id = timestamp()
  }
}

resource "random_password" "password" {
  length = var.isDB ? 16 : 10
  special = var.isDB ? true : false
  override_special = "!#$%*?"
}- 자식 모듈 - variable.tf
variable "isDB" {
  type = bool
  default = false
  description = "패스워드 대상의 DB 여부"
}- 자식 모듈 - output.tf
output "id" {
  value = random_pet.name.id
}

output "pw" {
  value = nonsensitive(random_password.password.result)
}-
자식 모듈 동작 테스트

-
자식 모듈 호출 실습
06-module-traning/06-01-basic/main.tf 파일 생성
#main.tf
module "mypw1" {
  source = "../modules/terraform-random-pwgen"
}

module "mypw2" {
  source = "../modules/terraform-random-pwgen"
  isDB   = true
}

output "mypw1" {
  value  = module.mypw1
}

output "mypw2" {
  value  = module.mypw2
}- 실행
루트 모듈에서 자식 모듈을 정상적으로 호출되는 것을 확인 할 수 있다.
#
terraform init && terraform plan && terraform apply -auto-approve
Apply complete! Resources: 2 added, 0 changed, 0 destroyed.
Outputs:
mypw1 = {
  "id" = "equipped-mustang"
  "pw" = "OXST1EYqQc"
}
mypw2 = {
  "id" = "diverse-impala"
  "pw" = "y8mEbOJhS6dCTiK#"
}

# 확인
terraform state list

# tfstate에 모듈 정보 확인 : VSCODE에서 terraform.tfstate 파일 확인
cat terraform.tfstate | grep module

# terraform init 시 생성되는 modules.json 파일 확인
tree .terraform
.terraform
├── modules
│   └── modules.json
...

## 모듈로 묶여진 리소스는 module이라는 정의를 통해 단순하게 재활용하고 반복 사용할 수 있다.
## 모듈의 결과 참조 형식은 module.<모듈 이름>.<output 이름>으로 정의된다.
cat .terraform/modules/modules.json | jq
{
  "Modules": [
    {
      "Key": "",
      "Source": "",
      "Dir": "."
    },
    {
      "Key": "mypw1",
      "Source": "../modules/terraform-random-pwgen",
      "Dir": "../modules/terraform-random-pwgen"
    },
    {
      "Key": "mypw2",
      "Source": "../modules/terraform-random-pwgen",
      "Dir": "../modules/terraform-random-pwgen"
    }
  ]
}

# graph 확인
terraform graph > graph.dot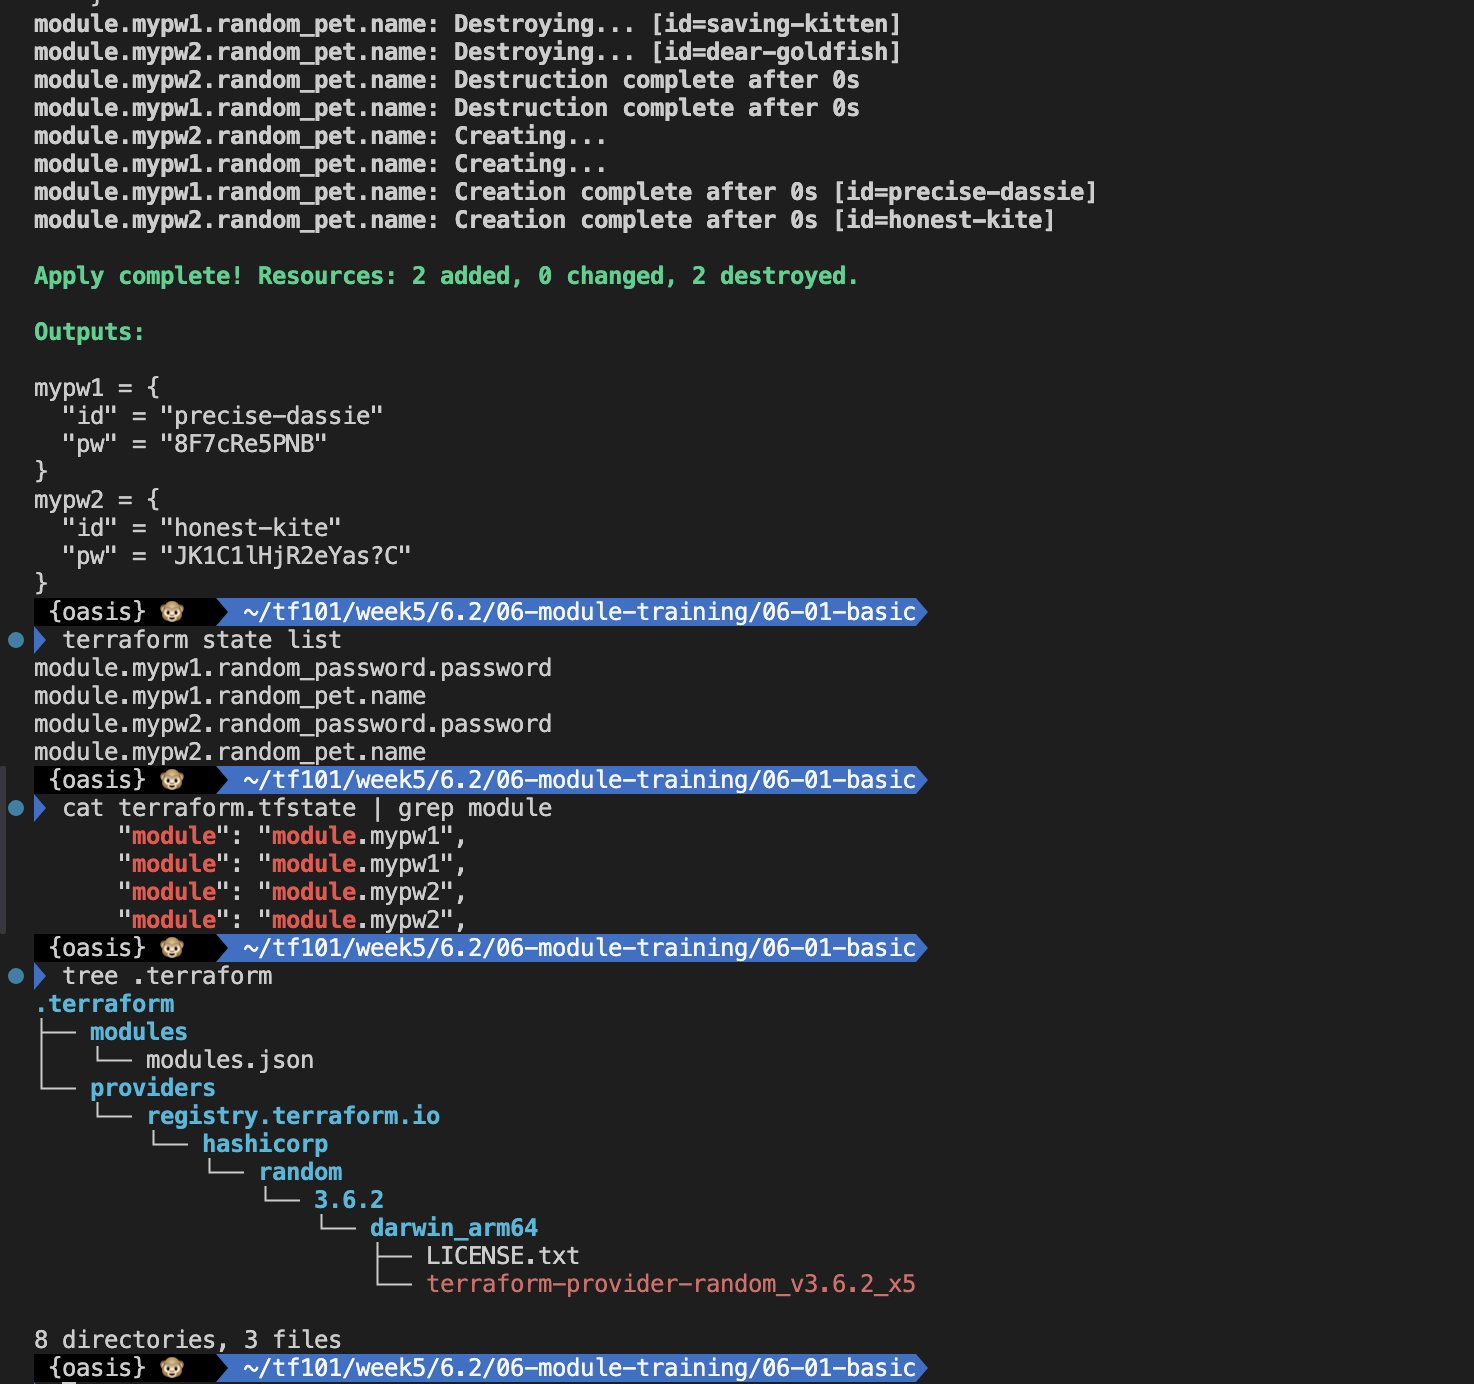
실습: 루트 모듈에서 프로바이더 정의
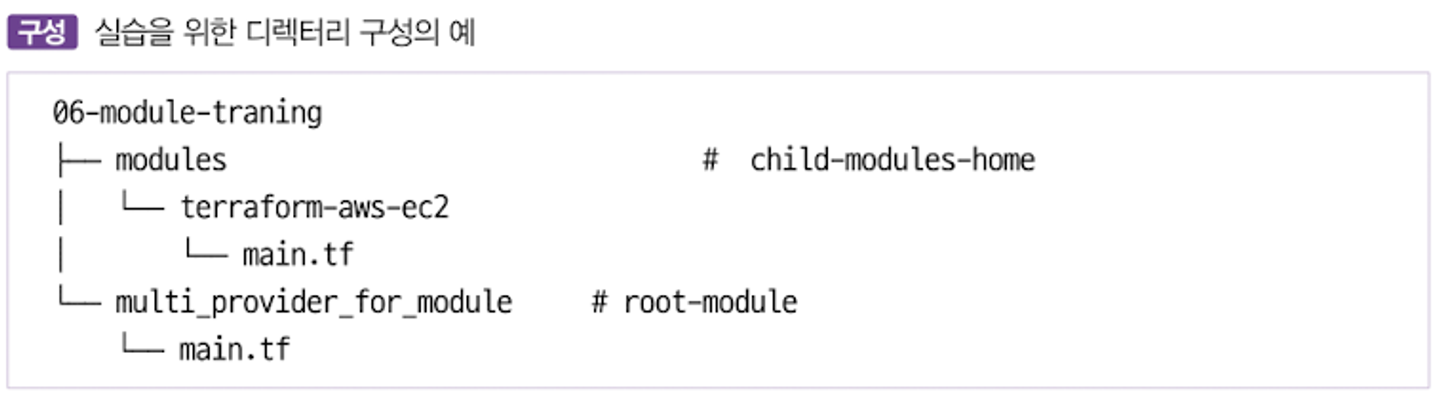
- 자식 모듈은 루트 모듈의 프로바이더 구성에 종속되는 방식
- 자식 모듈과 루트 모듈은 아래 디렉터리 구조를 따른다.
- 자식 모듈 - main.tf
# main.tf
terraform {
  required_providers {
    aws = {
      source = "hashicorp/aws"
    }
  }
}

resource "aws_default_vpc" "default" {}

data "aws_ami" "default" {
  most_recent = true
  owners      = ["amazon"]

  filter {
    name   = "owner-alias"
    values = ["amazon"]
  }

  filter {
    name   = "name"
    values = ["amzn2-ami-hvm*"]
  }
}

resource "aws_instance" "default" {
  depends_on    = [aws_default_vpc.default]
  ami           = data.aws_ami.default.id
  instance_type = var.instance_type

  tags = {
    Name = var.instance_name
  }
}- 자식 모듈 - variable.tf
# variable.tf
variable "instance_type" {
  description = "vm 인스턴스 타입 정의"
  default     = "t2.micro"
}

variable "instance_name" {
  description = "vm 인스턴스 이름 정의"
  default     = "my_ec2"
}- 자식 모듈 - output.tf
# output.tf
output "private_ip" {
  value = aws_instance.default.private_ip
}- 루트 모듈 - main.tf
# main.tf
provider "aws" {
  region = "ap-southeast-1"
}

provider "aws" {
  alias  = "seoul"
  region = "ap-northeast-2"
}

module "ec2_singapore" {
  source = "../modules/terraform-aws-ec2"
}

module "ec2_seoul" {
  source = "../modules/terraform-aws-ec2"
  providers = {
    aws = aws.seoul
  }
  instance_type = "t3.small"
}- 루트 모듈 - output.tf
# output.tf
output "module_output_singapore" {
  value = module.ec2_singapore.private_ip
}

output "module_output_seoul" {
  value = module.ec2_seoul.private_ip
}- 실행
#
cd 06-module-traning/multi_provider_for_module/
terraform init
cat .terraform/modules/modules.json | jq

#
terraform apply -auto-approve
terraform output
terraform state list
terraform state show module.ec2_seoul.data.aws_ami.default
terraform state show module.ec2_singapore.data.aws_ami.default

# tfstate에 모듈 정보 확인 : VSCODE에서 terraform.tfstate 파일 확인
cat terraform.tfstate | grep module

# graph 확인
terraform graph > graph.dot

# aws cli로 ec2 확인
aws ec2 describe-instances --region ap-northeast-2 --query "Reservations[*].Instances[*].{PublicIPAdd:PublicIpAddress,InstanceName:Tags[?Key=='Name']|[0].Value,Status:State.Name}" --filters Name=instance-state-name,Values=running --output text
aws ec2 describe-instances --region ap-southeast-1 --query "Reservations[*].Instances[*].{PublicIPAdd:PublicIpAddress,InstanceName:Tags[?Key=='Name']|[0].Value,Status:State.Name}" --filters Name=instance-state-name,Values=running --output text

# 실습 완료 후 리소스 삭제
terraform destroy -auto-approve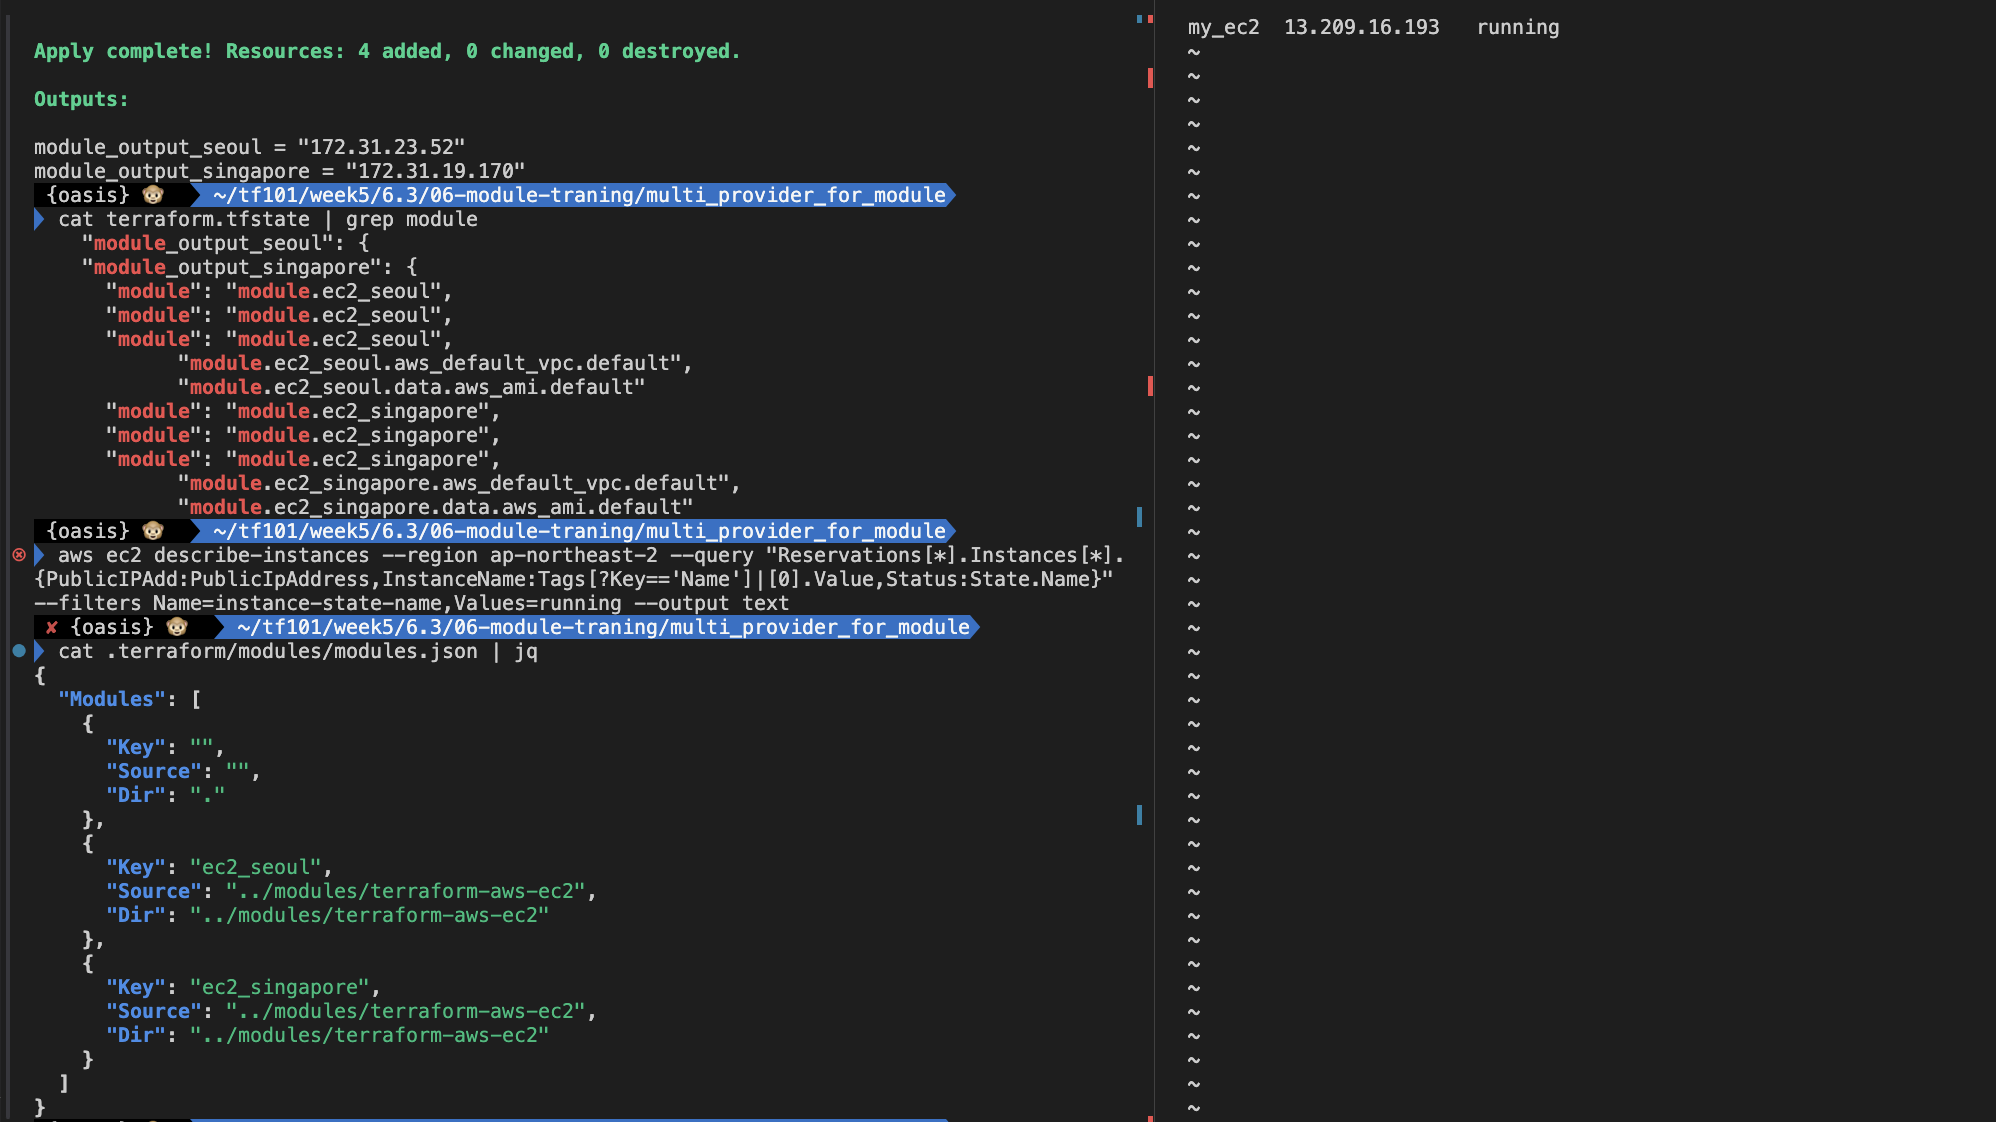
실습: 모듈의 반복문
- 모듈 또한 리소스에서 반복문을 사용하듯 구성할 수 있다.
- 모듈이라는 리소스 정의 묶음을 원하는 수량으로 프로비저닝할 수 있으므로 모듈 없이 구성하는 것과 대비해 리소스 종속성 관리와 유지 보수에 장점이 있다. count를 사용한 반복문 사용은 리소스에서의 사용 방식처럼 module 블록 내에 선언한다.
- main.tf 작성
provider "aws" {
  region = "ap-northeast-2"
}

module "ec2_seoul" {
  count  = 2
  source = "../modules/terraform-aws-ec2"
  instance_type = "t3.small"
}

output "module_output" {
  value  = module.ec2_seoul[*].private_ip
}- 실행
#
cd 06-module-traning/module_loop_count/
terraform init
cat .terraform/modules/modules.json | jq

#
terraform apply -auto-approve
terraform output
terraform state list

# tfstate에 모듈 정보 확인 : VSCODE에서 terraform.tfstate 파일 확인
cat terraform.tfstate | grep module

# graph 확인
terraform graph > graph.dot

# aws cli로 ec2 확인
aws ec2 describe-instances --region ap-northeast-2 --query "Reservations[*].Instances[*].{PublicIPAdd:PublicIpAddress,InstanceName:Tags[?Key=='Name']|[0].Value,Status:State.Name}" --filters Name=instance-state-name,Values=running --output text

# 실습 완료 후 리소스 삭제
terraform destroy -auto-approve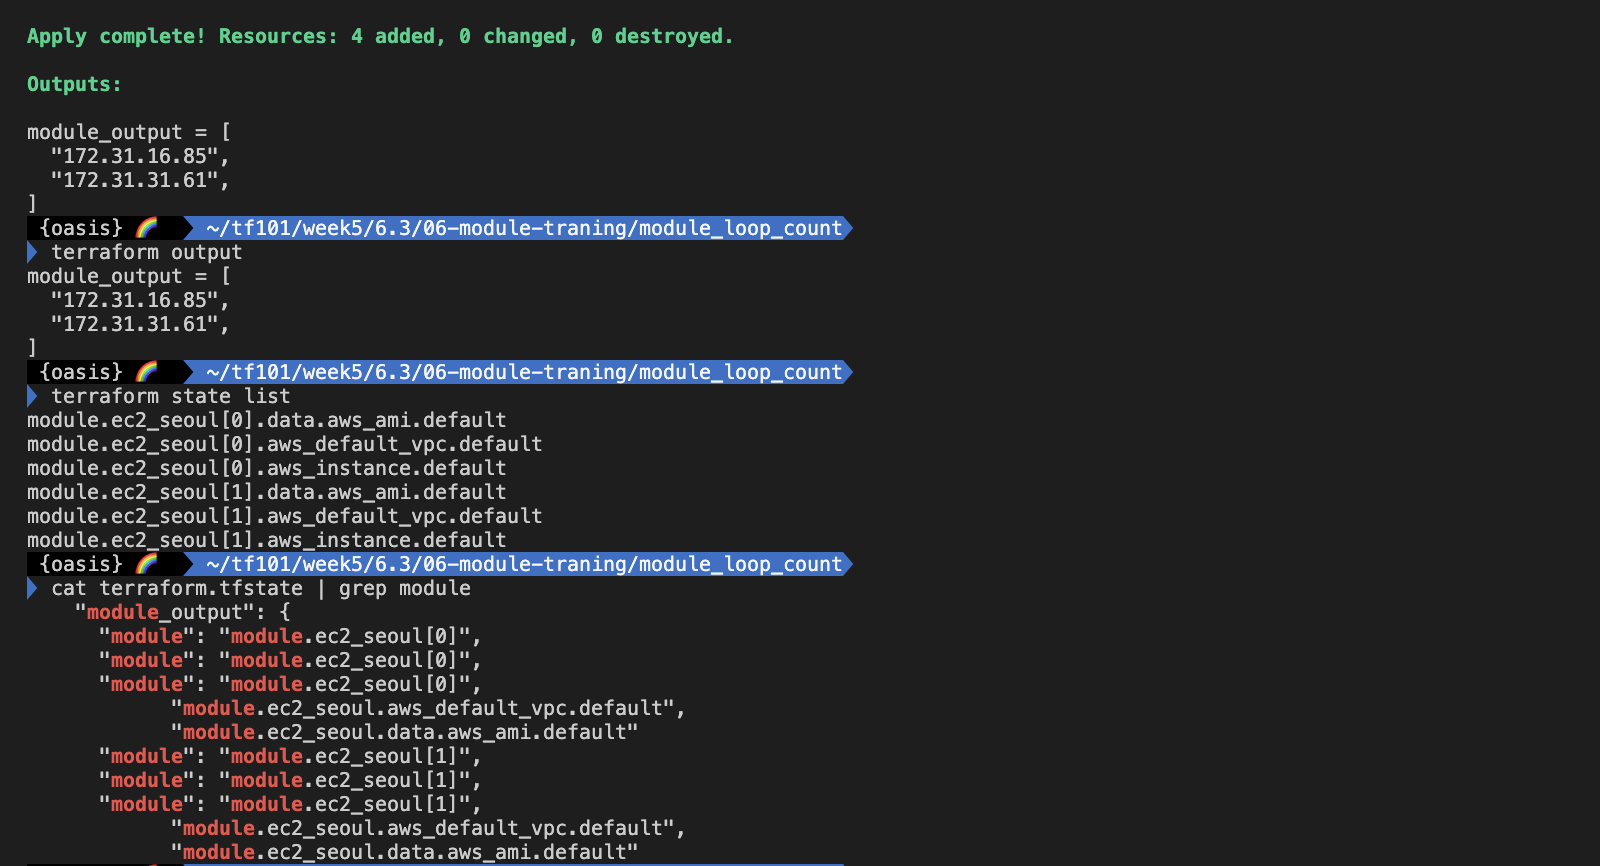

실습: 모듈의 반복문 - 입력 변수를 다르게 처리하여 생성
- main.tf 수정
locals {
  env = {
    dev = {
      type = "t3.micro"
      name = "dev_ec2"
    }
    prod = {
      type = "t3.medium"
      name = "prod_ec2"
    }
  }
}

module "ec2_seoul" {
  for_each = local.env
  source = "../modules/terraform-aws-ec2"
  instance_type = each.value.type
  instance_name = each.value.name
}

output "module_output" {
  value  = [
    for k in module.ec2_seoul: k.private_ip
  ]
}- 실행
#
terraform plan
terraform apply -auto-approve
terraform output
terraform state list

# tfstate에 모듈 정보 확인 : VSCODE에서 terraform.tfstate 파일 확인
cat terraform.tfstate | grep module

# graph 확인
terraform graph > graph.dot

# aws cli로 ec2 확인
aws ec2 describe-instances --region ap-northeast-2 --query "Reservations[*].Instances[*].{PublicIPAdd:PublicIpAddress,InstanceName:Tags[?Key=='Name']|[0].Value,Status:State.Name}" --filters Name=instance-state-name,Values=running --output text

# 실습 완료 후 리소스 삭제
terraform destroy -auto-approve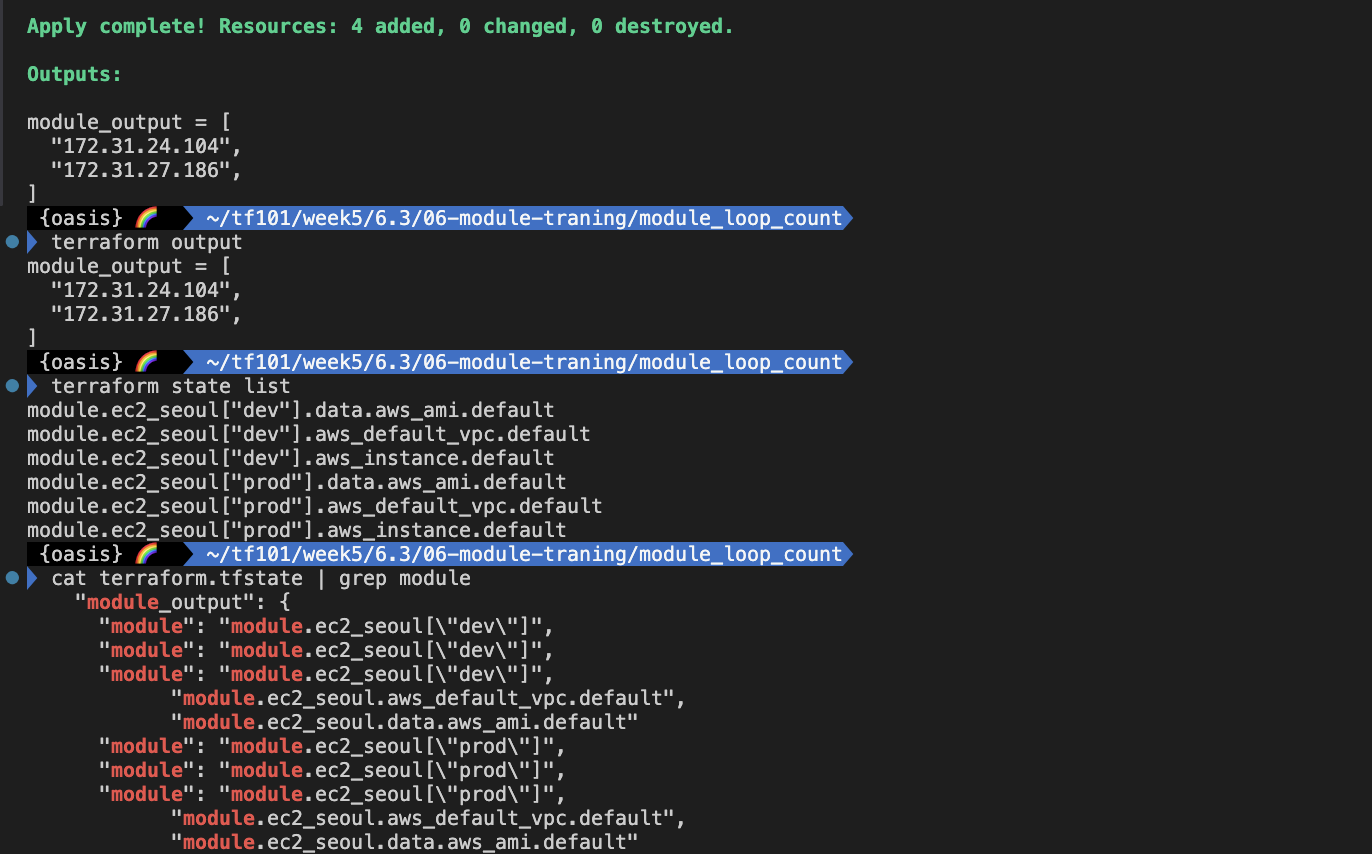

7. Terraform Runner
실습: atlantis 서버 설치
- AWS EC2 생성 : atlantis 서버 역할
# CloudFormation yaml 파일 다운로드

# CloudFormation 스택 배포
MYKEYNAME=2024-03-11_eks
aws cloudformation deploy --template-file t101-atlantis-ec2.yaml --stack-name t101 --parameter-overrides KeyName=$MYKEYNAME SgIngressSshCidr=$(curl -s ipinfo.io/ip)/32 --region ap-northeast-2

# [모니터링] CloudFormation 스택 상태
while true; do
  date
  AWS_PAGER="" aws cloudformation list-stacks \
    --stack-status-filter CREATE_IN_PROGRESS CREATE_COMPLETE CREATE_FAILED DELETE_IN_PROGRESS DELETE_FAILED \
    --query "StackSummaries[*].{StackName:StackName, StackStatus:StackStatus}" \
    --output table
  sleep 1
done

# EC2 공인 IP 확인
aws cloudformation describe-stacks --stack-name t101 --query 'Stacks[*].Outputs[0].OutputValue' --output text
- AWS EC2 SSH 접속 : 기본 정보 확인
# ubuntu EC2에 SSH 접속
ssh -i ~/.ssh/2024-03-11_eks.pem ubuntu@$(aws cloudformation describe-stacks --stack-name t101 --query 'Stacks[*].Outputs[0].OutputValue' --output text)
---------------------------
# 계정 확인
whoami

# aws 자격증명 설정 : (옵션) IAM profile로 설정 -> 단 이경우 tf 파일에 설정 필요
aws --version
aws configure
AWS Access Key ID [None]: ####
AWS Secret Access Key [None]: ####
Default region name [None]: ap-northeast-2
Default output format [None]:

# aws 자격증명 확인
aws s3 ls

# 테라폼 버전 확인
terraform version

#
git version

#
ls -l
./atlantis version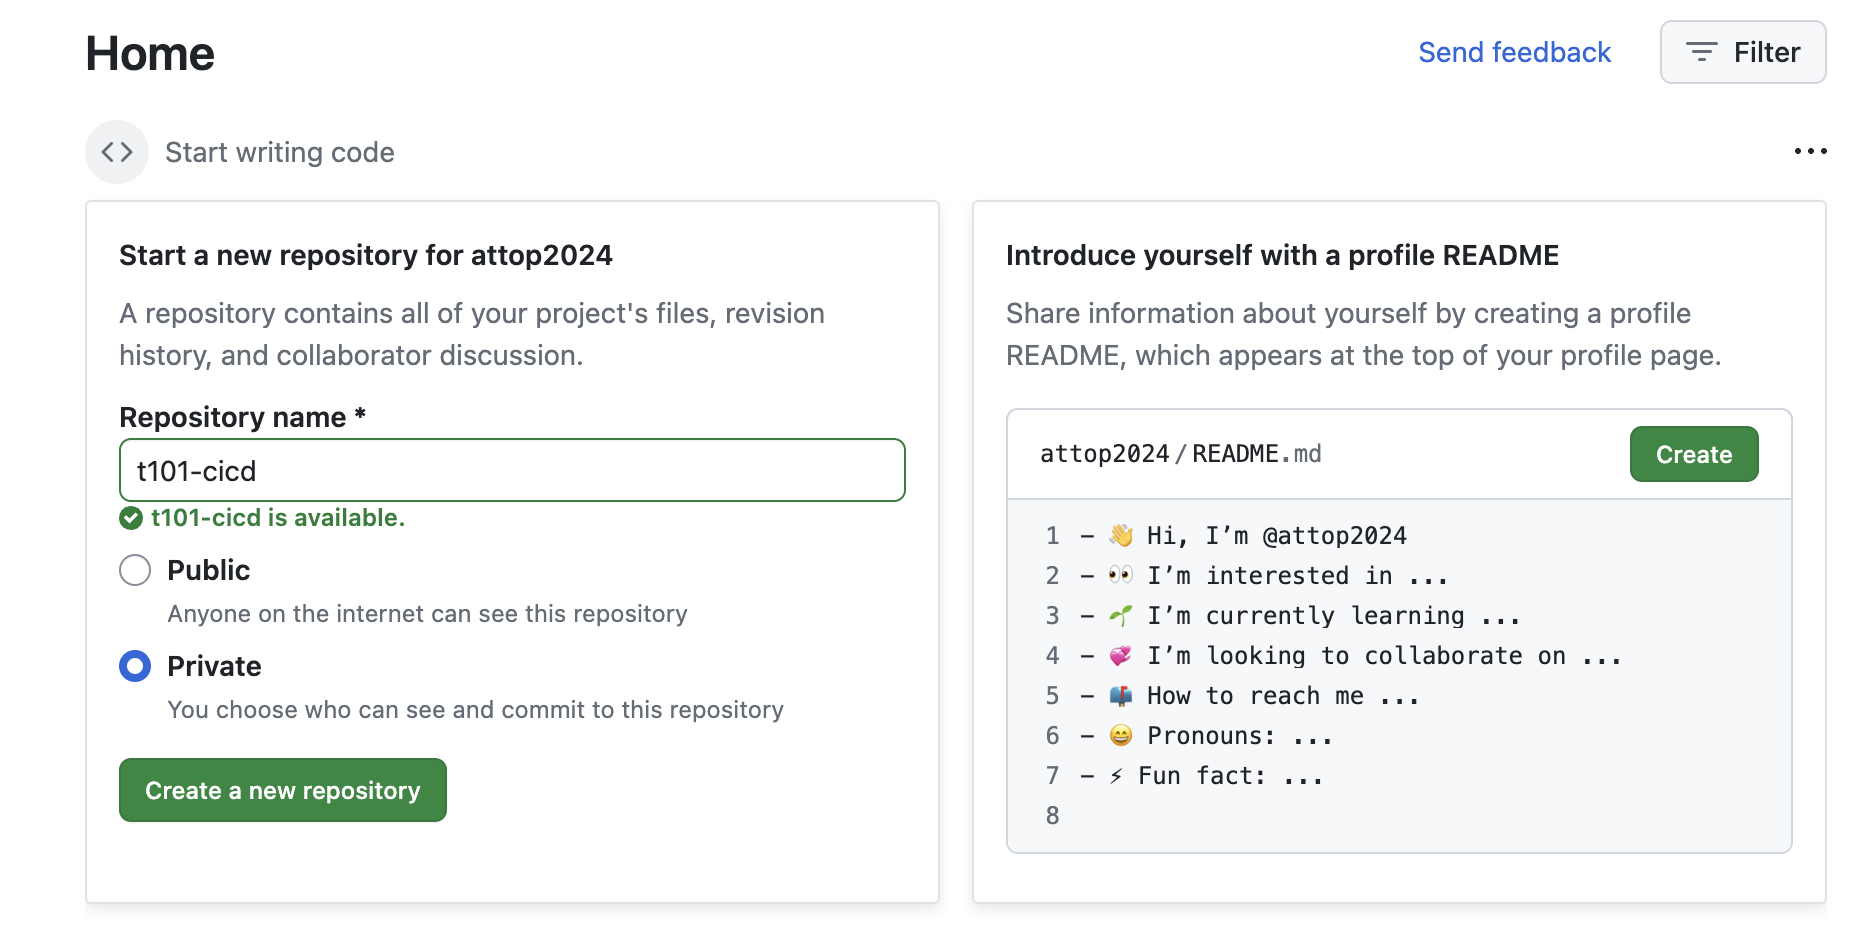
- 공인 IP 혹은 도메인 노출 설정
# URL 변수 지정
root@Atlantis:~# URL="http://$(curl -s ipinfo.io/ip):4141"
root@Atlantis:~# echo $URL
http://3.38.191.240:4141-
Git Repo (Private) 생성
-
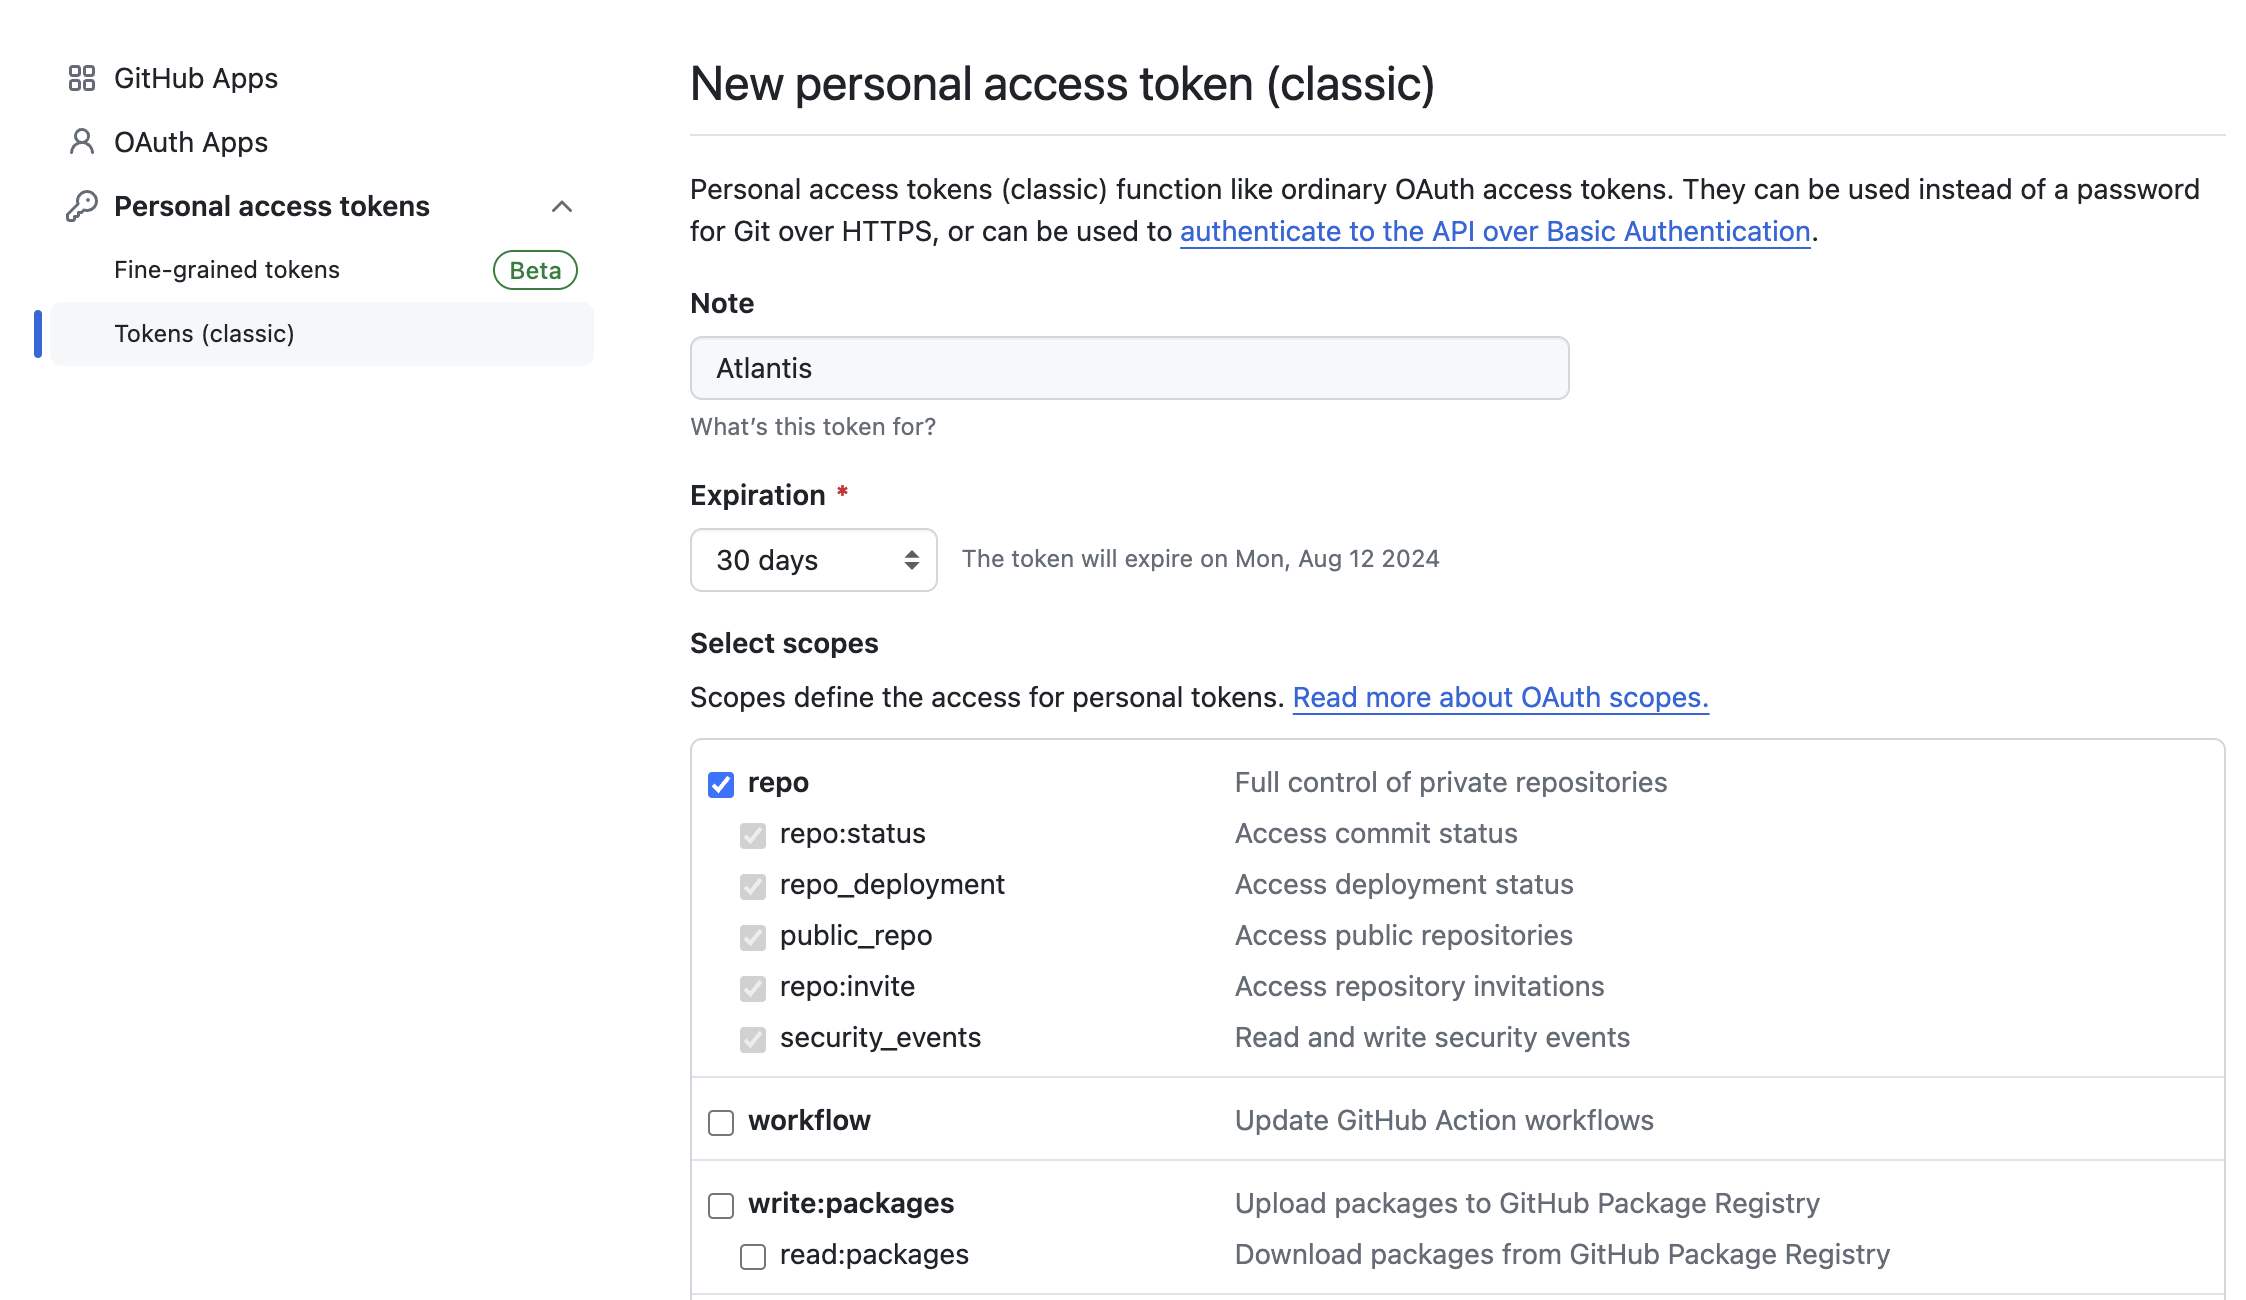
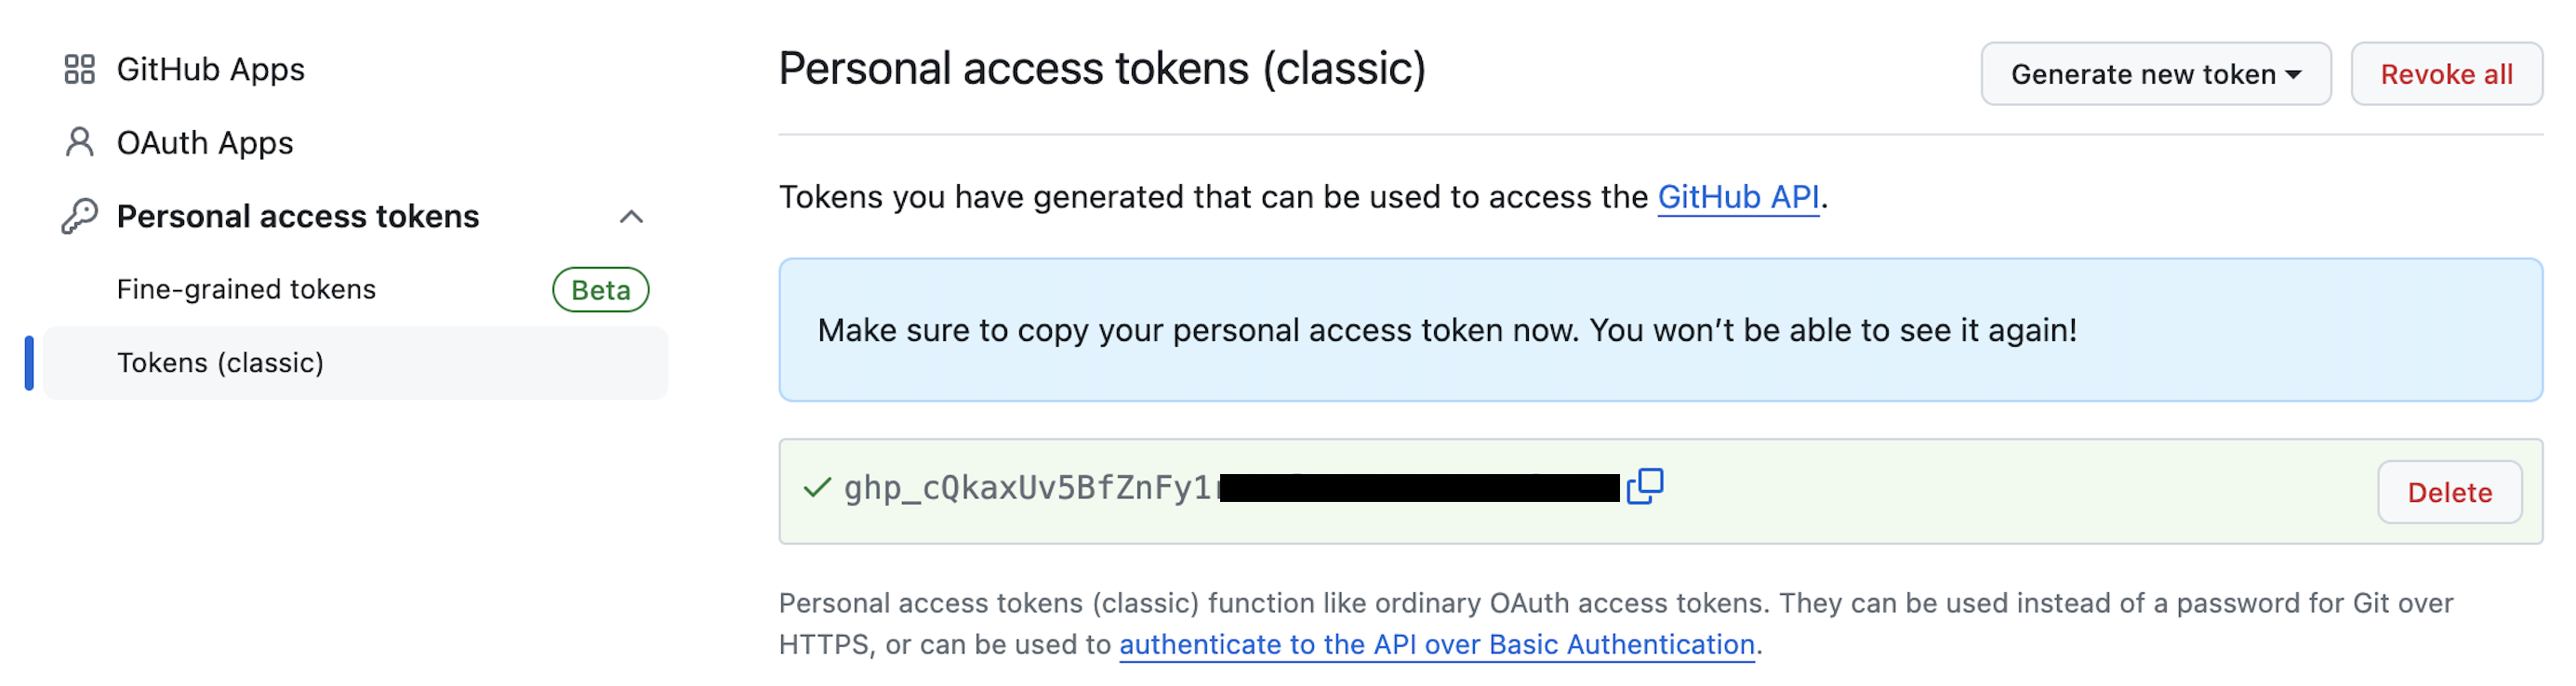
Git Token 생성
Github → Settings → Developer settings ⇒ Personal access tokens : Tokens (classic) ← Repo 제한 가능 Fine-grained tokens 사용 권장
-
Create an access token for Atlantis
-
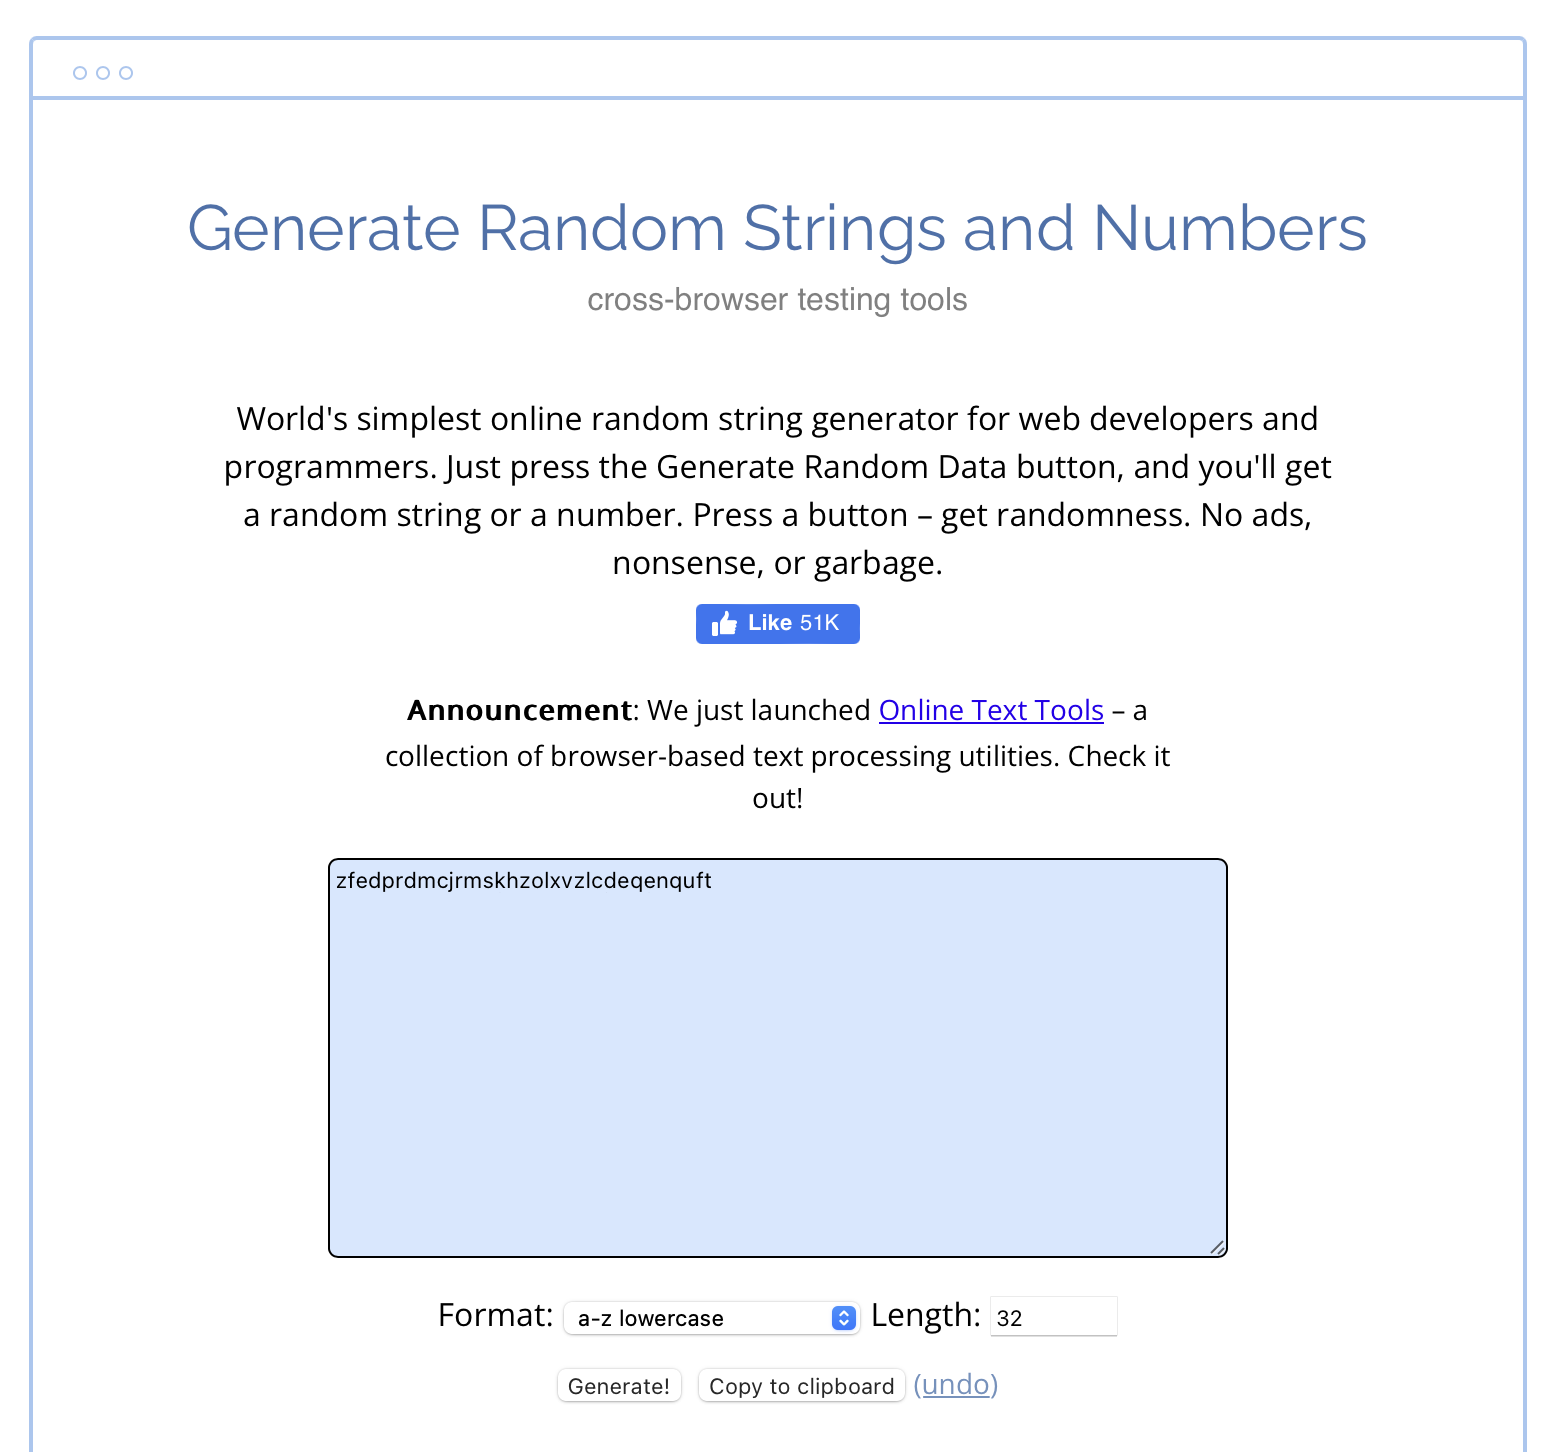
Atlantis Webhook Secret 생성
Atlantis가 Github의 Webhook을 통해 API를 요청 받는데, 이것에 대해 검증할 수 있도록 Webhook Secret을 생성한다.
Generate Random Strings and Numbers 에서 랜덤으로 Secret값을 생성하도록 하겠습니다.
https://www.browserling.com/tools/random-string
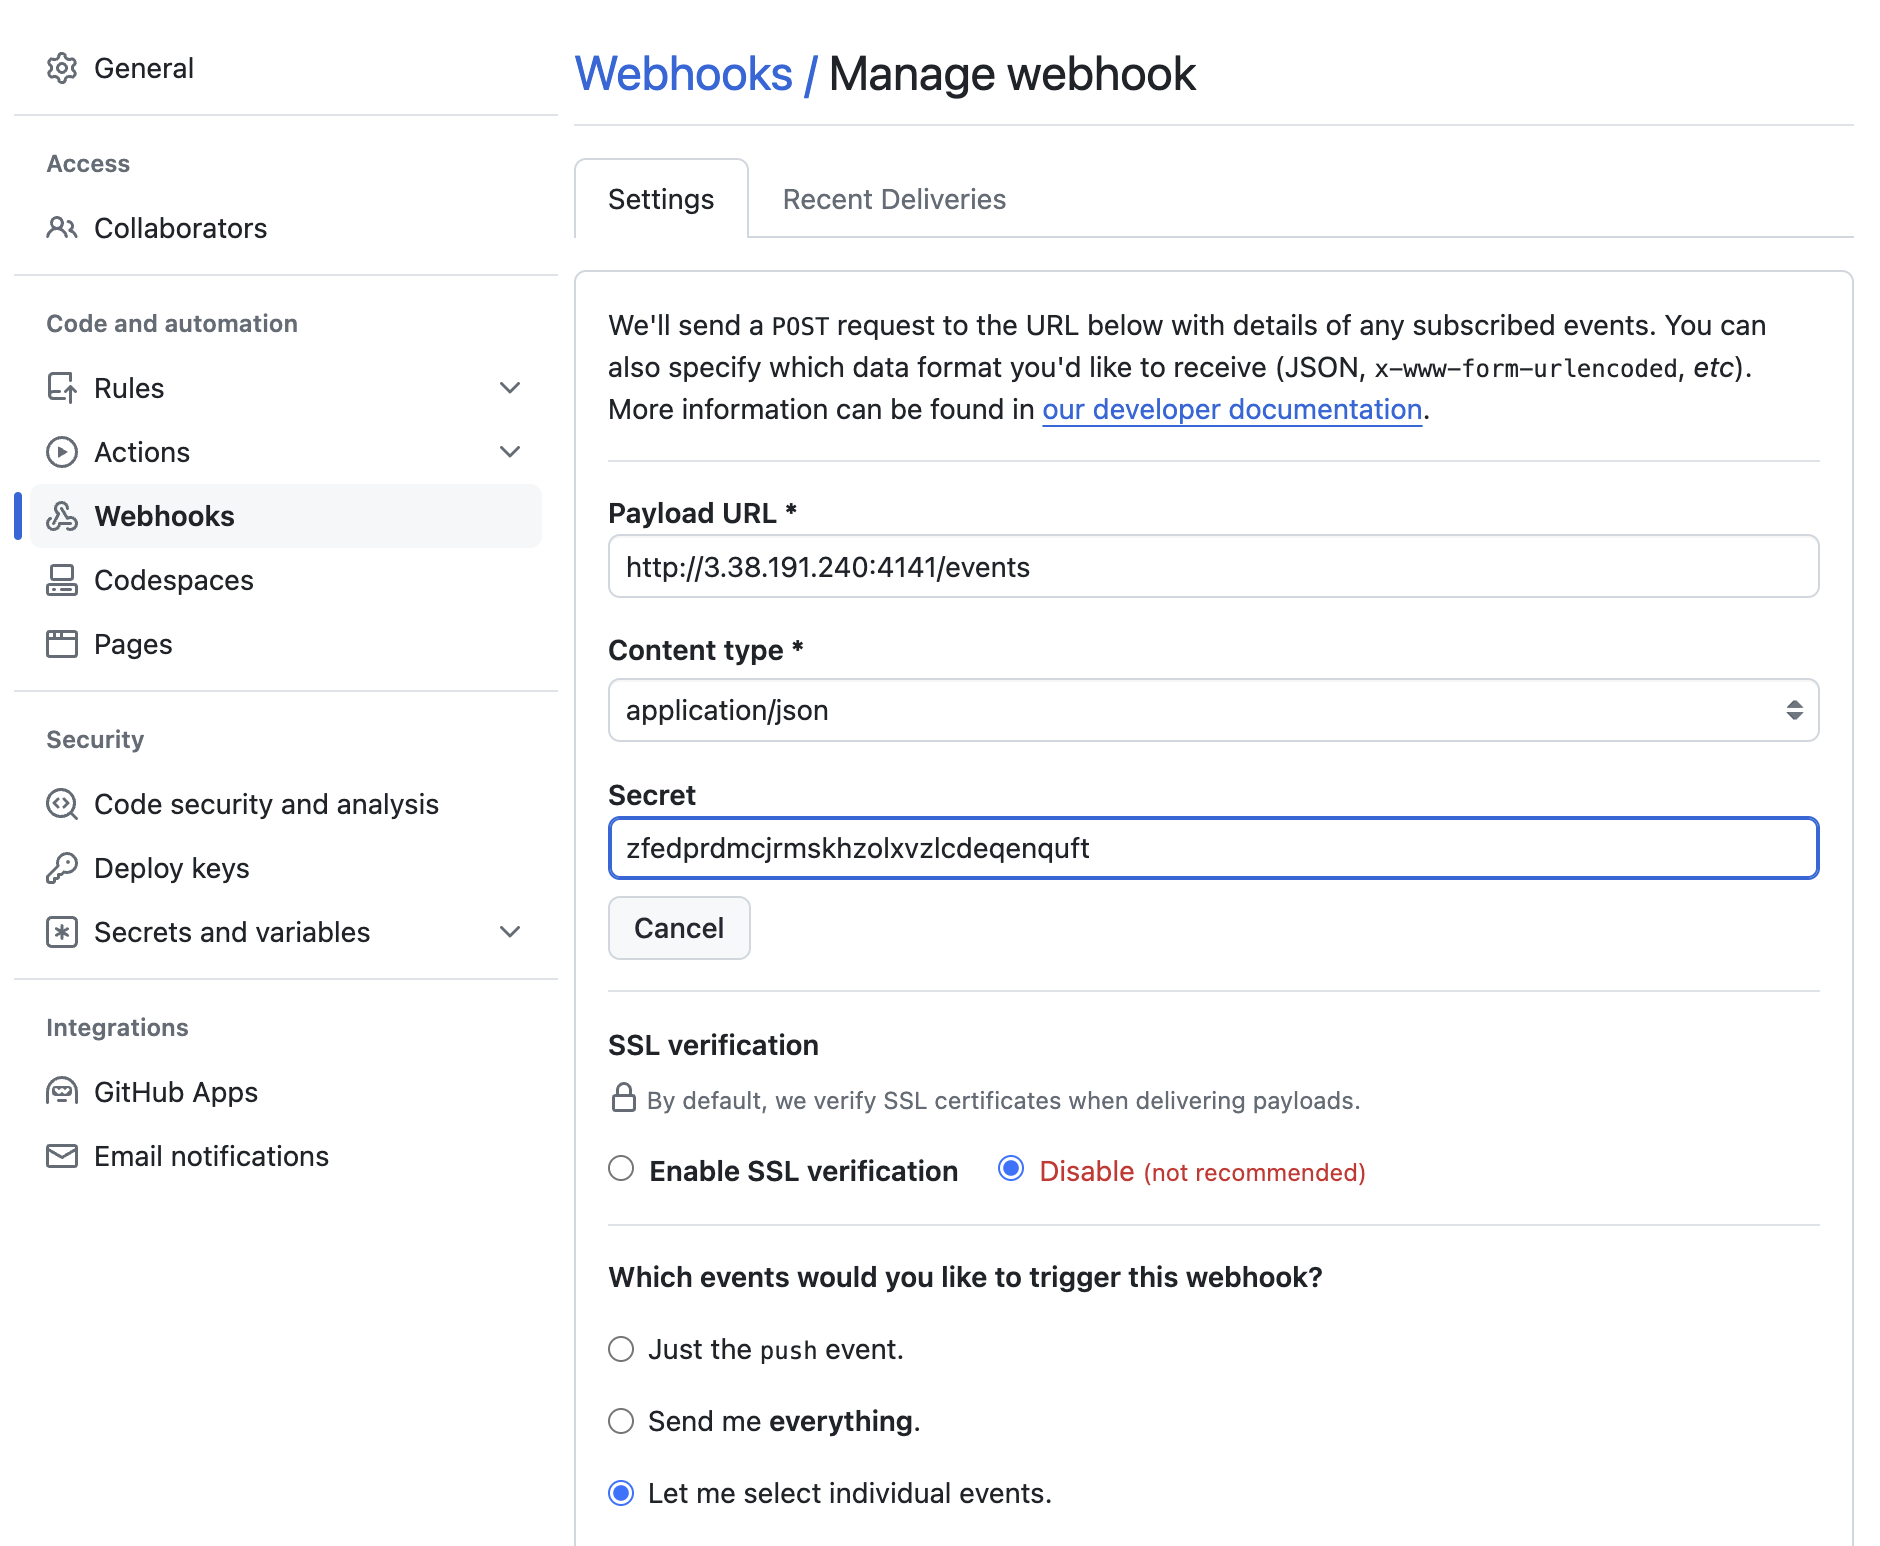
github의 webhooks 셋팅을 해준다.

- start Atlantis
2개의 변수를 설정해준다.
USERNAME="{the username of your GitHub, GitLab or Bitbucket user}"
REPO_ALLOWLIST="$YOUR_GIT_HOST/$YOUR_USERNAME/$YOUR_REPO"
#
URL="http://$(curl -s ipinfo.io/ip):4141"
USERNAME=gasida
TOKEN='###'
SECRET='###'
REPO_ALLOWLIST="github.com/gasida/t101-cicd"
# 변수 설정 확인
echo $URL $USERNAME $TOKEN $SECRET $REPO_ALLOWLIST
# Atlantis 서버 실행
./atlantis server \
--atlantis-url="$URL" \
--gh-user="$USERNAME" \
--gh-token="$TOKEN" \
--gh-webhook-secret="$SECRET" \
--repo-allowlist="$REPO_ALLOWLIST"
# [신규 터미널] 기본 tcp 4141 포트 오픈
ss -tnlp
State Recv-Q Send-Q Local Address:Port Peer Address:Port Process
LISTEN 0 4096 *:4141 *:* users:(("atlantis",pid=2089,fd=7))
...
# 웹 접속 확인
URL="http://$(curl -s ipinfo.io/ip):4141"
echo $URL
http://3.38.213.238:4141
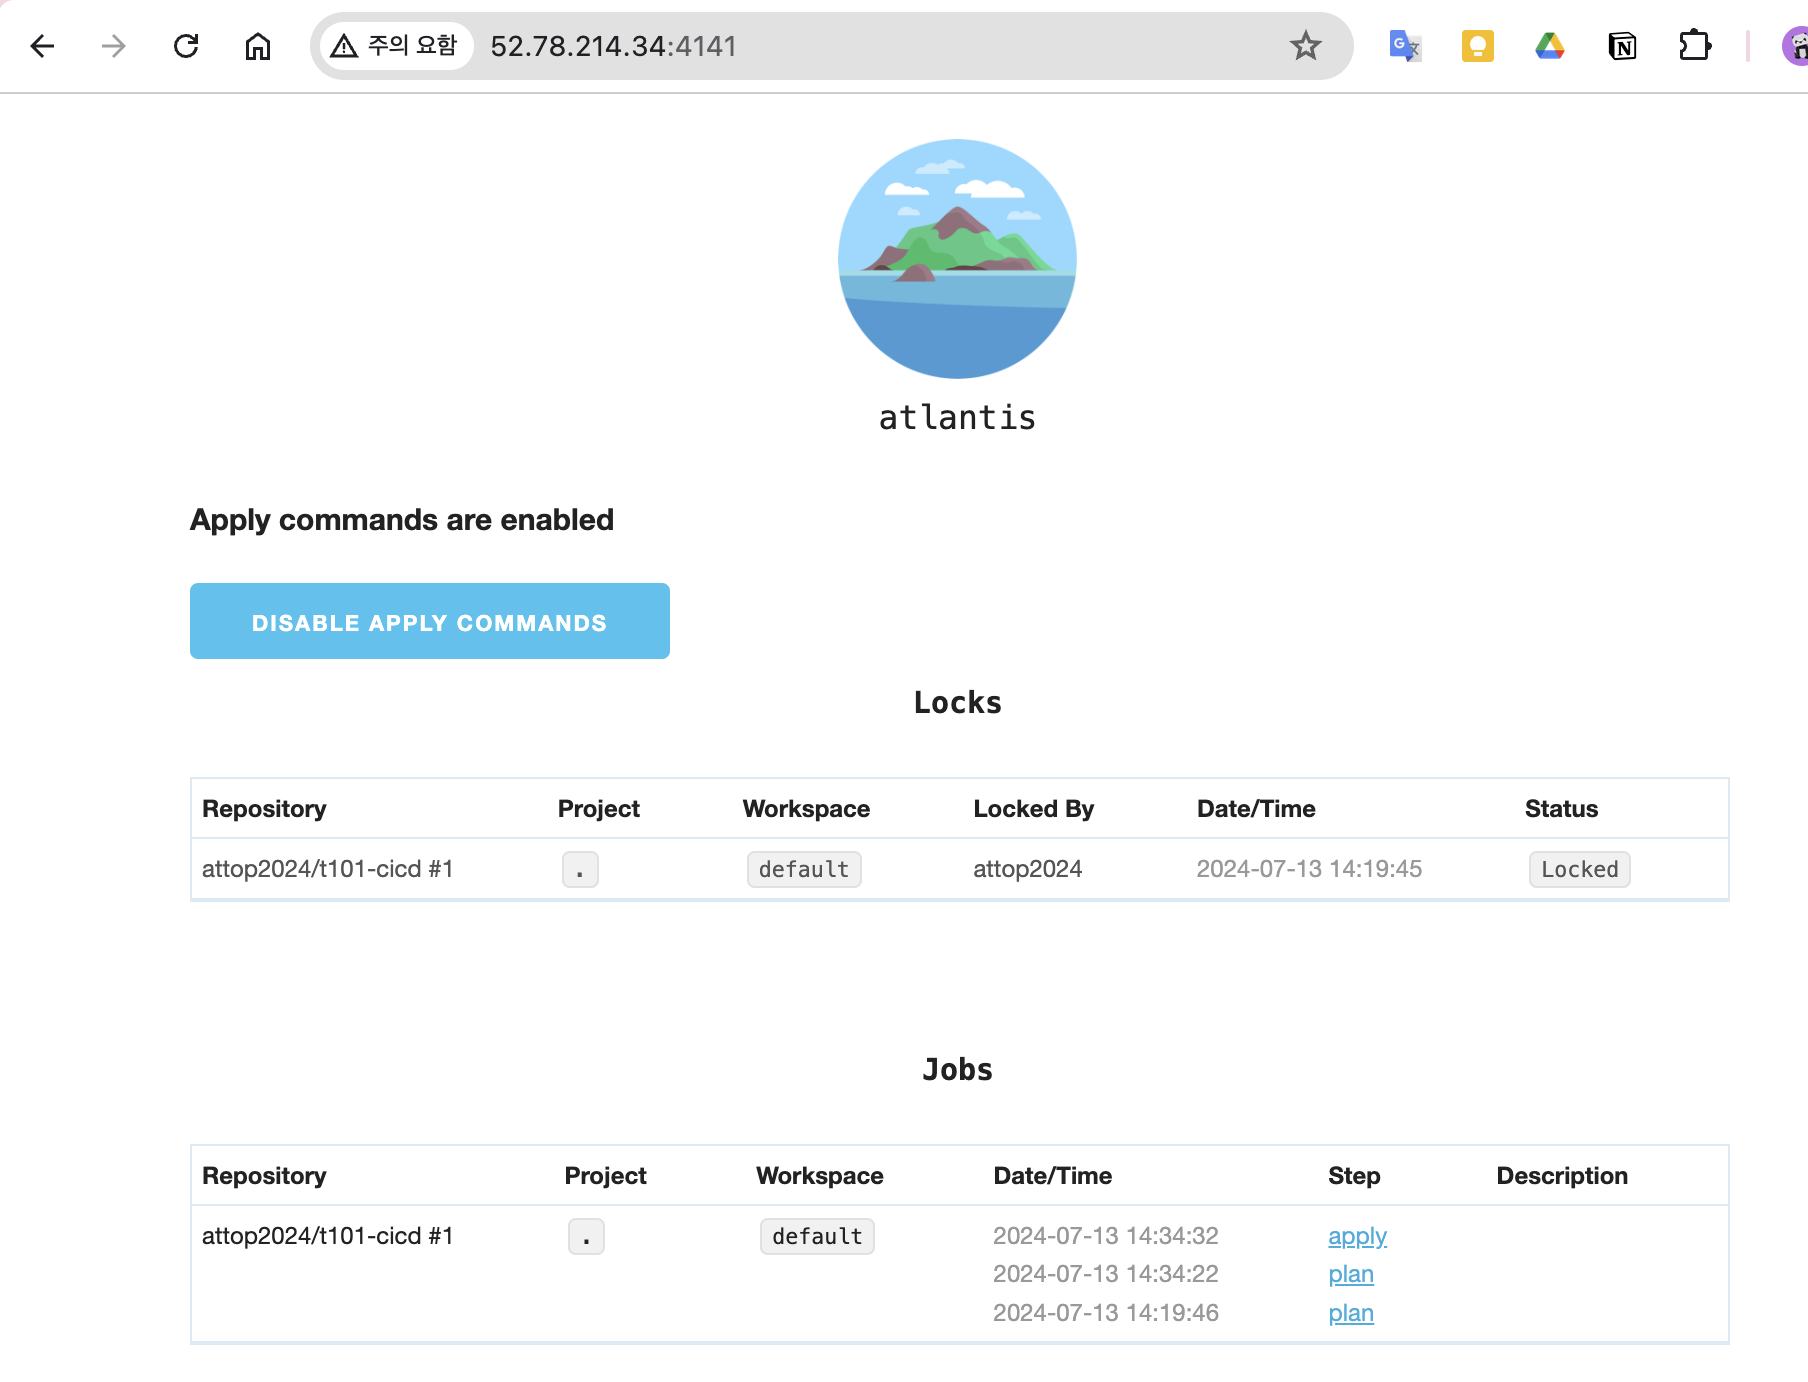
- atlantis 서버 접속
접속 url을 확인하여 웹브라우저에 접속한다.
URL="http://$(curl -s ipinfo.io/ip):4141"
echo $URL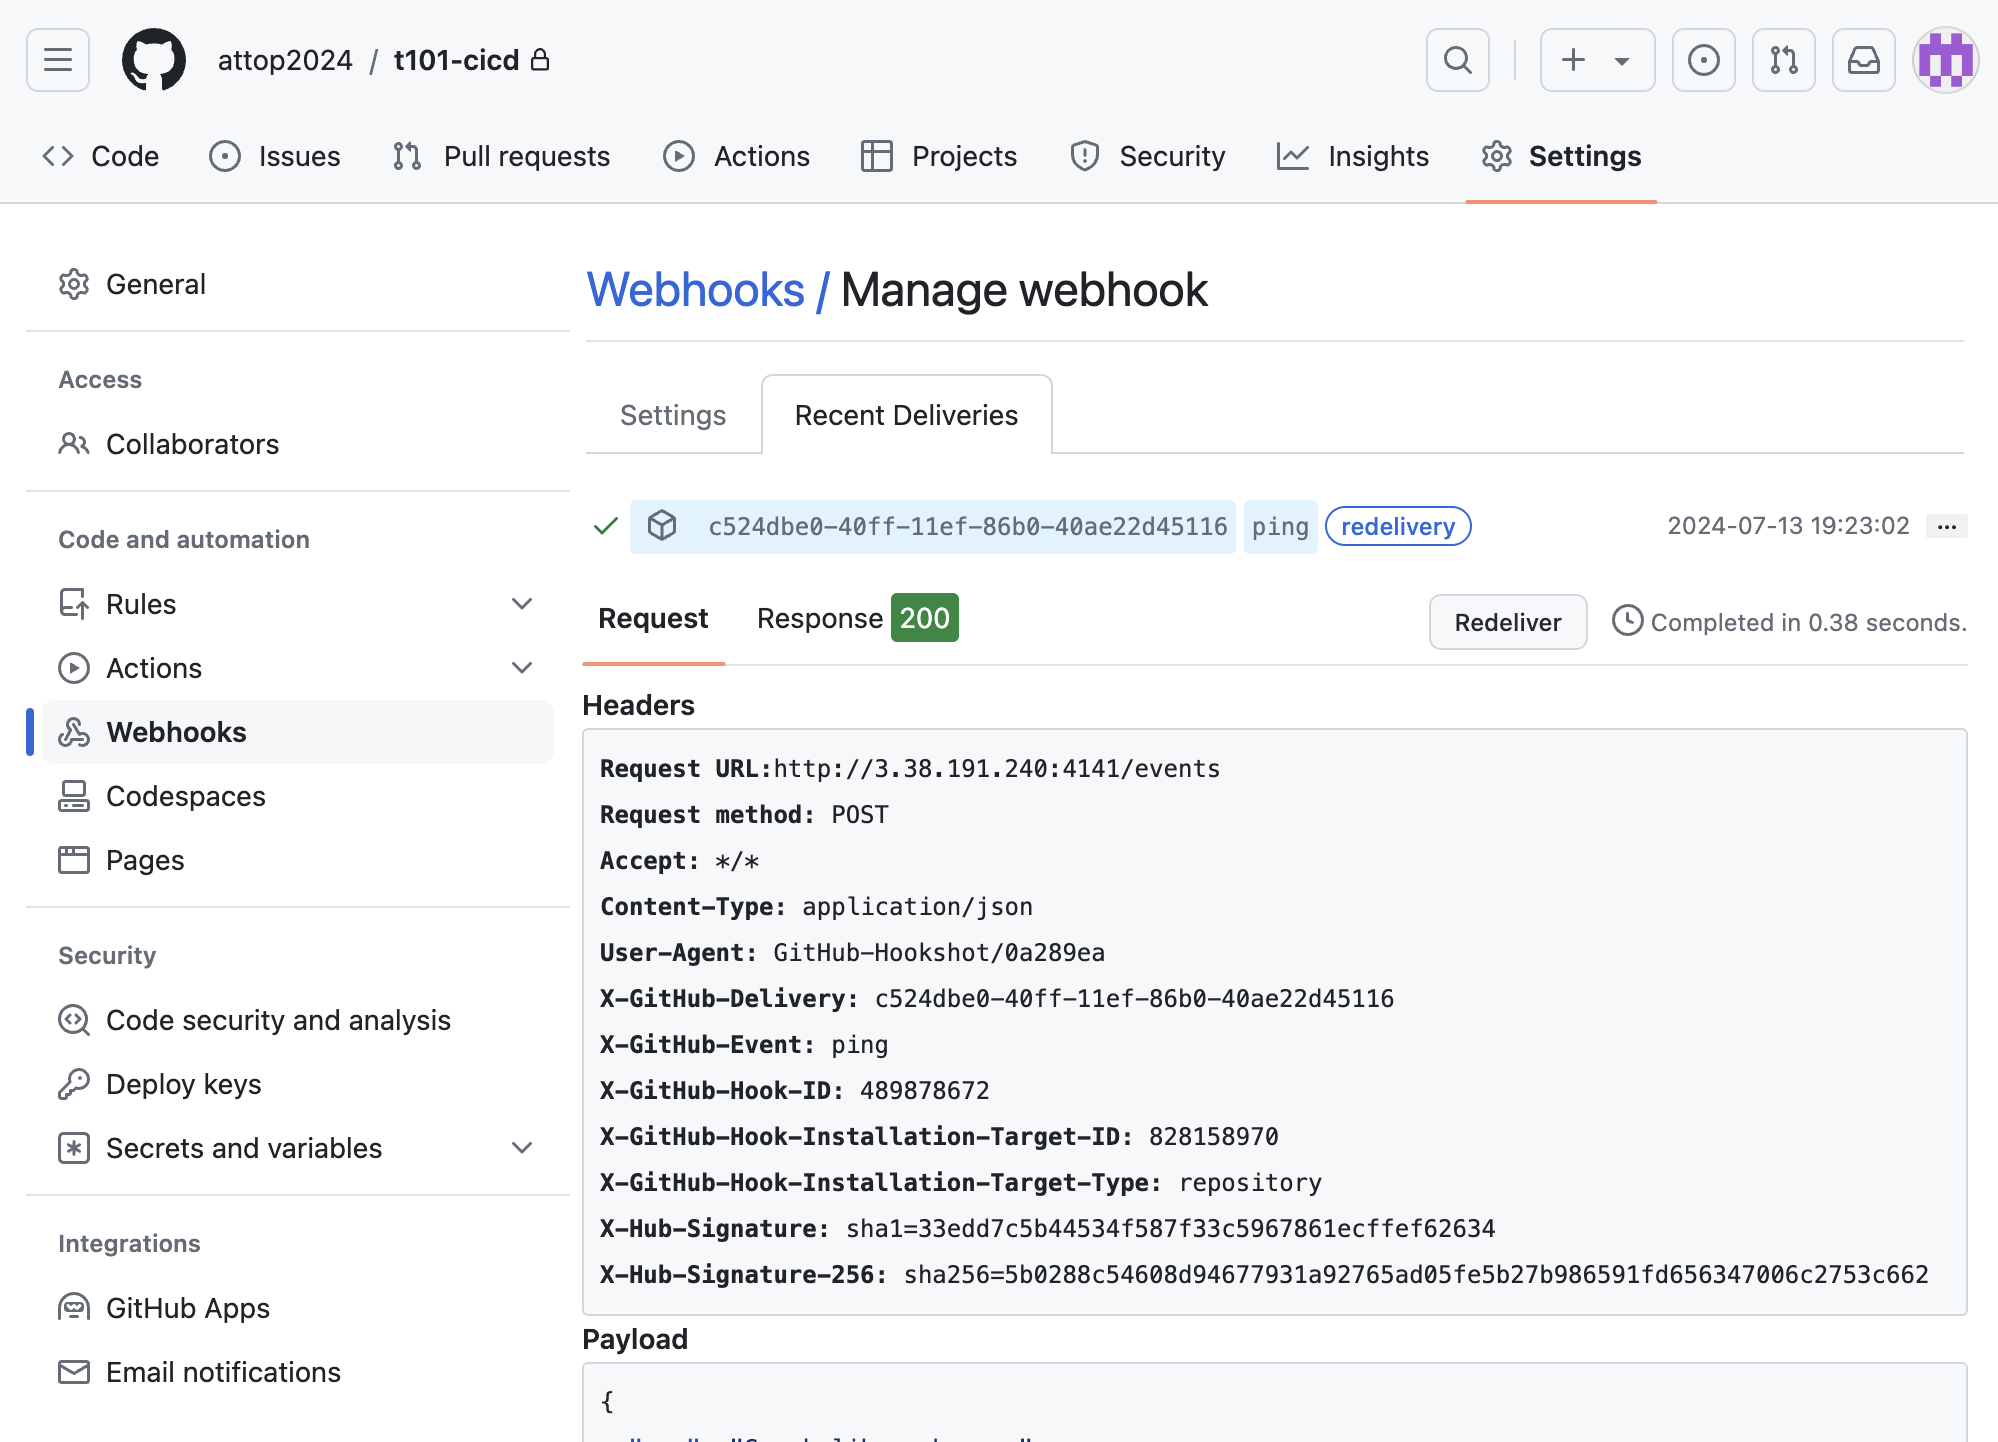
- webhook 접속 테스트
git repo Webhooks 에서 ping 실패 → 재발송 확인
재발송 확인 후 ping test 성공 확인
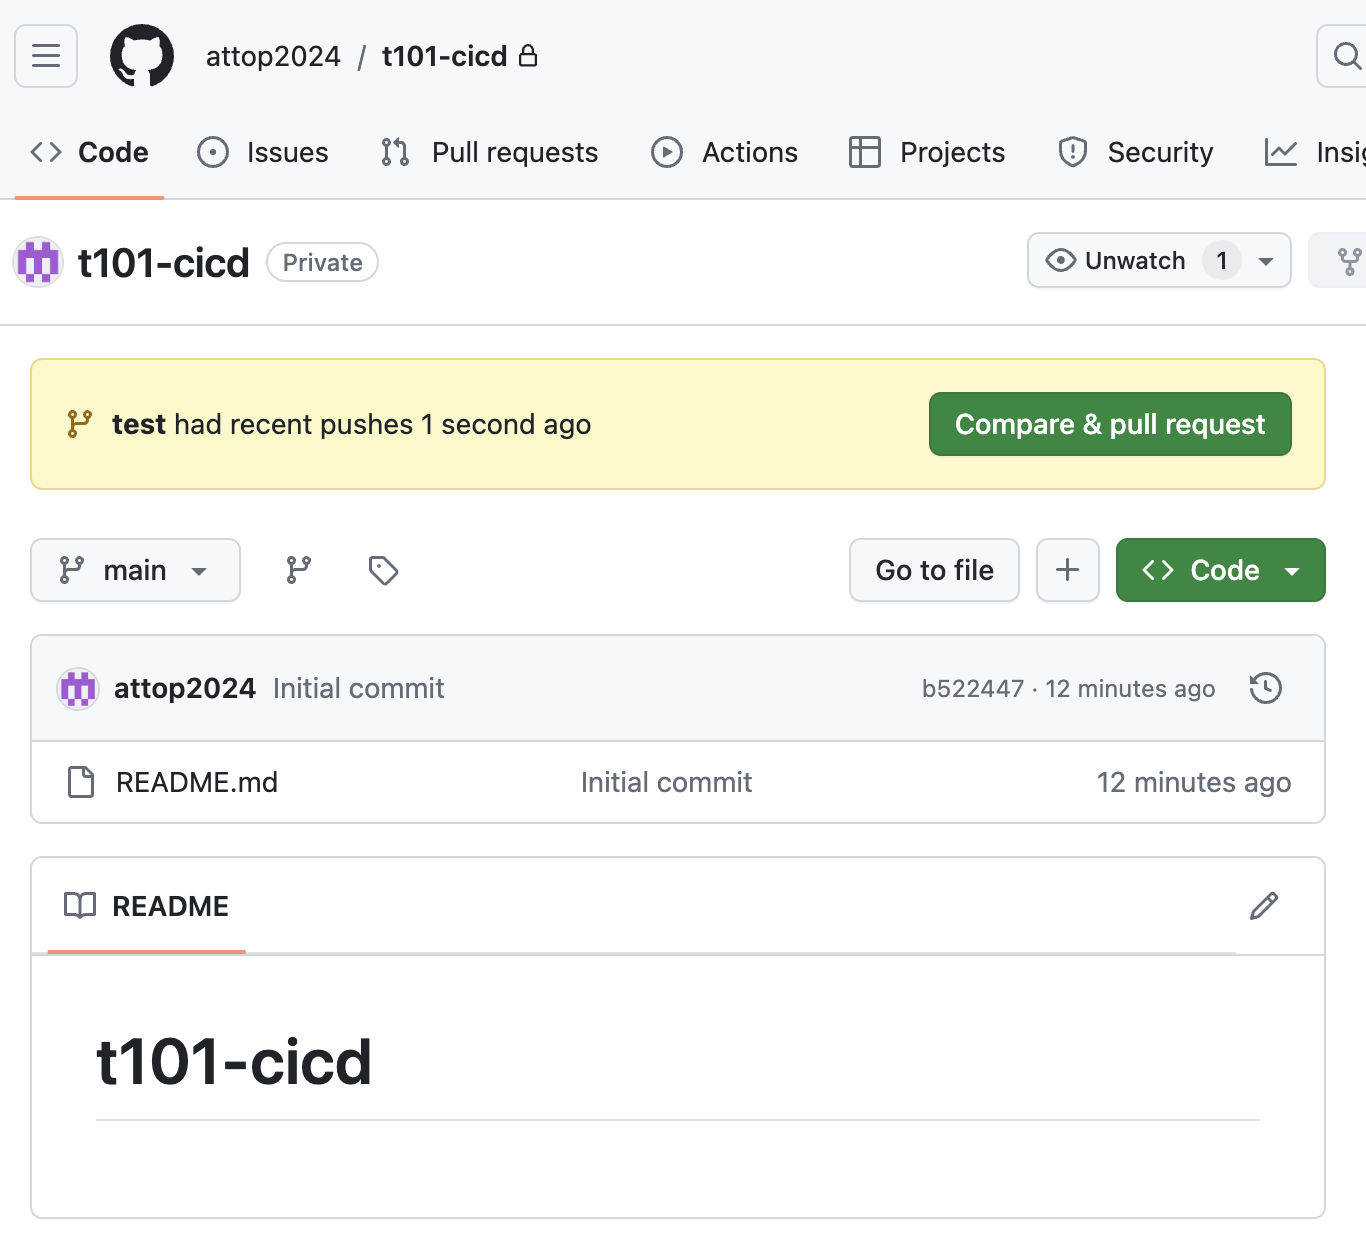
실습: atlantis - 작업1: null 프로바이더
- local에서 Git 코드 작업
# git clone
git clone https://github.com/attop2024/t101-cicd && cd t101-cicd && tree

# feature branch 생성
git branch test && git checkout test && git branch

# main.tf 파일 작성
echo 'resource "null_resource" "example" {}' > main.tf

# add commit push
git add main.tf && git commit -m "add main.tf" && git push origin test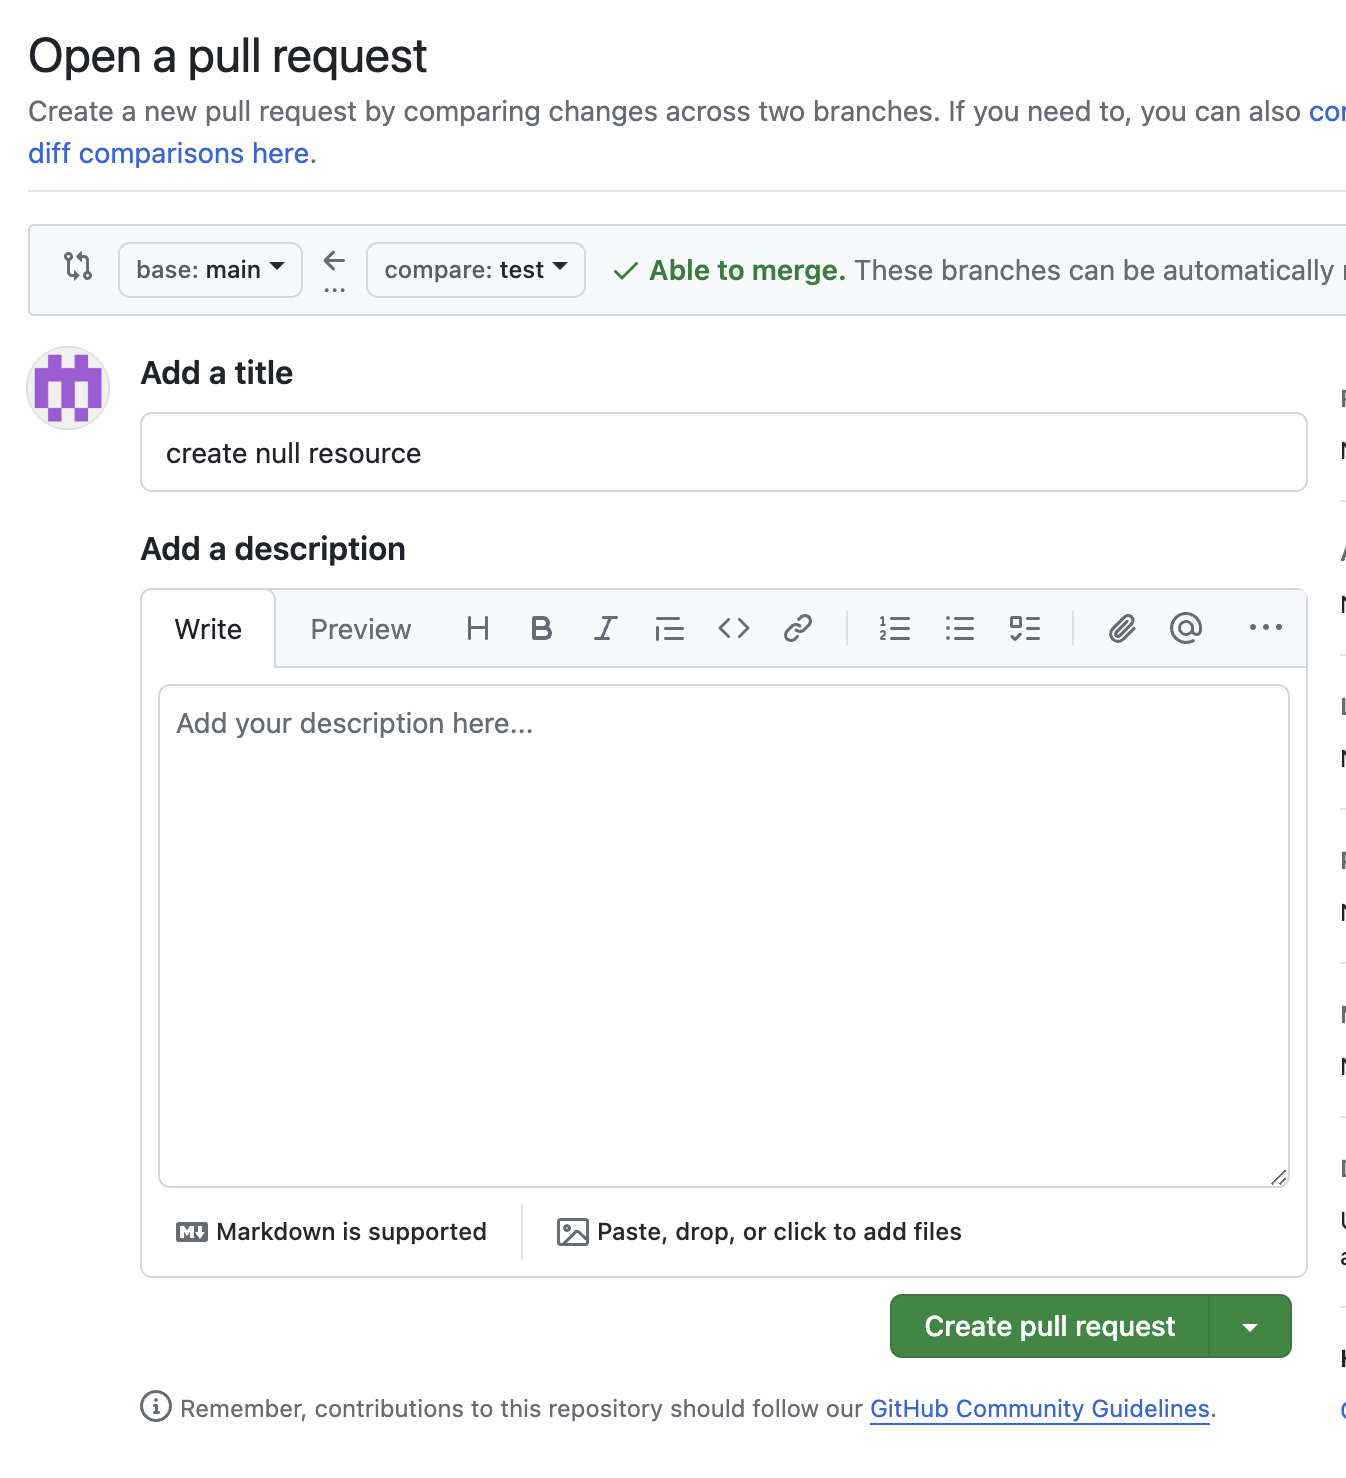
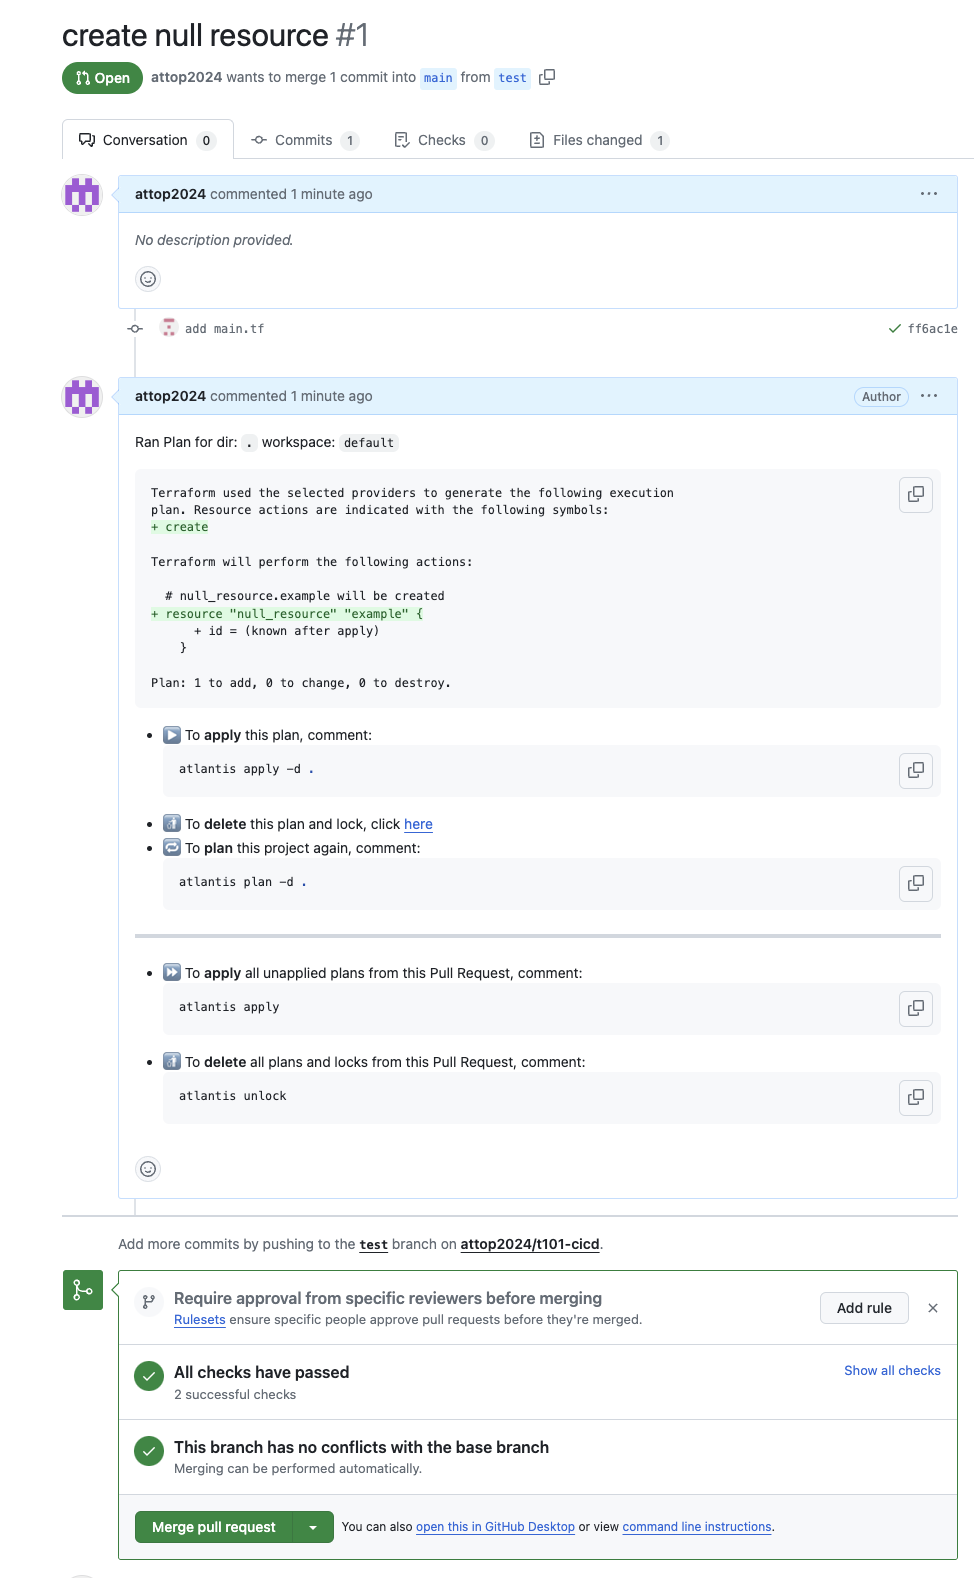
- plan 자동 수행 확인 -> 하단 plan Details 클릭 확인
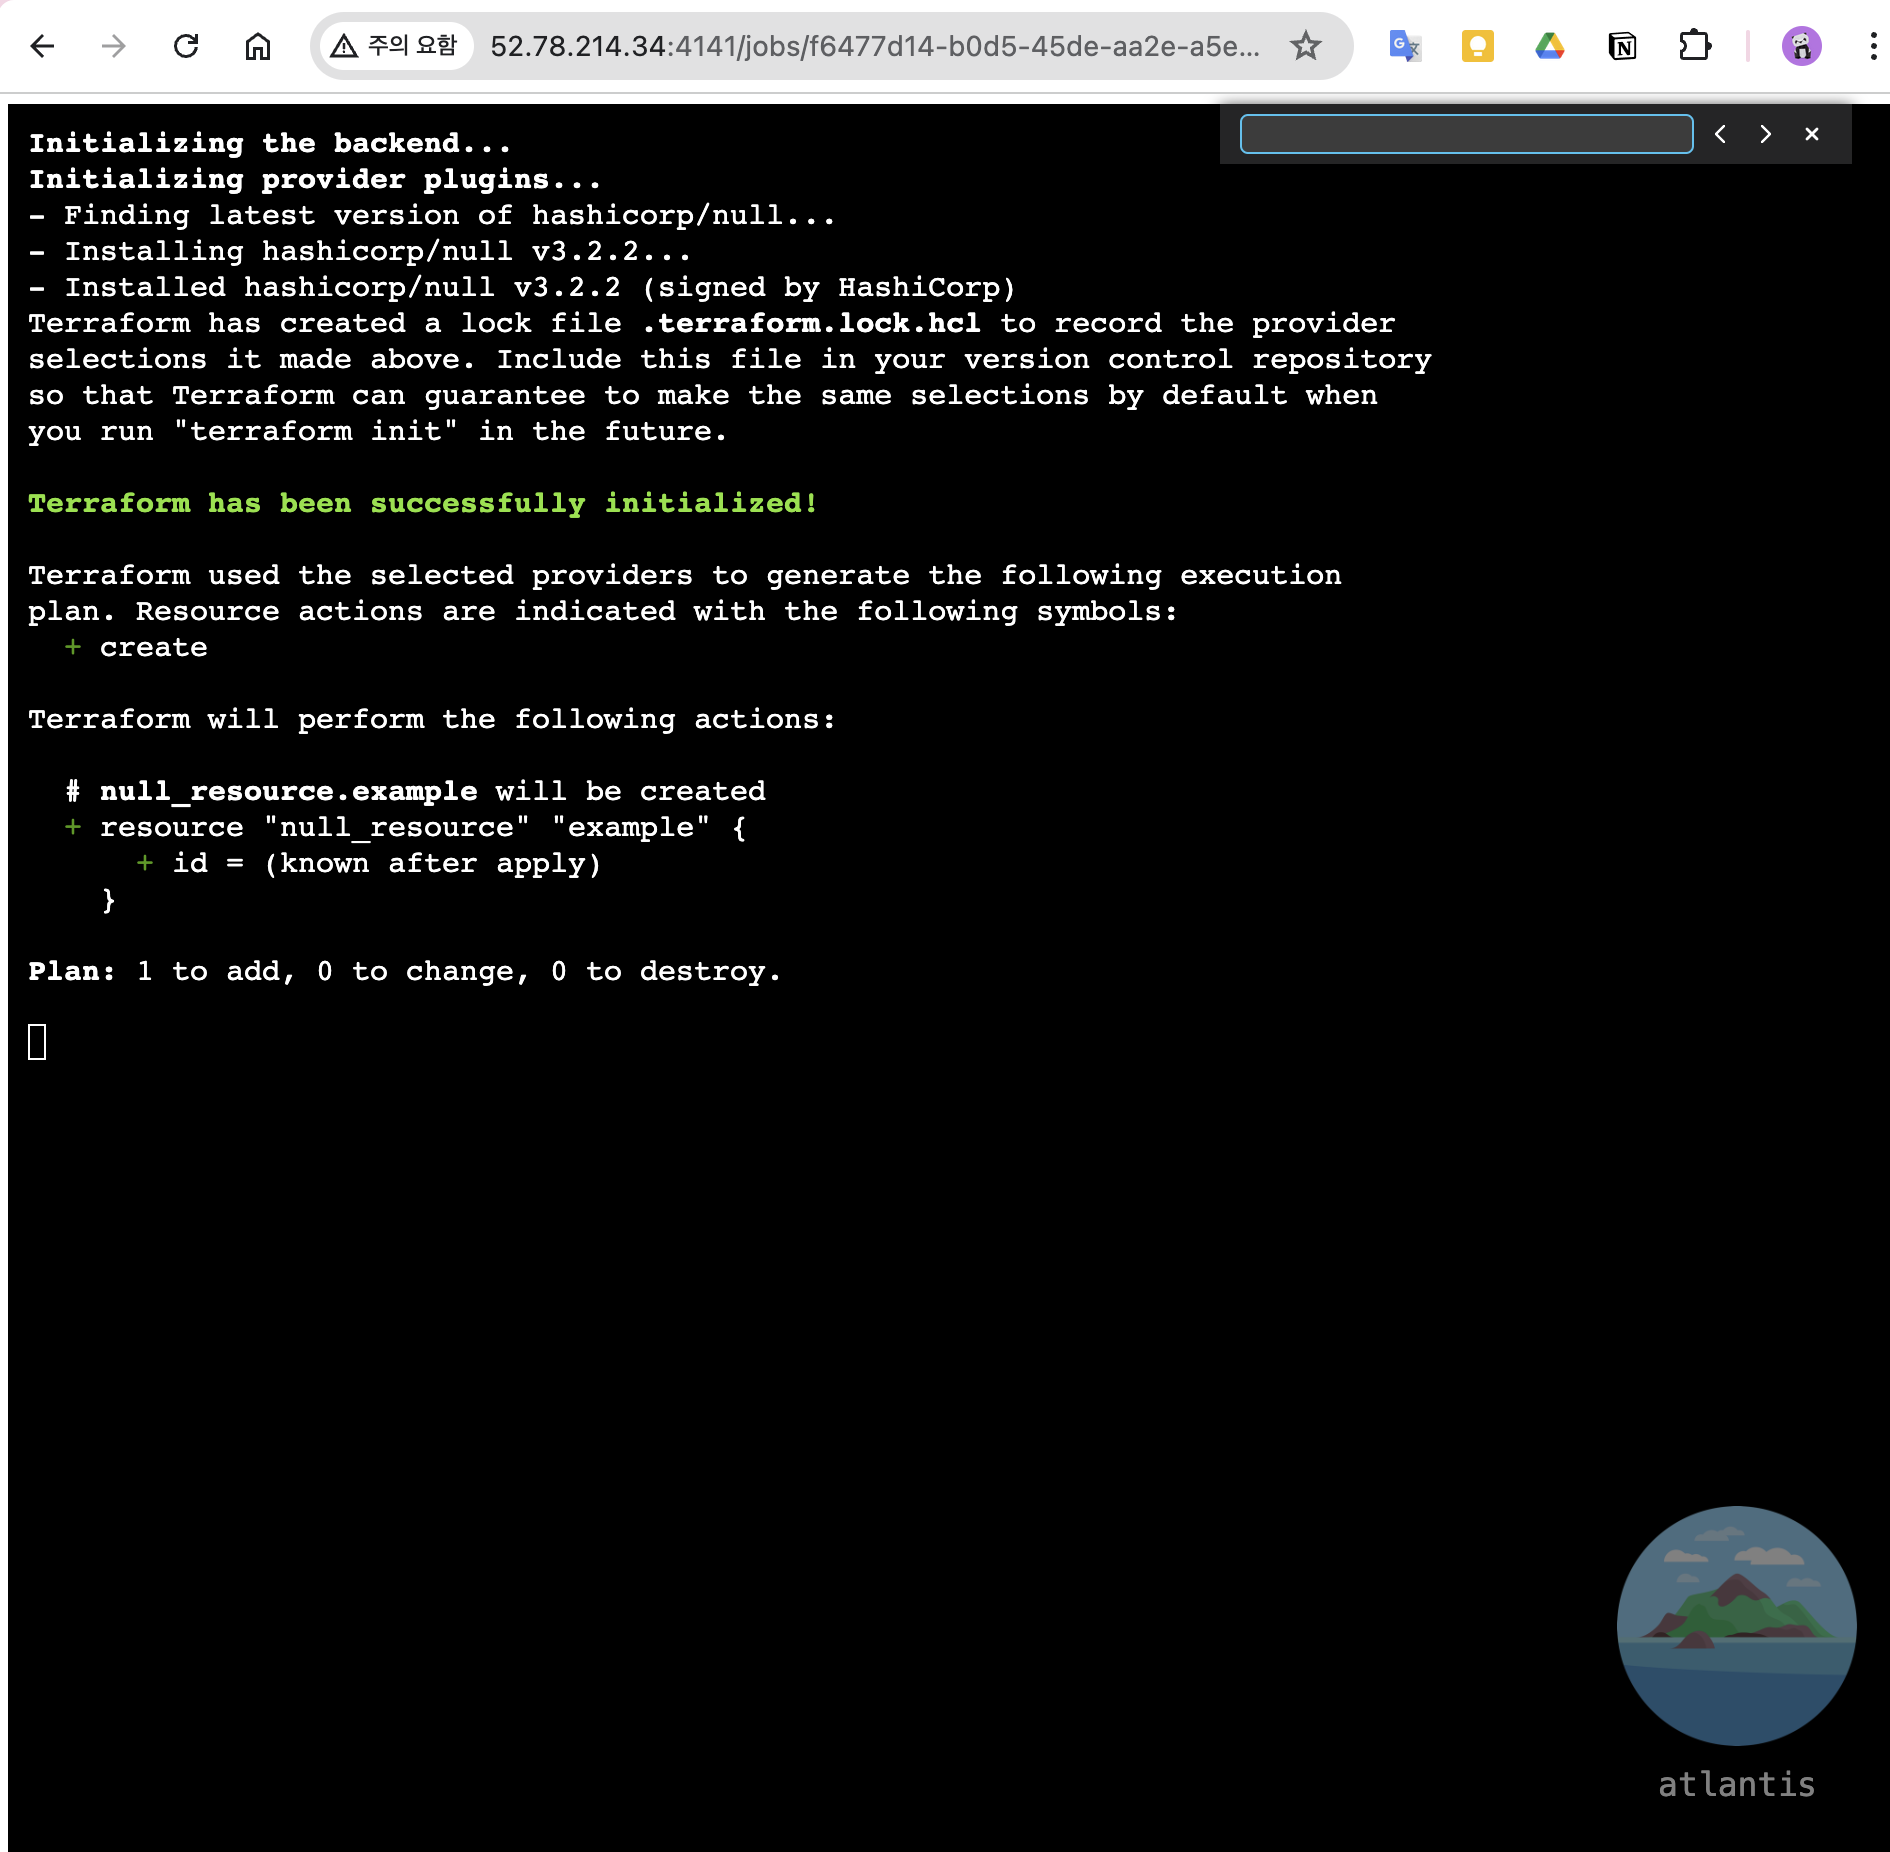
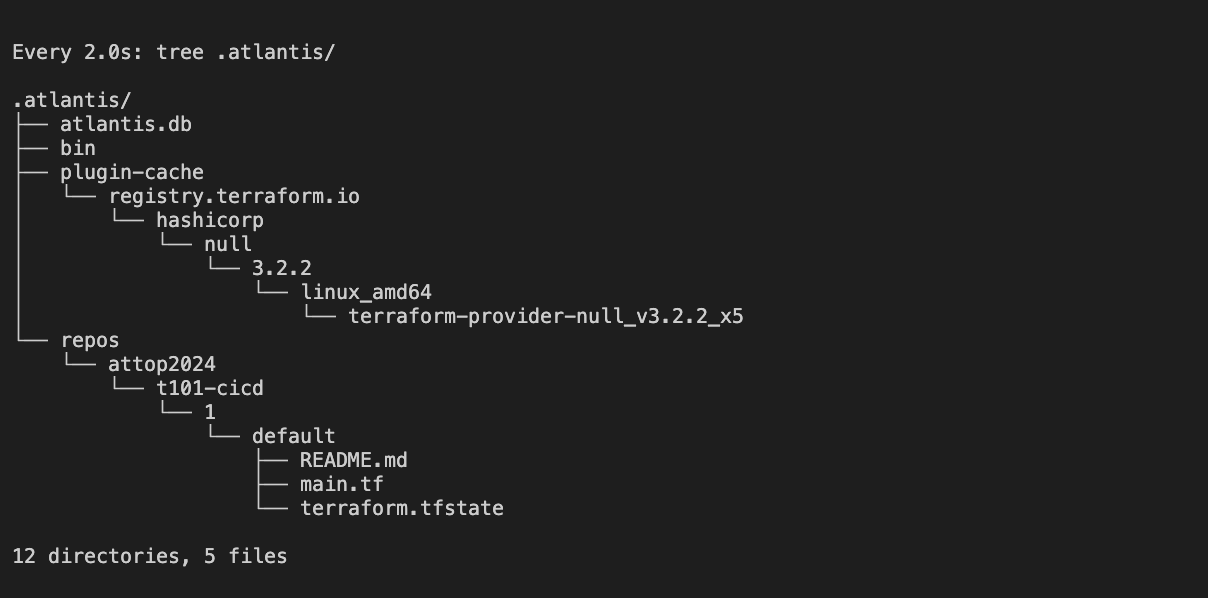
- 서버 모니터링
# terraform plan 수행 결과 파일 확인
watch -d tree .atlantis/
.atlantis/
├── atlantis.db
├── bin
├── plugin-cache
│   └── registry.terraform.io
│       └── hashicorp
│           └── null
│               └── 3.2.2
│                   └── linux_amd64
│                       └── terraform-provider-null_v3.2.2_x5
└── repos
    └── gasida
        └── t101-cicd
            └── 1
                └── default
                    ├── README.md
                    ├── default.tfplan
                    └── main.tf

# Github Repo 코드를 가져 온 것을 확인
cat .atlantis/repos/$USERNAME/t101-cicd/1/default/main.tf-
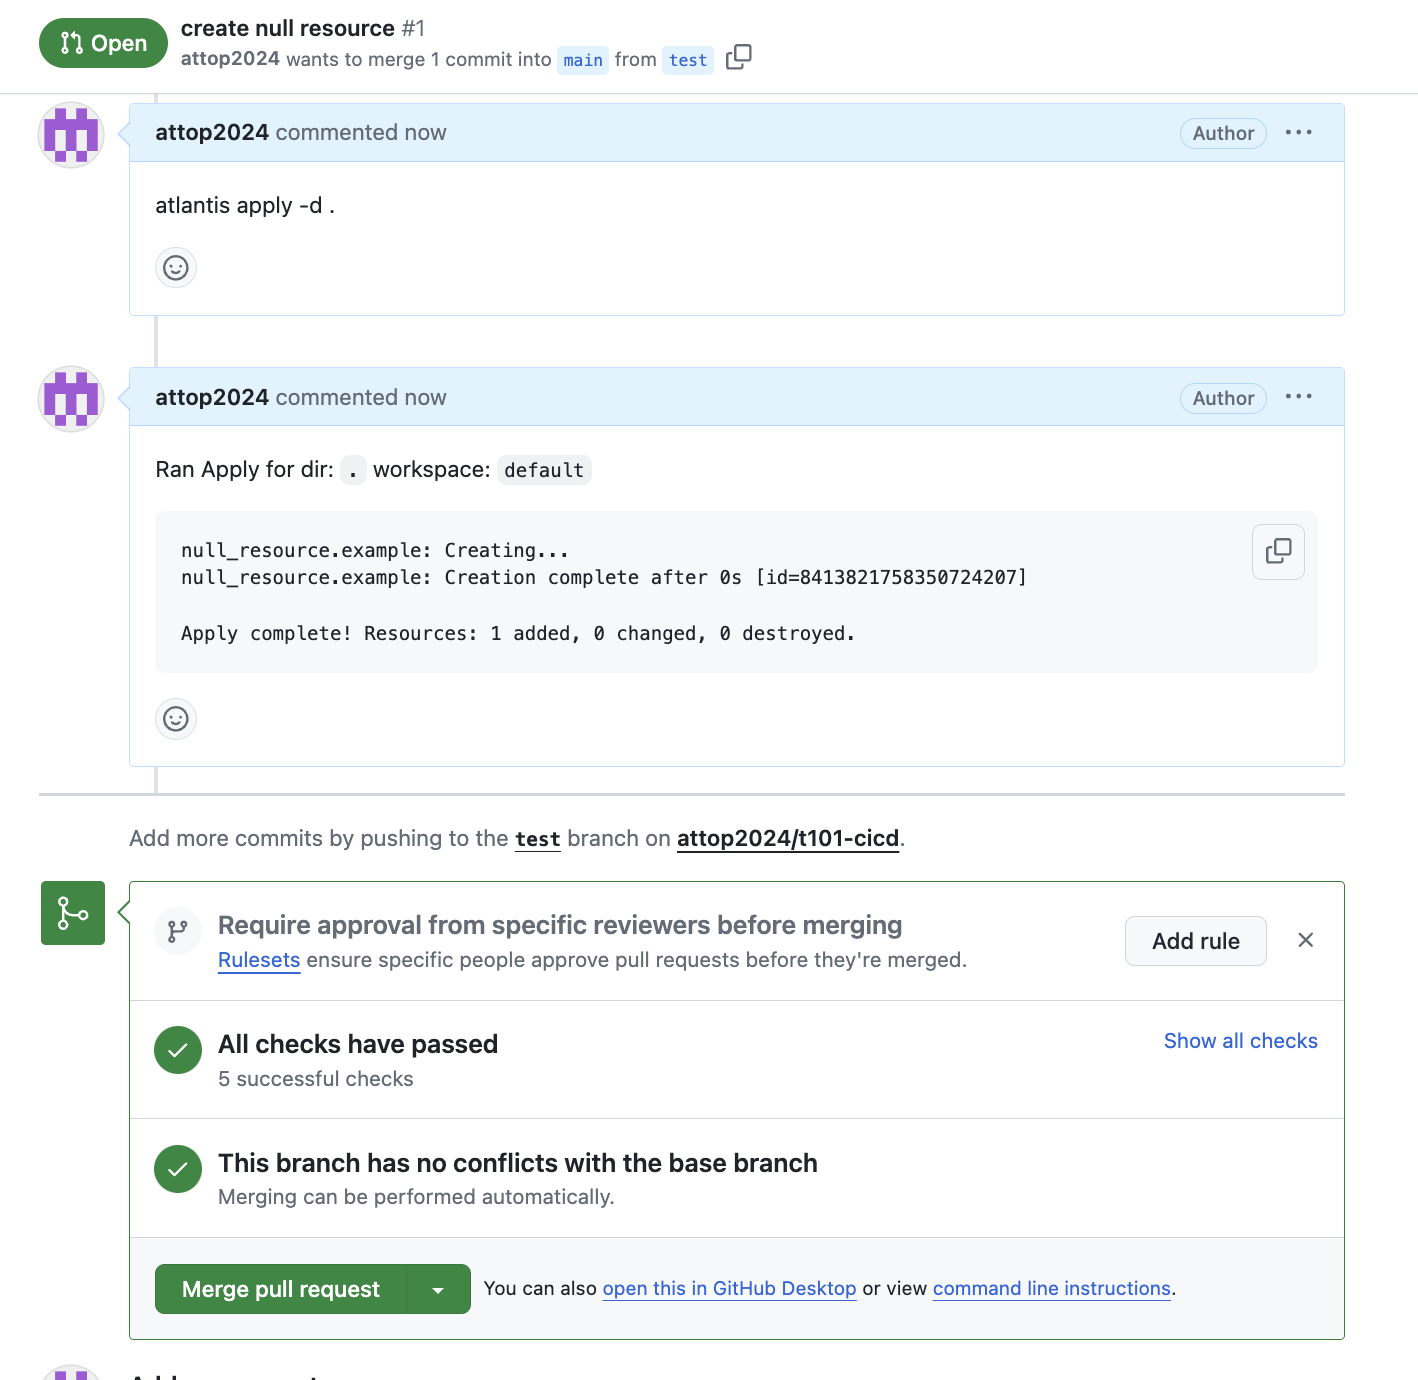
Add a comment ⇒ apply 결과 화면 확인
-
Merge pull request → Confirm merge
-
웹확인
실습: atlantis - 작업2: aws iam user 생성
- AWS S3 버킷 생성
# aws s3 mb s3://kgetall-t101 --region ap-northeast-2
make_bucket: kgetall-t101

# aws s3 ls
2024-07-13 14:43:53 kgetall-t101- Local 에서 Git 코드 작업
# feature branch 생성
git branch iam && git checkout iam && git branch

# 디렉터리 생성
mkdir iam && cd iam

# main.tf 파일 작성
vi main.tf
----------
terraform {
  backend "s3" {
    bucket = "kgetall-t101"
    key    = "terraform.tfstate"
    region = "ap-northeast-2"
  }
}

resource "aws_iam_user" "myuser" {
  name = "t101user"
}


# add commit push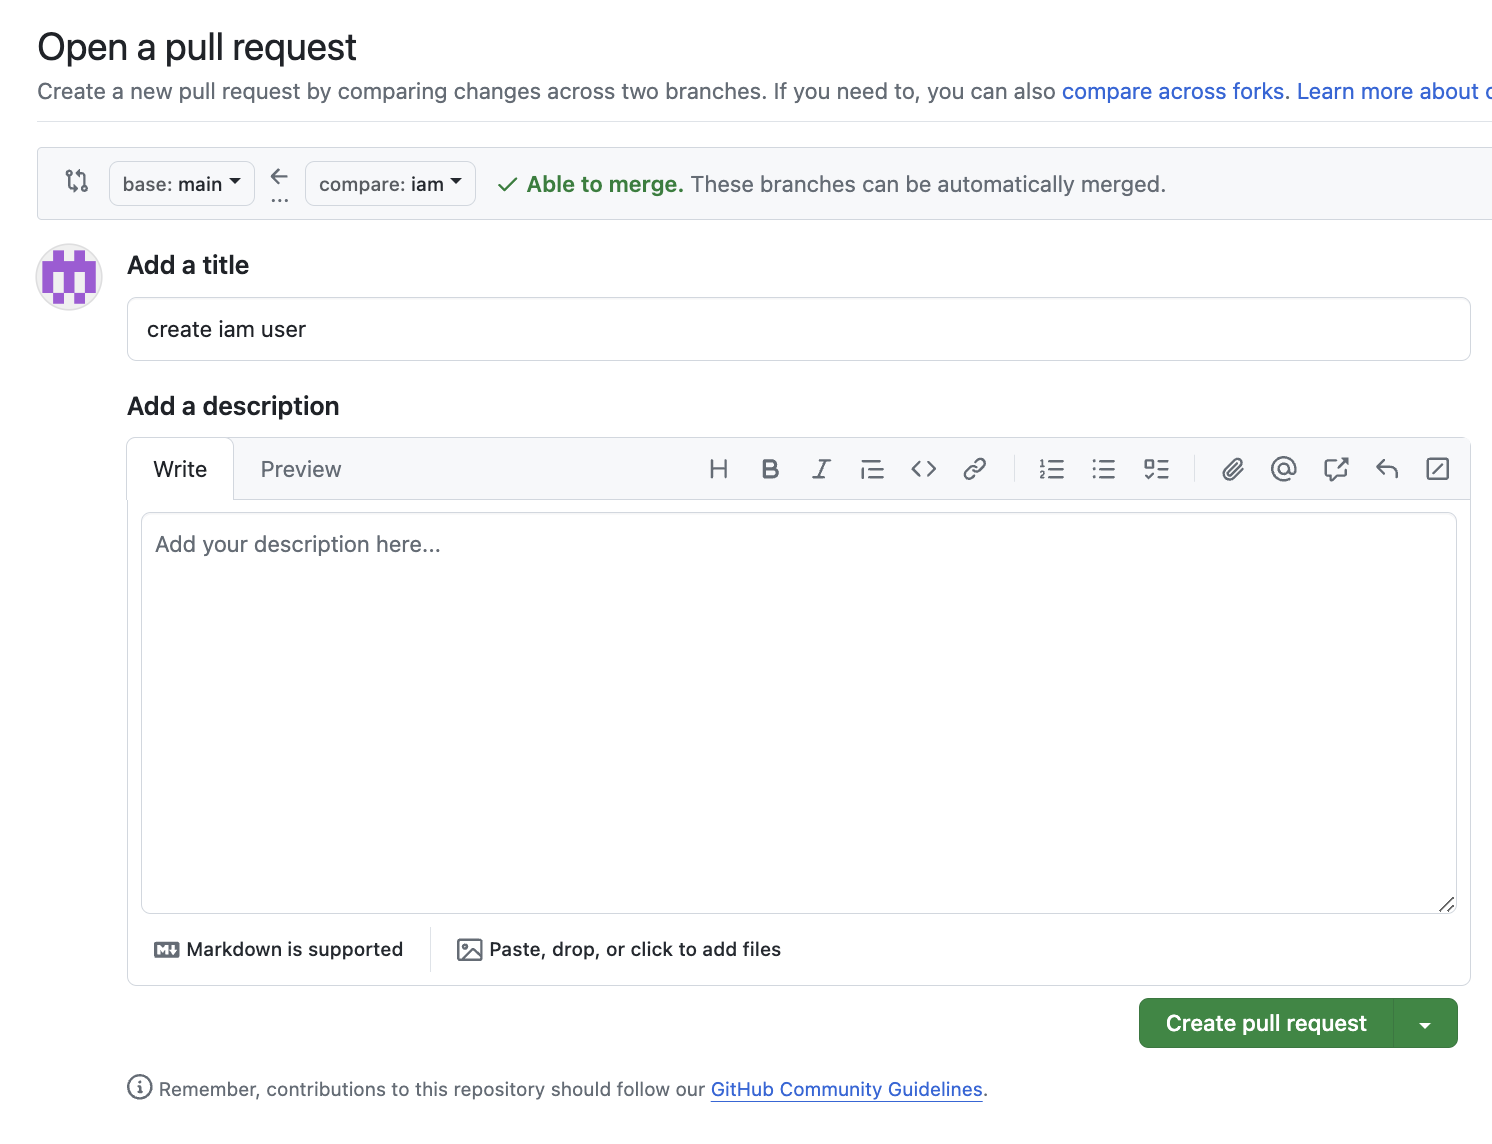
git add main.tf && git commit -m "add main.tf" && git push origin iam- Github(Create a pull request) → Atlantis 확인
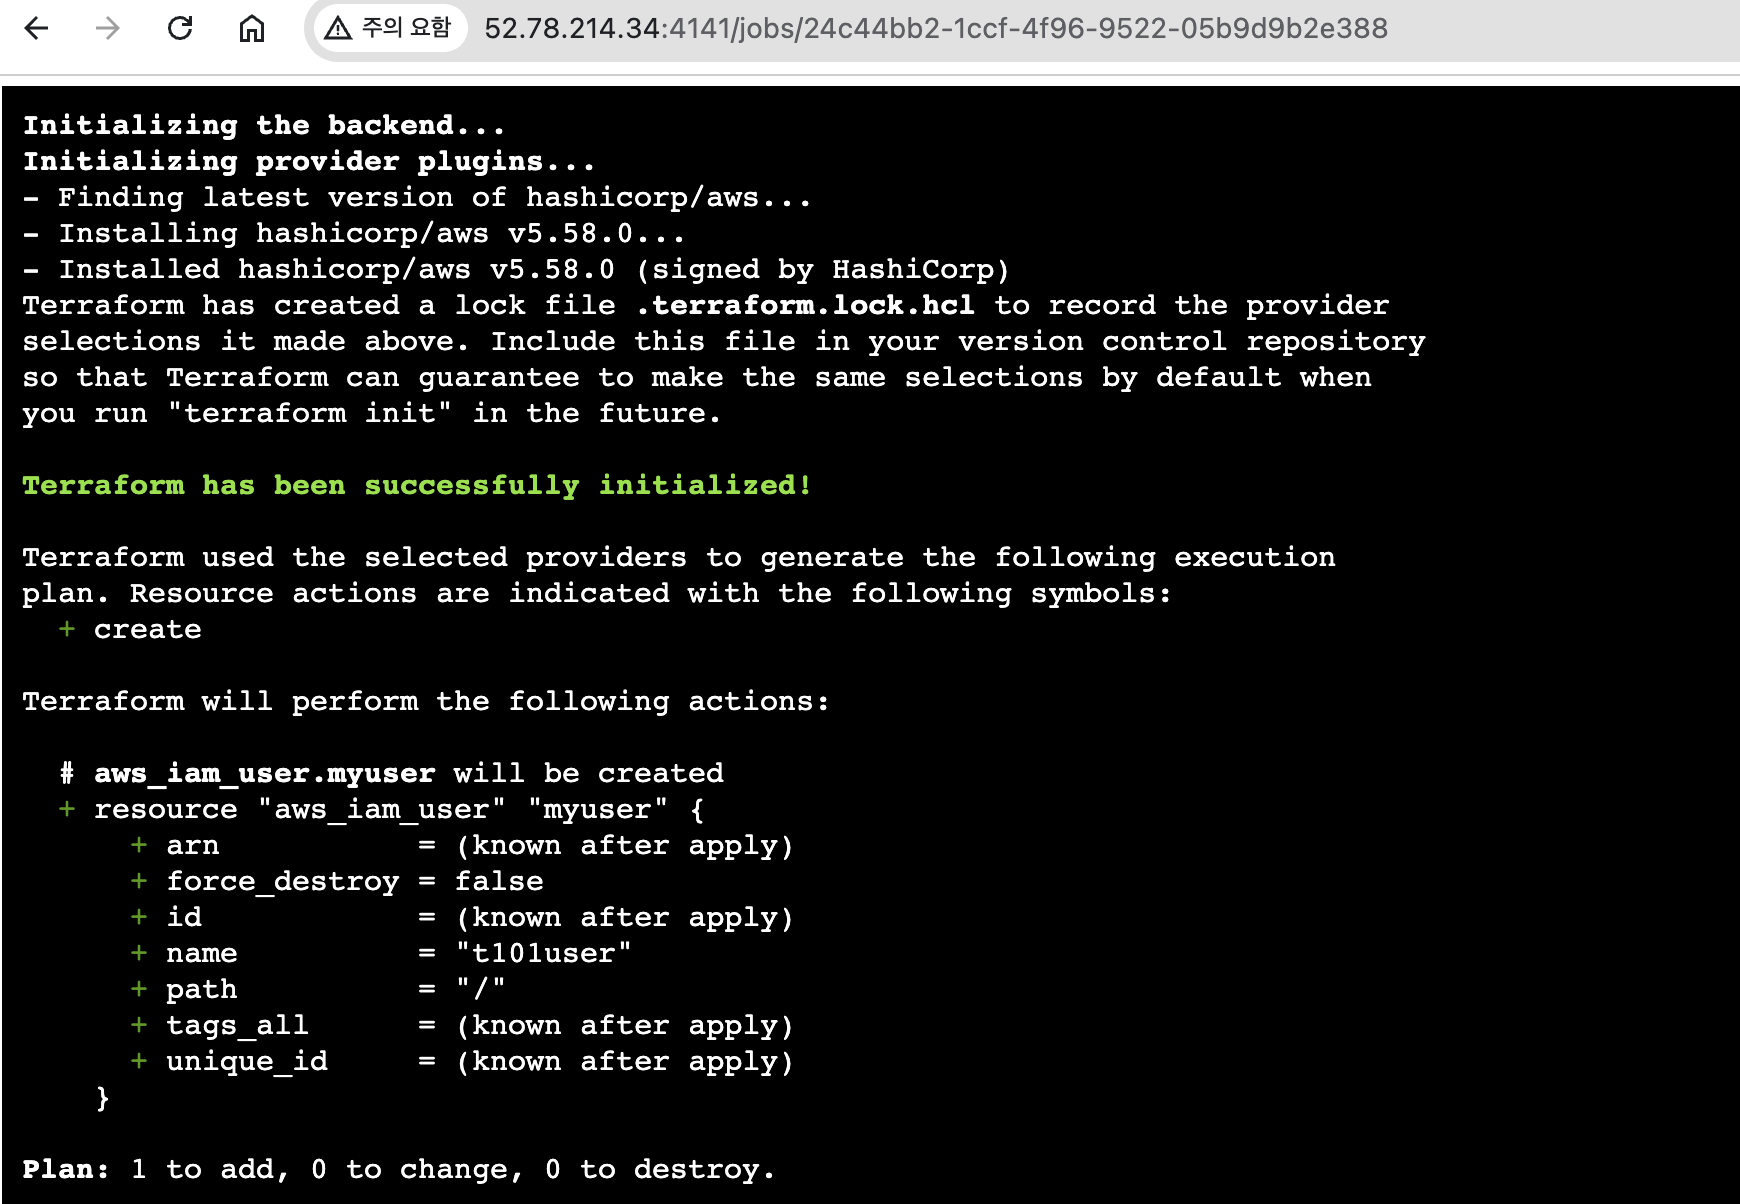
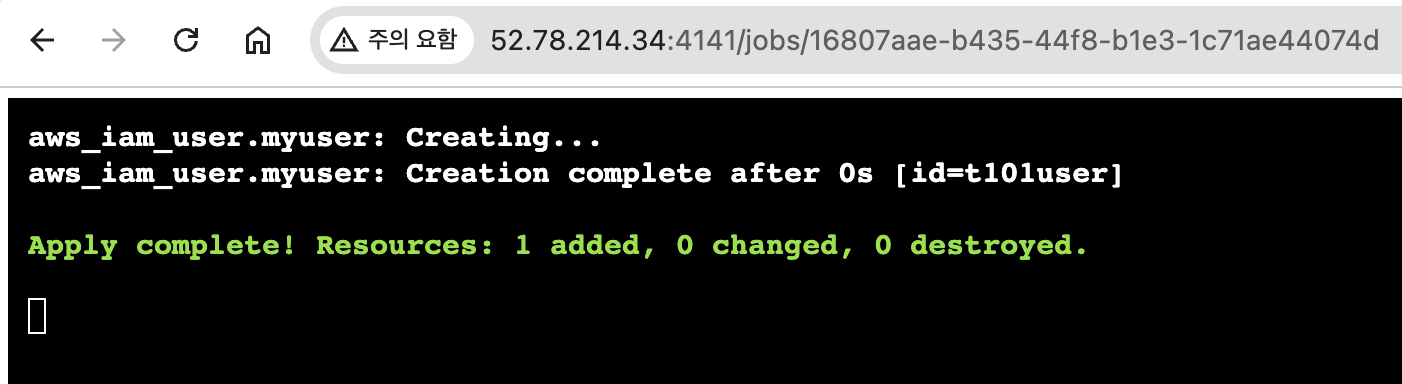
- Add a comment ⇒ apply 결과 화면 확인
#
atlantis plan -d iam

# 아래 명령???
atlantis destroy -d iam

#
atlantis apply -d iam
- aws s3 확인
root@Atlantis:~/t101-cicd/iam# aws s3 ls s3://kgetall-t101
2024-07-13 14:54:16        862 terraform.tfstate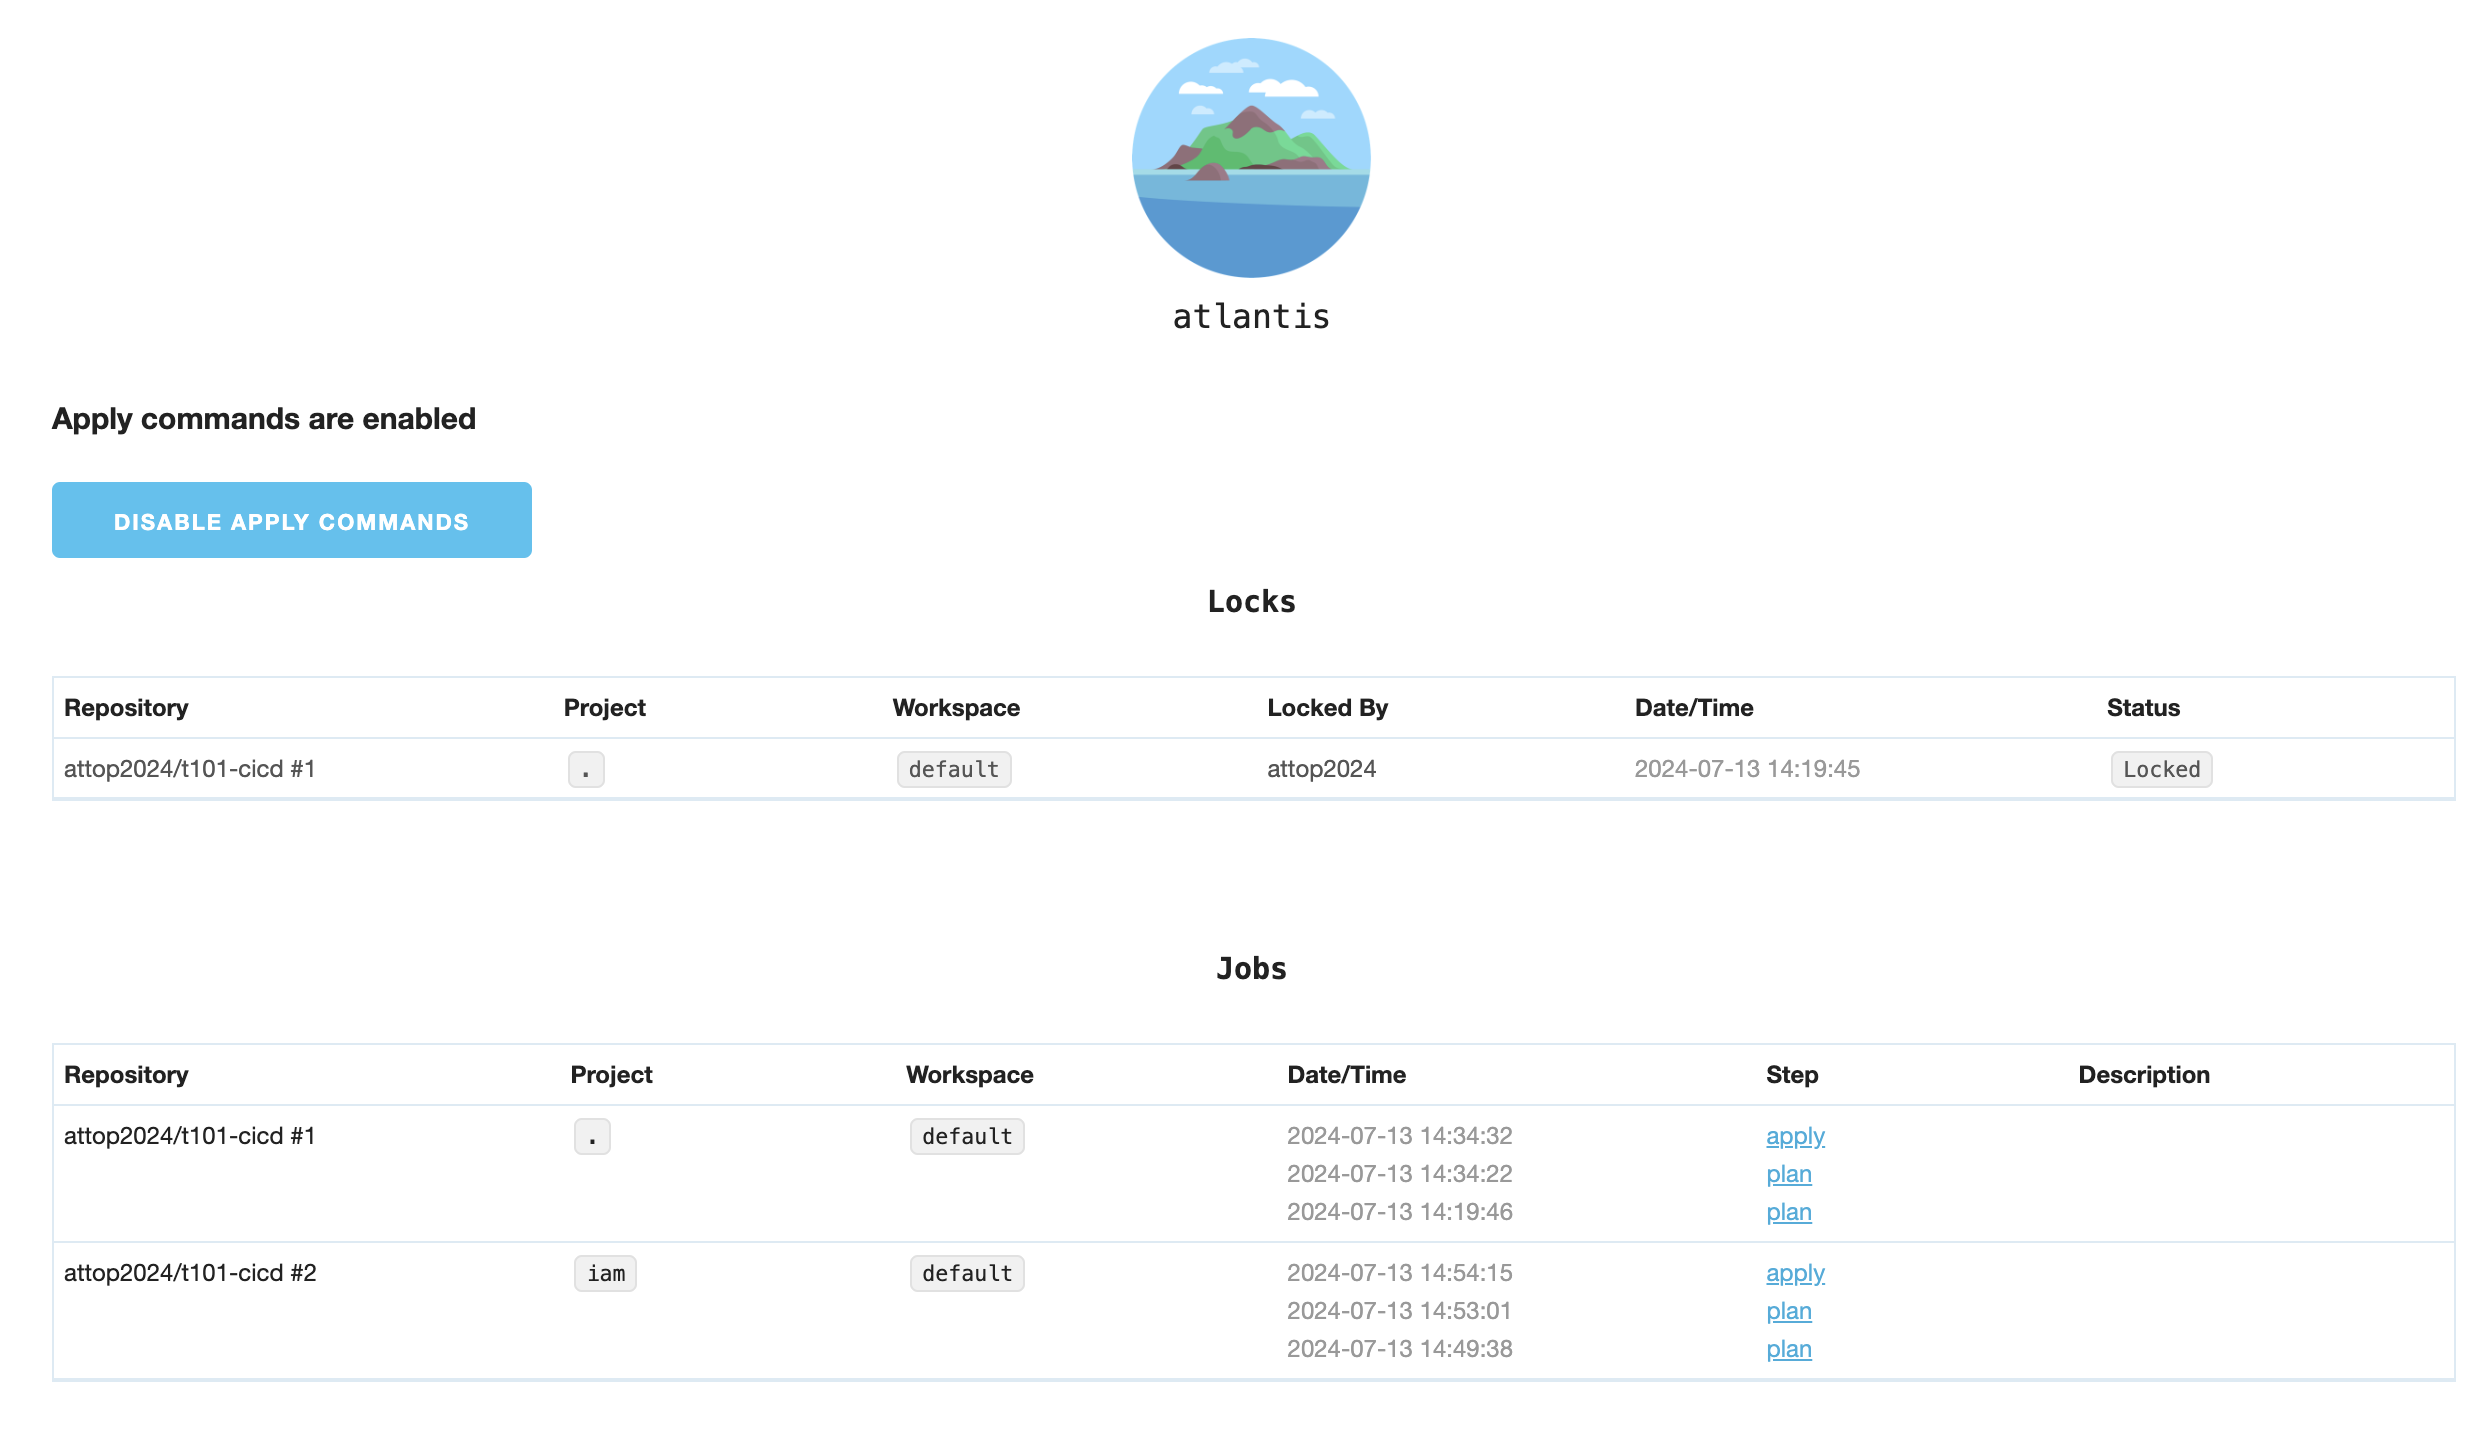
- Merge pull request → Confirm merge
# repos 에 1 디렉터리 삭제
watch -d tree .atlantis/
.atlantis/
├── atlantis.db
├── bin
├── plugin-cache
│   └── registry.terraform.io
│       └── hashicorp
│           └── null
│               └── 3.2.2
│                   └── linux_amd64
│                       └── terraform-provider-null_v3.2.2_x5
└── repos
    └── gasida
└── t101-cicd- 웹확인
