Avatar 컴포넌트 만들기
MUI를 통한 기본적 Avatar에서 원하는 props를 받아 만드는 컴포넌트 코드를 작성하고자 한다.
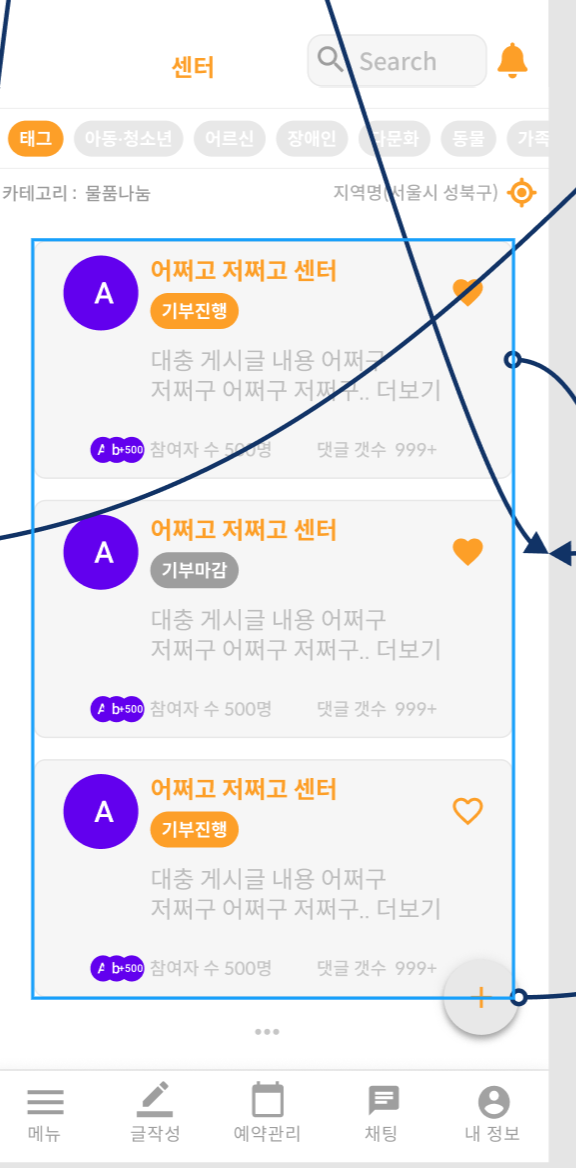
- 해당 참여자의 수 옆의 Avatar를 완성하고자 한다
❶ 코드 (문제점 발생)
import Avatar from "@mui/material/Avatar";
import AvatarGroup from "@mui/material/AvatarGroup";
import CircularProgress from "@mui/material/CircularProgress";
import { useEffect, useState } from "react";
import Box from "@mui/material/Box";
import PropTypes from "prop-types";

//dummy Data
const dataArr = [
  {
    name: "mmmm",
    image: "/",
    id: "khw970421",
  },
  {
    name: "김",
    image: "/",
    id: "khw97wdlwloed0",
  },
  {
    name: "박",
    image: "",
    id: "kii9222swwsss",
  },
  {
    name: "윤",
    image: "",
    id: "kqwjeowos11ss",
  },
  {
    name: "윤",
    image: "",
    id: "kqwjeowos11ss",
  },
  {
    name: "윤",
    image: "",
    id: "kqwjeowos11ss",
  },
  {
    name: "윤",
    image: "",
    id: "kqwjeowos11ss",
  },
];

// 사이즈 크기 자유롭게

const Profile = ({ max }) => {
  const [loading, setLoading] = useState(true);
  const [data, setData] = useState([]);

  //초기 api 실행
  useEffect(async () => {
    await setTimeout(() => {
      setLoading(false);
      // api로 부터 받아온 댓글 사용자 데이터 넣기
      setData(dataArr);
    }, 2000);
  }, []);

  //Avatar 태그 클릭시 이벤트
  const clickAvatarHandler = (id) => {
    //해당 대상의 마이페이지로 이동하는 함수 구현
    console.log(id);
  };

  return (
    <>
      {loading ? (
        <>
          <Box sx={{ display: "flex" }}>
            <CircularProgress
              style={{ color: "#FD9F28", width: "20px", height: "20px" }}
            />
          </Box>
        </>
      ) : (
        <AvatarGroup max={max}>
          {data.map(({ name, image, id }) => {
            return (
              <Avatar
                sx={{ width: "30px", height: "30px" }}
                key={id + Math.random()}
                alt={name}
                src={image}
                onClick={() => {
                  clickAvatarHandler(id);
                }}
              />
            );
          })}
        </AvatarGroup>
      )}
    </>
  );
};

Profile.defaultProps = {
  max: 3,
};

Profile.propTypes = {
  max: PropTypes.number,
};

export default Profile;
일정시간
Spinner가 돌고 나중에Avatar가 보이게 된다.
공식 MUI사이트에서 제공하는Avatar의sx속성을 적용해 width, height를 적용시켰다.
문제점 발견

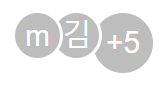
결과는 이와 같이 max로 적용된 남은 대상에 대한
Avatar가 적용이 되지않았다.
❷ 코드 (styled-components)
import Avatar from "@mui/material/Avatar";
import AvatarGroup from "@mui/material/AvatarGroup";
import CircularProgress from "@mui/material/CircularProgress";
import { useEffect, useState } from "react";
import Box from "@mui/material/Box";
import PropTypes from "prop-types";
import styled from "styled-components";

const CustomAvatar = styled(Avatar)`
  width: 30px;
  height: 30px;
`;

//dummy Data
const dataArr = [
  {
    name: "mmmm",
    image: "/",
    id: "khw970421",
  },
  {
    name: "김",
    image: "/",
    id: "khw97wdlwloed0",
  },
  {
    name: "박",
    image: "",
    id: "kii9222swwsss",
  },
  {
    name: "윤",
    image: "",
    id: "kqwjeowos11ss",
  },
  {
    name: "윤",
    image: "",
    id: "kqwjeowos11ss",
  },
  {
    name: "윤",
    image: "",
    id: "kqwjeowos11ss",
  },
  {
    name: "윤",
    image: "",
    id: "kqwjeowos11ss",
  },
];

// 사이즈 크기 자유롭게

const Profile = ({ max }) => {
  const [loading, setLoading] = useState(true);
  const [data, setData] = useState([]);

  //초기 api 실행
  useEffect(async () => {
    await setTimeout(() => {
      setLoading(false);
      // api로 부터 받아온 댓글 사용자 데이터 넣기
      setData(dataArr);
    }, 2000);
  }, []);

  //Avatar 태그 클릭시 이벤트
  const clickAvatarHandler = (id) => {
    //해당 대상의 마이페이지로 이동하는 함수 구현
    console.log(id);
  };

  return (
    <>
      {loading ? (
        <>
          <Box sx={{ display: "flex" }}>
            <CircularProgress
              style={{ color: "#FD9F28", width: "20px", height: "20px" }}
            />
          </Box>
        </>
      ) : (
        <AvatarGroup max={max}>
          {data.map(({ name, image, id }) => {
            return (
              <CustomAvatar
                key={id + Math.random()}
                alt={name}
                src={image}
                onClick={() => {
                  clickAvatarHandler(id);
                }}
              />
            );
          })}
        </AvatarGroup>
      )}
    </>
  );
};

Profile.defaultProps = {
  max: 3,
};

Profile.propTypes = {
  max: PropTypes.number,
};

export default Profile;
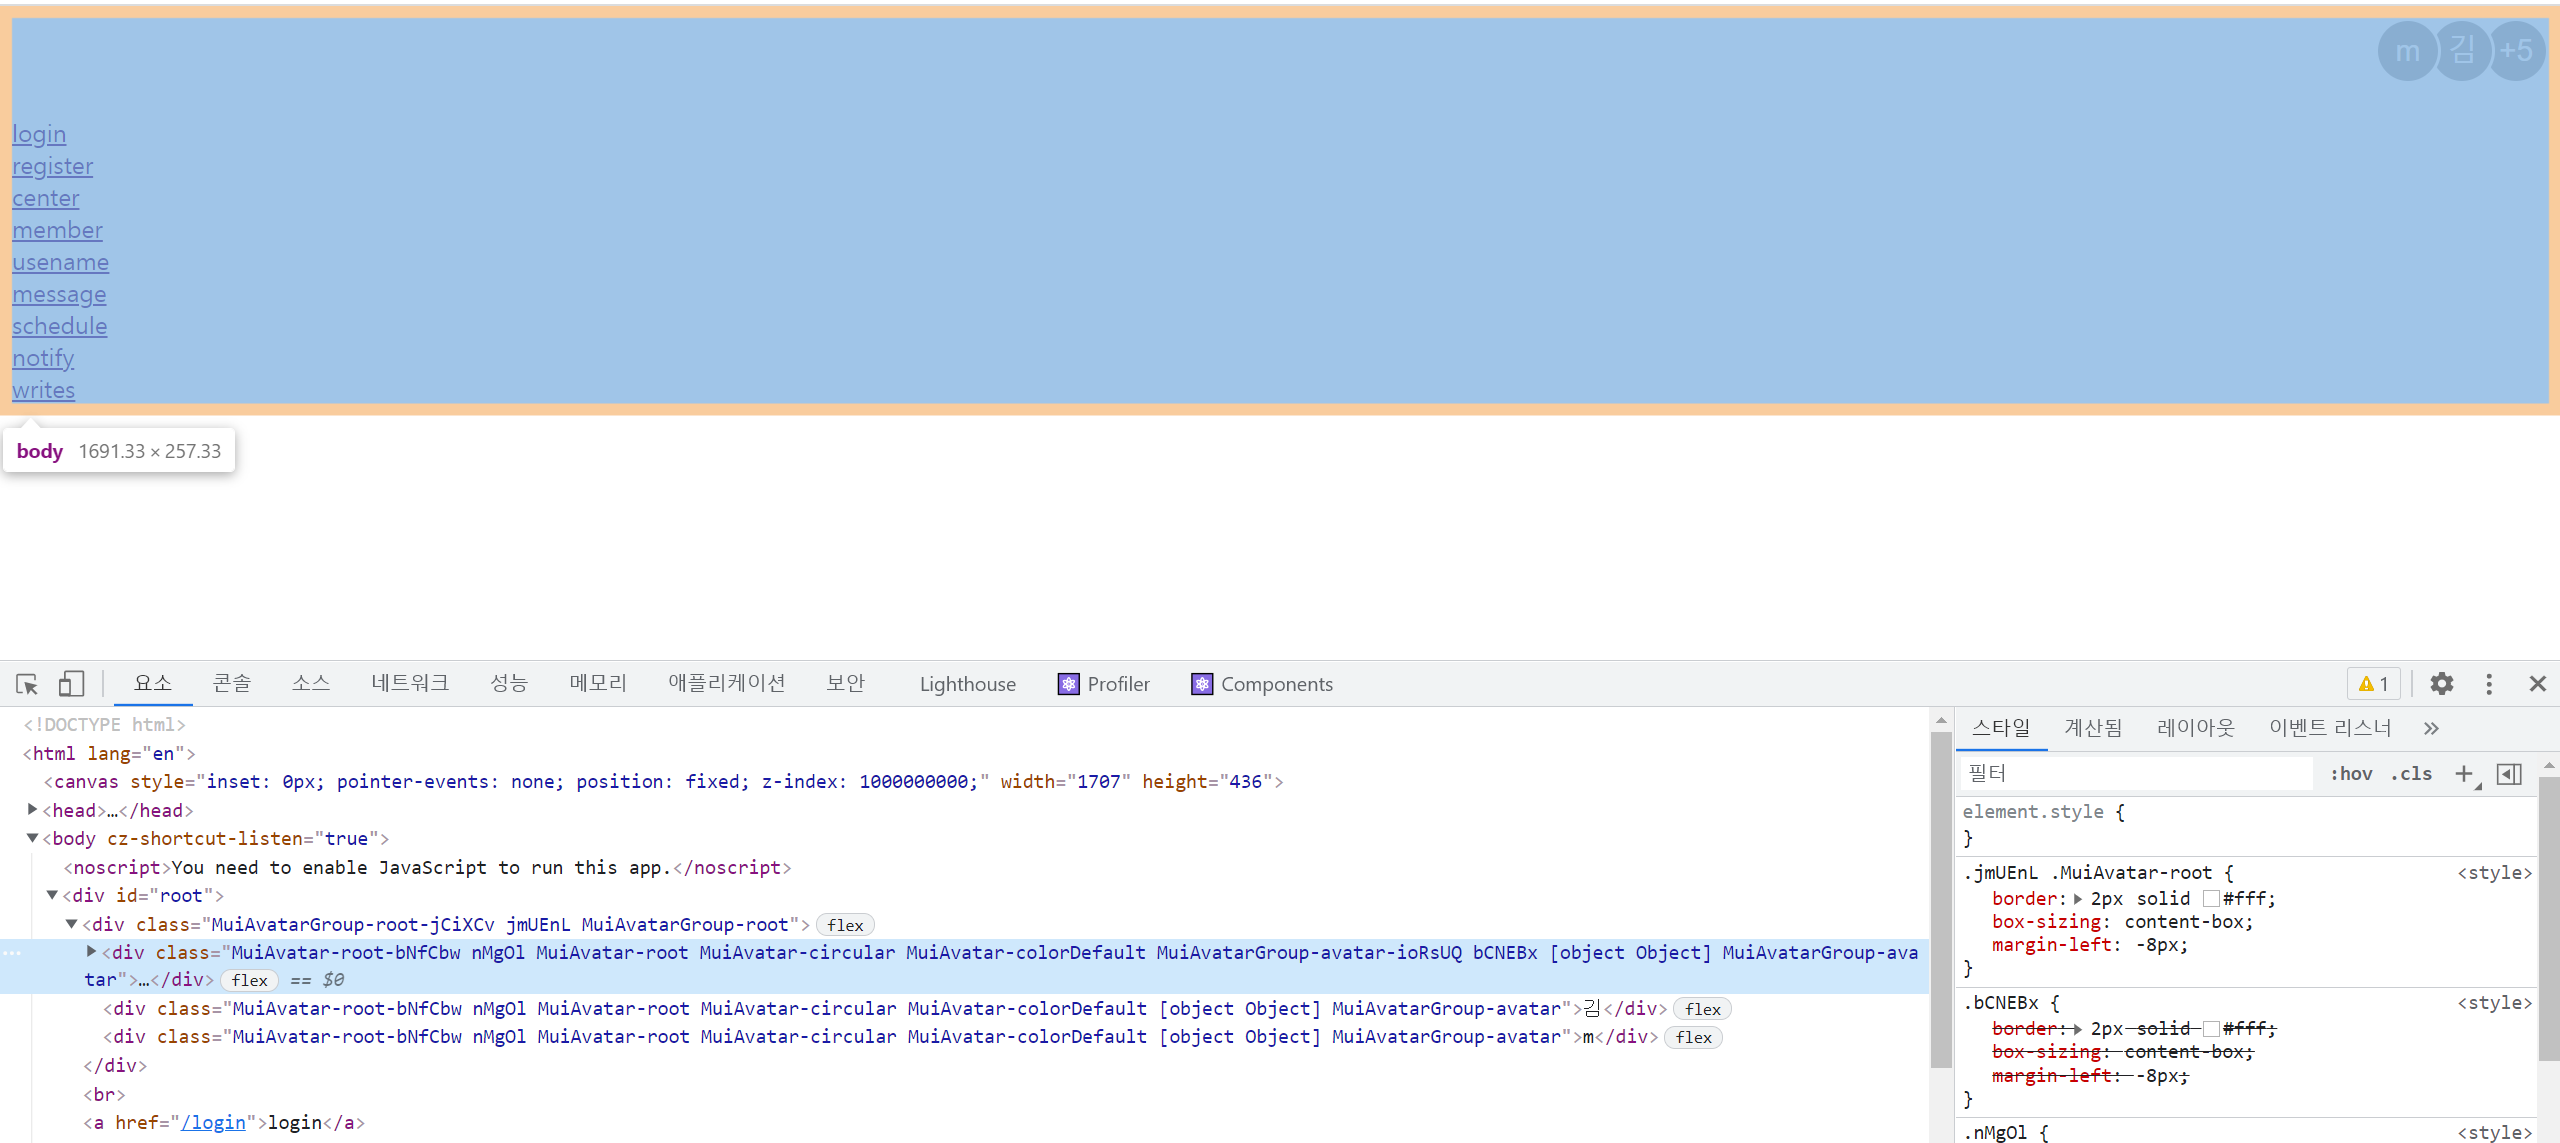
styled-components를 추가해 기존에Avatar인 곳을CustomAvatar로 바꾸어 style을 적용했다.
- 결과는 마찬가지였다.
문제점 요소 스타일로 확인하기

.ibvPWJ를 가진 아래 2개의 div는 30px이 적용되고 위의 div 하나는 그렇지 못한 상태이다.
이를 통해 보면
Avatar태그가 문제가 아니고AvatarGroup의 부분에서 해결을 고민해봐야한다.
AvatarGroup
props => classes
사용법 => object
내용 => Override or extend the styles applied to the component. See CSS API below for more details.
- 간단히 해당 감싸고 있는 부분의 CSS를 classes를 통해 Override를 처리할 수 있다. 공식사이트 mui
❸ 코드 (AvatarGroup 속성 추가)
import Avatar from "@mui/material/Avatar";
import AvatarGroup from "@mui/material/AvatarGroup";
import CircularProgress from "@mui/material/CircularProgress";
import { useEffect, useState } from "react";
import Box from "@mui/material/Box";
import PropTypes from "prop-types";

//dummy Data
const dataArr = [
  {
    name: "mmmm",
    image: "/",
    id: "khw970421",
  },
  {
    name: "김",
    image: "/",
    id: "khw97wdlwloed0",
  },
  {
    name: "박",
    image: "",
    id: "kii9222swwsss",
  },
  {
    name: "윤",
    image: "",
    id: "kqwjeowos11ss",
  },
  {
    name: "윤",
    image: "",
    id: "kqwjeowos11ss",
  },
  {
    name: "윤",
    image: "",
    id: "kqwjeowos11ss",
  },
  {
    name: "윤",
    image: "",
    id: "kqwjeowos11ss",
  },
];

// 사이즈 크기 자유롭게

const Profile = ({ max }) => {
  const [loading, setLoading] = useState(true);
  const [data, setData] = useState([]);

  //초기 api 실행
  useEffect(async () => {
    await setTimeout(() => {
      setLoading(false);
      // api로 부터 받아온 댓글 사용자 데이터 넣기
      setData(dataArr);
    }, 2000);
  }, []);

  //Avatar 태그 클릭시 이벤트
  const clickAvatarHandler = (id) => {
    //해당 대상의 마이페이지로 이동하는 함수 구현
    console.log(id);
  };

  return (
    <>
      {loading ? (
        <>
          <Box sx={{ display: "flex" }}>
            <CircularProgress
              style={{ color: "#FD9F28", width: "20px", height: "20px" }}
            />
          </Box>
        </>
      ) : (
        <AvatarGroup
          max={max}
          classes={{
            avatar: {
              width: "100px",
              height: "100px",
            },
          }}
        >
          {data.map(({ name, image, id }) => {
            return (
              <Avatar
                key={id + Math.random()}
                alt={name}
                src={image}
                onClick={() => {
                  clickAvatarHandler(id);
                }}
              />
            );
          })}
        </AvatarGroup>
      )}
    </>
  );
};

Profile.defaultProps = {
  max: 3,
};

Profile.propTypes = {
  max: PropTypes.number,
};

export default Profile;해당링크를 참고해
classes를 사용해보았다.
(makeStyles는@material-ui/core/styles를 따로 설치하기 때문에 사용하지 않고 시도해보았다. )
해당 결과를 보면 요소에서 [Object Object]로 인식을 제대로 하지 못한다.
❹ 코드 (makeStyles사용)
makeStyles 사용을 위해
yarn add @mui/styles명령어를 이용해 설치를 진행했다.
(프로젝트에서 yarn을 사용하기 때문에)
import Avatar from "@mui/material/Avatar";
import AvatarGroup from "@mui/material/AvatarGroup";
import CircularProgress from "@mui/material/CircularProgress";
import { useEffect, useState } from "react";
import Box from "@mui/material/Box";
import PropTypes from "prop-types";

import { makeStyles } from "@material-ui/core/styles";

const useStyles = makeStyles({
  avatar: () => ({
    width: `100px`,
    height: `100px`,
  }),
});

//dummy Data
const dataArr = [
  {
    name: "mmmm",
    image: "/",
    id: "khw970421",
  },
  {
    name: "김",
    image: "/",
    id: "khw97wdlwloed0",
  },
  {
    name: "박",
    image: "",
    id: "kii9222swwsss",
  },
  {
    name: "윤",
    image: "",
    id: "kqwjeowos11ss",
  },
  {
    name: "윤",
    image: "",
    id: "kqwjeowos11ss",
  },
  {
    name: "윤",
    image: "",
    id: "kqwjeowos11ss",
  },
  {
    name: "윤",
    image: "",
    id: "kqwjeowos11ss",
  },
];

// 사이즈 크기 자유롭게

const Profile = ({ max }) => {
  const classes = useStyles();
  const [loading, setLoading] = useState(true);
  const [data, setData] = useState([]);

  //초기 api 실행
  useEffect(async () => {
    await setTimeout(() => {
      setLoading(false);
      // api로 부터 받아온 댓글 사용자 데이터 넣기
      setData(dataArr);
    }, 100);
  }, []);

  //Avatar 태그 클릭시 이벤트
  const clickAvatarHandler = (id) => {
    //해당 대상의 마이페이지로 이동하는 함수 구현
    console.log(id);
  };

  return (
    <>
      {loading ? (
        <>
          <Box sx={{ display: "flex" }}>
            <CircularProgress
              style={{ color: "#FD9F28", width: "20px", height: "20px" }}
            />
          </Box>
        </>
      ) : (
        <AvatarGroup max={max} classes={{ avatar: classes.avatar }}>
          {data.map(({ name, image, id }) => {
            return (
              <Avatar
                key={id + Math.random()}
                alt={name}
                src={image}
                onClick={() => {
                  clickAvatarHandler(id);
                }}
              />
            );
          })}
        </AvatarGroup>
      )}
    </>
  );
};

Profile.defaultProps = {
  max: 3,
};

Profile.propTypes = {
  max: PropTypes.number,
};

export default Profile;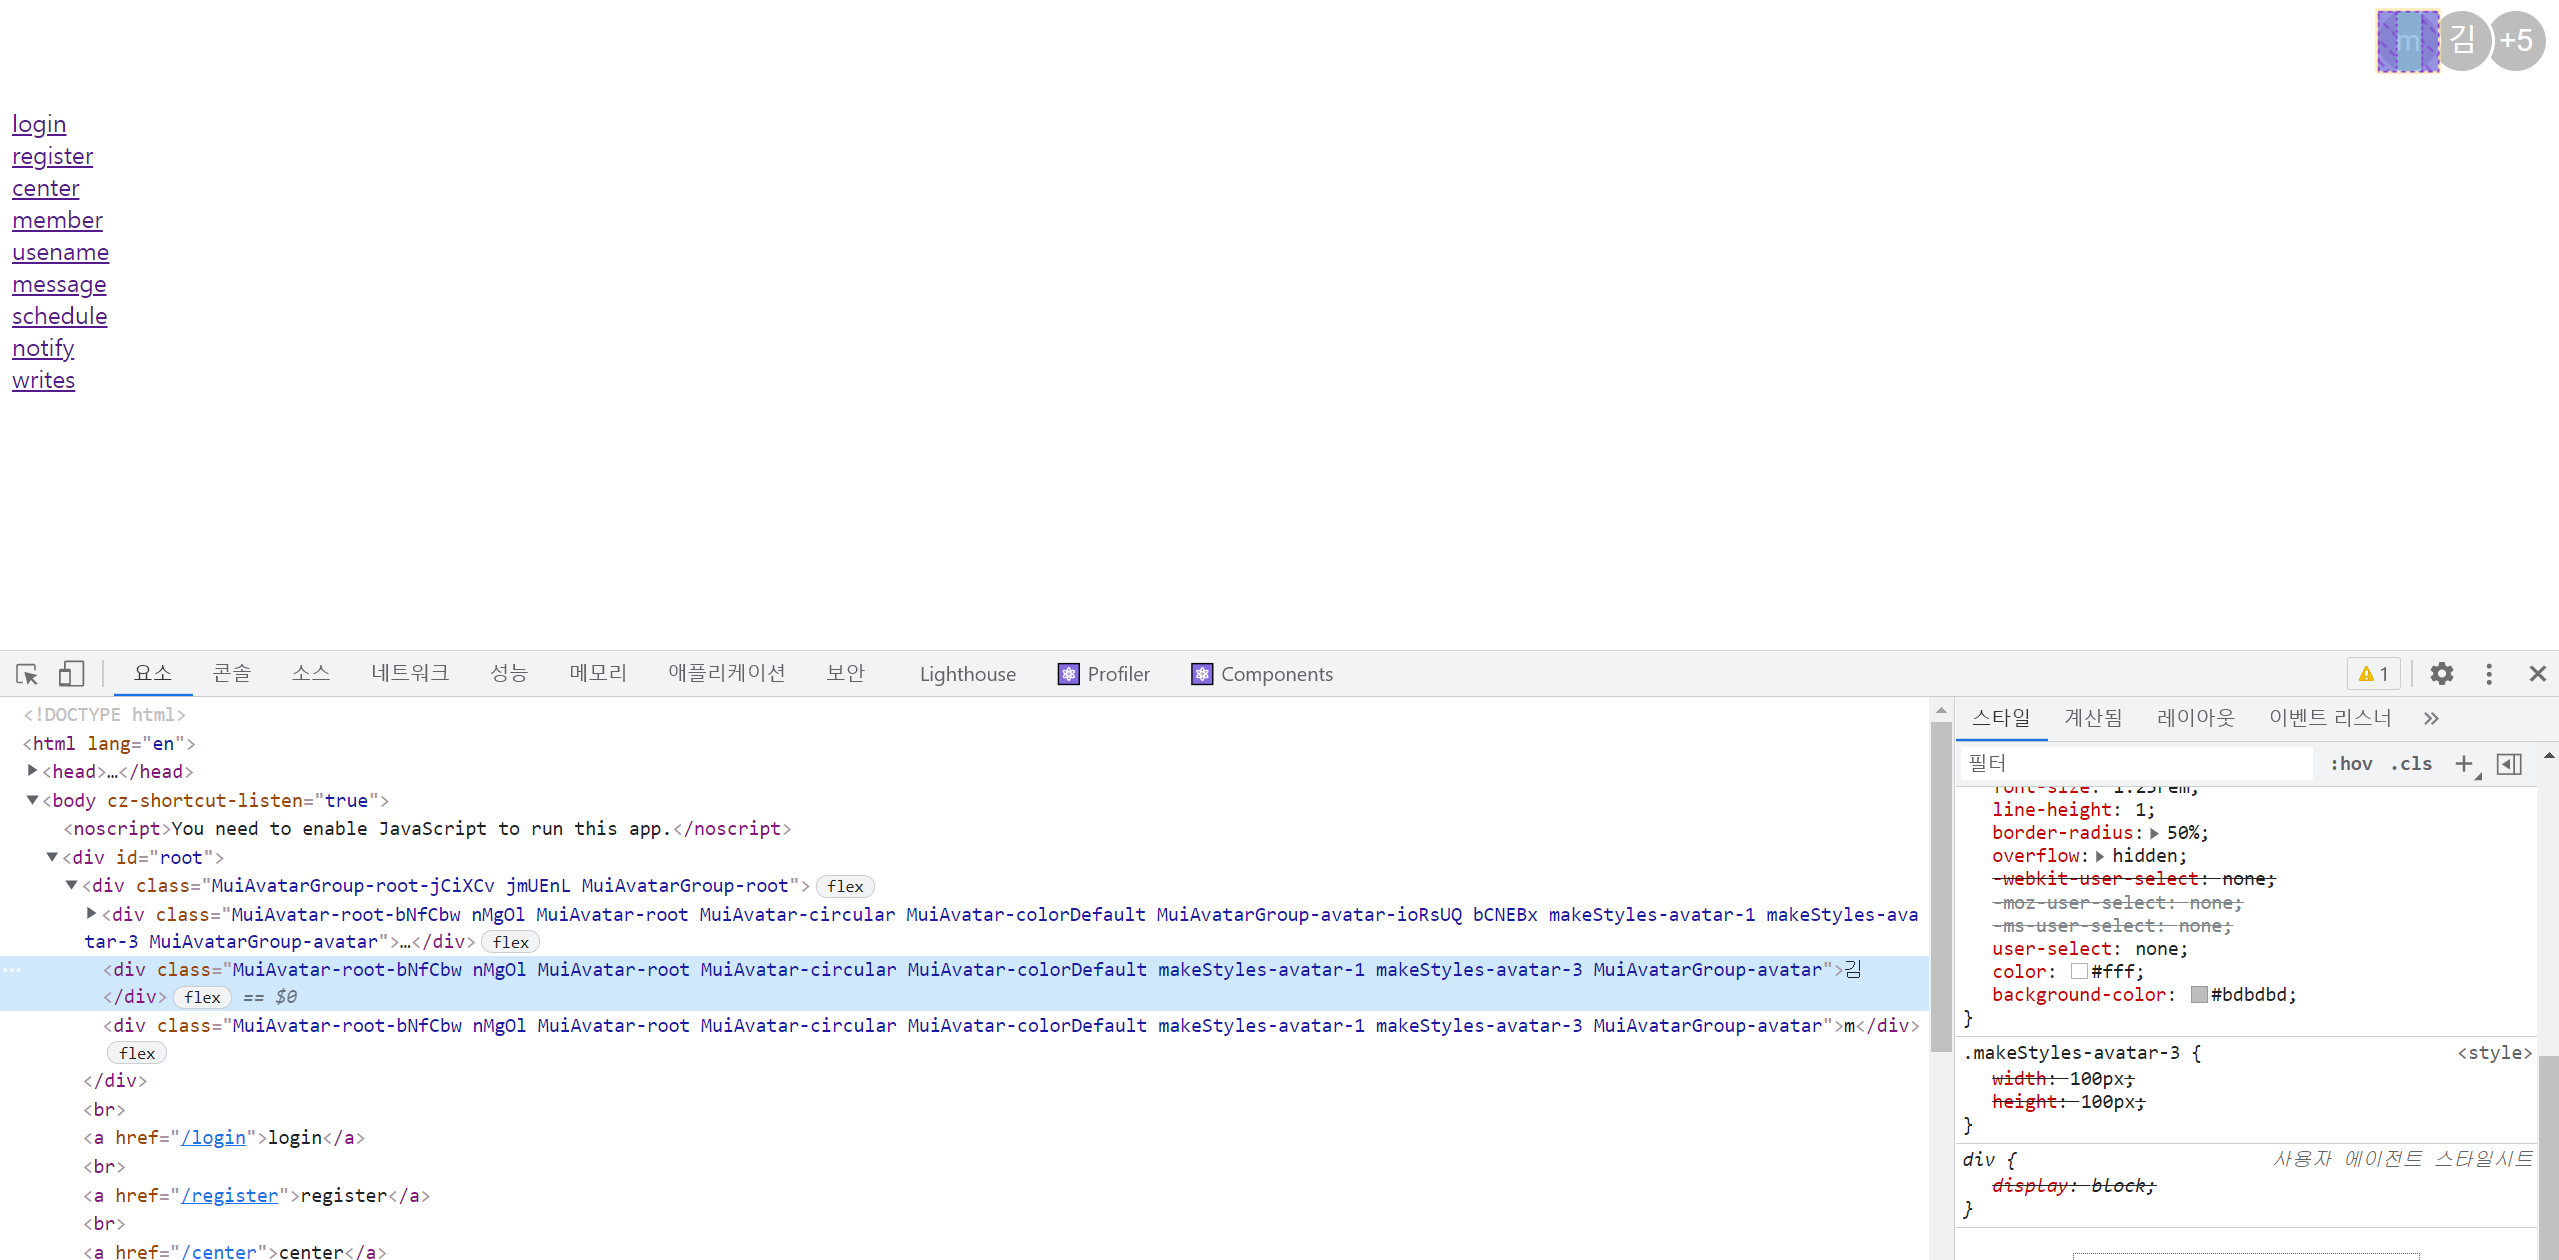
[Object Object]가 없어지기는 했지만 실제로 원하는
width height가 inline style에 의해서 적용이 되지않는다.
❺ 코드 (!important 추가)
App.js에서 아래와 같이 사용을 했다.
     <Profile />
     <Profile width={70} height={70} />
     <Profile width={100} height={100} />
import Avatar from "@mui/material/Avatar";

import AvatarGroup from "@mui/material/AvatarGroup";
import CircularProgress from "@mui/material/CircularProgress";
import { useEffect, useState } from "react";
import Box from "@mui/material/Box";
import PropTypes from "prop-types";

import { makeStyles } from "@material-ui/core/styles";

const useStyles = makeStyles({
  avatar: ({ width, height }) => ({
    width: `${width}px!important`,
    height: `${height}px!important`,
  }),
});

//dummy Data
const dataArr = [
  {
    name: "mmmm",
    image: "/",
    id: "khw970421",
  },
  {
    name: "김",
    image: "/",
    id: "khw97wdlwloed0",
  },
  {
    name: "박",
    image: "",
    id: "kii9222swwsss",
  },
  {
    name: "윤",
    image: "",
    id: "kqwjeowos11ss",
  },
  {
    name: "윤",
    image: "",
    id: "kqwjeowos11ss",
  },
  {
    name: "윤",
    image: "",
    id: "kqwjeowos11ss",
  },
  {
    name: "윤",
    image: "",
    id: "kqwjeowos11ss",
  },
];

// 사이즈 크기 자유롭게

const Profile = ({ max, width, height }) => {
  const classes = useStyles({ width, height });
  const [loading, setLoading] = useState(true);
  const [data, setData] = useState([]);

  //초기 api 실행
  useEffect(async () => {
    await setTimeout(() => {
      setLoading(false);
      // api로 부터 받아온 댓글 사용자 데이터 넣기
      setData(dataArr);
    }, 100);
  }, []);

  //Avatar 태그 클릭시 이벤트
  const clickAvatarHandler = (id) => {
    //해당 대상의 마이페이지로 이동하는 함수 구현
    console.log(id);
  };

  return (
    <>
      {loading ? (
        <>
          <Box sx={{ display: "flex" }}>
            <CircularProgress
              style={{ color: "#FD9F28", width: "20px", height: "20px" }}
            />
          </Box>
        </>
      ) : (
        <AvatarGroup max={max} classes={{ avatar: classes.avatar }}>
          {data.map(({ name, image, id }) => {
            return (
              <Avatar
                key={id + Math.random()}
                alt={name}
                src={image}
                onClick={() => {
                  clickAvatarHandler(id);
                }}
              />
            );
          })}
        </AvatarGroup>
      )}
    </>
  );
};

Profile.defaultProps = {
  max: 3,
  width: 40,
  height: 40,
};

Profile.propTypes = {
  max: PropTypes.number,
  width: PropTypes.number,
  height: PropTypes.number,
};

export default Profile;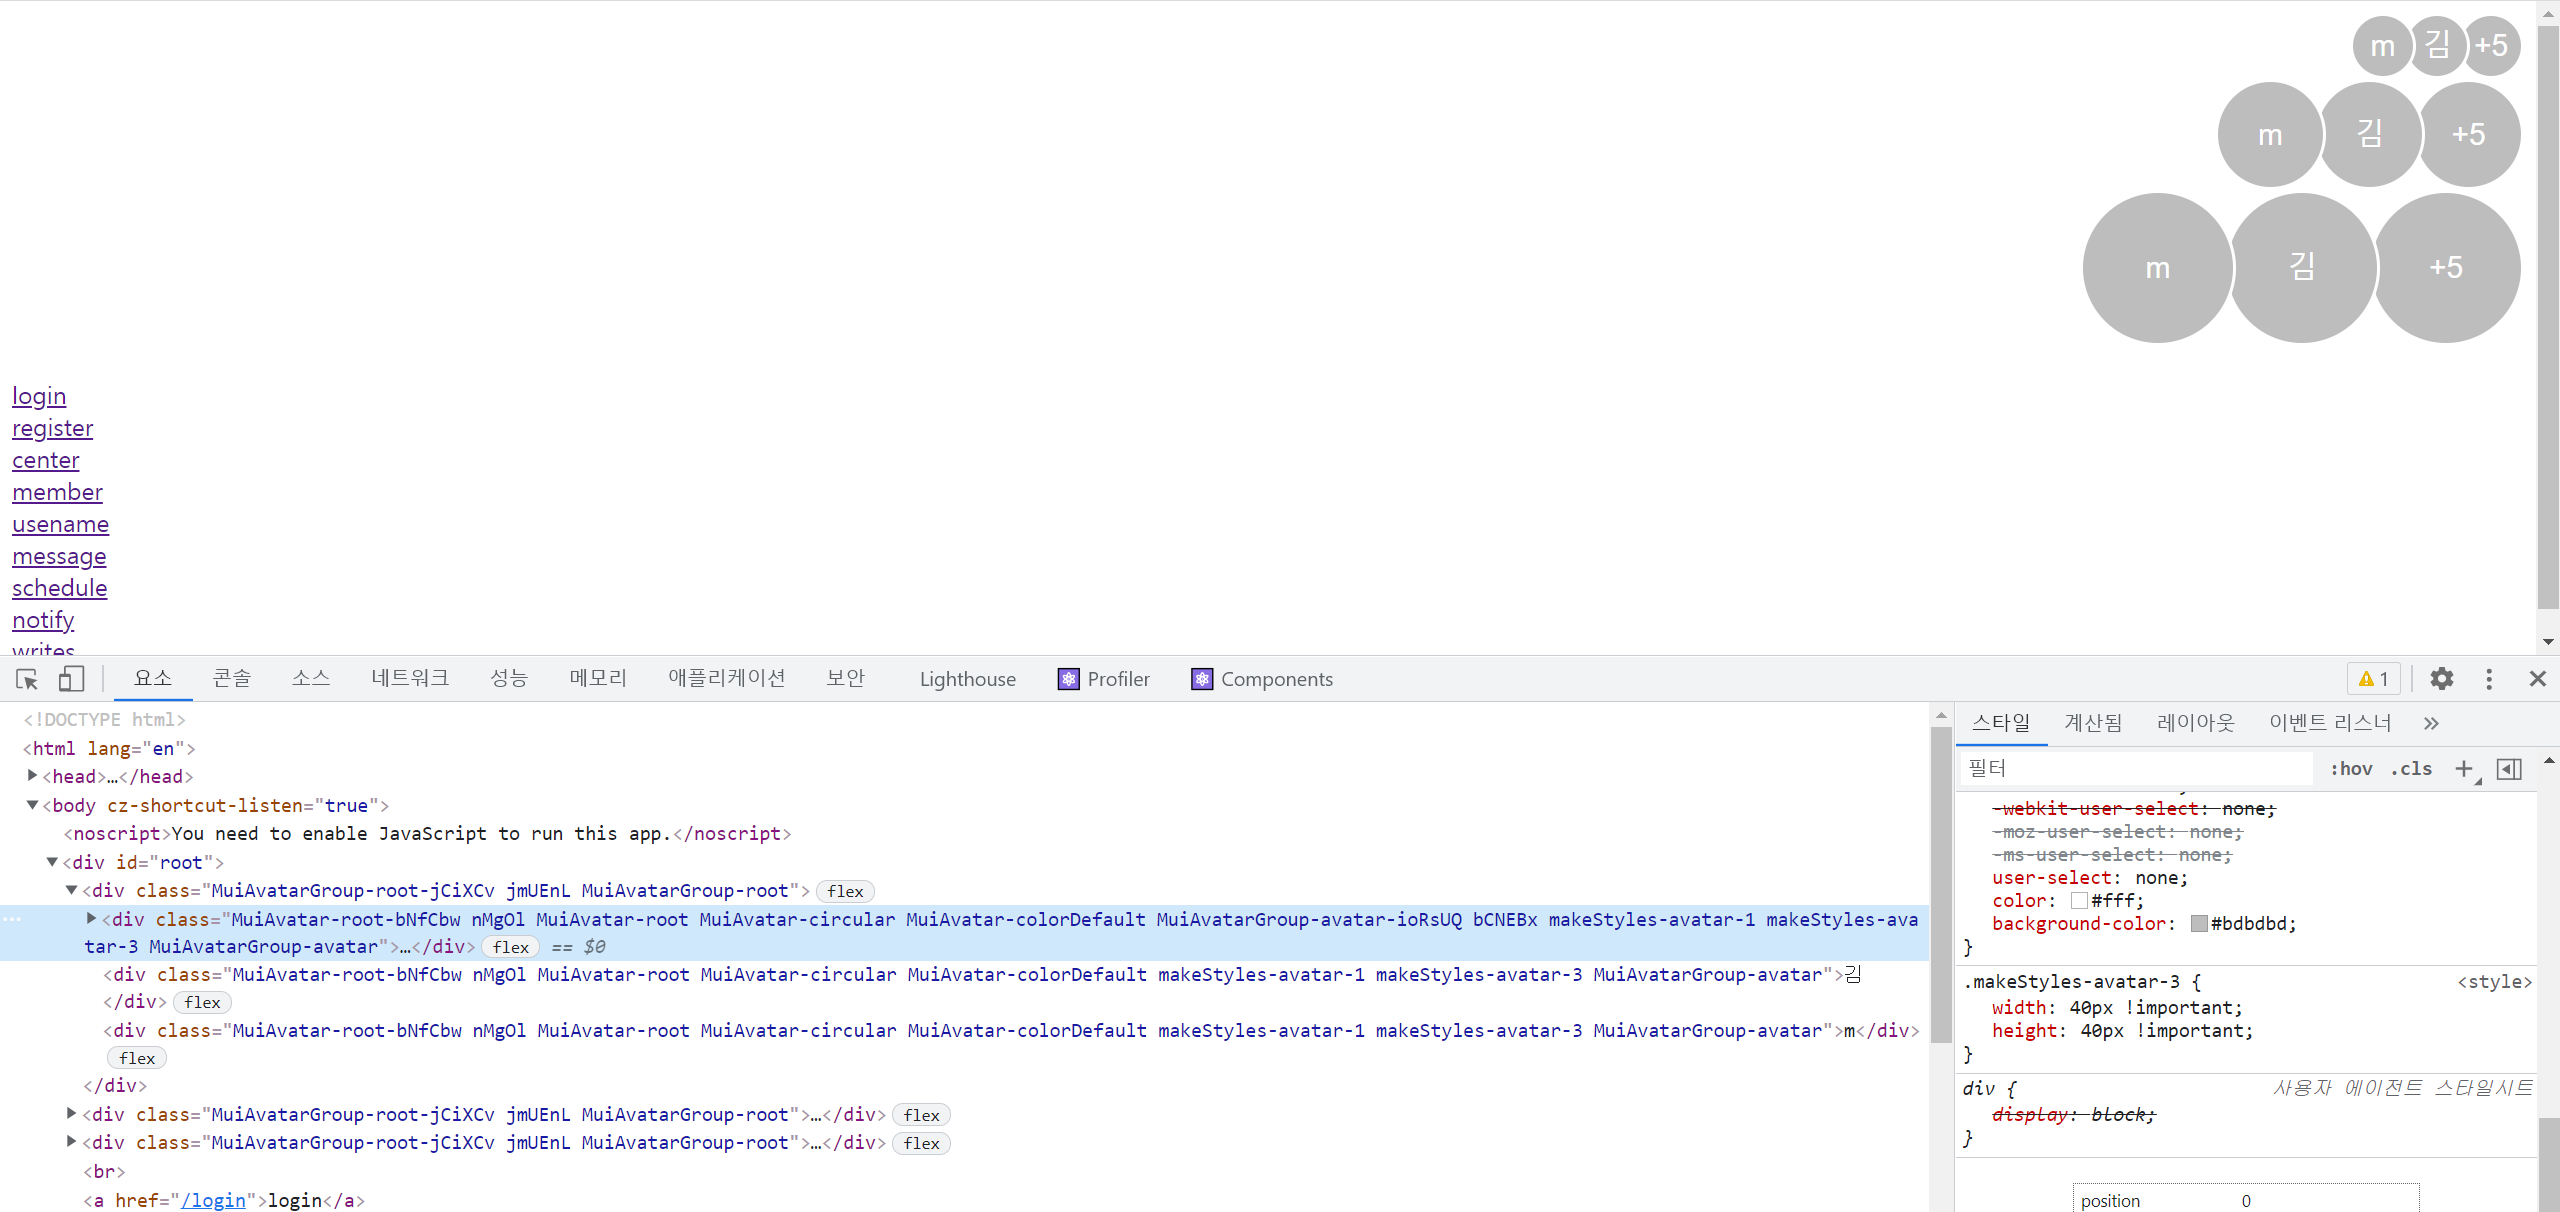
해당 결과를 통해
props를 통해 받은maxwidth와height를 이용해Avatar의 커스터마이징을 가능하게 해주었다.
느낀점
MUI의 편한함이 있었지만 원하는 부분에서 좀 더 크기 조절이 공식사이트에 없어 해당 부분을 직접 커스터마이징 하는 부분에서 애를 먹었고
그만큼 라이브러리가 좋지만 단점도 이와 같은 경험을 통해 느낄 수 있었다.
