- CRUD를 구현하기 위해 테이블,모델,Interface, 구현 클래스 생성, DI 컨테이너 , view 화면 구현까지를 포스팅을 나눠서 진행 예정.
- 현재 포스팅은 1번글로 DB, 테이블, model, interface, Repository 생성 까지 진행함.
- 진행 순서는 DB(테이블생성) > Model > Interface(API) > 구현 클래스(Repository)
- View 프로젝트 생성, Model 프로젝트 생성, Sql Server 프로젝트 생성
- 소스 깃경로
1. 프로젝트 생성
- Blazor Server 사이드 프로젝트 생성(VideoAppCore) 개별 인증
- Sql Server 프로젝트 생성 (VideoAppCoreSqlServer)
- 클래스라이브러리 .netStandarde2.1 모델 프로젝트 생성(VideoAppCoreModels)
2. 데이터 베이스 및 테이블 생성
- visualstudio를 설치하면 기본적으로 Mssql 로컬 서버가 설치됨.
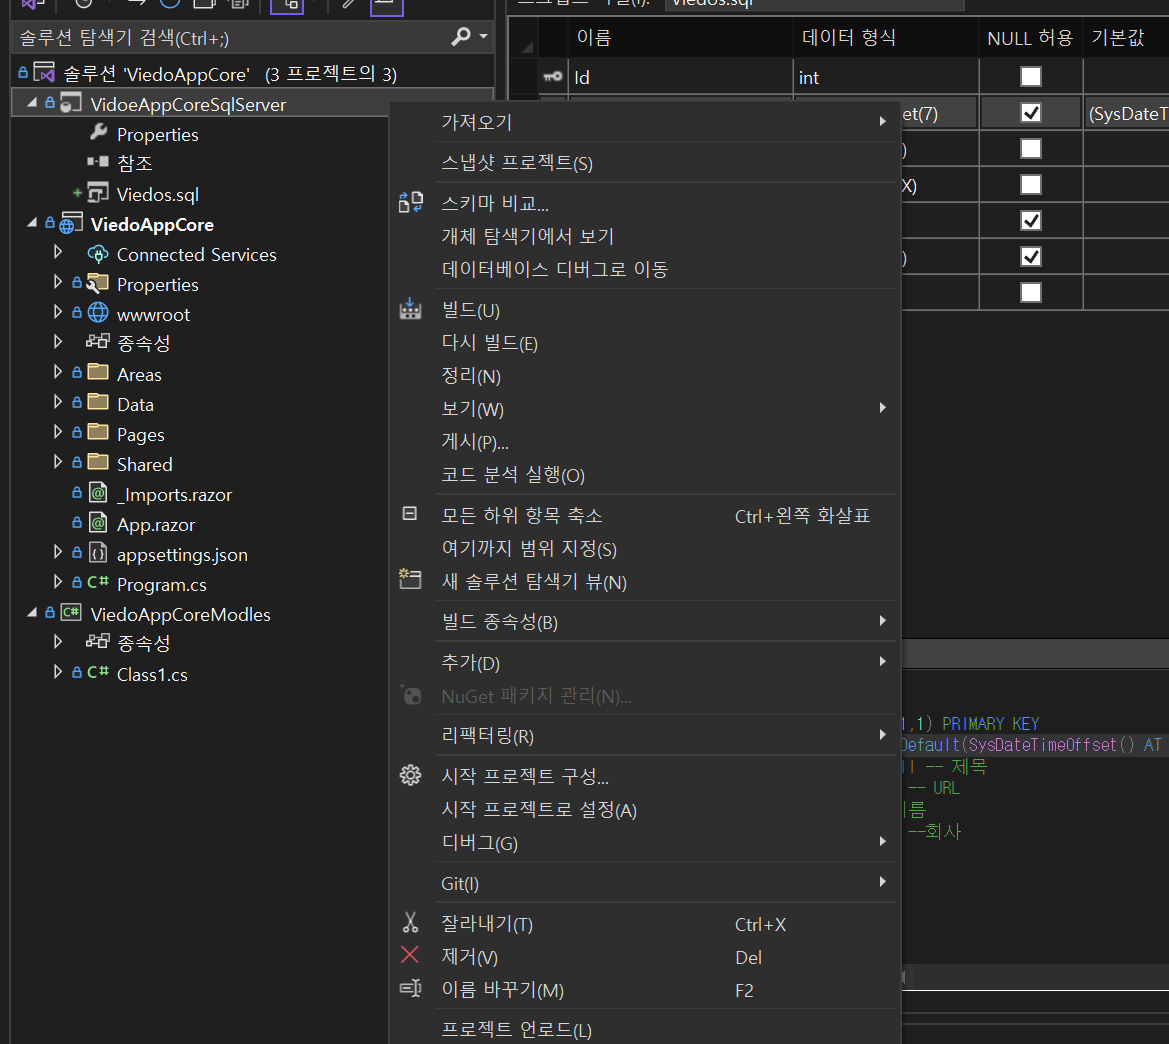
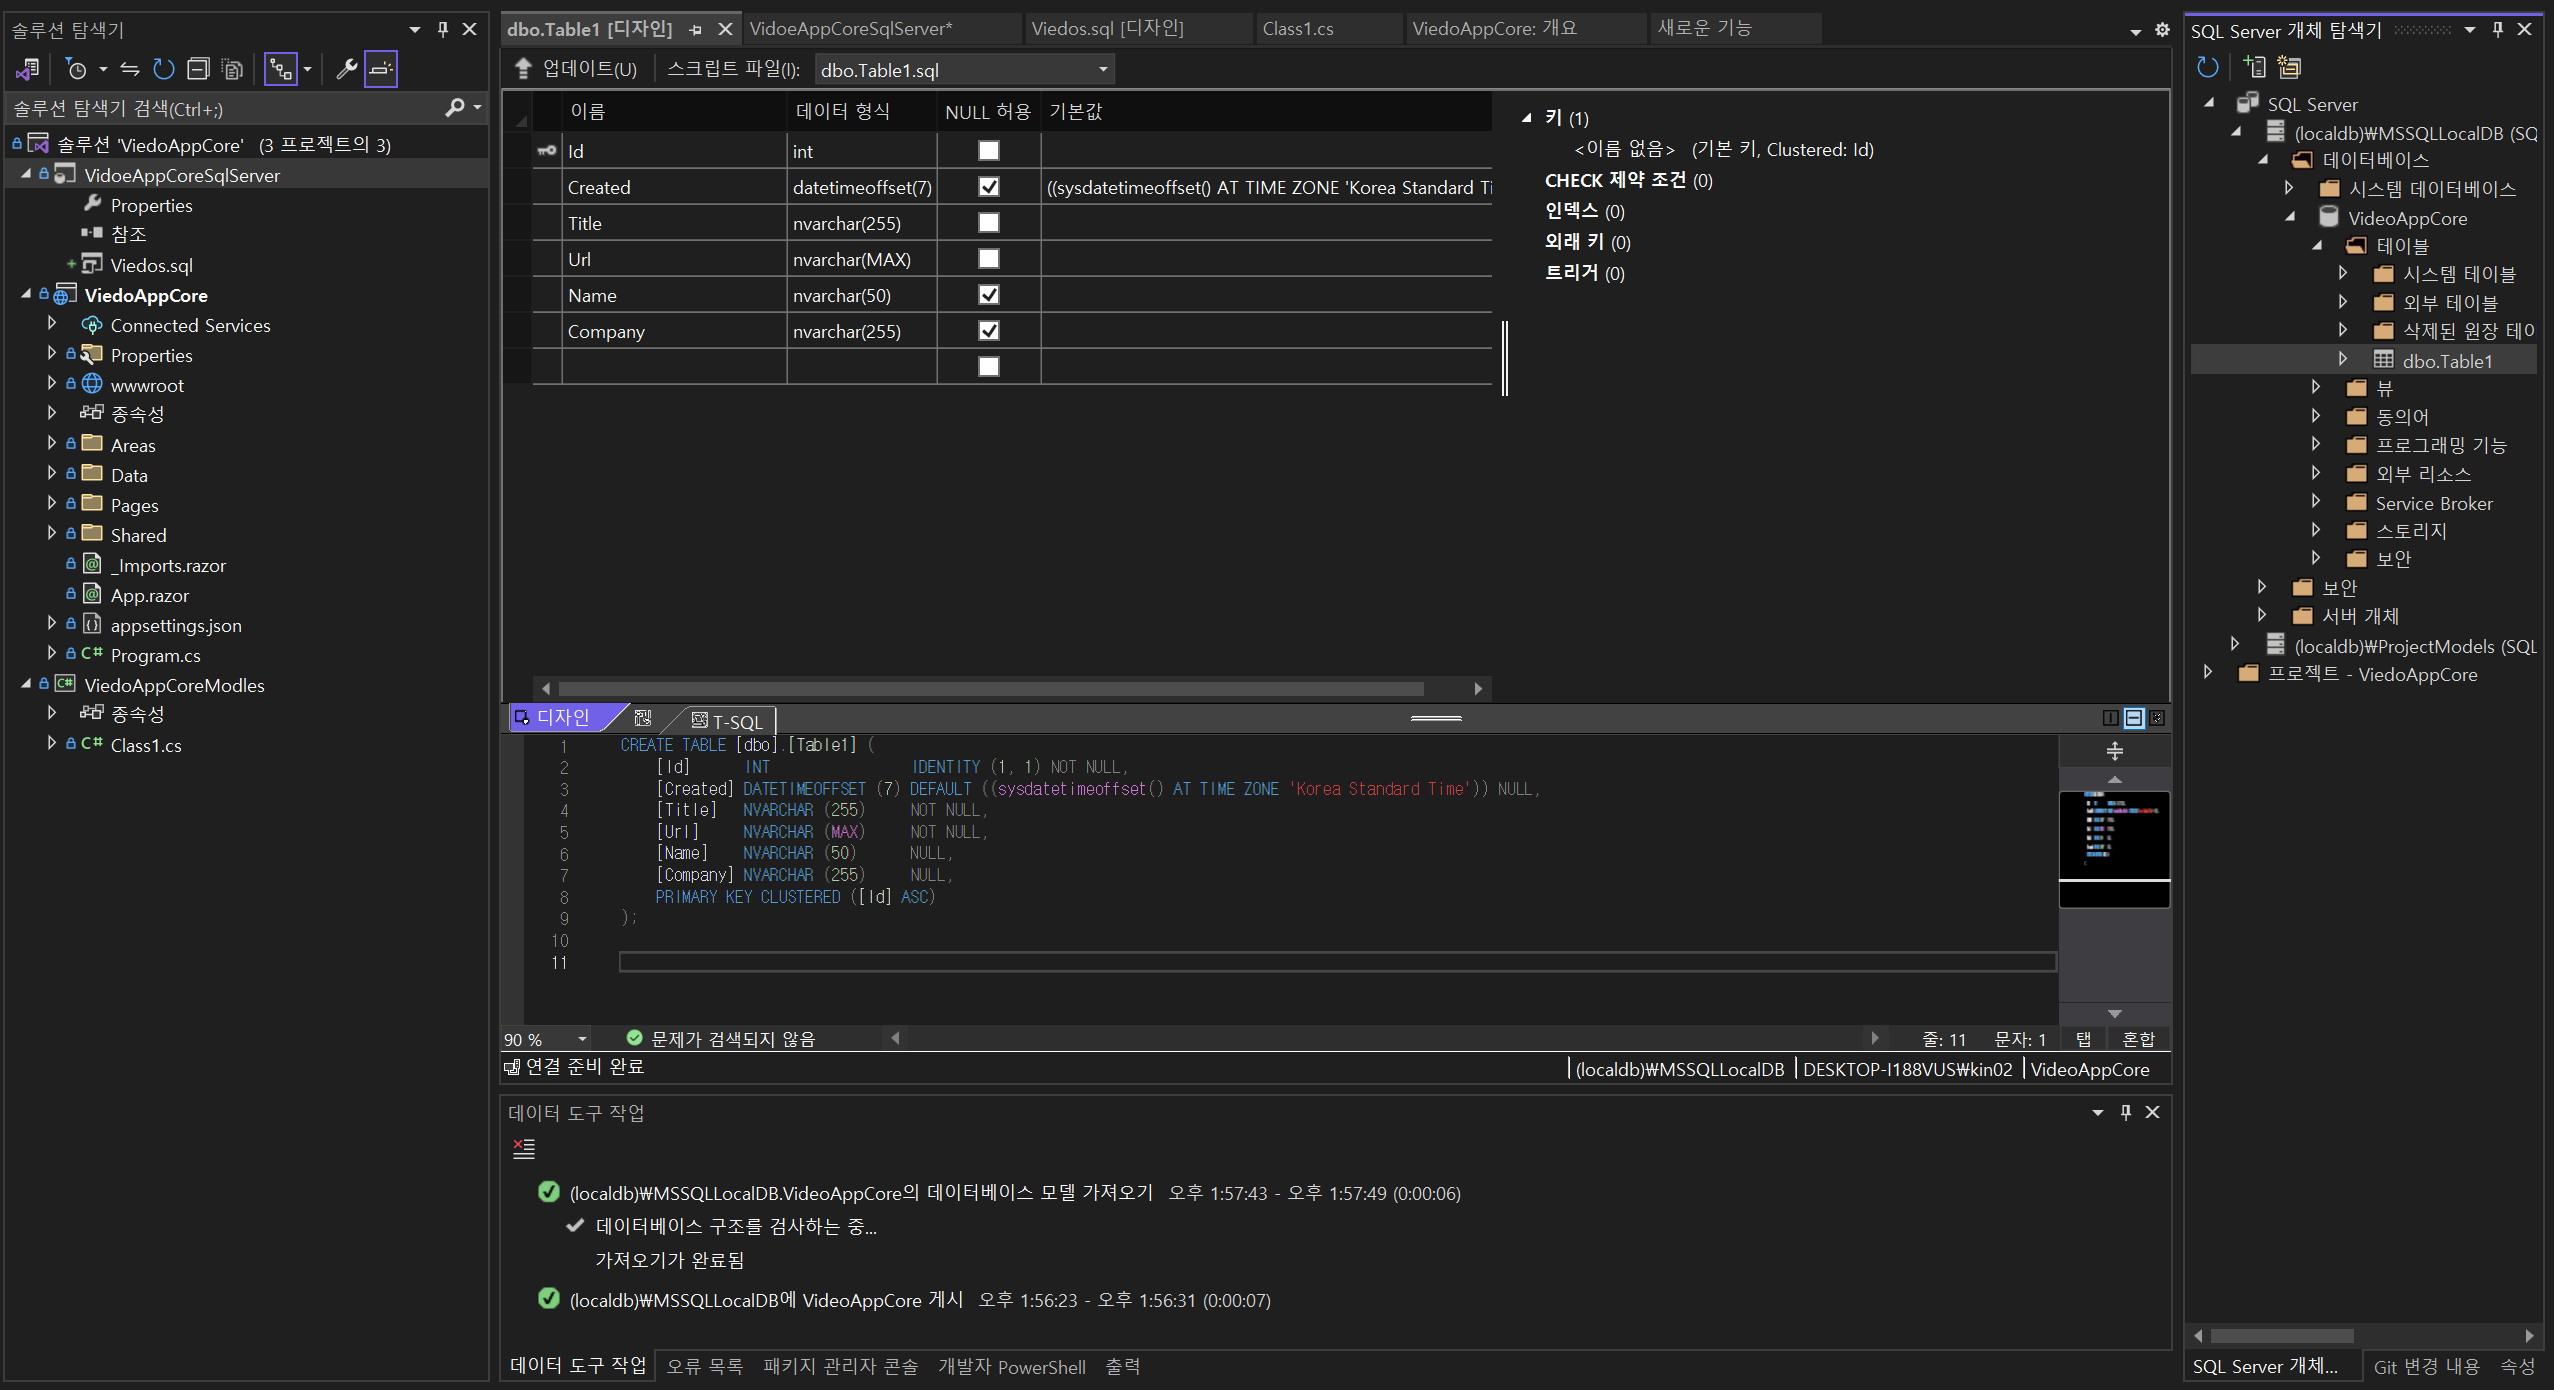
- VideoAppCoreSqlServer프로젝트에서 테이블 생성 (Video.Sql)
- 테이블 스키마 구성.
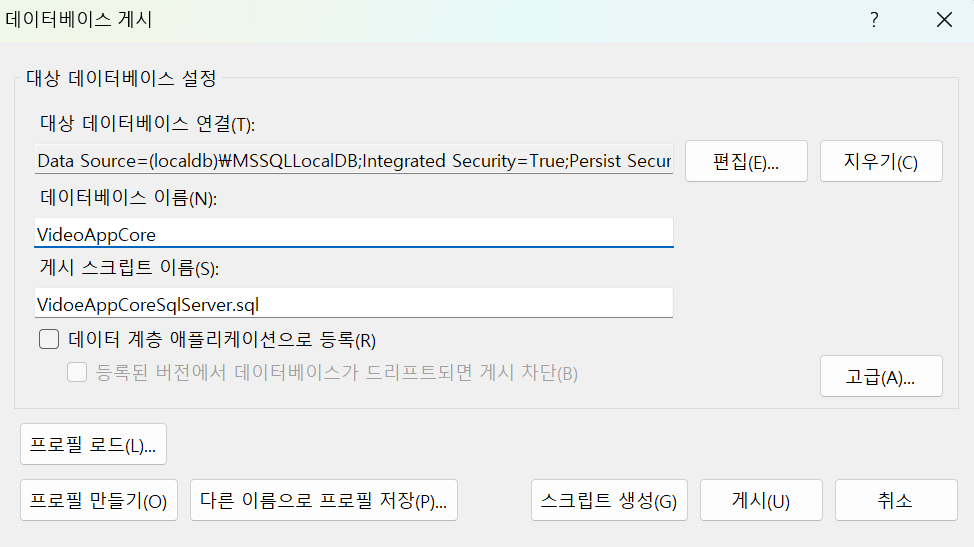
- 로컬 Db에 게시
- 스키마 구성
CREATE TABLE [dbo].[Table1]
(
[Id] INT NOT NULL identity(1,1) PRIMARY KEY
,Created DateTimeOffset(7) Default(SysDateTimeOffset() AT TIME ZONE 'Korea Standard Time')
,Title nvarchar(255) not null
,Url nvarchar(max) not null
,Name nvarchar(50) null
,Company nvarchar(255) null
)
- 로컬 Db에 게시(게시 방법은 아래 스크린샷 참조)
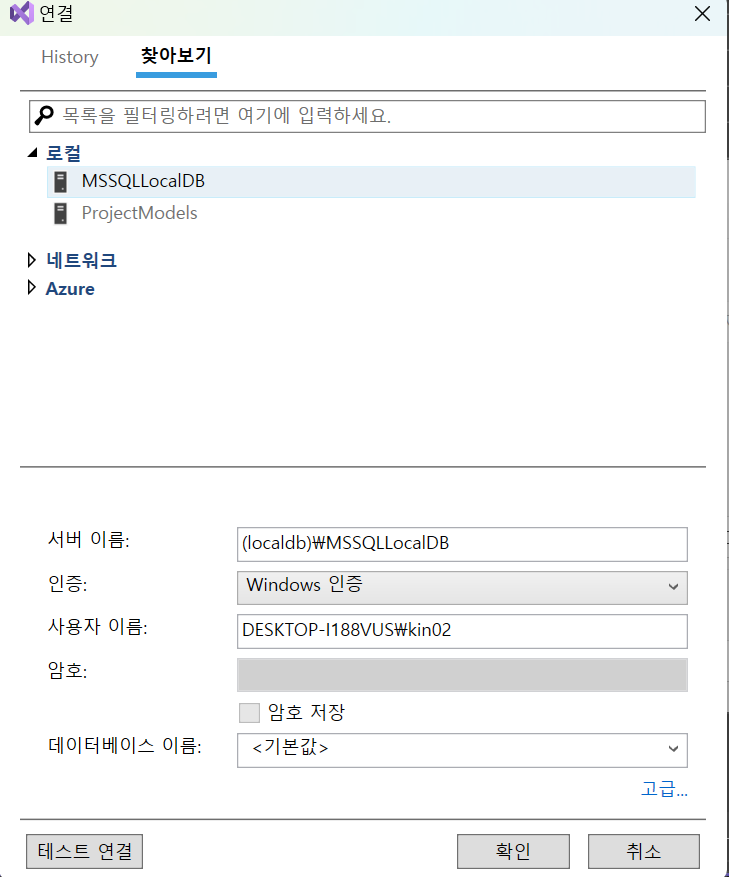

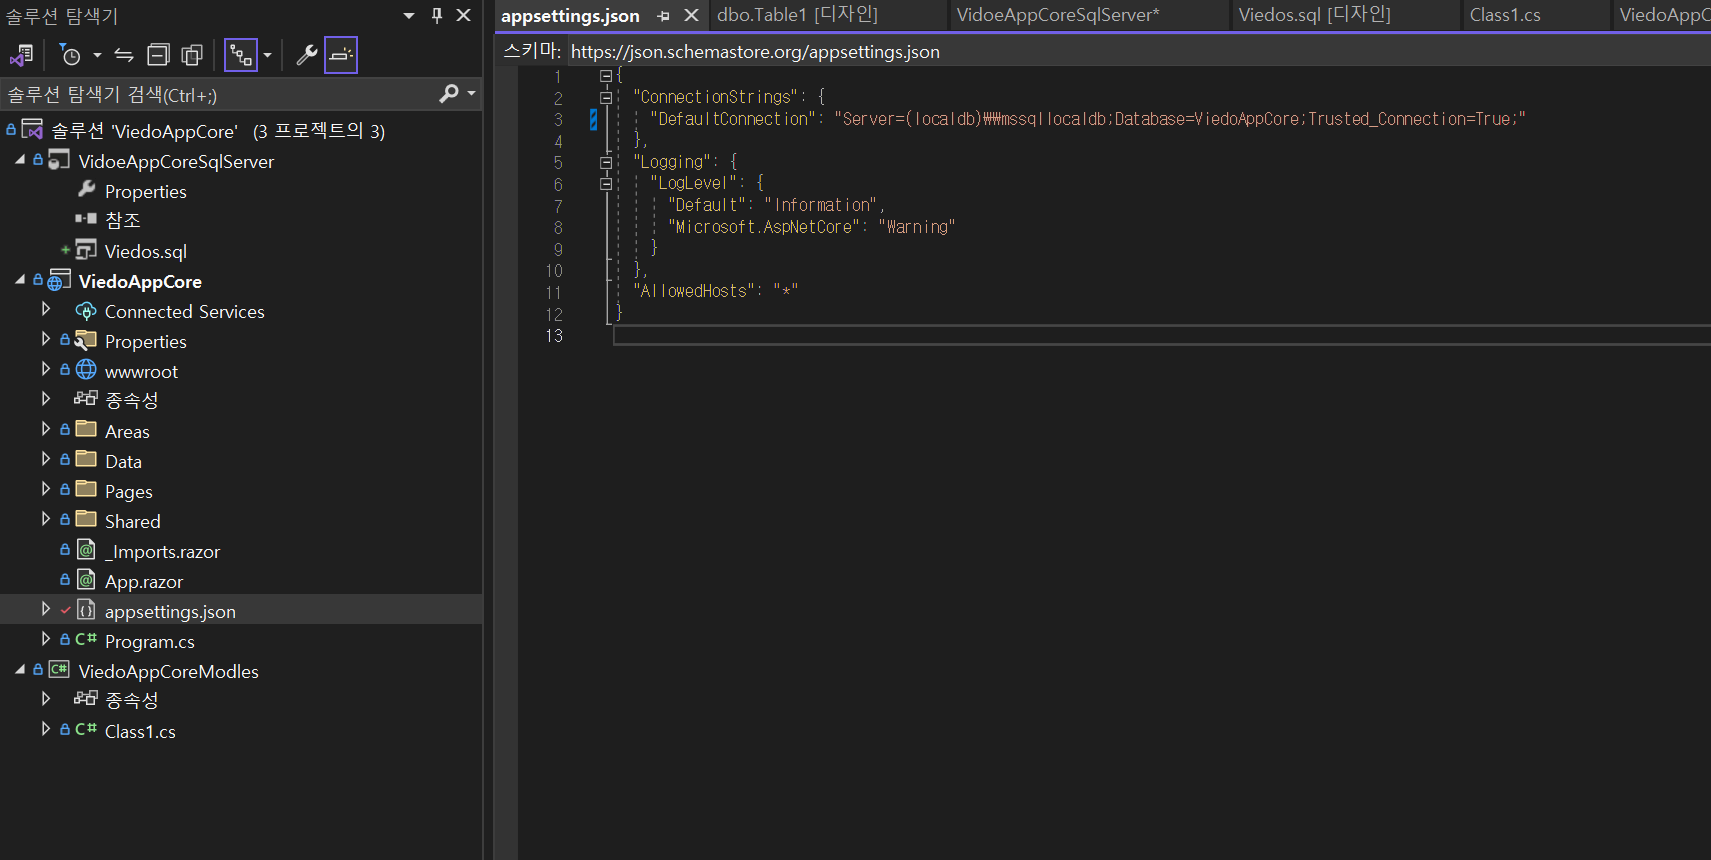
- 아래 사진은 blazor프로젝트에서 Db접속 정보 수정 appsettings.json에서 게시한 Db정보를 맞춰 주면 됨.
3. Model 클래스 생성
- VideoAppCoreModels프로젝트에서 미리 생성한 테이블의 스키마와 동일하게 멤버 변수 생성
using System;
namespace VideoAppCoreModels
{
public class Video
{
public int Id { get; set; }
public DateTimeOffset Created { get; set; }
public string Title { get; set; }
public string Url { get; set; }
public string Name { get; set; }
public string Company { get; set; }
}
}
4. API(interface)생성
- VideoAppCoreModels프로젝트에서 CRUD API 명세서(interface)생성
using System.Collections.Generic;
using System.Text;
namespace VideoAppCoreModels
{
public interface IVideoRepository
{
Video AddVideo(Video model);
List<Video> GetVideos();
Video GetVideoById(int id);
Video UpdateVideo(Video model);
Video RemoveVideo(int id);
}
}
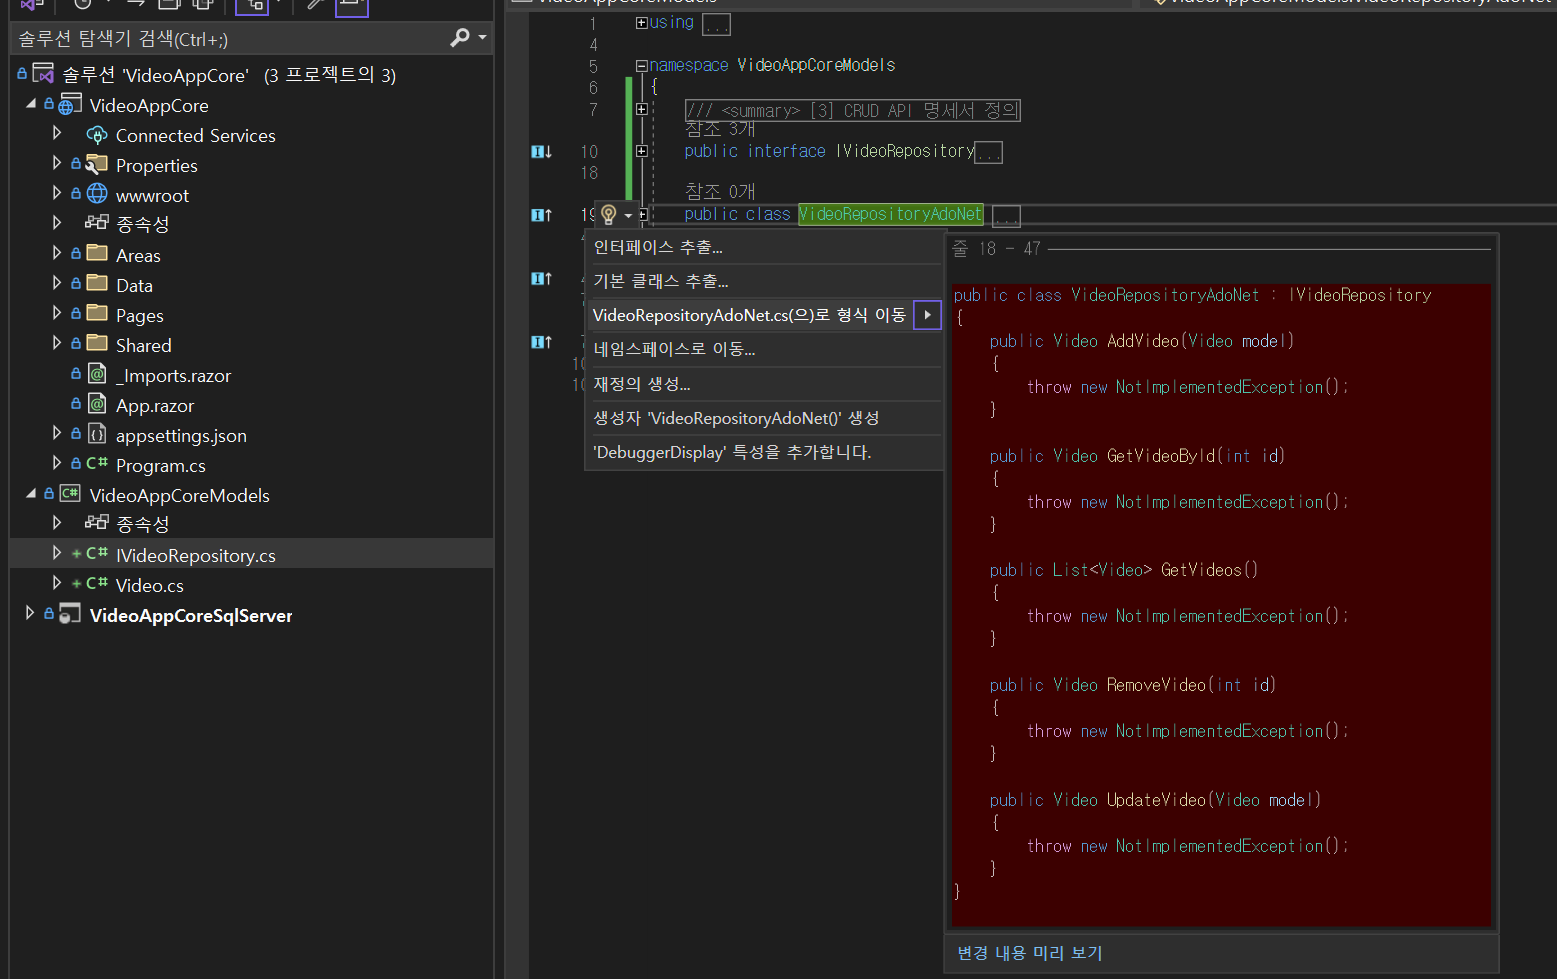
5. IVideoRepository를 상속 받아 CRUD를 구현할 Class 생성.
- IVideoRepository를 상속 받은 클래스 생성
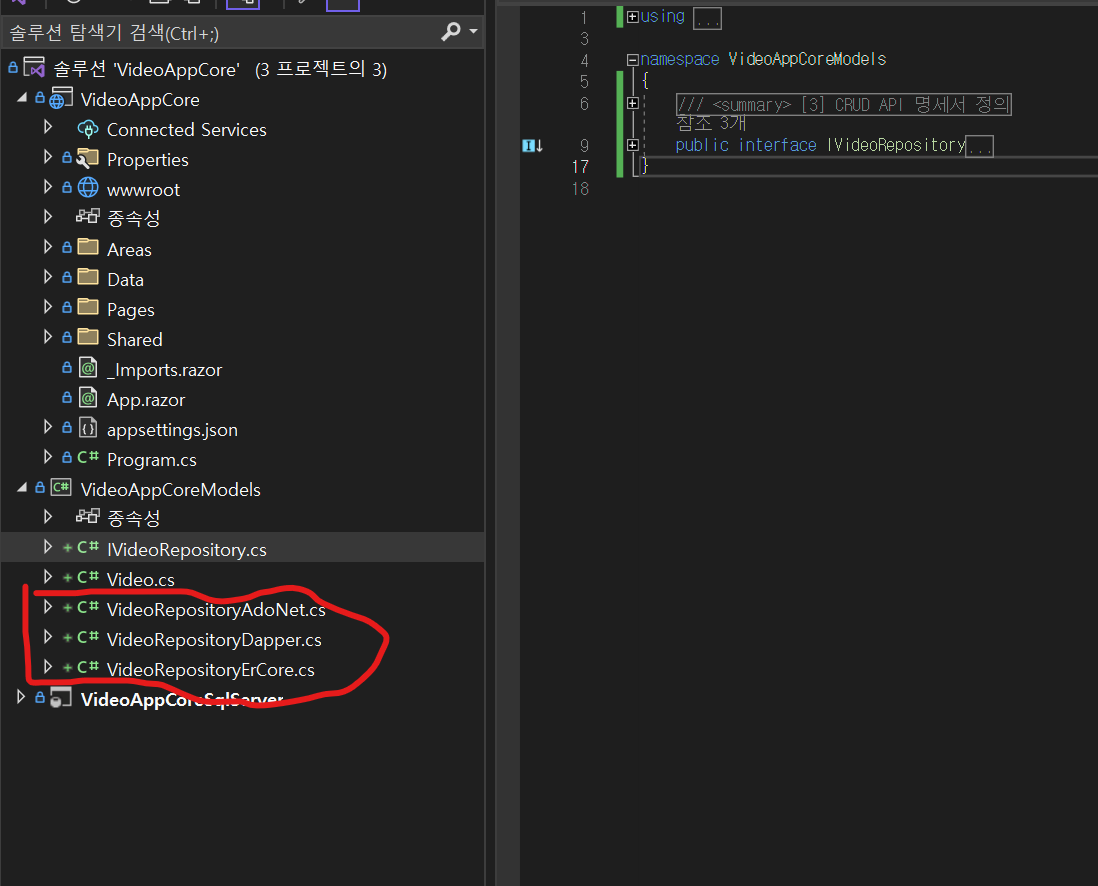
- Ado.Net, Dapper, Er Core Reopsitory생성.
- postgreSql,Oracle등 다른 DB를 사용할 경우 IVideoRepository를 상속 받은 Repository를 상속 받은 class생성 후 구현 코드 작성 하면 됨.
- 상속 클래스 생성시 팁
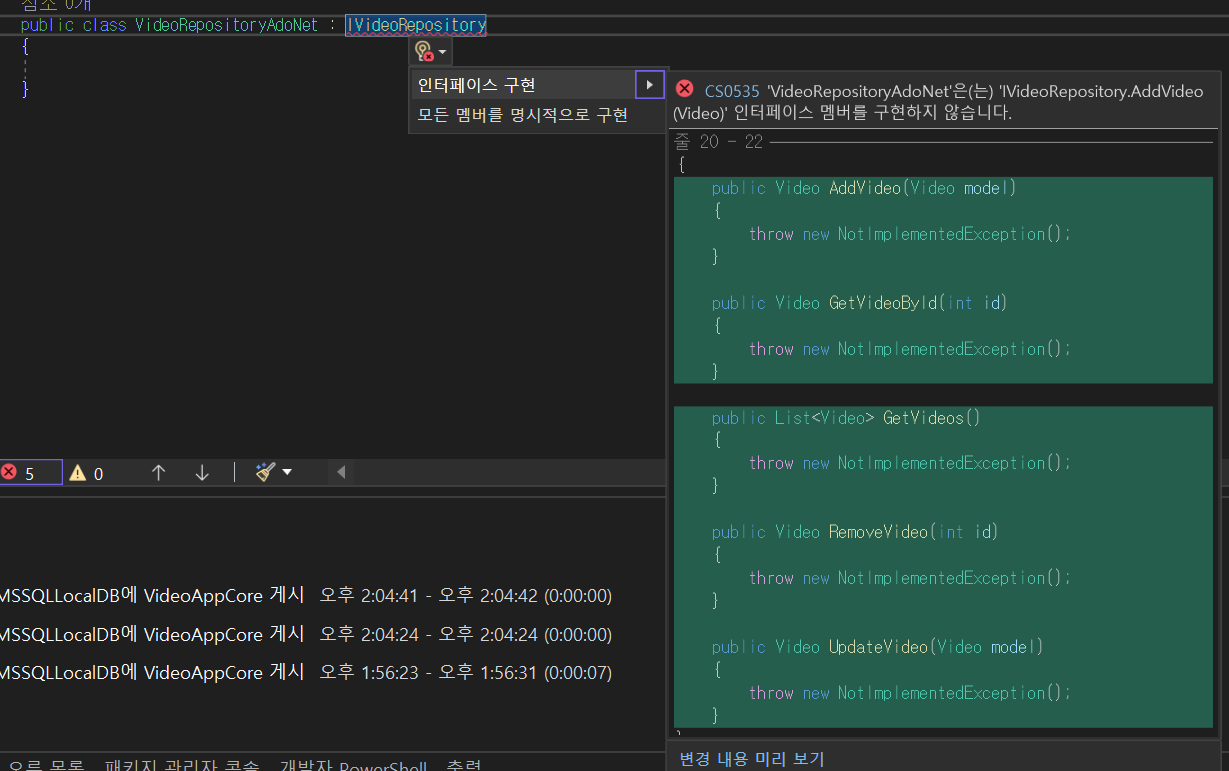
1) interface를 생성한 클래스 내부에 상속할 클래스 생성 및 상속
2) interface명에 인터페이스 멤버를 구현하지 않아 붉은색으로 표시 되며 커서를 해당 칸에 올려둔 후 ctrl + .을 누르면 아래와 같이 인터페이스 구현을 누르면 interface에서 정의해둔 메소드가 생성되며 각 Repository에 맞춰 코드를 구현 하면됨.
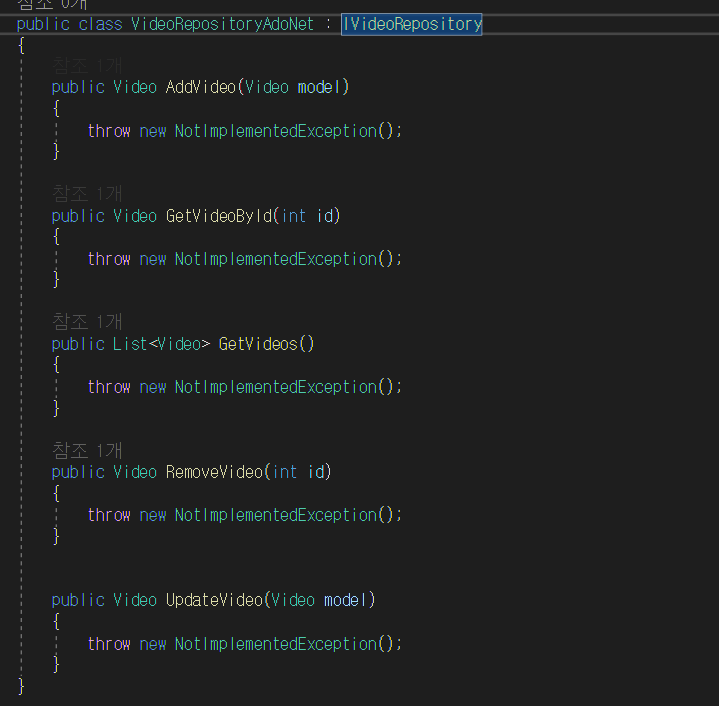
3) AdoNet,Papper,Ercore클레스를 생성 및 인터페이스 멤버 구현진행 후 해당 클래스를 파일로 빼는 방법은 각 클래스에 커서를 두고 ctrl + .을 누르면
... 형식 이동을 누르면 해당 클래스가 파일이 생성되며 interface에서 코드가 지워짐.