Event Handling
Responding to Events
- All the HTML form elements that are available to the DOM are also available as React elements
<form>
    <input type="text" placeholder="color title..." required />
    <input type="color" required />
    <button>ADD</button>
</form>
export default function Button() {
return (
<button>
I don't do anything
</button>
);
}- React lets you add event handlers to your JSX.
- Event handlers are your own functions that will be triggered in response to interactions like clicking, hovering, focusing form inputs, and so on.
onClick Event Handler
- Declare a function called
handleClickinside yourButtoncomponent. - Implement the logic inside that function (use
alertto show the message). - Add
onClick={handleClick}to the<button>JSX.
export default function Button() {
    function handleClick() {
        alert('You clicked me!');
    }
    return (
        <button onClick={handleClick}>
            Click me
        </button>
    );
}
EventHandler
- Event handler functions:
- are usually defined inside your components.
- have names that start with
handle, followed by the name of the event.
- By convention, it is common to name event handlers as
handlefollowed by the event name
이벤트 핸들러 함수의 이름은 보통 handle이라는 단어로 시작하고, 그 뒤에 이벤트의 이름이 따라옵니다. - An event handler can be defined inline in the JSX
<button onClick={function handleClick() {
        alert('You clicked me!');
}}<button onClick={() => {
alert('You clicked me!');
}}/>Reading props in event handlers
- Because event handlers are declared inside of a component, they have access to the component’s props.
- the children prop is a special prop in React components that is used to pass elements or content between the opening and closing tags of a component
children prop은 React 컴포넌트에서 특별한 속성으로, 컴포넌트의 여는 태그와 닫는 태그 사이에 요소나 내용을 전달하는 데 사용됩니다
- the children prop is a special prop in React components that is used to pass elements or content between the opening and closing tags of a component
function AlertButton({ message, children }) {
return (
<button onClick={() => alert(message)}>
{children}
</button>
);
}
export default function Toolbar() {
return (
<div>
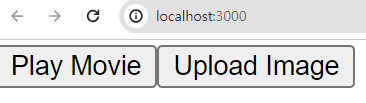
<AlertButton message="Playing!">Play Movie</AlertButton>
<AlertButton message="Uploading!">Upload Image</AlertButton>
</div>
);
}
태그 사이의 내용이 children prop에 들어간 것을 확인 할 수 있다.
Using Function Props (Passing EventHandlers as Props)
- Function props, where the parent component provides a child with a function that it can invoke to notify the parent that something important has happened.
- The parent component may want to specify a child’s event handler.
- depending on where you’re using a Button component, you might want to execute a different function — perhaps one plays a movie and another uploads an image
function Button({ onClick, children }) {
    return (
        <button onClick={onClick}>
            {children}
        </button>
    );
}
function PlayButton({ movieName }) {
    function handlePlayClick() {
        alert(`Playing ${movieName}!`);
    }
    return (
        <Button onClick={handlePlayClick}>
            Play "{movieName}“
        </Button>
    );
}
function UploadButton() {
    return (
        <Button onClick={() => alert('Uploading!')}>
            Upload Image
        </Button>
    );
}
export default function Toolbar() {
    return (
        <div>
            <PlayButton movieName="Kiki's Delivery Service" />
            <UploadButton />
        </div>
    );
}- The Toolbar component renders a
PlayButtonand anUploadButton:PlayButtonpasseshandlePlayClickas theonClickprop to theButtoninside.UploadButtonpasses() => alert('Uploading!')as theonClickprop to theButtoninside
Event Propagation
- Event bubbles (propagates) up to the parent-child tree: it starts with where the event happened, and then goes up the tree.
<button>’sonClickwill run first, followed by the parent<div>’sonClick
export default function Toolbar() {
    return (
        <div className="Toolbar" onClick={() => {
            alert('You clicked on the toolbar!');
        }}>
            <button onClick={() => alert('Playing!')}>Play Movie</button>
            <button onClick={() => alert('Uploading!')}>Upload Image</button>
        </div>
    );
}
playing 출력 후 you clicked on the toolbar!가 출력된다
function Button({ onClick, children }) {
    return (
        <button onClick={e => {
            e.stopPropagation();
            onClick();
        }}>
            {children}
        </button>
    );
}
export default function Toolbar() {
    return (
        <div className="Toolbar" onClick={() => {
            alert('You clicked on the toolbar!');
        }}>
            <Button onClick={() => alert('Playing!')}>
                Play Movie
            </Button>
            <Button onClick={() => alert('Uploading!')}>
                Upload Image
            </Button>
        </div>
    );
}e.StopPropagation()will stop the event propagatedonClickhandler defined in Button does the following:- Calls
e.stopPropagation(), preventing the event from bubbling further. - Since the propagation was stopped, the parent
<div>’sonClickhandler does not run.
- Calls
playing만 출력된다.
State
State is a component’s memory
- Components need to “remember” things: the current input value, the current image, the shopping cart. In React, this kind of component specific memory is called state.
- To update a component with new data, two things need to happen:
- Retain the data between renders.
- Trigger React to render the component with new data (re-rendering).
- The useState Hook provides those two things:
- A state variable to retain the data between renders.
- A state setter function to update the variable and trigger React to render the component again
Use State for
- To manage dynamic data (keep tracking)
- To react to changes in data (re-render)
- To store user inputs
- To encapsulate and manage internal (local) state of component
What is the problem of the index (local variable)?
- Clicking the ‘Next’ button should show the next sculpture by changing the index. However,
- When React renders this component a second time, it renders it from scratch(처음부터).
- React doesn’t realize it needs to render the component again with the new data.
- Local variables don’t persist between renders.
- Changes to local variables won’t trigger renders.
※ So retain the data and trigger
import { sculptureList } from './data.js';
export default function Gallery() {
    let index = 0;
    function handleClick() {
        index = index + 1;
    }
    let sculpture = sculptureList[index];
    return (
        <>
            <button onClick={handleClick}>Next</button>
            <h2>
                <i>{sculpture.name} </i> by {sculpture.artist}
            </h2>
            <h3>
                ({index + 1} of {sculptureList.length})
            </h3>
            <img src={sculpture.url} alt={sculpture.alt} />
            <p>
                {sculpture.description}
            </p>
        </>
    );
}
Use State (Hook)
- useState
- To tell React that you want this component to remember something
- Every time your component renders, useState gives you an array containing two values:
- The state variable (index) with the value you stored. (retain)
- The state setter function (setIndex) which can update the state variable and trigger React to render the component again. (trigger)
import { useState } from 'react';
import { sculptureList } from './data.js’;
export default function Gallery() {
    const [index, setIndex] = useState(0);
    function handleClick() {
        setIndex(index + 1);
    }
    let sculpture = sculptureList[index];
    return (
        <>
            <button onClick={handleClick}>Next</button>
            <h2>
                <i>{sculpture.name} </i> by {sculpture.artist}
            </h2>
            <h3>
                ({index + 1} of {sculptureList.length})
            </h3>
            <img src={sculpture.url} alt={sculpture.alt} />
            <p>
                {sculpture.description}
            </p>
        </>
    );
}
useState Hook
- Hooks : special functions that are only available while React is rendering
- They let you “hook into” different React features.
- Can’t call Hooks inside conditions, loops, or other nested functions.
조건, 루프 또는 기타 중첩된 함수에서 후크를 호출할 수 없음 - Hooks are functions, but it’s helpful to think of them as unconditional declarations about your component’s needs.
- useState Hook:
const [index, setIndex] = useState(0);useStatereturns an array of two elements- ‘0’ is the initial value
[ ]is array destructing (give values from an array)setIndex(newValue) : setIndexis responsible for updating andnewValuewill be the new index- When it called, React will re-render the component
Multiple State
import { useState } from 'react';
import { sculptureList } from './data.js’;
export default function Gallery() {
    const [index, setIndex] = useState(0);
    const [showMore, setShowMore] = useState(false);
    function handleClick() {
        setIndex(index + 1);
    }
    function handleMoreClick() {
        setShowMore(!showMore);
    }
    let sculpture = sculptureList[index];
    return (
        <>
            <button onClick={handleClick}>Next</button>
            <h2>
                <i>{sculpture.name} </i> by {sculpture.artist}
            </h2>
            <h3>
                ({index + 1} of {sculptureList.length})
            </h3>
            <button onClick={handleMoreClick}>
                {showMore ? 'Hide' : 'Show'} details
            </button>
            {showMore && <p>{sculpture.description}</p>}
            <img
                src={sculpture.url}
                alt={sculpture.alt}
            />
        </>
    );
}- Logical AND (&&) expression1 && expression2;
- If expression1 is truthy, then the result is the value of expression2.
- If expression1 is falsy, the result is the value of expression1 (expression2 is not evaluated).
State is isolated and private
- State is local to a component instance on the screen.
- In other words, if you render the same component twice, each copy will have completely isolated state! Changing one of them will not affect the other.
즉, 같은 구성 요소를 두 번 렌더링하면 각 복사본은 완전히 분리된 상태가 됩니다! 둘 중 하나를 변경해도 다른 하나에는 영향을 미치지 않습니다
- In other words, if you render the same component twice, each copy will have completely isolated state! Changing one of them will not affect the other.
- State is fully private to the component declaring it.
- Unlike props, the parent component can’t change it. This lets you add state to any component or remove it without impacting the rest of the components.
프롭과 달리 상위 구성요소는 변경할 수 없습니다. 이를 통해 모든 구성요소에 상태를 추가하거나 나머지 구성요소에 영향을 주지 않고 제거할 수 있습니다.
- Unlike props, the parent component can’t change it. This lets you add state to any component or remove it without impacting the rest of the components.
- To share the state of components, remove state from both and move it to their closest common parent. Then, pass it(state) down to them(parent) via props (Lifting state up)