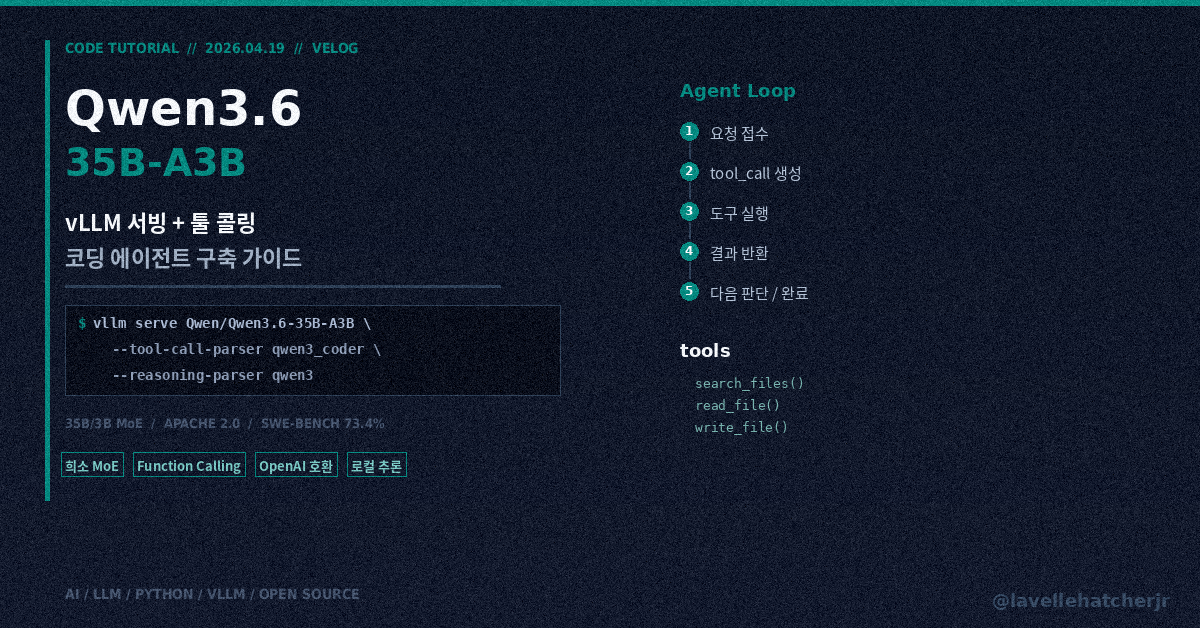
Alibaba Qwen 팀이 4월 16일에 Apache 2.0으로 공개한 Qwen3.6-35B-A3B는 총 파라미터 35B, 토큰당 활성 파라미터 약 3B의 희소 MoE 모델이에요. SWE-bench Verified 73.4%, MCPMark 37.0으로, 에이전트성 코딩 쪽에서 오픈 웨이트 중 가장 강한 축에 속합니다.
이 글에서는 vLLM으로 로컬에 OpenAI 호환 API를 띄우고, Python에서 툴 콜링(Function Calling)까지 연결하는 과정을 정리해 봤어요.
※ 공개 정보를 바탕으로 한 개인 정리입니다. 각 기업의 공식 입장이 아닙니다.
준비물
- vLLM 0.19.0 이상 (공식 권장 버전)
- NVIDIA GPU (RTX 4090 24GB면 단일 GPU로 동작, 멀티 GPU면 더 긴 컨텍스트 가능)
- Python 3.12
- 모델은 첫 실행 시 Hugging Face에서 자동 다운로드됨
1. vLLM 설치
python -m venv qwen36-env
source qwen36-env/bin/activate
pip install vllm>=0.19.0
오래된 vLLM에서는 Qwen3.6의 MoE 아키텍처를 지원하지 않아요. Qwen3MoeSparseMoeBlock 관련 에러가 나면 버전이 낮은 거예요.
2. vLLM 서버 띄우기
기본 실행 (추론만)
vllm serve Qwen/Qwen3.6-35B-A3B \
  --port 8000 \
  --tensor-parallel-size 1 \
  --max-model-len 32768 \
  --reasoning-parser qwen3
--reasoning-parser qwen3을 붙이면 thinking 모드가 켜져요. 모델이 내부적으로 추론 단계를 거친 뒤 답을 내놓는 방식인데, 코딩 작업에서는 이게 정확도를 꽤 올려줘요.
RTX 4090 한 장이면 --max-model-len은 32768이나 65536 정도로 잡아주세요. 262144 풀로 가면 OOM 납니다.
툴 콜링 지원으로 띄우기
vllm serve Qwen/Qwen3.6-35B-A3B \
  --port 8000 \
  --tensor-parallel-size 1 \
  --max-model-len 32768 \
  --reasoning-parser qwen3 \
  --enable-auto-tool-choice \
  --tool-call-parser qwen3_coder
--tool-call-parser qwen3_coder는 필수예요. 이게 없으면 모델이 툴 콜 JSON을 생성하긴 하는데 vLLM이 그걸 파싱을 못 해서, 구조화된 tool_calls 객체로 안 돌아와요. 가장 흔한 셋업 실수이고, 에러 메시지도 안 뜨고 조용히 실패합니다.
멀티 GPU (예: 4장)
vllm serve Qwen/Qwen3.6-35B-A3B \
  --port 8000 \
  --tensor-parallel-size 4 \
  --max-model-len 262144 \
  --reasoning-parser qwen3 \
  --enable-auto-tool-choice \
  --tool-call-parser qwen3_coder
서버가 뜨면 http://localhost:8000/v1에 OpenAI 호환 API가 열려요.
3. Python에서 기본 채팅
from openai import OpenAI

client = OpenAI(
    base_url="http://localhost:8000/v1",
    api_key="dummy",  # vLLM 로컬에서는 API 키 불필요
)

response = client.chat.completions.create(
    model="Qwen/Qwen3.6-35B-A3B",
    messages=[
        {"role": "user", "content": "파이썬으로 피보나치 수열 제너레이터를 작성해줘"}
    ],
    temperature=0.7,
    max_tokens=2048,
)

print(response.choices[0].message.content)
OpenAI SDK가 그대로 동작하니까, 기존 코드에서 base_url만 바꾸면 클라우드 API에서 로컬로 전환할 수 있어요.
4. 툴 콜링 (Function Calling)
여기서부터가 핵심이에요. Qwen3.6-35B-A3B는 툴 사용 패턴을 명시적으로 학습한 모델이라, MCPMark에서 Gemma 4-31B의 18.1% 대비 37.0%를 기록했어요.
import json
from openai import OpenAI

client = OpenAI(
    base_url="http://localhost:8000/v1",
    api_key="dummy",
)

tools = [
    {
        "type": "function",
        "function": {
            "name": "search_files",
            "description": "프로젝트 내 파일을 키워드로 검색한다",
            "parameters": {
                "type": "object",
                "properties": {
                    "query": {
                        "type": "string",
                        "description": "검색 키워드"
                    },
                    "file_extension": {
                        "type": "string",
                        "description": "파일 확장자 (예: .py, .ts)"
                    }
                },
                "required": ["query"]
            }
        }
    },
    {
        "type": "function",
        "function": {
            "name": "read_file",
            "description": "지정 경로의 파일 내용을 읽는다",
            "parameters": {
                "type": "object",
                "properties": {
                    "path": {
                        "type": "string",
                        "description": "파일 경로"
                    }
                },
                "required": ["path"]
            }
        }
    },
    {
        "type": "function",
        "function": {
            "name": "write_file",
            "description": "지정 경로에 파일을 쓴다",
            "parameters": {
                "type": "object",
                "properties": {
                    "path": {
                        "type": "string",
                        "description": "파일 경로"
                    },
                    "content": {
                        "type": "string",
                        "description": "작성할 내용"
                    }
                },
                "required": ["path", "content"]
            }
        }
    }
]

response = client.chat.completions.create(
    model="Qwen/Qwen3.6-35B-A3B",
    messages=[
        {
            "role": "system",
            "content": "당신은 코딩 에이전트입니다. 파일을 검색하고 읽고 수정해서 사용자의 요청을 완수하세요."
        },
        {
            "role": "user",
            "content": "프로젝트에서 DB 연결을 처리하는 Python 파일을 찾고, 커넥션 풀 크기를 5에서 20으로 변경해줘."
        }
    ],
    tools=tools,
    tool_choice="auto",
    temperature=1.0,  # thinking 모드 권장값
    max_tokens=4096,
)

message = response.choices[0].message

if message.tool_calls:
    for call in message.tool_calls:
        print(f"Tool: {call.function.name}")
        print(f"Args: {call.function.arguments}")
        print("---")
else:
    print(message.content)
5. 에이전트 루프 (멀티턴 툴 콜링)
실제로 쓸 수 있는 에이전트를 만들려면, 툴 호출 → 결과 반환 → 다음 판단의 루프가 필요해요.
def run_agent(user_request: str, tools: list, max_steps: int = 10):
    messages = [
        {
            "role": "system",
            "content": "당신은 코딩 에이전트입니다. 사용 가능한 도구를 활용해 작업을 완료하세요."
        },
        {"role": "user", "content": user_request}
    ]

    for step in range(max_steps):
        response = client.chat.completions.create(
            model="Qwen/Qwen3.6-35B-A3B",
            messages=messages,
            tools=tools,
            tool_choice="auto",
            temperature=1.0,
            max_tokens=4096,
        )

        assistant_message = response.choices[0].message
        messages.append(assistant_message)

        if not assistant_message.tool_calls:
            print(f"[완료] {assistant_message.content}")
            return assistant_message.content

        for call in assistant_message.tool_calls:
            tool_name = call.function.name
            tool_args = json.loads(call.function.arguments)

            print(f"[Step {step+1}] {tool_name}({tool_args})")

            result = execute_tool(tool_name, tool_args)

            messages.append({
                "role": "tool",
                "tool_call_id": call.id,
                "content": json.dumps(result, ensure_ascii=False),
            })

    return "최대 스텝 수에 도달했습니다"


def execute_tool(name: str, args: dict) -> dict:
    """실제 파일 시스템 작업으로 교체하세요."""
    if name == "search_files":
        return {
            "files": [
                {"path": "src/db/connection.py", "match": "pool_size=5"},
                {"path": "src/db/config.py", "match": "POOL_SIZE = 5"},
            ]
        }
    elif name == "read_file":
        return {"content": f"# {args['path']}의 내용"}
    elif name == "write_file":
        return {"status": "ok", "path": args["path"]}
    return {"error": "unknown tool"}
execute_tool 안을 실제 파일 시스템 호출로 바꾸면 로컬에서 도는 코딩 에이전트가 돼요.
6. thinking 모드 전환
Qwen3.6에는 thinking 모드(내부 추론 후 답변)와 non-thinking 모드(바로 답변)가 있어요.
| 모드 | temperature | 용도 |
|---|---|---|
| thinking (권장) | 1.0 | 복잡한 코딩, 디버깅, 설계 |
| non-thinking | 0.7 | 단순 질문, 코드 보완 |
서버 시작 시 --reasoning-parser qwen3을 붙였으면 thinking이 기본값이에요.
하드웨어 가이드
| 구성 | max-model-len | 비고 |
|---|---|---|
| RTX 4090 (24GB) × 1 | 32,768 | 대부분의 코딩 작업 가능 |
| RTX 4090 × 2 (TP=2) | 65,536 | 리포 전체 컨텍스트 |
| A100 80GB × 1 | 131,072 | 여유 있는 단일 구성 |
| H100 × 4 (TP=4) | 262,144 | 풀 컨텍스트, 프로덕션 |
FP8 버전(Qwen/Qwen3.6-35B-A3B-FP8)을 쓰면 VRAM을 더 아낄 수 있고 성능은 거의 동일하다고 보고돼요.
정리
- vLLM 0.19.0 이상으로
Qwen/Qwen3.6-35B-A3B를 서빙하면localhost:8000/v1에 OpenAI 호환 API가 열림 - 툴 콜링에는
--enable-auto-tool-choice --tool-call-parser qwen3_coder가 필수 — 없으면 조용히 실패함 - OpenAI SDK로 바로 호출 가능해서, 클라우드 API → 로컬 전환이
base_url한 줄 변경 - thinking 모드(
temperature=1.0)로 코딩 정확도 향상 - Apache 2.0 라이선스라 상업 이용 자유
모델이 나온 지 3일밖에 안 됐기 때문에 툴 콜링 안정성은 아직 커뮤니티에서 검증 중이에요. 프로덕션에 넣기 전에 자체 워크로드로 테스트하는 걸 추천드려요.
참고
- Qwen/Qwen3.6-35B-A3B - Hugging Face
- Qwen3.5 & Qwen3.6 Usage Guide - vLLM Recipes
- QwenLM/Qwen3.6 - GitHub
- vLLM Tool Calling Documentation