Handling Errors
이전 Chapter에서는 Server Action을 사용하여 데이터를 변경하는 방법에 대해 알아보았습니다. 이번에는 JavaScript의 try/catch 문과 Next.js API를 사용하여 오류를 효과적으로 처리하는 방법을 살펴보겠습니다.
📋 이번 Chapter에서 다룰 내용
-
error.tsx파일을 활용한 오류 처리
라우트 세그먼트에서 발생한 오류를 잡고, 사용자에게 대체 UI를 표시하는 방법 -
404 오류 처리
notFound함수와not-found파일을 사용하여 존재하지 않는 리소스에 대한 404 오류를 처리하는 방법 -
Server Action 오류 처리
서버 액션에try/catch문을 추가하여 오류를 안전하게 처리하는 방법
1. Adding try/catch to Server Actions
JavaScript의 try/catch 문을 서버 액션에 추가하여 오류를 처리해 보겠습니다.
/app/lib/actions.ts 수정
// ...

// 송장 데이터 생성부분 수정
export async function createInvoice(formData: FormData) {
  const { customerId, amount, status } = CreateInvoice.parse({
    customerId: formData.get("customerId"),
    amount: formData.get("amount"),
    status: formData.get("status"),
  });

  const amountInCents = amount * 100;
  const date = new Date().toISOString().split("T")[0];

  try { // 수정
    await sql`
    INSERT INTO invoices (customer_id, amount, status, date)
    VALUES (${customerId}, ${amountInCents}, ${status}, ${date})
  `;
  } catch (e) {
    return {
      message: "DB Error : Faileed to Create Invoice",
    };
  }

  revalidatePath("/dashboard/invoices");
  redirect("/dashboard/invoices"); // add code
}

// 송장 데이터 업데이트부분 수정
export async function updateInvoice(id: string, formData: FormData) {
  const { customerId, amount, status } = UpdateInvoice.parse({
    customerId: formData.get("customerId"),
    amount: formData.get("amount"),
    status: formData.get("status"),
  });

  const amountInCents = amount * 100;

  try {
    await sql`
    UPDATE invoices
    SET customer_id = ${customerId}, amount = ${amountInCents}, status = ${status}
    WHERE id = ${id}
  `;
  } catch (e) {
    return {
      message: "DB Error : Faileed to Update Invoice",
    };
  }

  // 클라이언트 캐시 무효화 및 서버 요청 갱신
  revalidatePath("/dashboard/invoices");
  // 업데이트 후 인보이스 페이지로 리다이렉트
  redirect("/dashboard/invoices");
}

// 송장 데이터 삭제부분 수정
export async function deleteInvoice(id: string) {
  try {
    await sql`DELETE FROM invoices WHERE id = ${id}`;
    revalidatePath("/dashboard/invoices");
    return { message: "Deleted Invoice." };
  } catch (error) {
    return { message: "Database Error: Failed to Delete Invoice." };
  }
}
⚠️ 중요한 주의사항
위 코드에서 redirect가 try/catch 구문 밖에서 호출되는 점에 주목해야 합니다.
Next.js에서 redirect 함수는 내부적으로 오류를 던져서 redirect를 실행합니다. 따라서 redirect가 try/catch 블록 안에 있을 경우, redirect가 호출되면 오류가 발생하여 바로 catch 블록에서 잡히게 됩니다.
그래서 redirect 함수를 사용할 때는 try 영역 내 코드흐름이 성공한 다음에 도달할 수 있게끔 구현해야 합니다.
오류 테스트해보기
Server Action에서 오류가 발생했을 때 어떻게 되는지 확인해 보겠습니다. 예시로 deleteInvoice 액션에서 의도적인 오류를 발생시켜보겠습니다.
export async function deleteInvoice(id: string) {
  // 의도적 에러 발생
  throw new Error("Failed to Delete Invoice");

  // 도달불가
  try {
    await sql`DELETE FROM invoices WHERE id = ${id}`;
    revalidatePath("/dashboard/invoices");
    return { message: "Deleted Invoice." };
  } catch (error) {
    return { message: "Database Error: Failed to Delete Invoice." };
  }
}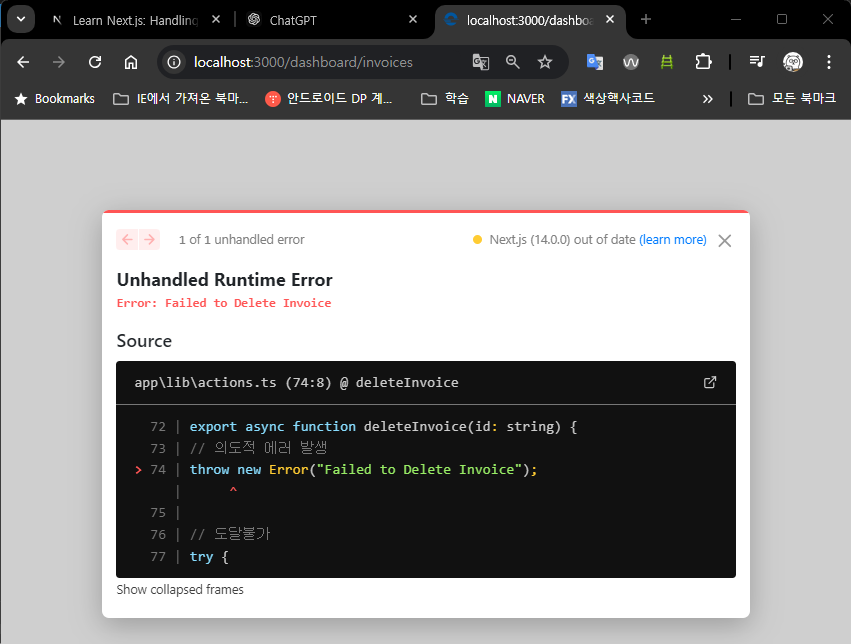
이러한 오류를 개발 중에 확인하는 것은 잠재적인 문제를 조기에 발견하는 데 도움이 됩니다. 하지만 애플리케이션이 갑작스럽게 실패하는 것을 방지하고, 사용자에게 오류를 표시하여 계속 실행되도록 하는 것이 더 중요합니다! 이때 Next.js의 error.tsx 파일이 유용하게 사용됩니다.
2. Handling all errors with error.tsx
error.tsx 파일은 특정 라우트 세그먼트에 대한 UI 경계를 정의하는 데 사용되는 Next.js의 약속된 파일입니다. 이 파일은 예상치 못한 오류를 잡아내고, 사용자에게 대체 UI를 표시할 수 있습니다.
/dashboard/invoices/error.tsx 파일 생성
"use client";

import { useEffect } from "react";

export default function Error({
  error,
  reset,
}: {
  error: Error & { digest?: string };
  reset: () => void;
}) {
  useEffect(() => {
    // 필요에 따라 오류를 오류 보고 서비스에 로깅
    console.error(error);
  }, [error]);

  return (
    <main className="flex h-full flex-col items-center justify-center">
      <h2 className="text-center">Something went wrong!</h2>
      <button
        className="mt-4 rounded-md bg-blue-500 px-4 py-2 text-sm text-white transition-colors hover:bg-blue-400"
        onClick={() => reset()}
      >
        Try again
      </button>
    </main>
  );
}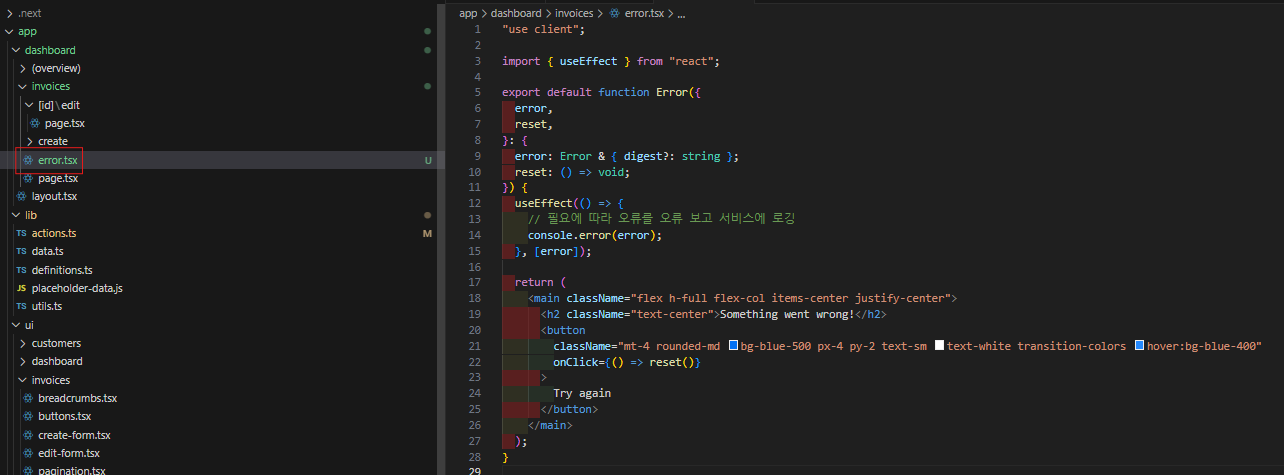
🔑 error.tsx 파일의 주요 특징
-
"use client":error.tsx파일은 클라이언트 컴포넌트여야 합니다. -
필수 props: 해당 파일은 항상 두 개의 props를 받습니다.
error: JavaScript의 기본 Error 객체reset: 오류 경계를 리셋하는 함수로, 실행하면 해당 라우트 세그먼트를 다시 렌더링을 시도합니다.
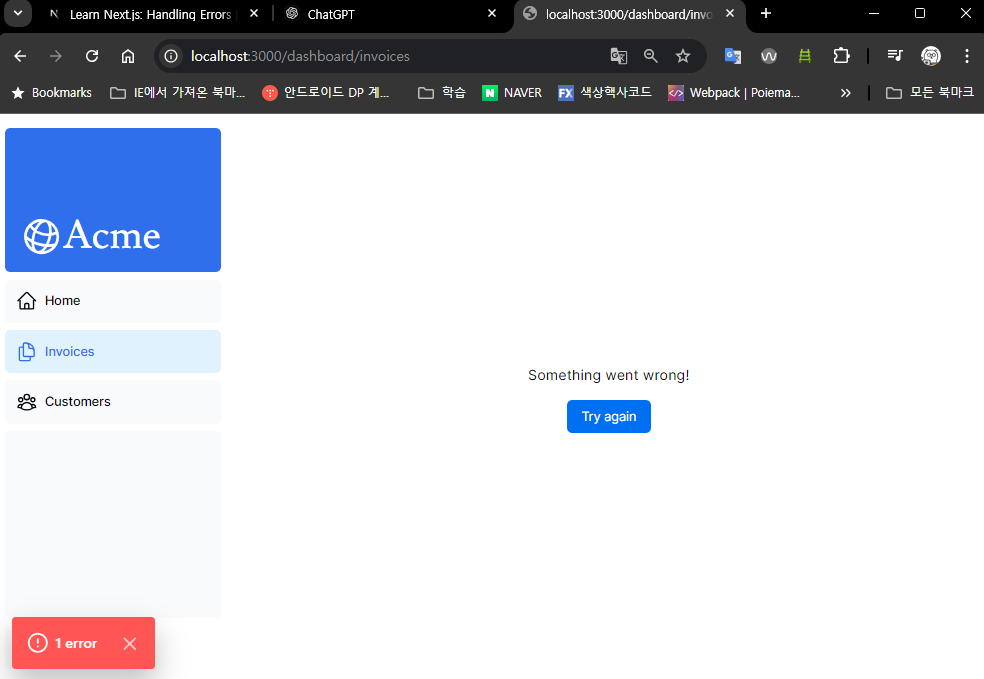
이제 다시 송장 데이터의 삭제를 진행하려 하면 다음과 같은 UI가 표시됩니다.
3. Handling 404 errors with the notFound function
error.tsx가 모든 오류를 처리하는 데 유용하지만, notFound 함수는 존재하지 않는 리소스를 요청할 때 더 적절한 처리를 제공합니다.
404 오류 상황 테스트
다음 URL을 방문한다고 가정해보겠습니다 (해당 UUID는 DB에 없는 값입니다).
http://localhost:3000/dashboard/invoices/2e94d1ed-d220-449f-9f11-f0bbceed9645/edit데이터 존재 여부 확인
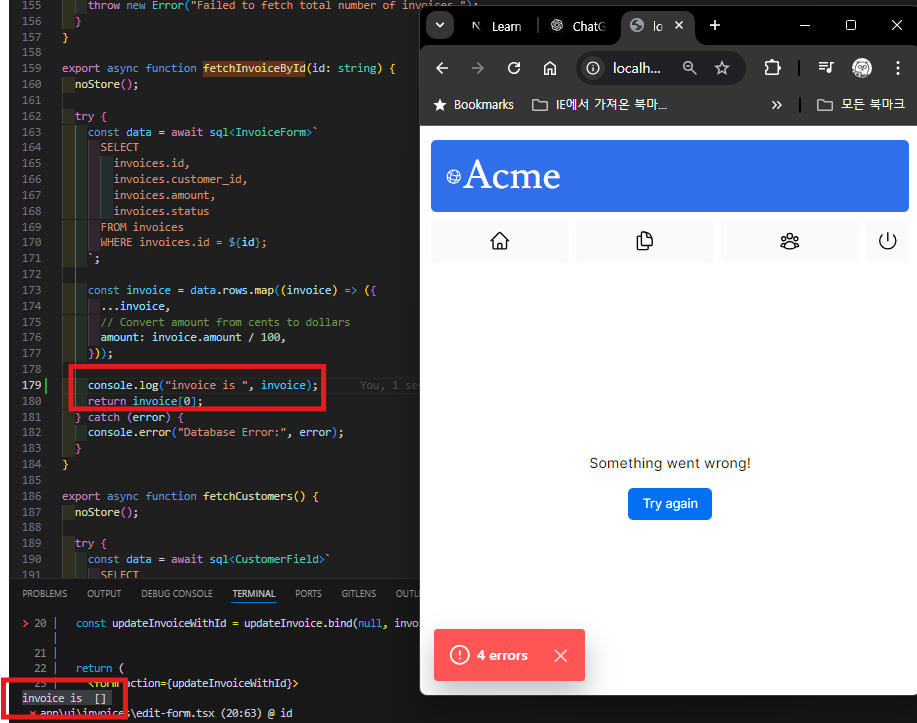
리소스가 존재하지 않는지 확인하기 위해 fetchInvoiceById 함수에서 console.log로 확인해보겠습니다.
export async function fetchInvoiceById(id: string) {
  noStore();

  try {
    const data = await sql<InvoiceForm>`
      SELECT
        invoices.id,
        invoices.customer_id,
        invoices.amount,
        invoices.status
      FROM invoices
      WHERE invoices.id = ${id};
    `;

    const invoice = data.rows.map((invoice) => ({
      ...invoice,
      amount: invoice.amount / 100,
    }));

    console.log("invoice is ", invoice); // 출력 : invoices is []
    return invoice[0];
  } catch (error) {
    console.error("Database Error:", error);
  }
}
notFound() 함수 적용
데이터베이스에 해당 송장데이터가 없다는 것을 확인했으니, notFound() 함수를 사용해 적절한 404 처리를 해보겠습니다.
/dashboard/invoices/[id]/edit/page.tsx 수정
import Form from "@/app/ui/invoices/edit-form";
import Breadcrumbs from "@/app/ui/invoices/breadcrumbs";
import { fetchCustomers, fetchInvoiceById } from "@/app/lib/data";
import { notFound } from "next/navigation";
export default async function Page({ params }: { params: { id: string } }) {
const id = params.id;
// Promise.all을 사용하여 인보이스와 고객 데이터를 동시에 가져옴
const [invoice, customers] = await Promise.all([
fetchInvoiceById(id), // 특정 인보이스 데이터를 가져옴
fetchCustomers(), // 고객 데이터를 가져옴
]);
if (!invoice) notFound();
return (
<main>
<Breadcrumbs
breadcrumbs={[
{ label: "Invoices", href: "/dashboard/invoices" },
{
label: "Edit Invoice",
href: `/dashboard/invoices/${id}/edit`,
active: true,
},
]}
/>
<Form invoice={invoice} customers={customers} />
</main>
);
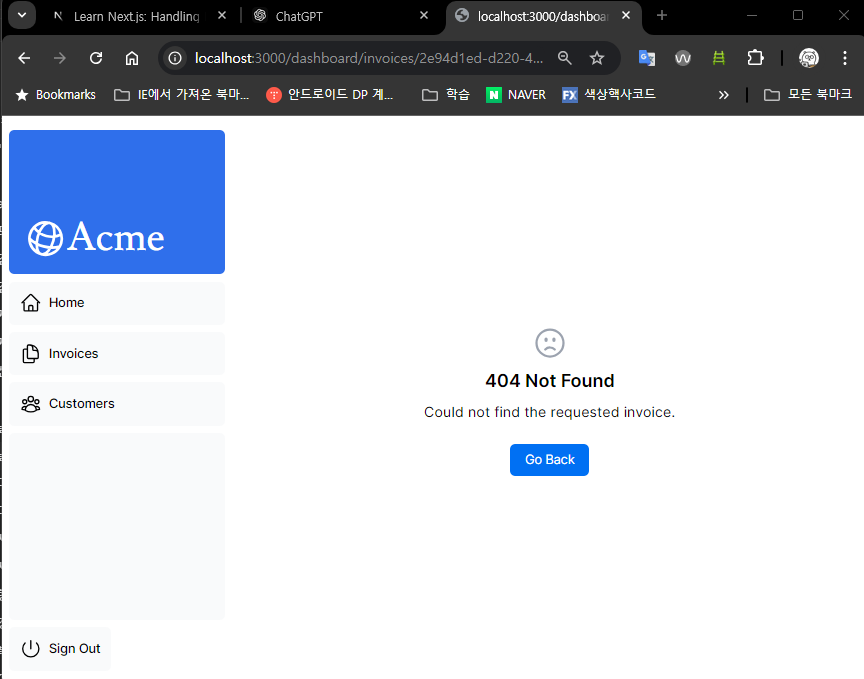
}not-found.tsx 파일 생성
notFound() 함수가 호출되면 내부적으로 라우트 세그먼트 범위 내의 not-found.tsx 파일을 탐색하고, 해당 파일 내용을 렌더링합니다.
/app/dashboard/invoices/[id]/edit/not-found.tsx 생성
import Link from "next/link";
import { FaceFrownIcon } from "@heroicons/react/24/outline";

export default function NotFound() {
  return (
    <main className="flex h-full flex-col items-center justify-center gap-2">
      <FaceFrownIcon className="w-10 text-gray-400" />
      <h2 className="text-xl font-semibold">404 Not Found</h2>
      <p>Could not find the requested invoice.</p>
      <Link
        href="/dashboard/invoices"
        className="mt-4 rounded-md bg-blue-500 px-4 py-2 text-sm text-white transition-colors hover:bg-blue-400"
      >
        Go Back
      </Link>
    </main>
  );
}
🎯 중요한 우선순위
notFound() 함수로 호출되어 표시되는 not-found.tsx는 error.tsx보다 우선순위가 높습니다.
이는 특정 오류 상황을 더 구체적으로 처리할 때 notFound() 함수와 not-found.tsx 파일을 사용할 수 있다는 의미입니다.
4. 참고: Route Segment (라우트 세그먼트)
위에서 몇 번 라우트 세그먼트라고 언급했는데, 이것이 정확히 무엇인지 알아보겠습니다.
라우트 세그먼트란?
라우트 세그먼트(route segment)는 Next.js에서 URL 경로를 구성하는 각 경로(path)의 부분을 의미합니다.
예시로 이해하기
다음과 같은 URL이 있다고 가정해보겠습니다.
http://localhost:3000/dashboard/invoices/edit위 경로의 라우트 세그먼트는 다음과 같습니다:
dashboardinvoicesedit
폴더 구조와의 관계
Next.js에서 각각의 세그먼트는 폴더 구조와 1:1로 대응됩니다.
# App Router 방식
/app/dashboard/invoices/edit/page.tsx

# Pages Router 방식
/pages/dashboard/invoices/edit.tsx
UI 경계 설정
Next.js는 각 세그먼트별로 독립적인 UI 경계(error boundary)를 설정할 수 있습니다.
예를 들어, invoices 세그먼트에 오류가 발생했을 때, error.tsx 파일이 /dashboard/invoices/ 폴더에 정의되어 있다면, 이 세그먼트 내의 오류를 처리할 수 있게 됩니다.
정리
라우트 세그먼트는 Next.js에서 특정 경로 또는 URL의 한 부분을 의미하며, 이를 통해 각 라우트 세그먼트마다 개별적으로 다음과 같은 기능들을 관리할 수 있습니다:
- 🔥 오류 처리 (
error.tsx,not-found.tsx) - 📊 데이터 가져오기
- 🎨 레이아웃 설정
- 🛡️ 로딩 상태 관리
🎯 마무리
이번 Chapter에서는 Next.js에서 오류를 효과적으로 처리하는 세 가지 주요 방법을 살펴보았습니다:
- Server Actions에서 try/catch 사용: 서버 단에서의 안전한 오류 처리
- error.tsx 파일 활용: 예상치 못한 오류에 대한 사용자 친화적 UI 제공
- notFound() 함수와 not-found.tsx: 404 오류에 대한 구체적이고 명확한 처리
이러한 오류 처리 메커니즘을 적절히 활용하면, 사용자에게 더 안정적이고 친화적인 웹 애플리케이션 경험을 제공할 수 있습니다.