학습내용
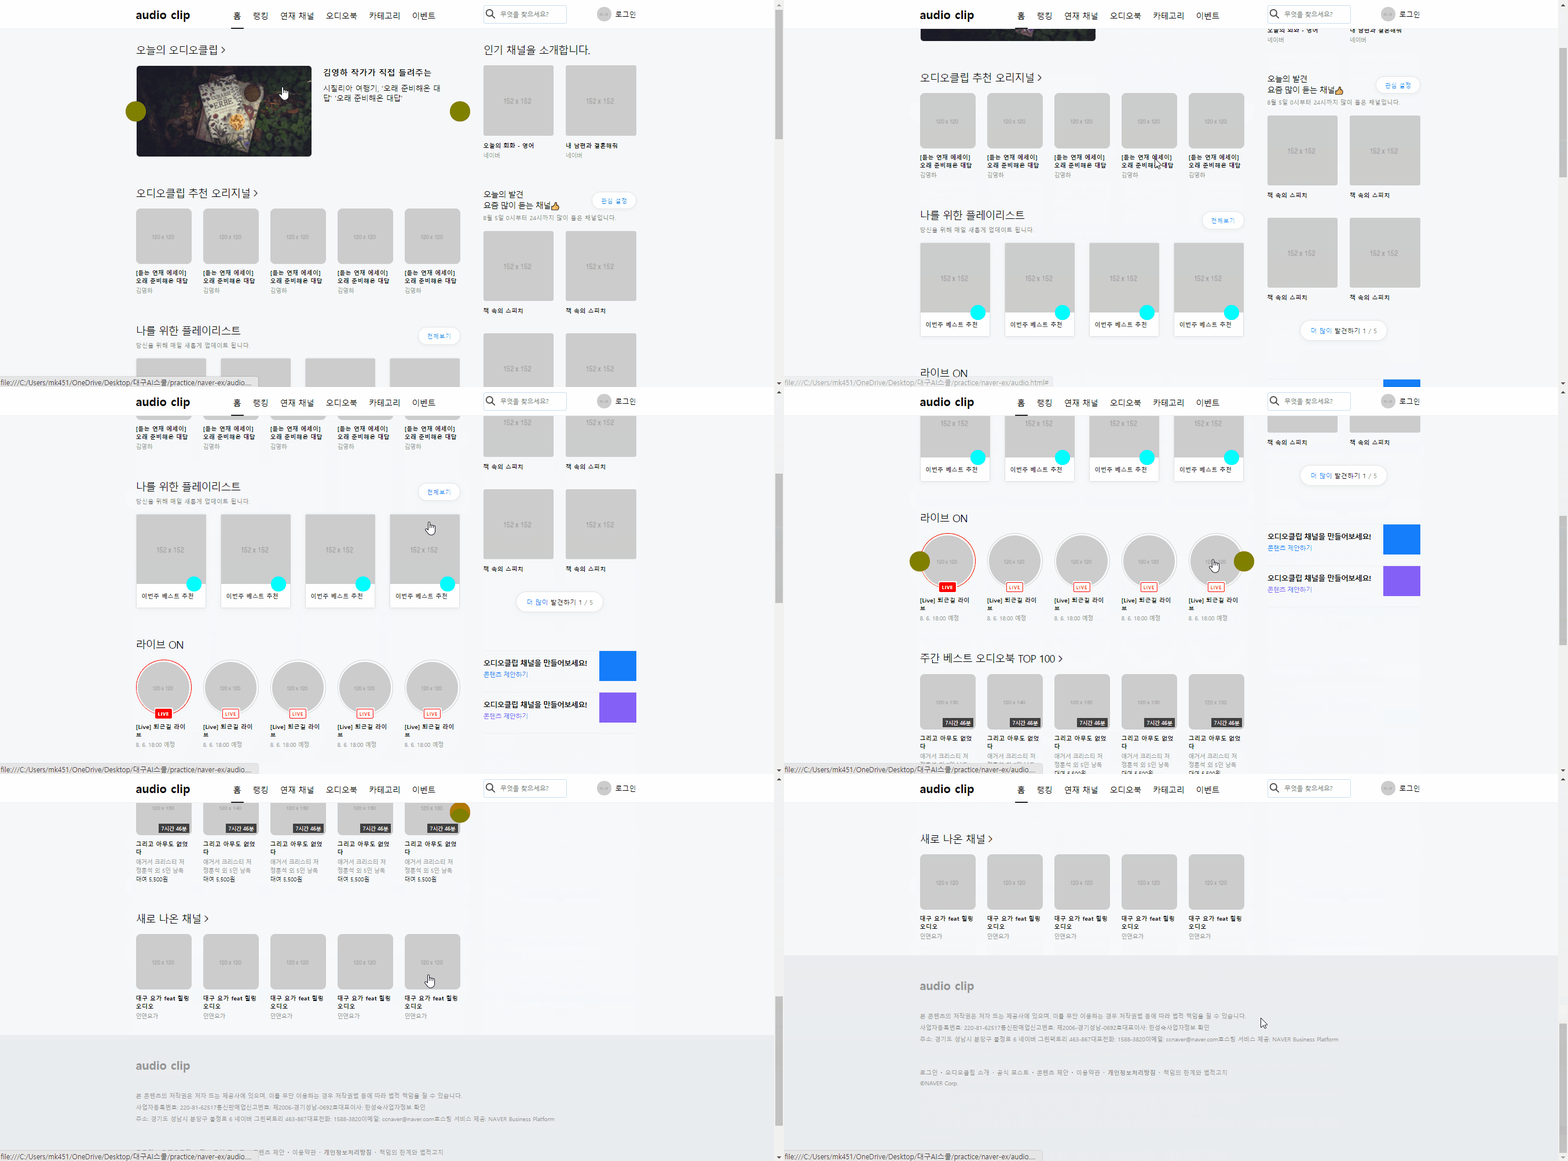
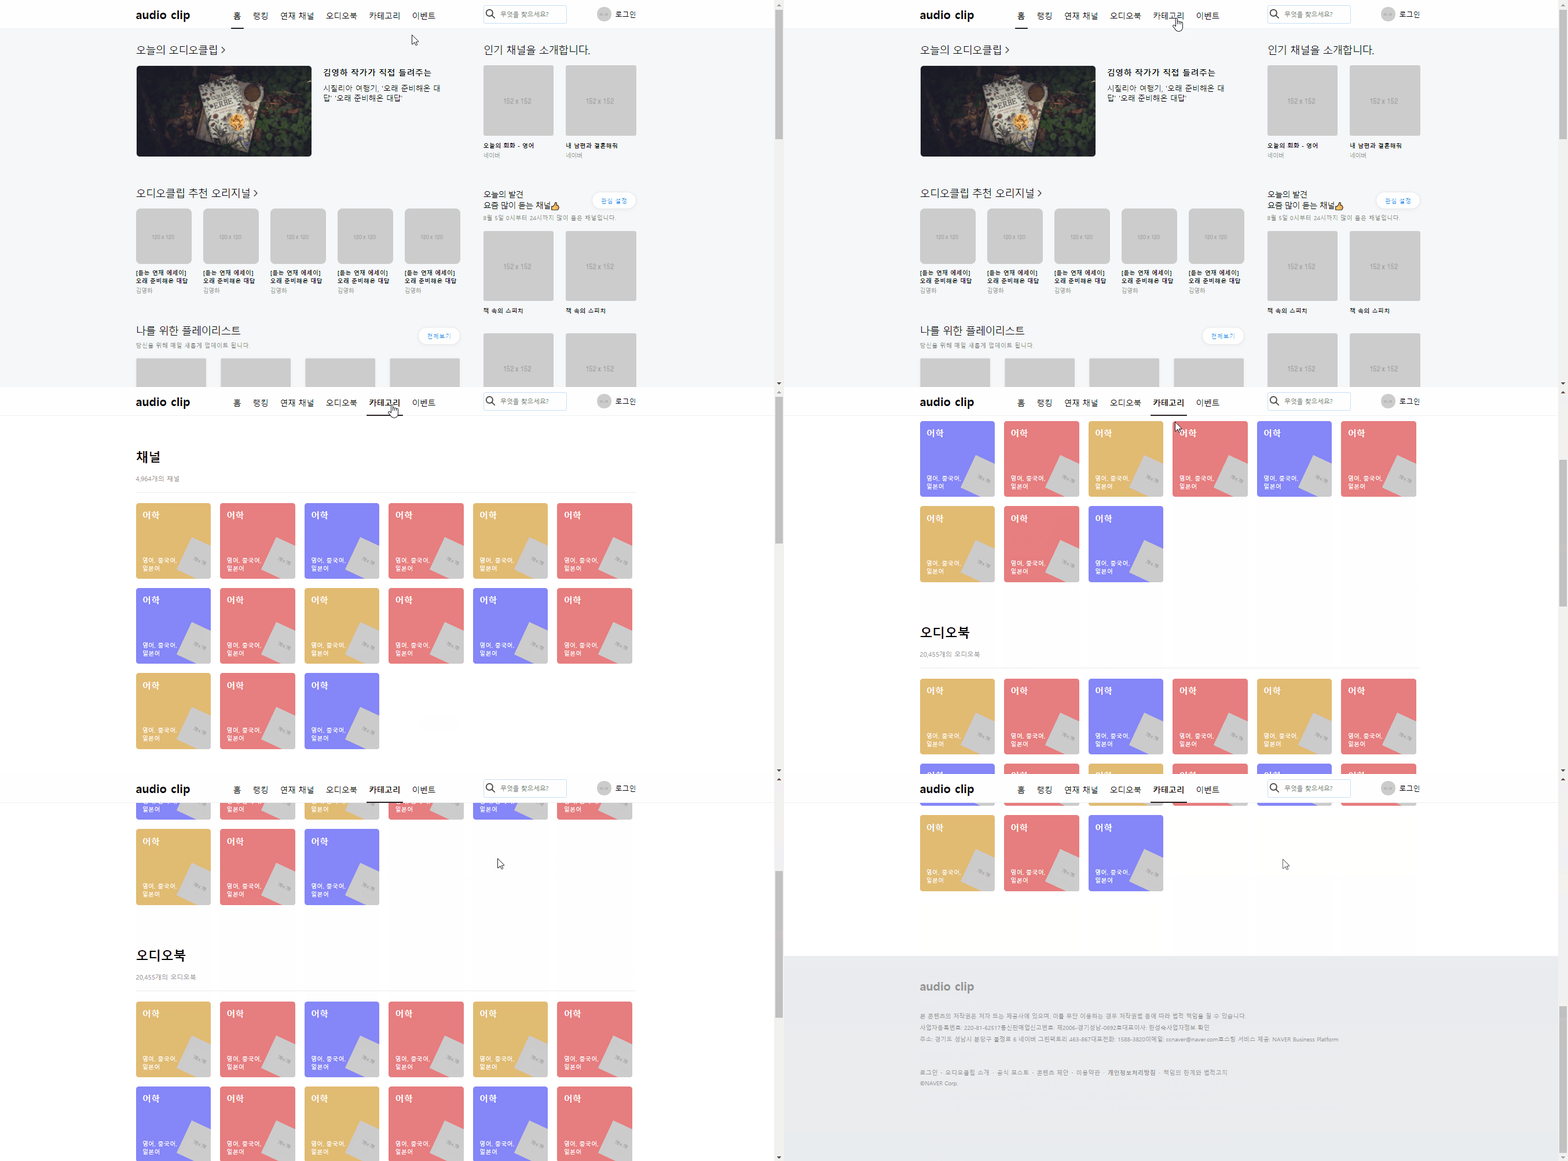
네이버 오디오클립 main-left, main-right, footer, 오디오 카테고리 페이지
github소스코드
오디오 main-left

section 버튼 표준화
- 어제 '오늘의 오디오클립' 영역을 만들 때 사용했던 버튼을 default 클래스로 변경했다.
- 영역에 따라 위아래 위치만
top으로 변경해서 사용했다.
.audio-section .audio-body {
    position: relative;
    padding-top: 19px;
}
.audio-body .btn {
    display: none;
    position: absolute;
    width: 44px;
    height: 44px;
    background-color: olive;
    border-radius: 50%;
    top: 50%;
    transform: translateY(-50%);
}
.audio-body:hover .btn {
    display: initial;
}
.audio-body .btn.btn-left {
    left: -22px;
}
.audio-body .btn.btn-right {
    right: -22px;
}
/* section마다 버튼 위치 조정 */
.audio-section .audio-body .btn {
    top: 80px;
}
추천 오리지널 & 새로 나온 채널
- 2개 영역의 레이아웃이 동일해서 여기도 표준 클래스화했다.
.audio-section .audio-body {
    position: relative
}
.audio-section .audio-body ul {
    align-items: flex-start;
}
.audio-section .audio-body li {
    width: 120px;
}
.audio-section .audio-body li a img {
    width: 100%;
    height: 120px;
    border-radius: 10px;
}
.audio-section .audio-body li a h3 {
    margin-top: 10px;
    font-size: 13px;
}
.audio-section .audio-body li a .author {
    margin-top: 6px;
    font-size: 12px;
    color: #959595;
}
나를 위한 플레이리스트
- header 부분 오른쪽에 버튼이 있는데, 왼쪽 텍스트들을 따로 정렬할 필요가 없어서 그런지 wrap으로 묶지 않고 그냥 버튼에
position:absolute를 이용해 위치를 조정했다.
#audio-playlist .audio-header .link-total {
    position: absolute;

    padding: 10px 18px 8px;
    background-color: #fff;
    border: 1px solid rgba(0,0,0,.1);
    border-radius: 20px;
    box-shadow: 0 2px 10px 0 rgb(80 85 91 / 7%);

    font-size: 13px;
    font-weight: 500;
    color: #157efb;

    top: 6px;
    right: 0;
}
라이브 on
- img-wrap, img, live-state, live 영역 모두에 border를 사용해서 테두리를 몇 겹으로 보이게 했다.
- li 태그에 active 클래스를 줘서 내부 border 및 background-color를 바꾸어주었다.
#audio-live li a .img-wrap {
    /* overflow: hidden; */
    position: relative;
    width: 120px;
    height: 120px;
    border: solid 2px lightgray;
    border-radius: 50%;
}
#audio-live li.active a .img-wrap {
    border: solid 2px red;
}
#audio-live li a .img-wrap img {
    width: 100%;
    height: 100%;
    border: solid 2px #fff;
    border-radius: 50%;
}
#audio-live li a .img-wrap .live-state {
    position: absolute;
    padding: 2px;
    border-radius: 3px;
    background-color: #fff;

    left: 50%;
    transform: translateX(-50%);
    bottom: -11px;
}
#audio-live li a .img-wrap .live-state .live {
    display: block;
    padding: 2px 4px;

    border: solid 2px red;
    border-radius: 3px;

    color: red;
    font-size: 10px;
    font-weight: 700;
    letter-spacing: 1px;
}
#audio-live li.active a .img-wrap .live-state .live {
    border: solid 2px red;
    background-color: red;
    color: #fff;
}
오디오 main-right
- 컨텐츠의 종류에 맞는 적절한 태그를 사용하기: 글자를 입력할 때는 정보를 뜻하는 태그를 사용하는 것이 웹 표준(웹 접근성)에 맞다. div는 공간을 만들 때만 사용하기
inline-block속성은margin: 0 auto로 중앙정렬 안 됨. block 속성으로 바꿔서 x축 한 줄 전부 차지한 후 그 안에서
중앙 정렬 하기
#audio-discovery .audio-body .btn-more {
    display: block;
    margin: 0 auto;
}
오디오 카테고리 페이지

flex-between,wrap으로 형제 태그들을 정렬할 때, 각 줄에 오는 요소의 개수가 다르면 레이아웃이 틀어진다. 그럴 땐flex-start로 왼쪽으로 몰고 개체 사이 간격을 지정해서 정렬할 수 있다.nth-child()선택자 활용:odd(홀수),even(짝수) 등. 여러 가지 선택자를 사용해 배경색을 다양하게 넣어보았다.
#audio-main .audio-category .audio-category-lists li:nth-child(6n) {
    margin-right: 0;
}
#audio-main .audio-category .audio-category-lists li:nth-child(even) a {
    background-color: rgb(230, 125, 127);
}
#audio-main .audio-category .audio-category-lists li:nth-child(4n+1) a {
    background-color: rgb(225, 187, 114);
}
#audio-main .audio-category .audio-category-lists a {
    position: relative;
    overflow: hidden;
    display: block;
    width: 100%;
    height: 100%;
    background-color: rgb(133, 134, 247);
    border-radius: 6px;
    padding: 14px;
}
어려웠던 점
- 표준화 시킨 클래스 사용이 많아지다보니 반대로 커스텀 해야 할 영역에 표준 클래스 속성이 적용되어서 레이아웃이 틀어지는 일이 없는지 잘 살펴야 했다.
- 오디오 페이지의 주간베스트 오디오북 부분을 만들 때 강의에선 부모 img-wrap의 높이값이 없어서 span태그의 bottom이 적용되지 않았는데 나는 그냥 됐는데 이유를 몰랐다.
- 강의와 다르게 링크가 연결된 모든 영역을 a태그로 다 감싸면서 진행하다보니 코드가 같아도 레이아웃이 달라지는 경우가 있다.
해결방법
- 크롬 브라우저를 보며 찾았다. 크롬 만세
- 알고보니 부모 태그인 img-wrap에 높이값이 없고 overflow:hidden도 적용하지 않았는데 자식 태그인 img와 span 둘다 absolute를 적용해서 자식 높이값이 부모에 영향을 주지 못한 것이었다. 나는 img에 absolute를 적용하지 않았기 때문에 img의 높이값이 부모에 적용되어 배치에 문제가 없었다.
- 부모자식 관계, 영역의 크기 지정 등 a태그를 추가로 사용할 때 대충 어떤 부분을 신경써야 되는지도 점점 연습이 되고 있다.
소감
오늘은 특히 표준 클래스를 많이 만들고 사용했다. 그래서 강의 내용은 많았지만 내용에 비해 시간이 좀 적게 걸린 느낌이다. 여러 곳에 적용할 수 있는 코드를 잘 만들어서 좀 더 효율적인 코딩을 하고 싶다.
