좌우 버튼을 통해 이미지 슬라이드를 구현해보았다.
✅ Goal
- 자바스크립트를 활용하여 슬라이드를 구현해본다.
✅ Keyword
querySelectorAll()
이번 슬라이더를 구현하기 위한 핵심 키워드이다. querySelectorAll
는 지정된 셀렉터 그룹에 일치하는 다큐먼트의 엘리먼트 리스트를 나타내는 정적(살아 있지 않은) NodeList 를 반환한다.
즉 이메서드를 활용하여 지정한 셀렉터에 대한 NodeList의 길이를 활용하여 슬라이드를 구현하였다.
🟢 slide imgBox 생성
반복문을 활용하여 imgBox 길이만큼 생성하였다. 그리고 css를 활용하여 모든 이미지들이 정가운데에 겹치게 하였다. (position 활용)
//index js
//...
const imgBox = [
  ...,...,...,...
];

for (let i = 0; i < imgBox.length; i++) {
  const slideBox = document.createElement("div");

  if (i === 0) {
    slideBox.classList.add("slide", "active");
  }
  slideBox.classList.add("slide");
  slideBox.style.backgroundImage = `url(${imgBox[i]})`;
  container.appendChild(slideBox);
}
//...
🟢 slide button
우선 querySelectorAll 활용하여 오른쪽 버튼을 클릭하면 증가, 왼쪽 버튼을 클릭하면 감소 하도록 slide클래스명의 인덱스를 조절 할 수 있도록 하였다.
//...
const slides = document.querySelectorAll(".slide");

let slideInx = 0;

rightBtnId.addEventListener("click", () => {
  slideInx++;
  if (slideInx > slides.length - 1) {
    slideInx = 0;
  }

  //...
});

leftBtn.addEventListener("click", () => {
  slideInx--;
  if (slideInx < 0) {
    slideInx = slides.length - 1;
  }

  //...
});
바깥쪽 이미지를 표현하기 위해서 bodyBg()를 만들어서 표현하였고 activeSlide() 함수를 통해서 클래스명 active의 유무에 따라 투명도 조절을 하였다.
function bodyBg() {
  body.style.backgroundImage = slides[slideInx].style.backgroundImage;
}

function activeSlide() {
  slides.forEach((slide) => slide.classList.remove("active"));
  slides[slideInx].classList.add("active");
}
🟥 조금은 고민했던 부분
슬라이드 이미지를 구현하면서 첫 번째 이미지는 활성화 된 상태로 구현하고 싶어서 고민을 하다 새롭게 알게 된 점이 있다. mdn을 읽어보니 classList.add() 사용할 때 인자를 추가하면 class명을 여러개 이어 쓸수 있다는 점이다. 그래서 아래와 같이 문제 해결!
 for (let i = 0; i < imgBox.length; i++) {
  const slideBox = document.createElement("div");

  if (i === 0) {
    slideBox.classList.add("slide", "active");
  }

  slideBox.classList.add("slide");
  slideBox.style.backgroundImage = `url(${imgBox[i]})`;
  container.appendChild(slideBox);
}
✅ 기능 시연 및 코드
전에 리엑트를 활용하여 슬라이드를 구현해본 경험이 있어 수월하게 작업하였다. 확실히 html마크업을 안하고 오직 자바스크립트만 활용해서 만들다보니 조금 복잡한감이 있다. 남은 첼린지는 어느정도 마크업을 해야겠다..
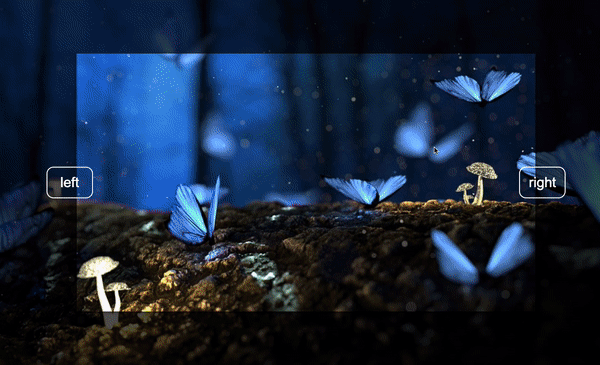
🟢 Slide img
🟢 js code
// index.js
const container = document.getElementById("container");
const leftBtn = document.createElement("button");
const rightBtn = document.createElement("button");

leftBtn.innerText = "left";
rightBtn.innerText = "right";
leftBtn.id = "left";
rightBtn.id = "right";

container.append(leftBtn);

const imgBox = [
  "https://cdn.pixabay.com/photo/2017/02/08/17/24/fantasy-2049567_960_720.jpg",
  "https://cdn.pixabay.com/photo/2014/02/27/16/10/flowers-276014_960_720.jpg",
  "https://cdn.pixabay.com/photo/2015/04/23/22/00/tree-736885_960_720.jpg",
  "https://cdn.pixabay.com/photo/2014/09/14/18/04/dandelion-445228_960_720.jpg",
];

for (let i = 0; i < imgBox.length; i++) {
  const slideBox = document.createElement("div");

  if (i === 0) {
    slideBox.classList.add("slide", "active");
  }
  slideBox.classList.add("slide");
  slideBox.style.backgroundImage = `url(${imgBox[i]})`;
  container.appendChild(slideBox);
}

container.appendChild(rightBtn);

const body = document.body;
const slides = document.querySelectorAll(".slide");
const leftBtnId = document.getElementById("left");
const rightBtnId = document.getElementById("right");

let slideInx = 0;

rightBtnId.addEventListener("click", () => {
  slideInx++;
  if (slideInx > slides.length - 1) {
    slideInx = 0;
  }

  bodyBg();
  ativeSlide();
});

leftBtn.addEventListener("click", () => {
  slideInx--;
  if (slideInx < 0) {
    slideInx = slides.length - 1;
  }

  bodyBg();
  ativeSlide();
});

bodyBg();

function bodyBg() {
  body.style.backgroundImage = slides[slideInx].style.backgroundImage;
}

function ativeSlide() {
  slides.forEach((slide) => slide.classList.remove("active"));
  slides[slideInx].classList.add("active");
}
https://github.com/fake-dp/Js-Challenge14-Mini-Project/tree/main/SlideImg
배포링크