Ⅰ. 9축 IMU 센서
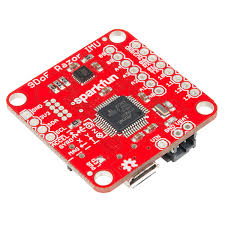
- 중력 가속도 감지
- 직선 방향 가속도 감지
- 회전 속도 감지
- 동서남북 방위각 감지
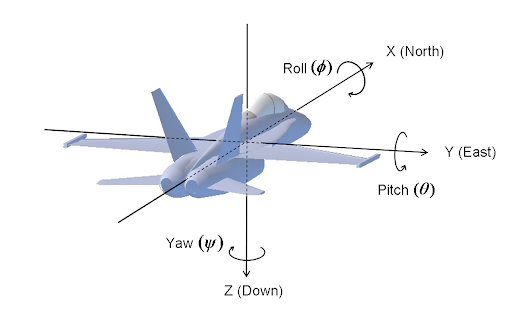
Ⅱ. RPY와 Querternion
물체의 orientation을 표기하는 방법
1. roll, pitch, yaw
- 오일러 표기법, 인간이 인지하기 쉬운 표기법이나 계산비용이 크다
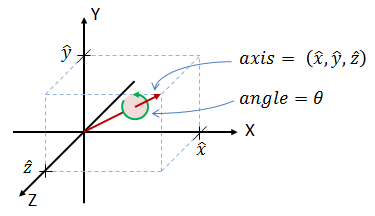
2. querternion
- 인간이 인지하기는 어려우나 컴퓨터가 계산하기 편한 표기법
3. 변환
#!/usr/bin/env python

from tf.transformations import euler_from_quaternion, quaternion_from_euler

q = quaternion_from_euler(1, 1, 1)
print(q)
e = euler_from_quaternion(q)
print(e)
jsg@jsg-ubuntu:~/xycar_ws/src/my_imu/src$ python transform.py
[ 0.16751879  0.57094147  0.16751879  0.78606663]
(1.0000000000000004, 1.0, 1.0000000000000007)
Ⅲ. IMU 센서가 발행하는 msg
- sensor_msgs/Imu
jsg@jsg-ubuntu:~$ rosmsg show sensor_msgs/Imu
std_msgs/Header header
  uint32 seq
  time stamp
  string frame_id
geometry_msgs/Quaternion orientation
  float64 x
  float64 y
  float64 z
  float64 w
float64[9] orientation_covariance
geometry_msgs/Vector3 angular_velocity
  float64 x
  float64 y
  float64 z
float64[9] angular_velocity_covariance
geometry_msgs/Vector3 linear_acceleration
  float64 x
  float64 y
  float64 z
float64[9] linear_acceleration_covariance
Ⅳ. IMU 센서 rpy로 출력
#!/usr/bin/env python
import rospy
import time

from sensor_msgs.msg import Imu
from tf.transformations import euler_from_quaternion

Imu_msg = None

def imu_callback(data):
    global Imu_msg
    Imu_msg = [data.orientation.x, data.orientation.y,
    	       data.orientation.z, data.orientation.w]

rospy.init_node("Imu_Print")
rospy.Subscriber("imu", Imu, imu_callback)

while not rospy.is_shutdown():
    if Imu_msg == None:
        continue

    (roll, pitch, yaw) = euler_from_quaternion(Imu_msg)

    print('Roll:%.4f, Pitch:%.4f, Yaw:%.4f' % (roll, pitch, yaw))

    time.sleep(0.5)
<launch>
  <node pkg="xycar_imu" type="9dof_imu_node.py" name="xycar_imu" output="screen">
    <param name="rviz_mode" type="string" value="false" />
  </node>
  <node pkg="my_imu" type="roll_pitch_yaw.py" name="Imu_Print" output="screen" />
</launch>
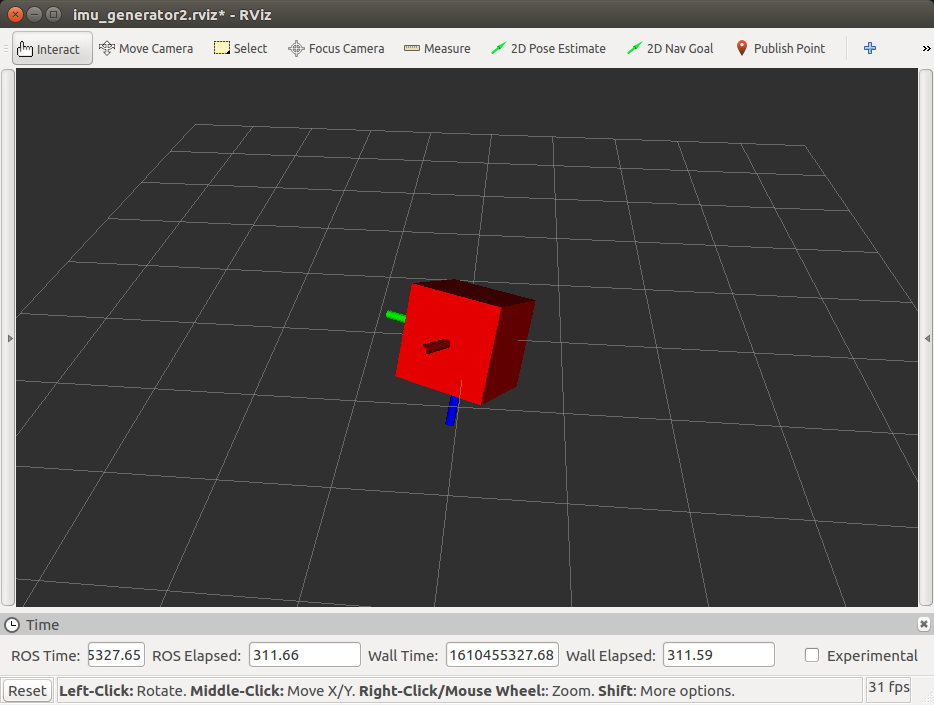
Ⅴ. IMU 데이터 시각화
-
rviz_imu_plugin 설치 : http://wiki.ros.org/rviz_imu_plugin
-
launch파일에 rviz 추가
<launch>
  <!-- rviz display -->
  <node name="rviz_visualizer" pkg="rviz" type="rviz" required="true"
        args="-d $(find rviz_imu)/rviz/imu_3d.rviz"/>
  <node pkg="xycar_imu" type="9dof_imu_node.py" name="xycar_imu" output="screen">
    <param name="rviz_mode" type="string" value="false" />
  </node>
</launch>
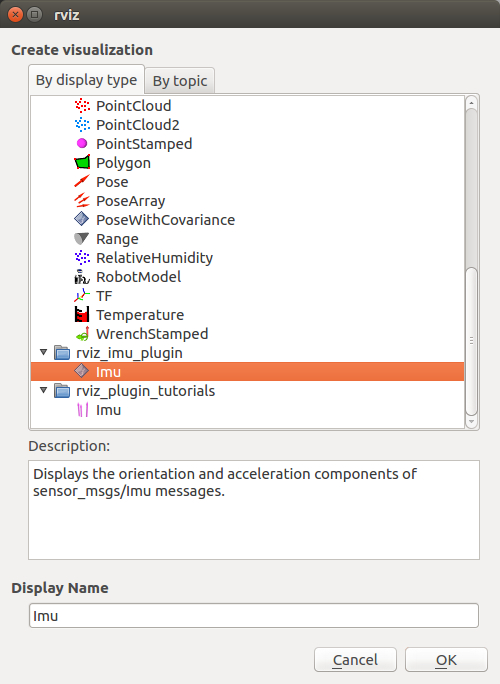
- Rviz 에서 add 누른 후 imu 추가
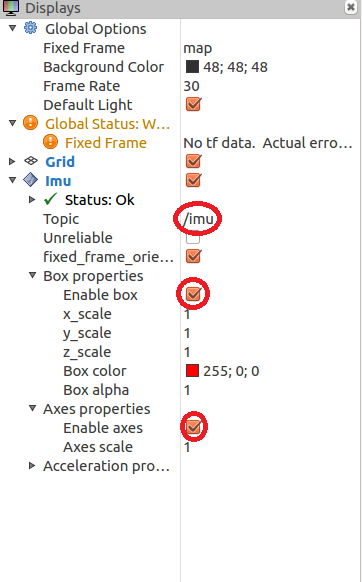
- 옵션 설정
- 결과