3 Zookeeper 실습
실습에서는 Zookeeper 3.7.1 버전을 사용한다.
3.1 설치하기
3.1.1 Prerequisites
System requirement: https://zookeeper.apache.org/doc/r3.3.5/zookeeperAdmin.html#sc_systemReq
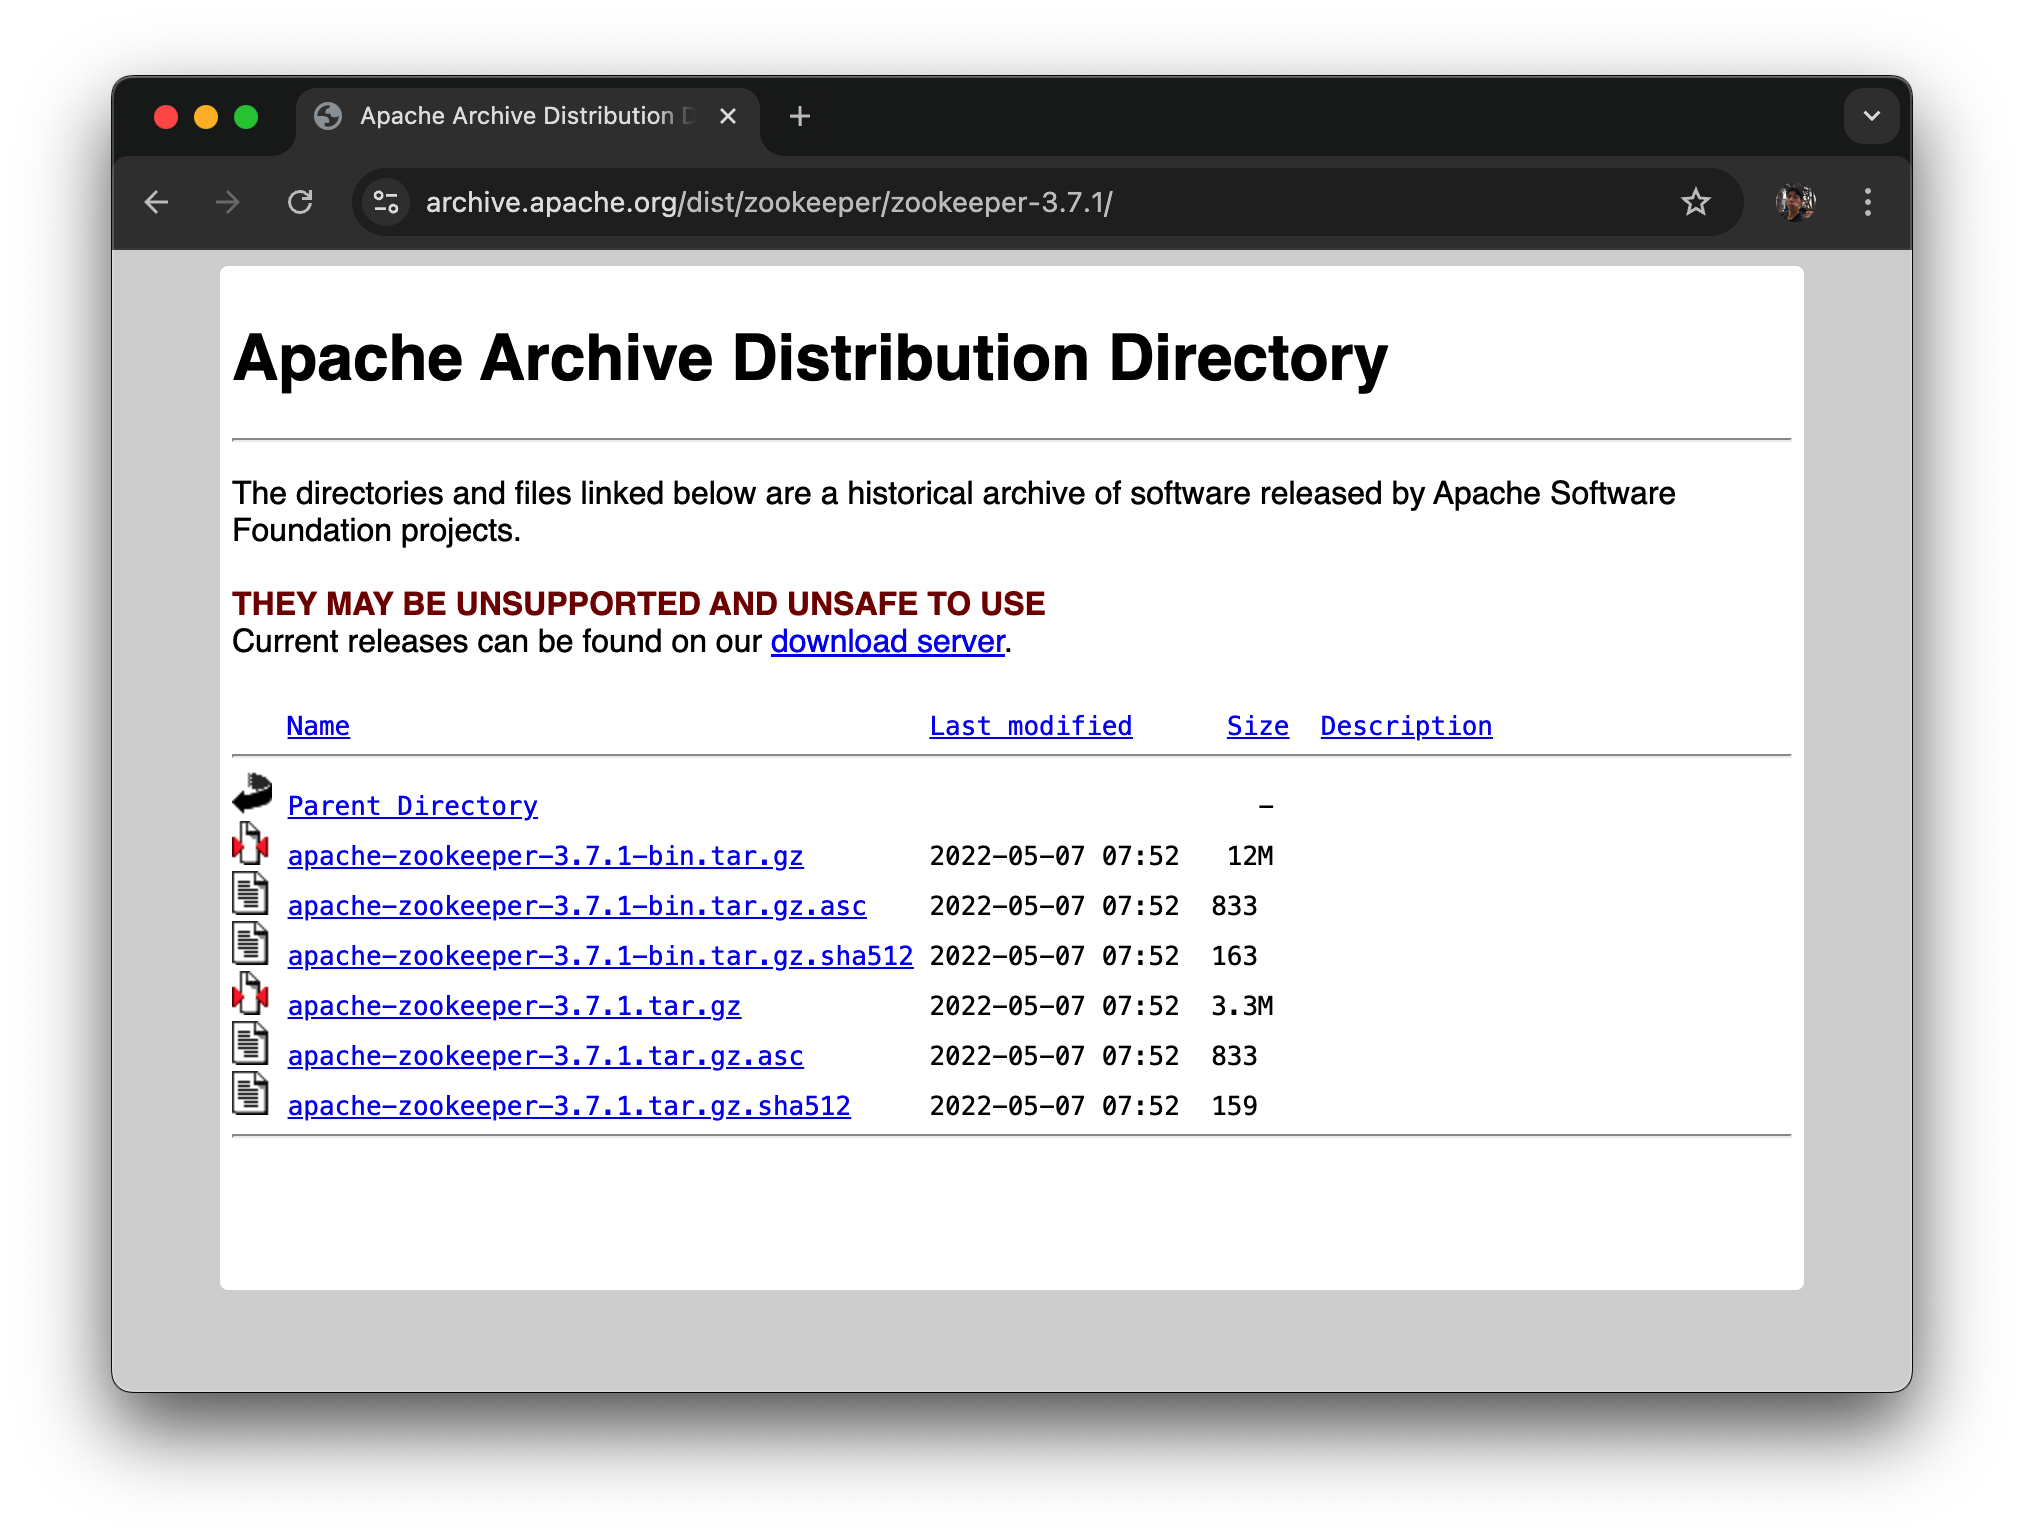
3.1.2 Download & untar
wget https://dlcdn.apache.org/zookeeper/zookeeper-3.7.1/apache-zookeeper-3.7.1-bin.tar.gzwget https://dlcdn.apache.org/zookeeper/zookeeper-3.7.1/apache-zookeeper-3.7.1-bin.tar.gz
지금 미러서버에서 내려온 상태라서 직접 사이트에서 다운을 받아주자.
tar xvzf apache-zookeeper-3.7.1-bin.tar.gz
mv apache-zookeeper-3.7.1-bin zookeeper
cd zookeeper
(선택)ZK_HOME 설정
echo "export ZK_HOME=$(pwd)" >> ~/.bashrc && source ~/.bashrc3.1.3 Java
java가 설치되어있어야 한다.
sudo apt install openjdk-8-jre-headless -y3.2 Configuration
이번 실습에서는 실습의 용이성과 비용절감을 위해 single mode 로 진행한다.
실제 환경에서는 멀티노드환경으로 진행을 해야 함.
3.2.1 Single mode
$ZK_HOME/conf/zoo.cfg 를 다음과 같이 구성한다.
- dataDir 은 원하는 위치로 수정한다.
initLimit=10
# The number of ticks that can pass between
# sending a request and getting an acknowledgement
syncLimit=5
# the directory where the snapshot is stored.
# do not use /tmp for storage, /tmp here is just
# example sakes.
dataDir=/home/ubuntu/zookeeper/data/single
# the port at which the clients will connect
clientPort=2181
# the maximum number of client connections.
# increase this if you need to handle more clients
#maxClientCnxns=60
#
# Be sure to read the maintenance section of the
# administrator guide before turning on autopurge.
#
# http://zookeeper.apache.org/doc/current/zookeeperAdmin.html#sc_maintenance
#
# The number of snapshots to retain in dataDir
#autopurge.snapRetainCount=3
# Purge task interval in hours
# Set to "0" to disable auto purge feature
#autopurge.purgeInterval=1

## Metrics Providers
#
# https://prometheus.io Metrics Exporter
metricsProvider.className=org.apache.zookeeper.metrics.prometheus.PrometheusMetricsProvider
metricsProvider.httpPort=7000
metricsProvider.exportJvmInfo=true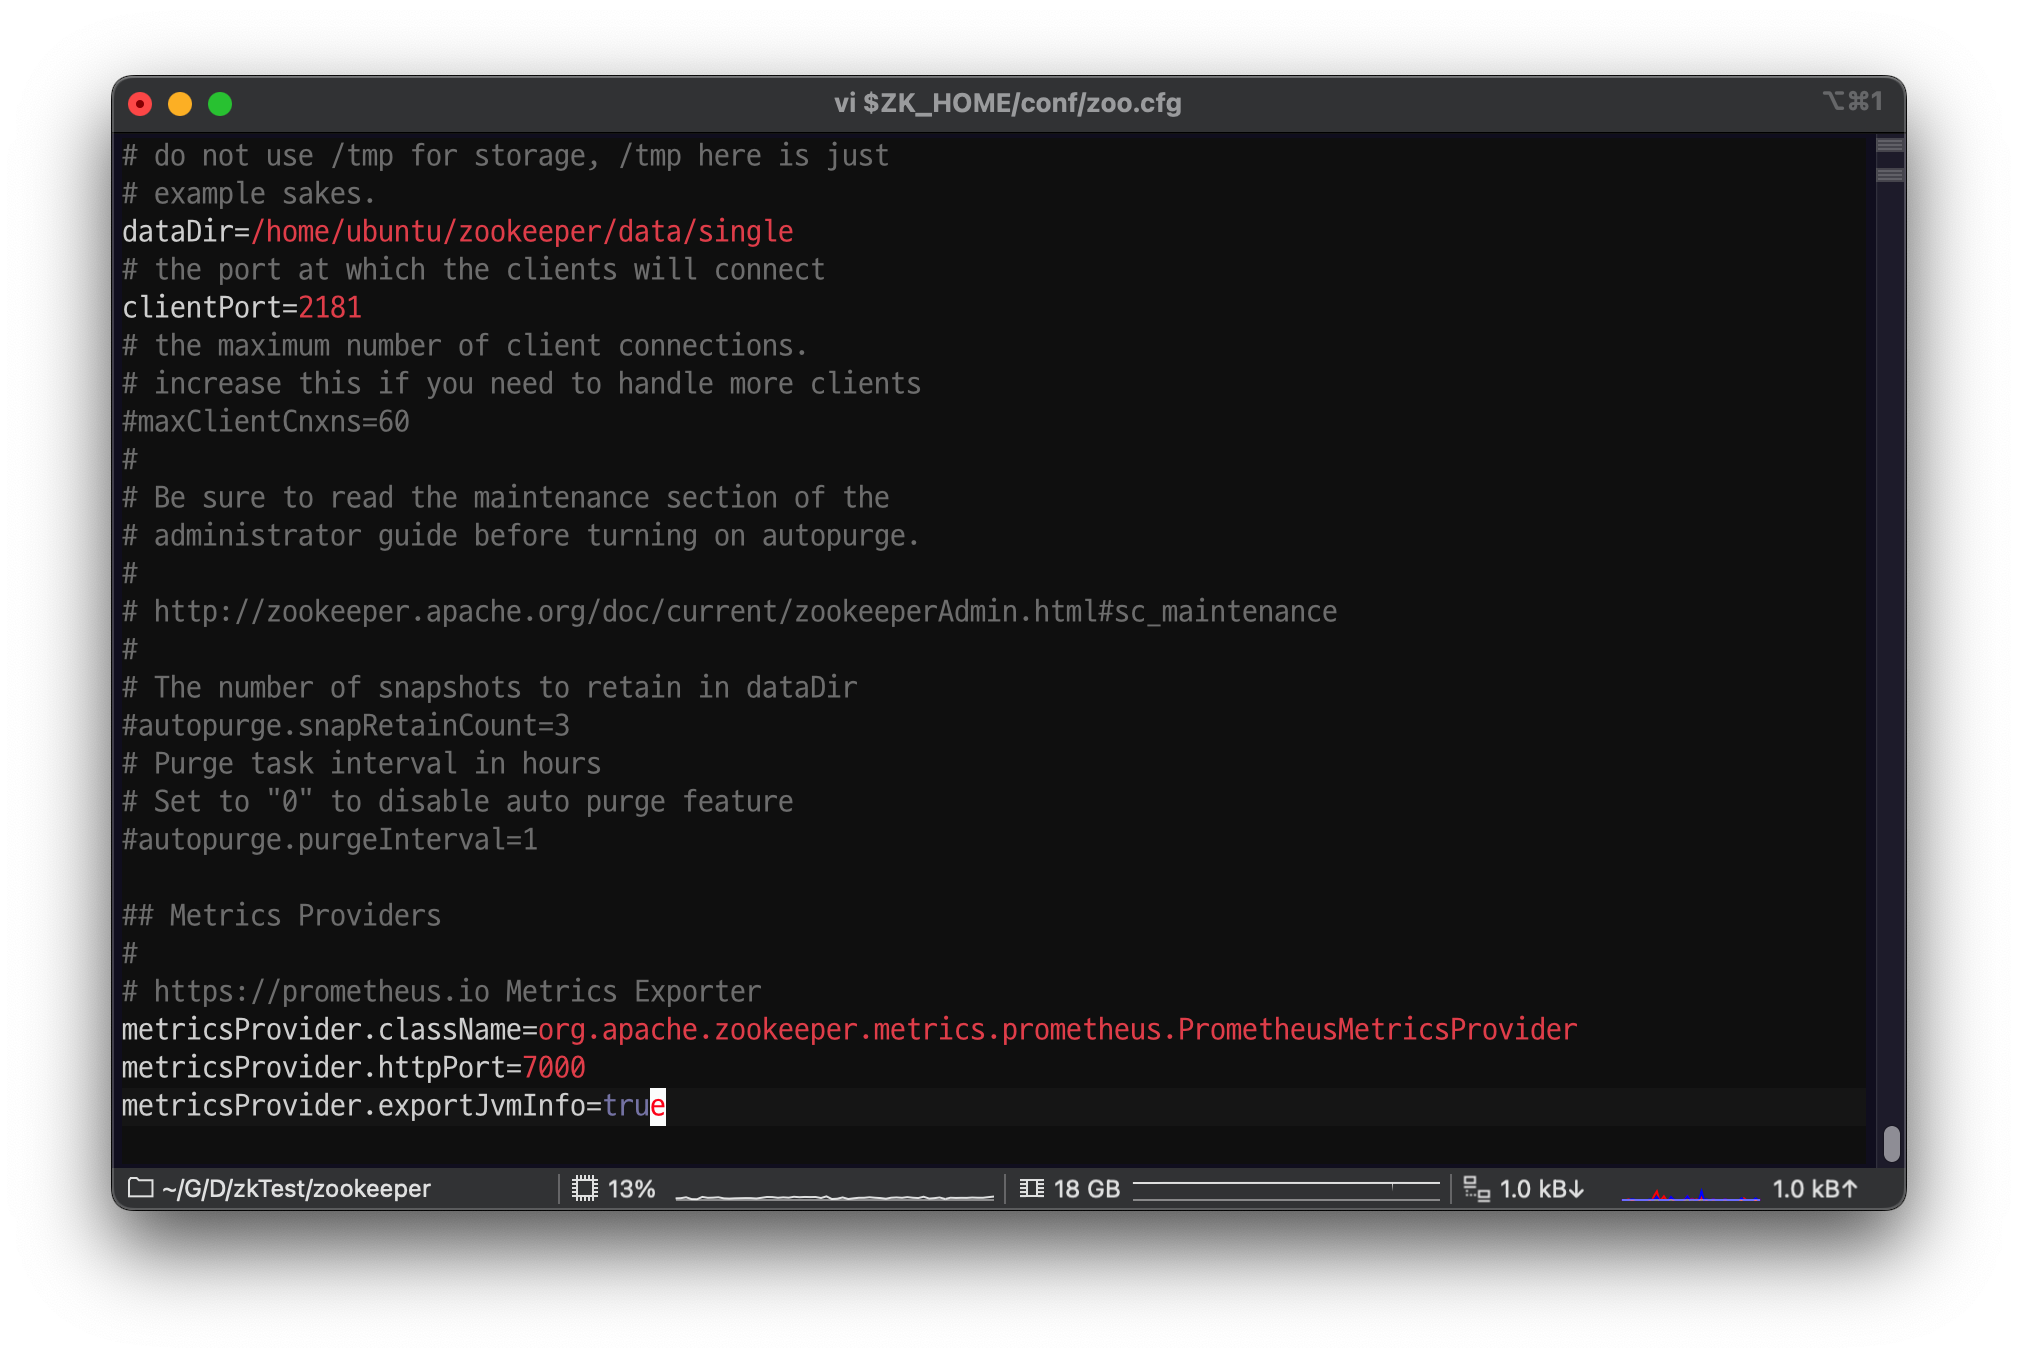
다음 명령어로 시작한다.
cd $ZK_HOME
./bin/zkServer.sh start conf/zoo.cfg
mac 환경에서 주키퍼를 실행하려고 하면
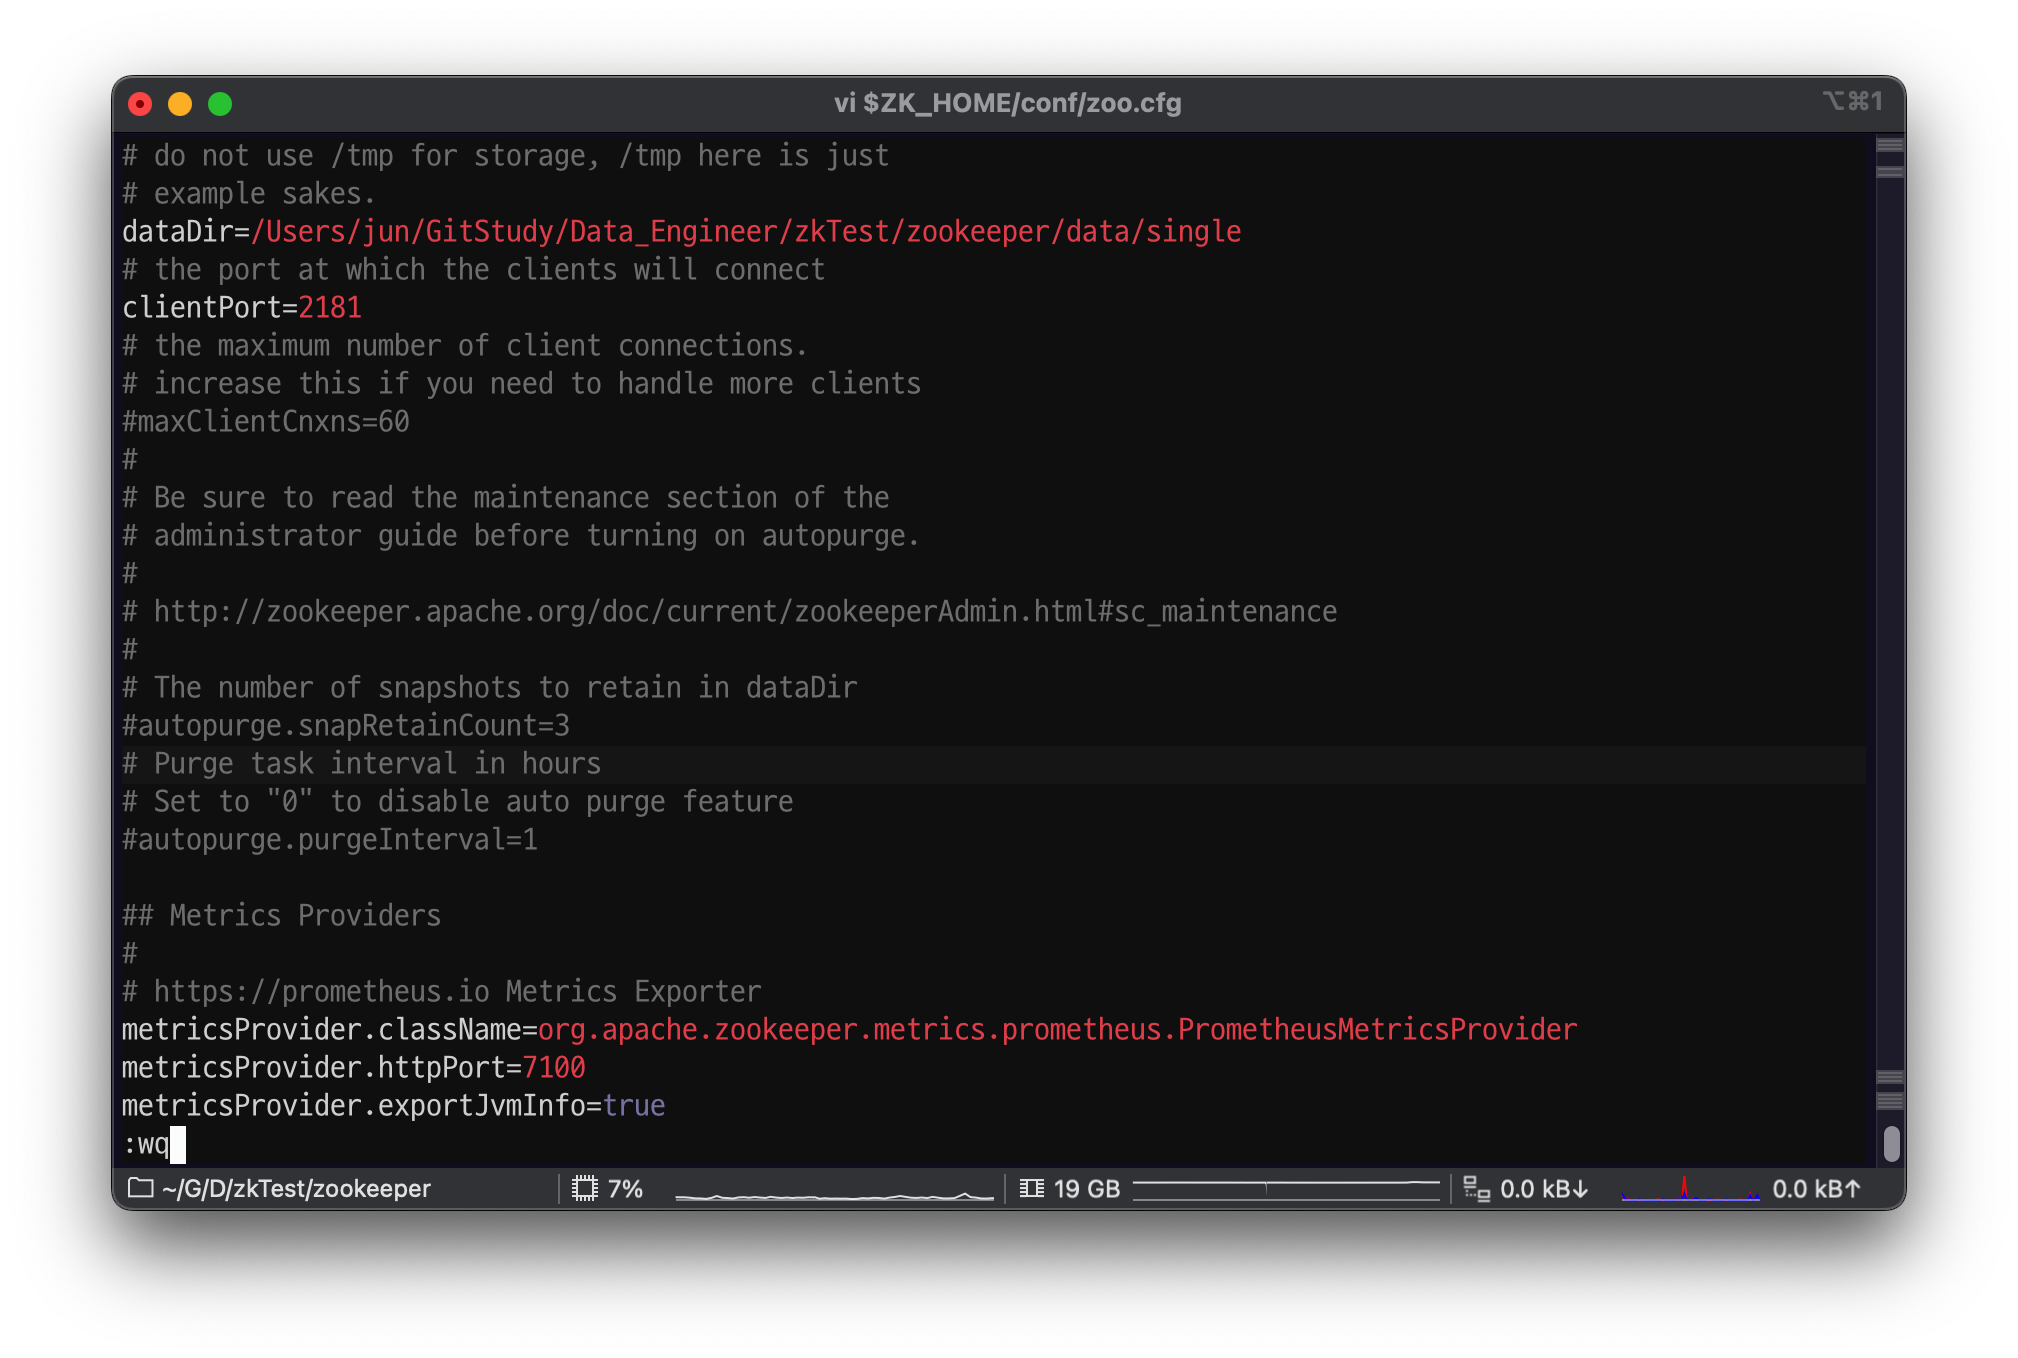
macOS의 ControlCenter 가 7000번 포트를 점유 중이기 때문에 오류가 난다.
- 디버깅, 모니터링, 혹은 시스템 내부 상태 점검을 위한 HTTP 인터페이스를 운영하기 때문에
port 7000 번에서 7100 으로 바꿔주자.
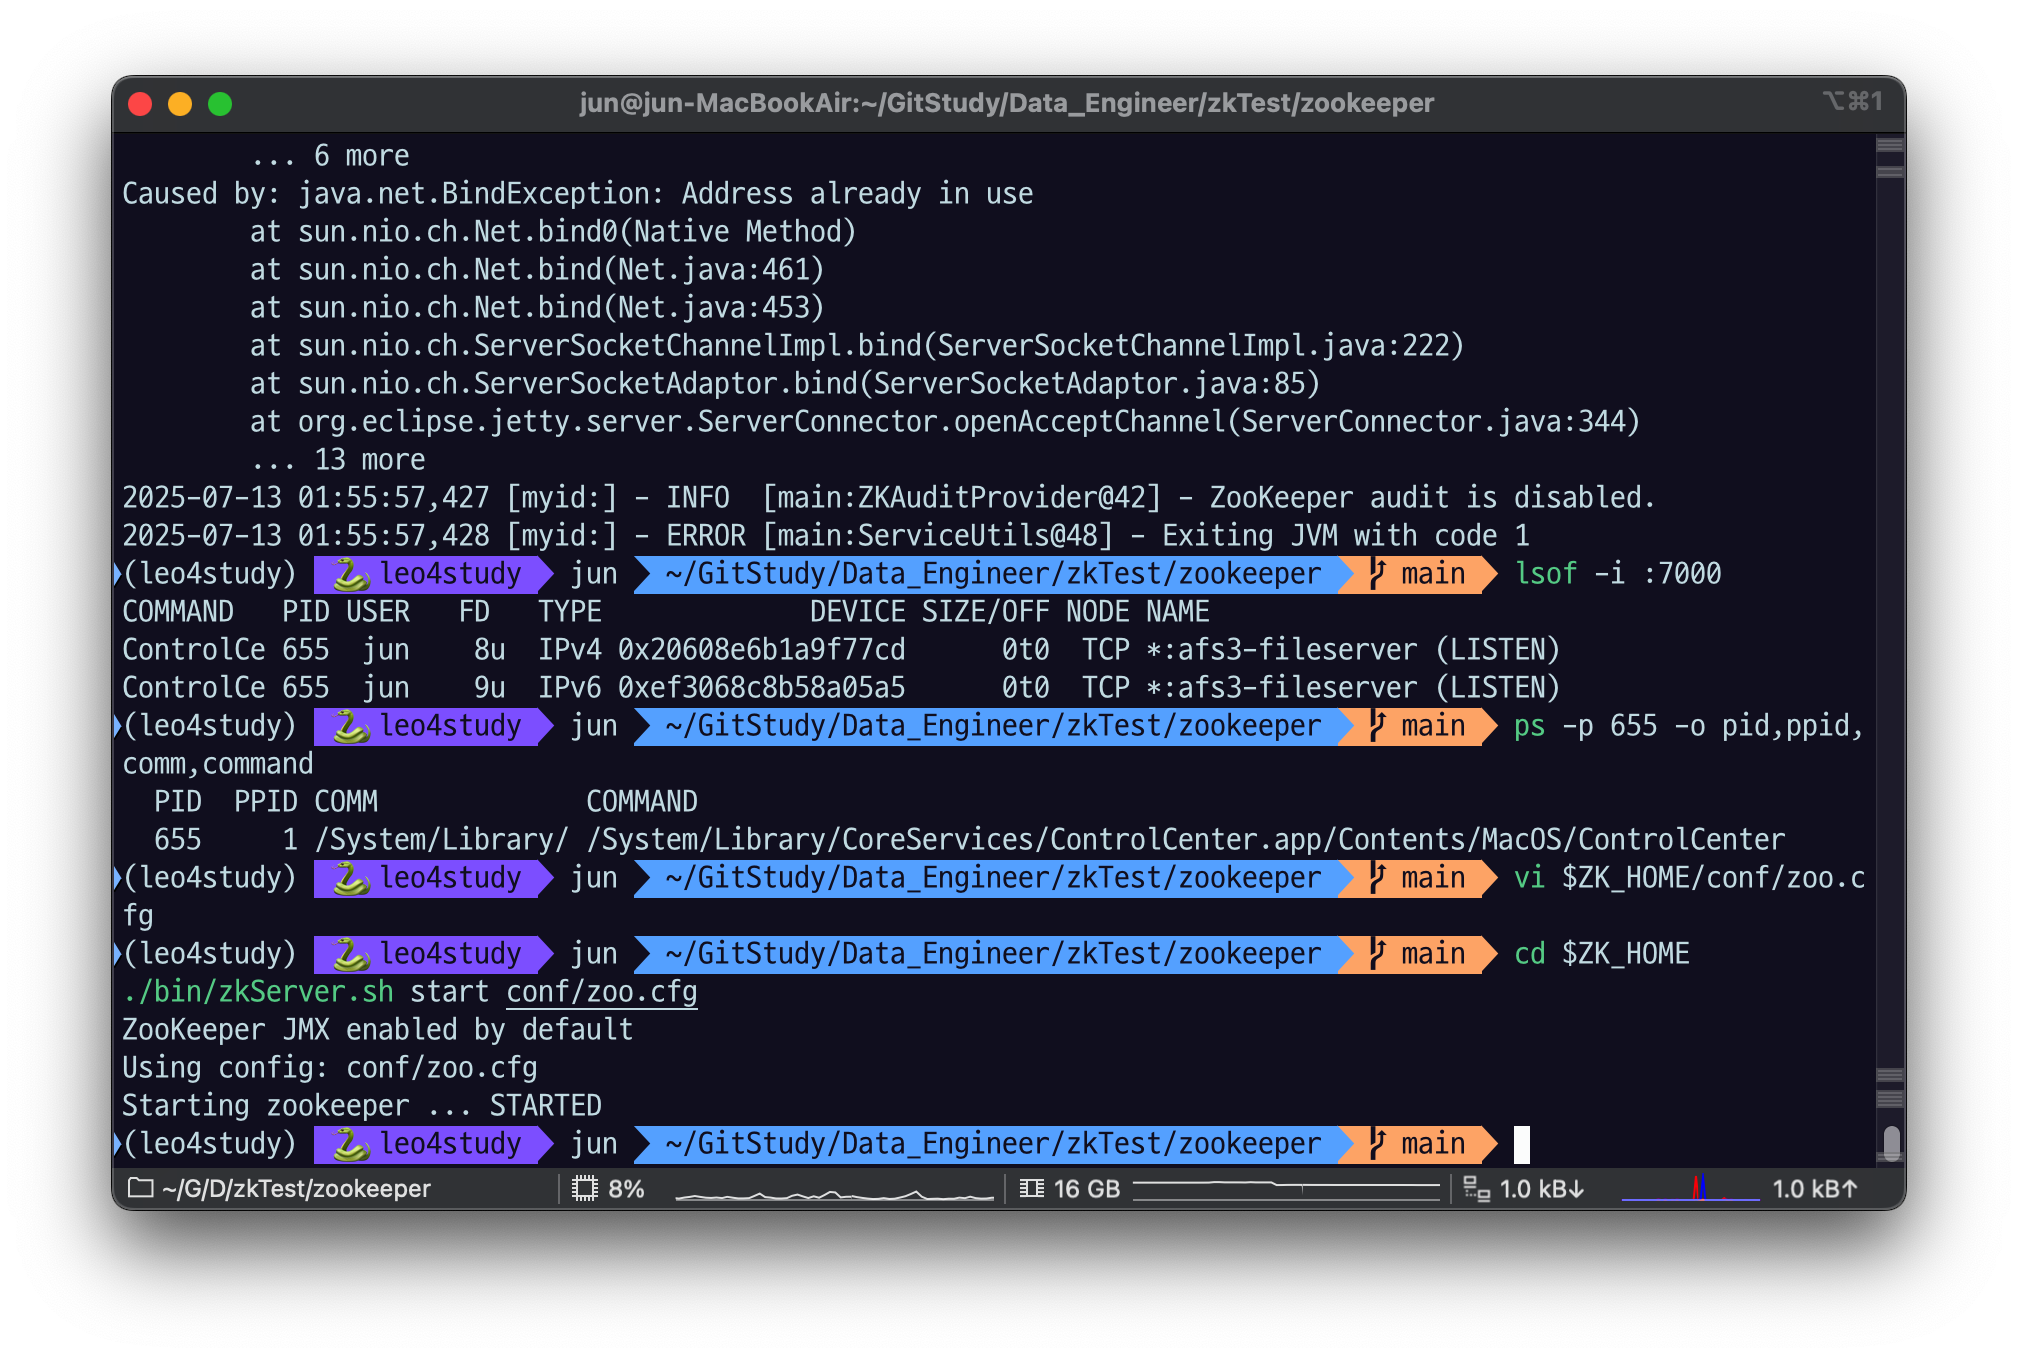
잘 실행된 모습
종료
cd $ZK_HOME
./bin/zkServer.sh stop conf/zoo.cfg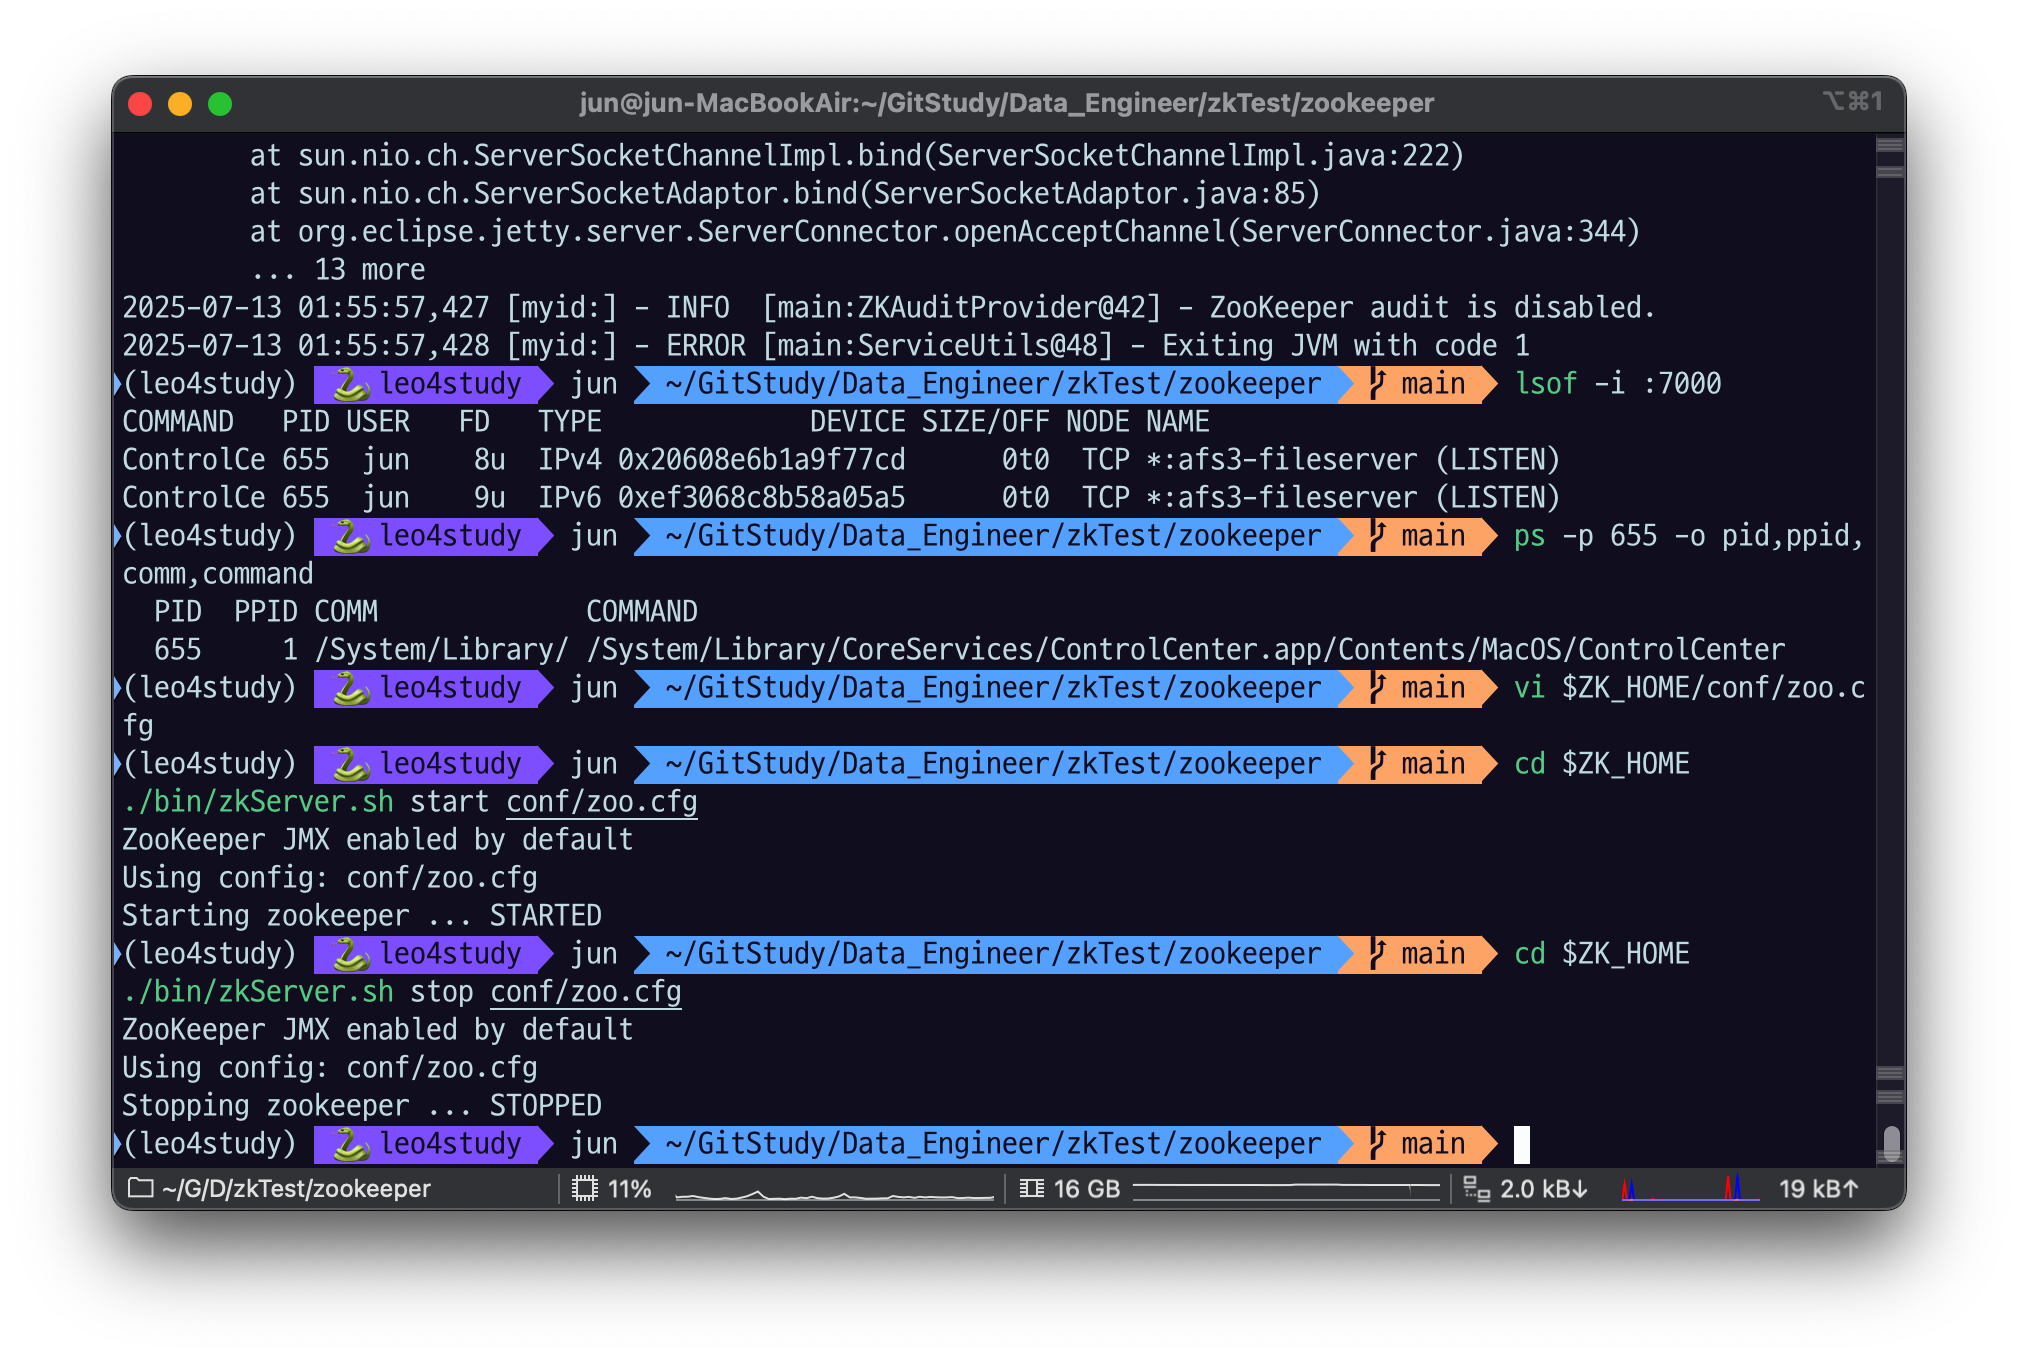
3.2.2 Multi Node
멀티 노드를 위해서는 앙상블을 이루는 모든 zookeeper 서버의 zoo.cfg 에 다음 내용이 추가되어야 한다.
새로운 서버가 추가되거나 삭제되었다? 이것들 전부 수정해서 재기동 시켜 줘야 함.
server.1=$host:$port_follower_connect_leader:$port_for_leader_election
server.2=$host:$port_follower_connect_leader:$port_for_leader_election
server.3=$host:$port_follower_connect_leader:$port_for_leader_election- 앙상블을 구성할 서버를 .1, .2, .3 과 같이 숫자 번호를 주어서 입력한다.
- 각 서버의 정보는
$host:$port_follower_connect_leader:$port_for_leader_election로 구성된다.$host: zookeeper 서버에서 검색/접근이 가능한 hostname 또는 IP주소$port_follower_connect_leader: follower 가 leader 와 connection을 맺을때 사용하는 port$port_for_leader_election: leader election 때 사용하는 포트
뿐만 아니라 자신의 dataDir 하위에 myid 라는 파일에 자신의 server number 를 기록해야한다.
echo "1" > $dataDirOfServer1/myid
echo "2" > $dataDirOfServer2/myid
echo "3" > $dataDirOfServer1/myid
각 인스턴스 별 myid 파일을 만든다. (zoo.cfc 에서는 $dataDir/myid 를 보고서 자신이 몇번 서버인지 인식한다.)
3.3 Zookeeper Cli 사용하기
Zookeeper binary 에 Cli 가 동봉되어있다.
3.3.1 Cli 실행
cd $ZK_HOME
./bin/zkCli.sh -server $host:$clientPort

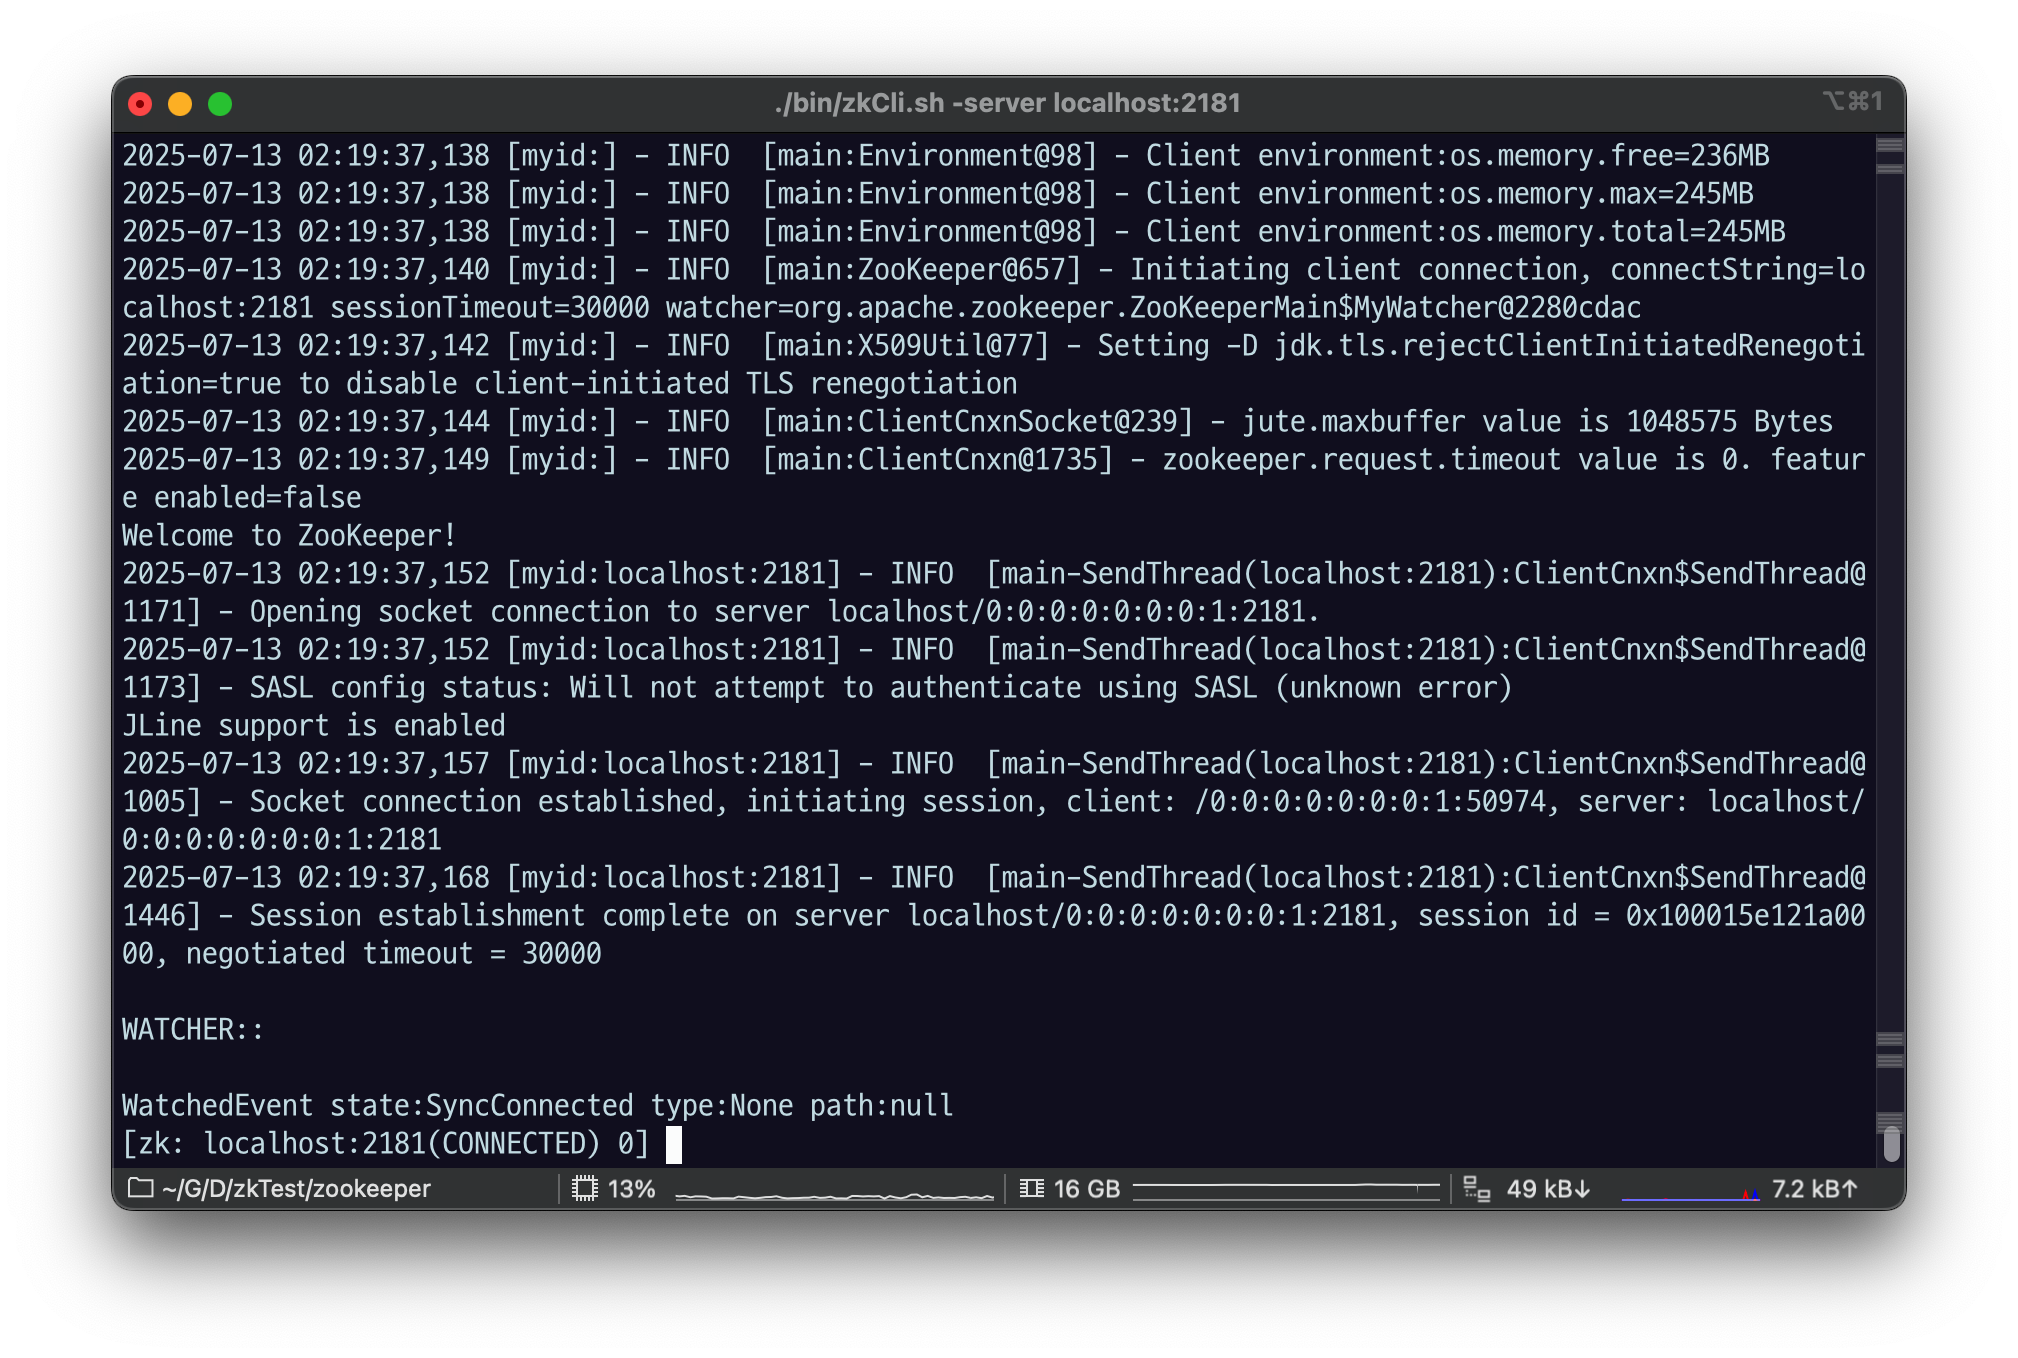
이렇게 호스트랑 포트가 있다는 건 권한만 있다면 리모트에 있어도 cli 파일로 접근할 수 있다는 것.
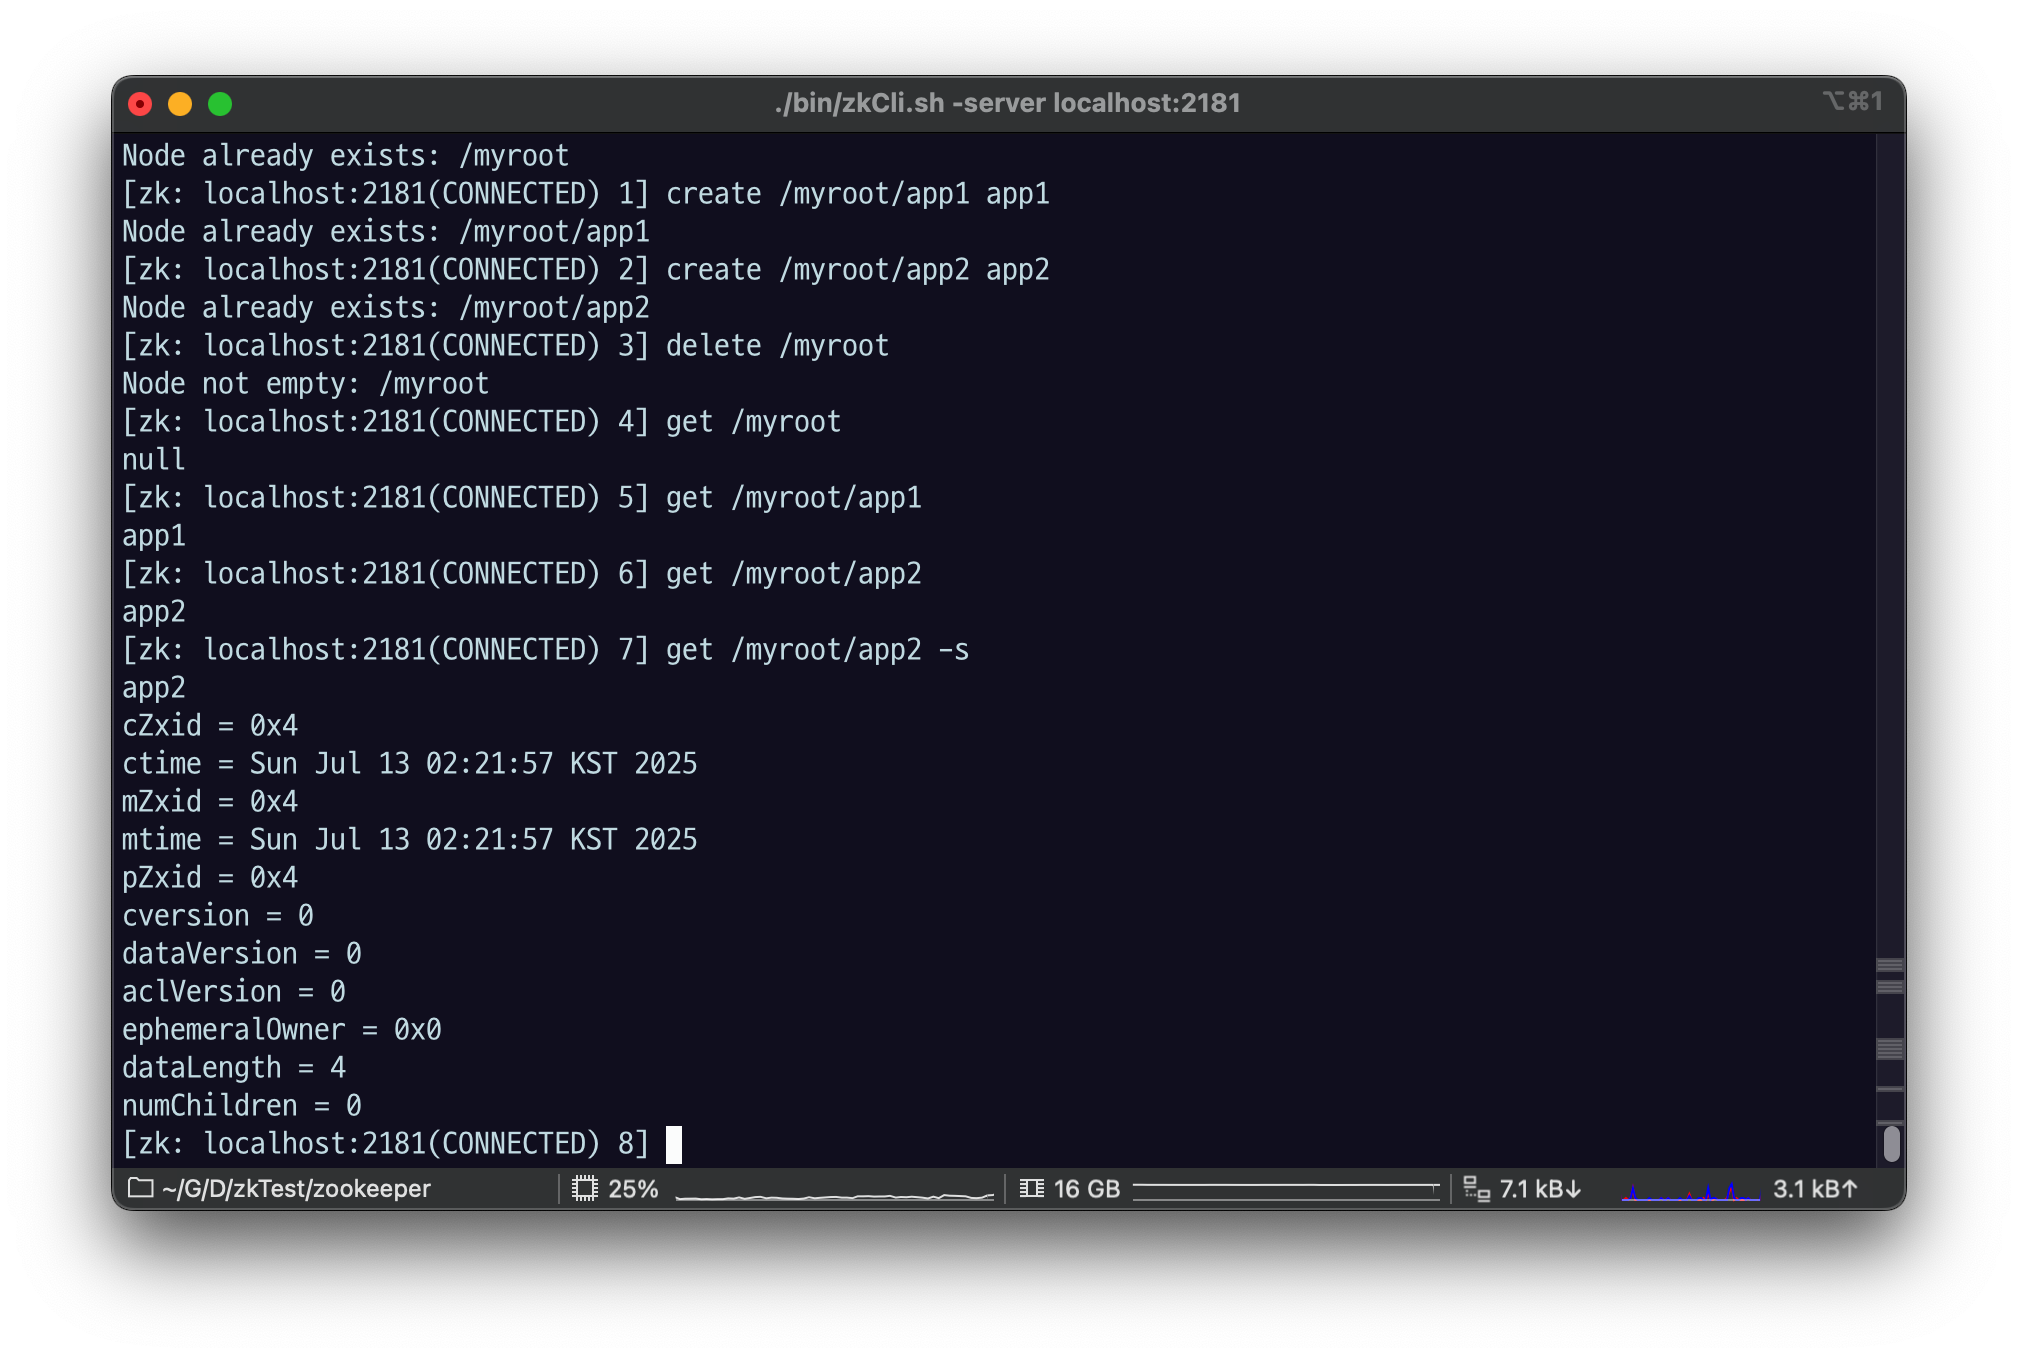
3.3.2 create
create /myroot rootvalue
create /myroot/app1 app1
create /myroot/app2 app2
3.3.3 get
get /myroot
get /myroot/app1
get /myroot/app2-s옵션으로 해당 znode 의 모든 정보를 볼 수 있따.
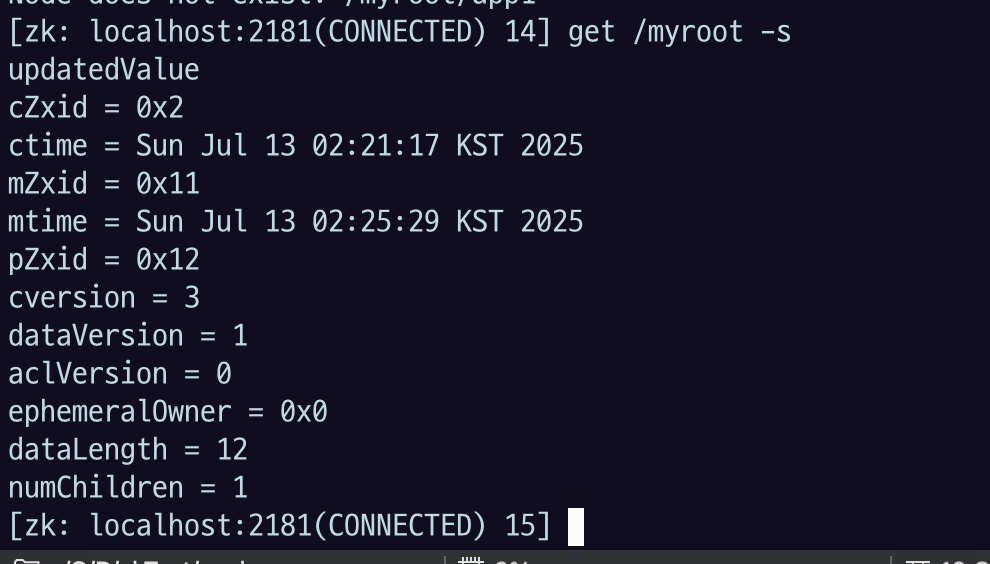
3.3.4 set (update)
set /myroot rootupdated
dataversion이 0>1로 바뀌었다.
3.3.5 delete
delete /myroot
numChildren 2 > 1 로 변경됨
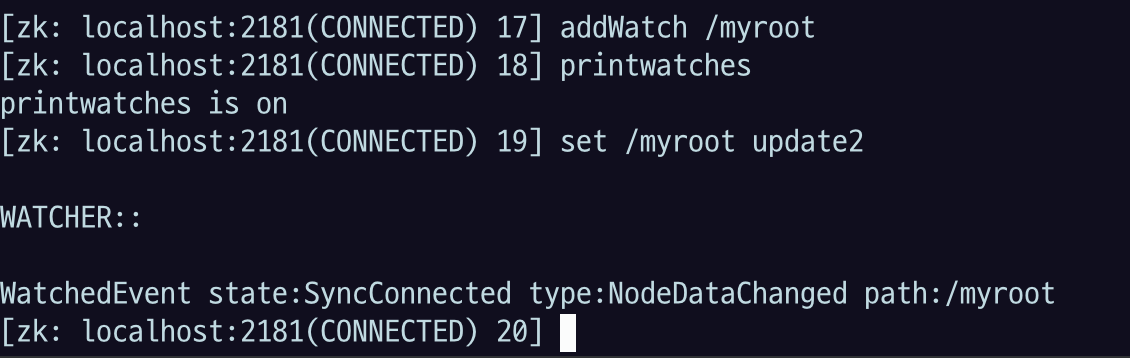
3.3.6 addWatch

addWatch /myroot
printwatches # > printwatches is on
set /myroot update2
#> WatchedEvent state:SyncConnected type:NodeDataChanged path:/myroot
-m모드로 watch level 을 조정할 수 있다.PERSISTENT: 해당 노드 자신만PERSISTENT_RECURSIVE: (default) 해당 노드와 자식노드까지
자식노드를 변경해보자
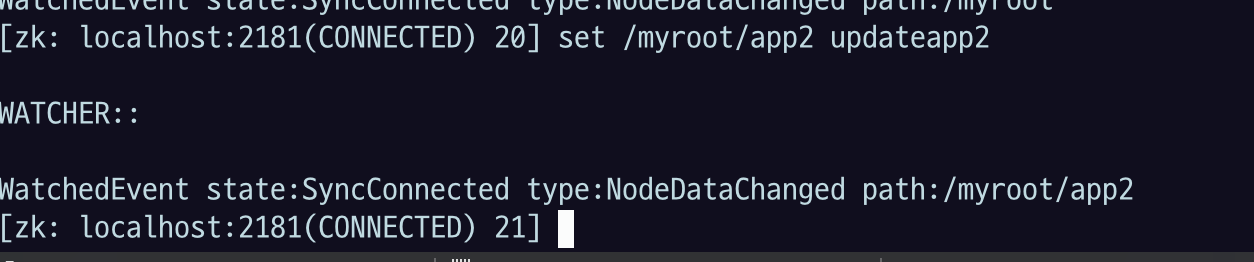
watch를 root에 걸었는데 자식을 바꿔도 데이터가 변경되었다는 이벤트가 나왔고 path는 자식 노드 주소를 보여 줌.
PERSISTENT_RECURSIVE 모드로 watch가 걸렸기 때문에 이렇게 나옴.
PERSISTENT 로 한 번 해보자
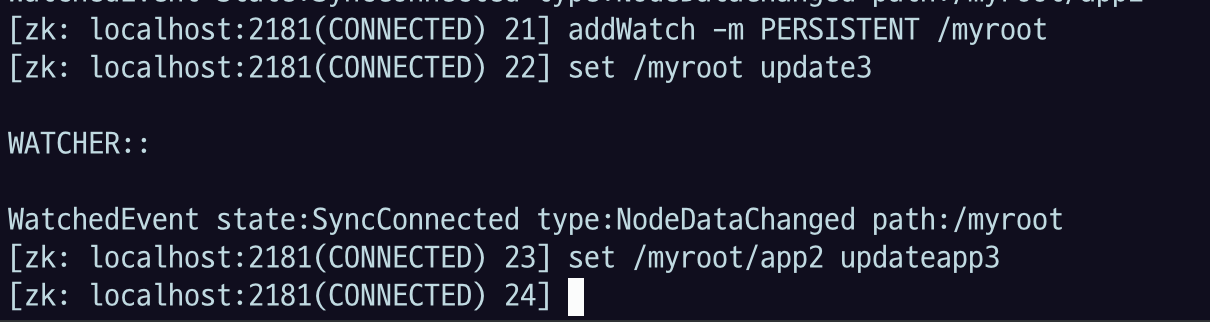
자식노드의 변경 메세지가 안 나오는 모습

이렇게 끄면 메세지가 안 나온다.
3.4 Java API
build.gradle 에 다음 dependency 를 추가하고 따라한다.
dependencies {
    implementation 'org.apache.zookeeper:zookeeper:3.7.1'
}
3.4.1 Connection
Zookeeper zk = new ZooKeeper(connectionString, sessionTimeout, new Watcher() {
            public void process(WatchedEvent we) {
                if (we.getState() == KeeperState.SyncConnected) {
										// do your first job
                }
            }
});- connectionString 은 zookeeper 서버의 host:port 의 list 를 String 형태로 등록한다.
- “1.1.1.1:2181”
- “1.1.1.1:2181,2.1.1.1:2181,3.1.1.1:2181”
- sessionTimeout 은 connection 시도에 대한 timeout 설정이다.
- watcher 를 등록하면, connection 상태에 따른 event 를 받고 그에 따른 callback method를 등록할 수 있다.
- KeeperState 참고
- 연결을 맺고 바로 동기화해야 하는 작업등이 있다면 이 callback 에 등록한다.
- 연결에 실패하면 재시도를 하거나 어플리케이션이 죽어야 하는 등의 작업이 있다면 callback으로 등록한다.
3.4.2 Create ZNode
public class Main {
    public static void main(String[] args) throws IOException, InterruptedException, KeeperException {
        ZooKeeper zk = new ZooKeeper("localhost:2181", 5000, new Watcher() {

            int retry_cnt = 0;
            @Override
            public void process(WatchedEvent event) {
                if (event.getState() == Event.KeeperState.SyncConnected) {
                    System.out.println("Connected to ZooKeeper!");
                }
            }
        });

        Thread.sleep(5000);
        String rootPath = zk.create("/exroot", "root".getBytes(StandardCharsets.UTF_8 ), ZooDefs.Ids.OPEN_ACL_UNSAFE, CreateMode.PERSISTENT);
        System.out.println("root path: " + rootPath);

    }
}
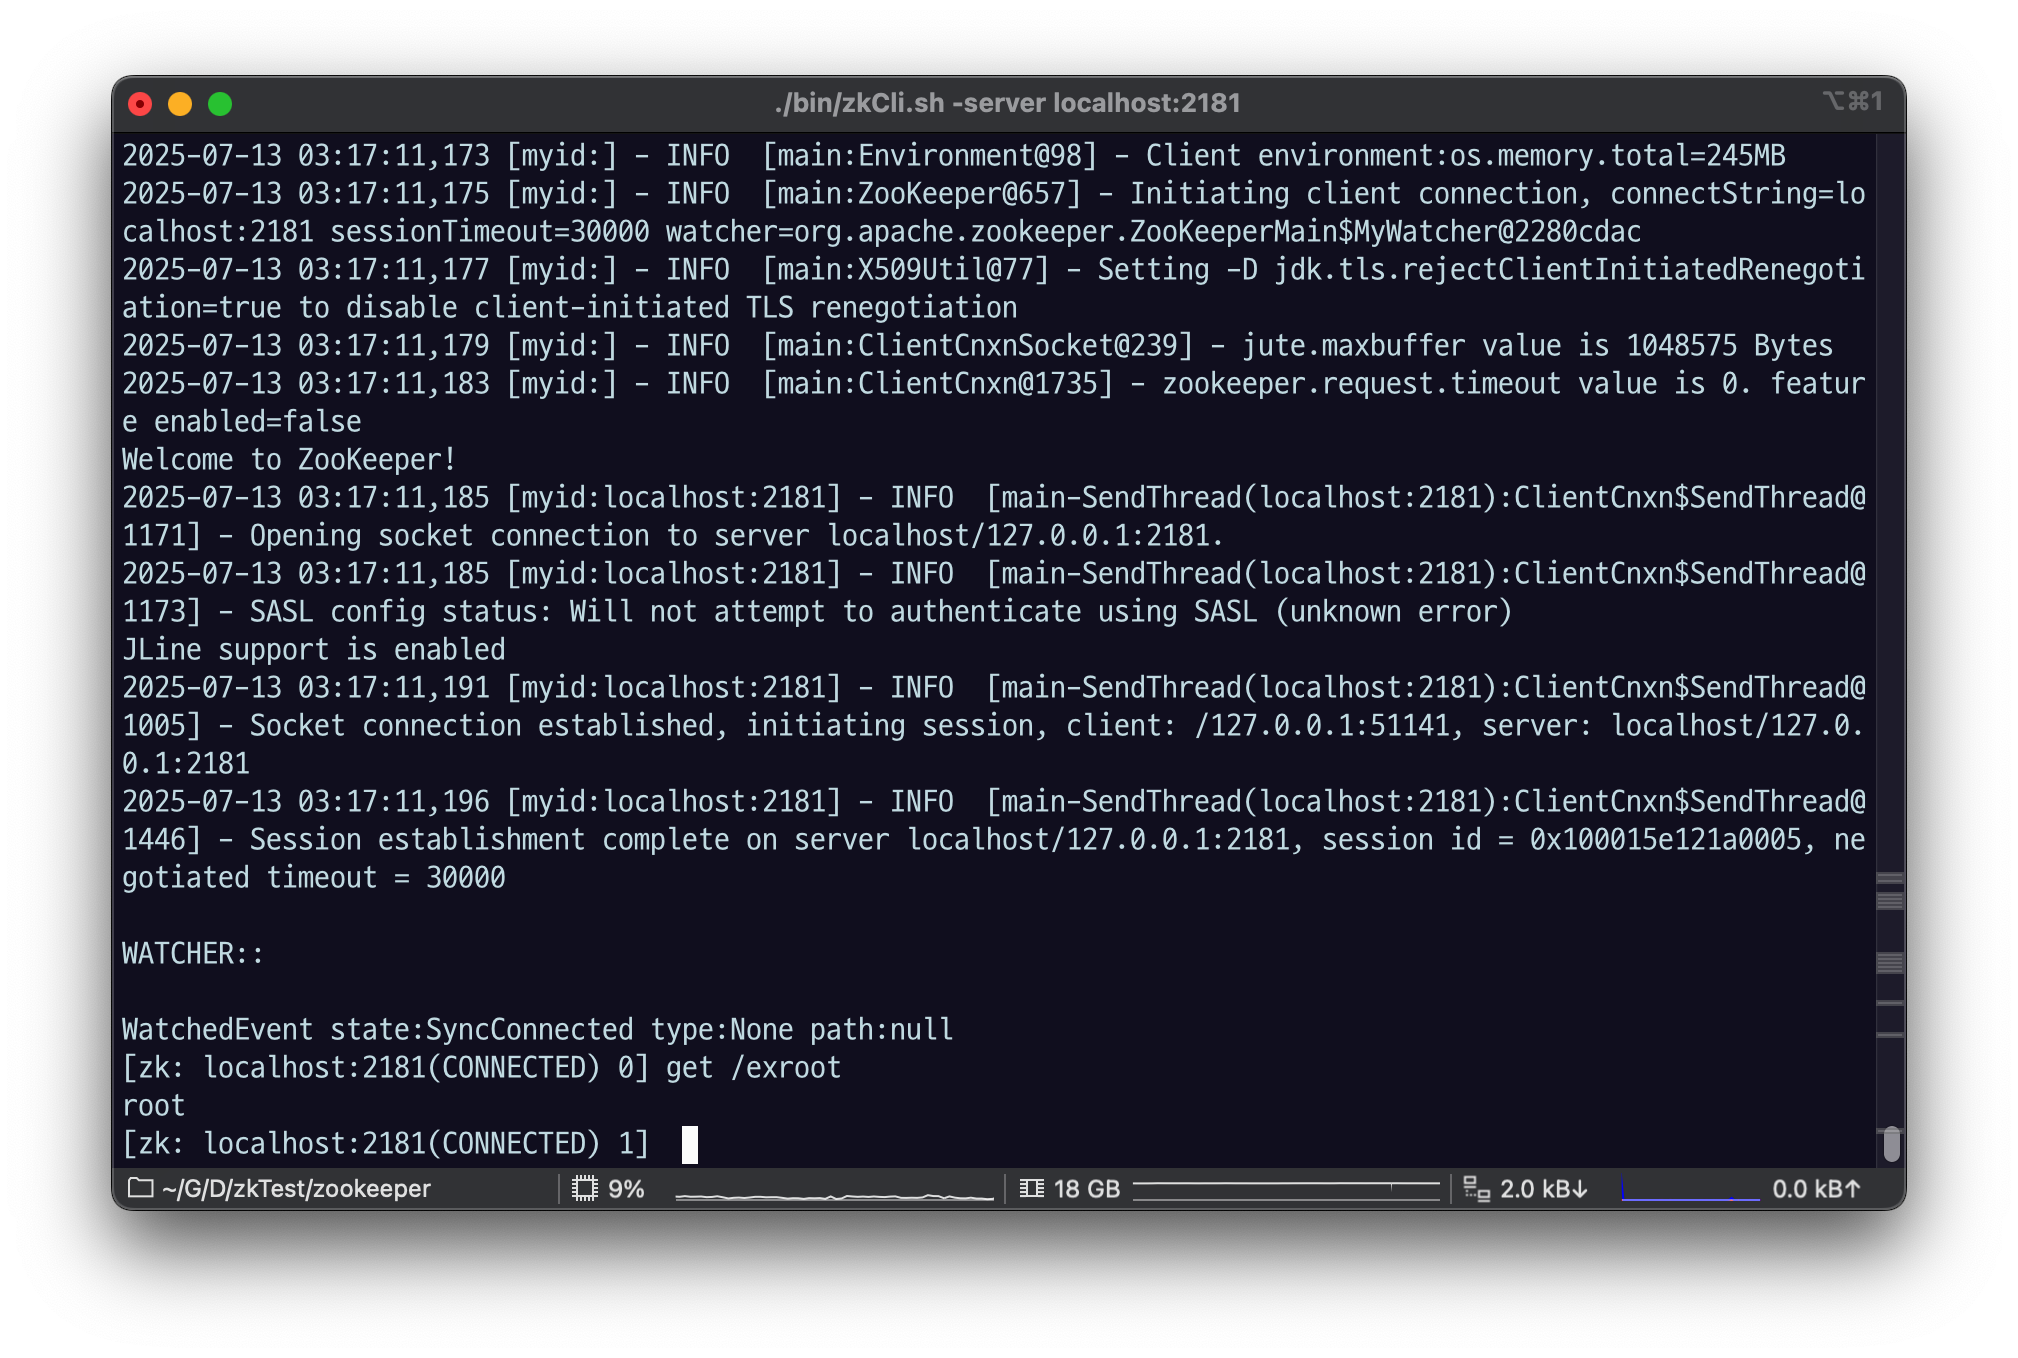
Zookeeper.create 함수로 znode 를 생성할 수 있다.
- sychronous 함수, aync callback 등록할 수 있는 함수, ttl 을 걸 수 있는 함수 등 여러 버전이 있다.
- 자세한 내용은 javadoc 참고
CreateMode 를 원하는 종류로 잘 지정해야한다.
- Javadoc
- CONTAINER
- container node 의 마지막 child 가 지워지면, zookeeper 서버에 의해서 container 노드가 지워진다.
- EPHEMERAL
- 임시 노드, 해당 노드를 생성한 client connection 이 끊어지면 해당 노드도 삭제된다.
- EPHEMERAL_SEQUENTIAL
- 기본 특성은 EPHEMERAL 과 같다. 노드의 이름에 단방향으로 incremental number 가 붙어서 지정된다. 생성후 리턴된 path 값을 기억해야한다.
- e.g. my_0000001, my_0000002
- 기본 특성은 EPHEMERAL 과 같다. 노드의 이름에 단방향으로 incremental number 가 붙어서 지정된다. 생성후 리턴된 path 값을 기억해야한다.
- PERSISTENT
- 가장 기본 노드, client connection 이 끊어져도 삭제되지 않는다.
- PERSISTENT_SEQUENTIAL
- 기본 특성은 PERSISTENT 과 같다. 노드의 이름에 단방향으로 incremental number 가 붙어서 지정된다. 생성후 리턴된 path 값을 기억해야한다.
- PERSISTENT_SEQUENTIAL_WITH_TTL
- 기본 특성은 PERSISTENT_SEQUENTIAL 과 같다. TTL 로 지정한 시간 만큼동안 해당 노드에 update 가 없고 children 이 없다면, 노드가 삭제된다.
- PERSISTENT_WITH_TTL
- 기본 특성은 PERSISTENT 과 같다. TTL 로 지정한 시간 만큼동안 해당 노드에 update 가 없고 children 이 없다면, 노드가 삭제된다.
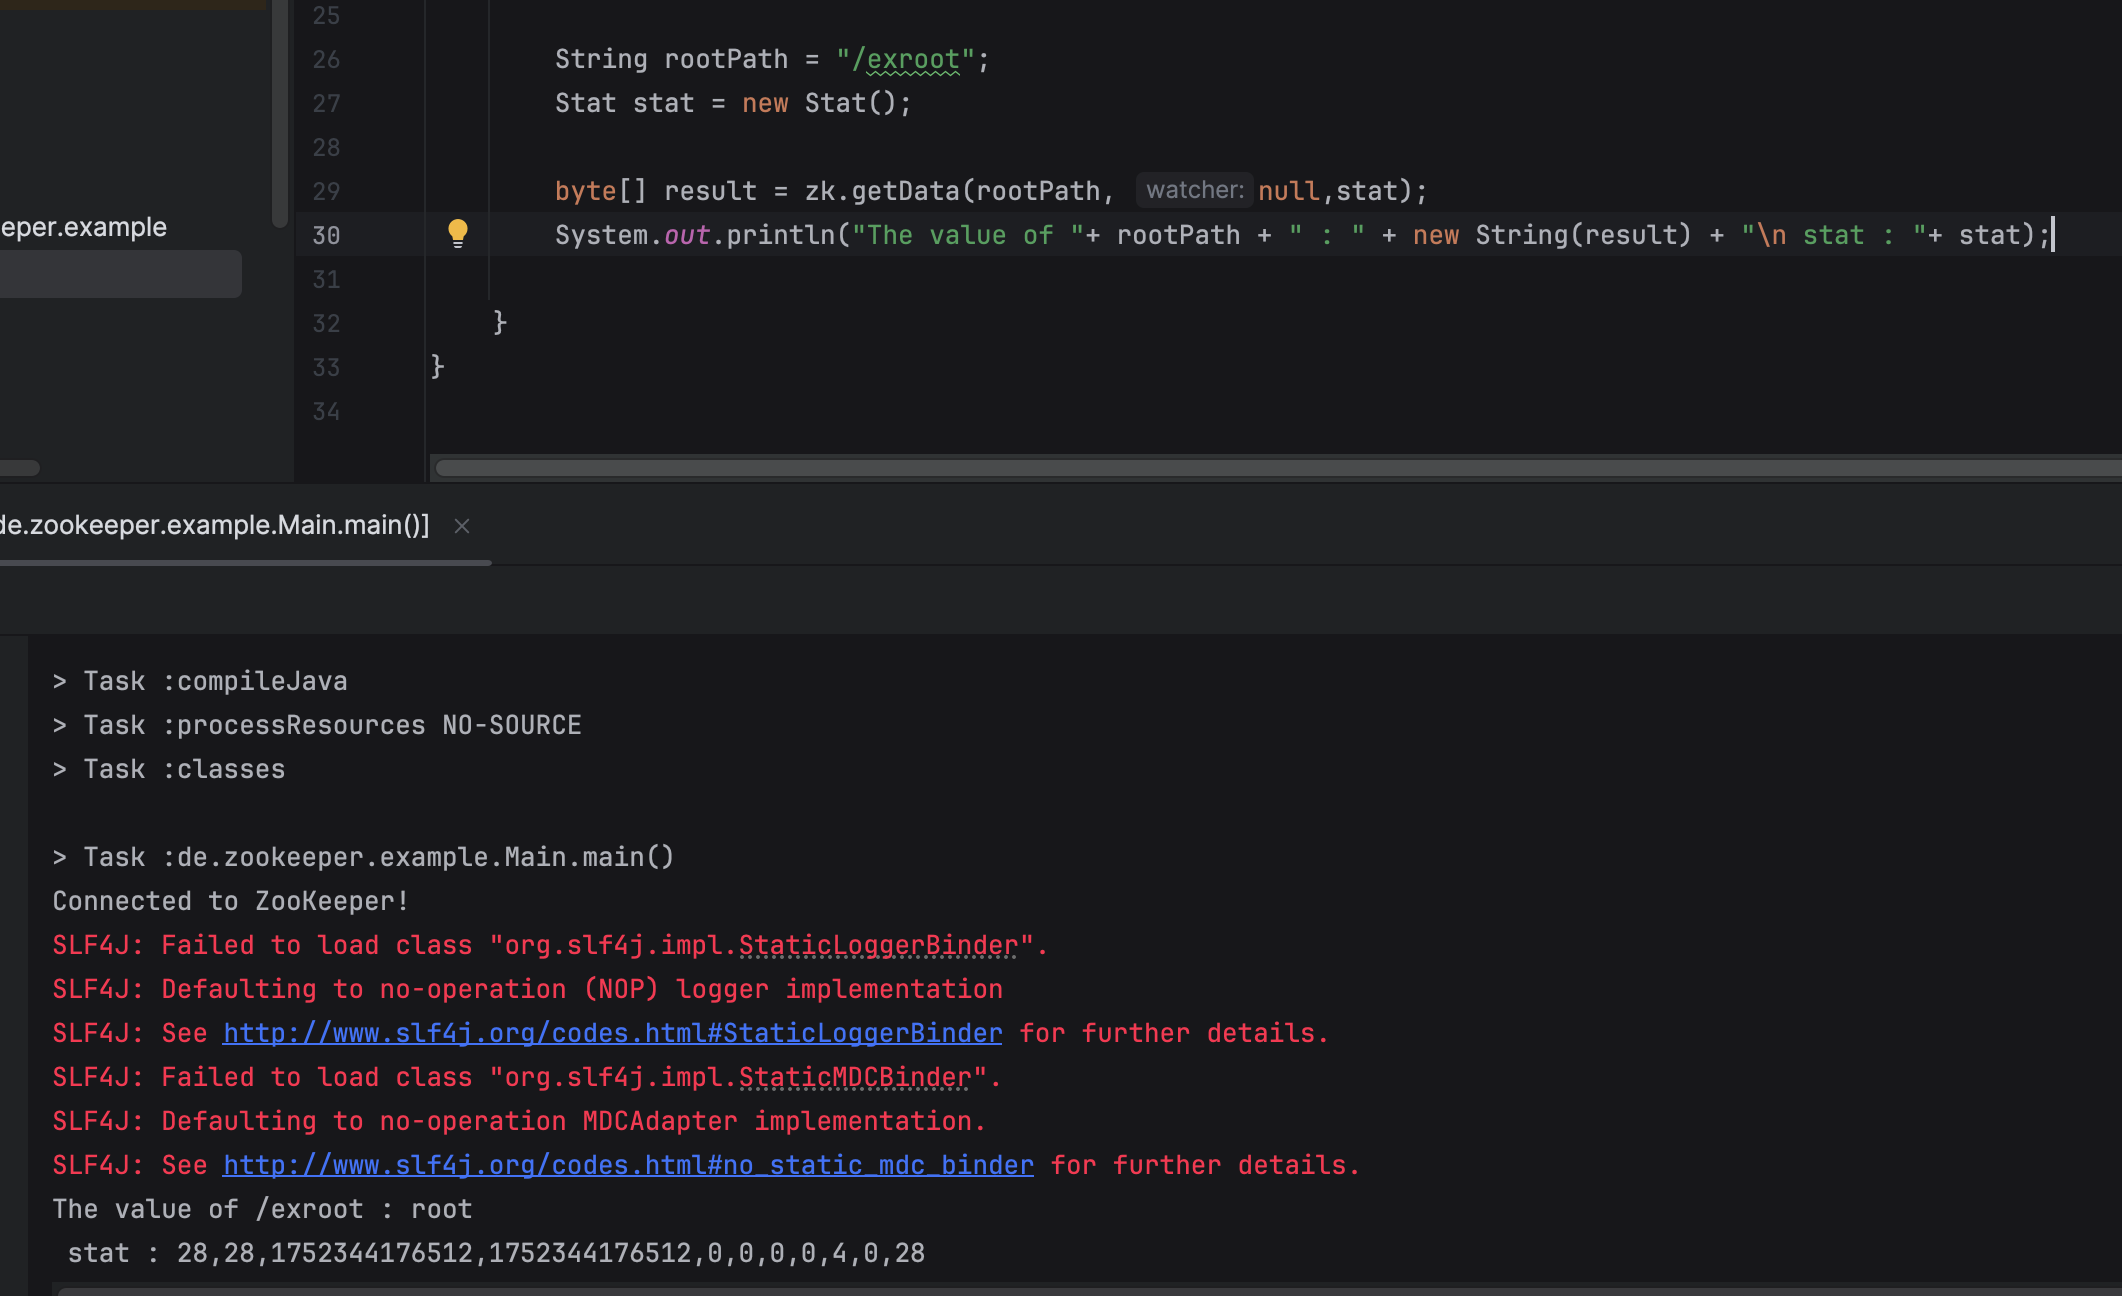
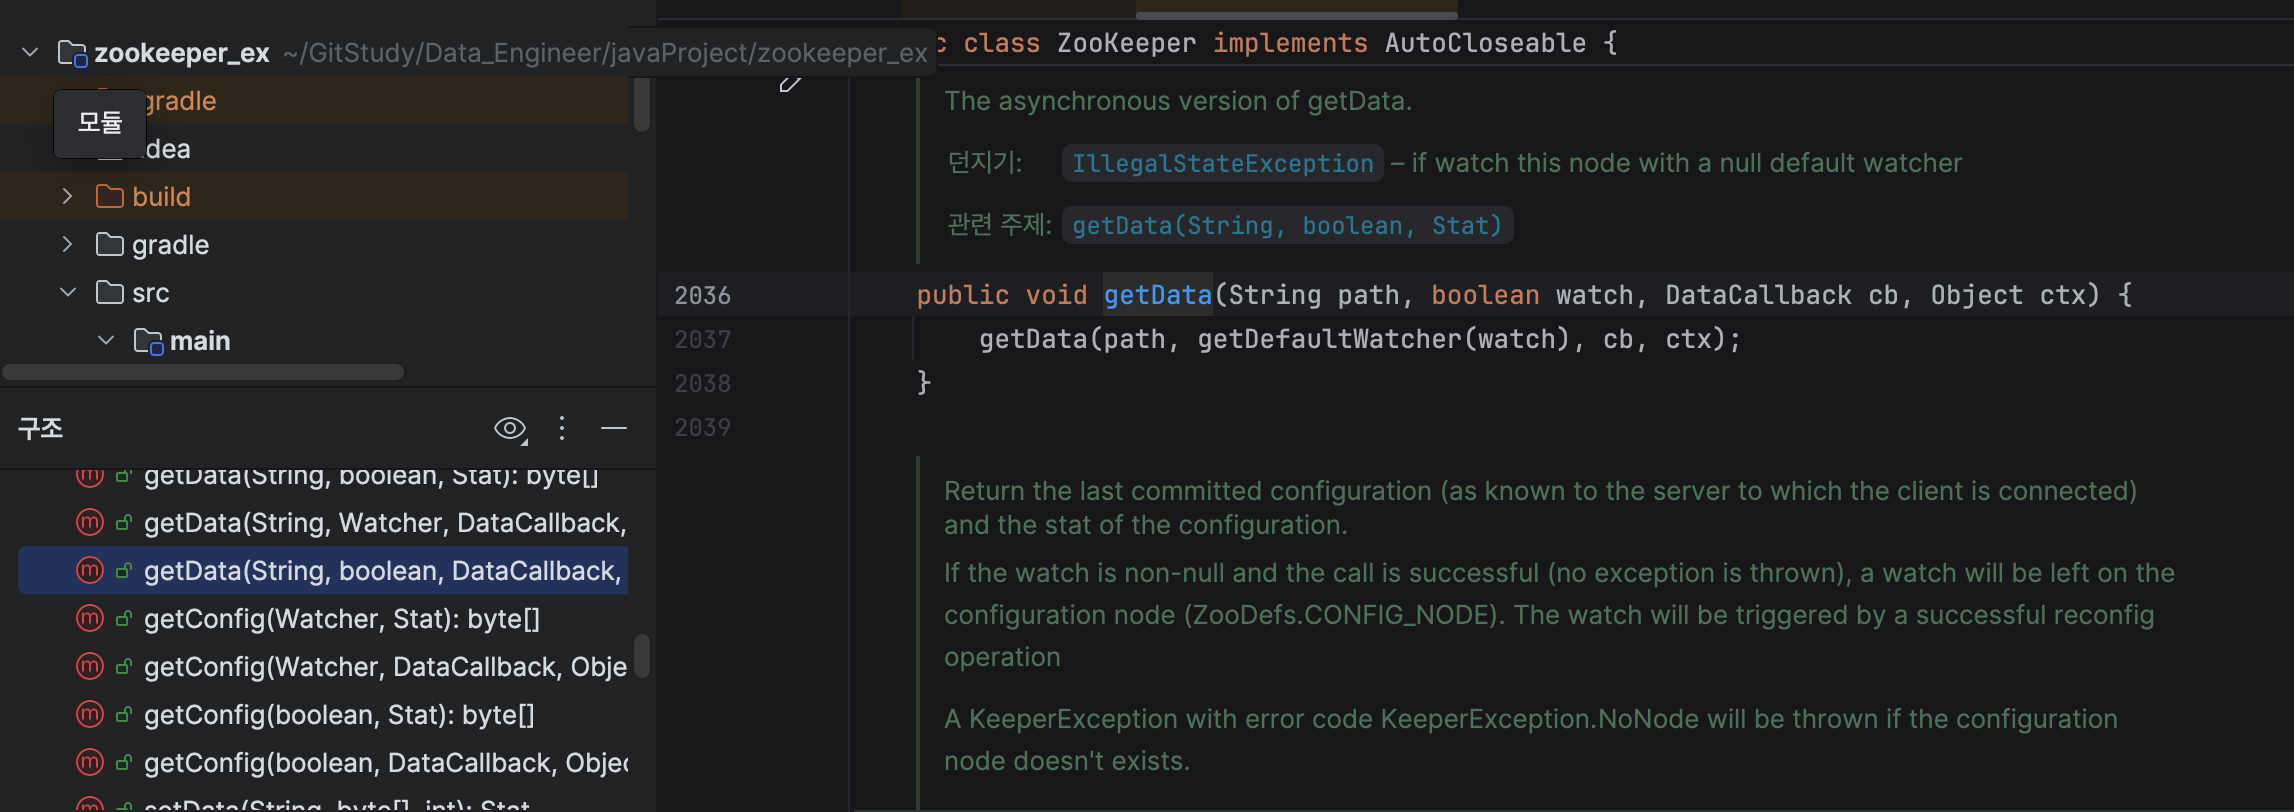
3.4.3 Get
zk.getData(path, watcher, stat);
zk.getData(path, null, null);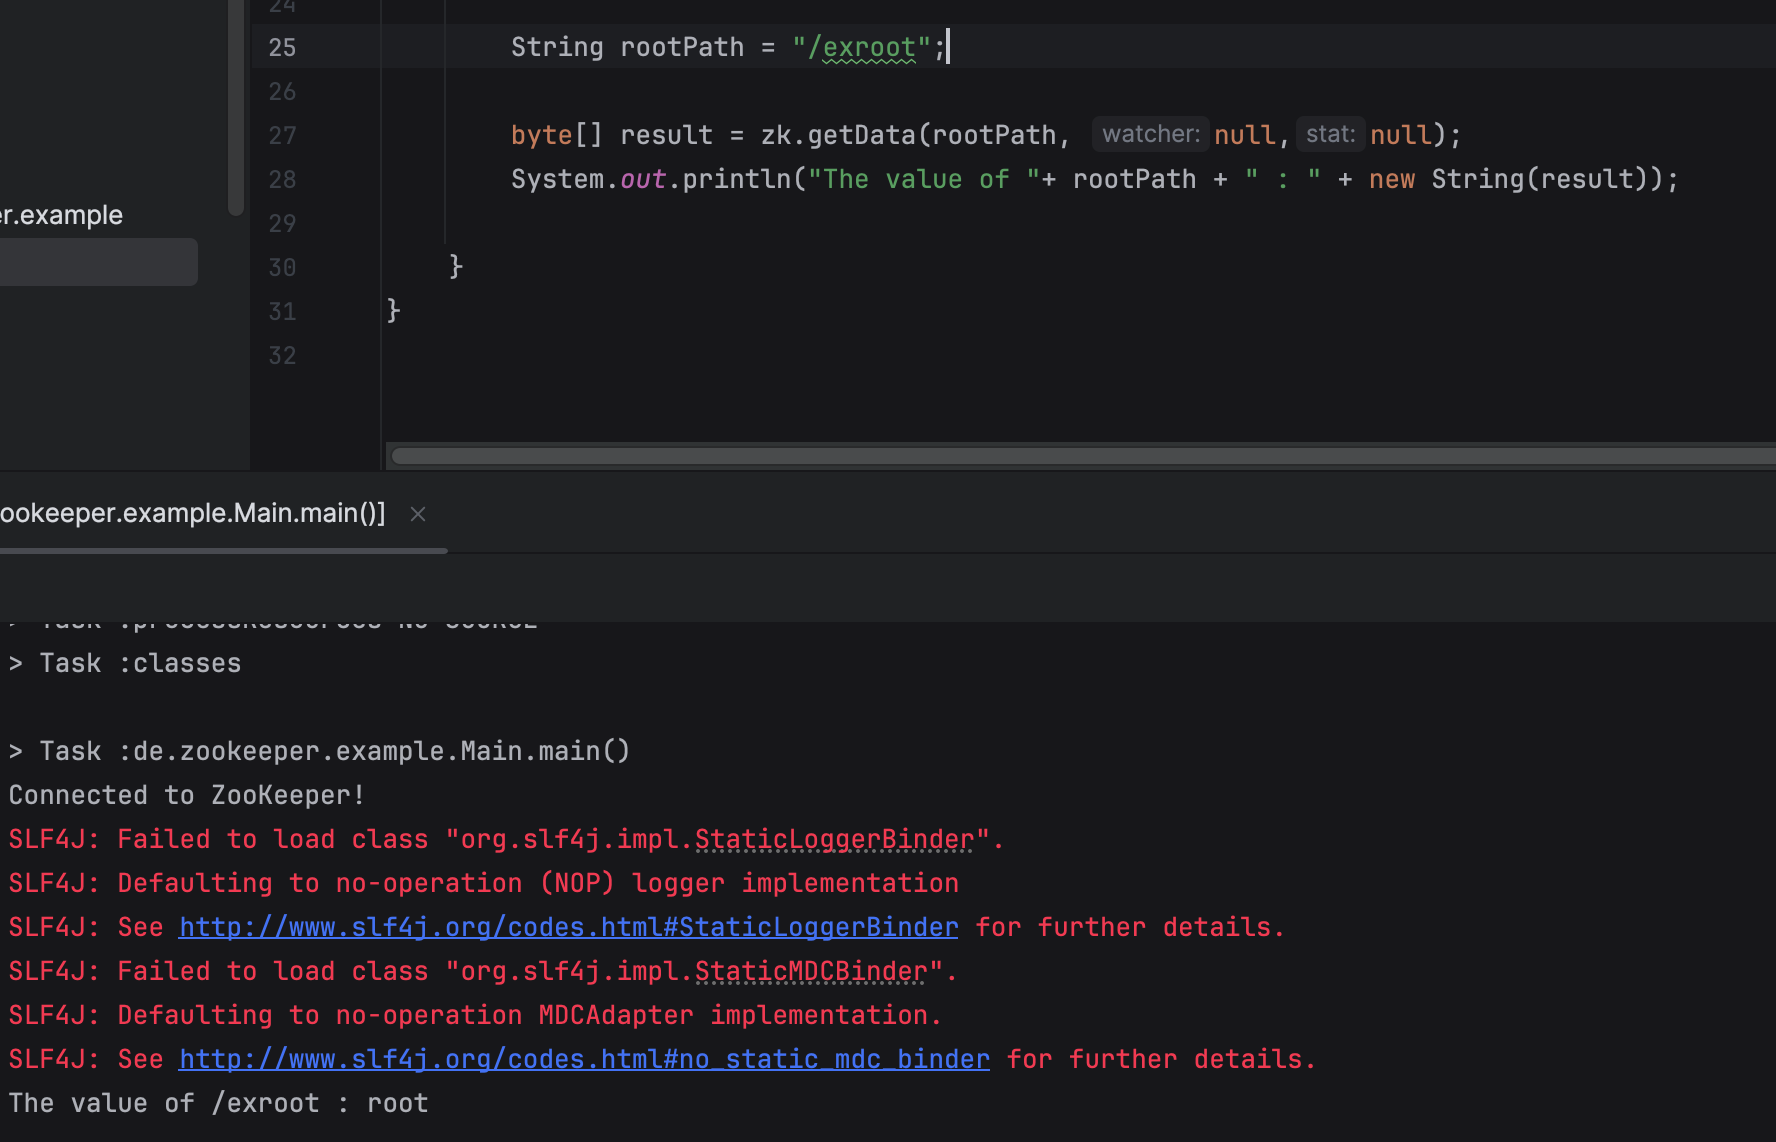
- 주어진 path의 value 를 조회한다.
- 해당 path가 없다면 KeeperException.NoNode 이 throw 된다.
- watcher 를 등록할 수 있다.
- stat 객체를 넣으면, 해당 객체에 stat 정보를 세팅한다.
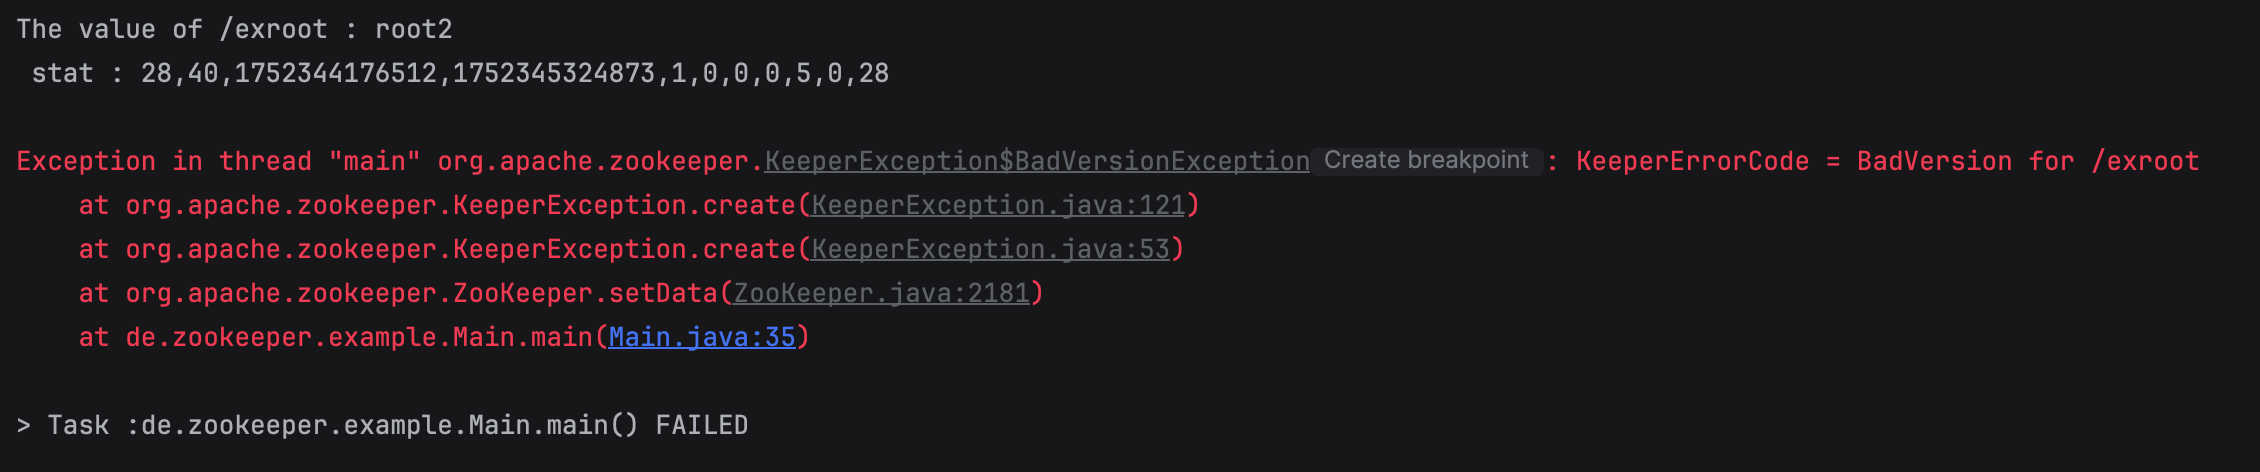
3.4.4 Update
Zookeeper.setData 함수를 이용한다.
int version = zk.exists(path, true).getVersion();
zk.setData(path, data, version);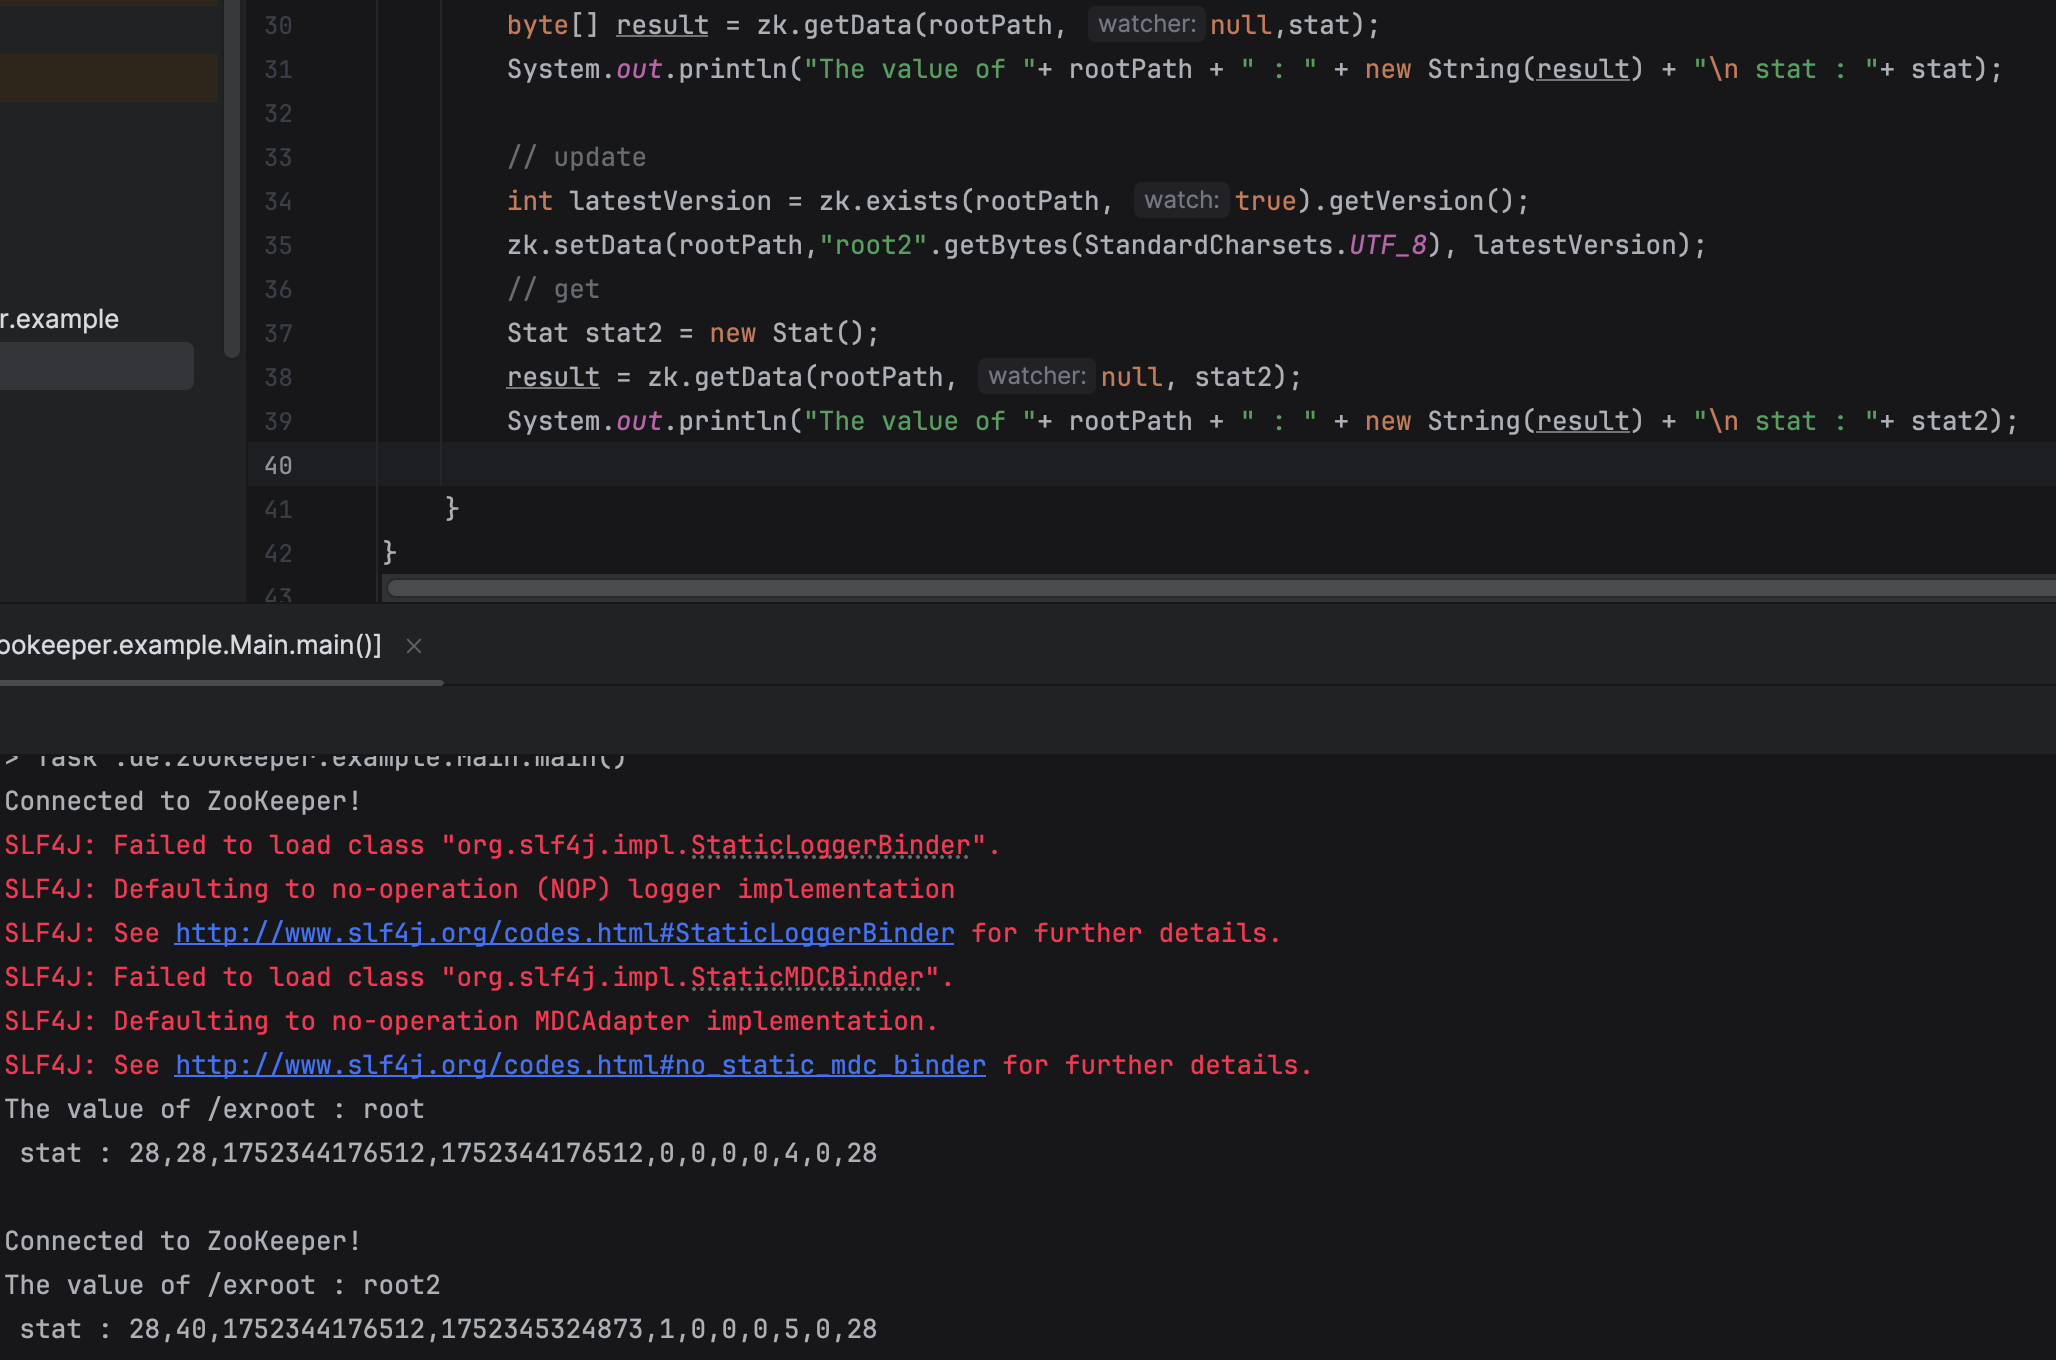
주키퍼에서도 확인을 해보자.
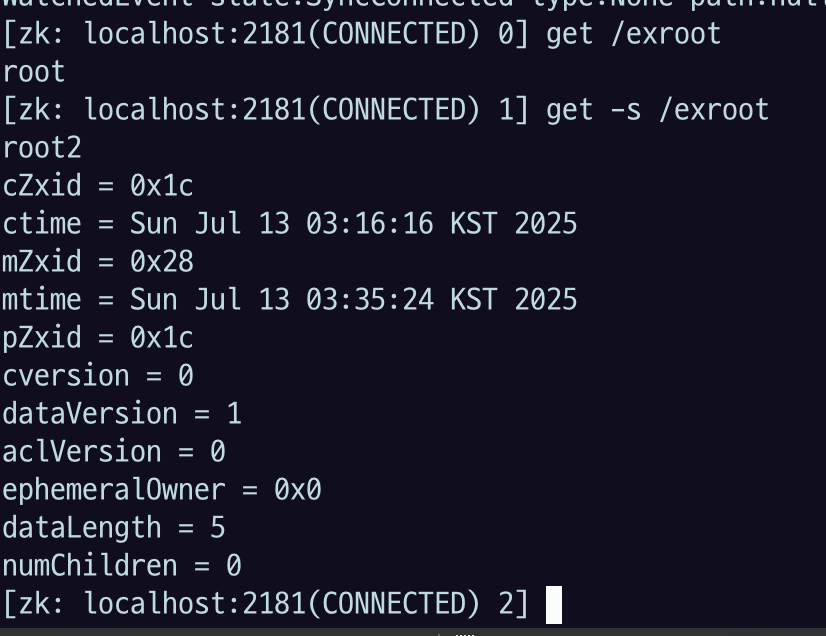
- setData 가 성공하면, 해당 znode 를 watch 하는 곳에 changed signal이 전달된다.
- version 값이 해당 path znode 의 현재 버전이 아니면 KeeperException.BadVersion 이 throw 된다.
- version 에
-1을 넣으면, 버전과 상관 없이 업데이트 된다.
- version 에
- 최대 data size 는 1MB이다.
- async callback 을 등록할 수 있는 비동기 함수도 있다.
3.4.5 addWatch
zk.addWatch(path, mode)
- AddWatchMode
- PERSISTENT: 해당 노드만 watch
- PERSISTENT_RECURSIVE: 해당 노드와 children 까지 watch
3.5 Zookeeper 를 이용한 Leader Election 구현
3.5.1 Leader Election Logic
Leader Election 은 ZooKeeper가 기본적으로 제공하는 기능은 아니지만, ZooKeeper의 코디네이션 기능과 ephemeral znode를 이용해 쉽게 구현할 수 있다.
일반적으로 리더 선출을 직접 구현하려면 락, 동기화, 장애 복구, 서비스 디스커버리 등 복잡한 분산 이슈를 직접 처리해야 한다.
하지만 ZooKeeper는 다음과 같은 기능을 통해 이런 복잡도를 낮춰줄 수 있다
ephemeral znode: 세션이 종료되면 자동으로 사라지는 노드sequential znode: 자동으로 순서 번호가 붙는 노드
이 두 가지를 조합하면 다음과 같이 리더 선출을 할 수 있다
- 참여자들이
/election경로 아래에ephemeral + sequential노드를 생성 - 가장 작은 번호를 가진 노드가 리더가 됨
- 리더가 죽으면 해당 노드가 삭제되고, 다음 순서 노드가 리더가 됨
pseudo code
when start application:
 1. create my node to znode of namespace for leader election as ephemeral child node
    with larger number value than existing children have.
 2. elect()

when elect:
 1. get children in znode of namespace for leader election.
 2. sort children by value
 3. get first node in children
 4. if first node is my node, I am a leader
    else I am a follower
 5. watch znode of namespace for leader election on mode - PERSISTENT_RECURSIVE

when watch triggered:
 1. if event is NodeDeleted, elect()
    else do nothing.

when stop application
 1. my node is removed from znode of namespace for leader election as child node because my node was ephemeral node.
3.5.2 구현
leader election 전용 namespace 를 가지는 znode 를 생성하고, CreateMode.EPHEMERAL_SEQUENTIAL 을 이용하면 leader election 을 간단하게 구현할 수 있다.
참고 Example Github
build.gradle
plugins {
    id 'java'
    id 'application'
    id 'com.github.johnrengelman.shadow' version '7.1.2'
}

group 'de.zookeeper'
version '1.0-SNAPSHOT'

repositories {
    mavenCentral()
}
application {
    mainClass.set("de.zookeeper.leaderelection.App")
}
dependencies {
    implementation 'org.apache.zookeeper:zookeeper:3.7.1'
    testImplementation 'org.junit.jupiter:junit-jupiter-api:5.8.1'
    testRuntimeOnly 'org.junit.jupiter:junit-jupiter-engine:5.8.1'
}

test {
    useJUnitPlatform()
}- 사용하는 zookeeper client 버전이, 설치된 버전과 일치하는 것이 좋다.
App.java
package de.zookeeper.leaderelection;

import java.io.IOException;
import org.apache.zookeeper.KeeperException;

public class App {
	public static void main( String[] args ) throws IOException, InterruptedException, KeeperException
    {
        LeaderElection leaderElection  = new LeaderElection();
        leaderElection.connectToZookeper();
        leaderElection.volunteerForLeadership();
        leaderElection.reelectLeader();
        leaderElection.run();
        leaderElection.close();
        System.out.println("Disconnected from zooKeeper, exiting application!!");
    }
}
LeaderElection.java
package de.zookeeper.leaderelection;

import java.io.IOException;
import java.util.Collections;
import java.util.List;

import org.apache.zookeeper.CreateMode;
import org.apache.zookeeper.KeeperException;
import org.apache.zookeeper.WatchedEvent;
import org.apache.zookeeper.Watcher;
import org.apache.zookeeper.ZooDefs;
import org.apache.zookeeper.ZooKeeper;
import org.apache.zookeeper.data.Stat;

public class LeaderElection implements Watcher
{
    private static final String ZOOKEEPER_ADDRESS = "localhost:2181";
    private ZooKeeper zooKeeper;
    private static final int SESSION_TIMEOUT = 3000;
    private static final String ELECTION_NAMESPACE = "/election";
    private String currentZNodeName;

	public void volunteerForLeadership() throws KeeperException, InterruptedException {
		String zNodePrefix = ELECTION_NAMESPACE + "/c_";
		String zNodeFullPath = zooKeeper.create(zNodePrefix, new byte[] {}, ZooDefs.Ids.OPEN_ACL_UNSAFE, CreateMode.EPHEMERAL_SEQUENTIAL);

		System.out.println("znode_name: " + zNodeFullPath);
		this.currentZNodeName = zNodeFullPath.replace(ELECTION_NAMESPACE + "/", "");
	}

	public void reelectLeader() throws KeeperException, InterruptedException {
		Stat predecessorStat = null;
		String predecessorZnodeName = "";

		while (predecessorStat == null) {
			List<String> children = zooKeeper.getChildren(ELECTION_NAMESPACE, false);
			Collections.sort(children);

			String smallestChild = children.get(0);

			if (smallestChild.equals(currentZNodeName)) {
				System.out.println("I am the leader !!");
			} else {
				System.out.println("I am not the leader ");
				int predecessorIndex = Collections.binarySearch(children, currentZNodeName) - 1;
				predecessorZnodeName = children.get(predecessorIndex);
				predecessorStat = zooKeeper.exists(ELECTION_NAMESPACE + "/" + predecessorZnodeName, this);
			}
		}

		System.out.println("Watching node: " + predecessorZnodeName);
		System.out.println();
	}

	public void watchTargetZNode() throws KeeperException, InterruptedException {
		Stat stat = zooKeeper.exists(ELECTION_NAMESPACE, this);
		if (stat == null) {
			return;
		}

		byte[] data = zooKeeper.getData(ELECTION_NAMESPACE, this, stat);
		List<String> children = zooKeeper.getChildren(ELECTION_NAMESPACE, this);

		System.out.println("Data: " + new String(data) + " Children: " + children);
	}

	public void connectToZookeper() throws IOException{
		this.zooKeeper = new ZooKeeper(ZOOKEEPER_ADDRESS, SESSION_TIMEOUT, this);
	}

	public void run() throws InterruptedException {
		synchronized (zooKeeper) {
			zooKeeper.wait();
		}
	}

	public void close() throws InterruptedException {
		zooKeeper.close();
	}

	public void process(WatchedEvent event) {
		switch(event.getType()) {
		case None:
			if (event.getState() == Event.KeeperState.SyncConnected) {
				System.out.println("Successfully connected to zookeeper!!");
			} else {
				synchronized (zooKeeper) {
					System.out.println("Disconnected from zookeeper event");
					zooKeeper.notifyAll();
				}
			}
			break;
		case NodeDeleted:
			try {
				reelectLeader();
			} catch(KeeperException e) {
			} catch(InterruptedException e) {

			}
			System.out.println(ELECTION_NAMESPACE + " got deleted!!");
		case NodeCreated:
			System.out.println(ELECTION_NAMESPACE + " got created!!");
		case NodeDataChanged:
			System.out.println(ELECTION_NAMESPACE + " data changed!!");
		case NodeChildrenChanged:
			System.out.println(ELECTION_NAMESPACE + " gchildren changed!!");
		default:
			break;
		}

		try {
			watchTargetZNode();
		} catch (KeeperException e) {
			e.printStackTrace();
		} catch (InterruptedException e) {
			e.printStackTrace();
		}

	}
}- 변수
ZOOKEEPER_ADDRESS를 자신의 zookeeper 서버의 IP:port 로 변경 - 빌드
./gradlew build또는 IDEA에서 더블클릭./gradlew shadowJar또는 IDEA에서 더블클릭
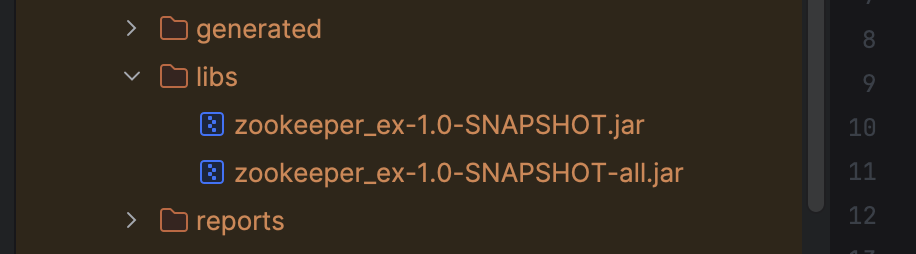
-all 적혀 있는 Jar는 fat Jar 라고 해서 라이브러리를 다 포함하고 있는 거라서 사이즈가 크다. 이걸로 실행시켜주면 됨.
3.5.3 실행
일단 주키퍼 서버 띄워져 있는지 확인해보자.
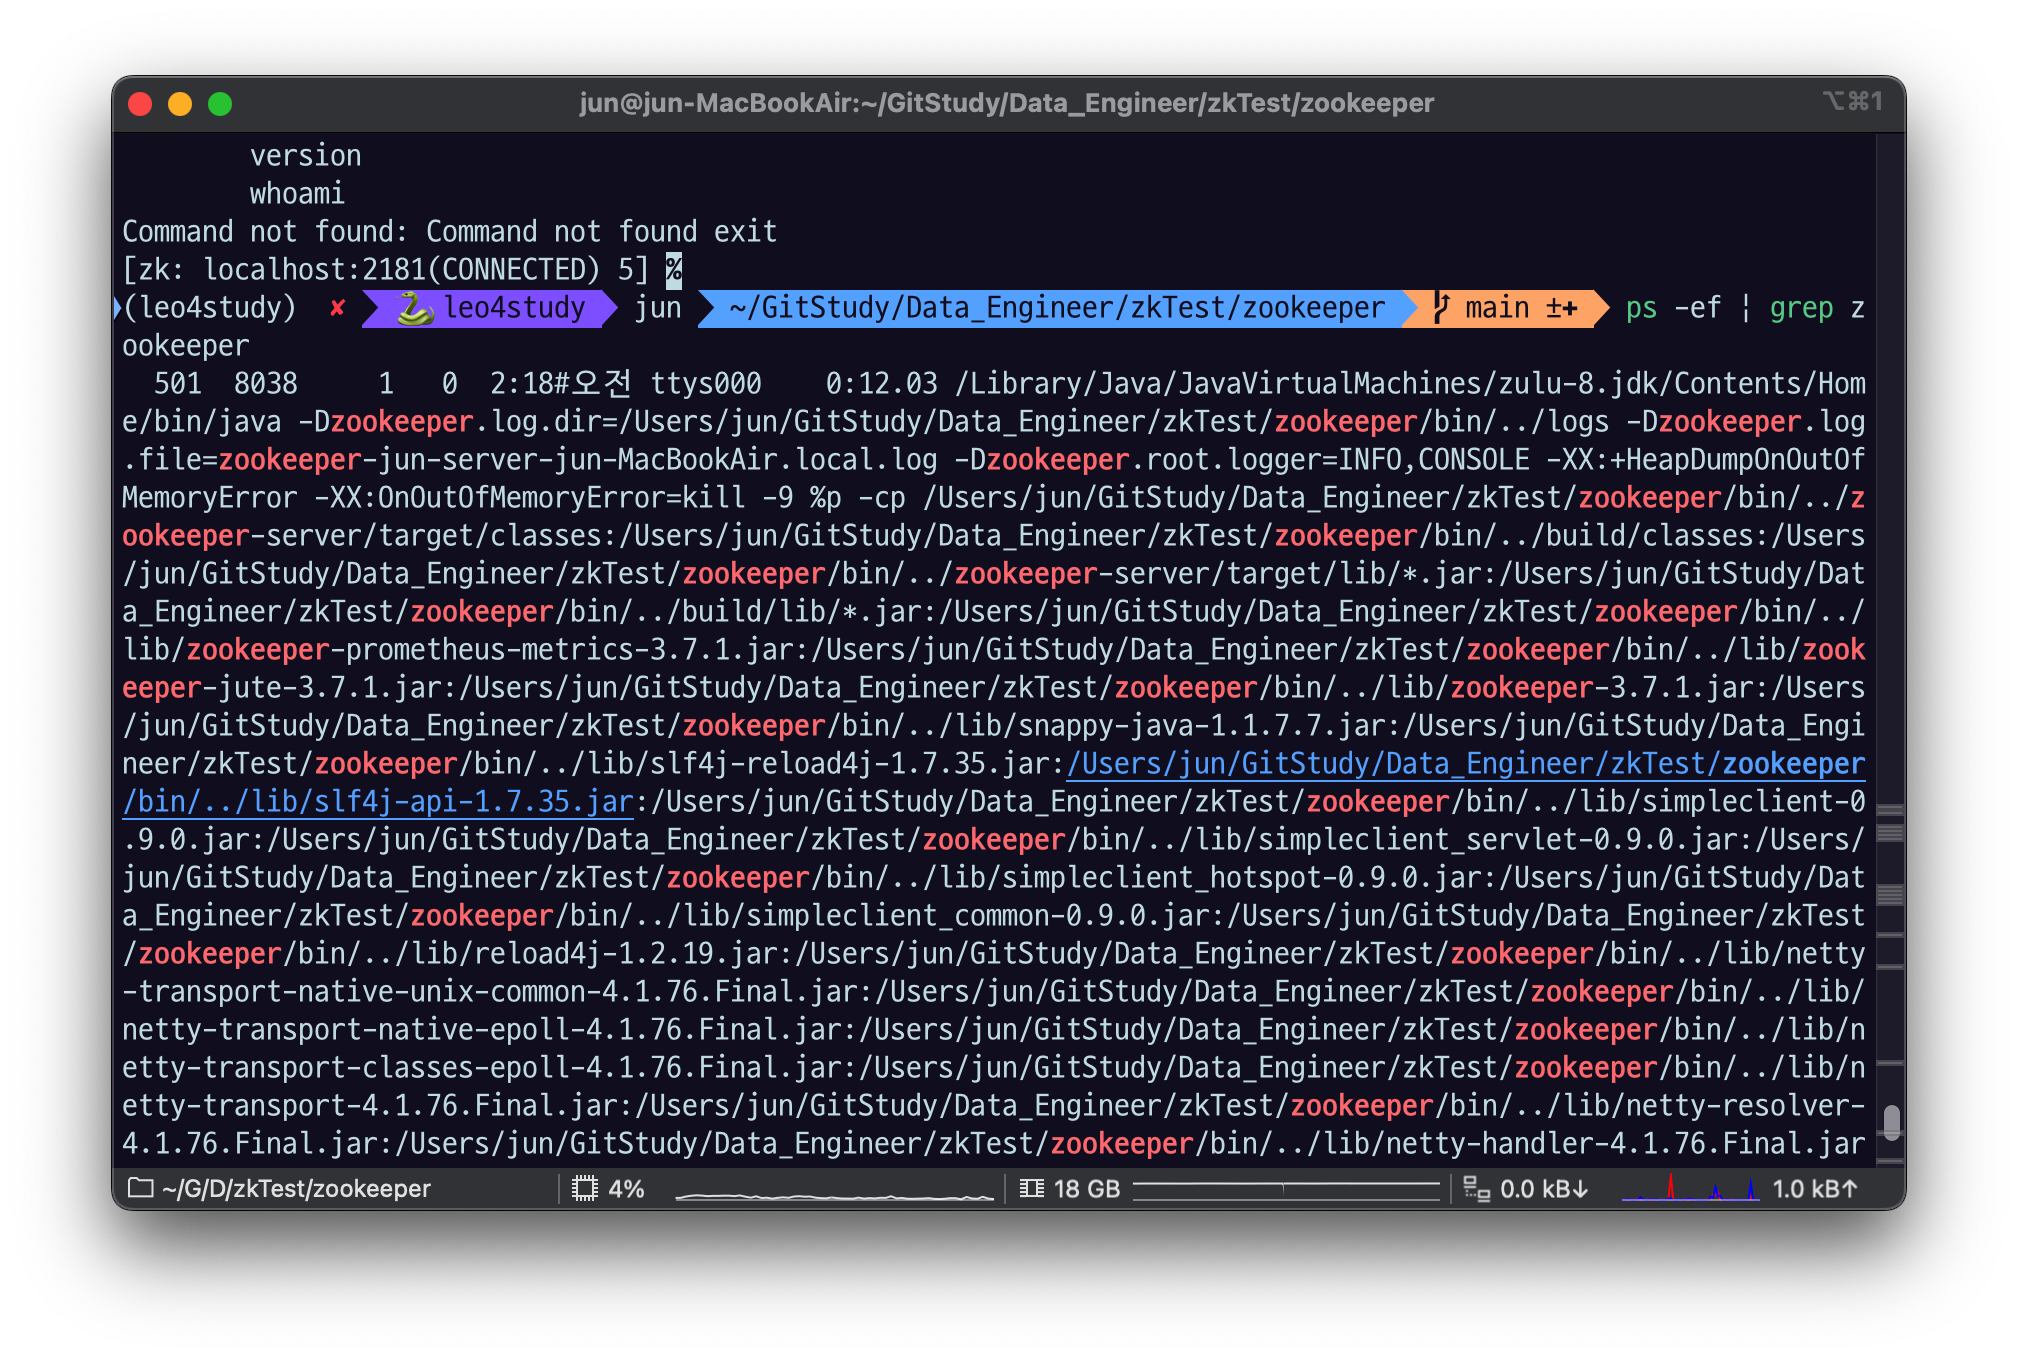
./bin/zkCli.sh -server localhost:2181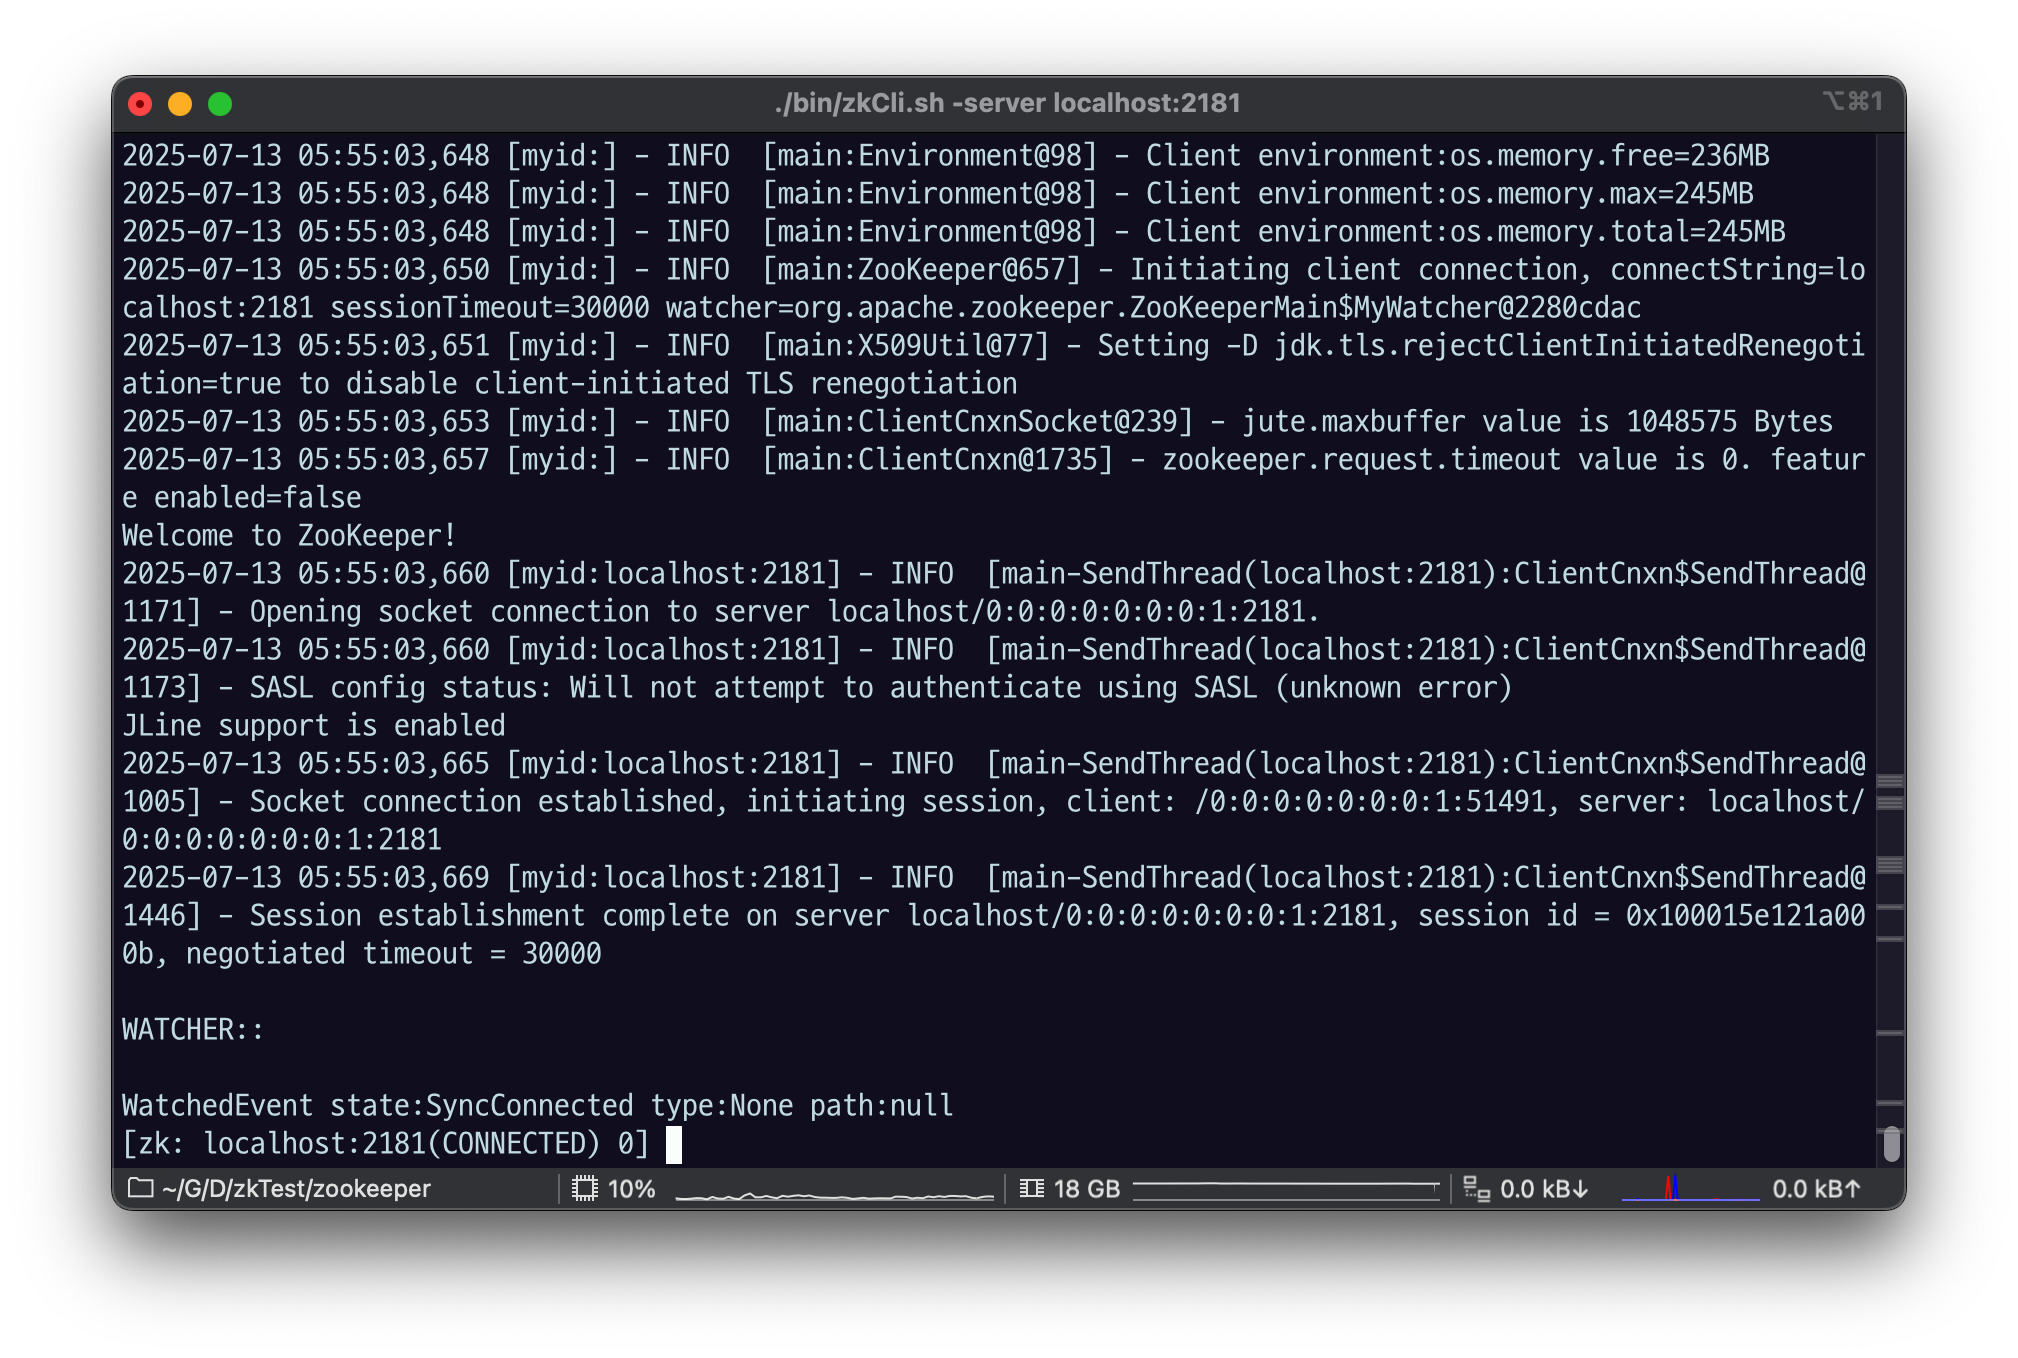
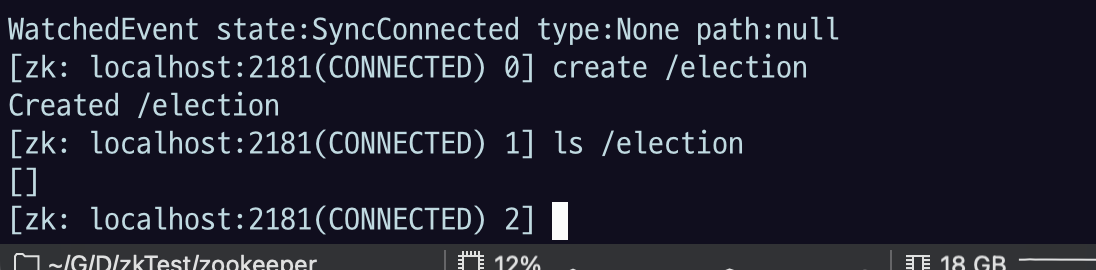
- zkCli 를 통해 미리
/electionznode 를 만들어놓는다.
- 빌드 결과물 jar 로 실행
java -jar $myjar.jar


다시 가서 ls 해보면 새로 생김.
터미널의 여러 session에서 실행해보자
3.5.4 확인
zkCli 를 실행해서 ls 로 znode 를 확인한다. leader election app 을 실행, 죽여가면서 확인한다.
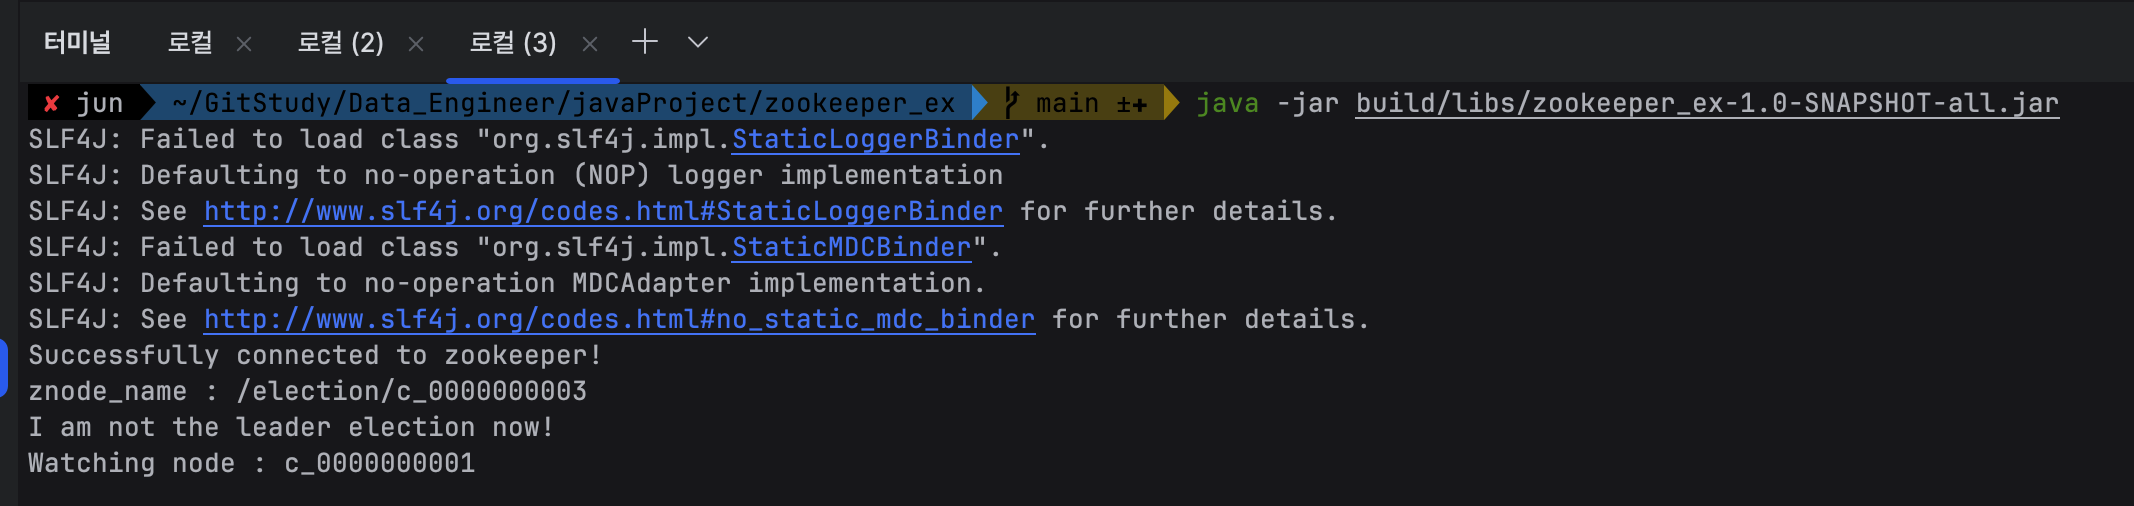
터미널을 하나 더 열어서 java-jar 또 실행시켜 보자.
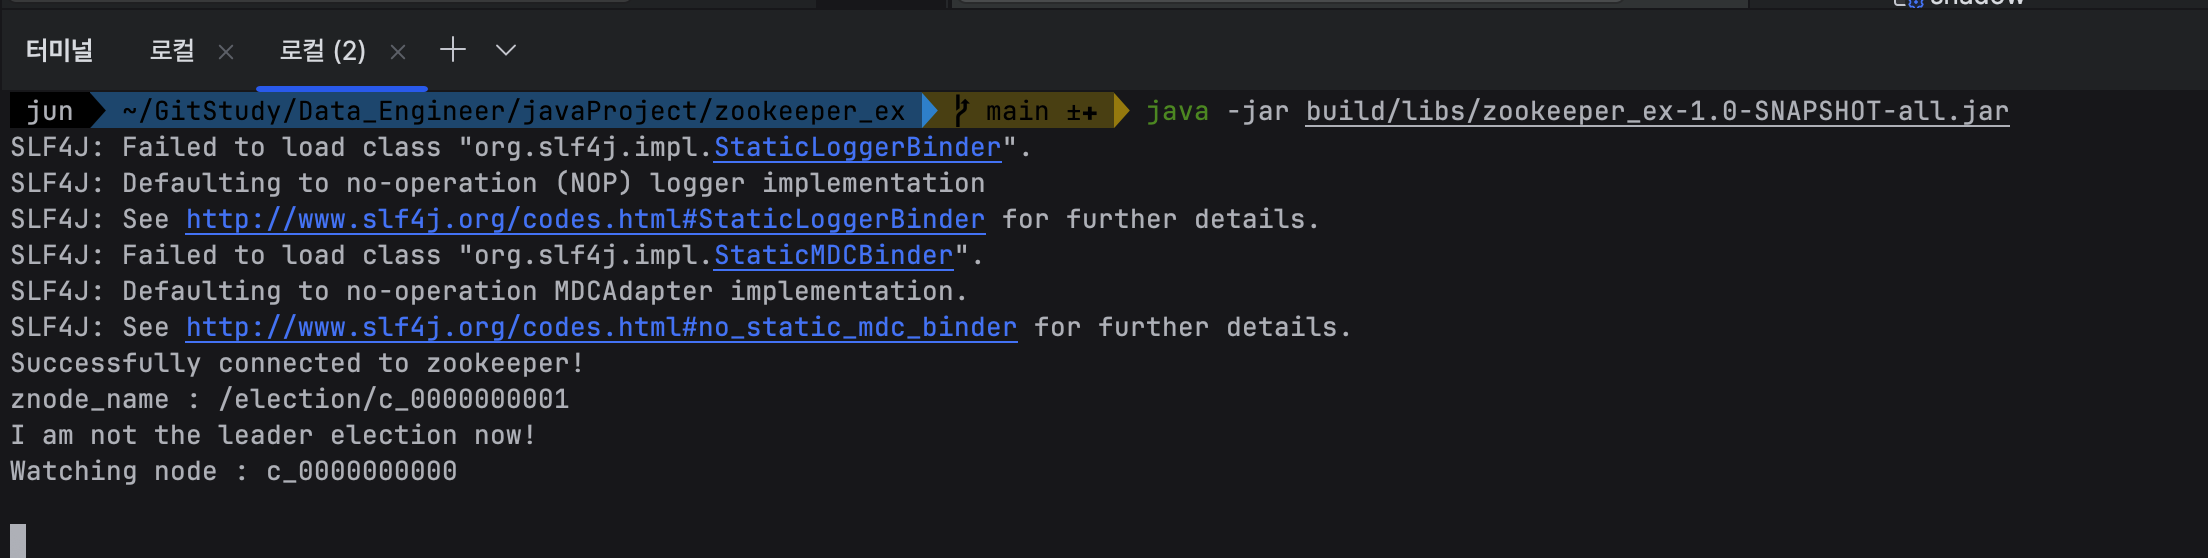
watching node 하고 watching node에 미리 등록되어 있는 children이 보이게 된다.
자기 자신의 zNode : /election/c_0000000001

Cli로 돌아가서 ls 해보면 00000 , 0001 가 등록된 것을 확인할 수 있다.
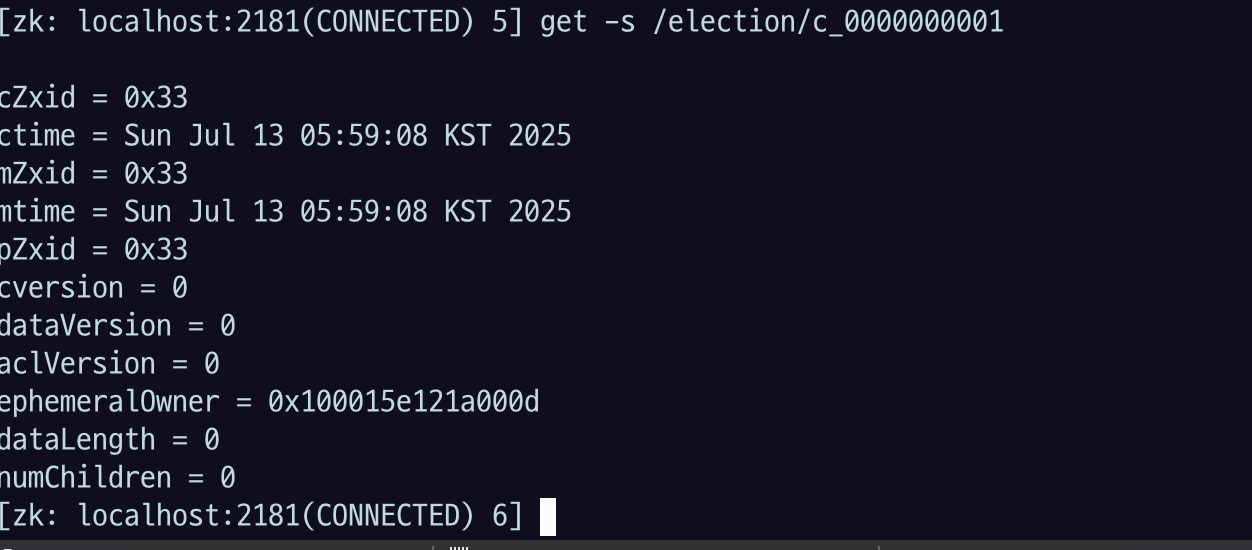
get -s 옵션으로 등록된 시간이나 데이터 볼 수 있음
세 번째 터미널에서도 실행해준다.
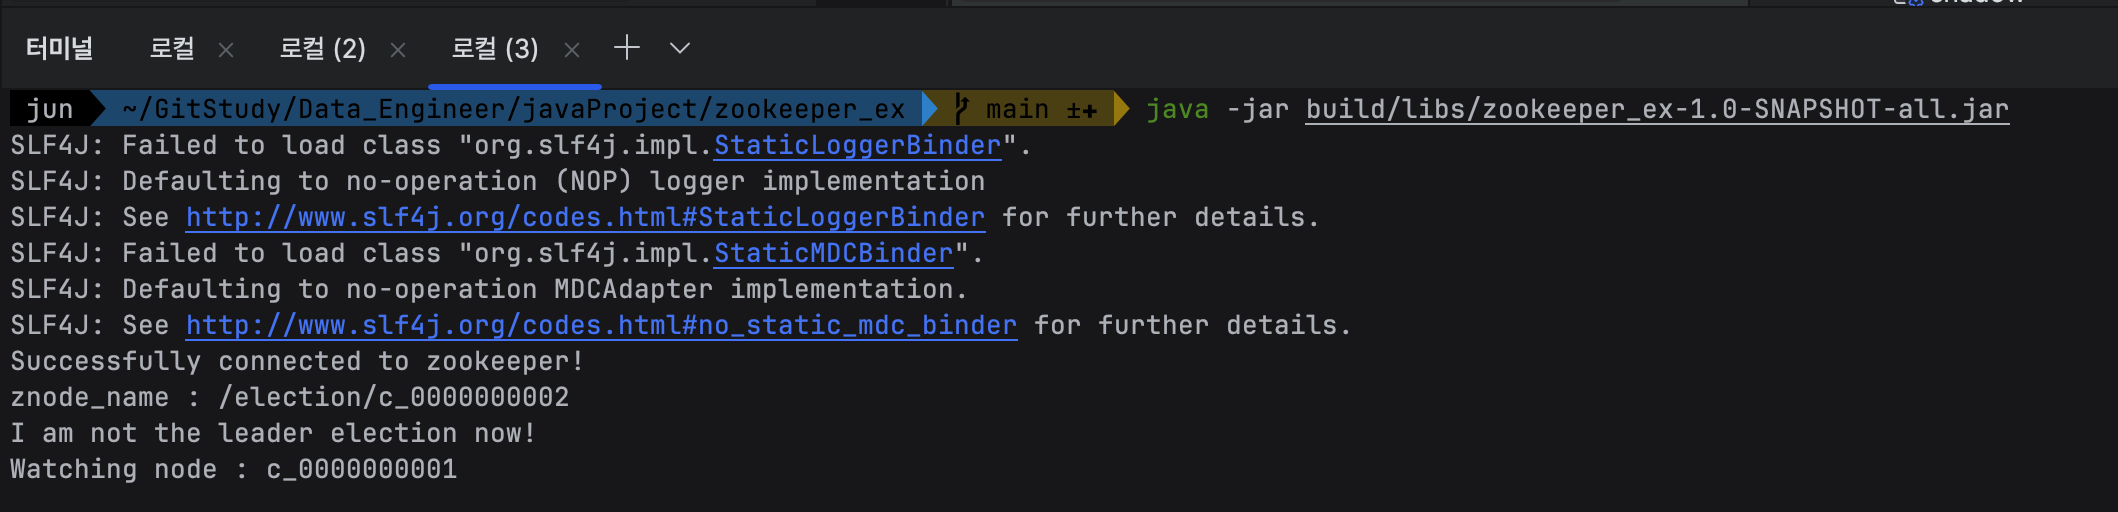
znode_name : /election/c_0000000002

cli 확인해보면 잘 만들어진 것 확인할 수 있었다.
이제 터미널 3번, c_0000000002 이 친구를
ctrl + c 로 종료시켜보자.
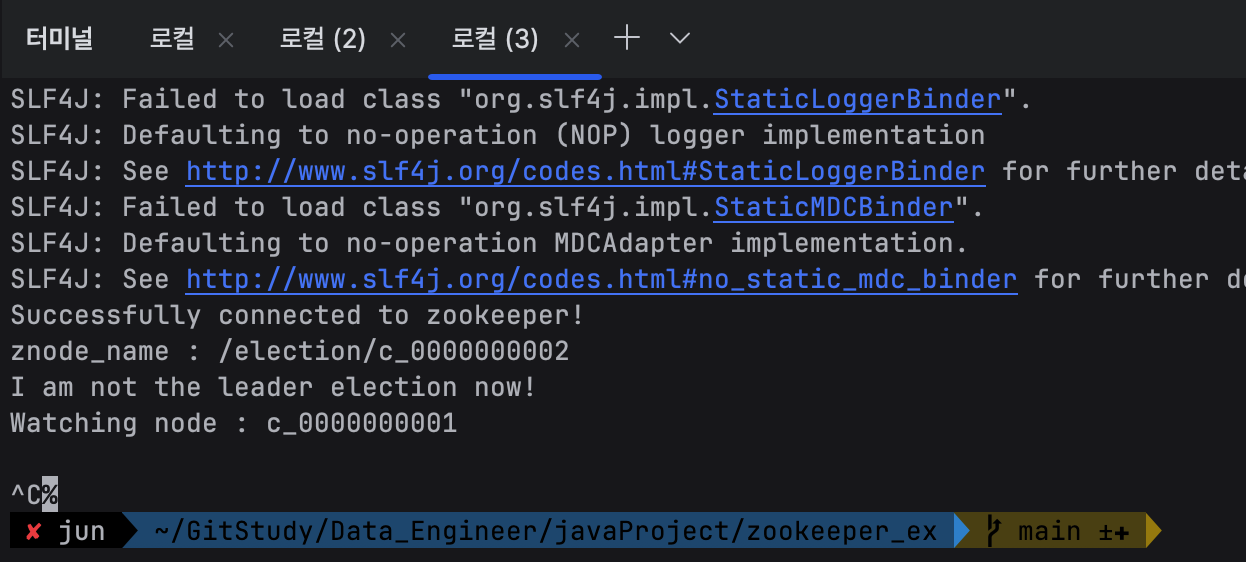
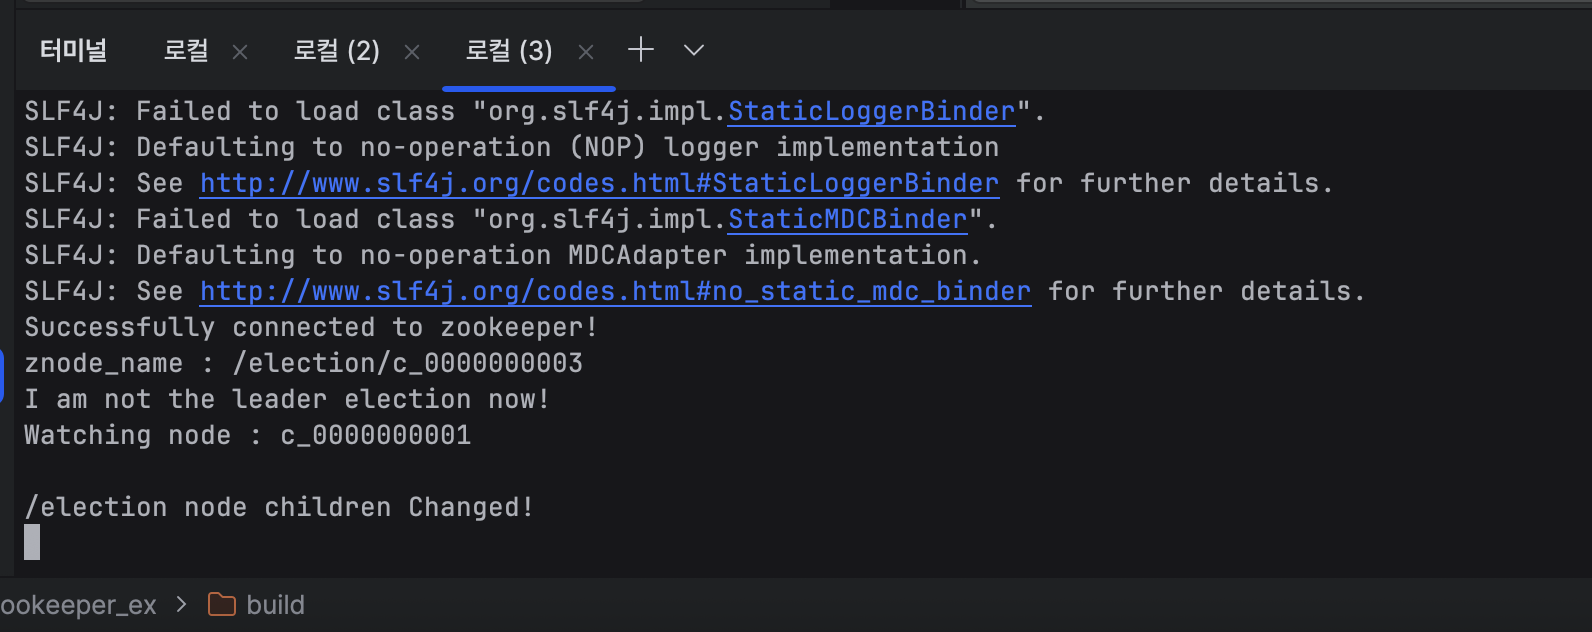
종료 시키고 터미널 2번으로 가서 확인을 해보면
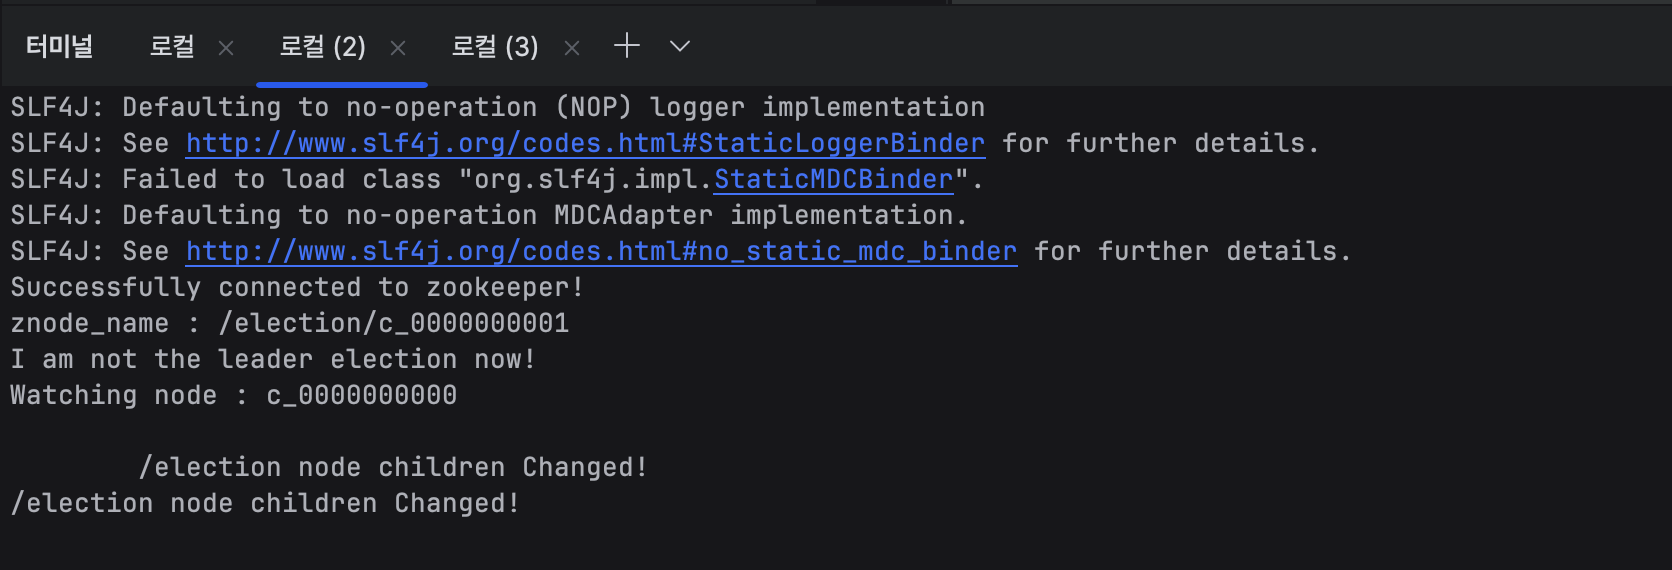
/election node children Changed!
라고 메세지가 나온다. 하지만
터미널 1로 가서 확인을 해 보면 리더는 바뀌지 않은 것을 볼 수 있다.
children 은 바뀌었지만 leader의 번호는 앞 번호인 c_0000000000 번 친구가 아직 살아있기 때문에 바뀌지 않았고
잠시 뒤

ls 해보면 c_0000000002 번 친구가 사라진 것을 볼 수 있다.
다시 3번 터미널에서 java -jar 로실행시켜서 살려주자.

이렇게 c_0000000003번으로 만들어졌고
그 다음엔 리더인 c_0000000000 번을 죽인 다음 확인을 해보자.
터미널 1번을 ctrl + c
다른 친구들이 changed라는 걸 받았고,
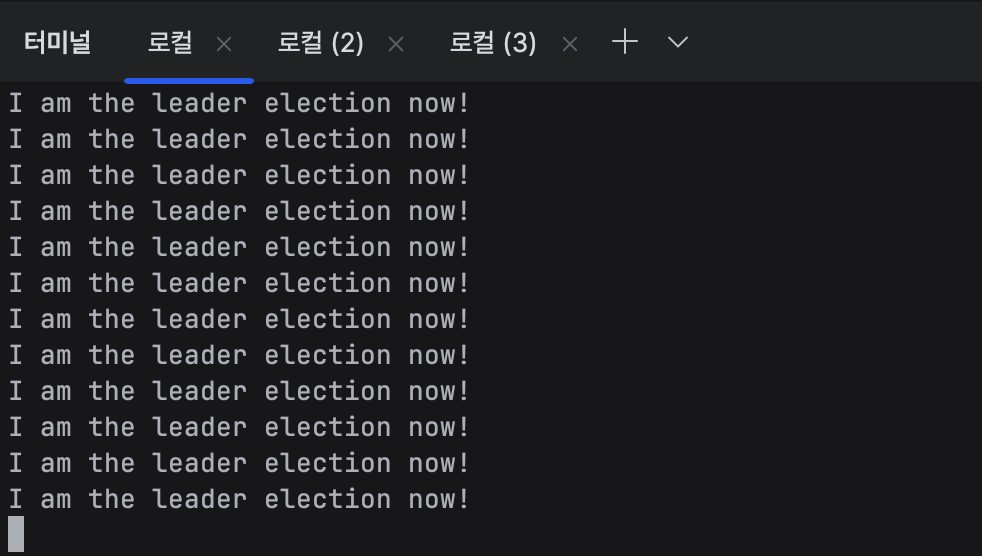
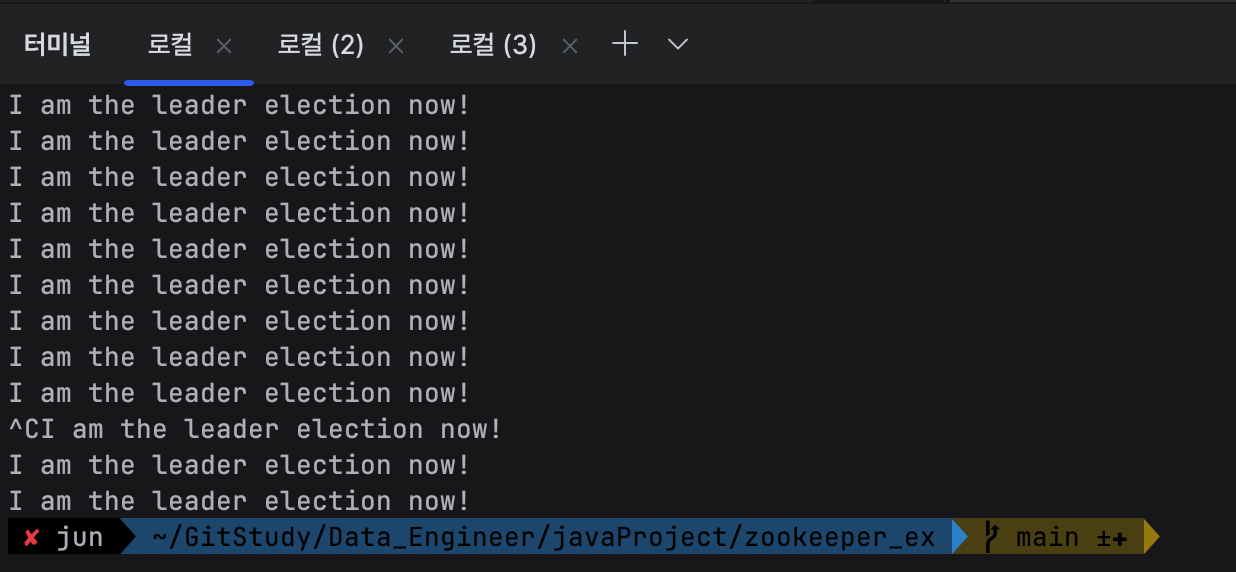
아까 c_0000000001 번 이던 친구는 자기가 리더가 되었다고 메세지가 쭉 나온다.
Cli 가서 확인을 해보면

c_0000000001번, c_0000000003 번이 있고 c_0000000001번이 앞 번호니까 리더가 된 모습
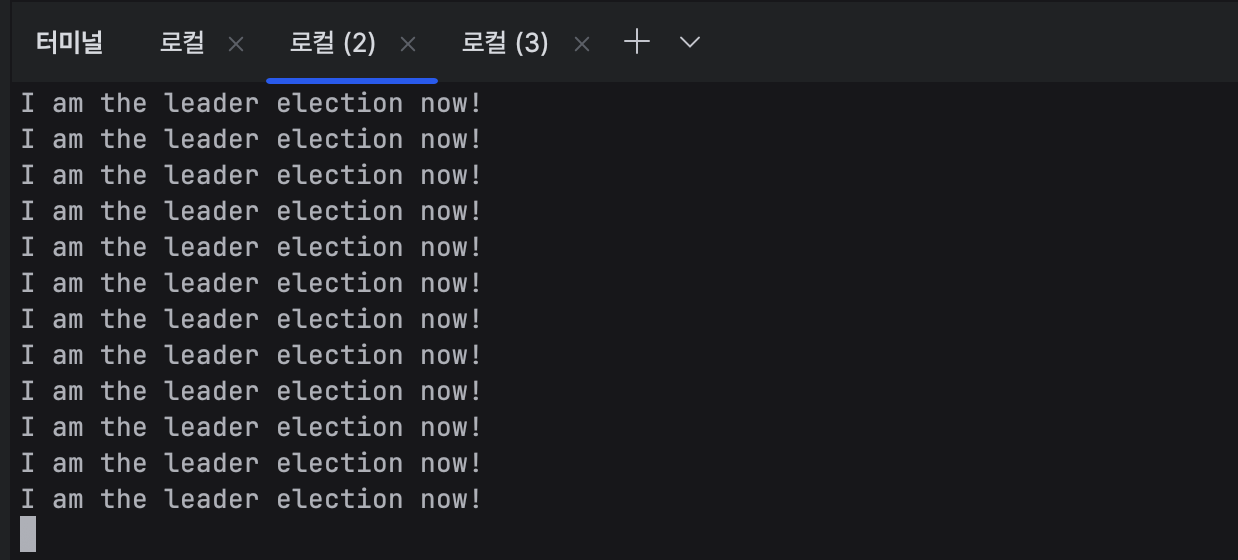
터미널 2번도 죽이면

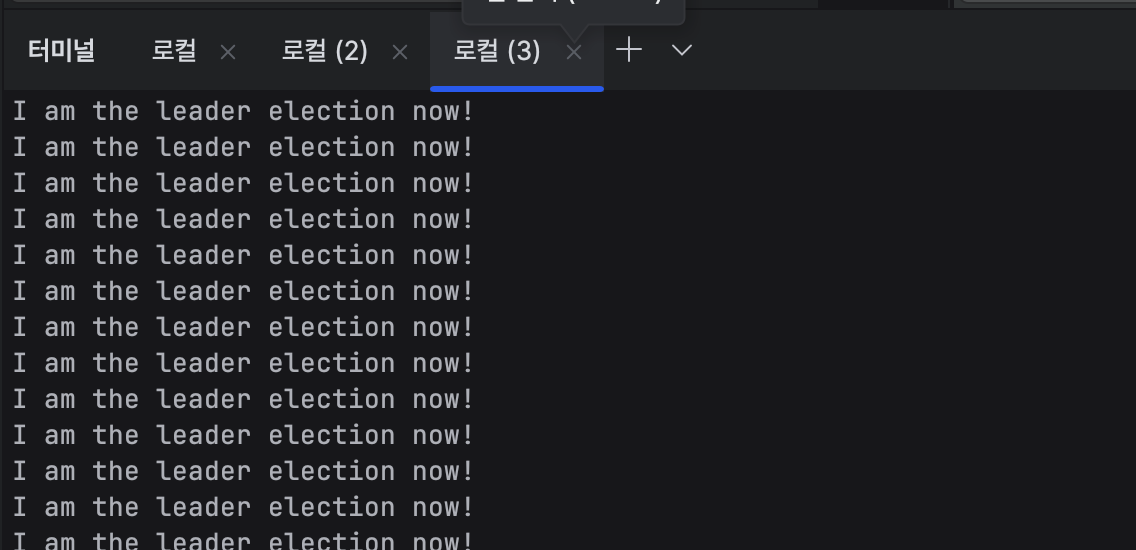
이제는 터미널 3번에서 자기가 리더라고 하는 모습.
이제 이 친구 까지 죽여주면

ephemeral, sequencial 이었으니까
ephemeral은 connection이 znode가 삭제된 걸 확인할 수 있다.
Leader election이라는 기능을 직접 구현하려면, 단순히 누가 리더인지 결정하는 것 이상의 요소들을 고려해야 한다.
예를 들어, 네트워크가 일시적으로 끊겼다가 다시 연결되는 상황, 노드가 실제로 죽은 건지 잠깐 통신이 안 되는 건지 구분하는 문제, 동시 접근이나 락 이슈 등… 복잡도가 매우 높아진다.
그런데 이런 복잡한 동기화 문제를 ZooKeeper를 이용하면 훨씬 간단하게 해결할 수 있다.
예제에서는 이 리더 일렉션 로직이 단 하나의 클래스로 구성되어 있는데, 이건 기능의 복잡도에 비해 구현 난이도가 말이 안 될 정도로 낮은 것이다.
즉, ZooKeeper의 강력한 API 덕분에 원래 수십, 수백 줄은 짜야 할 로직을 아주 간결하게 작성할 수 있다.
ZooKeeper가 제공하는 서비스 코디네이션 기능을 활용하면, 여러 노드 간에 공통 설정 정보나 메타데이터, 상태 정보 등을 안정적으로 공유하고 동기화할 수 있다.
이런 부분들을 ZooKeeper에 위임하면, 우리는 애플리케이션 로직 자체에 더 집중할 수 있고, 시스템의 신뢰성과 구현 속도 모두를 향상시킬 수 있다.
즉, 코디네이션을 ZooKeeper가 맡고, 애플리케이션은 본질적인 기능에 집중하는 방식으로 개발의 복잡도를 줄일 수 있는 것이다.