파이썬 머신러닝 완벽가이드에서의 UCI 데이터 분석 내용이다.
이번 데이콘에서 이와 비슷한 내용의 대회가 있었다.
이번 내용을 학습하고 저 대회도 한번 공부해보려고 한다.
UCI 데이터는 30명에게 스마트폰 센서 장착한 뒤 동작과 관련된 데이터를 수집 내용이다.
이 데이터들은 데이터들이 공백으로 분리되어 있다.
데이터 수집
import pandas as pd
import matplotlib.pyplot as plt
%matplotlib inline

feature_name_df = pd.read_csv("./human_activity/features.txt", sep='\s+',
                             header=None, names=['column_index', 'column_name'])
feature_name_df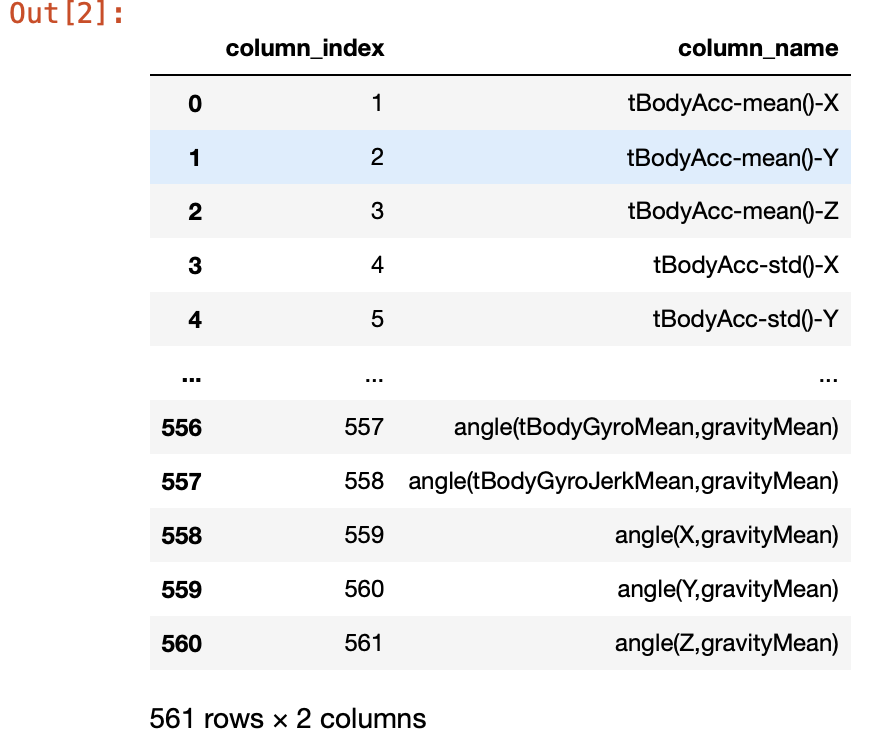
(무려 column명이 561개나 된다.)
헌데 변수명 중복이 있다.
feature_name_df['column_name'].unique().shape(477,)
원본 데이터는 561개인데 속성값 unique shape를 보면 477개이다. 이는 561-477 = 84개의 중복 데이터가 있다는 말이다. 그럼 중복된 변수명 자체는 몇개인지 확인해보자.
feature_dup_df = feature_name_df.groupby('column_name').count()
print(feature_dup_df[feature_dup_df['column_index'] > 1].count())
feature_dup_df[feature_dup_df['column_index'] > 1]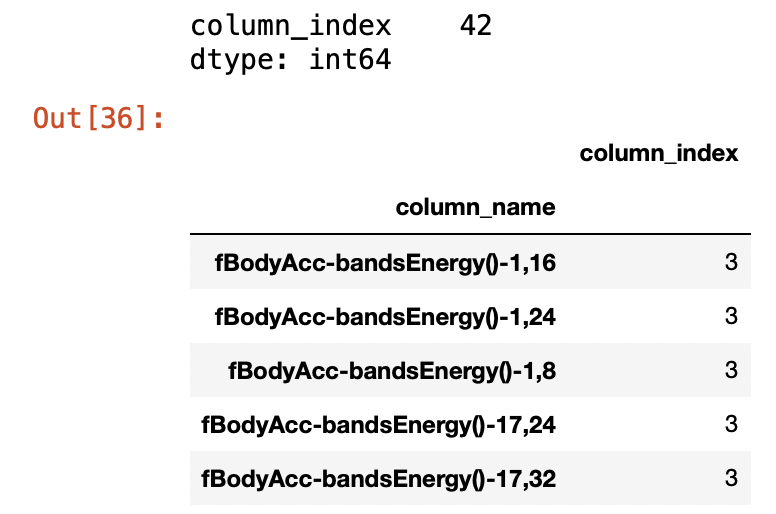
변수명으로 groupby하여 개수가 2 이상인것을 count해보니 42개의 변수명이 각각 3개씩 중복된 것을 알 수 있다. (561 - 126 + 42 = 477)
중복된 값이 존재한다는 의미 중복된 피처명을 이용해서 데이터 파일을 데이터프레임에 로드하면 오류가 발생한다.
이번엔 중복된 변수명을 다른 이름으로 변경해보자.
def get_new_feature_name_df(old_feature_name_df):
    feature_dup_df = pd.DataFrame(data=old_feature_name_df.groupby('column_name').cumcount(),
                                 columns=['dup_cnt'])
    feature_dup_df = feature_dup_df.reset_index()
    new_feature_name_df = pd.merge(old_feature_name_df.reset_index(), feature_dup_df, how='outer')
    new_feature_name_df['column_name'] = new_feature_name_df[['column_name', 'dup_cnt']].apply(lambda x: x[0]+'_'+
                                                                                              str(x[1]) if x[1] > 0 else x[0], axis=1)
    new_feature_name_df = new_feature_name_df.drop(['index'], axis=1)
    return new_feature_name_df
여기서 처음본 함수가 나왔다. cumcoumt() 이것이 생긴게 cumsum()이랑 비슷하다? 기능도 비슷한지 한번 봐보자.
df = pd.DataFrame([['a'], ['a'], ['a'], ['b'], ['b'], ['a']],
                 columns=['A'])
df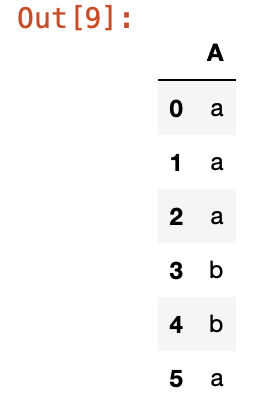
중복된 속성이 있는 데이터프레임을 만들어봤다. 이를 groupby하여 cumcount()하면 어떤 결과값이 나올까?
df.groupby('A').cumcount()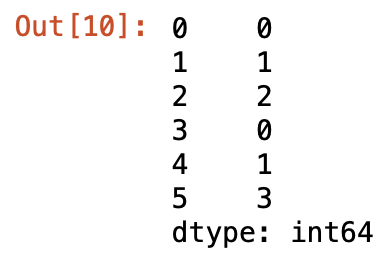
똑같은 속성을 모아서 최종 개수값을 채우는 것이 아니라 중복 변수마다 몇번째인지 값을 넣어준다.
이제 중복된 이름도 해결했겠다 train, test데이터를 불러와서 데이터 프레임으로 생성하자.
def get_human_dataset():
    # 각 데이터 파일이 공백으로 분리되어 있어, 공백문자를 sep로 할당
    feature_name_df = pd.read_csv('./human_activity/features.txt', sep='\s+',
                                 header=None, names=['column_index', 'column_name'])
    # 중복 이름 변경
    new_feature_name_df = get_new_feature_name_df(feature_name_df)
    feature_name = new_feature_name_df.iloc[:, 1].values.tolist()

    x_train = pd.read_csv('human_activity/train/X_train.txt', sep='\s+', names=feature_name)
    x_test = pd.read_csv('human_activity/test/X_test.txt', sep='\s+', names=feature_name)

    y_train = pd.read_csv('human_activity/train/y_train.txt', sep='\s+', header=None, names=['action'])
    y_test = pd.read_csv('human_activity/test/y_test.txt', sep='\s+', header=None, names=['action'])

    return x_train, x_test, y_train, y_test

x_train, x_test, y_train, y_test = get_human_dataset()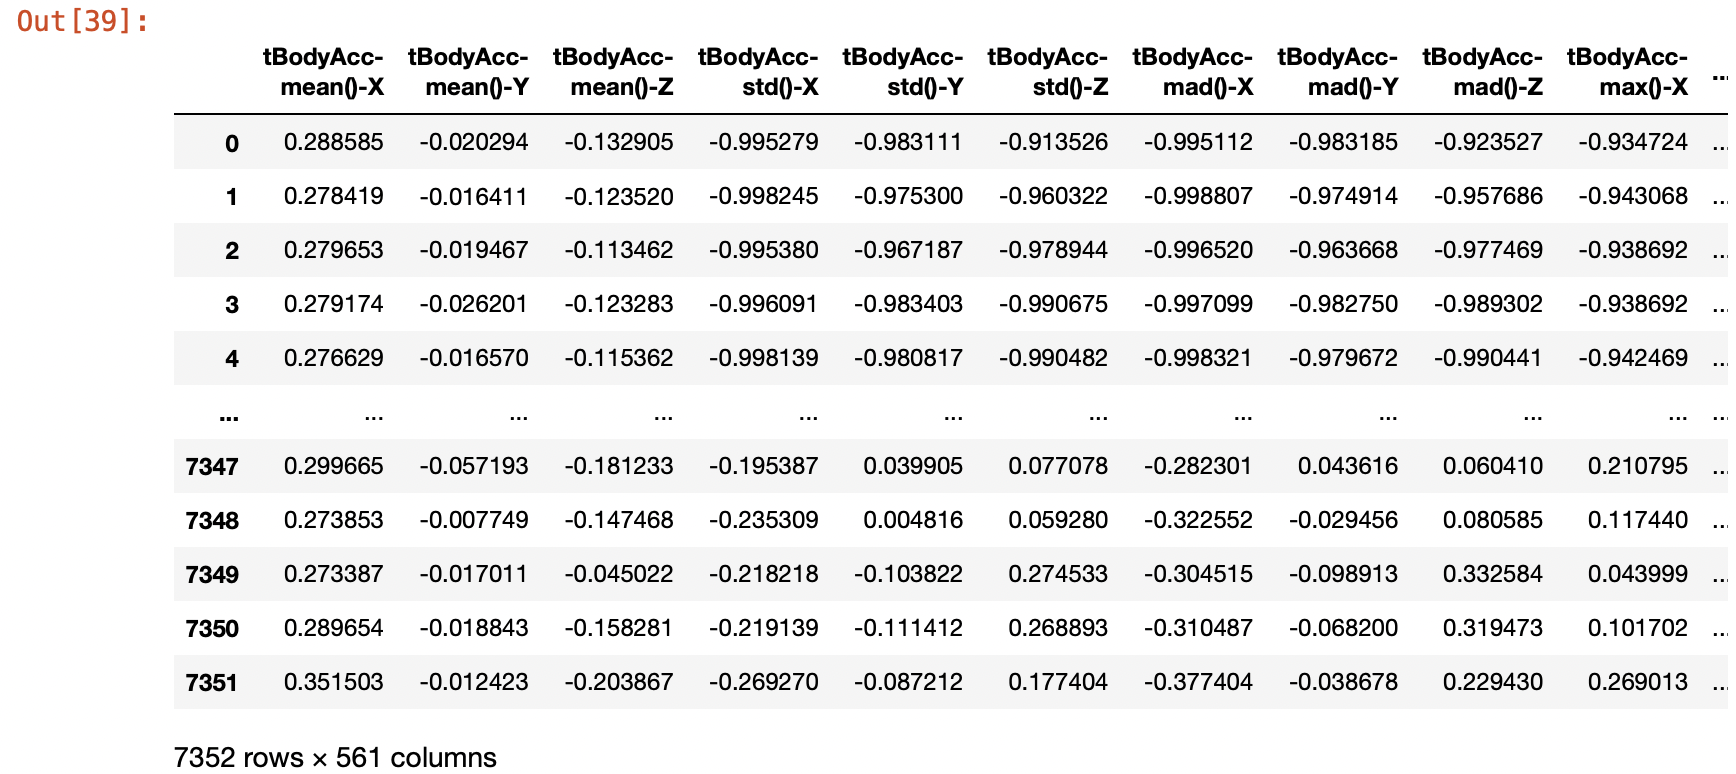
무사히 데이터를 불러왔다.
print('## 학습 피처 데이터 셋 info()')
print(x_train.info())
Label의 분포는 어떨까?
y_train['action'].value_counts() / y_train.shape[0]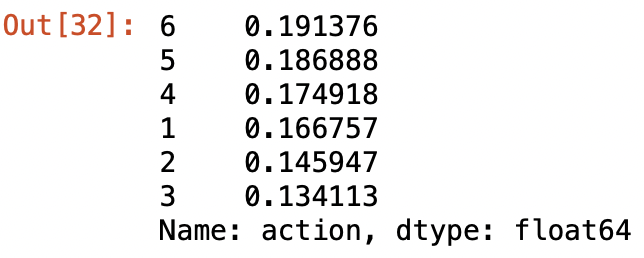
대체로 편협되어있지 않고 골고루 분포되어 있다.
DecisionTreeClassifier
처음은 하이퍼 파라미터를 default로 두고 예측정확도를 살펴보자.
from sklearn.tree import DecisionTreeClassifier
from sklearn.metrics import accuracy_score

dt_clf = DecisionTreeClassifier(random_state=156)
dt_clf.fit(x_train, y_train)
pred = dt_clf.predict(x_test)
accuracy = accuracy_score(pred, y_test)
print("결정 트리 예측 정확도 : {0:.4f}".format(accuracy))
결정 트리 예측 정확도 : 0.8548
모든 하이퍼 파라미터를 default로 두고 예측을 했을 경우 정확도가 85.48%이다.
그럼 이제부터 하이퍼 파라미터를 튜닝할 것인데, 시작하기에 앞서 DecisionTreeClassifier에는 어떤 하이퍼 파라미터가 있는지 보자.
print('DecisionTreeClassifier 기본 하이퍼 파라미터 : \n', dt_clf.get_params())DecisionTreeClassifier 기본 하이퍼 파라미터 :
{'ccp_alpha': 0.0, 'class_weight': None, 'criterion': 'gini', 'max_depth': None, 'max_features': None, 'max_leaf_nodes': None, 'min_impurity_decrease': 0.0, 'min_impurity_split': None, 'min_samples_leaf': 1, 'min_samples_split': 2, 'min_weight_fraction_leaf': 0.0, 'presort': 'deprecated', 'random_state': 156, 'splitter': 'best'}
하이퍼 파라미터 튜닝
첫번째로 튜닝해볼 파라미터는 트리의 깊이이다. GricSearchCV를 이용해서 max_depth가 어떤 값일 때 최적의 성능을 내는지 확인해보자.
from sklearn.model_selection import GridSearchCV

params = {
    'max_depth' : [6, 8, 10, 12, 16, 20, 24]
}

grid_cv = GridSearchCV(dt_clf, param_grid=params, scoring='accuracy', cv=5, verbose=1)
grid_cv.fit(x_train, y_train)
print('GridSearchCV 최고 평균 정확도 수치 : {0:.4f}'.format(grid_cv.best_score_))
print('GridSearchCV 최적 하이퍼 파라미터 : ', grid_cv.best_params_)
GridSearchCV 최고 평균 정확도 수치 : 0.8513
GridSearchCV 최적 하이퍼 파라미터 : {'max_depth': 16}
max_depth가 16일 때 85.13%의 성능을 내는것을 확인할 수 있다.
# 각 max_depth 값마다 성능값 추출
cv_results_df = pd.DataFrame(grid_cv.cv_results_)
cv_results_df[['param_max_depth', 'mean_test_score']]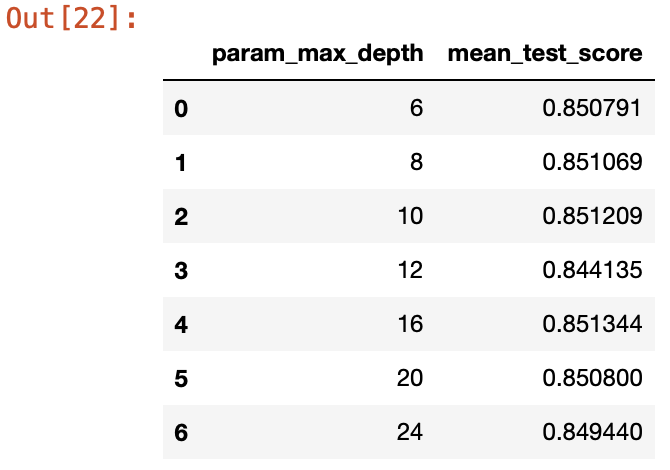
이번엔 GridSearch 말고 별도의 데이터로 학습시킨후 테스트해보자.
max_depths = [6, 8, 10, 12, 16, 20, 24]

for depth in max_depths:
    dt_clf = DecisionTreeClassifier(max_depth=depth, random_state=156)
    dt_clf.fit(x_train, y_train)
    pred = dt_clf.predict(x_test)
    accuracy = accuracy_score(y_test, pred)
    print('max_depth = {0}, 정확도 : {1}'.format(depth, accuracy))
max_depth = 6, 정확도 : 0.8557855446216491
max_depth = 8, 정확도 : 0.8707159823549372
max_depth = 10, 정확도 : 0.8673227010519172
max_depth = 12, 정확도 : 0.8646080760095012
max_depth = 16, 정확도 : 0.8574821852731591
max_depth = 20, 정확도 : 0.8547675602307431
max_depth = 24, 정확도 : 0.8547675602307431
원본 테스트 데이터로 시험해본 결과 max_depth = 8일때가 최고이다. 8이후부터는 정확도가 계속적으로 감소한다. 이처럼 결정 트리가 깊어질수록 과적합의 영향력이 커져 정확도가 감소하므로, 하이퍼 파라미터를 통해 깊이를 제어해야 한다.
이번엔 min_samples_splits도 같이 split해보려고 한다.
GridSearchCV와 원본 데이터 두가지로 똑같이 평가를 해보자.
- GrdiSearchCV
params = {
    'max_depth' : [6, 8, 10, 12, 16, 20, 24],
    'min_samples_split' : [16, 24]
}

grid_cv = GridSearchCV(dt_clf, param_grid=params, scoring='accuracy', cv=5, verbose=1)
grid_cv.fit(x_train, y_train)
print('GridSearchCV 최고 평균 정확도 수치 : {0:.4f}'.format(grid_cv.best_score_))
print('GridSearchCV 최적 하이퍼 파라미터 : ', grid_cv.best_params_)
GridSearchCV 최고 평균 정확도 수치 : 0.8549
GridSearchCV 최적 하이퍼 파라미터 : {'max_depth': 8, 'min_samples_split': 16}
- 원본 데이터
max_depths = [6, 8, 10, 12, 16, 20, 24]
min_samples_split = [16, 24]

for depth in max_depths:
    for split in min_samples_split:
        dt_clf = DecisionTreeClassifier(max_depth=depth, min_samples_split=split,random_state=156)
        dt_clf.fit(x_train, y_train)
        pred = dt_clf.predict(x_test)
        accuracy = accuracy_score(y_test, pred)
        print('max_depth = {0}, min_samples_split = {1},정확도 : {2}'.format(depth, split, accuracy))
max_depth = 6, min_samples_split = 16,정확도 : 0.8551068883610451
max_depth = 6, min_samples_split = 24,정확도 : 0.8551068883610451
max_depth = 8, min_samples_split = 16,정확도 : 0.8717339667458432
max_depth = 8, min_samples_split = 24,정확도 : 0.8696979979640312
max_depth = 10, min_samples_split = 16,정확도 : 0.8598574821852731
max_depth = 10, min_samples_split = 24,정확도 : 0.8601968103155752
max_depth = 12, min_samples_split = 16,정확도 : 0.8571428571428571
max_depth = 12, min_samples_split = 24,정확도 : 0.8578215134034611
max_depth = 16, min_samples_split = 16,정확도 : 0.8598574821852731
max_depth = 16, min_samples_split = 24,정확도 : 0.8506956226671191
max_depth = 20, min_samples_split = 16,정확도 : 0.8564642008822532
max_depth = 20, min_samples_split = 24,정확도 : 0.8506956226671191
max_depth = 24, min_samples_split = 16,정확도 : 0.8564642008822532
max_depth = 24, min_samples_split = 24,정확도 : 0.8506956226671191
두가지로 테스트해본 결과 depth = 8, splits=16일때의 정확도가 높다.
