
[C#과 유니티, 실전 게임으로 제대로 시작하기]섹션4. 스터디
아이템 구현하기
Item 클래스
Item 동작 정의
- 시간이 지나면 사라지도록 한다.(DestroyAfterTime())
- 아이템을 획득하면 아이템 기능이 적용되도록 한다.(ApplyItem())
- 에셋 폴더에 Item폴더를 생선한 후 Item, Coin(코인을 획득하도록 하는 아이템이다.), SpeedUp(Player의 스피드가 빨라지도록하는 아이템이다.) 스크립트를 생성한다.
- 부모클래스 Item스크립트를 상속받도록 한다.
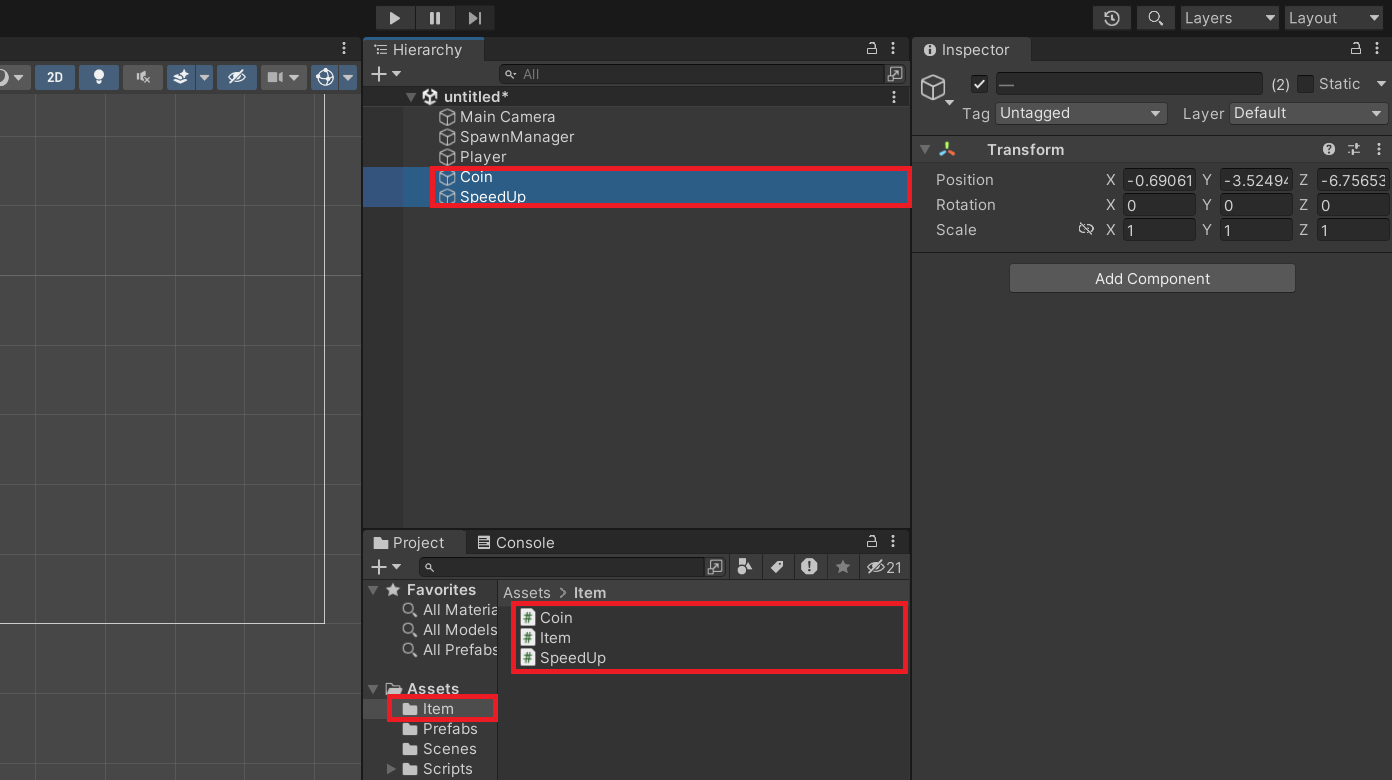
- Player가 움직여 Item과 충돌했을 때 Item이 실행되어야한다.(Collider과 Rigidbody component를 달아준다.

Item 스크립트
public abstract class Item : MonoBehaviour
{
	void Start(){
    	DestroyAfterTime();
    }

	public abstract void DestroyAfterTime();//일정 시간이 지난 후 gameObject가 사라지도록 한다.
    										//아이템이 적용되었을 때 Coin gameobject와 SpeedUp gameObject는 다른 동작을 하기 때문에 추상메서드로 구현한다.
    public abstract void ApplyItem();//아이템이 적용되고 동작을 하도록한다.
    public void DestroyThis(){ //gameobject를 제거하도록한다.
    	Destroy(gameobject);
    }
    void OnCollosionEnter2D(Collision2D coll){ //item과 충돌했을 때 실행하는 메서드이다.
    	if(coll.gameObject.ComponentTag("Player")){ //만약 Component의 Tag가 Player라면 ApplyItem함수를 실행한다.
        	ApplyItem();
        }
    }
}
Coin 스크립트
public class Coin : Item
{
	public override void DestroyAfterTime(){ //DestroyAfterTime함수가 호출되고 5초 뒤에 DestroyThis함수를 호출하도록한다.
    	Invoke("DestroThis", 5.0f);
    }
    public override void ApplyItem(){//코인 아이템을 먹으면 Coin
   		DestroyThis();
    }

}
SpeedUp 스크립트
Player 스피드를 높이도록 하기 위하여 ApplyItem()에는 다음과 같은 기능을 구현해야한다.
- 플레이어를 찾는다.
- Player Controller 스크립트에 접근한다.
- Player Controller 스크립트의 Speed 값을 찾아서 높여준다.
public class SpeedUp : Item
{
	public override void DestroyAfterTime(){
    	Invoke("DestroyThis", 3.0f);
    }

    public override void ApplyItem(){
     	GameObject player = GameObject.find("Player");//find()는 유니티 Hierarchy에서 gameObject를 찾아주는 역할을 한다.
        					 //find()인수로 Player를 작성했기 때문에 Player를 찾는다.
		PlayerController controller = player.GetComponent<PlayerController>(); // GetComponent<>를 활용하여 Player Controller에 접근한다.
		controller.speed *= 1.1f; //기존의 controller가 가지고 있는 스피드값을 약 10%만큼 증가하도록 한다.
		DestroyThis();

    }
}
해결하고 싶은 문제
문제1> Collider가 Scene에 많아져서 충돌하면 안될 gameObject들이 서로 충돌한다.
(Item gameObject와 Bullet gameObject가 서로 충돌한다.)
문제1 해결방법
gameObject들의 충돌을 제한하도록 해야한다.
Inspector 중 Layer를 조정한다.
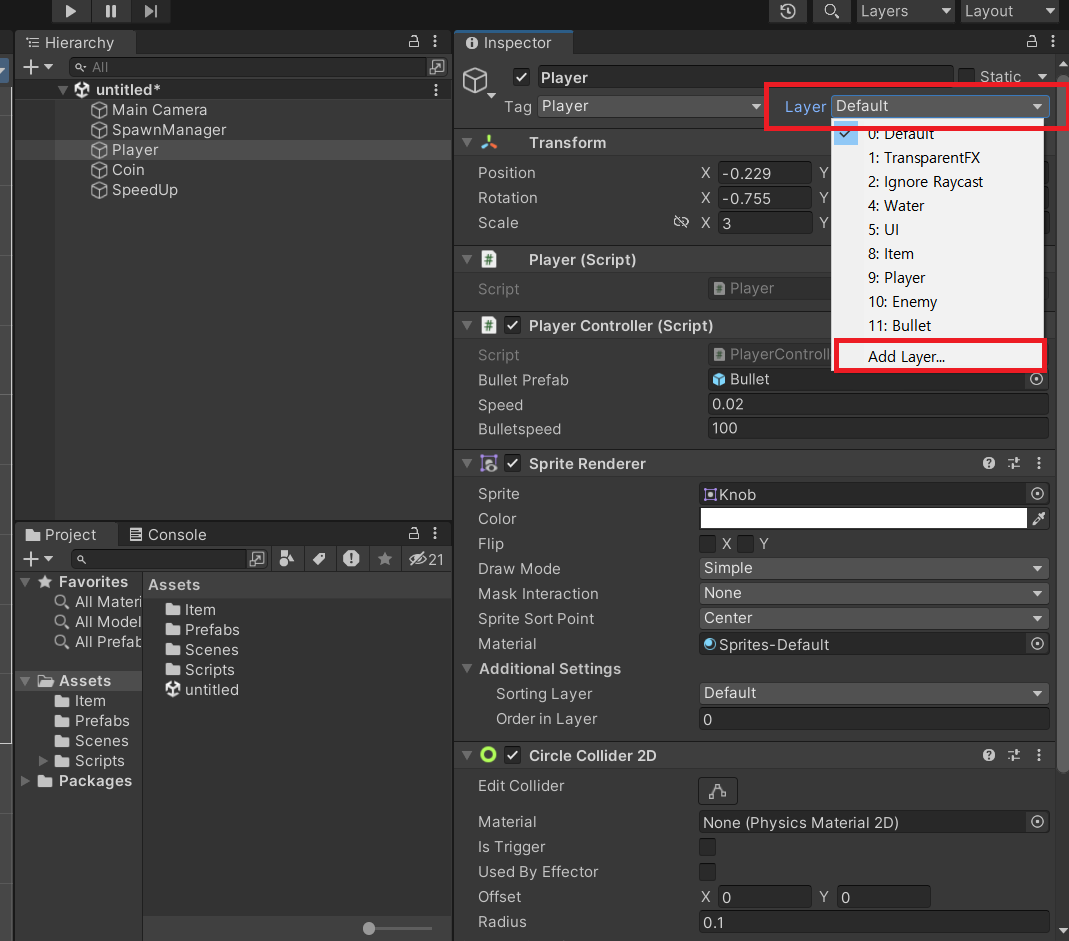
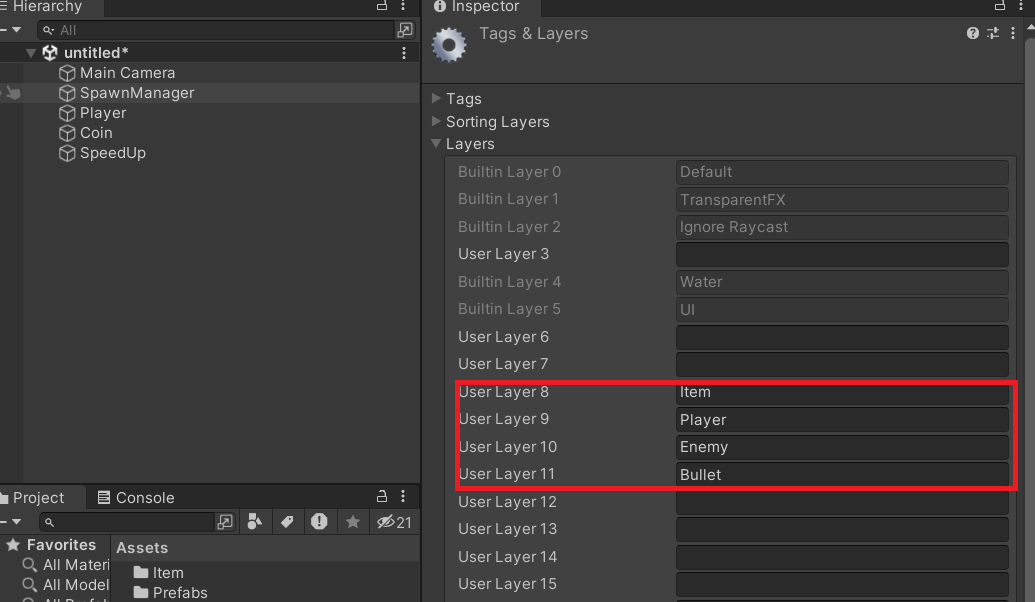
Item, Player, Enemy, Bullet Layer를 만든 뒤 각각의 GameObject에 적용한다.
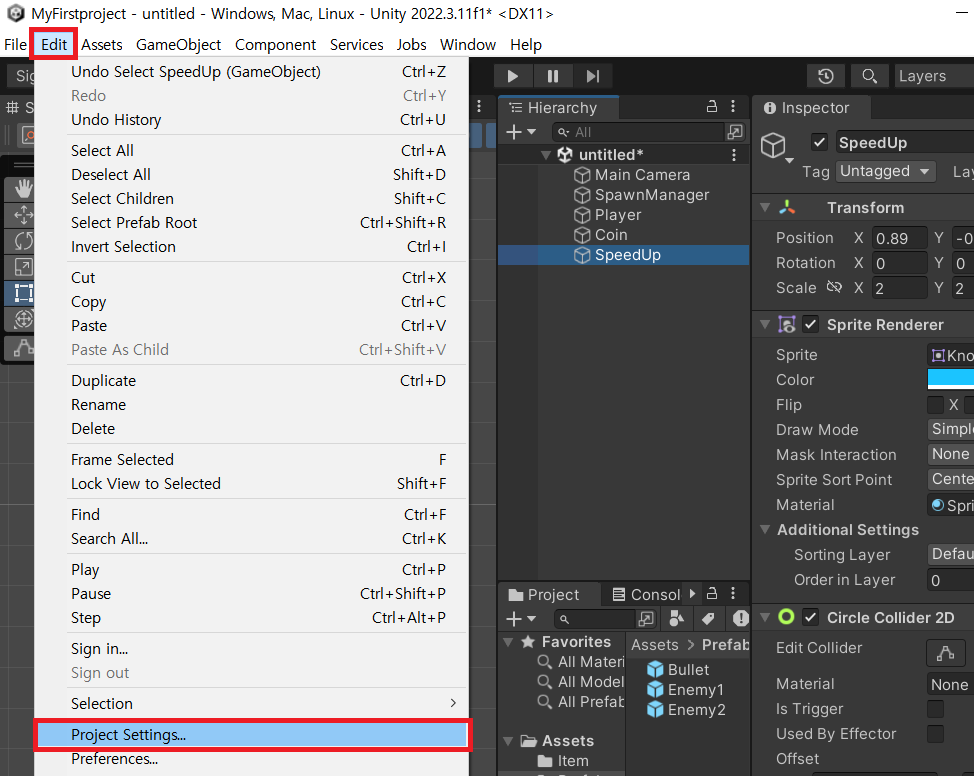

Layer Collision Matrix(층의 충돌을 제한할 수 있도록 한다.)
충돌시킬 Layer를 선택한다.(예를 들어 가로Item축과 세로Player축이 겹치는 공간이 체크되어 있으므로 Item과 Player는 충돌한다. 가로Item축과 세로Bullet, Enemy, Item축이 겹치는 공간에는 체크되어있지 않으므로 충돌되지 않는다.)
Layer Collision Matrix를 활용하여 원치 않는 충돌을 방지할 수 있다. Collider의 개수가 많아지면 Sence에 있는 Collider들의 충돌 여부를 검사해야하기 때문에 연산량이 많아진다.(연산량이 많아지면 배터리가 광탈되거나 발열이 심해진다.) 연산량을 최소화하기 위해 Layer Collision Matrix를 미리 체크해두는 것이 좋다.
Point 구조체
Item gameObject들을 무작위로 생성하기 위한 기능을 구현한다.
Item gameObject들을 위한 ItemManager gameObject를 생성한 후, Item이 여러개 생성할 수 있도록 Prefab화 해준다.
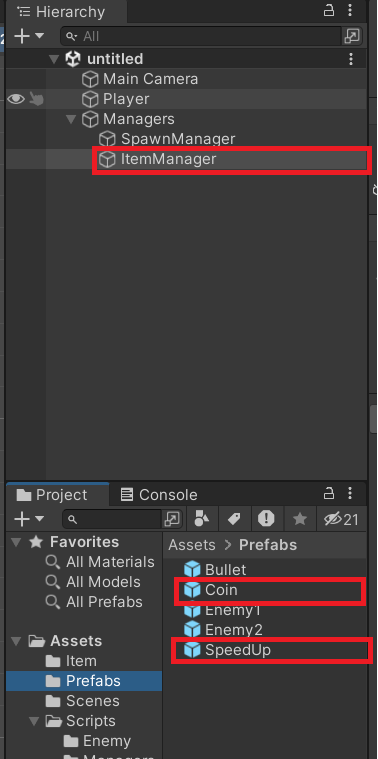
ItemManager 스크립트를 생성 후 ItemManager gameObject에 부착한다.
public GameObject Coin;
public GameObject SpeedUp;
따로 선언해도 좋지만, 배열을 활용하려 선언하는 것이 효율적이다.
public GameObject[] ItemPrefabs;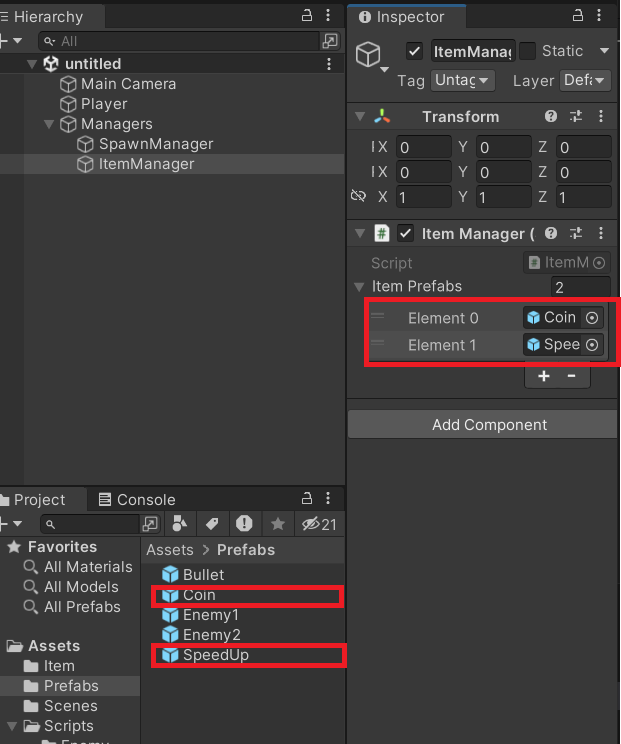
public 배열로 선언하여 각각의 공간에 Coin과 SpeedUp 프리팹을 담아준다.
ItemManager 스크립트
using UnityEngine;

public class ItemManager : MonoBehaviour
{
    public GameObject[] ItemPrefabs;


    void Start(){
        for(int i = 0; i<5;i++){
            Points points = new Points();
            GameObject itemPrefab = ItemPrefabs[Random.Range(0,ItemPrefabs.Length)]; //itemPrefab변수에 ItemPrefabs에 있는 gameObject를 랜덤으로 담을 것이다.
                                                                                    //Random.Range(0,ItemPrefabs.Length)는 0부터 ItemPrefabs의 길이. 즉, 0이상 2미만인 숫자가 랜덤으로 들어간다.
            Vector2 pos = points[Random.Range(0,points.GetLength())].GetPos(); //pos의 변수에 points배열 중 하나를 랜덤으로 골라 GetPos()를 활용하여 Vector2값으로 출력한다.
            SpawnItem(itemPrefab, pos);
        }
    }

    void SpawnItem(GameObject itemPrefab, Vector2 pos){ //어떤 아이템을 스폰할 수 있는 메서드이다.
        GameObject item = Instantiate(itemPrefab); //item변수에 전달받은 itemPrefab을 저장한다.
        item.transform.position = pos; //생성된 item의 transform의 position 값을 pos로 지정한다.
    /*
    만약 void Start(){
        SpawnItem(ItemPrefabs[0], new vector2(1,0));
    }으로 실행한다면, (1,0)위치에 ItemPrefabs[0]에 담겨있는 gameObject가 게임 씬에 출력된다.
    */

    }
}

class Points{ //Enemy 스크립트에서 따로 작성하지 않고 랜덤으로 Enemy를 생성하기 위해서 class Points를 선언하였다.
   public Point[] points = {
        new Point(0,0),
        new Point(0,1),
        new Point(-1,0),
        new Point(-2,0),
        new Point(0,2)
    };

    public Point this[int index]{
        get{
            return points[index];
        }
        set{
            points[index]=value;
        }
    }

    public int GetLength(){
        return points.Length;
    }
}

public struct Point{
    int x;
    int y;

    public Point(int x, int y){ //개체를 생성할 때 x,y값을 초기화할 수 있다.
        this.x=x;
        this.y=y;
    }

    public Vector2 GetPos(){ //해당 Point의 x,y값을 Vector2값으로 반환해준다.
        return new Vector2(this.x,this.y);
    }
}
IEffect 인터페이스
Interface를 활용하여 Item의 투명도를 조절하는 기능을 구현한다.
앞서 작성한 스크립트에 이어 작성한다.
Item 스크립트
public interface IEffect{ //아이템을 불투명하게 하는 함수이다.
  void GetOpaque();
}
Coin 스크립트
using UnityEngine;
using UnityEngine.UI;

public class Coin : Item,IEffect
{
    public override void DestroyAfterTime()
    {
        Invoke("DestroyThis", 5.0f);
        Invoke("GetOpaque", 3.0f);

    }
    public override void ApplyItem()
    {
        DestroyThis();
    }
    public void GetOpaque(){
        Color32 color = GetComponent<SpriteRenderer>().color; //color값을 담을 수 있는 자료형은 Color32이다.
        GetComponent<SpriteRenderer>().color = new Color32(color.r, color.g, color.b, 60); //투명도를 60으로 설정하였다.
    }
}
SpeedUp 스크립트
using UnityEngine;

public class SpeedUp : Item,IEffect
{
     public override void DestroyAfterTime(){
        Invoke("DestroyThis",3.0f);
        Invoke("GetOpaque", 1.5f);
    }
    public override void ApplyItem()
    {
        GameObject player = GameObject.Find("Player");
        PlayerController controller = player.GetComponent<PlayerController>();
        controller.speed*=1.1f;

        DestroyThis();
    }
      public void GetOpaque(){
        Color32 color = GetComponent<SpriteRenderer>().color;
        GetComponent<SpriteRenderer>().color = new Color32(color.r, color.g, color.b, 60);
    }
}
