
이전 포스팅: nGrinder와 Pinpoint를 이용한 성능 / 부하 테스트1 - 테스트 계획
📝 테스트 스트립트 작성
테스트를 진행하기 위해서는 먼저 시나리오 기반으로 스크립트를 작성해야합니다. nGrinder는 Groovy나 Jython를 지원합니다.
Grinder 이용
nGrinder는 Grinder라는 오픈소스 기반에서 개발되었습니다. Grinder의 TCPProxy를 이용해서 직접 스크립트를 작성하는 것이 아닌 사용자의 인터넷 요청 액션을 recording하여 자동으로 스크립트를 만들 수 있습니다. nGrinder에서도 제공했던 기능이라고 하는데 현재는 안된다고 하네요.
저는 MAC 기준으로 진행하겠습니다
1) 먼저 Grinder를 다운 받고 압축을 풀어줍니다.
https://sourceforge.net/projects/grinder/
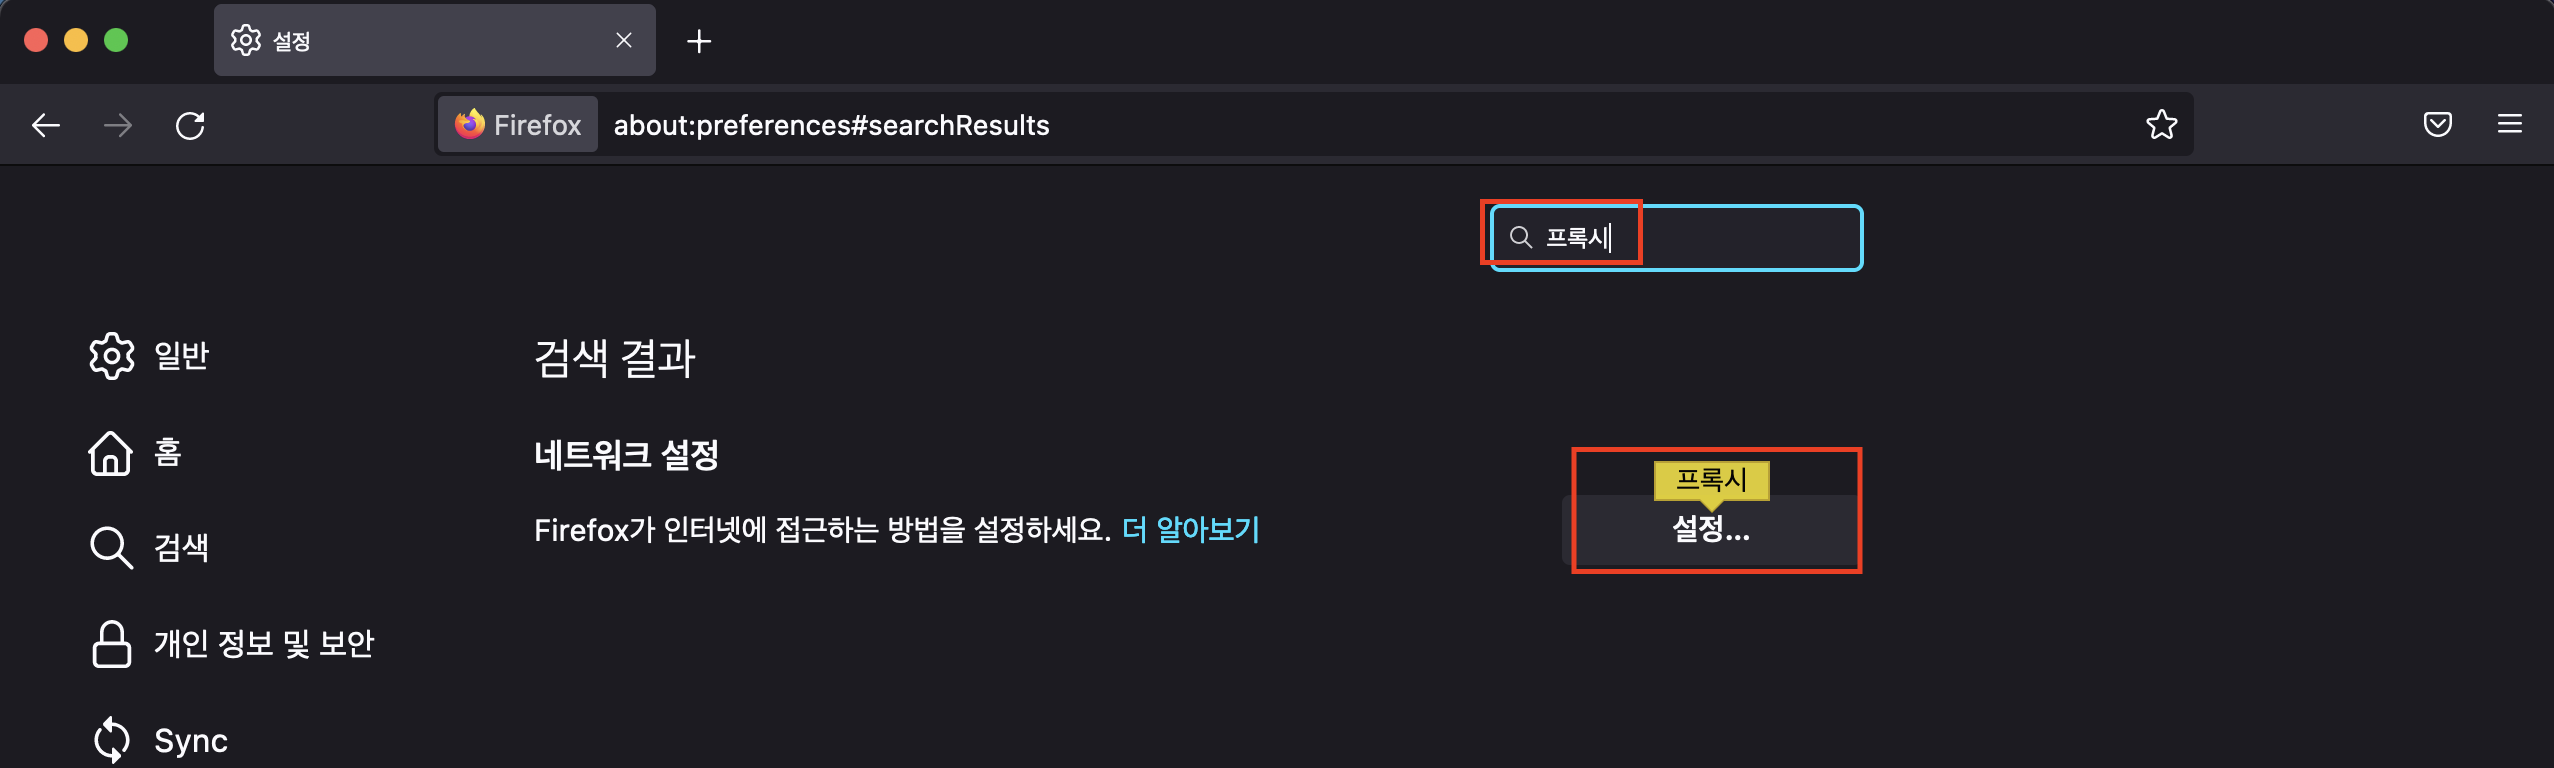
2) Firefox 프록시 설정하기
Firefox의 설정에 들어간 후, 프록시를 검색해줍니다.
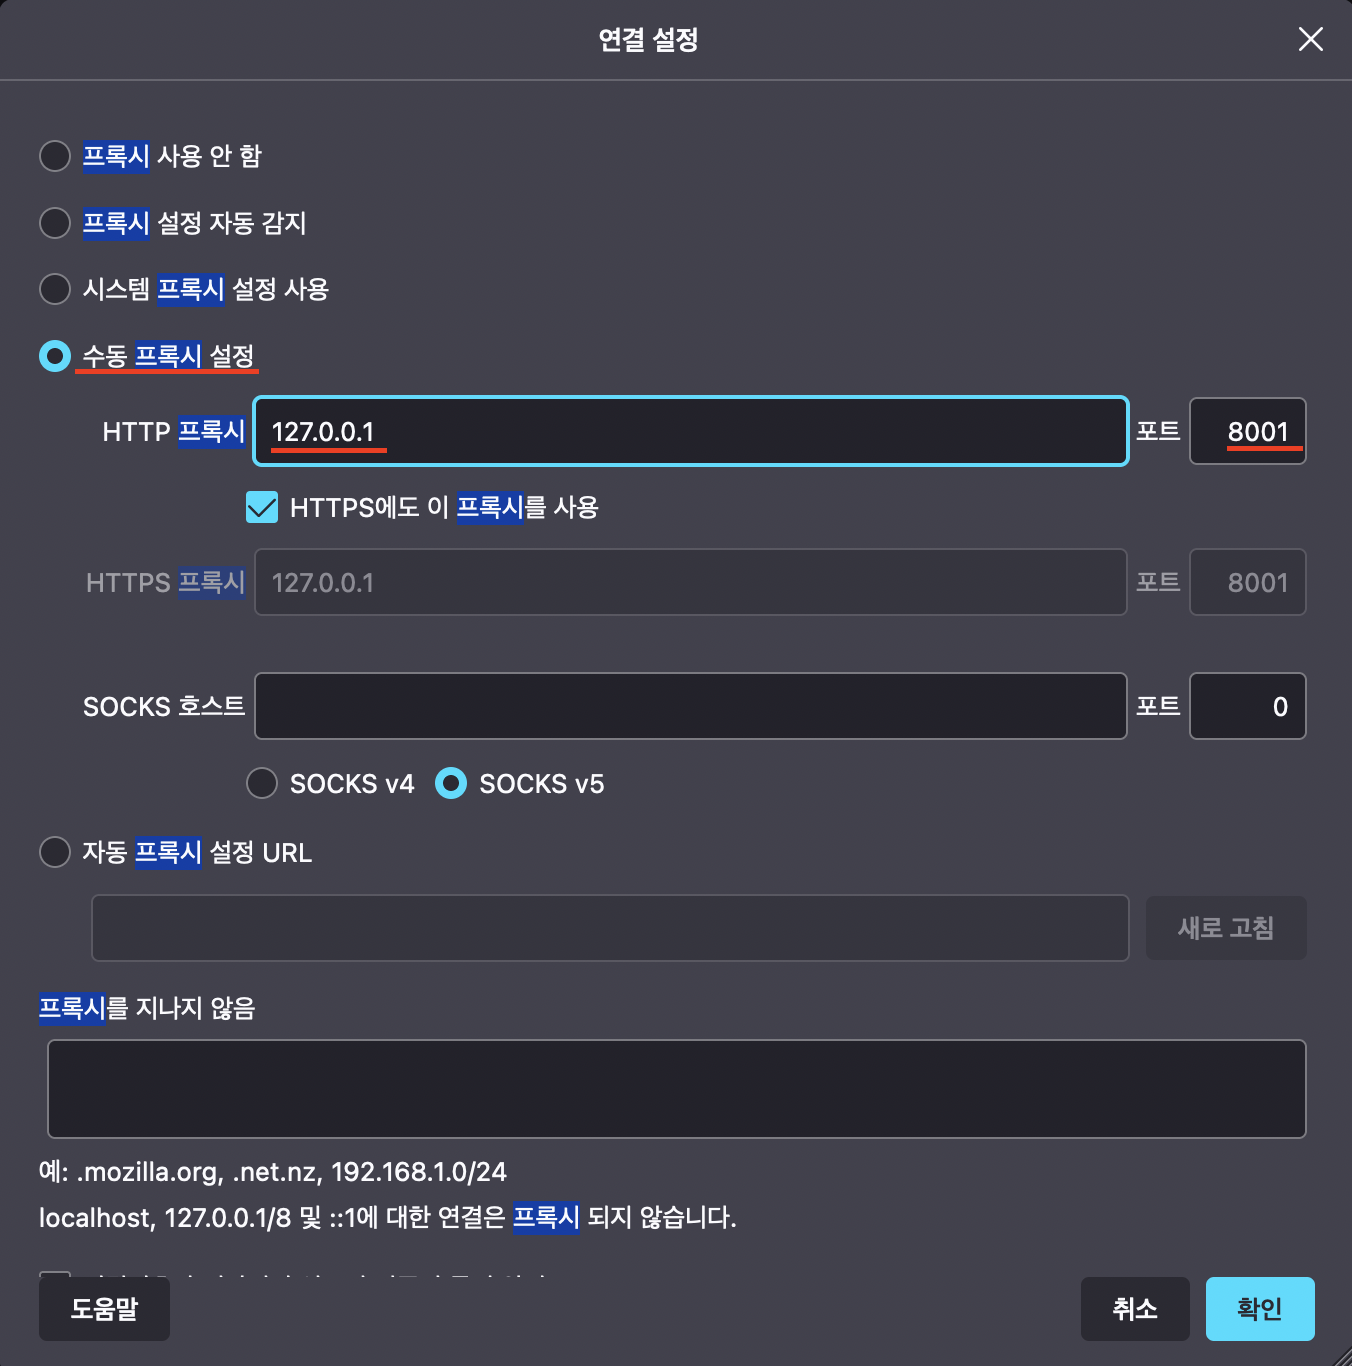
그리고 수동 프록시 설정을 아래와 같이 127.0.0.1로 해줍니다.
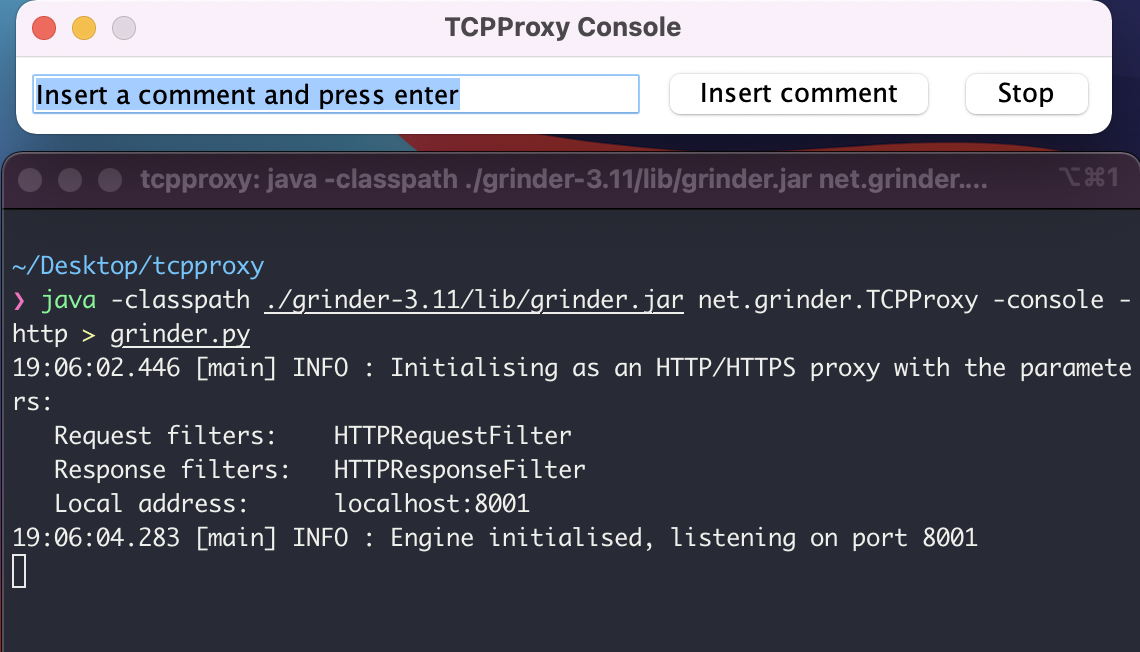
3) Grinder 압축을 푼 폴더가 있는 경로에서 아래의 명령어를 입력합니다.
java -classpath ./grinder-3.11/lib/grinder.jar net.grinder.TCPProxy -console -http > ${스크립트 이름}

// example
java -classpath ./grinder-3.11/lib/grinder.jar net.grinder.TCPProxy -console -http > grinder.py
이때 주의할 점이 저는 java11을 사용중이었는데 자바 버전 오류가 났습니다. 자바 버전을 1.8로 바꿔주니까 정상적으로 작동했습니다.
이렇게 아래와 같이 TCPProxy Console이 뜨면 성공입니다.
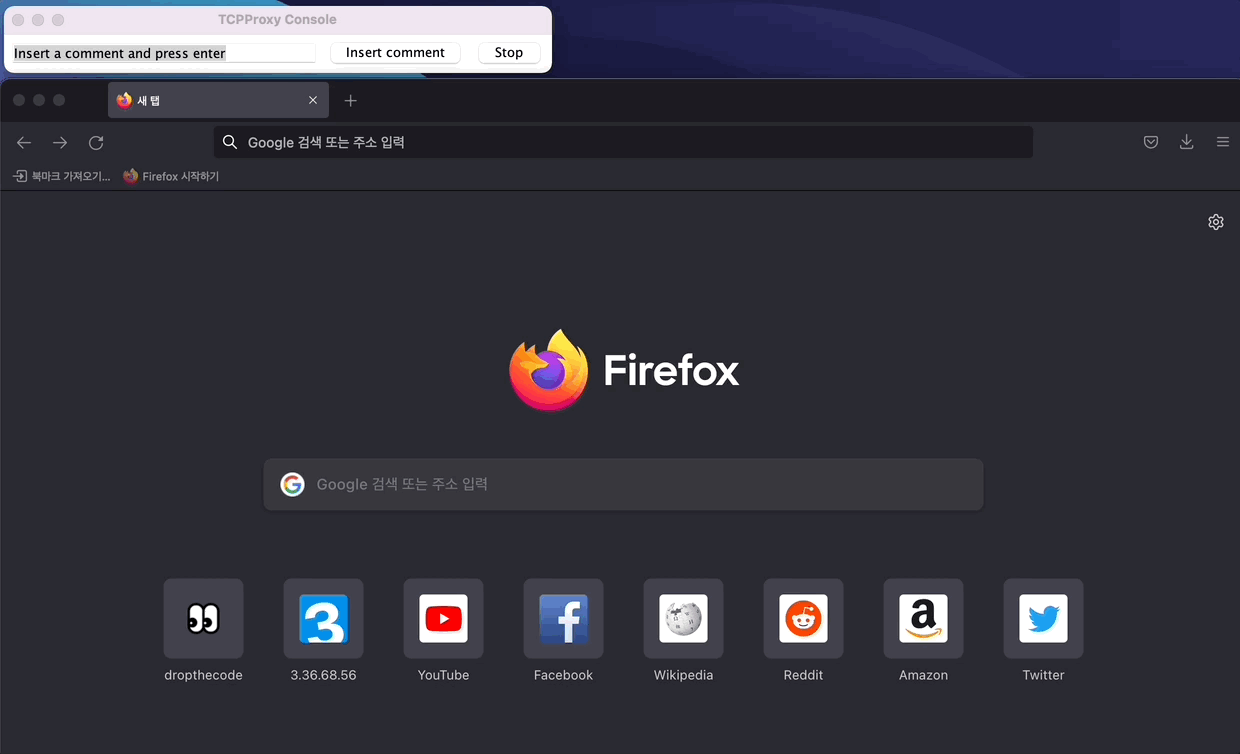
4) 설정해 준 Firefox를 이용해서 원하는 인터넷 액션을 수행하고 TCPProxy의 stop를 누릅니다.
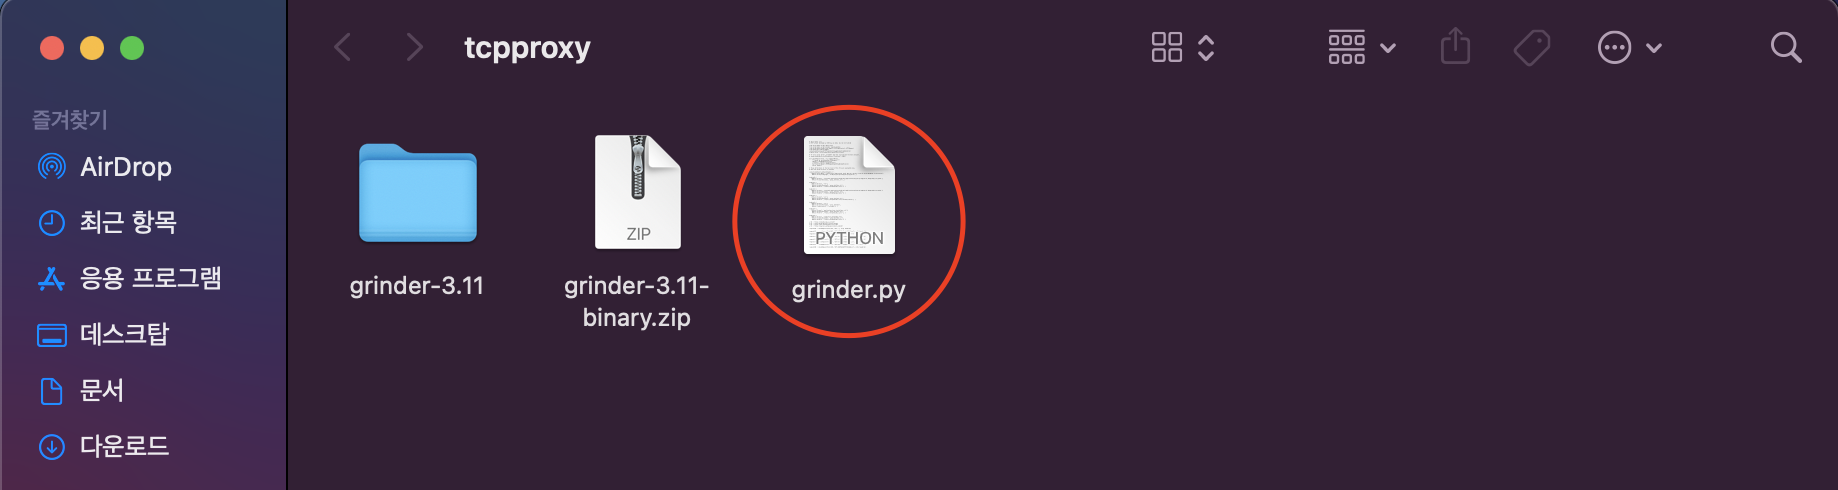
5) 스크립트가 생성된 것을 확인할 수 있습니다.
이 스크립트를 nGrinder에 올려서 사용할 수 있습니다.
그러나 이 방식은 Jython으로 생성되어 저 같은 경우는 파악하기가 좀 힘들었고, WAS만 테스트 하고 싶었는데, .html, .js와 같은 요청까지 모두 들어가게 되는 단점이 있었습니다. 그래서 이번에는 Groovy를 이용하여 직접 스크립트를 작성하는 방법을 사용했습니다.
직접 작성
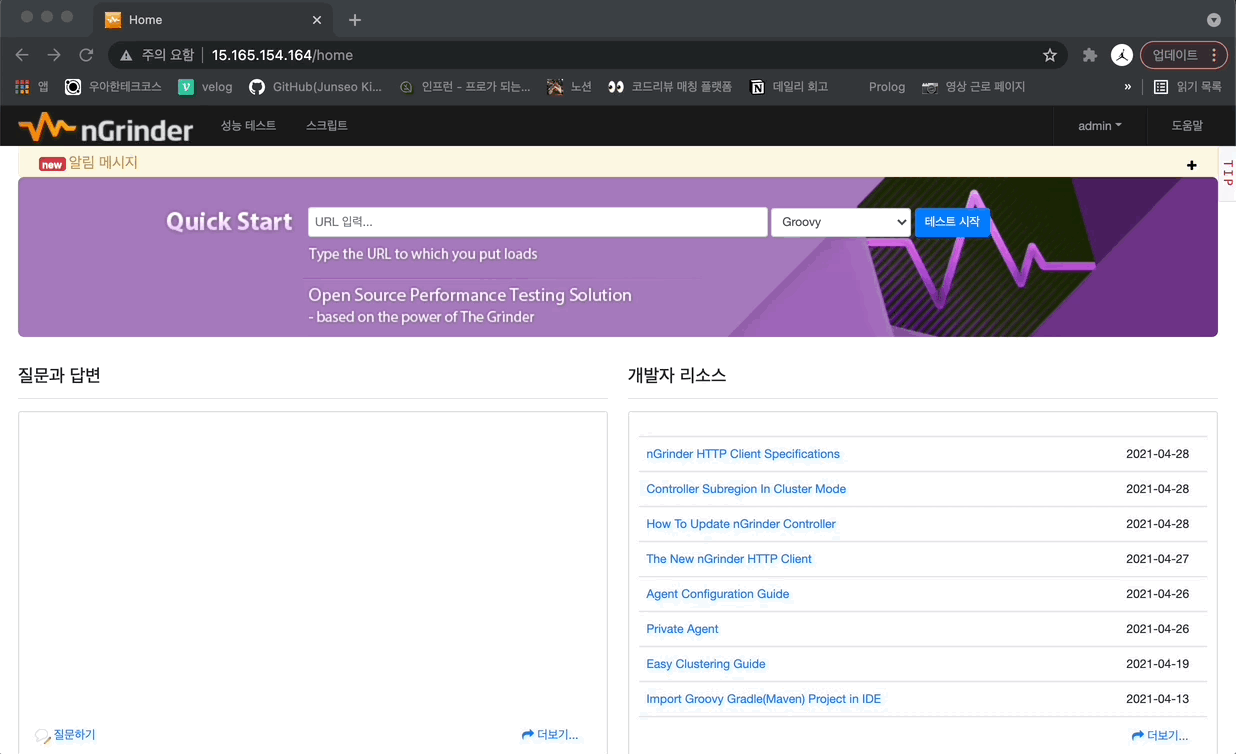
1) nGrinder controller 웹에 접속하여 스크립트 만들기를 클릭한다.
2) 그럼 예시 스크립트가 나옵니다. 이를 커스텀해서 사용하면 됩니다. 자바를 사용하셨다면 생긴 것이 비슷하여 나름 쉽게 작성하실 수 있습니다.
동작 방식이나, 문법 등은 구글신에게..
예시)
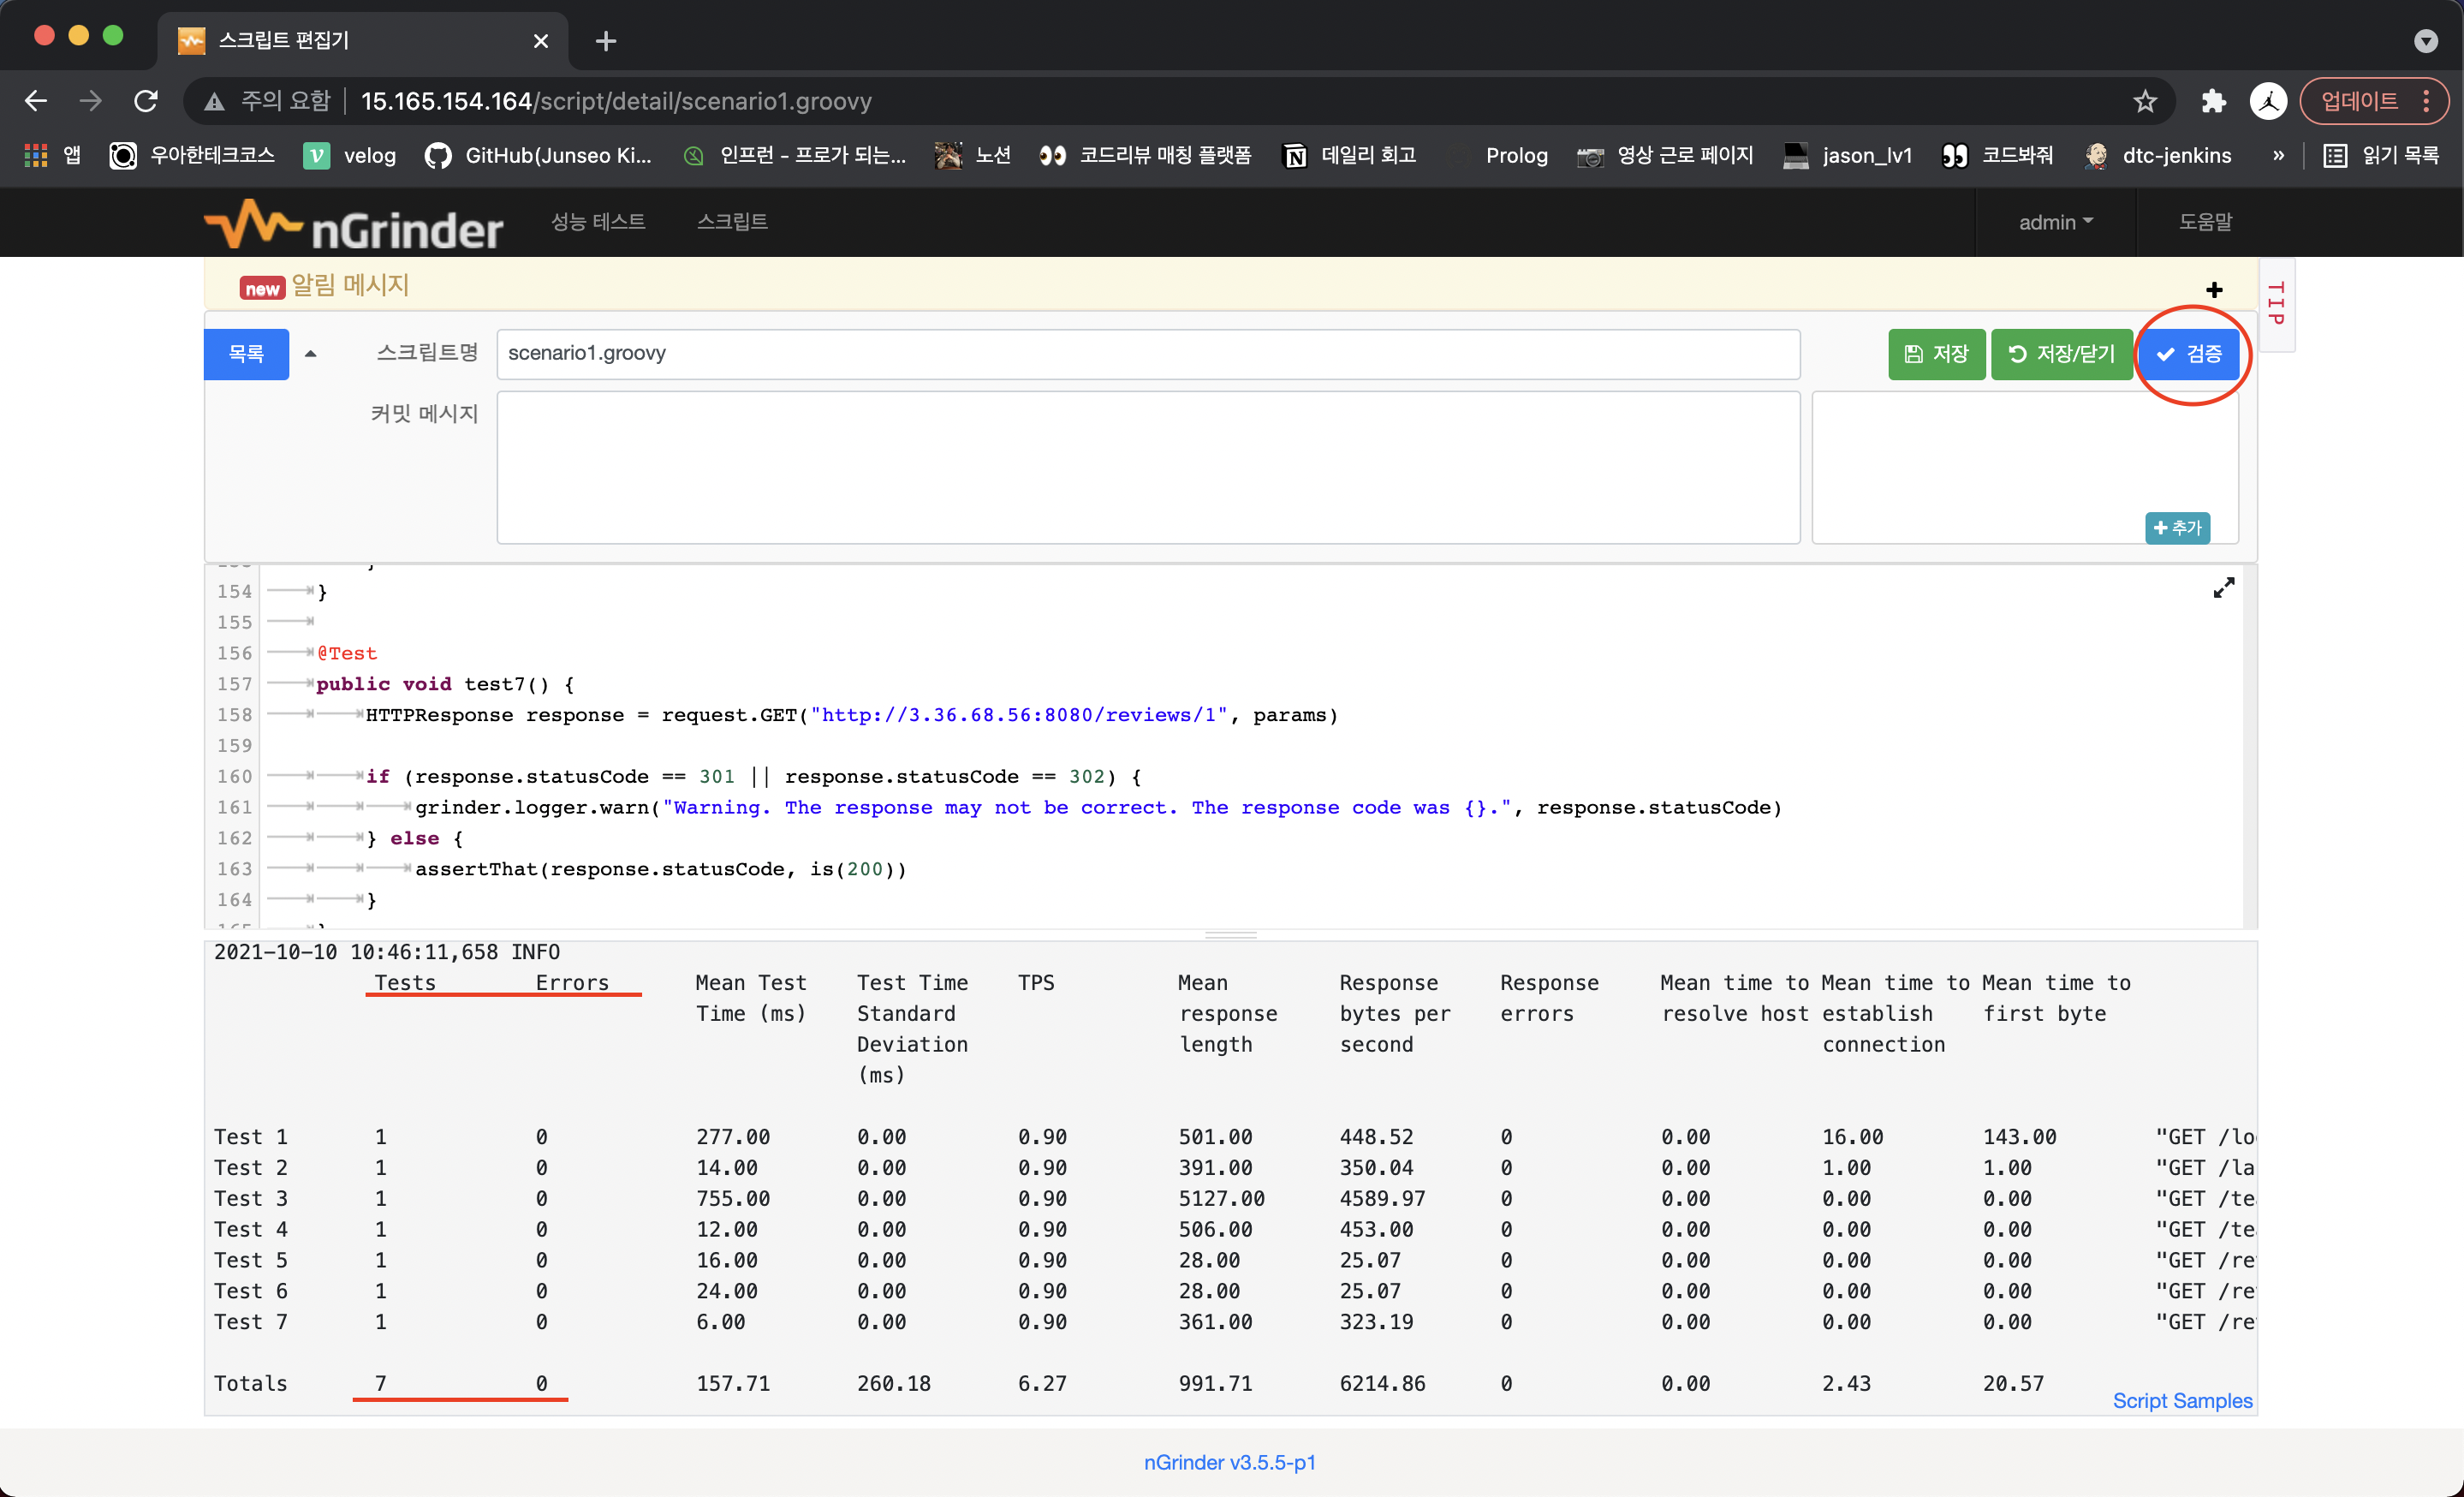
제가 아래의 시나리오를 테스트하기 위해 만든 스크립트를 첨부합니다.
로그인 - 언어 기술 목록 조회 - 리뷰어 목록 조회 - 리뷰어 단일 조회 - 내가 받은 리뷰 목록 조회 - 내가 리뷰한 리뷰 목록 조회 - 리뷰 상세 조회
@RunWith(GrinderRunner)
class TestRunner {
	public static GTest test1
	public static GTest test2
	public static GTest test3
	public static GTest test4
	public static GTest test5
	public static GTest test6
	public static GTest test7

	public static HTTPRequest request
	public static Map<String, String> headers = [:]
	public static Map<String, Object> params = [:]
	public static List<Cookie> cookies = []

	@BeforeProcess
	public static void beforeProcess() {
		HTTPRequestControl.setConnectionTimeout(300000)

		test1 = new GTest(1, "GET /login/oauth?providerName={provider}&code={code}")
		test2 = new GTest(2, "GET /languages")
		test3 = new GTest(3, "GET /teachers?language=java")
		test4 = new GTest(4, "GET /teachers/{id}")
		test5 = new GTest(5, "GET /reviews/teacher/{id}")
		test6 = new GTest(6, "GET /reviews/student/{id} with token")
		test7 = new GTest(7, "GET /reviews/{id}")

		request = new HTTPRequest()

		grinder.logger.info("before process.")
	}

	@BeforeThread
	public void beforeThread() {
		test1.record(this, "test1")
		test2.record(this, "test2")
		test3.record(this, "test3")
		test4.record(this, "test4")
		test5.record(this, "test5")
		test6.record(this, "test6")
		test7.record(this, "test7")

		grinder.statistics.delayReports = true
		grinder.logger.info("before thread.")
	}

	private String accessToken
	private String userId = "1"

	@Test
	public void test1() {
		def slurper = new JsonSlurper()
		def toJSON = { slurper.parseText(it) }

		HTTPResponse response = request.GET("http://3.36.68.56:8080/login/oauth?providerName=github&code=a", params)

		def result = response.getBody(toJSON);

		accessToken = result.accessToken
		userId = result.id.toString()

		if (response.statusCode == 301 || response.statusCode == 302) {
			grinder.logger.warn("Warning. The response may not be correct. The response code was {}.", response.statusCode)
		} else {
			assertThat(response.statusCode, is(200))
		}
	}

	@Test
	public void test2() {
		HTTPResponse response = request.GET("http://3.36.68.56:8080/languages", params)

		if (response.statusCode == 301 || response.statusCode == 302) {
			grinder.logger.warn("Warning. The response may not be correct. The response code was {}.", response.statusCode)
		} else {
			assertThat(response.statusCode, is(200))
		}
	}

	@Test
	public void test3() {
		HTTPResponse response = request.GET("http://3.36.68.56:8080/teachers?language=java&page=30000", params)

		if (response.statusCode == 301 || response.statusCode == 302) {
			grinder.logger.warn("Warning. The response may not be correct. The response code was {}.", response.statusCode)
		} else {
			assertThat(response.statusCode, is(200))
		}
	}

	@Test
	public void test4() {
		HTTPResponse response = request.GET("http://3.36.68.56:8080/teachers/2", params)

		if (response.statusCode == 301 || response.statusCode == 302) {
			grinder.logger.warn("Warning. The response may not be correct. The response code was {}.", response.statusCode)
		} else {
			assertThat(response.statusCode, is(200))
		}
	}

	@Test
	public void test5() {
		HTTPResponse response = request.GET("http://3.36.68.56:8080/reviews/teacher/" + userId)

		if (response.statusCode == 301 || response.statusCode == 302) {
			grinder.logger.warn("Warning. The response may not be correct. The response code was {}.", response.statusCode)
		} else {
			assertThat(response.statusCode, is(200))
		}
	}

	@Test
	public void test6() {
		headers["Authorization"] = "Bearer " + accessToken
		request.setHeaders(headers)
		HTTPResponse response = request.GET("http://3.36.68.56:8080/reviews/student/" + userId)

		if (response.statusCode == 301 || response.statusCode == 302) {
			grinder.logger.warn("Warning. The response may not be correct. The response code was {}.", response.statusCode)
		} else {
			assertThat(response.statusCode, is(200))
		}
	}

	@Test
	public void test7() {
		HTTPResponse response = request.GET("http://3.36.68.56:8080/reviews/1", params)

		if (response.statusCode == 301 || response.statusCode == 302) {
			grinder.logger.warn("Warning. The response may not be correct. The response code was {}.", response.statusCode)
		} else {
			assertThat(response.statusCode, is(200))
		}
	}
}
이때 주의할 점이 있습니다. 저와 같이 하나의 스크립트에 여러 요청이 포함된 경우. 각 테스트의 이름을 test1, test2 이런식으로 해주시는 것이 좋습니다. 그 이유는 제가 해본 결과 각 테스트가 알파벳 순으로 실행되기 때문입니다.
참고로 테스트의 순서에 따라 공유된 변수를 가져다 쓸 수 있습니다.(위의 accessToken, userId 참고)
3) 스크립트 작성 완료 후 우측 상단의 검증을 눌러 Error가 발생하지 않는다면 스크립트 작성이 완료됩니다.
이번 포스팅에서는 시나리오 스크립트를 작성해보았습니다. 다음 포스팅에서는 실제 테스트를 진행하면서 개선해가는 과정을 포스팅하려고 합니다.

안녕하세요 ~ 포스트 잘 읽었습니다~ 혹시 로그인 할때 id,pw 정보는 ngrinder 테스트할때 어떻게 줄 수 있을까요??
시나리오처럼 로그인 넣고 할때 넣을 수 있는 방법이 있을까요?