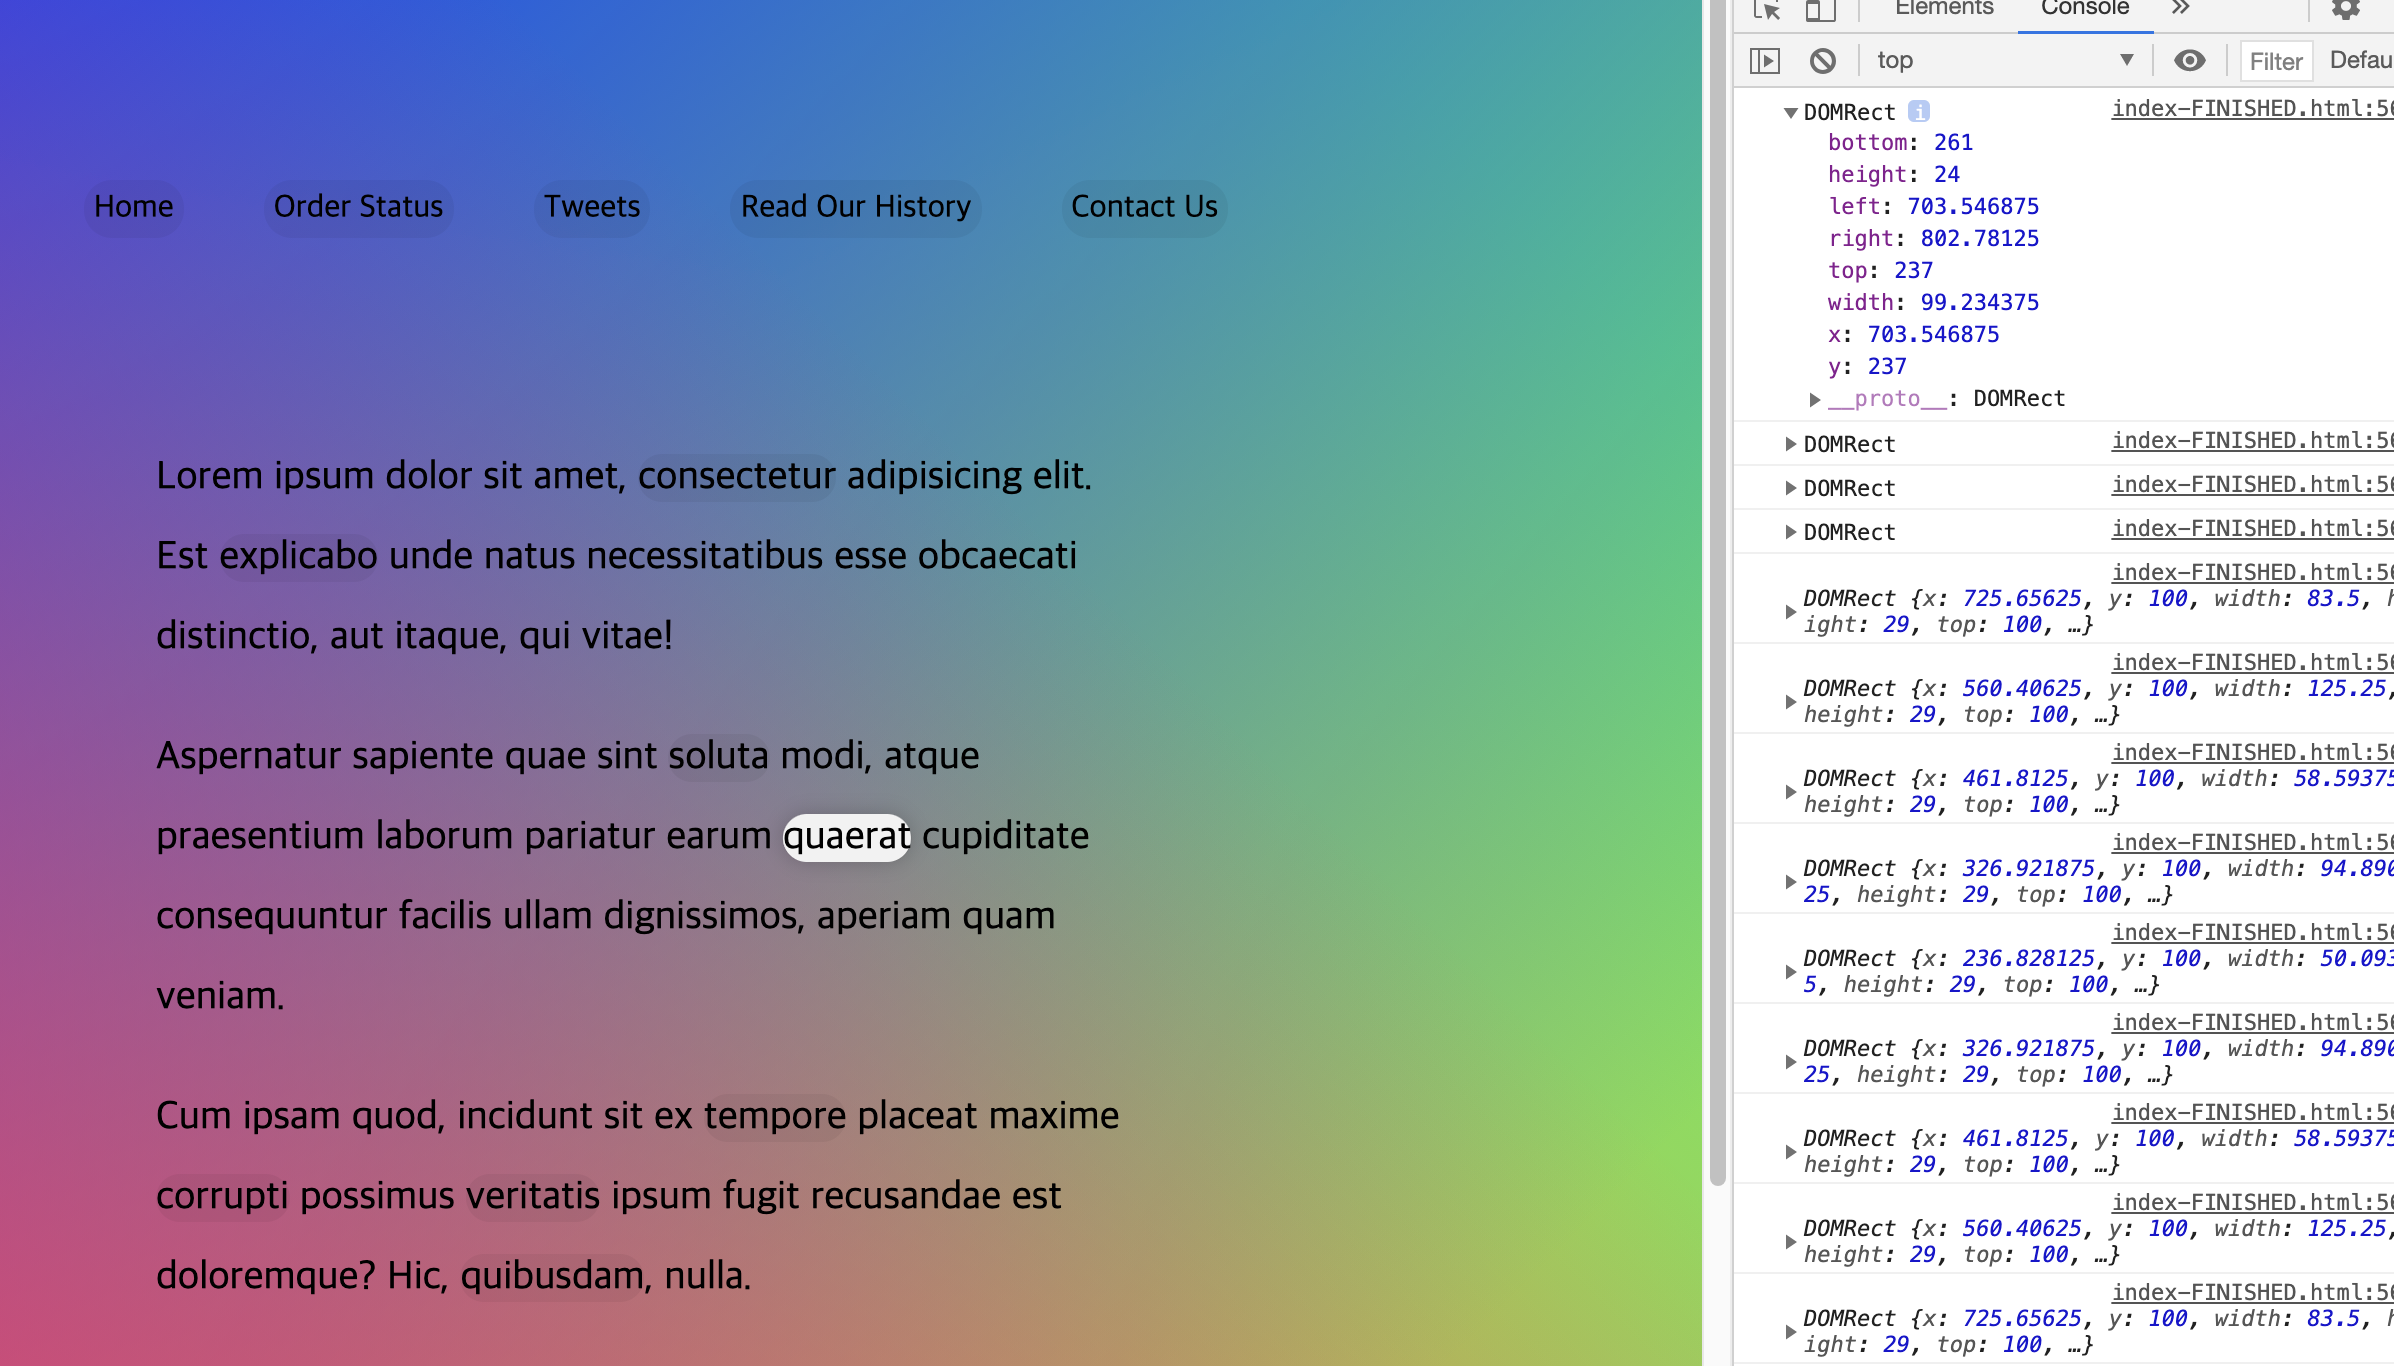
프로젝트 소개
- 마우스 포인터를 따라서 해당 텍스트의 길이와 위치에 맞게 하이라이트 효과가 되도록 구현 (stripe 웹페이지처럼, 메뉴 버튼에 hovering 하면, 이에 따라 선택 가능한 하위 메뉴 박스가 열리는 효과와 동일)
배운 것들
- 'mouseover' event와 'mouseenver' event 차이
: mouseover는 해당 element위에 마우스 포인터가 있는 한 계속 함수를 호출하지만, mouseenter는 해당 Element경계를 통해 진입하는 1회에 한하여 함수 실행 차이 - Element.getBoundingClientRect()
: Element의 크기와 위치값을 가져올 때 사용하는 method
: left, top, right, bottom, x, y, width, height의 8개 값을 가져옴
최종 코드
<script>
      const targetTx = document.querySelectorAll('a');
      const highlight = document.createElement('span');
      highlight.classList.add('highlight');
      document.body.appendChild(highlight);

      function highlightEffect() {
        const coordinate = this.getBoundingClientRect();
        const coord = {
          width: coordinate.width,
          height: coordinate.height,
          left: coordinate.left + window.scrollX,
          top: coordinate.top + window.scrollY,
        };

        highlight.style.width = `${coord.width}px`;
        highlight.style.height = `${coord.height}px`;
        highlight.style.transform = `translate(${coord.left}px, ${coord.top}px)`;
      }
      // 또는 아래도 OK
        // highlight.style.left = `${coord.left}px`;
        // highlight.style.top = `${coord.top}px`;

      targetTx.forEach((target) =>
        target.addEventListener('mouseenter', highlightEffect)
      );
    </script>
느낀 점/ 기억할 점
-
a 태그로 둘러싸인 텍스트의 길이와 위치가 전부 다양한 경우, 마우스 포인터를 옮겼을 때, 정확히 그 대상에만 highlight 효과를 적용시키는 게 포인트인 프로젝트였음
-
핵심개념은 getBoundingClientRect()을 통해 대상 element의 크기와 위치값을 가져와서 효과를 적용시키는 것임
-
좀 더 active하고 사용자와 효과적으로 상호작용할 수 있는 기능으로 보임
-
top 값은 보고 있는 창에서 상단에서 현재 element의 상단 경계까지이므로, 전체 page 길이에서 top값을 지정하려면 scrollY를 더해야 전체 페이지 상단에서 element 위 경계까지의 값으로 환산됨
-
element 명에서 css 접근할 때는 항상 .style을 거쳐서 접근할 것(실수 해서 highlight.height식으로 접근했음)
