이번에는 버튼에 관해서 공부를 했다💻
대화형 Dice Roller 앱 만들기
버튼을 추가하고 로직을 더해 주사위를 굴리는 앱!
버튼 추가
Button(onClick = { /*TODO*/ }) {
	Text("Click") // 버튼에 들어갈 텍스트 (버튼 이름)
}
버튼에 동작 추가
위의 코드에서 TODO 부분에 코드를 작성하면 버튼을 눌렀을 때의 동작을 구현할 수 있다.
1 ~ 6 사이의 숫자 중 하나를 랜덤하게 골라서 주사위를 변경시켜주면 된다.
여기서 remember라는 개념이 등장한다.
컴포저블은 기본적으로 스테이트리스(Stateless)이다.
즉, 값을 보유하지 않고 시스템에서 언제든지 다시 구성할 수 있어 값이 재설정된다.
그러나 Compose를 사용하면 이를 간단하게 방지할 수 있다. 구성 가능한 함수는 remember 컴포저블을 사용하여 메모리에 객체를 저장할 수 있다.
- 1 ~ 6 사이의 랜덤 숫자를 저장할 변수를
remember컴포저블로 만든다.remember컴포저블을 사용하려면 함수를 전달해야 한다.
remember컴포저블 본문에서mutableStateOf()함수를 전달하고 함수에 1 인수를 전달한다.mutableStateOf()함수는 observable을 반환한다. 쉽게 말하면 변수 값이 업데이트되면 재구성이 트리거되고 결과 값이 반영되어 UI가 새로고침된다는 의미이다. LiveData 느낌!
// remember 컴포저블을 사용해 변수 선언
var result by remember { mutableStateOf(1) }

val imageResource = when (result) {
	1 -> R.drawable.dice_1
	2 -> R.drawable.dice_2
    3 -> R.drawable.dice_3
    4 -> R.drawable.dice_4
    5 -> R.drawable.dice_5
    else -> R.drawable.dice_6
}

// 1 ~ 6 사이의 랜덤 숫자가 선택됨
// 값이 변경되면 imageResource값도 변경되어 주사위 이미지가 변경됨
Button(onClick = { result = (1..6).random() }) {
	Text(stringResource(R.string.roll))
}
전체 코드
@Composable
fun DiceWithButtonAndImage(modifier: Modifier = Modifier) {
// 열 내에 있는 하위 요소가 너비에 따라 기기 화면의 중앙에 배치
Column(modifier = modifier,
horizontalAlignment = Alignment.CenterHorizontally) {
var result by remember { mutableStateOf(1) }
// result 값에 따리 이미지 리소스 변경
val imageResource = when (result) {
1 -> R.drawable.dice_1
2 -> R.drawable.dice_2
3 -> R.drawable.dice_3
4 -> R.drawable.dice_4
5 -> R.drawable.dice_5
else -> R.drawable.dice_6
}
Image(
painter = painterResource(imageResource),
contentDescription = result.toString() // 이미지 설명
)
// 이미지와 버튼 사이에 공간 16dp만큼의 공간 추가
Spacer(modifier = Modifier.height(16.dp))
// 1 ~ 6사이의 숫자 중에서 랜덤으로 수를 선택
Button(onClick = { result = (1..6).random() }) {
Text(stringResource(R.string.roll)) // 버튼에 들어갈 텍스트 (버튼 이름)
}
}
}
// 앱 실행
class MainActivity : ComponentActivity() {
override fun onCreate(savedInstanceState: Bundle?) {
super.onCreate(savedInstanceState)
setContent {
AndroidComposeTheme {
// A surface container using the 'background' color from the theme
Surface(
modifier = Modifier.fillMaxSize(),
color = MaterialTheme.colorScheme.background
) {
DiceWithButtonAndImage(modifier = Modifier
.fillMaxSize()
.wrapContentSize(Alignment.Center))
}
}
}
}
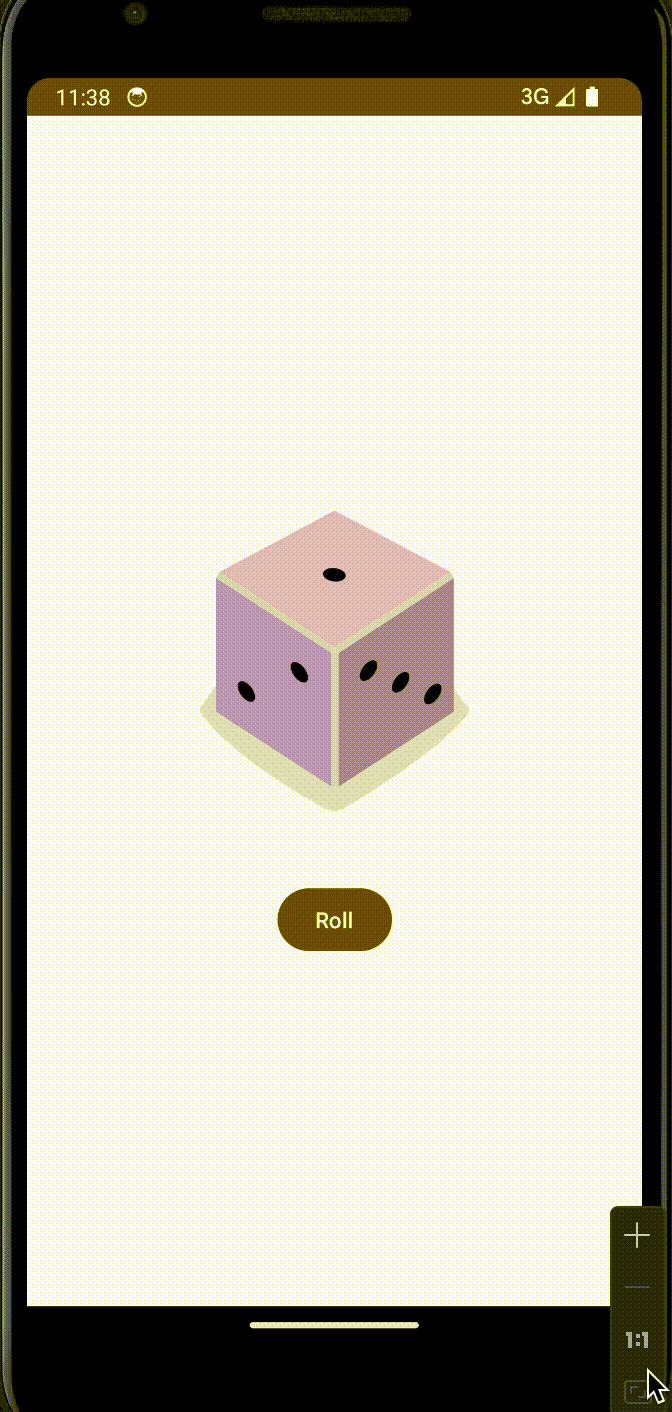
}실행 화면
연습 : 클릭 동작 (디지털 레모네이드 앱 만들기)
Dice Roller에서 배운걸 응용해 간단한 디지털 레모네이트 앱 만들기!
Dice Roller와 비슷하게 구현하면 된다.
버튼에 이미지 추가하고 step(현재 단계), cnt (레몬 압축 횟수)를 추가해 step에 따라 버튼 이미지, 텍스트를 바꿔주면 끝!
단계 돌면서 어떤 이미지와 텍스트가 들어갈지 정하는 함수와 버튼 이미지, 텍스트를 설정하는 함수 두 개를 만들면 된다.
그리고 마지막으로 디자인을 넣어주면 끝!
Surface
- 일반적으로 카드 또는 패널과 같은 요소를 나타내는데 사용
- 그림자, 경계선, 배경색 등과 같은 시각적 효과를 자동으로 처리하며, 표면에 콘텐츠를 배치하는데 사용
Scaffold
- 앱의 기본 레이아웃 구조를 제공하는 컴포넌트
- Material Design 가이드라인을 따르며, 앱의 상단 앱바, 하단 탐색 막대, 콘텐츠 영역 등을 설정할 수 있다.
Scaffold 구성 요소
- TopAppBar
- BottomAppBar
- FloatingActionButton
- Content
전체 코드
로직 짜고 배치하는 부분은 쉽게 할 수 있었지만 색상 바꾸고 위에 상단 앱바 추가하는 부분은 Compose에서 처음 해보는거라 솔루션 코드를 참고했당🫣
@OptIn(ExperimentalMaterial3Api::class)
@Composable
fun LemonApp() {
    var step by remember { mutableStateOf(1) } // 현재 단계
    var cnt by remember { mutableStateOf(0) } // 레몬 압착 횟수

    Scaffold(
        topBar = {
            CenterAlignedTopAppBar(
                title = {
                    Text(
                        text = stringResource(R.string.lemonade_appname),
                        fontWeight = FontWeight.Bold
                    )
                },
                colors = TopAppBarDefaults.smallTopAppBarColors(
                    containerColor = MaterialTheme.colorScheme.primaryContainer,
                    titleContentColor = MaterialTheme.colorScheme.onPrimaryContainer,
                    navigationIconContentColor = MaterialTheme.colorScheme.onPrimaryContainer,
                    actionIconContentColor = MaterialTheme.colorScheme.onPrimaryContainer
                )
            )
        }
    ) { innerPadding ->
        Surface(
            modifier = Modifier
                .fillMaxSize()
                .padding(innerPadding)
                .background(MaterialTheme.colorScheme.tertiaryContainer),
            color = MaterialTheme.colorScheme.background
        ) {
            when (step) {
                1 -> {
                    LemonImageAndText(
                        textResource = R.string.lemon_select,
                        drawableResource = R.drawable.lemon_tree,
                        contentResource = R.string.lemon_tree_content,
                        onImageClick = {
                            step = 2
                            cnt = (2..4).random() // 2 ~ 4 사이의 랜덤 숫자로 압착 횟수 설정
                        }
                    )
                }

                2 -> {
                    LemonImageAndText(
                        textResource = R.string.lemon_sqeeze,
                        drawableResource = R.drawable.lemon_squeeze,
                        contentResource = R.string.lemon_content,
                        onImageClick = {
                            cnt--

                            if (cnt == 0) {
                                step = 3
                            }
                        }
                    )
                }

                3 -> {
                    LemonImageAndText(
                        textResource = R.string.lemon_drink,
                        drawableResource = R.drawable.lemon_drink,
                        contentResource = R.string.glass_lemon_content,
                        onImageClick = {
                            step = 4
                        }
                    )
                }

                4 -> {
                    LemonImageAndText(
                        textResource = R.string.lemon_again,
                        drawableResource = R.drawable.lemon_restart,
                        contentResource = R.string.empty_lemon,
                        onImageClick = {
                            step = 1
                        }
                    )
                }
            }
        }
    }

}

// 레모네이드 상태에 따라 버튼 이미지와 텍스트를 다르게 보여줌
@Composable
fun LemonImageAndText(
    textResource: Int,
    drawableResource: Int,
    contentResource: Int,
    onImageClick: () -> Unit,
    modifier: Modifier = Modifier
) {
    Column(
        modifier = Modifier.fillMaxSize(),
        horizontalAlignment = Alignment.CenterHorizontally,
        verticalArrangement = Arrangement.Center
    ) {
        Button(
            onClick = onImageClick,
            shape = RoundedCornerShape(40.dp),
            colors = ButtonDefaults.buttonColors(containerColor = MaterialTheme.colorScheme.tertiaryContainer)
        ) {
            Image(
                painter = painterResource(drawableResource),
                contentDescription = stringResource(contentResource), // 이미지 설명
                modifier = Modifier
                    // 이미지 크기 설정
                    .width(128.dp)
                    .height(160.dp)
                    .padding(24.dp) // 패딩 설정
            )
        }

        Spacer(modifier = Modifier.height(16.dp)) // 버튼과 텍스트 사이에 16dp 간격 추가

        Text(
            text = stringResource(id = textResource),
            fontSize = 18.sp
        )
    }
}
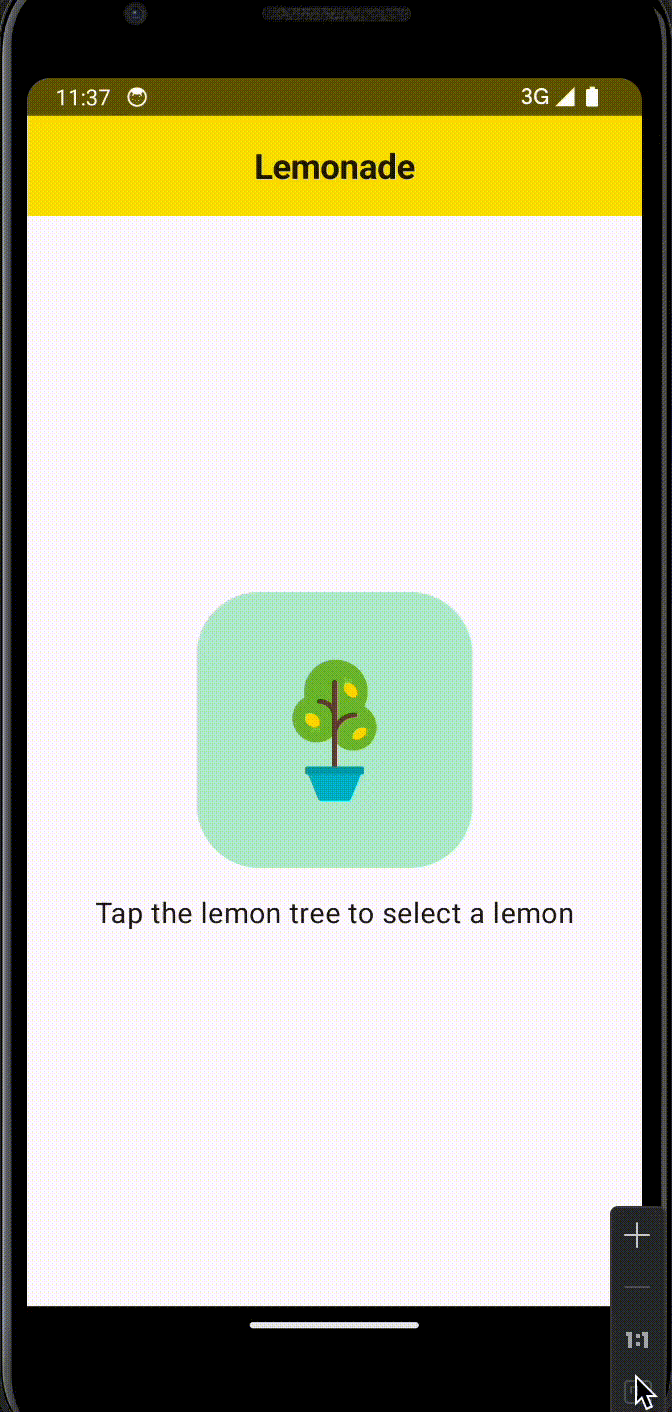
실행 화면
참조
코딩계의 떠오르는 태양☀️