과정 설명
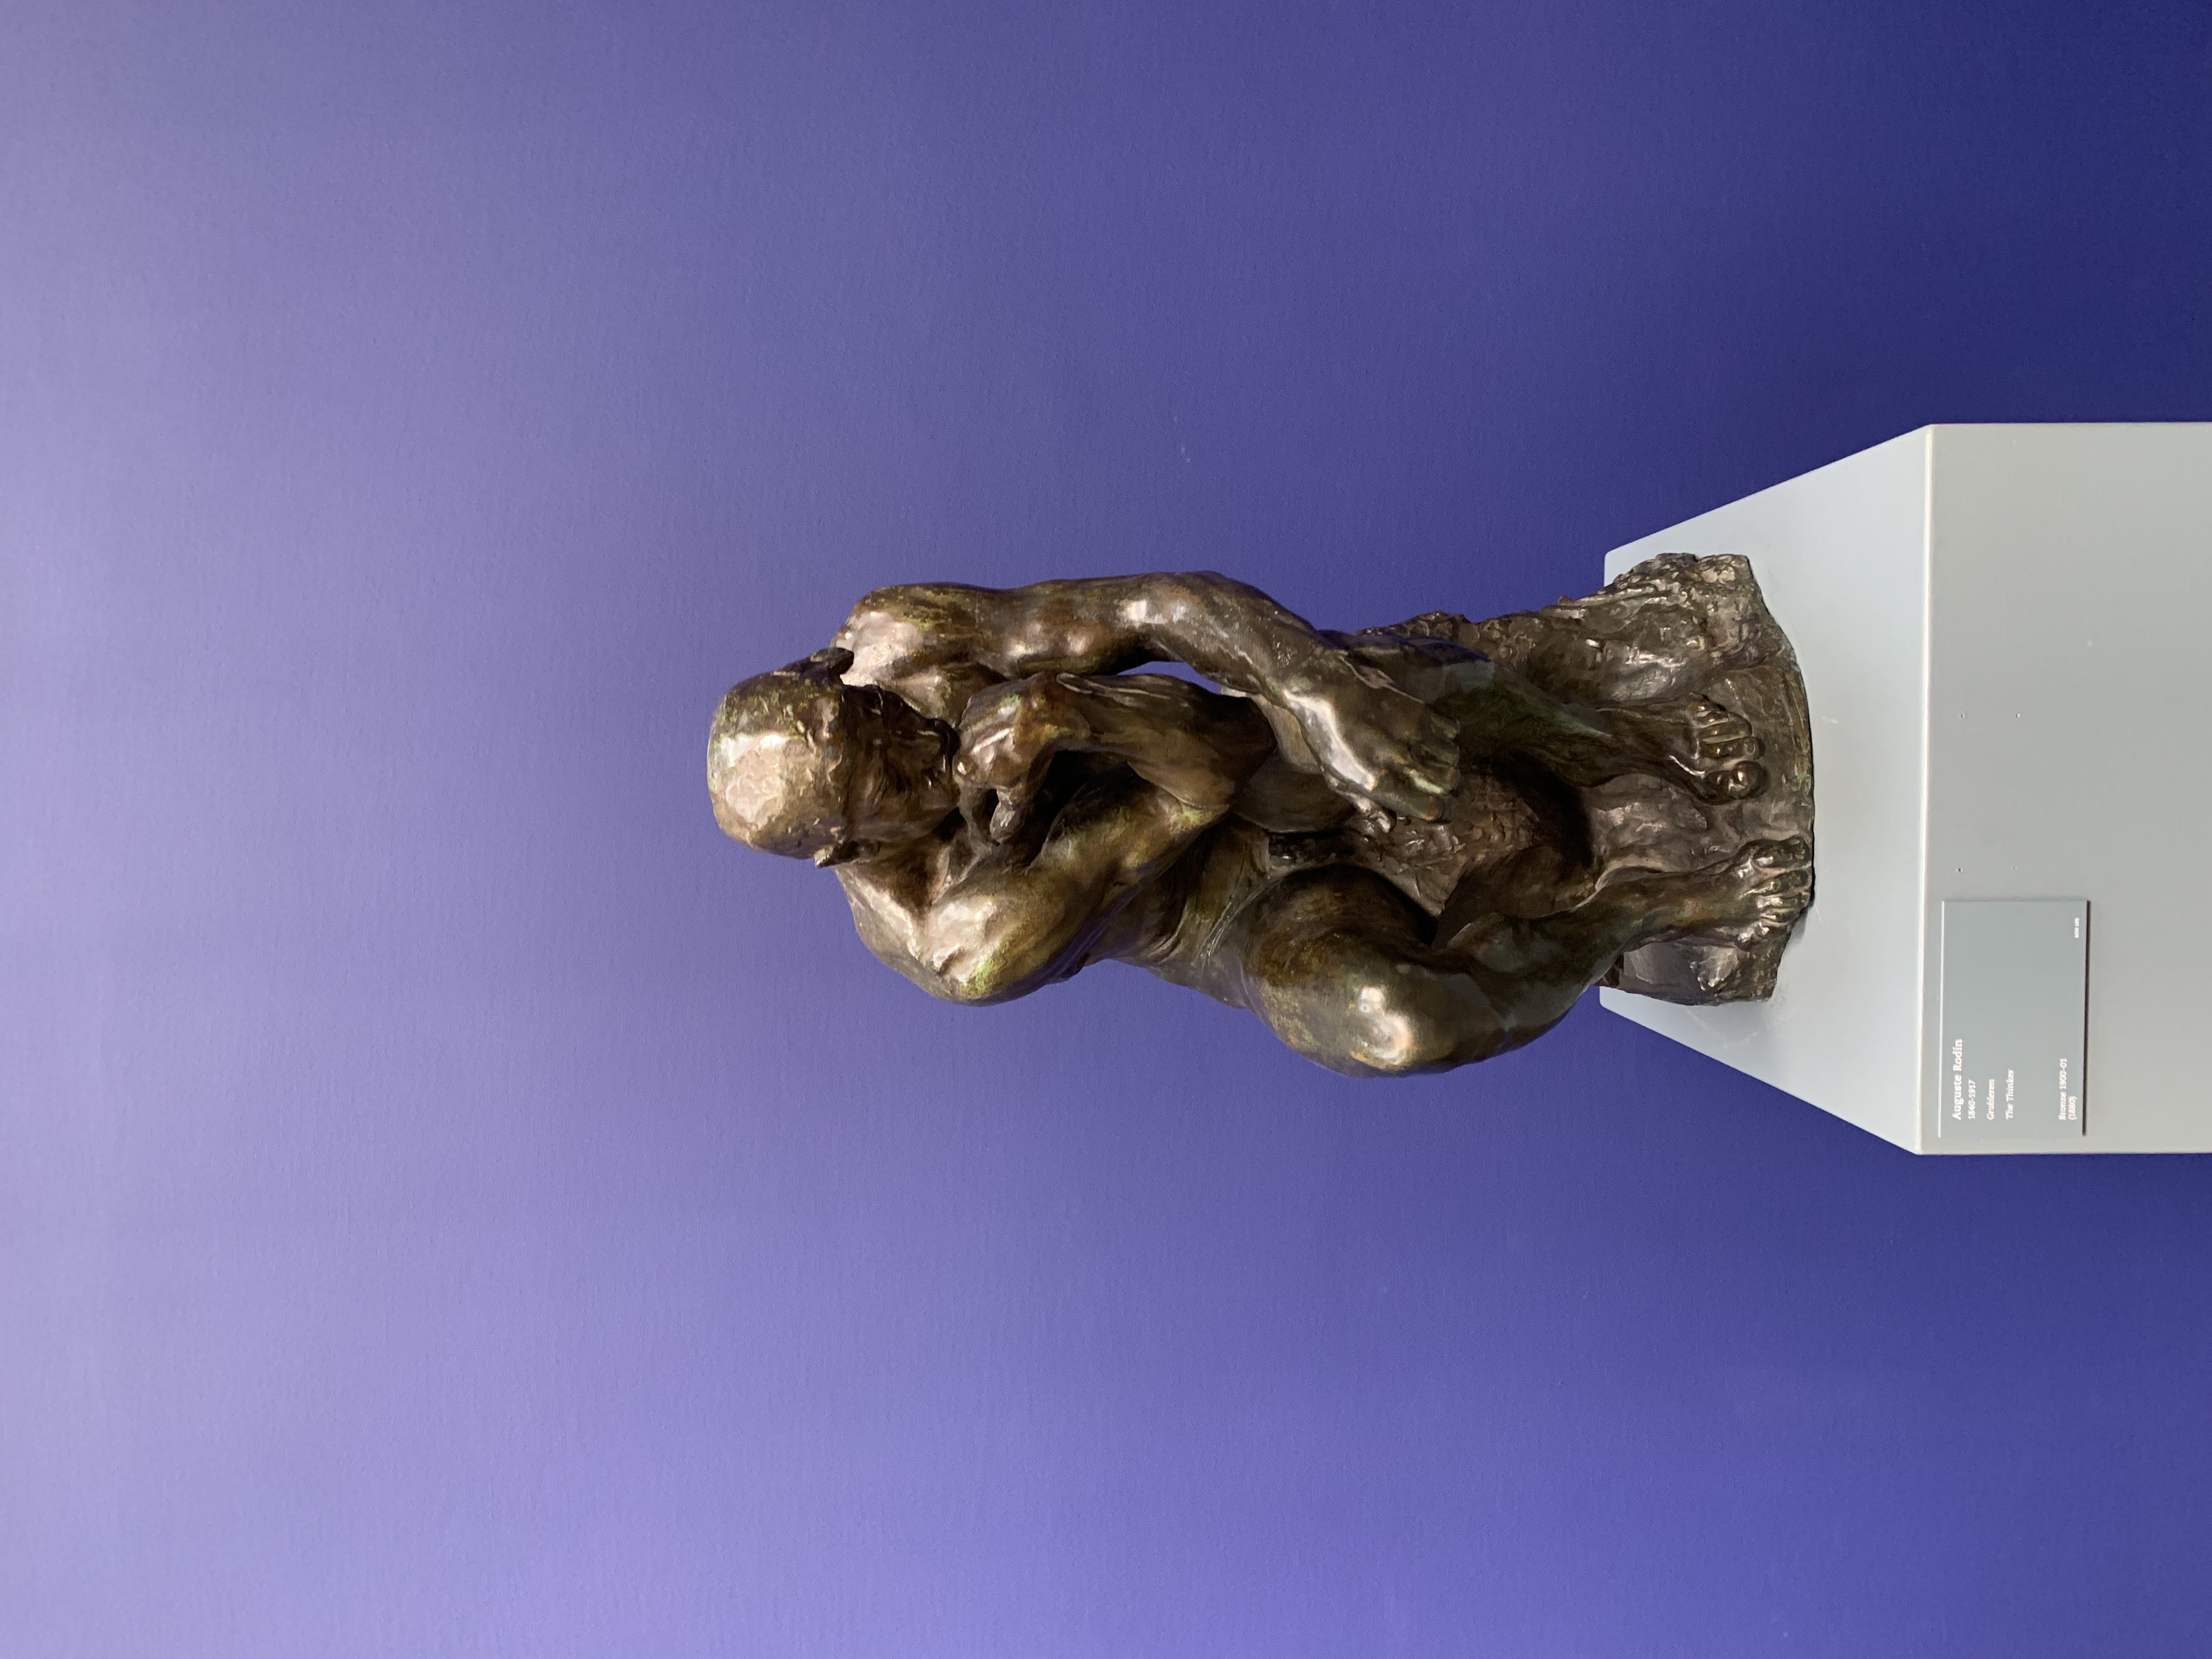
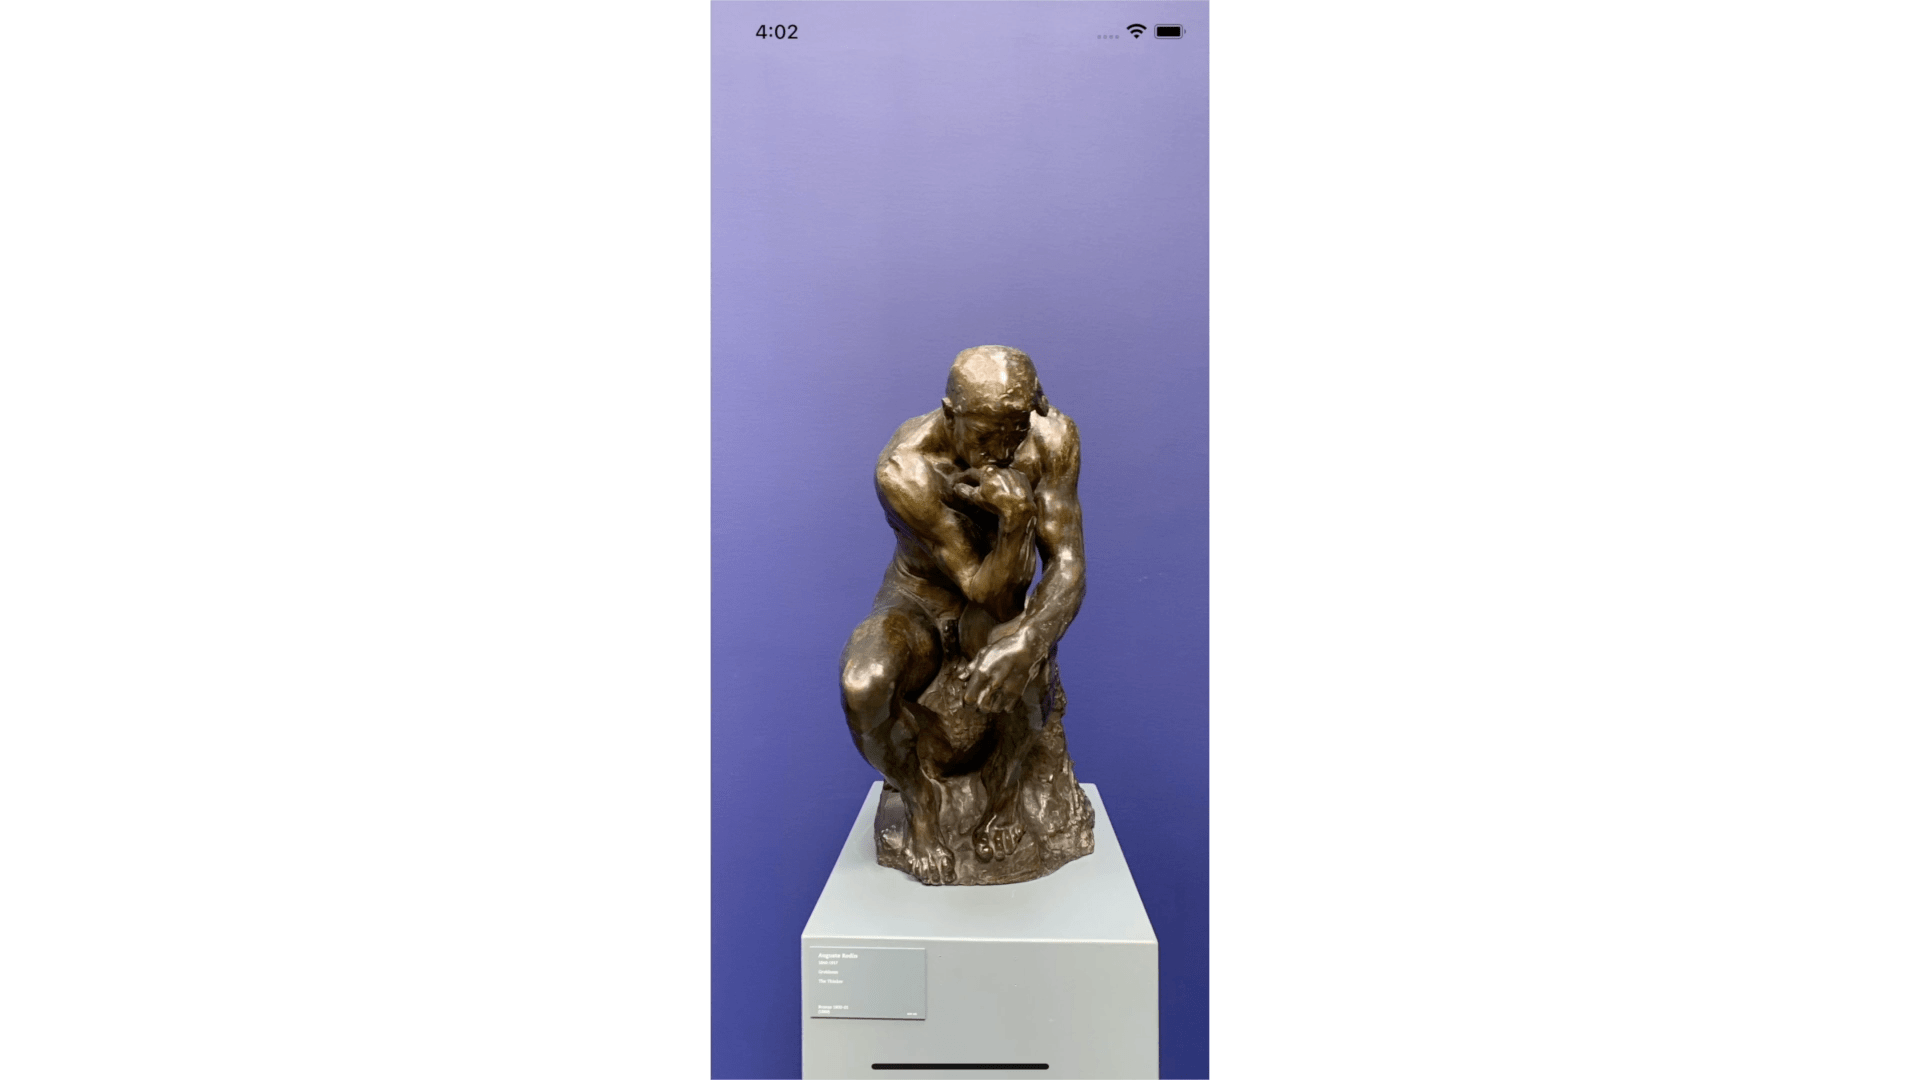
위의 예시는 제가 직접 찍은 사진을 가지고,
오른쪽에서 왼쪽으로 화면을 Swipe 했을 때 작품 이름이랑 작가 정보가 나타나도록 만든 것입니다.
오늘의 구현 순서
- 스와이프 할 화면 만들기(Swipeable, ImageBackground)
- rightAction 스와이프 동작 정의하기(Interpolation)
이 글을 쓰는 이유?
저처럼 Interpolation이 많이 헷갈리시는 분들, 예시 코드가 많은 왼쪽이 아닌 오른쪽 스와이프를 구현하고 싶으신 분들에게 작은 도움이 되길 바라며..!
스와이프 할 화면 만들기
import Swipeable from 'react-native-gesture-handler/Swipeable';Swipeable을 사용하기 위해 별도로 import를 해줍니다.(react-native-gesture-handler 필요)
ImageBackground
우선 제일 먼저 화면을 꽉 채우는 이미지를 만들고, 그 이미지를 Swipeable하게 만들어야 합니다.
여러 가지 방법이 있겠지만 저는 ImageBackground 안에 Swipeable을 넣고 width, height을 100%로 만들었습니다.
<View style={{width: '100%', height: '100%',}}>
      <ImageBackground
          source={url}
          style={{
            resizeMode: 'contain',
            position: 'absolute',
            top: 0,
            left: 0,
            right: 0,
            bottom: 0,
          }}
      >
          <Swipeable
            containerStyle={{
              width: '100%',
              height: '100%',
            }}
            renderRightActions={rightAction}
          ></Swipeable>
      </ImageBackground>
</View>
그리고 오른쪽에서 Swipe가 감지되면 rightAction 함수를 호출하도록 합니다.
rightAction 함수 정의하기
const rightAction = (progress, dragX) => {
      const trans = dragX.interpolate({
      	inputRange: [-window.width, 0],   //화면의 왼쪽 끝, 화면의 맨 오른쪽
        outputRange: [0, window.width],   //transitin 0, transition 100%
      });

      return (
        <View style={{flex: 1, justifyContent: 'center', alignItems: 'center', zIndex: 10,}}>
          //작품 정보
          <Animated.Text
            style={{
              fontSize: 60,
              color: 'white',
              fontWeight: '500',
              fontFamily: 'LibreBaskerville-Bold',
              transform: [{ translateX: trans }],
              }}
            >
              The Thinker
              Bronze 1900-01 (1880)
          </Animated.Text>
          //작가 정보
          <Animated.Text
            style={{
              fontSize: 22,
              color: 'white',
              fontWeight: '200',
              transform: [{ translateX: trans }],
            }}
          >
            Auguste Rodin (French, 1840-1917)
          </Animated.Text>
        </View>
      );
}
App.js에 정의한 rightAction 코드입니다.
Interpolation
interpolate는 간단히 말하면 inputRange를 outputRange로 매핑시키는 함수입니다.
const trans = dragX.interpolate({
      	inputRange: [-window.width, 0],   //화면의 왼쪽 끝, 화면의 맨 오른쪽
        outputRange: [0, window.width],   //transition 0, transition 100%
      });
따라서 해당 코드는 input인 dragX에 따라, output인 trans의 값이 매핑됩니다.
dragX
interpolate()의 input이자 오른쪽 <-> 왼쪽 스와이프 정도를 나타내는 값입니다.
dragX의 값을 콘솔로 확인해 보면 오른쪽 -> 왼쪽으로 스와이프 시 값이 0에서 마이너스로 변하는 것을 확인할 수 있습니다.
따라서
inputRange: [-window.width, 0]의 뜻은 화면의 왼쪽 끝과 오른쪽 끝이 Swipe의 범위가 되도록 했습니다.
trans
interpolate()의 output이자 Swipe를 했을 때 화면에 보일 텍스트의 translateX 값입니다.
outputRange: [0, window.width],translateX가 0 이라면 텍스트를 원래자리 그대로 보여주고, translateX가 window 크기라면 텍스트가 화면의 오른쪽으로 완전히 숨겨지는 상태입니다.
따라서 input과 output이 매핑된다는 것은
스와이프를 화면의 왼쪽 끝(dragX : -window.width)까지 했을 때 텍스트를 보여주고(translateX : 0),
오른쪽 끝(dragX : 0)까지 했을 때는 텍스트를 오른쪽으로 완전히 숨기는(translateX : window.width) 것입니다.
사실 저도 interpolation은 처음이라,
interpolation에 대한 설명이라기 보다는 제가 작성한 코드를 설명한 것에 불과한 것 같기도 합니다..
range 구간이 3개 이상인 interpolation도 사용해 보면서 더 공부해야 할 것 같습니다.
전체 코드 보기👀
import React from 'react';
import { View, Animated, ImageBackground, } from 'react-native';

import Swipeable from 'react-native-gesture-handler/Swipeable';
import { Dimensions } from 'react-native';

const window = Dimensions.get("window");
const url = require('./rodin.jpeg')


function App() {
    const rightAction = (progress, dragX) => {
      console.log(dragX);
      const trans = dragX.interpolate({
        inputRange: [-window.width, 0],   //화면의 왼쪽 끝, 화면의 맨 오른쪽
        outputRange: [0, window.width],   //transitin 0, transition 100%
      });

      return (
        <View style={{flex: 1, justifyContent: 'center', alignItems: 'center', zIndex: 10,}}>
          <Animated.Text
            style={{
              fontSize: 60,
              color: 'white',
              fontWeight: '500',
              fontFamily: 'LibreBaskerville-Bold',
              transform: [{ translateX: trans }],
              }}
            >
              The Thinker
              Bronze 1900-01 (1880)
            </Animated.Text>
          <Animated.Text
            style={{
              fontSize: 22,
              color: 'white',
              fontWeight: '200',
              transform: [{ translateX: trans }],
            }
          }>
            Auguste Rodin (French, 1840-1917)
          </Animated.Text>
        </View>
      );
    }

    return (
      <View style={{width: '100%', height: '100%',}}>
        <ImageBackground
          source={url}
          style={{
            resizeMode: 'contain',
            position: 'absolute',
            top: 0,
            left: 0,
            right: 0,
            bottom: 0,
          }}
        >
          <Swipeable
            containerStyle={{
              width: '100%',
              height: '100%',
            }}
            renderRightActions={rightAction}
          >
          </Swipeable>
        </ImageBackground>
      </View>
    );
}

export default App;