Sorting
Bubble Sort
Bubble Sort는 인접한 두 자료를 비교하며 자리를 교환하는 방식이다. 첫 번째 원소와 두 번째 원소를 비교해 첫 번째 원소가 두 번째 원소보다 크다면, 둘의 자리를 교환한다. 두 번째 원소와 세 번째 원소도 동일하게 비교하고 교환한다. 이를 마지막 두 원소까지 반복하는 것이다. 위 과정이 한 번 진행되면, 제일 큰 원소가 정렬이 끝난다. 이후 위 과정을 정렬이 안 된 원소가 없을 때까지 반복하는 것이다. 즉, 가장 큰 원소가 거품처럼 밀려오는 방식이다.
| 36 | 12 | 18 | 15 | 41 | 19 |
|---|
| 12 | 36 | 18 | 15 | 41 | 19 |
|---|
| 12 | 18 | 36 | 15 | 41 | 19 |
|---|
| 12 | 18 | 15 | 36 | 41 | 19 |
|---|
| 12 | 18 | 15 | 36 | 19 | 41 |
|---|
이 과정을 통해 가장 큰 숫자를 가장 오른쪽에 정렬할 수 있게 된다. 이를 n-1 번 반복하면 전체 배열에 대한 정렬이 가능해진다. 각 단계마다 n-1, n-2, n-3 번의 비교가 n 번 필요하기 때문에 시간복잡도는 이다.
public class BubbleSort {
    public void BuubleSort(int[] arr) {
        int n = arr.length;
        for (int i = 0; i < n - 1; i++) {
            for (int j = 0; j < n - i - 1; j++) {
                if(arr[j] > arr[j + 1]){
                    int temp = arr[j + 1];
                    arr[j + 1] = arr[j];
                    arr[j] = temp;
                }
            }
        }
    }
    public static void main(String[] args) {
        int[] arr = {36, 12, 18, 15, 41, 19};
        BubbleSort bubbleSort = new BubbleSort();
        bubbleSort.BuubleSort(arr);
        System.out.println(Arrays.toString(arr));
    }
}
Selection Sort
주어진 자료 중 가장 작은 숫자를 골라서 앞으로 정렬하는 방식이다. 자료 전체를 확인해 가장 작은 값을 찾아 제일 앞의 원소와 교환한다. 이 과정이 끝나면 제일 앞 원소는 정렬이 끝난다. 이후 정렬되지 않은 원소들을 기준으로 계속 같은 작업을 진행하는 것이다. 이도 Bubble Sort처럼 시간복잡도가 라서 자주 사용되지는 않는다.
| 36 | 12 | 18 | 15 | 41 | 19 |
|---|
| 12 | 36 | 18 | 15 | 41 | 19 |
|---|
| 12 | 15 | 18 | 36 | 41 | 19 |
|---|
| 12 | 15 | 18 | 36 | 41 | 19 |
|---|
| 12 | 15 | 18 | 19 | 41 | 36 |
|---|
| 12 | 15 | 18 | 19 | 36 | 41 |
|---|
public class SelectionSort {
    public void selectionsort(int[] arr) {
        int n = arr.length;
        for (int i = 0; i < n - 1; i++) {
            int minIndex = i;
            for (int j = i + 1; j < n; j++) {
                if(arr[j] < arr[minIndex]){
                    minIndex = j;
                }
            }
            int temp = arr[minIndex];
            arr[minIndex] = arr[i];
            arr[i] = temp;
        }
    }
    public static void main(String[] args) {
        int[] arr = {25, 12, 18, 24, 2, 21};
        SelectionSort selectionSort = new SelectionSort();
        selectionSort.selectionsort(arr);
        System.out.println(Arrays.toString(arr));
    }
}
Counting Sort
각 자료가 몇 개 있는지를 정리한 뒤 그 정보를 활용해 정렬하는 방식이다. 먼저 자료들의 값의 범위 만큼의 공간을 가진 counts 배열을 만든다. 각 자료의 데이터를 확인하여 숫자가 등장하는 빈도를 countsd에 저장한다. 첫 번째 원소부터 시작하여 counts 배열의 앞 원소에 값을 합해 준다. 이후 본래의 자료 데이터를 순회해 counts 배열에 따라 결과를 정리한다. 시간복잡도는 로 배열 안 숫자가 반복되는 요소 없이 다양하게 나오는 경우 비효율적일 수도 있다.

이때 counts의 index를 값이라고 생각하고 빈도를 저장하면 다음과 같다.

이 배열에서 count[4] = 2라는 점은 앞에 있는 2 + 2 + 1 + 1 = 6 총 여섯 개의 칸은 일단 4가 아니고 7, 8 번째 칸은 4라는 것을 의미한다. 즉 counts 배열의 덧셈을 이용하면 상대적 위치가 아닌 절대적 위치를 알 수 있다.
public class CountSort {
    public int[] countsort(int[] arr) {
        int n = arr.length;

        int max = 5;
        int min = 0;
        int k = max - min + 1;

        int[] counts = new int[k];

        for(int data: arr) {
            counts[data]++;
        }

        for (int i = 0; i < k - 1; i++) {
            counts[i + 1] += counts[i];
        }

        int[] output = new int[n];
        for (int i = n - 1; i >= 0; i--) {
            counts[arr[i]]--;
            int position = counts[arr[i]];
            output[position] = arr[i];
        }
        return output;
    }
    public static void main(String[] args) {
        int[] arr = {0, 1, 4, 4, 3, 0, 5, 2, 5, 1};
        CountSort countSort = new CountSort();
        int[] output = countSort.countsort(arr);
        System.out.println(Arrays.toString(output));
    }
}
Spring
@Service
MVC 패턴에서 Model의 역할을 하는 Annotation 중 하나이다. 비즈니스 로직을 담당하는 Bean 객체임을 나타내는 어노테이션이다.
MVC 패턴에서 Model과 View와 Controller는 서로 분리되어서 각자의 역할을 맡는 것이 원칙이다. 그런데 지금 자세히 살펴보면 Controller 가 데이터를 다루고 있다. Model과 Controller가 분리되지 않은 모습이다.
서비스에 필요한 hits 데이터는 Controller가 아니라 Model이 다루는 것이 맞다. 먼저 LottoService 클래스를 만든 뒤, LottoService 에 @Service 어노테이션을 붙여 준다. @Service 어노테이션은 @Controller 와 마찬가지로 LottoService 가 IoC Container가 관리하는 Bean 객체로서 지정하는 어노테이션이다.
import org.springframework.stereotype.Service;

@Service
public class HitsService {
    private int hits = 0;

    public int addHit() {
        hits++;
        return hits;
    }
}
이를 Controller에서 사용하고자 하니, 우리는 Controller를 직접 만든 적이 없다. 따라서 직접 Controller를 관리할 수 없다. 그렇다면 어떻게 Spring IoC에게 해당 객체가 필요한 시점인지 알려 줄 수 있을까. 바로 Constructor를 만들어 주면 된다. 이 생성자를 통해 Spring IoC가 bean 객체를 관리하면서 Dependency Injection을 실행한다.
private LottoService lottoService;
    public MvcController(LottoService lottoService) {
        this.lottoService = lottoService;
    }
이후 Controller에서 데이터를 관리하거나 수정하지 못하도록 final 문법을 추가해 안정적으로 객체를 활용할 수 있다.
private final LottoService lottoService;같은 방식으로 LottoService도 분리하면 다음과 같다.
@Service
public class LottoService {
    private List<Integer> lottoNum = new ArrayList<>();

    public List<Integer> randomLotto() {
        lottoNum.clear();
        for (int i = 0; i < 6; i++) {
            int num = (int)(Math.random() * 45) + 1;
            lottoNum.add(num);
        }
        return lottoNum;
    }
}@RequestMapping("/lotto")
public String lotto(Model model) {
List<Integer> lottoNum = lottoService.randomLotto();
model.addAttribute("lotto", lottoNum.toString());
return "lotto";
}HTML Form
만약 우리에게 어떤 자원이 있다면, 이 자원에 대한 추가(Create) 조회(Read) 갱신(Update) 삭제(Delete) 작업을 CRUD라고 한다.
본격적인 CRUD 작업 이전에 먼저 사용자가 정보를 입력받는 창구를 마련하는 연습한다.
Spring initialize에서 Thymeleaf와 Spring Web 의존성을 가진 프로젝트를 다운로드받는다. 서비스의 사용자가 사용할 HTML 부터 작성한다. 사용자는 이 HTML에서 데이터를 입력하고 저희한테 보내게 될 것이다. 가장 기초적으로 웹 브라우저에서 사용자의 입력을 받는 용도로 사용되는 요소는 form 과 input 이다.
<!DOCTYPE html>
<html lang="en">
<head>
    <meta charset="UTF-8">
    <title>Send</title>
</head>
<body>
<form action="/reveive" method="post">
    <label for="message">Message:
        <input type="text" id="message"/>
    </label>
    <br>
    <br>
    <input type="submit">
</form>
</body>
</html>
이후 send 작업을 실행할 FormController를 작성해 준다. 뿐만 아니라 사용자가 입력을 했을 때 받을 receive Controller도 작성해 준다.
@Controller
public class FormController {
    @RequestMapping("/send")
    public String getForm(){
        return "send";
    }

    @RequestMapping("/receive")
    public String receive() {
        return "send";
    }
}
이때 전송받은 데이터가 어디로 가는지를 url 속성으로 표현할 수 있다. 현재 Web이 띄워진 곳이 localhost:8080 이기 때문에 여기까지는 생략해서 표현할 수 있다. 따라서 receive 기능에서는 사용자가 입력하는 값을 parameter로 받아 와야 하기 때문에 @RequestParam 으로 받아 올 수 있다. 어노테이션은 객체, 변수, 메소드가 어떤 타입인지 설명만 해 놓은 것이다.
 @RequestMapping("/receive")
    public String receive(
            @RequestParam("msg")
            String msg
    ) {
        System.out.println(msg);
        return "send";
    }
이대로 한 뒤 데이터를 입력하고 제출 버튼을 누르면 오류가 뜬다. html Form에 오류가 있기 때문이다. Controller에서 받은 parameter와 html에서 입력받은 값이 동일한 변수라는 것을 알려 주기 위해 input 태그에 name을 추가해 준다
<input type="text" id="message" name="msg"/>HTTP Method
HTTP 규약 상에 요청을 보낼 때 어떤 목적으로 보내는 것인지 간략하게 명시해 줘야 한다. 따라서 html 코드에method = “post”가 들어가는 것이다. 대표적인 HTTP Method로는 다음과 같은 것들이 있다.
| Method | 설명 |
|---|---|
| GET | 서버로부터 리소스를 조회하기 위해 사용 주로 정보를 요청하고 받아올 때 사용되며 요청 시 데이터를 URL 쿼리 문자열이나 헤더에 포함하여 전달 |
| POST | 서버에 데이터를 전송하기 위해 사용되고 주로 새로운 리소스를 생성하거나 데이터를 처리하기 위해 사용됨 요청 시 데이터를 요청 본문에 담아 전송 |
| PATCH | 서버에 데이터 일부를 수정하기 위해 사용됨 PATCH는 전체 리소스를 교체하는 대신 요청에 포함된 데이터 일부만 수정 |
| PUT | 서버에 데이터를 전송하여 리소스를 갱신 또는 생성하기 위해 사용됨 요청 시 데이터를 요청 본문에 담아 전송하며 해당 리소스를 요청에 포함된 데이터로 교체함 |
| DELETE | 서버에서 리소스를 삭제하기 위해 사용 요청 시 삭제할 리소스의 식별자를 URL에 포함하여 전송함 |
@GetMapping & @RequestMapping
@RequestMapping 의 문제점은 method가 POST든 GET든 구분을 하지 않는다. 따라서 니가 응답해야 하는 메소드는 따로 있다며 지정하는 방법은 두 가지와 같다.
RequestMapping(method = RequestMethod.GET)으로 RequestMapping에 인자로 지정해 주는 방법이다. 하지만 옛날 방식의 코드 짜임이라 요즈음은 자주 활용하지 않는다.@GetMapping@PostMapping을 사용해 더욱 명시적으로 보여 주는 방법이다.
@PostMapping("/receive")
    public String receive(
            @RequestParam("msg")
            String msg,
            @RequestParam("email")
            String email
    ) {
        System.out.println(msg);
        System.out.println(email);
        return "send";
    }
이때 @PostMapping으로 어노테이션을 바꾸고 실행하면 다음과 같은 에러가 발생한다.

화면에 띄우는 것은 html을 가져오는 것이기 때문에 GET Mapping이 필요하다. 따라서 잘못된 Method를 사용했다는 에러 코드 405가 뜬다.
CRUD
Create
Student 객체를 위해 StudentDto를 만든다.
DTO (Data Transfer Object)
이 객체는 주고받는 정보를 표현하기 위한 데이터라는 것을 명시적으로 표시해 주는 용도이자 이름 규칙의 일부이다.
public class StudentDto {
    private Long id;
    private String name;
    private String email;

    public StudentDto() {

    }

    public StudentDto(Long id, String name, String email) {
        this.id = id;
        this.name = name;
        this.email = email;
    }

    public Long getId() {
        return id;
    }

    public void setId(Long id) {
        this.id = id;
    }

    public String getName() {
        return name;
    }

    public void setName(String name) {
        this.name = name;
    }

    public String getEmail() {
        return email;
    }

    public void setEmail(String email) {
        this.email = email;
    }
}
이후 templete 패키지에 create.html을 작성한 뒤 학생 정보를 입력받는 form을 작성한다.
<!DOCTYPE html>
<html lang="en">
<head>
    <meta charset="UTF-8">
    <title>Create Student</title>
</head>
<body>
  <h1>Create Student</h1>
  <form action="/create">
    <!-- 사용자가 제공할 데이터에 알맞은 input과 label을 만든다. -->
    <label for="name-input">Name: <input id="name-input" name="name"></label><br>
    <label for="email-input">Name: <input id="email-input" name="email"></label><br>
    <input type="submit">
  </form>
</body>
</html>
Controller를 만들어서 create View를 보여 주는 Mapping을 만들어 준다.
@Controller
public class StudentController {
@GetMapping("/create-view")
public String createView() {
return "create";
}
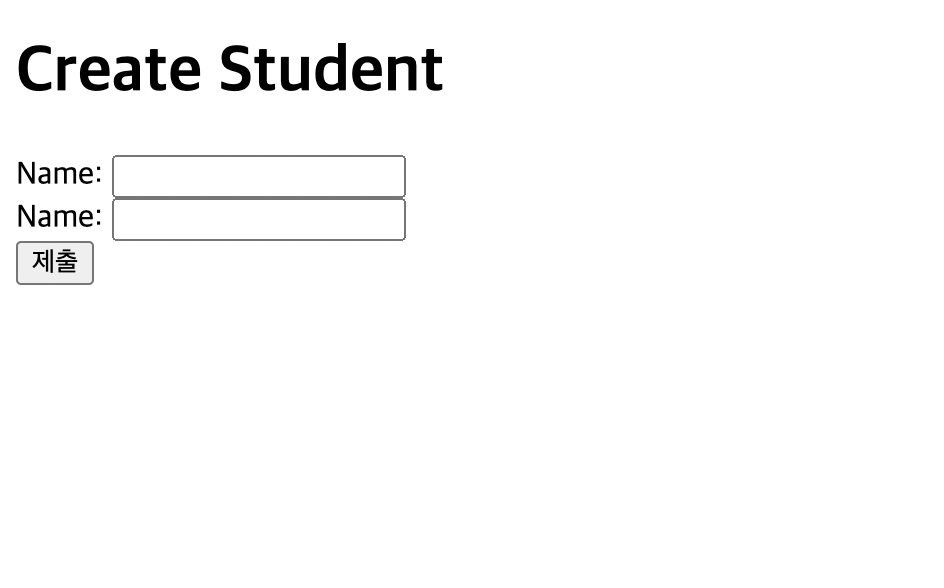
}실행하면 화면이 정상적으로 작동하는 것을 볼 수 있다.
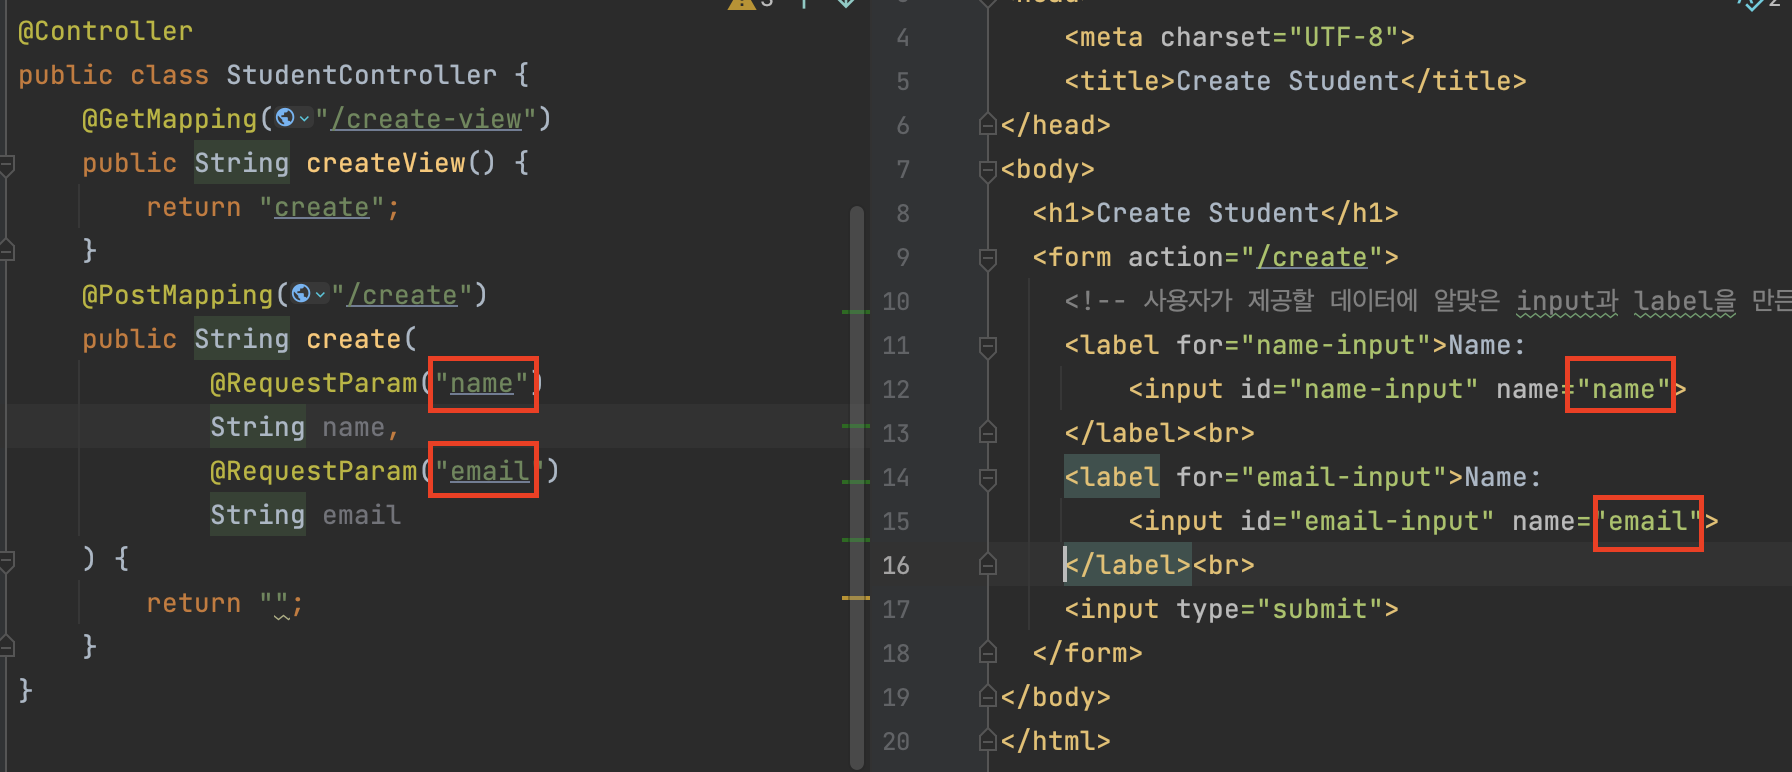
이후 @PostMapping 을 만든 뒤 사용자의 입력을 받아 오는 작업을 실행한다. 이때 parameter와 name을 동일하게 해 줘야 같은 변수로 인식한다.
이후 localhost:8080/create-view로 접속해야 한다.
@GetMapping 은 localhost:8080/create-view이고
@PostMapping 은 localhost:8080/create 이다.
이후 Model 분리를 위해 Student Service를 구현하면 다음과 같다.
@Service
public class StudentService {
    // 복수의 StudentDto를 담는 변수
    private final List<StudentDto> studentDtoList = new ArrayList<>();
    private long nextId = 1L;
    // 새로운 StudentDto를 생성하는 메소
    public StudentDto createStudent(String name, String email) {
        StudentDto studentDto = new StudentDto(nextId++, name, email);
        studentDtoList.add(studentDto);
        return studentDto;
    }
}
Controller에도 등록해 줘야 한다.
StudentService studentService;

public StudentController(StudentService studentService) {
    this.studentService = studentService;
}
Post Redirect Get Pattern
하지만 create-view에서 새로고침을 누르면 다음과 같은 경고창이 뜬다.
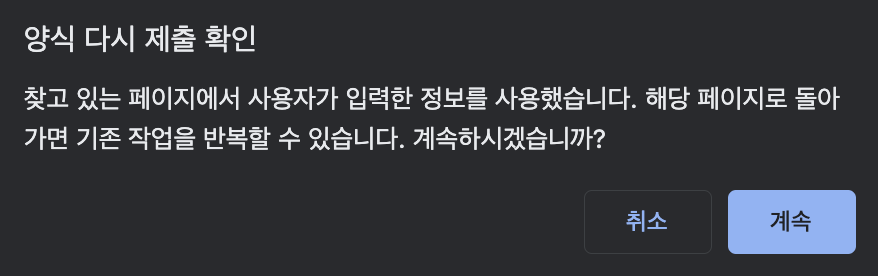
이것을 무시한 채 계속 새로고침을 하면 studentDtoList에 id 값만 증가한 채 같은 값이 계속 저장되게 된다. 그 이유를 살펴 보자.
localhost:8080/create-view 에서 제출을 누르는 것도 HTTP 요청이다. 따라서 create-view를 받아 온 PostMapping이 반환하는 장소인 localhost:8080/create 로 간다. 현재의 구조는 서로 다른 create-view create url에서 똑같은 html을 반환한다. 즉 POST를 보내고 새로 고침을 하면 마지막으로 보낸 POST 요청을 다시 보내도록 되어 있다. 데이터 손실 때문에 데이터를 다시 제출해야 할 경우도 있기 때문에 이런 기능이 탑재되어 있다. 따라서 위 경고창은 데이터 손실 때문에 이 데이터를 다시 저장하려는 게 맞냐는 뜻이다. 이를 double post problem이라고 한다.
이 상황을 처리하기 위해 POST가 성공적으로 된다면 데이터가 정상적으로 처리되었으니 다른 곳으로 이동하라는 redirect를 사용하면 된다. 이 패턴을 post redirect get pattern이라고 한다. post가 성공했으니 데이터가 새로 등록된 것을 확인할 수 있도록 get 해서 다시 가져오는 것이다.
@Controller
public class StudentController {
    StudentService studentService;

    public StudentController(StudentService studentService) {
        this.studentService = studentService;
    }

    @GetMapping("/create-view")
    public String createView() {
        return "create";
    }
    @PostMapping("/create")
    public String create(
            @RequestParam("name")
            String name,
            @RequestParam("email")
            String email
    ) {
        System.out.println("name = " + name);
        System.out.println("email = " + email);
        StudentDto studentDto
                = studentService.createStudent(name, email);
        System.out.println(studentDto.toString());
        return "**redirect:**/create";
    }
}
redirect: 를 붙이면 Spring에서 알아서 리다이렉트로 조정해 준다.
ReadAll
studentService에 studentDto를 담고 있는 list를 반환해 주는 메소드를 작성해 준다.
public List<StudentDto> readStudentAll() {
        return this.studentDtoList;
    }
이후 학생 리스트를 보여 줄 read.html 을 만들고 form을 작성해 준다.
<!DOCTYPE html>
<html lang="en">
<head>
    <meta charset="UTF-8">
    <title>Student List</title>
</head>
<body>
<h1>Student List</h1>
<!-- 등록된 학생이 없을 때 -->
<div>
  <p>No Student Here...</p>
</div>
<!-- 등록된 학생이 있을 때 -->
<div>
  <p>ID: </p><br>
  <p>Name: </p><br>
  <p>Email: </p><br>
</div>
<a href="/create-view">Create</a>
</body>
</html>
이후 Controller에서 값들을 넘겨 주는 코드를 작성한다.
@GetMapping("/read")
    public String readAll(Model model) {
        model.addAttribute(
                "studentList",
                studentService.readStudentAll());
        return "home";
    }
다음에 Thymeleaf를 통해 html 양식을 채워 넣어 준다.
<!DOCTYPE html>
<html lang="en">
<head>
<meta charset="UTF-8">
<title>Student List</title>
</head>
<body>
<h1>Student List</h1>
<!-- 등록된 학생이 없을 때 -->
<div th:if="${studentList.isEmpty()}">
<p>No Student Here...</p>
</div>
<!-- 등록된 학생이 있을 때 -->
<div th:unless="${studentList.isEmpty()}" th:each="student: ${studentList}">
<p>ID: [[${student.id}]]</p><br>
<p>Name: [[${student.name}]]</p><br>
<p>Email: [[${student.email}]]</p><br>
</div>
<a href="/create-view">Create</a>
</body>
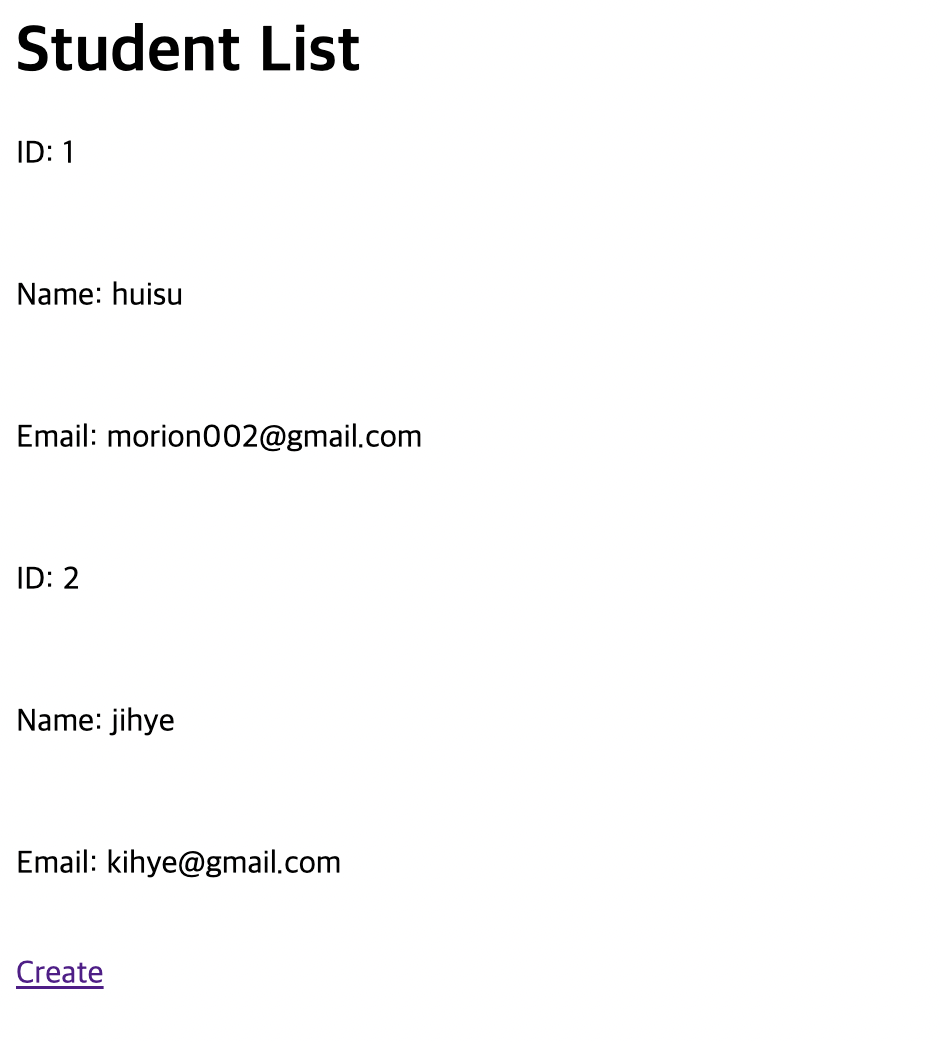
</html>이후 create를 통해 학생 리스트를 채운 뒤 localhost:8080/read 로 이동하면 다음과 같은 화면이 잘 뜬다.