
Before setup, we setup just on jetson nano
So, we are going to set esp32 dev module.
Development env
- Jetson Nano B01
- ESP32-WROOM_32D
- Arduino IDE
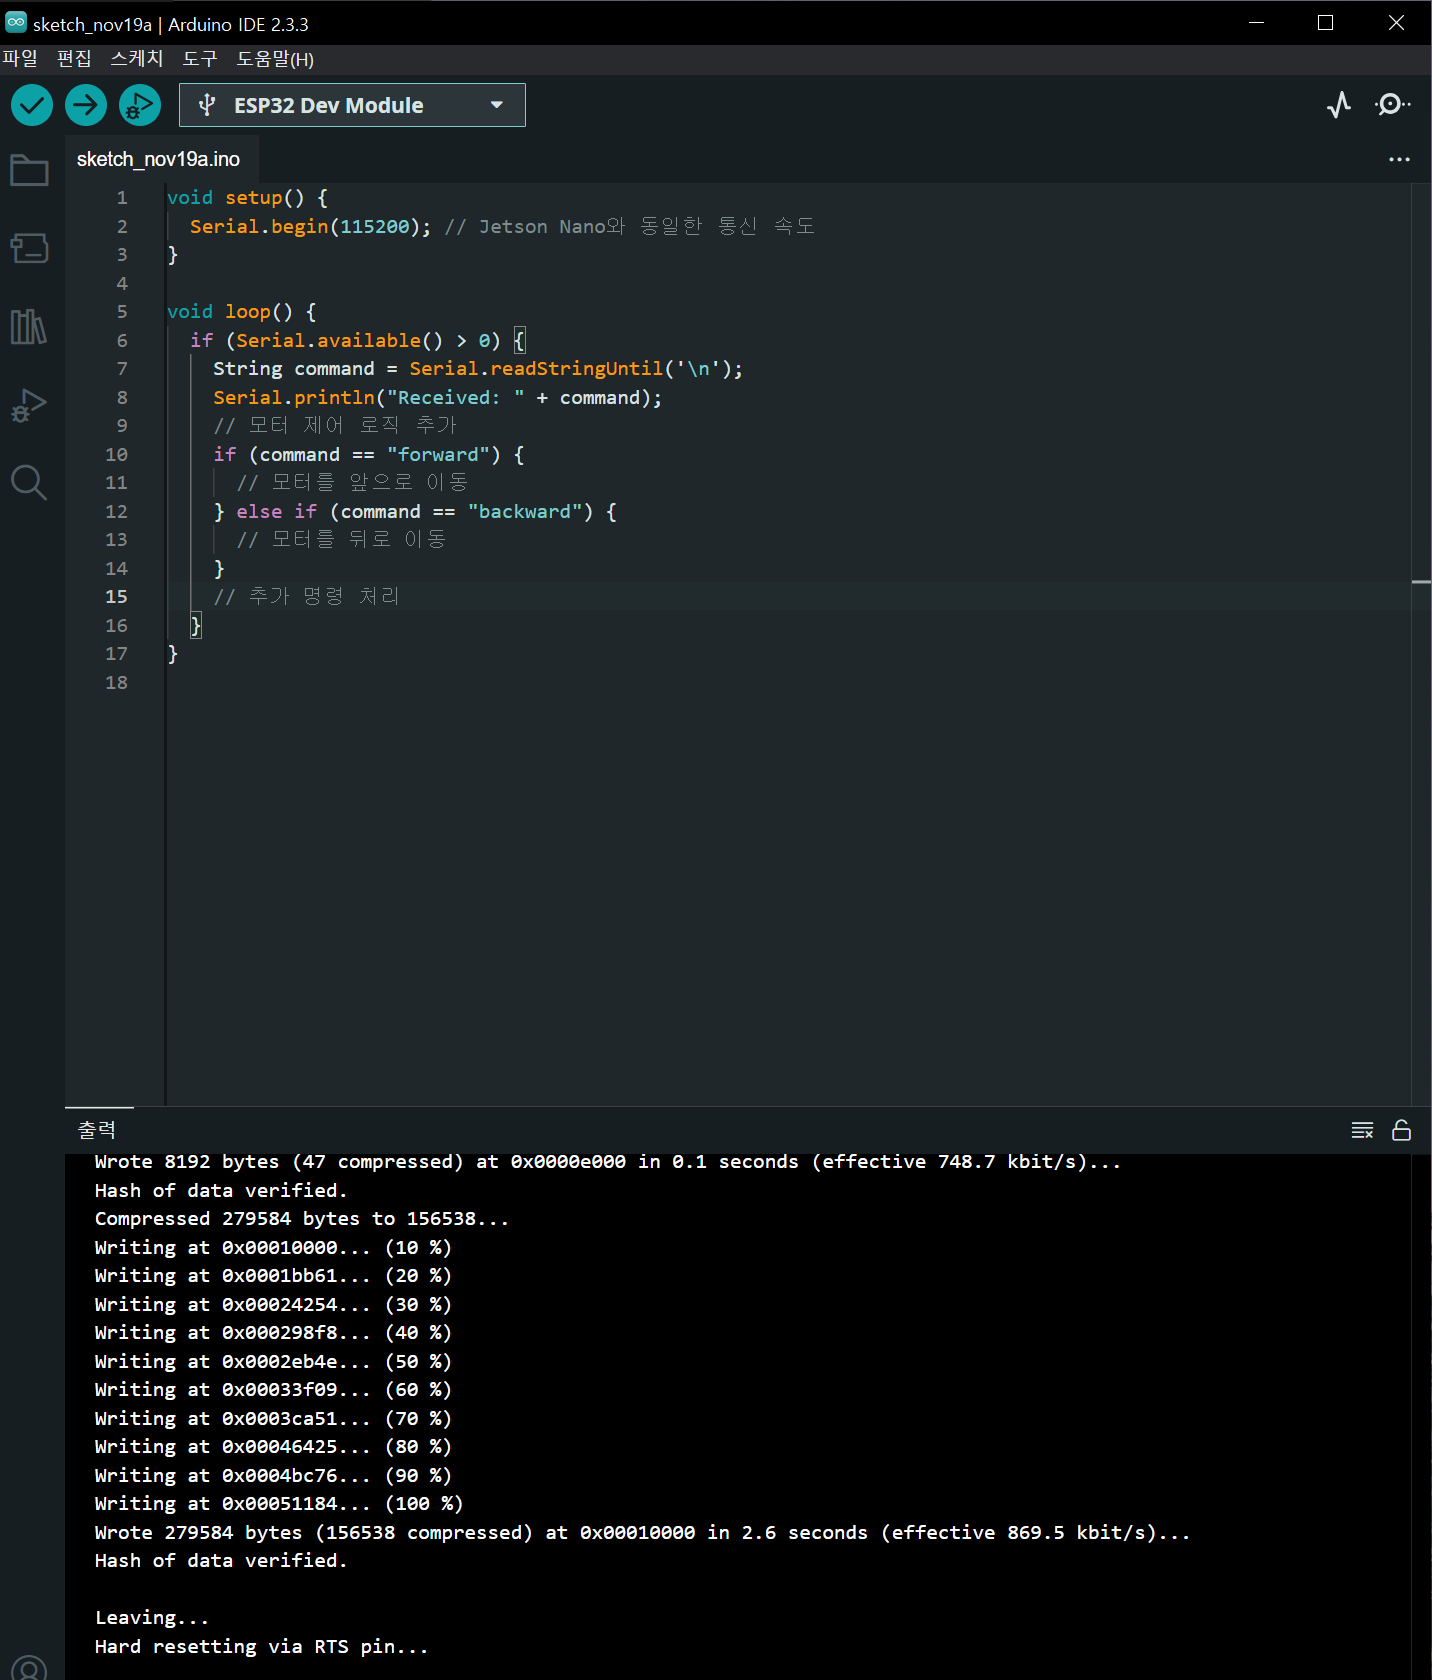
1. Compile this code on Arduino IDE.
void setup() {
  Serial.begin(115200); // same Jetson Nano board rate}

void loop() {
  if (Serial.available() > 0) {
    String command = Serial.readStringUntil('\n');
    Serial.println("Received: " + command);
    // add motor control logic
    if (command == "forward") {
      // you should edit code about motor move forward for moving robot
    } else if (command == "backward") {
      // motor move back
    }
    // if need, you can edit any movement
  }
}
2. Node launch & Test
ros2 run serial_communication serial_node
+) Transfer Command via topic
ros2 topic pub /motor_commands std_msgs/String "data: 'forward'"
3. User permissions settings
sudo usermod -a -G dialout $USER
See the log on "serial_node" is activated terminal , you can see respond on ESP32
..