예전에는 스크롤 이벤트를 구현하기 위해 scroll, Element.getBoundingClientRect() 등의 메서드를 사용해 하나하나 계산해서 값을 얻어야 했다. 그러던 와중에 2016년 구글 개발자 페이지를 통해 IntersectionObserver가 소개됐다.
intersection 정보가 필요한 이유
MDN 설명에 따르면 아래와 같은 이유로 intersection 정보가 필요하다.
- 페이지가 스크롤될 때, 다른 콘텐츠나 이미지 로딩 지연 (Lazy loading)
- 사용자가 스크롤을 내릴 때 더 많은 콘텐츠가 로드나 렌더링 되는 infinite-scroll(무한 스크롤) 구현
- 광고 가시성 보고를 통해 광고 수익 계산
- 사용자에게 결과가 표시되는지 여부에 따라 애니메이션 등 동작 수행
기존 문제점
scroll 이벤트의 경우 동기적으로 실행되기 때문에 이벤트 연속 호출, 렌더링 성능 저하 등의 문제가 있었다.
Intersection Observer API 등장
IntersectionObserver는 비동기적으로 실행된다. 관찰 대상과 뷰포트의 교차점을 관찰하고, 뷰포트 안으로 들어오는 시점에 정보를 제공한다.
IntersectionObserver 사용법
인스턴스 생성
const io = new IntersectionObserver(콜백함수, 옵션);콜백함수 설정
const io = new IntersectionObserver((entries, observer) => {}, 옵션)
- entries
관찰 대상의 여러 정보들이 배열로 담겨져 있다.
- boundingClientRect: 관찰 대상의 사각형 정보(DOMRectReadOnly)
- intersectionRect: 관찰 대상의 교차한 영역 정보(DOMRectReadOnly)
- intersectionRatio: 관찰 대상의 교차한 영역 백분율(intersectionRect 영역에서 boundingClientRect 영역까지 비율, Number)
- isIntersecting: 관찰 대상의 교차 상태(Boolean)
- rootBounds: 지정한 루트 요소의 사각형 정보(DOMRectReadOnly)
- target: 관찰 대상 요소(Element)
- time: 변경이 발생한 시간 정보(DOMHighResTimeStamp)
- observer
대상을 지정하면 그 대상을 관찰하는 역할을 한다.
옵션 설정
let 옵션 = {
  root: document.querySelector('#scrollArea'),
  rootMargin: '10px 0 -20px 0', // root가 위로 10px 커지고 아래로 20px 작아진다.
  threshold: 0.5 // 대상이 50% 보였을 때 실행
}

let io = new IntersectionObserver(콜백함수, 옵션);
- root : 뷰포트 대신 사용할 요소를 지정한다. 지정하지 않을 경우 브라우저 뷰포트로 설정된다.
- rootMargin : 마진을 설정하여 Root에서 지정된 뷰포트의 영역을 확장/축소할 수 있다.
- threshold : 뷰포트에 관찰 대상이 얼마나 보여야 observer를 실행할 지 설정할 수 있다. 숫자나 숫자 배열로 값을 설정할 수 있다.
25% 단위로 타겟 요소의 보일때마다 콜백함수를 호출하고 싶다면 [0, 0.25,0.5, 0.75, 1]로 설정하면 된다.
관찰 시작
const io = new IntersectionObserver((entries, observer) => {});

io.observe(관찰대상);
관찰 종료
io.disconnect();🌟 활용 🌟
✋ 리액트에서 IntersectionObserver 사용 시, 관찰할 DOM 요소는 Ref를 사용해 참조를 만든다.
1. 클래스 추가/제거
클래스 추가/제거를 통해 여러 가지 스크롤 효과를 줄 수 있겠다.
const observer = () => {
  const itemRef = useRef<HTMLDivElement[]>([]);

  const io = new IntersectionObserver((entries, observer) => {
    entries.forEach((entry) => {
      // 관찰 대상이 뷰포트에 들어왔을 경우
      if (entry.intersectionRatio > 0) {
        entry.target.classList.add("active");
      }
      // 관찰 대상이 뷰포트에 없을 경우
      else {
        entry.target.classList.remove("active");
      }
    });
  });

  // 관찰 대상 관찰 시작
  for (let i = 0; i < itemRef.current.length; i++) {
    io.observe(itemRef.current[i]);
  }
}
2. Lazy loading
용량이 작은 임시 이미지를 경로로 설정해두고, data를 활용해 진짜 이미지 경로를 담아둔다.
<img class="lazy" src="../용량작은임시이미지1.jpg" data-src="../진짜이미지1.jpg"/>
<img class="lazy" src="../용량작은임시이미지2.jpg" data-src="../진짜이미지2.jpg"/>
해당 이미지가 뷰포트에 보이면, 가짜 이미지의 src를 진짜 이미지 src로 교체해준다.
let 옵션 = {
  threshold: 0,
};

const io = new IntersectionObserver(
  (entries, observer) => {
    entries.forEach((entry) => {
      if (entry.isIntersecting) {
        observer.unobserve(entry.target);
        entry.target.src = entry.target.dataset.src;
      }
    });
  }
  , 옵션);

io.observe(
  Array.from(
    document.getElementsByClassName('lazy')
  )
);
단점
아직 모든 브라우저에서 지원하지 않는다.
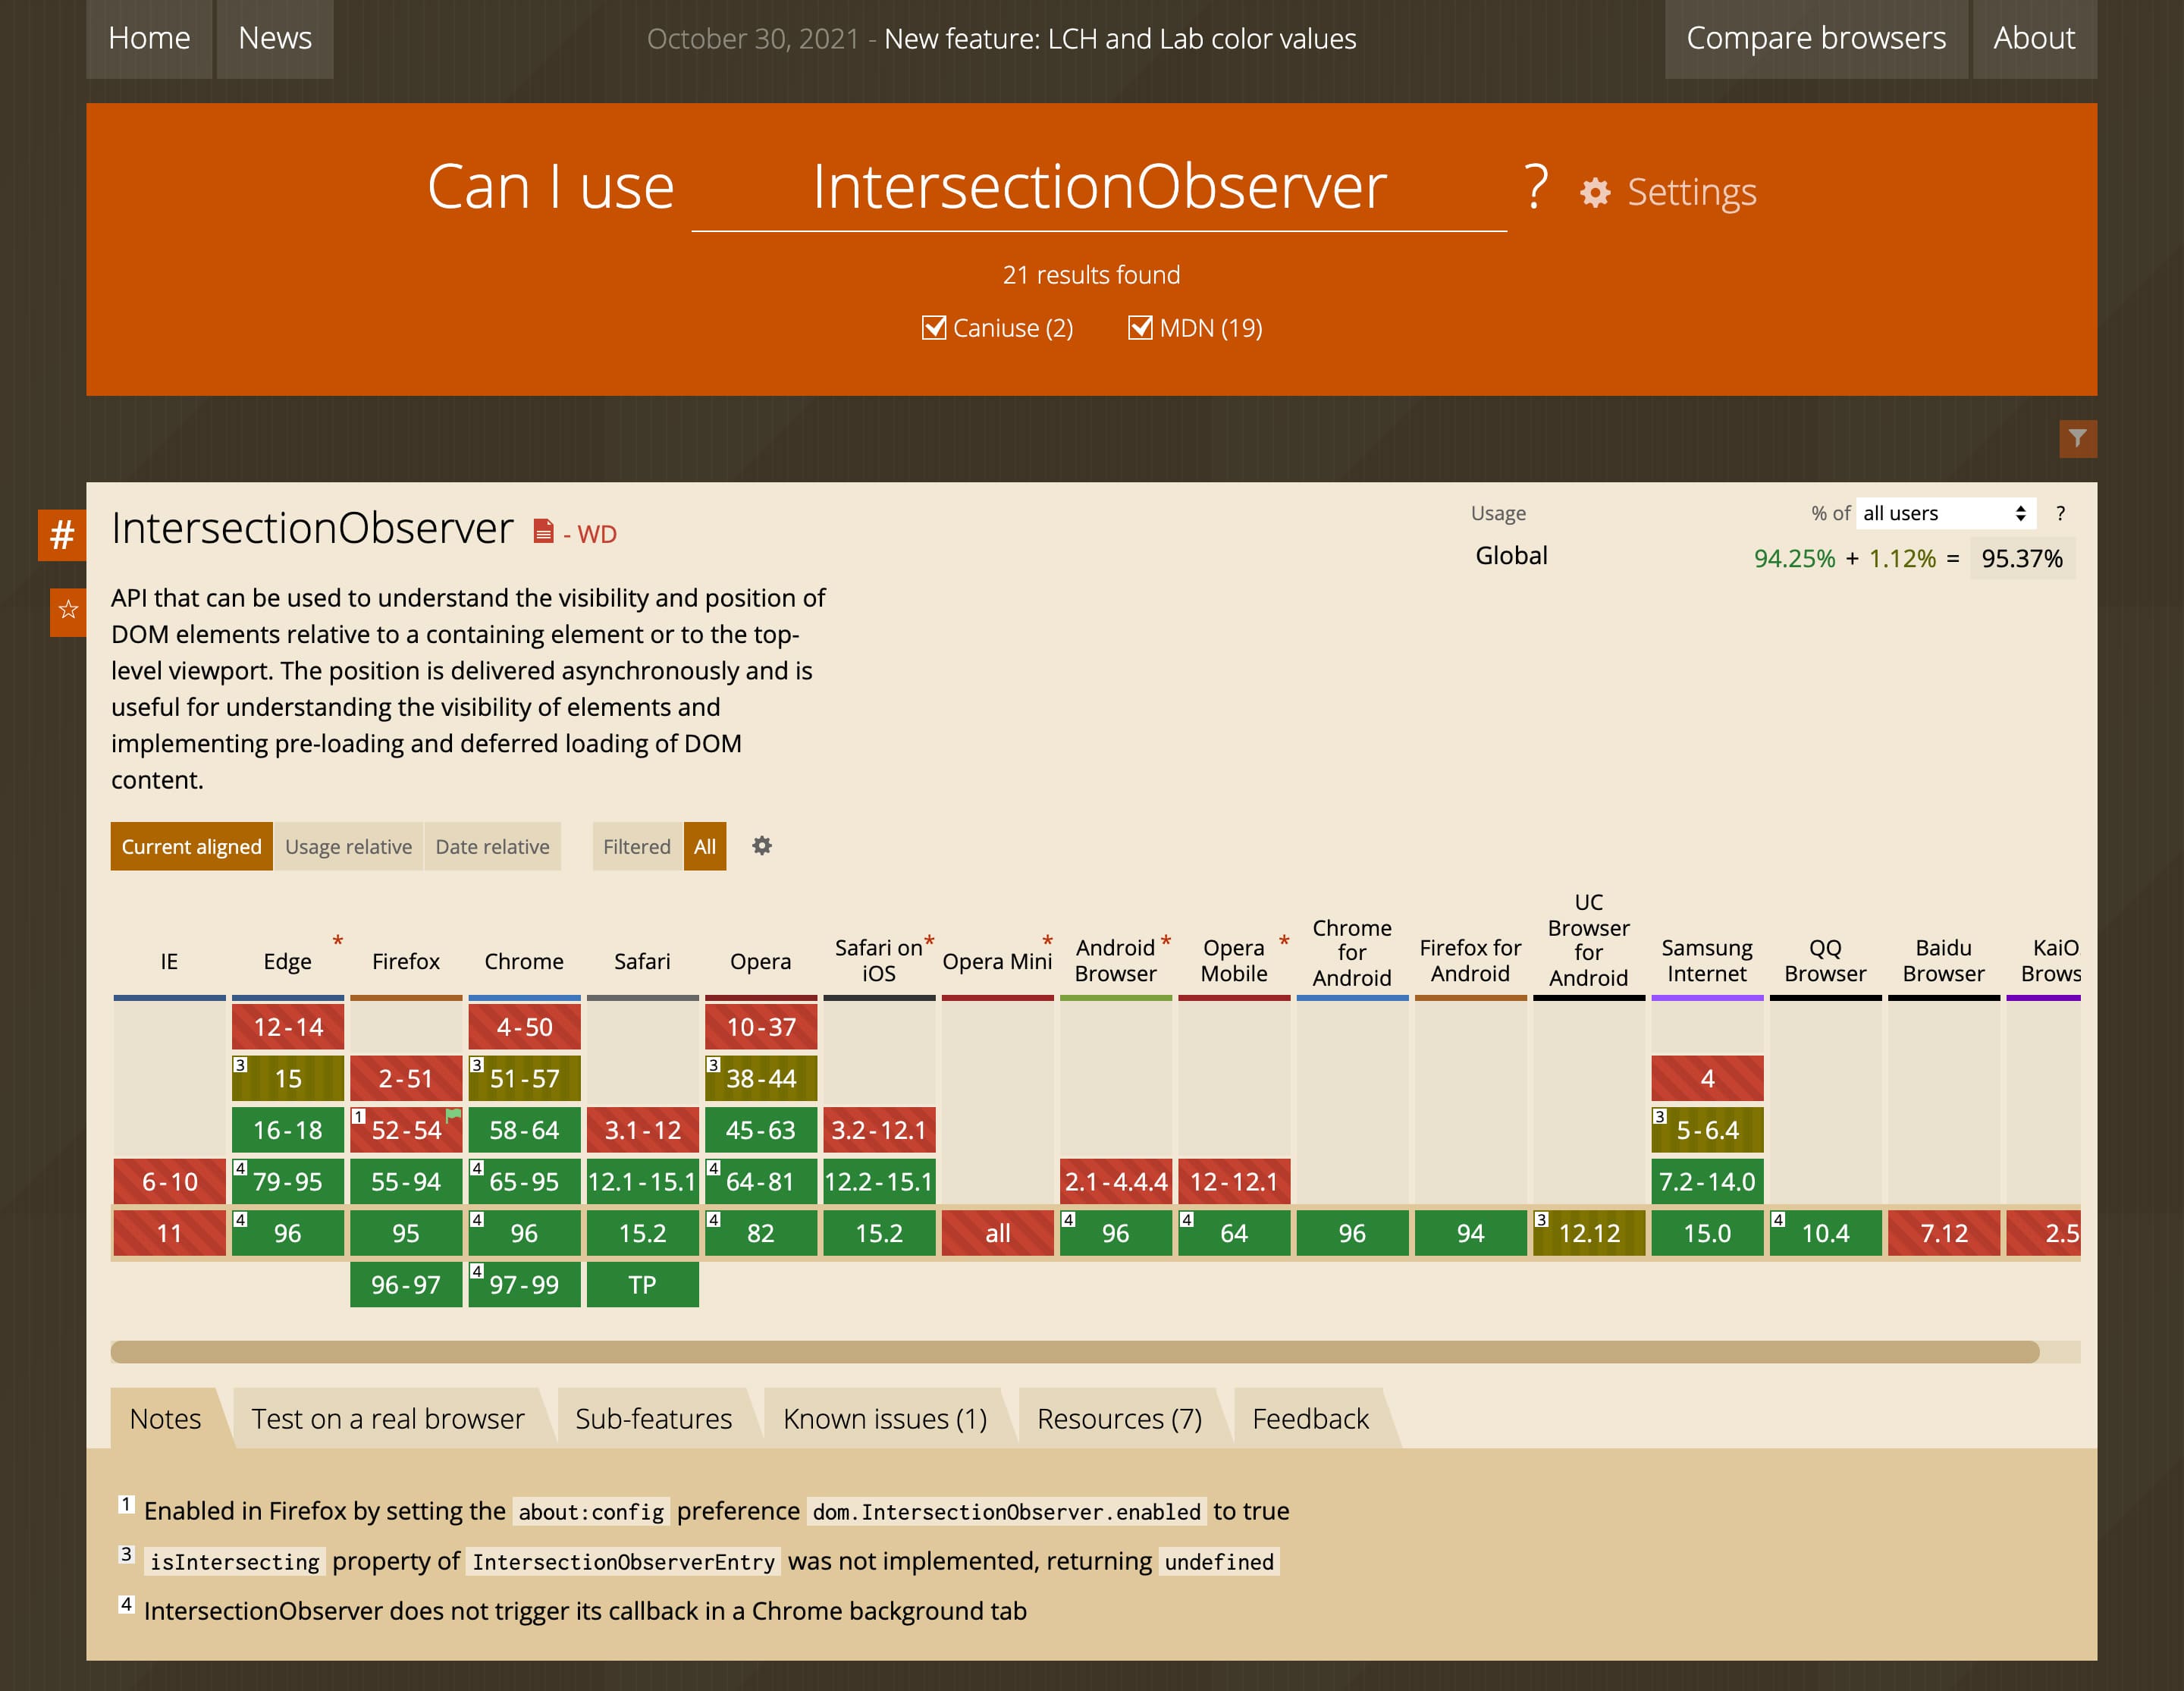
IntersectionObserver 브라우저 지원 현황
| 브라우저 | 지원여부 |
|---|---|
| IE | X 💩 |
| Edge | 15 이상 |
| Firefox | 55 이상 |
| Chrome | 51 이상 |
| Opera | 38 이상 |
| Safari | 12.1 이상 |
| Android | 96 이상 |
IE 대응 (polyfill)
IE에선 Intersection Observer API를 아예 지원하지 않는다. IE에서 사용하려면 polyfill 라이브러리 설치해야 한다.
방법 1) CDN 사용
<script src="https://polyfill.io/v3/polyfill.min.js?features=IntersectionObserver"></script>방법 2) npm 라이브러리 설치
npm으로 라이브러리 설치 후,
$ npm i intersection-observerimport한 다음 아래와 같이 사용하면 된다.
import 'intersection-observer'

const io = new IntersectionObserver(콜백함수, 옵션)

const 관찰대상 = document.querySelectorAll(관찰대상)

// IE에서 사용하기
Array.prototype.slice.call(관찰대상).forEach(elim => {
  io.observe(elim)
})

+=