chocolatey
윈도우용 패키지 매니저
대부분의 오픈소스 패키지 설치 가능
설치
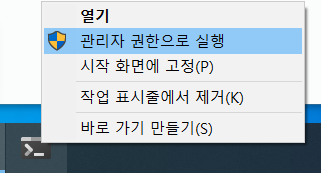
- window terminal 관리자 권한으로 실행(shift + 우클릭)
- 설치 가이드의 명령어 실행
PS C:\Users\Playdata> Set-ExecutionPolicy Bypass -Scope Process -Force; [System.Net.ServicePointManager]::SecurityProtocol = [System.Net.ServicePointManager]::SecurityProtocol -bor 3072; iex ((New-Object System.Net.WebClient).DownloadString('https://community.chocolatey.org/install.ps1'))- 명령어인 choco로 설치 확인
PS C:\Users\Playdata> choco
Chocolatey v1.1.0
Please run 'choco -?' or 'choco <command> -?' for help menu.

PS C:\Users\Playdata> choco list --local
Chocolatey v1.1.0
chocolatey 1.1.0
1 packages installed.
choco 사용 시 실제 패키지 버전보다 낮을 수 있으니 주의
vagrant
가상 시스템 환경을 구축하고 관리하기위한 도구
설치
윈도우 패키지 매니저인 choco를 이용해 설치
PS C:\Users\Playdata> choco install vagrant

PS C:\Users\Playdata> choco list -l
Chocolatey v1.1.0
chocolatey 1.1.0
chocolatey-core.extension 1.3.5.1
vagrant 2.2.19
3 packages installed.
설치 후, 윈도우 시스템 재부팅 필요
vagrant로 가상환경 생성
Vagrantfile
vagrant의 설정파일
Ruby로 작성되어 있음
- Vagrantfile 생성
vagrant init <IMAGE>- vagrantfile은 디렉토리 경로가 중요
test 디렉토리 생성
PS C:\Users\Playdata\vagrant\test> pwd

Path
----
C:\Users\Playdata\vagrant\test- 아래 링크에서 설치하고자 하는 가상 환경 이미지 선택
vagrant에서 사용 가능한 가상환경 이미지

- Vagrant 파일을 생성하고 싶은 디렉토리 위치에서 init
PS C:\Users\Playdata\vagrant\test> vagrant init centos/7
A `Vagrantfile` has been placed in this directory. You are now
ready to `vagrant up` your first virtual environment! Please read
the comments in the Vagrantfile as well as documentation on
`vagrantup.com` for more information on using Vagrant.

PS C:\Users\Playdata\vagrant\test> ls


    디렉터리: C:\Users\Playdata\vagrant\test


Mode                 LastWriteTime         Length Name
----                 -------------         ------ ----
-a----      2022-04-12  오전 12:14           3084 Vagrantfile
Vagrantfile 내용
Vagrant.configure("2") do |config|
  config.vm.box = "centos/7"
end
생성할 가상머신을 centos7으로 생성한다는 내용
Vagrantfile 예시
Vagrant.configure("2") do |config|
	# Define VM
	config.vm.define "myvm1" do |centos|
		centos.vm.box = "centos/7"
		centos.vm.hostname = "myvm1"
		centos.vm.network "private_network", ip: "*.11"
		centos.vm.provider "virtualbox" do |vb|
			vb.name = "myvm1"
			vb.cpus = 2
			vb.memory = 2048
		end
		config.vm.provision "shell", inline: <<-SHELL
			#!/bin/bash
			echo "hello world" > /tmp/hello.txt
		SHELL
	end

	# Define VM
	config.vm.define "myvm2" do |centos|
		centos.vm.box = "centos/7"
		centos.vm.hostname = "myvm2"
		centos.vm.network "private_network", ip: "*.12"
		centos.vm.provider "virtualbox" do |vb|
			vb.name = "myvm2"
			vb.cpus = 2
			vb.memory = 2048
		end
		config.vm.provision "shell", inline: <<-SHELL
			#!/bin/bash
			echo "hello world" > /tmp/hello.txt
		SHELL
	end
end
가상머신 생성
PS C:\Users\Playdata\vagrant\test> vagrant up- 생성확인
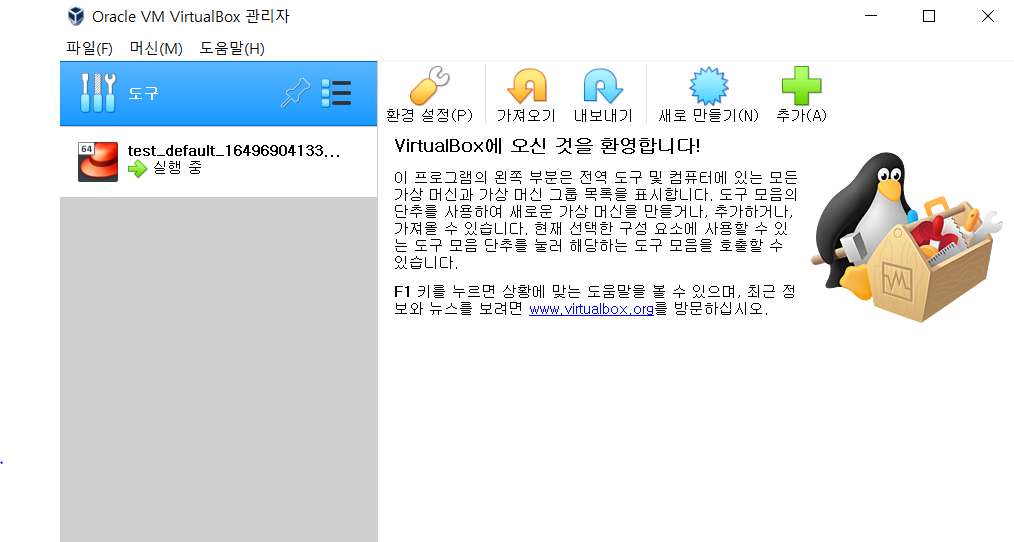
PS C:\Users\Playdata\vagrant\test> vagrant status
Current machine states:

default                   running (virtualbox)

The VM is running. To stop this VM, you can run `vagrant halt` to
shut it down forcefully, or you can run `vagrant suspend` to simply
suspend the virtual machine. In either case, to restart it again,
simply run `vagrant up`.
가상머신 접속
Vagrantfile 있는 위치에서 ssh를 통해 바로 원격 접속 가능
PS C:\Users\Playdata\vagrant\test> vagrant ssh
[vagrant@localhost ~]$
서브커맨드
> vagrant [sub-command] [VM_NAME]| 커맨드 | 설명 |
|---|---|
| destroy | 생성한 가상머신 삭제 |
| halt | 가상머신 중지 |
| reload | 가상머신 재시작 |
| resume | suspend로 일시정지한 가상머신 재시작 |
| ssh | 가상머신 접속 |
| status | 가상머신 상태 확인 |
| suspend | 가상머신 일시 정지 |
| up | Vagrantfile을 참조하여 가상머신이 없다면 새로 생성, 있다면 실행 |

네.. 뭐.. 김건호입니다...