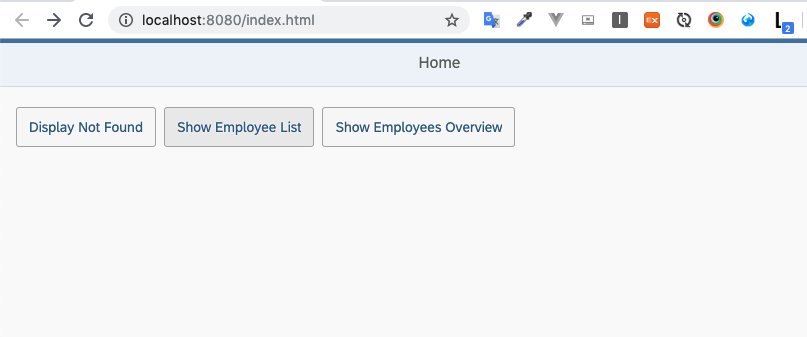
이번 튜토리얼은 홈 페이지에 새로운 버튼을 추가하여 route에 대한 multiple targets에 대해서 알아본다.
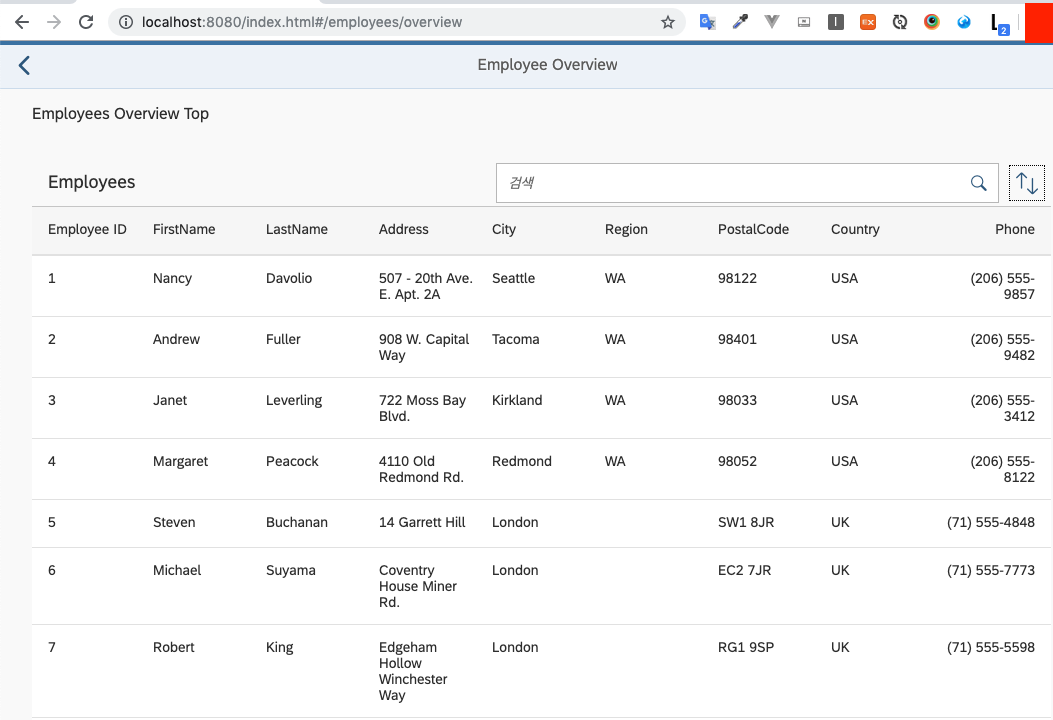
show Employees Overview 버튼을 누르면 header와 content 부분으로 구성된 새 페이지가 보인다.
content 부분은 정렬 및 검색 할 수있는 직원 테이블을 표시한다.
Preview
Coding
Routing and Navigation - Step 11 .
webapp/view/Home.view.xml
<mvc:View
	controllerName="sap.ui.demo.nav.controller.Home"
	xmlns="sap.m"
	xmlns:mvc="sap.ui.core.mvc">
	<Page title="{i18n>homePageTitle}" class="sapUiResponsiveContentPadding">
		<content>
			<Button id="displayNotFoundBtn" text="{i18n>DisplayNotFound}" press="onDisplayNotFound" class="sapUiTinyMarginEnd"/>
			<Button id="employeeListBtn" text="{i18n>ShowEmployeeList}" press="onNavToEmployees" class="sapUiTinyMarginEnd"/>
			<Button id="employeeOverviewBtn" text="{i18n>ShowEmployeeOverview}" press="onNavToEmployeeOverview" class="sapUiTinyMarginEnd"/>
		</content>
	</Page>
</mvc:View>
home view에서 새로운 버튼을 추가하고 onNavToEmployeeOverview 이벤트 핸들러를 추가한다.
webapp/controller/Home.controller.js
sap.ui.define([
	"sap/ui/demo/nav/controller/BaseController"
], function (BaseController) {
	"use strict";
	return BaseController.extend("sap.ui.demo.nav.controller.Home", {
		...
	 onNavToEmployees : function (oEvent){
			this.getRouter().navTo("employeeList");
		},
	 onNavToEmployeeOverview : function (oEvent) {
			this.getRouter().navTo("employeeOverview");
		}

	});
});
view에서 추가한 핸들러를 컨트롤러에 정의한다.
webapp/manifest.json
{
	...,
	"sap.ui5": {
		...
		"routing": {
			"config": {...},
			"routes": [{
			    {...},
			    {
                    "pattern": "employees/overview",
                    "name": "employeeOverview",
                    "target": ["employeeOverviewTop", "employeeOverviewContent"]
			    },
            }],
            "targets": {
                "EmployeeOverview": {
                    "viewId": "employeeOverview",
                    "viewPath": "sap.ui.demo.nav.view.employee.overview",
                    "viewName": "EmployeeOverview",
                    "viewLevel" : 2
                },
                "EmployeeOverviewTop": {
                    "parent": "EmployeeOverview",
                    "viewId": "employeeOverviewTop",
                    "viewPath": "sap.ui.demo.nav.view.employee.overview",
                    "viewName": "EmployeeOverviewTop",
                    "controlId": "EmployeeOverviewParent",
                    "controlAggregation": "content"
                },
                "EmployeeOverviewContent": {
                    "parent": "EmployeeOverview",
                    "viewId": "employeeOverviewContent",
                    "viewPath": "sap.ui.demo.nav.view.employee.overview",
                    "viewName": "EmployeeOverviewContent",
                    "controlId": "EmployeeOverviewParent",
                    "controlAggregation": "content"
                }
            }
		}
	}
}
새로운 라우트 employeeOverview를 추가한다. 해당 라우트는 employee 라우트보다 먼저 정의가 되어야 한다. 그렇지 않으면 employee 라우트가 /#/employees/overview와 같이 hash가 일치해야한다.
새 라우트인 employeeOverview는 "target": ["employeeOverviewTop", "employeeOverviewContent"] 두개의 대상을 동시에 참조한다.
note:
첫번째로 일치하는 항복이 매치되면 이후 라우트는 동작을 안하기 때문에 라우팅 할때 configuration 순서가 중요하다.
라우트에서 매개 변수greedy속성을 true로 설정하면 이 동작을 무시할 수 있다. 그러면 다른 라우트가 전에 매치된 경우에도 pattern이 형재 URL과 일치 할때 라우트가 항상 일치된다.
보통greedy는 view가 없는 target을 구성할대 라우트 일치 이벤트를 수신하는 용도로 사용한다.
target으로 설정한 employeeOverviewTop, employeeOverviewContent의 부모인 EmployeeOverview를 생성한다.
부모의 target에서 viewLevel을 2로 설정하고 targets에서 controlID,controlAggregation를 셋팅해준다.
라우터는 해당 라우트가 일치하고 target이 표시 될 때 상위 view target view가 로드되는지 확인한다.(Page 컨트롤에 content aggregation에 의해 표기됨)
webapp/view/employee/overview/EmployeeOverview.view.xml (New)
<mvc:View
	controllerName="sap.ui.demo.nav.controller.employee.overview.EmployeeOverview"
	xmlns="sap.m"
	xmlns:mvc="sap.ui.core.mvc"
	xmlns:l="sap.ui.layout">
	<Page id="EmployeeOverviewParent" title="{i18n>EmployeeOverview}"
		showNavButton="true"
		navButtonPress="onNavBack"
		class="sapUiResponsiveContentPadding">
		<content>
			<!-- inserted by routing -->
		</content>
	</Page>
</mvc:View>
webapp/view/employee/overview 경로에 해당 파일을 만든다. 해당 파일은 parent view로 descriptor 파일에 target에서 참조된다.
Page 컨트롤에서 content aggregation은 해당 라우트에 도달했을때 채워진다.
webapp/controller/employee/overview/EmployeeOverview.controller.js (New)
sap.ui.define([
	"sap/ui/demo/nav/controller/BaseController"
], function (BaseController) {
	"use strict";
	return BaseController.extend("sap.ui.demo.nav.controller.employee.overview.EmployeeOverview", {
	});
});
컨트롤러는 아직 로직을 포함하진 않았지만 다음 튜토리얼에서 기능을 추가시킬 예정이다.
webapp/view/employee/overview/EmployeeOverviewTop.view.xml (New)
<mvc:View xmlns="sap.m" xmlns:mvc="sap.ui.core.mvc" class="sapUiMediumMarginBottom">
	<Title text="{i18n>EmployeeOverviewTop}" />
</mvc:View>
이 view는 정적인 텍스트만 표시된다. 따라서 별도의 컨트롤러가 필요 없다.
webapp/view/employee/overview/EmployeeOverviewContent.view.xml (New)
<mvc:View
	controllerName="sap.ui.demo.nav.controller.employee.overview.EmployeeOverviewContent"
	xmlns="sap.m"
	xmlns:mvc="sap.ui.core.mvc">
	<Table id="employeesTable"
			items="{/Employees}">
		<headerToolbar>
			<Toolbar>
				<Title text="{i18n>Employees}" level="H2"/>
				<ToolbarSpacer />
				<SearchField id="searchField" search="onSearchEmployeesTable" width="50%"/>
				<Button icon="sap-icon://sort" press="onSortButtonPressed" />
			</Toolbar>
		</headerToolbar>
		<columns>
			<Column id="employeeIDCol"><Text text="{i18n>EmployeeID}"/></Column>
			<Column id="firstNameCol" demandPopin="true"><Text text="{i18n>FirstName}"/></Column>
			<Column id="lastNameCol" demandPopin="true"><Text text="{i18n>LastName}"/></Column>
			<Column id="addressCol" minScreenWidth="Tablet" demandPopin="true"><Text text="{i18n>Address}"/></Column>
			<Column id="cityCol" minScreenWidth="Tablet" demandPopin="true"><Text text="{i18n>City}"/></Column>
			<Column id="regionCol" minScreenWidth="Tablet" demandPopin="true"><Text text="{i18n>Region}"/></Column>
			<Column id="postalCodeCol" minScreenWidth="Tablet" demandPopin="true"><Text text="{i18n>PostalCode}"/></Column>
			<Column id="countryCol" minScreenWidth="Tablet" demandPopin="true"><Text text="{i18n>Country}"/></Column>
			<Column id="homePhoneCol" minScreenWidth="Tablet" demandPopin="true" hAlign="End"><Text text="{i18n>Phone}"/></Column>
		</columns>
		<items>
			<ColumnListItem>
				<cells>
					<Text text="{EmployeeID}"/>
					<Text text="{FirstName}"/>
					<Text text="{LastName}"/>
					<Text text="{Address}"/>
					<Text text="{City}"/>
					<Text text="{Region}"/>
					<Text text="{PostalCode}"/>
					<Text text="{Country}"/>
					<Text text="{HomePhone}"/>
				</cells>
			</ColumnListItem>
		</items>
	</Table>
</mvc:View>
해당 view는 employeeID, first Name, Last Name등 직원 데이터를 표시하는 테이블을 생성한다.
headerToolbar에 SearchField와 Button을 추가하여 테이블 내 검색기능을 구현하고 검색 옵션을 구현한다.
webapp/controller/employee/overview/EmployeeOverviewContent.controller.js (New)
sap.ui.define([
"sap/ui/demo/nav/controller/BaseController",
"sap/ui/model/Filter",
"sap/ui/model/FilterOperator",
"sap/ui/model/Sorter"
], function (BaseController, Filter, FilterOperator, Sorter) {
"use strict";
return BaseController.extend("sap.ui.demo.nav.controller.employee.overview.EmployeeOverviewContent", {
onInit: function () {
this._oTable = this.byId("employeesTable");
this._oVSD = null;
this._sSortField = null;
this._bSortDescending = false;
this._aValidSortFields = ["EmployeeID", "FirstName", "LastName"];
this._sSearchQuery = null;
this._initViewSettingsDialog();
},
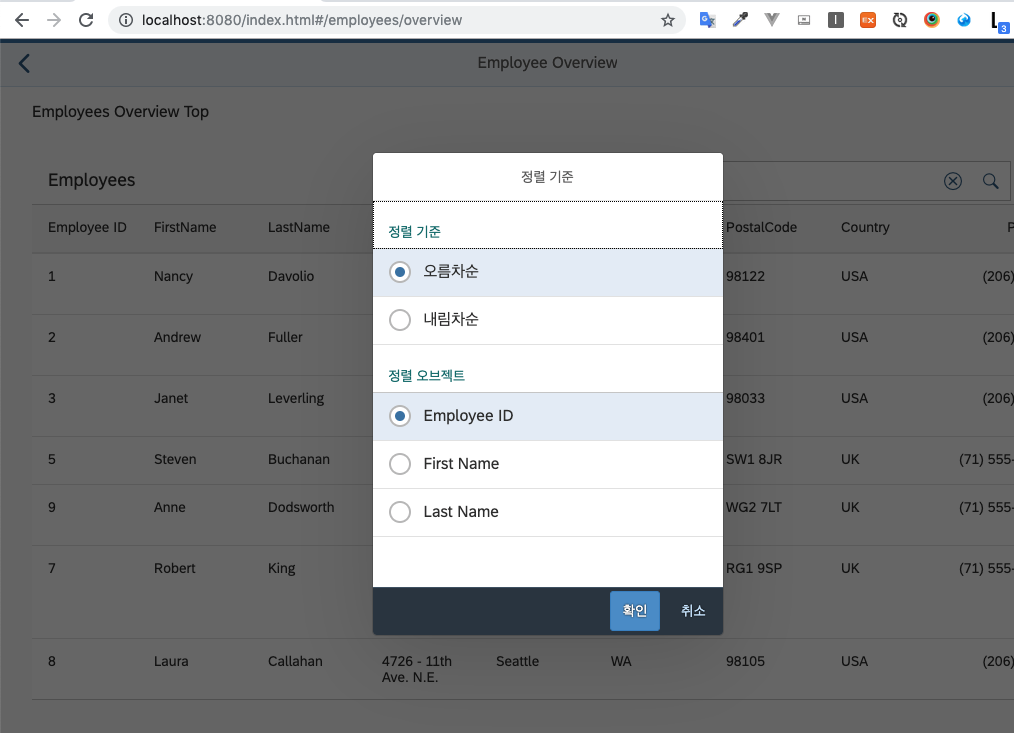
onSortButtonPressed : function (oEvent) {
this._oVSD.open();
},
onSearchEmployeesTable : function (oEvent) {
var sQuery = oEvent.getSource().getValue();
this._applySearchFilter( oEvent.getSource().getValue() );
},
_initViewSettingsDialog : function () {
var oRouter = this.getRouter();
this._oVSD = new sap.m.ViewSettingsDialog("vsd", {
confirm: function (oEvent) {
var oSortItem = oEvent.getParameter("sortItem");
this._applySorter(oSortItem.getKey(), oEvent.getParameter("sortDescending"));
}.bind(this)
});
// init sorting (with simple sorters as custom data for all fields)
this._oVSD.addSortItem(new sap.m.ViewSettingsItem({
key: "EmployeeID",
text: "Employee ID",
selected: true // we do this because our MockData is sorted anyway by EmployeeID
}));
this._oVSD.addSortItem(new sap.m.ViewSettingsItem({
key: "FirstName",
text: "First Name",
selected: false
}));
this._oVSD.addSortItem(new sap.m.ViewSettingsItem({
key: "LastName",
text: "Last Name",
selected: false
}));
},
_applySearchFilter : function (sSearchQuery) {
var aFilters, oFilter, oBinding;
// first check if we already have this search value
if (this._sSearchQuery === sSearchQuery) {
return;
}
this._sSearchQuery = sSearchQuery;
this.byId("searchField").setValue(sSearchQuery);
// add filters for search
aFilters = [];
if (sSearchQuery && sSearchQuery.length > 0) {
aFilters.push(new Filter("FirstName", FilterOperator.Contains, sSearchQuery));
aFilters.push(new Filter("LastName", FilterOperator.Contains, sSearchQuery));
oFilter = new Filter({ filters: aFilters, and: false }); // OR filter
} else {
oFilter = null;
}
// update list binding
oBinding = this._oTable.getBinding("items");
oBinding.filter(oFilter, "Application");
},
/**
* Applies sorting on our table control.
* @param {string} sSortField the name of the field used for sorting
* @param {string} sortDescending true or false as a string or boolean value to specify a descending sorting
* @private
*/
_applySorter : function (sSortField, sortDescending){
var bSortDescending, oBinding, oSorter;
// only continue if we have a valid sort field
if (sSortField && this._aValidSortFields.indexOf(sSortField) > -1) {
// convert the sort order to a boolean value
if (typeof sortDescending === "string") {
bSortDescending = sortDescending === "true";
} else if (typeof sortDescending === "boolean") {
bSortDescending = sortDescending;
} else {
bSortDescending = false;
}
// sort only if the sorter has changed
if (this._sSortField && this._sSortField === sSortField && this._bSortDescending === bSortDescending) {
return;
}
this._sSortField = sSortField;
this._bSortDescending = bSortDescending;
oSorter = new Sorter(sSortField, bSortDescending);
// sync with View Settings Dialog
this._syncViewSettingsDialogSorter(sSortField, bSortDescending);
oBinding = this._oTable.getBinding("items");
oBinding.sort(oSorter);
}
},
_syncViewSettingsDialogSorter : function (sSortField, bSortDescending) {
// the possible keys are: "EmployeeID" | "FirstName" | "LastName"
// Note: no input validation is implemented here
this._oVSD.setSelectedSortItem(sSortField);
this._oVSD.setSortDescending(bSortDescending);
}
});
});마지막으로 EmployeeOverviewContent 컨트롤러를 추가한다. 해당 컨트롤러는 직원 데이터를 필터링하고 검색 필터를 사용하는 기능들이 구현되어 있다.
이 튜토리얼에선 라우팅 관련한 기술만 서술 하므로 자세한 내용은 walkthroug step 24 ~ 25 참고하도록 한다.
이제 URL에 http://localhost:8080/index.html#/employees/overview주소로 가면 descriptor에 의해 해당 url에서 haeder와 content overview 페이지가 로드됨을
알 수 있다.
note:
sao.m의 라우터는 hash가 변경되면(navTo() 혹은 브라우저 뒤로가기)모든 다이얼로그가 닫힌다. 이 동작은 라우터 또는 target의getTargetHandler().setCloseDialogs(false)
을 호출하여 변경할 수 있다.
아직 검색을 하면 북마크를 만들지 않았다. 다음 튜토리얼에서 다루도록 한다.
webapp/i18n/i18n.properties
...
EmployeeOverview=Employee Overview
ShowEmployeeOverview=Show Employee Overview

EmployeeOverviewTop=Employee Overview Top

Region=Region
EmployeeID=Employee ID
Phone=Phone
Employees=Employees
Related Information