실시간 채팅은 어떻게 이루어지는지 하단 참고 링크를 통해 알아가고 찾아보면서 nodejs와 socket.io로 채팅을 구현 해보았습니다.
웹소켓(WebSocket) 이란?
HTTP 프로토콜은 클라이언트가 서버에 요청을 보내면 서버가 응답하는 단방향 통신 방식이다. 하지만 웹소켓은 양방향 통신을 제공하는 네트워크 프로토콜 중 하나로 실시간으로 서버와 클라이언트 간의 데이터 및 메세지 교환을 주고 받을 수 있다. 예시로 채팅 및 주식 등 실시간이 중요한 분야에 활용된다.
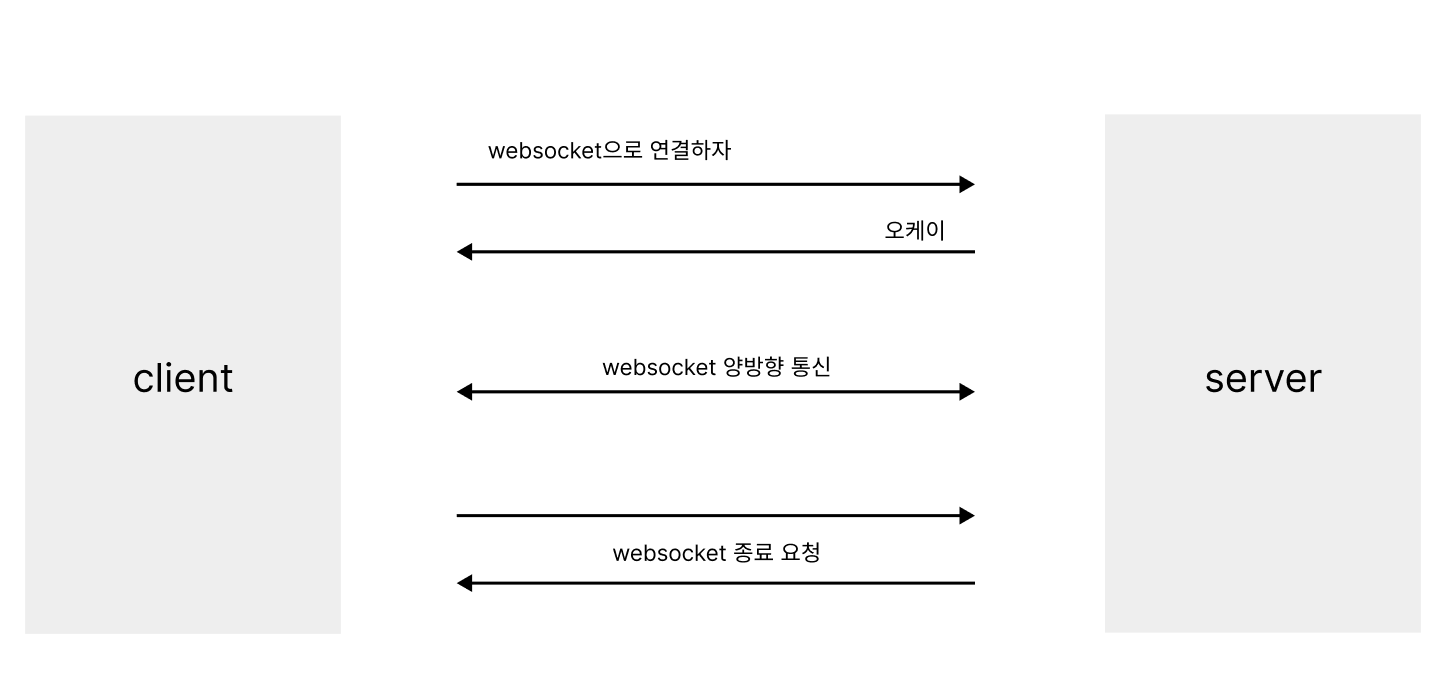
간단한 그림으로 보면 처음 연결을 요청할때 클라이언트에서 HTTP를 통해 웹서버에 요청하는 부분이 핸드셰이크이다. 이 핸드셰이크 과정이 성공하면 통신 프로토콜이 websocket으로 전환되며 클라이언트와 서버 간의 양방향 통신이 이루어진다. 마지막으로 클라이언트와 서버 누구나 웹 소켓 연결을 종료할 수 있다.
socket.io 사용법
// server
npm install socket.io
// client
npm install socket.io-client- on : 이벤트 받기
- emit : 이벤트 보내기
server
// 웹 서버 생성 및 옵션 설정
const http = require('http');
const server = http.createServer();
const io = require('socket.io')(server, {
cors: {
origin: 'http://localhost:3000',
method: ['GET', 'POST'],
},
});
// 클라이언트가 서버에 접속했을때 발생
io.on('connection', (socket) => {
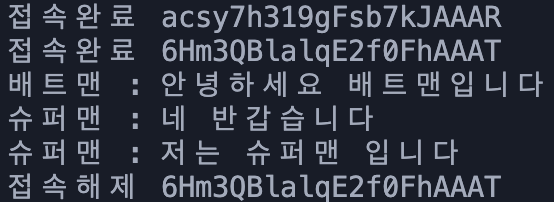
console.log('접속완료', socket.id);
// 클라이언트와 연결이 해제될때 발생
socket.on('disconnect', () => {
console.log('접속해제', socket.id);
});
// 클라이언트에서 보낸 메세지를 서버에서 수신
socket.on('send', (item) => {
console.log(item.nickname + ' : ' + item.message);
// 서버에서 연결된 클라이언트로 메세지 전송
io.emit('receive', { nickname: item.nickname, message: item.message });
});
});
server.listen(3001);- 클라이언트 접속 및 해제 상대방과 채팅을 통한 메세지 수신의 콘솔
client
// ChatRoom 컴포넌트
import React, { useState, useEffect } from 'react';
import ChatList from './ChatList';
import io from 'socket.io-client';

// 소켓 통신 포트 연결
const socket = io.connect('http://localhost:3001');

const ChatRoom = () => {
  const [chatList, setChatList] = useState([]);
  const [chat, setChat] = useState({ nickname: '', message: '' });
  const user = chat.nickname;

// 서버로 받은 메세지를 chatList에 저장 (화면에 보여줄려는 채팅 정보값)
  useEffect(() => {
    socket.on('receive', (msg) => {
      setChatList((chatList) => chatList.concat(msg));
    });
  }, []);

// 메세지와 닉네임 입력값을 usestate에 저장
  const handleMessage = (e) => {
    setChat((chat) => ({ ...chat, nickname: chat.nickname, message: e.target.value }));
  };
  const handleNickName = (e) => {
    setChat((chat) => ({ ...chat, nickname: e.target.value, message: chat.message }));
  };

 // 클라이언트에서 서버로 저장된 usestate값을 보냄
  const handleButton = () => {
    socket.emit('send', { nickname: chat.nickname, message: chat.message });
  };

  const handleEnterKey = (e) => {
    if (e.key === 'Enter' && !e.nativeEvent.isComposing) {
      handleButton();
      e.target.value = '';
    }
  };
컴포넌트 및 스타일
// ChatRoom 컴포넌트
return (
<div className="flex flex-col center bg-gray-200">
<h2 className="text-center border-b py-2 border-gray-400">채팅방</h2>
<div className="h-full py-4">
<ChatList chatList={chatList} user={user} />
</div>
<div className="w-full fixed bottom-0 flex items-center gap-1 px-2 py-4">
<input
type="text"
onChange={handleNickName}
className="w-1/4 px-2 py-1 rounded-lg border border-gray-400 placeholder:text-center"
placeholder="닉네임"
/>
<input
type="text"
onChange={handleMessage}
onKeyDown={handleEnterKey}
className="w-2/3 px-2 py-1 rounded-lg border border-gray-400 placeholder:text-center"
placeholder="메세지를 입력하세요."
/>
<button
type="button"
onClick={handleButton}
className="w-9 rounded-lg border border-gray-500 py-1 bg-white hover:bg-gray-200"
>
전송
</button>
</div>
</div>
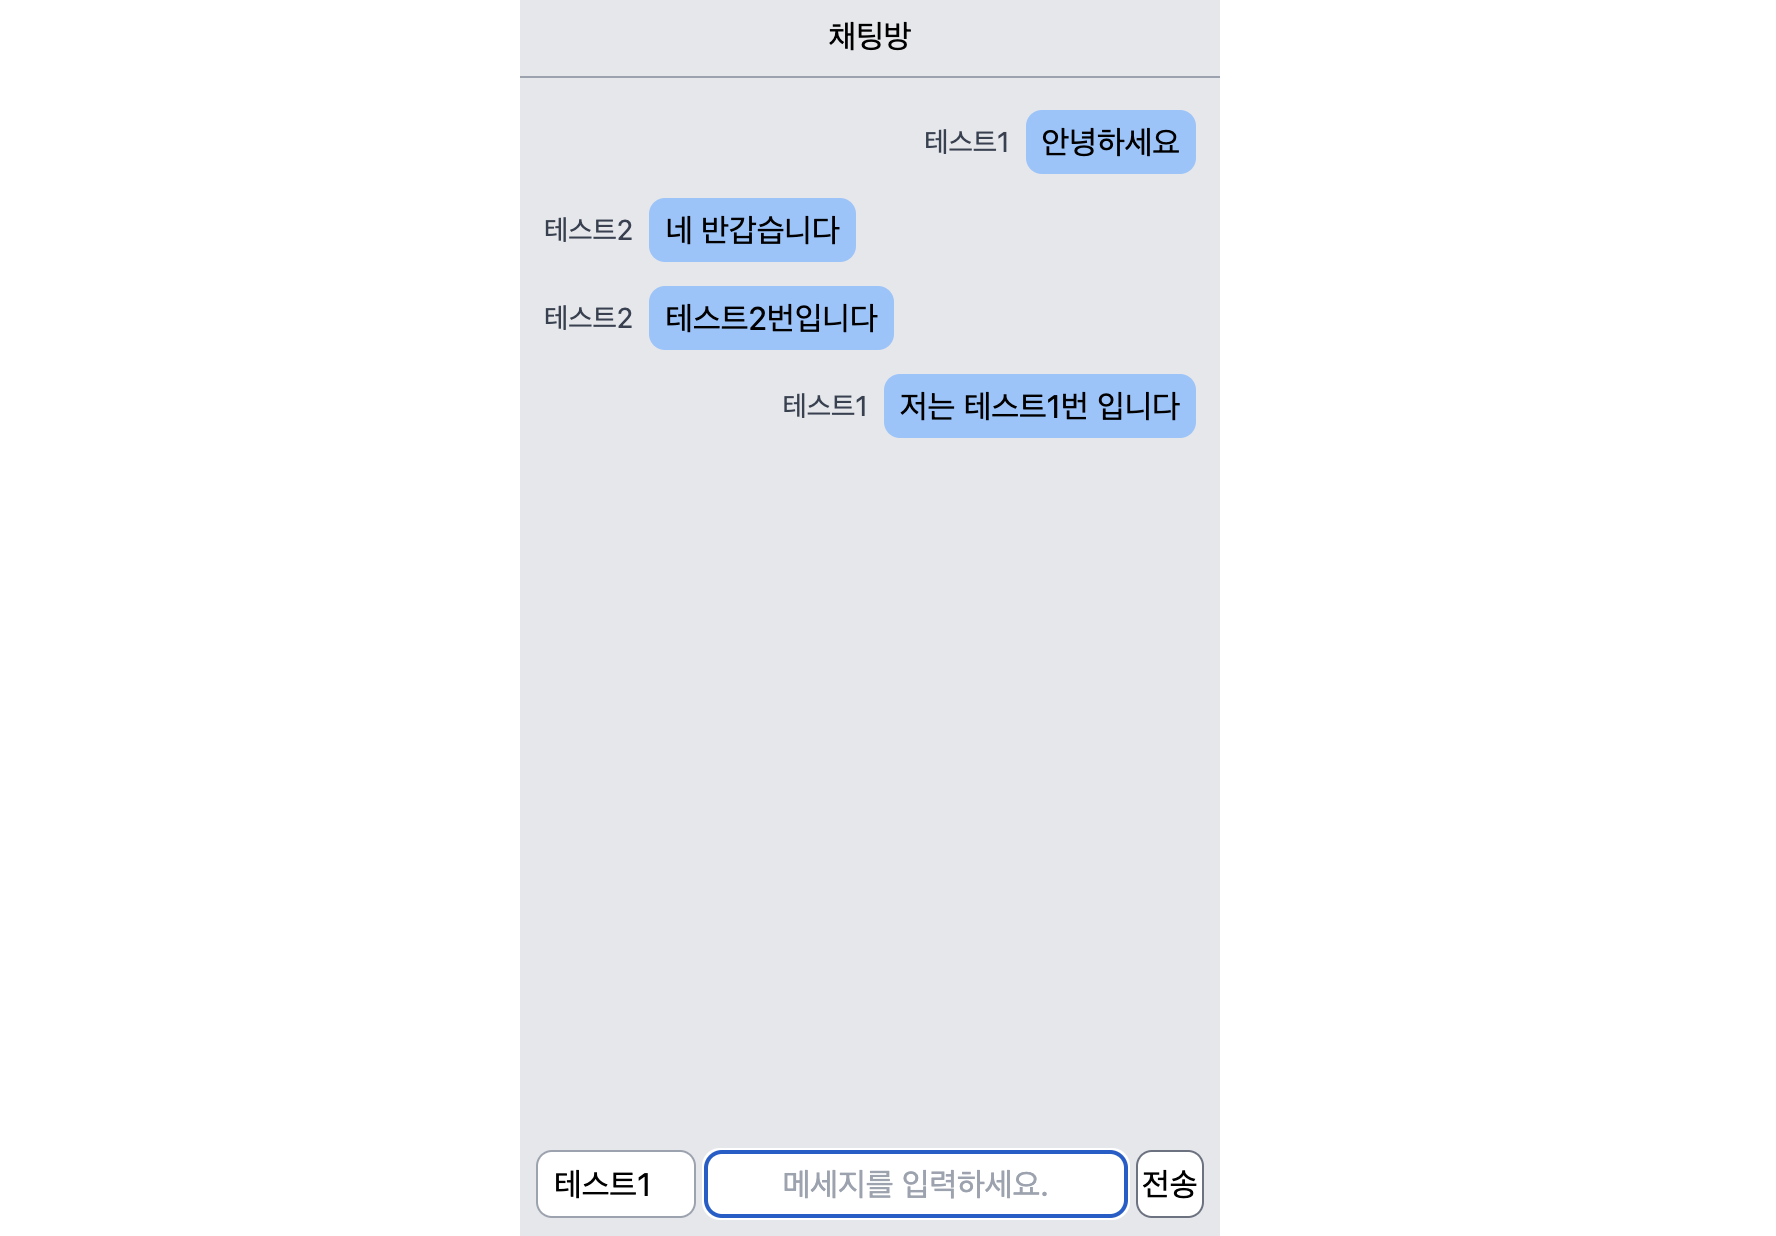
);// ChatList 컴포넌트
const ChatList = ({ chatList, user }) => {
return (
<div className="flex flex-col gap-3 mx-3">
{chatList.map((el, index) => (
<div
key={index}
className={`w-full flex items-center gap-2 ${user === el.nickname ? 'justify-end' : 'justify-start'}`}
>
<span className="text-sm text-gray-700">{el.nickname}</span>
<span className="px-2 py-1 rounded-lg bg-blue-300">{el.message}</span>
</div>
))}
</div>
);
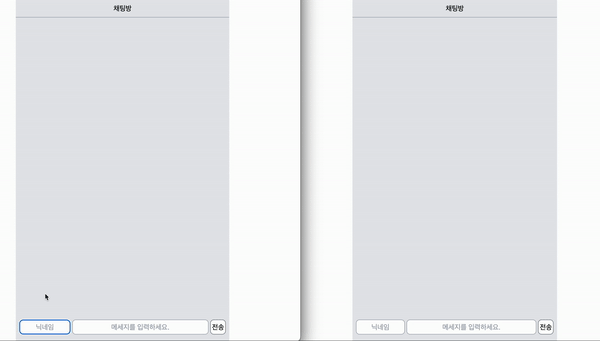
};채팅 테스트로 2개의 로컬창 동시에 띄운 화면
🖇️ Reference

데굴데굴데굴데굴데굴