aws 회원가입하기
* V-Box 에러 상황 2가지
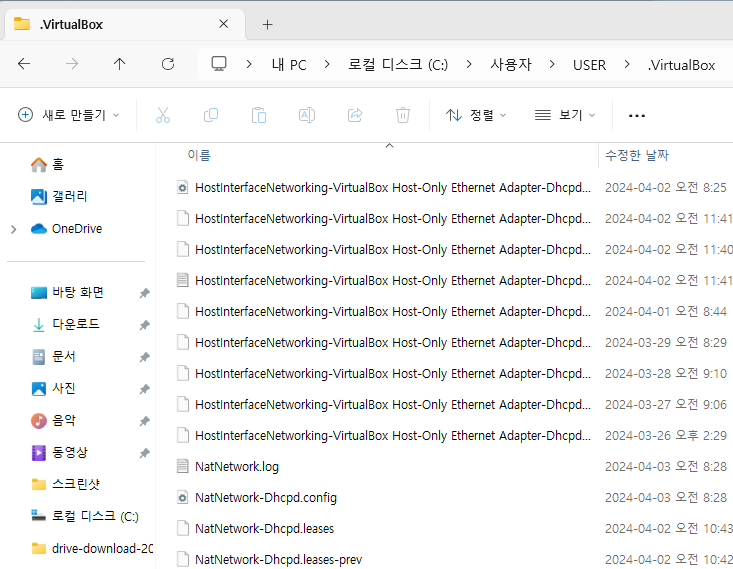
- 이미지를 불러오지 못할때 :
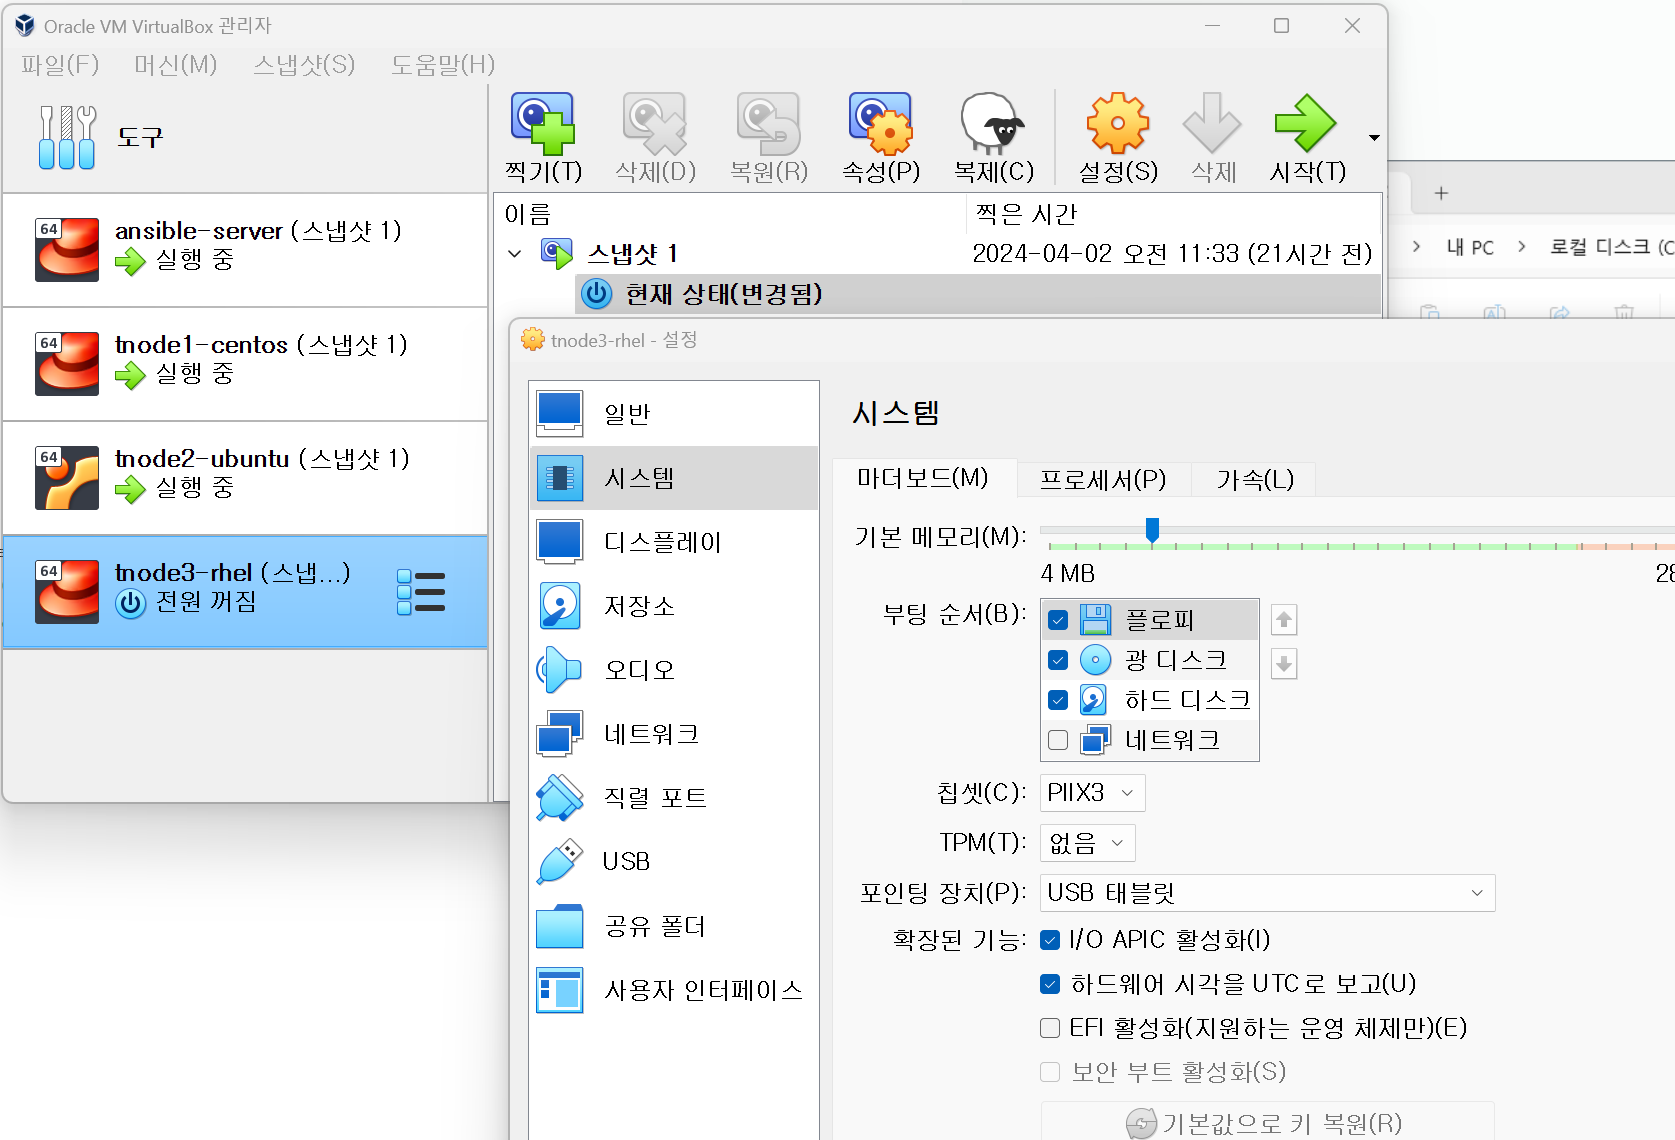
C:₩Users₩사용자이름₩.VirtualBox 여기안에 있는것 파일 삭제 - 마우스가 제대로 컨트롤이 안될때 .. 해당 OS전원을 끄고
설정 / 시스템 / 포인팅 장치를 USB 테블릿으로 변경하고 다시 실행 - 마우스 : 키보드 잡기 [해제 ]
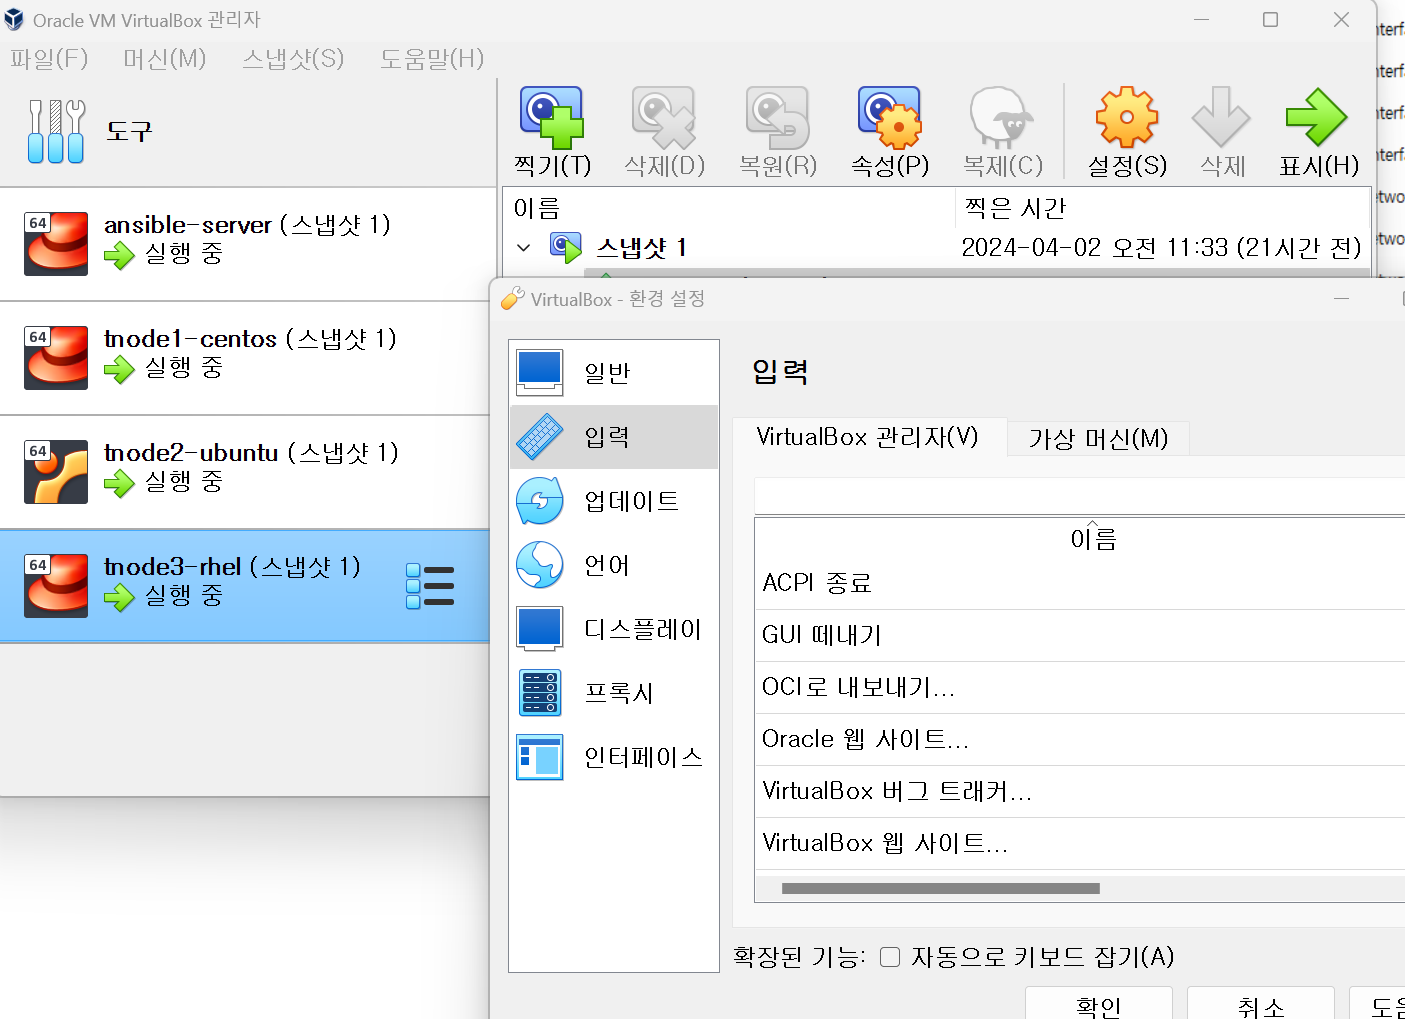
== > 파일 / 환경설정 / 입력 [ 자동으로 키보드 잡기 체크 해제 ]
- V-Box 에러가 발생했을 때
- 오늘 날짜 파일을 지우기
- 마우스가 작동이 안될 때 포인팅 장치를 USB 테블릿으로 바꾸기
- 자동으로 키보드 잡기 기능 해제하면 좋다(파일 -> 환경설정)
* NFS설정
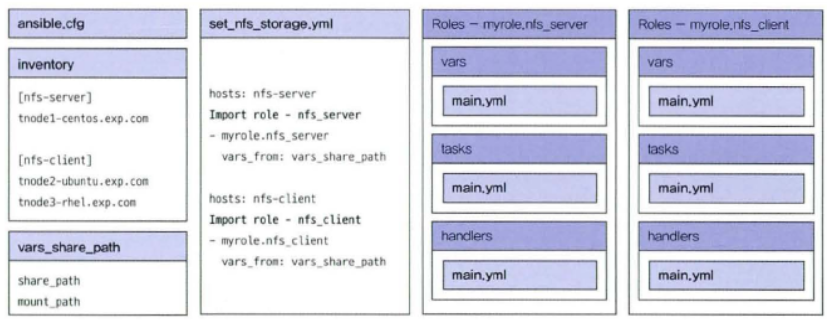
*챗 GPT에서 앤서블에서 NFS서버 플레이북 생성 검색 .
- mkdir day43-1
#inventory
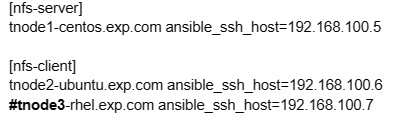
*ansible.cfg 파일은 기존것 사용
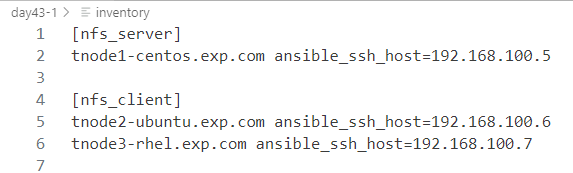
- ansible.cfg는 그대로
- inventory 파일에서
- nfs서버와 nfs클라이언트 나누기
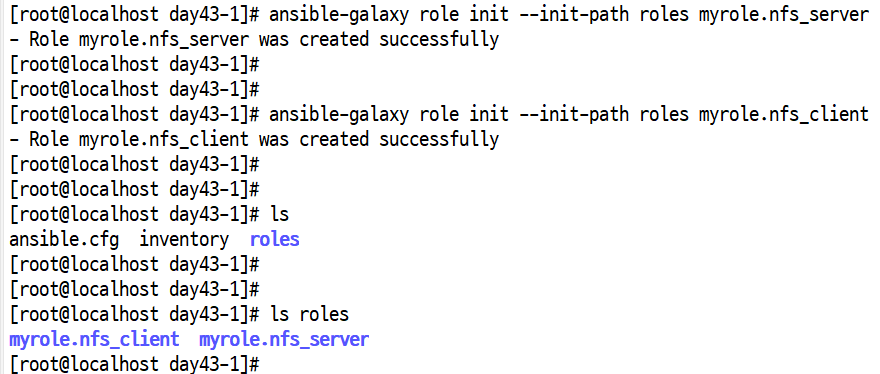
*서버 / 클라이언트 role 생성
- [root@ansible-server day43-1]# ansible-galaxy role init --init-path roles myrole.nfs_server
- Role myrole.nfs_server was created successfully
- [root@ansible-server day43-1]# ansible-galaxy role init --init-path roles myrole.nfs_client
- Role myrole.nfs_client was created successfully
- [root@ansible-server roles]# cd myrole.nfs_server/
- ansible roles 다운로드하기(ansible-galaxy)
- roles 리스트 확인(서버와 클라이언트)

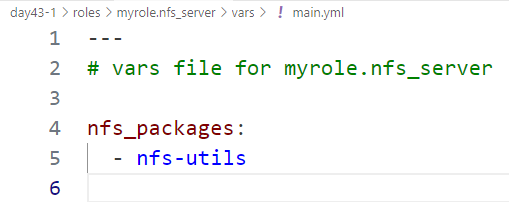
[root@ansible-server myrole.nfs_server]# vi vars/main.yml
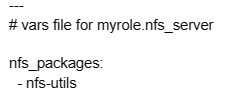
- nfs_server 디렉토리에서
- day43-1/roles/myrole.nfs_server/vars/main.yml 폴더로 들어가서
- nfs_pakage 설치할 것을 입력한다(변수).
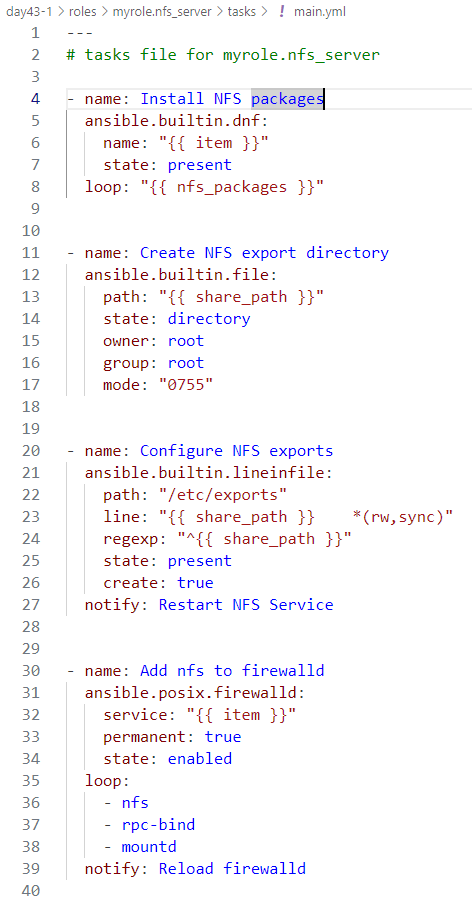
[root@ansible-server myrole.nfs_server]# vi tasks/main.yml ⇒ 폴더생성과/마운트/방화벽 등록
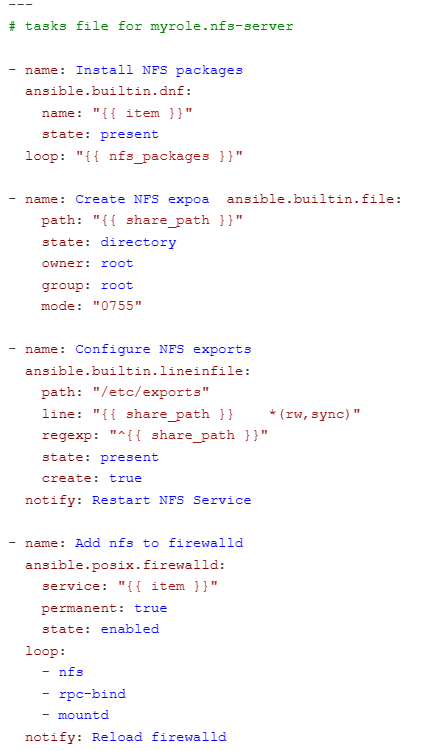
- /root/day43-1/roles/myrole.nfs_server/tasks/main.yml 파일에서
- 패키지 설치, 디렉터리 생성, nfs서비스 재시작의 task 내용을 작성한다.
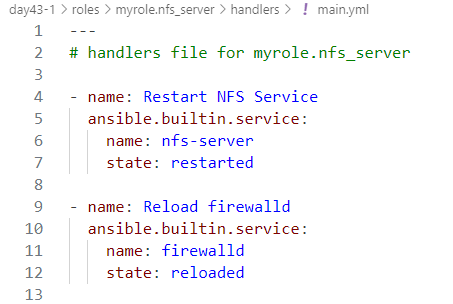
[root@ansible-server myrole.nfs_server]# vi handlers/main.yml
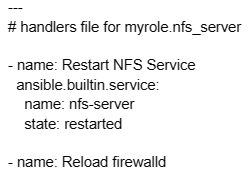
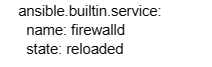
- /root/day43-1/roles/myrole.nfs_server/handlers/main.yml
- 특정 이벤트가 발생했을 때 nfs 서버 재시작과 방화벽 재설정하는 핸들러 내용 작성(name 맞춰주기)
[root@ansible-server myrole.nfs_server]# cd ../myrole.nfs_client/
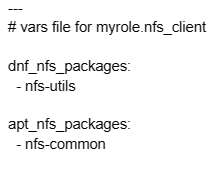
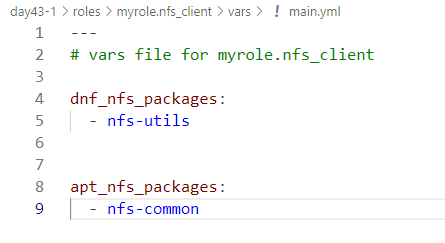
#vi vars/main.yml
- client로 이동
- /root/day43-1/roles/myrole.nfs_client/vars/main.yml
- Rocky와 Ubuntu에 nfs 서비스를 설치할 패키지를 입력한다
#vi tasks/main.yml
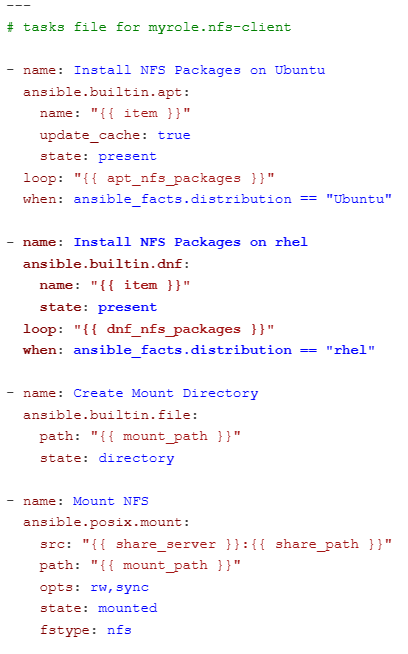
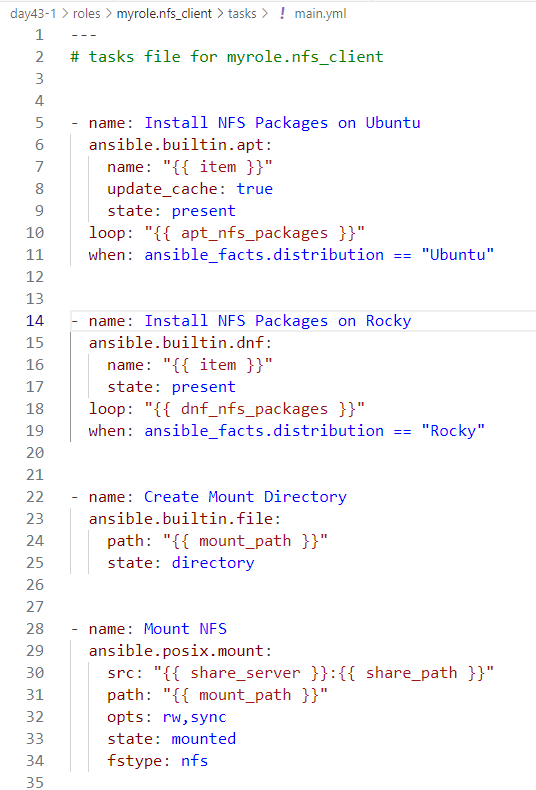
- /root/day43-1/roles/myrole.nfs_client/tasks/main.yml
- Rocky와 Ubuntu에 패키지를 불러와서 NFS 클라이언트를 설치하기 위한 작업을 정의하고 마운트를 위한 디렉터리 생성 및 마운트하는 작업을 정의한다
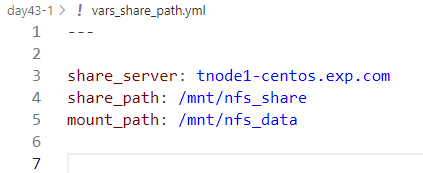
root@ansible-server day43-1]# vi vars_share_path.yml
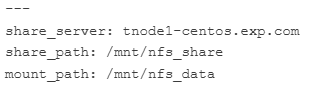
- day43-1로 이동
- /root/day43-1/vars_share_path.yml
- 공유할 서버와 경로, 마운트 경로를 입력한다
[root@ansible-server day43-1]# vi set_nfs_storage.yml
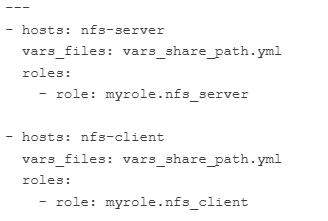
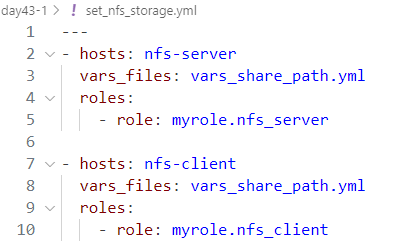
- /root/day43-1/set_nfs_storage.yml
- 호스트에 수행할 role을 작성한다(인벤토리의 그룹 이름과 호스트이름 맞춰주기)
day43-1]# vi roles/myrole.nfs_client/tasks/main.yml
- 여기에서 Rocky 를 rhel로 수정
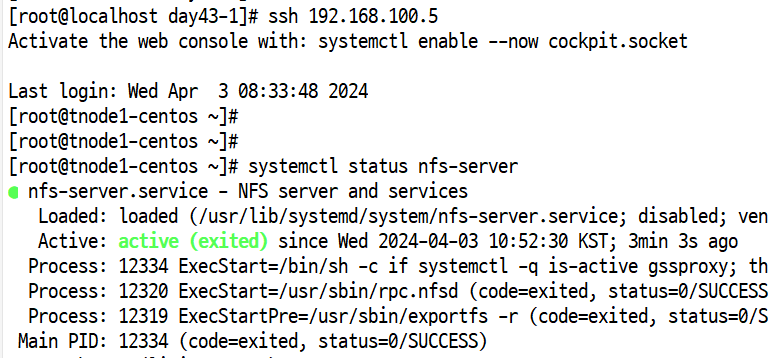
- tnode1 로 원격접속 후 systemctl status nfs-server 동작 확인
- tnode2,3 로 원격접속 후 df -h | grep nfs
- tnode1-centos.exp.com:/mnt/nfs_share 64G 5.8G 59G 9% /mnt/nfs_data
- 정의한 role을 플레이 북으로 실행한다
- tnode1(서버)는 서비스가 동작한다
- tnode2,3(클라이언트)는 서비스가 동작 안한다


- tnode1(서버)는 공유폴더 생성 안된다
- tnode2(클라이언트)는 공유폴더 생성된다 , tnode3은 공유폴더 생성 x


- 쳇 GPT를 이용한 오류 찾기 예
https://chat.openai.com/share/7a743a7b-1fe1-4191-8932-ffd38e0d06d1
* DB설정 tnode2에 DB서버 설치 하고 접속 해보기
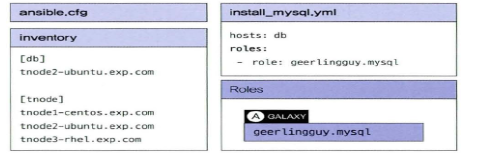
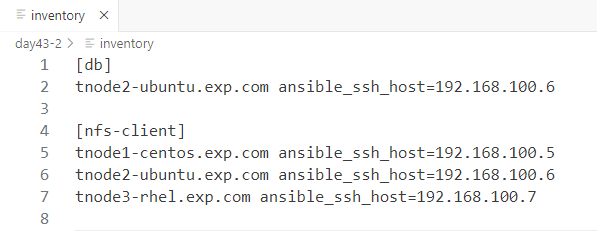
*ansible.cfg는 기존거 사용, inventory 파일은 위 그림 참조해서 수정
- #ansible-galaxy role install -p ./roles geerlingguy.mysql
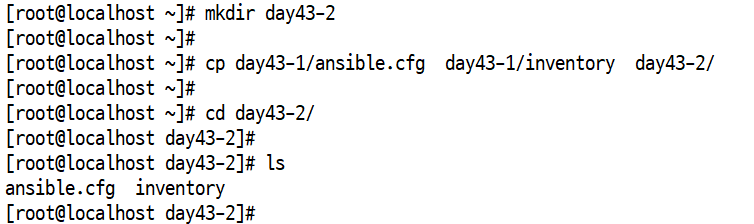
- 폴더 만들어서 ansible.cfg, inventory 복사
- inventory 파일에서
- db 그룹과 nfs-client 그룹 설정
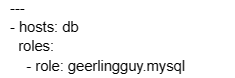
#vi install_mysql.yml
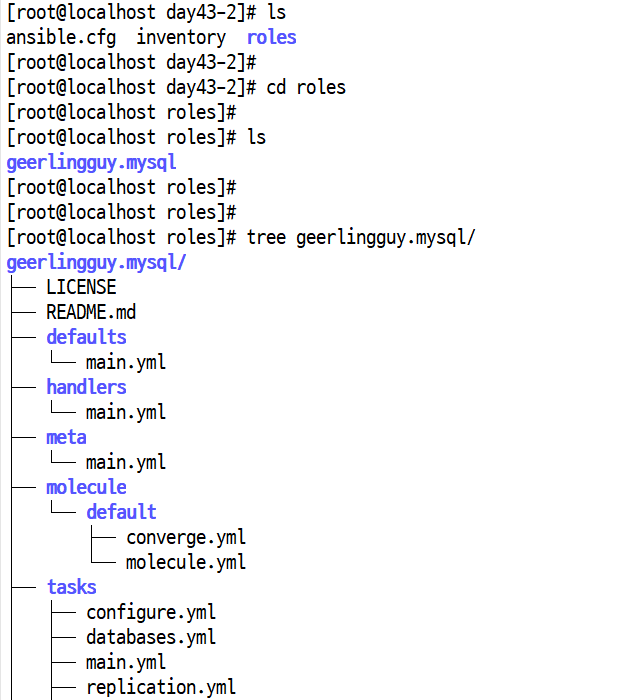
- ansible galaxy를 이용해서 role 설치 ,(-p 옵션: 경로 지정)
- geerlingguy 구조 확인

- /root/day43-2/install_mysql.yml 파일에서
- 호스트에게 role 수행할 것을 작성
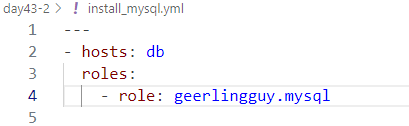
*실행하고 설치가 끝나면 tnode2로 접속 후 동작 확인
- root@tnode2-ubuntu:~# systemctl status mysql.service
- Active: active (running)
- root@tnode2-ubuntu:~#mysql
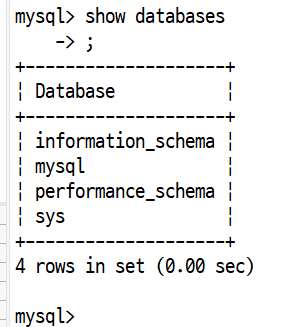
- show databases; 확인 까지 ..
- 플레이북으로 실행
- tnode2로 접속해서 서비스 동작하는 것을 확인
- mysql도 정상적으로 실행
- 생성된 databases 확인
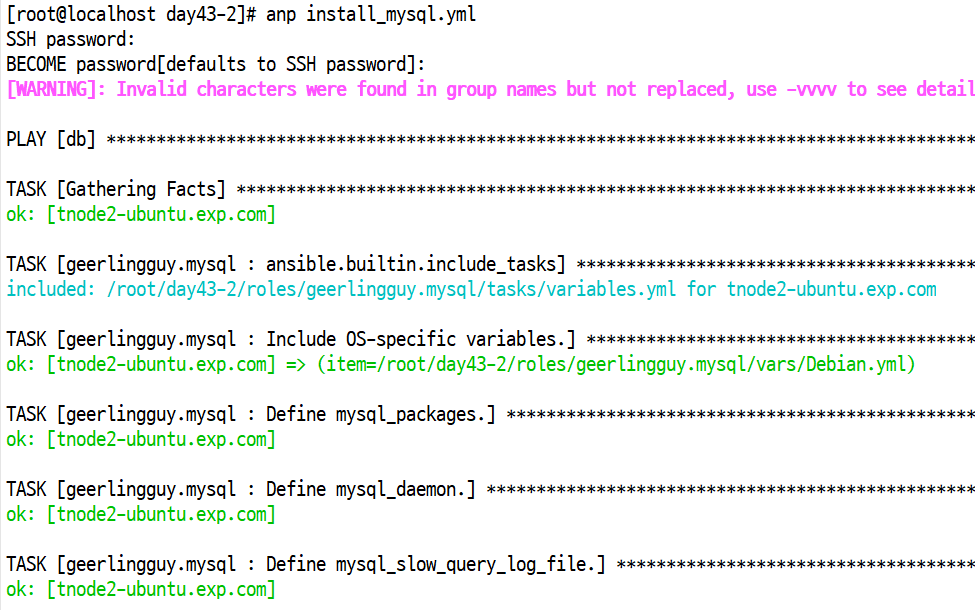
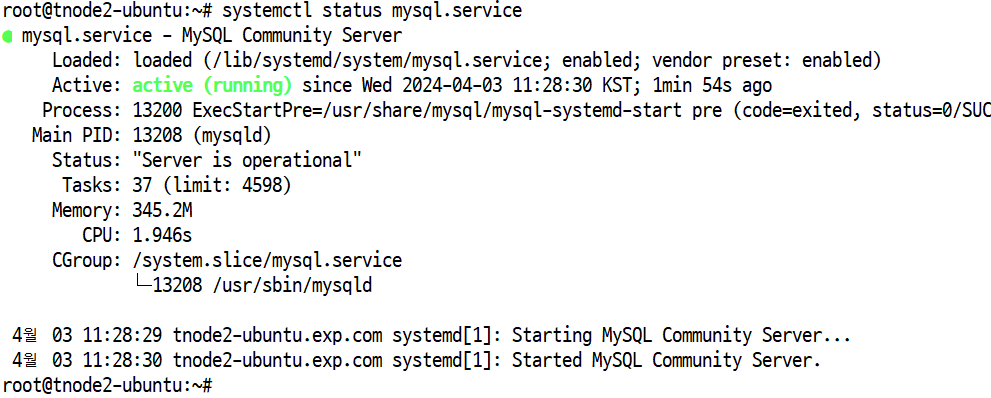
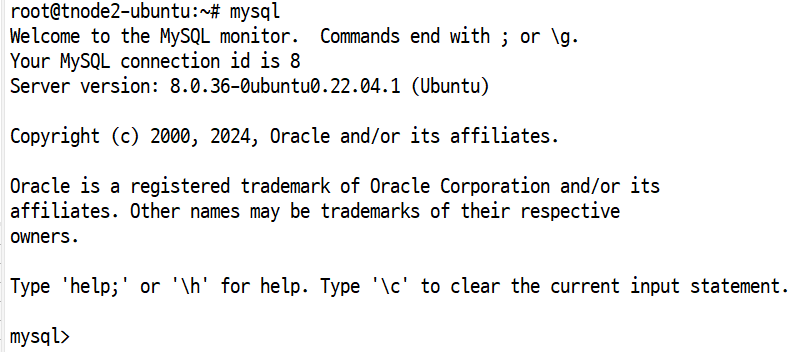
*리눅스에서 패스워드 관련
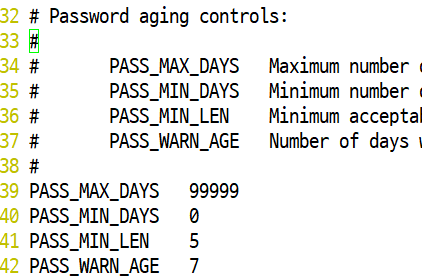
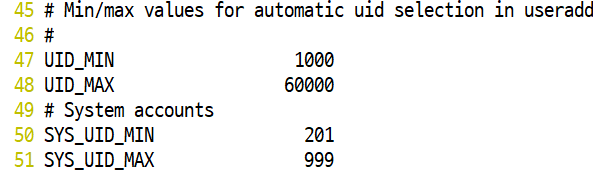
- #vi /etc/login.defs
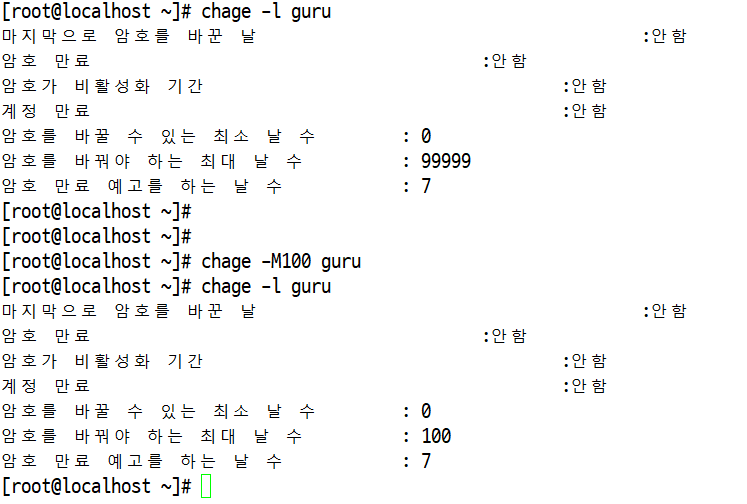
- #chage -l guru
- #chage -M100 guru 암호 사용기간을 100일로 변경
- #chage -d 2024-12-31 guru
[root@localhost ~]# vi /etc/login.defs 파일에서
- 비밀번호 설정 가능 (PASS_WARN_AGE: 비밀번호 만기 되기 7일 전에 경고)
- 사용자 설정도 가능
- chage 명령어 옵션
- "-l" 또는 "--list": 사용자 계정의 암호 관련 정보를 출력합니다.
- "-E" 또는 "--expiredate": 사용자 계정의 암호 만료일을 설정합니다.
- "-d" 또는 "--lastday": 사용자 계정의 암호 만료 후 마지막 액세스 날짜를 설정합니다.
- "-m" 또는 "--mindays": 새 암호를 설정한 후 변경할 수 있는 최소 일 수를 설정합니다.
- "-M" 또는 "--maxdays": 암호의 유효 기간을 설정합니다.
- "-W" 또는 "--warndays": 암호 만료 전에 사용자에게 경고를 표시하는 일 수를 설정합니다.
- chage를 통해 비밀번호 정보 확인, 암호 유효 기간 설정
- shadow 파일 : 리눅스 시스템에서 사용자의 암호화된 암호를 저장하는 파일
- username: 사용자의 로그인 이름
- password: 암호화된 암호
- lastchg: 암호가 마지막으로 변경된 날짜로부터의 일 수
- min: 새 암호를 설정한 후 변경할 수 있는 최소 일 수
- max: 암호의 유효 기간
- warn: 암호 만료 전에 사용자에게 경고를 표시하는 일 수
- inactive: 계정이 잠기기 시작하는 일 수
- expire: 계정이 만료되는 날짜
- reserved: 예약된 필드
*보안관련 자동화 관련
-패스워드 변경 주기
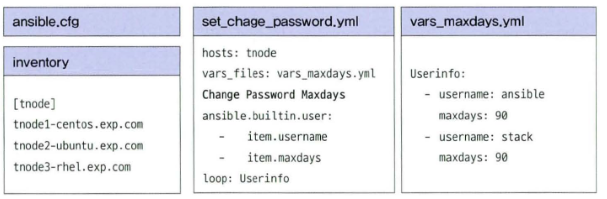
#mkdir day43-3
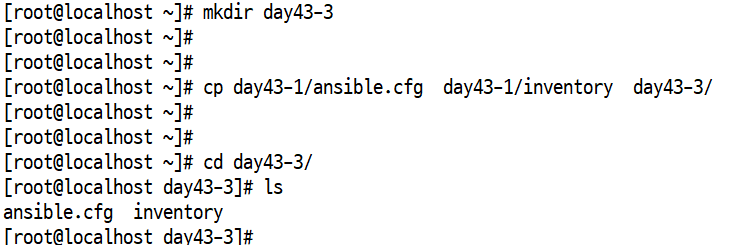
- inventory, ansible.cfg 파일은 기존 파일 사용
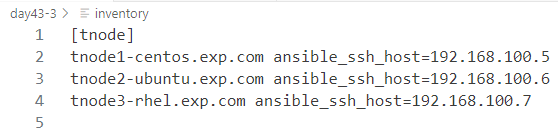
#vi inventory
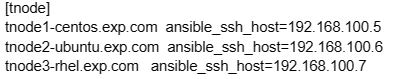
- ansible.cfg, inventory 카피하기
- 인벤토리 수정
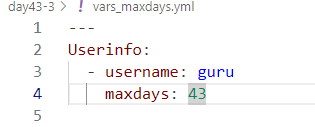
vi vars_maxdays.yml
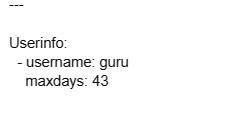
- /root/day43-3/vars_maxdays.yml
- 변수 지정하고 사용자 암호 정보 입력하기
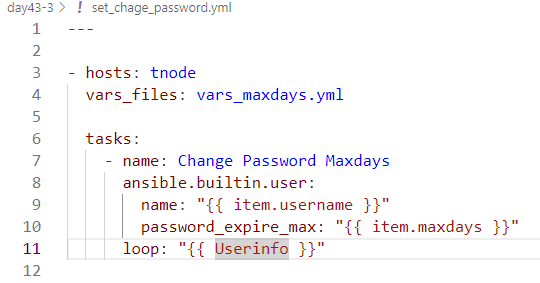
#vi set_chage_password.yml
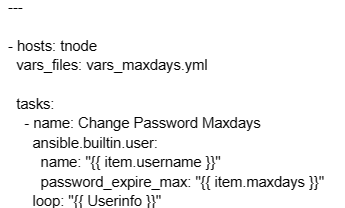
- /root/day43-3/set_chage_password.yml
- 변수에서 지정한 것을 통해 사용자의 암호 정보를 지정하는 내용 입력
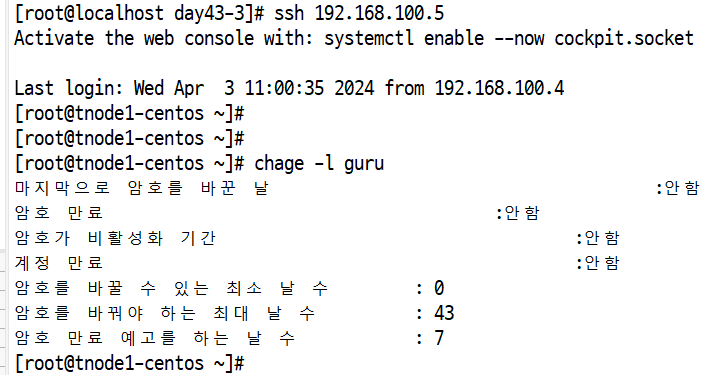
*실행 후 ssh 접속 해서 chage -l guru
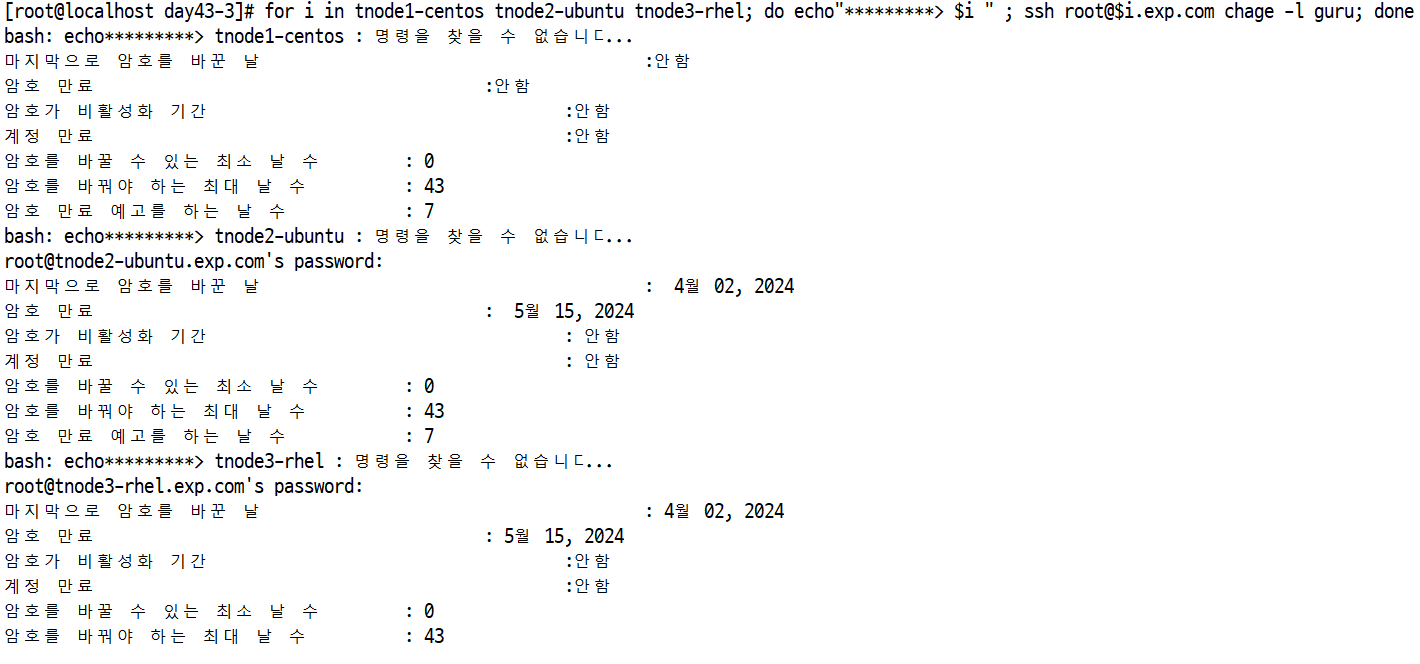
- 또는 아래처럼 한꺼번에 확인도 가능
- [root@ansible-server day43-3]# for i in tnode1-centos tnode2-ubuntu tnode3-rhel; do echo "**> i.exp.com chage -l guru; done
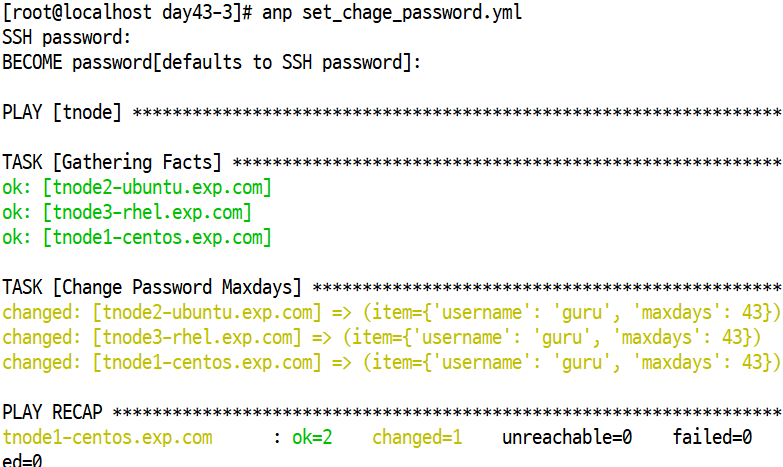
- 플레이북 실행
- tnode1로 접속해서 바뀐 사용자 암호 정보 확인(chage)
- for문을 이용해서 한번에 확인
*패스워드 생성 규칙
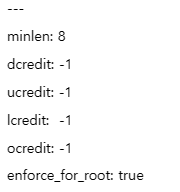
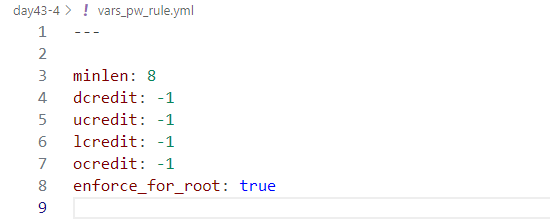
vars_pw_rule.yml
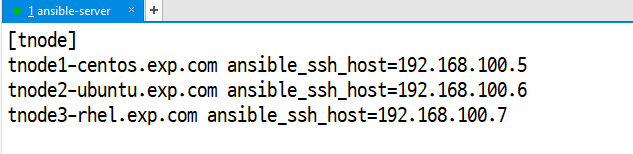
- day43-4 폴더 만들어서 ansible.cfg와 inventory 복사해서 invetory 수정
- 인벤토리 수정
- /root/day43-4/vars_pw_rule.yml
- 패스워드 만드는 정의 설정
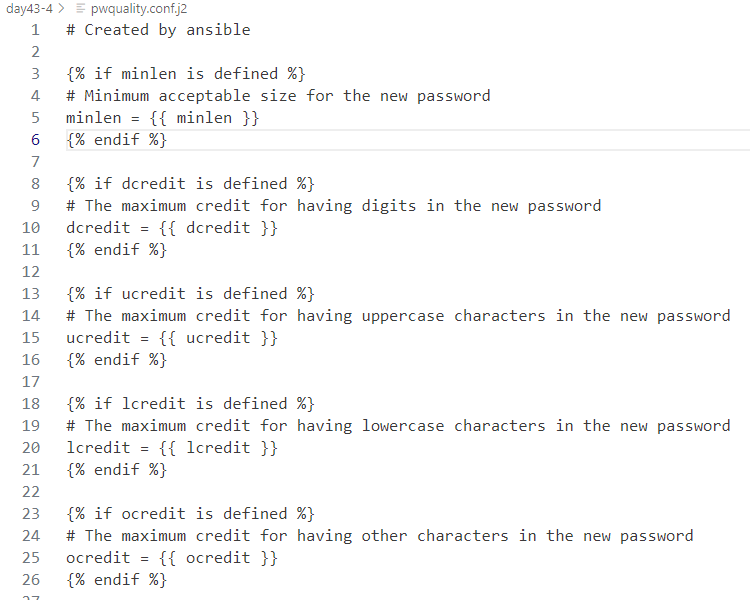
[root@ansible-server day43-4]# vi pwquality.conf.j2
-
#Created by ansible
{% if minlen is defined %}
#Minimum acceptable size for the new password ⇒ 최소길이
minlen = {{ minlen }}
{% endif %} -
{% if dcredit is defined %}
#The maximum credit for having digits in the new password ⇒ 숫자 포함
dcredit = {{ dcredit }}
{% endif %} -
{% if ucredit is defined %}
#The maximum credit for having uppercase characters in the new password ⇒ 대문자 포함
ucredit = {{ ucredit }}
{% endif %} -
{% if lcredit is defined %}
#The maximum credit for having lowercase characters in the new password ⇒ 소문자 포함
lcredit = {{ lcredit }}
{% endif %} -
{% if ocredit is defined %}
#The maximum credit for having other characters in the new password ⇒ 특수문자 포함.
ocredit = {{ ocredit }}
{% endif %} -
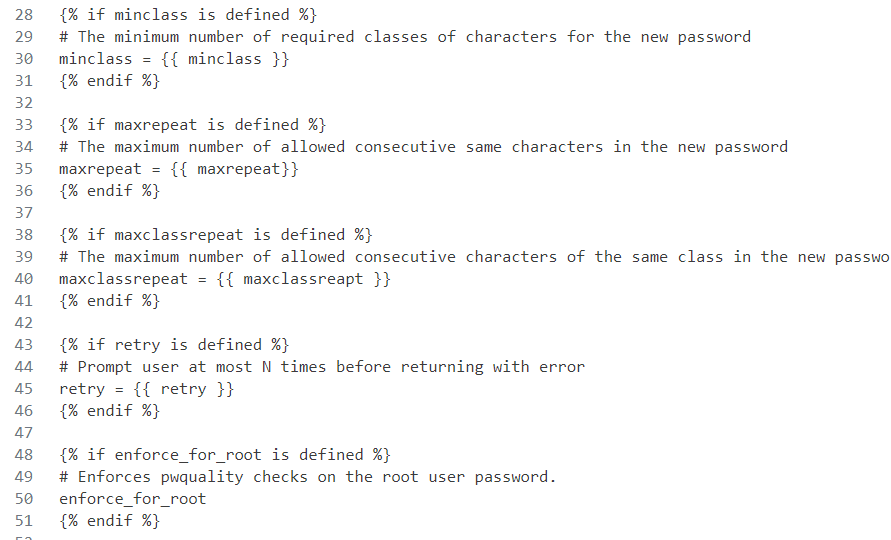
{% if minclass is defined %}
#The minimum number of required classes of characters for the new password ⇒ 보안정책 ( 복잡성 )
minclass = {{ minclass }}
{% endif %} -
{% if maxrepeat is defined %}
#The maximum number of allowed consecutive same characters in the new password ⇒ 동일문자 연속사용 안됨
maxrepeat = {{ maxrepeat}}
{% endif %} -
{% if maxclassrepeat is defined %}
#The maximum number of allowed consecutive characters of the same class in the new password
maxclassrepeat = {{ maxclassreapt }}
{% endif %} -
{% if retry is defined %}
#Prompt user at most N times before returning with error ⇒ 틀린 횟수 지정
retry = {{ retry }}
{% endif %} -
{% if enforce_for_root is defined %}
#Enforces pwquality checks on the root user password.
enforce_for_root -
{% endif %}
- /root/day43-4/pwquality.conf.j2
- 패스워드 만드는 정의 세부 설정
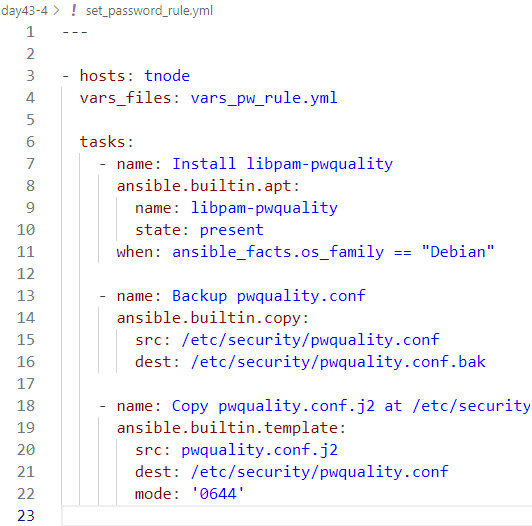
#vi set_password_rule.yml
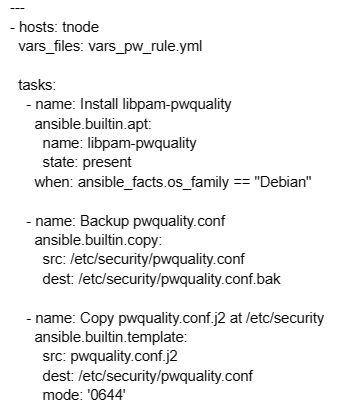
- /root/day43-4/set_password_rule.yml
- 패스워드 만드는 정의를 적용시키는 내용 작성
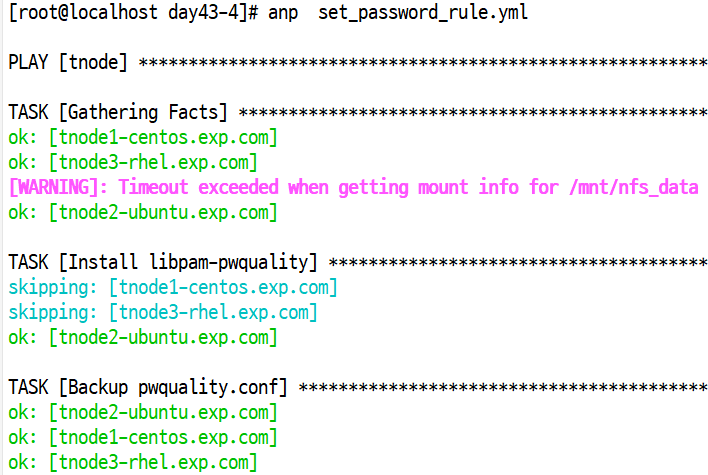
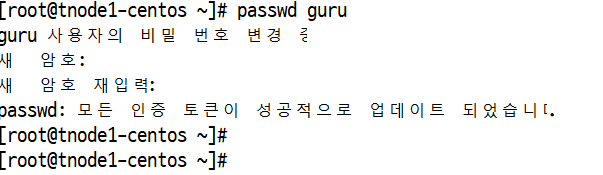
실행 후 원격접속 해서 guru 패스워드 변경 해보기
- 1234 에러
- P@ssw0rd1234 다시 변경
- Password1234
- 플레이북 실행
- 비밀번호 변경
*접근 권한
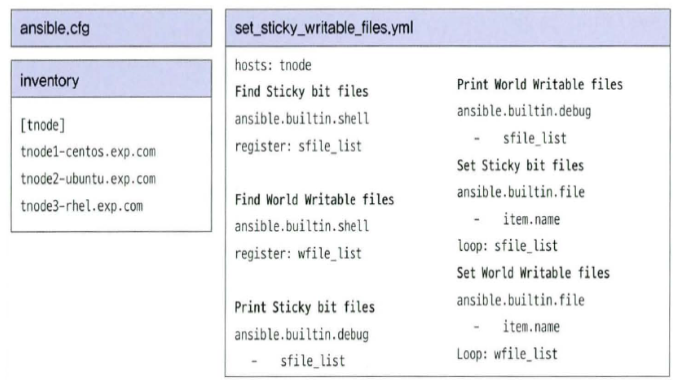
#mkdir 43-4 생성하고 inventory, ansible.cfg 파일 기존것 사용
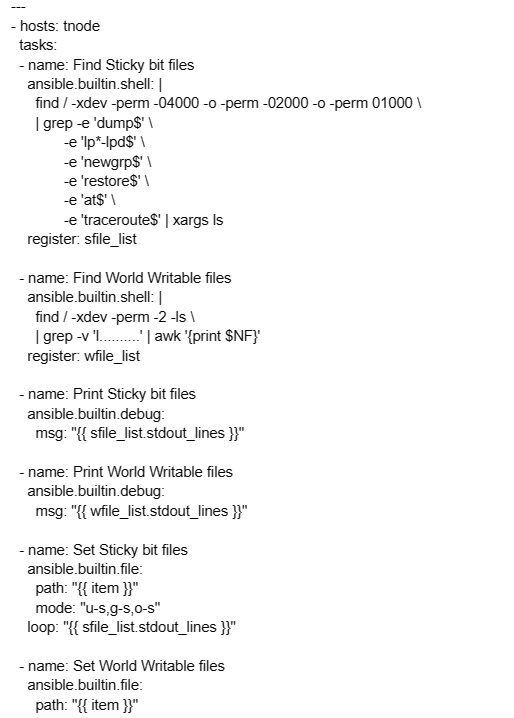

-> 실행하면 sticky 비트 설정된다43