Implementing a Multi-Touch App
"Learn how to create a simple app that handles multitouch input."
다중 터치 입력을 처리하는 간단한 앱 생성 방법을 설명합니다.
Overview
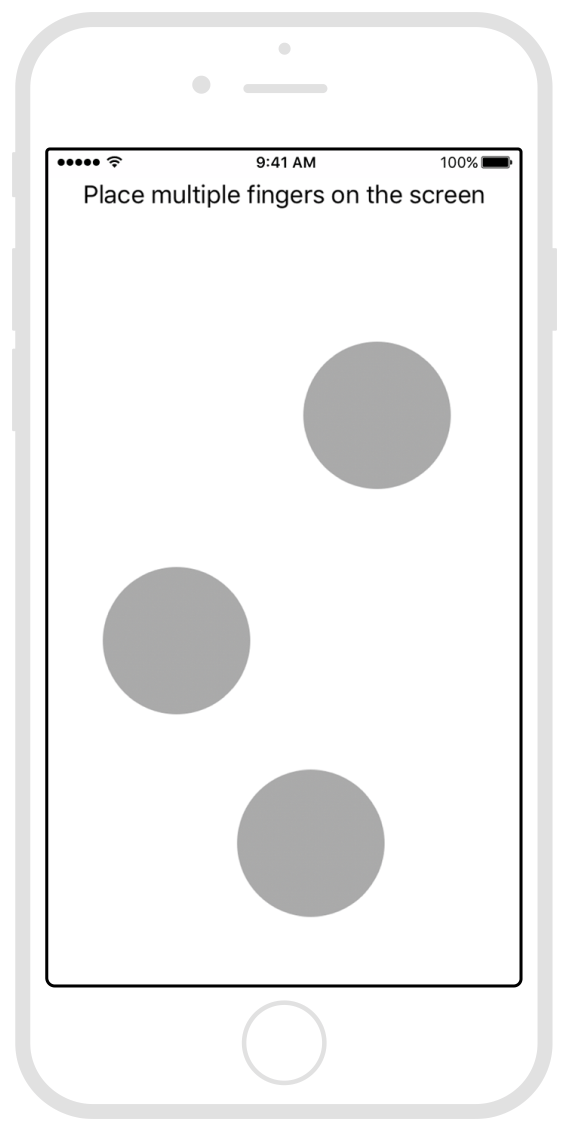
Figure 1은 각 터치 위치에 회색 원을 그려주는 단일 메인 뷰 앱을 보여주고 있습니다. 터치가 끝나면 원은 사라집니다. 사용자의 손가락들이 이동하면 손가락들을 따라 원이 이동합니다.
Figure 1 Handling multiple touches in a view

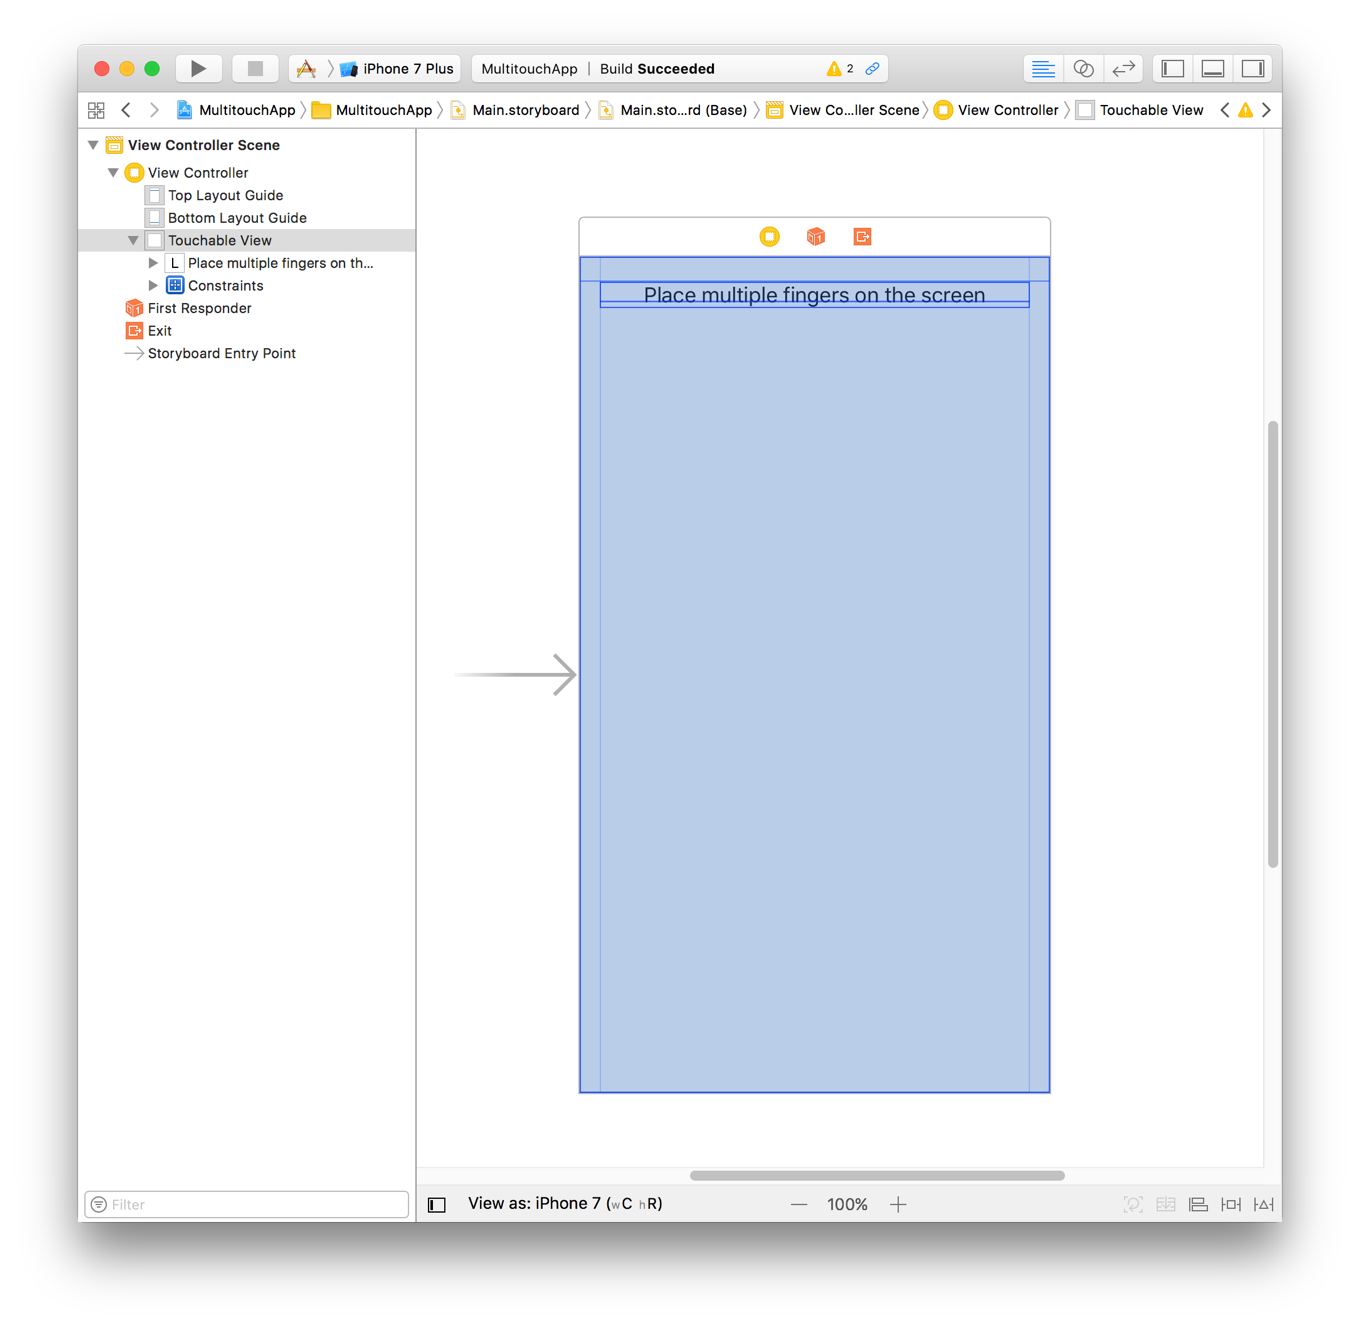
이 앱의 생성은 Xcode 싱글 뷰 앱 템플릿으로 시작합니다. 이런 타입의 앱은 스크린을 채우는 뷰를 가진 싱글 뷰 컨트롤러를 갖고 있습니다. 이 경우 TouchableView라고 부르는 UIView의 커스텀 서브클래스입니다. 뷰는 초기에 레이블 하나만 포함하고 있습니다. 이후에 앱은 코드 작성을 통해 하위뷰를 추가합니다. Figure 2는 뷰 컨트롤러에 대한 스토리보드를 보여주고 있습니다.
Figure 2 The app's main view

Implement the TouchableView Class
TouchableView 클래스는 상속받은 touchesBegan(_:with:), touchesMoved(_:with:), touchesEnded(_:with:), touchesCancelled(_:with:) 메소드를 오버라이드합니다. 이 메소드들은 생성을 처리하고 터치의 각 위치에 회색 원을 그려주는 하위뷰들의 생성을 처리합니다. 구체적으로 이 메소드들은 아래처럼 작동합니다.
touchesBegan(_:with:)메소드는 각각의 터치 이벤트 위치에 새 하위뷰를 생성합니다.touchesMoved(_:with:)메소드는 각 터치와 관련이 있는 하위뷰의 위치를 업데이트합니다.touchesEnded(_:with:)와touchesCancelled(_:with:)메소드는 종료된 각 터치 이벤트와 관련이 있는 하위뷰를 제거합니다.
Listing 1은 TouchableView의 주요 구현 및 터치 처리 메소드를 나태나고 있습니다. 각 메소드는 터치를 통해 반복하고, 필요한 액션을 수행합니다. toucheViews 딕셔너리는 사용자가 화면에 생성하는 하위뷰를 회수할 수 있도록 UITouch 객체를 키로 사용합니다.
Listing 1 Handling the touch events
벨로그에서 코드 블록 내에 센터를 영어로 작성하면 자동으로 비공개 글로 업도르되어 코드 내에서 해당 부분을 한글 센터로 입력했습니다.
class TouchableView: UIView {
   var touchViews = [UITouch:TouchSpotView]()

   override init(frame: CGRect) {
      super.init(frame: frame)
      isMultipleTouchEnabled = true
   }

   required init?(coder aDecoder: NSCoder) {
      super.init(coder: aDecoder)
      isMultipleTouchEnabled = true
   }

   override func touchesBegan(_ touches: Set<UITouch>, with event: UIEvent?) {
      for touch in touches {
         createViewForTouch(touch: touch)
      }
   }

   override func touchesMoved(_ touches: Set<UITouch>, with event: UIEvent?) {
      for touch in touches {
         let view = viewForTouch(touch: touch)
         // Move the view to the new location.
         let newLocation = touch.location(in: self)
         view?.센터 = newLocation
      }
   }

   override func touchesEnded(_ touches: Set<UITouch>, with event: UIEvent?) {
      for touch in touches {
         removeViewForTouch(touch: touch)
      }
   }

   override func touchesCancelled(_ touches: Set<UITouch>, with event: UIEvent?) {
      for touch in touches {
         removeViewForTouch(touch: touch)
      }
   }

   // Other methods. . .
}
Listing 2에서 보이는 것처럼 몇 가지 메소드는 하위뷰의 생성, 관리, 해제를 처리합니다. createViewForTouch 메소드는 새 TouchSpotView 객체를 생성하고, 이 객체를 TouchableView 객체에 추가합니다. 이는 뷰의 전체 크기에 대한 애니메이션과 함께 동작합니다. removeViewForTouch 메소드는 상응하는 하위뷰를 제거하고 클래스 데이터 구조를 업데이트합니다. viewForTouch 메소드는 주어진 터치 이벤트와 관련이 있는 뷰를 회수하기 위한 편의 메소드입니다.
Listing 2 Managing the subviews
벨로그에서 코드 블록 내에 센터를 영어로 작성하면 자동으로 비공개 글로 업도르되어 코드 내에서 해당 부분을 한글 센터로 입력했습니다.
func createViewForTouch( touch : UITouch ) {
   let newView = TouchSpotView()
   newView.bounds = CGRect(x: 0, y: 0, width: 1, height: 1)
   newView.센터 = touch.location(in: self)

   // Add the view and animate it to a new size.
   addSubview(newView)
   UIView.animate(withDuration: 0.2) {
      newView.bounds.size = CGSize(width: 100, height: 100)
   }

   // Save the views internally
   touchViews[touch] = newView
}

func viewForTouch (touch : UITouch) -> TouchSpotView? {
   return touchViews[touch]
}

func removeViewForTouch (touch : UITouch ) {
   if let view = touchViews[touch] {
      view.removeFromSuperview()
      touchViews.removeValue(forKey: touch)
   }
}
Implement the TouchSpotView Class
TouchSpotview 클래스(Listing 3에서 보이는)는 화면에 회색 원들을 그리는 커스텀 하위뷰를 나타내고 있습니다. TouchSpotView는 bounds 속성이 변경될 때마다 원형 모양을 유지할 수 있도록 레이어의 cornerRadius 속성을 설정하고 있습니다.
Listing 3 Implementation of the TouchSpotView class
class TouchSpotView : UIView {
   override init(frame: CGRect) {
      super.init(frame: frame)
      backgroundColor = UIColor.lightGray
   }

   // Update the corner radius when the bounds change.
   override var bounds: CGRect {
      get { return super.bounds }
      set(newBounds) {
         super.bounds = newBounds
         layer.cornerRadius = newBounds.size.width / 2.0
      }
   }
}
See Also
Advanced Touch Handling
Getting High-Fidelity Input with Coalesced Touches
앱에서 높은 정확도 터치를 지원하는 방법에 대해 알아봅니다.
https://developer.apple.com/documentation/uikit/touches_presses_and_gestures/handling_touches_in_your_view/getting_high-fidelity_input_with_coalesced_touches
https://velog.io/@panther222128/Getting-High-Fidelity-Input-with-Coalesced-Touches
Minimizing Latency with Predicted Touches
터치 위치에 대한 UIKit의 예측을 사용해 부드럽고 반응적인 드로잉 경험을 생성합니다.
https://developer.apple.com/documentation/uikit/touches_presses_and_gestures/handling_touches_in_your_view/minimizing_latency_with_predicted_touches
https://velog.io/@panther222128/Minimizing-Latency-with-Predicted-Touches
