[CaRLA 가상환경의 데이터셋을 기반으로, Matlab에서 Stereo Vslam]
FLOW
- caRLA 가상환경에 Python API를 이용해서 차량 및 센서 엑터를 생성.
- 해당 센서로부터 얻은 값들을 저장.
- Matlab에서 기존 예제를 기반으로 SLAM 구현.
1. caRLA python API를 이용하여 차량 및 센서 엑터 생성
🟢 python에서 carla 모듈을 import 하여, caRLA 서버와 통신을 통해 차량 및 센서엑터, 키보드 제어기능, 녹화 및 저장기능을 구현해보자.
1️⃣ 모듈
import carla 					#caRLA
import os    					#파일 저장
import numpy as np 				#이미지 처리
from datetime import datetime 	#타임스탬프
import cv2 						#이미지 저장
import pygame 					#키보드 조작
2️⃣ 이미지 저장 함수
-> 스테레오 카메라의 좌,우측 카메라 이미지를 폴더에 각각 담아준다.
def save_image(image, camera_type):
    save_dir = f'./{camera_type}_images'
    if not os.path.exists(save_dir):
        os.makedirs(save_dir)

    timestamp = datetime.now().strftime('%Y%m%d_%H%M%S_%f')
    filename = f'{save_dir}/{timestamp}.png'

    array = np.frombuffer(image.raw_data, dtype=np.dtype("uint8"))  #이미지를 읽어와서 uint8형식, 넘파이배열으로 변환
    array = array.reshape((image.height, image.width, 4)) #3차원 배열(열 x 행) RGBA 형태로 변환
    array = array[:, :, :3] #Alpha채널 삭제

    cv2.imwrite(filename, array) #이미지 저장
3️⃣ 차량 소환 함수
-> caRLA world에 차량을 소환한다. 스폰 가능한 포인트(다른 액터가 없는 포인트)를 반복적으로 찾아서 소환 가능한 지점에서 소환한다.
def try_spawn_vehicle(world, vehicle_bp, spawn_points, clear_existing=True): #인자 순서대로, caRLA world, 차량 블루프린트, 스폰포인트 리스트, 기존차량들을 제거할건지에 대한 인자
    if clear_existing:
        print("기존 액터들을 제거합니다...")
        for actor in world.get_actors().filter('vehicle.*'): #월드에 생성된 모든 actor정보중 vehicle.~ (모든 차량) 을 제거
            actor.destroy()

    for spawn_point in spawn_points:
        try:
            vehicle = world.spawn_actor(vehicle_bp, spawn_point) #spawn포인트를 순회하며 차량을 소환 시도.
            print(f"차량이 스폰되었습니다. 스폰 위치: {spawn_point}")
            return vehicle
        except:
            continue

    raise Exception("사용 가능한 스폰 포인트를 찾을 수 없습니다.")
4️⃣ main 함수 - world 연결 부분
        print("CARLA 서버에 연결 중...")
        client = carla.Client('localhost', 2000)
        client.set_timeout(10.0)
        world = client.get_world() #월드 참조하는 클라이언트 객체 생성
5️⃣ main 함수 - pygame을 이용한 키보드 제어 기능
        # pygame 초기화
        pygame.init()
        screen = pygame.display.set_mode((800, 600))
        pygame.display.set_caption('CARLA Manual Control')

        #--------------------<중간 생략>----------------------#
                # 초기 설정
        clock = pygame.time.Clock()
        print("\n조작법:")
        print("W: 전진")
        print("S: 후진")
        print("A: 좌회전")
        print("D: 우회전")
        print("SPACE: 브레이크")
        print("R: 녹화 시작/정지")
        print("ESC: 종료\n")

        # 게임 루프
        running = True
        while running:
            # 이벤트 처리
            for event in pygame.event.get():
                if event.type == pygame.QUIT: #창 종료시 키 입력 루프 종료
                    running = False
                elif event.type == pygame.KEYDOWN: # 키 눌림을 감지
                    if event.key == pygame.K_ESCAPE: # 키 눌림이 esc이면 농료
                        running = False
                    elif event.key == pygame.K_r: # r이 눌리면 녹화 플래그 변경
                        recording = not recording
                        status = "시작됨" if recording else "정지됨"
                        print(f"녹화가 {status}")

            # 키 입력 처리
            keys = pygame.key.get_pressed()

            # 차량 제어
            control = carla.VehicleControl() #차량 컨트롤 객체 생성
            control.throttle = 1.0 if keys[pygame.K_w] else 0.0
            control.brake = 1.0 if keys[pygame.K_SPACE] else 0.0
            control.steer = -0.5 if keys[pygame.K_a] else 0.5 if keys[pygame.K_d] else 0.0
            control.reverse = keys[pygame.K_s]
            vehicle.apply_control(control) #차량 컨트롤 정보 적용.
6️⃣ main 함수 - 차량 스폰 (try_spawn_vehicle 함수 이용)
        # 차량 스폰
        vehicle_bp = world.get_blueprint_library().find('vehicle.tesla.model3') #'vehicle.tesla.model3 차량의 블루프린트를 world(클라이언트 객체)에서 찾음.
        spawn_points = world.get_map().get_spawn_points() #world에서 spawn_point들을 리스트로 받아옴.
        np.random.shuffle(spawn_points) #스폰포인트를 랜덤하게 섞어줌
        vehicle = try_spawn_vehicle(world, vehicle_bp, spawn_points) #위에서 짜둔 차량 소환 함수 호출
7️⃣ main 함수 - 스테레오 카메라 설정 및 카메라 부착, 카메라 기능 (녹화 콜백함수) 구현
-> 카메라 두대를 차량 본넷 양끝에 달아서 스테레오 카메라로서 사용할거임.
       # 카메라 설정
        camera_bp = world.get_blueprint_library().find('sensor.camera.rgb') #카메라 블루프린트 정보를 불러옴.
        camera_bp.set_attribute('image_size_x', '800') #카메라 블루프린트의 설정(사진 해상도 및 시야각 설정을 해줌)
        camera_bp.set_attribute('image_size_y', '600')
        camera_bp.set_attribute('fov', '90')

                # 카메라 생성 및 부착, x값을 차이나게 해서 스테레오 카메라.
                #attach_to 기준으로 상대적인 xyz임. (차량 정방향 기준 x앞, y우측, z위)
        left_camera_transform = carla.Transform(carla.Location(x=2.0, y=-0.5, z=1.5))
        right_camera_transform = carla.Transform(carla.Location(x=2.0, y=0.5, z=1.5))

        #카메라를 실제 차량객체에 붙히는 부분
        left_camera = world.spawn_actor(camera_bp, left_camera_transform, attach_to=vehicle)
        right_camera = world.spawn_actor(camera_bp, right_camera_transform, attach_to=vehicle)

                # 카메라 콜백 함수, save_image함수를 불러와서 각 이미지들이 특정 디렉토리에 저장될 수 있도록함.
        def left_camera_callback(image):
            if recording:
                save_image(image, 'left')

        def right_camera_callback(image):
            if recording:
                save_image(image, 'right')

#caRLA에서 센서 클래스는  .listen을 통해 매 프레임 콜백 함수를 호출 할 수 있음.
        left_camera.listen(left_camera_callback)
        right_camera.listen(right_camera_callback)
8️⃣ main 함수 - Spectator (시뮬레이션 관전자) 시점 조정
-> 차량이 주행할때, 시뮬레이션의 관전자가 차량의 뒤쪽에서 바라보는 시점이 되도록 설정.
            # 스펙테이터 카메라 업데이트
            spectator = world.get_spectator() #실제 시뮬레이션에서 사용되고있는 spectator 객체를 가져옴.
            vehicle_transform = vehicle.get_transform()

            # 카메라 위치 계산
            spectator_transform = carla.Transform() #carla의 좌표계 객체
            #spectator가 차량의 뒤쪽 위에서 바라보도록 계산 하는 부분(자세한건 몰라도 된다. 걍 수학이다.)
            spectator_transform.location = vehicle_transform.location + carla.Location(
                x=-8 * np.cos(np.radians(vehicle_transform.rotation.yaw)),
                y=-8 * np.sin(np.radians(vehicle_transform.rotation.yaw)),
                z=3
            )

            # 카메라 방향 계산 (차량 뒤쪽 위에서 살짝 내려다 보는 방향)
            direction = vehicle_transform.location - spectator_transform.location
            spectator_transform.rotation = carla.Rotation(
                pitch=-15,
                yaw=np.degrees(np.arctan2(direction.y, direction.x)),
                roll=0
            )

            #spectator 객체에 설정한 좌표세팅 적용.
            spectator.set_transform(spectator_transform)
9️⃣ main 함수 - 예외처리 및 finally 블록
    except Exception as e:
        print(f'오류가 발생했습니다: {e}')

    finally:
        print('정리 작업을 시작합니다...')
        pygame.quit()

        # 액터 정리
        if 'left_camera' in locals():
            left_camera.destroy()
        if 'right_camera' in locals():
            right_camera.destroy()
        if 'vehicle' in locals():
            vehicle.destroy()

        print('모든 액터가 제거되었습니다.')

if __name__ == '__main__':
    main()
🔟 가상환경에서 실제 주행을 통해 스테레오 카메라 이미지 수집
1. CarlaUE4.exe (서버 실행)
2. 작성한 Python 파일 실행
3. 방향키로 차량을 움직일 수 있고, R키를 누르면 녹화 시작/종료
4. 녹화된 사진들은 파이썬 파일과 같은 디렉토리에 left,right 나뉘어서 저장이 됨.
2. matlab을 이용한 stereo slam
🟢 Matlab Stereo vSLAM official example DDOKKON VELOG 해당 포스팅을 기반으로 매틀랩 예제를 수정해나가며 커스텀 데이터셋을 stereo vSLAM 하겠음.
1️⃣이미지 데이터 폴더 구성
⚠️ dataFolder의 주소를 caRLA를 통해 얻은 이미지 데이터 디렉토리로 해주자.
dataFolder = 'C:/Users/emili/OneDrive/문서/MATLAB/Examples/R2024b/rl/caRLA_stereo_test/dataFolder';
imgFolderLeft = [dataFolder,'/images/left/'];
imgFolderRight = [dataFolder,'/images/right/'];
imdsLeft = imageDatastore(imgFolderLeft);
imdsRight = imageDatastore(imgFolderRight);
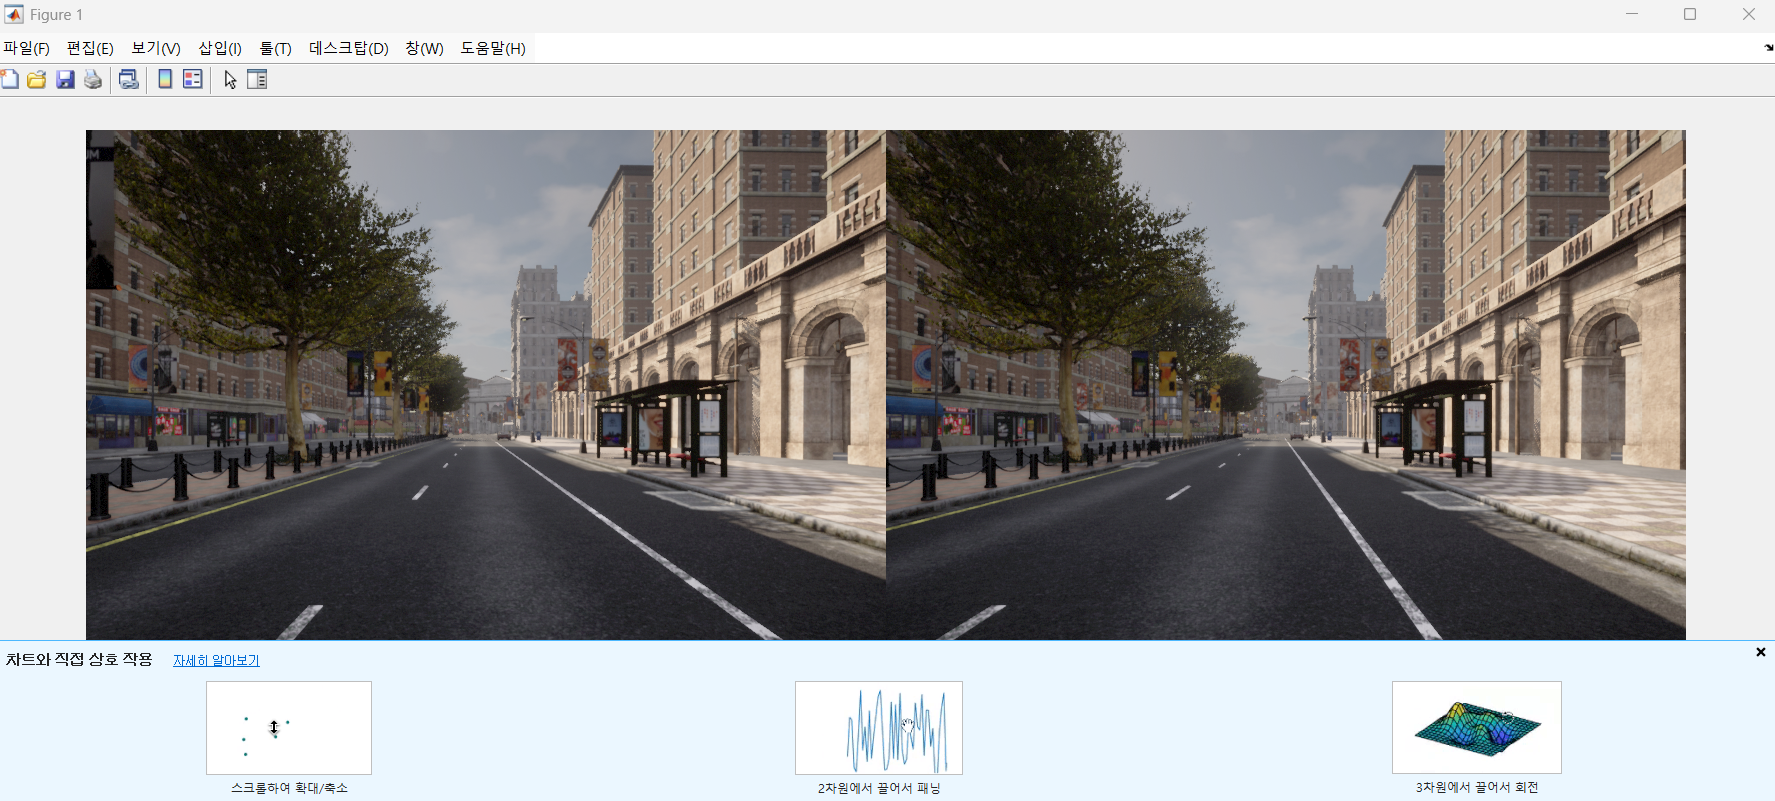
% 첫 번째 이미지 쌍 불러오기 및 표시
currFrameIdx = 1;
currILeft = readimage(imdsLeft, currFrameIdx);
currIRight = readimage(imdsRight, currFrameIdx);
imshowpair(currILeft, currIRight, 'montage');2️⃣map initialize
⚠️helperDetectionAndExtractionFeature.m , helperReconstructionFromStereo.m 헬퍼함수 예제에서 복사해서 옮겨주기
% Set random seed for reproducibility
rng(0);
% Load the initial camera pose. The initial camera pose is derived based
% on the transformation between the camera and the vehicle:
% http://asrl.utias.utoronto.ca/datasets/2020-vtr-dataset/text_files/transform_camera_vehicle.t
initialPoseData = load("initialPose.mat");
initialPose = initialPoseData.initialPose;
% Construct the reprojection matrix for 3-D reconstruction.
% The intrinsics for the dataset can be found at the following page:
% http://asrl.utias.utoronto.ca/datasets/2020-vtr-dataset/text_files/camera_parameters.txt
focalLength = [387.777 387.777]; % specified in pixels
principalPoint = [257.446 197.718]; % specified in pixels [x, y]
baseline = 0.239965; % specified in meters
imageSize = size(currILeft,[1,2]); % in pixels [mrows, ncols]
intrinsics = cameraIntrinsics(focalLength, principalPoint, imageSize);
reprojectionMatrix = [1, 0, 0, -principalPoint(1);
0, 1, 0, -principalPoint(2);
0, 0, 0, focalLength(1);
0, 0, 1/baseline, 0];
% In this example, the images are already undistorted and rectified. In a general workflow,
% uncomment the following code to undistort and rectify the images.
% currILeft = undistortImage(currILeft, intrinsics);
% currIRight = undistortImage(currIRight, intrinsics);
% stereoParams = stereoParameters(intrinsics, intrinsics, eye(3), [-baseline, 0 0]);
% [currILeft, currIRight] = rectifyStereoImages(currILeft, currIRight, stereoParams, OutputView="full");
% Detect and extract ORB features from the rectified stereo images
scaleFactor = 1.1;
numLevels = 9;
numPoints = 4000;
[currFeaturesLeft, currPointsLeft] = helperDetectAndExtractFeatures(im2gray(currILeft), scaleFactor, numLevels, numPoints);
[currFeaturesRight, currPointsRight] = helperDetectAndExtractFeatures(im2gray(currIRight), scaleFactor, numLevels, numPoints);
% Match feature points between the stereo images and get the 3-D world positions
disparityRange = [0 48]; % specified in pixels
[xyzPoints, matchedPairs] = helperReconstructFromStereo(im2gray(currILeft), im2gray(currIRight), ...
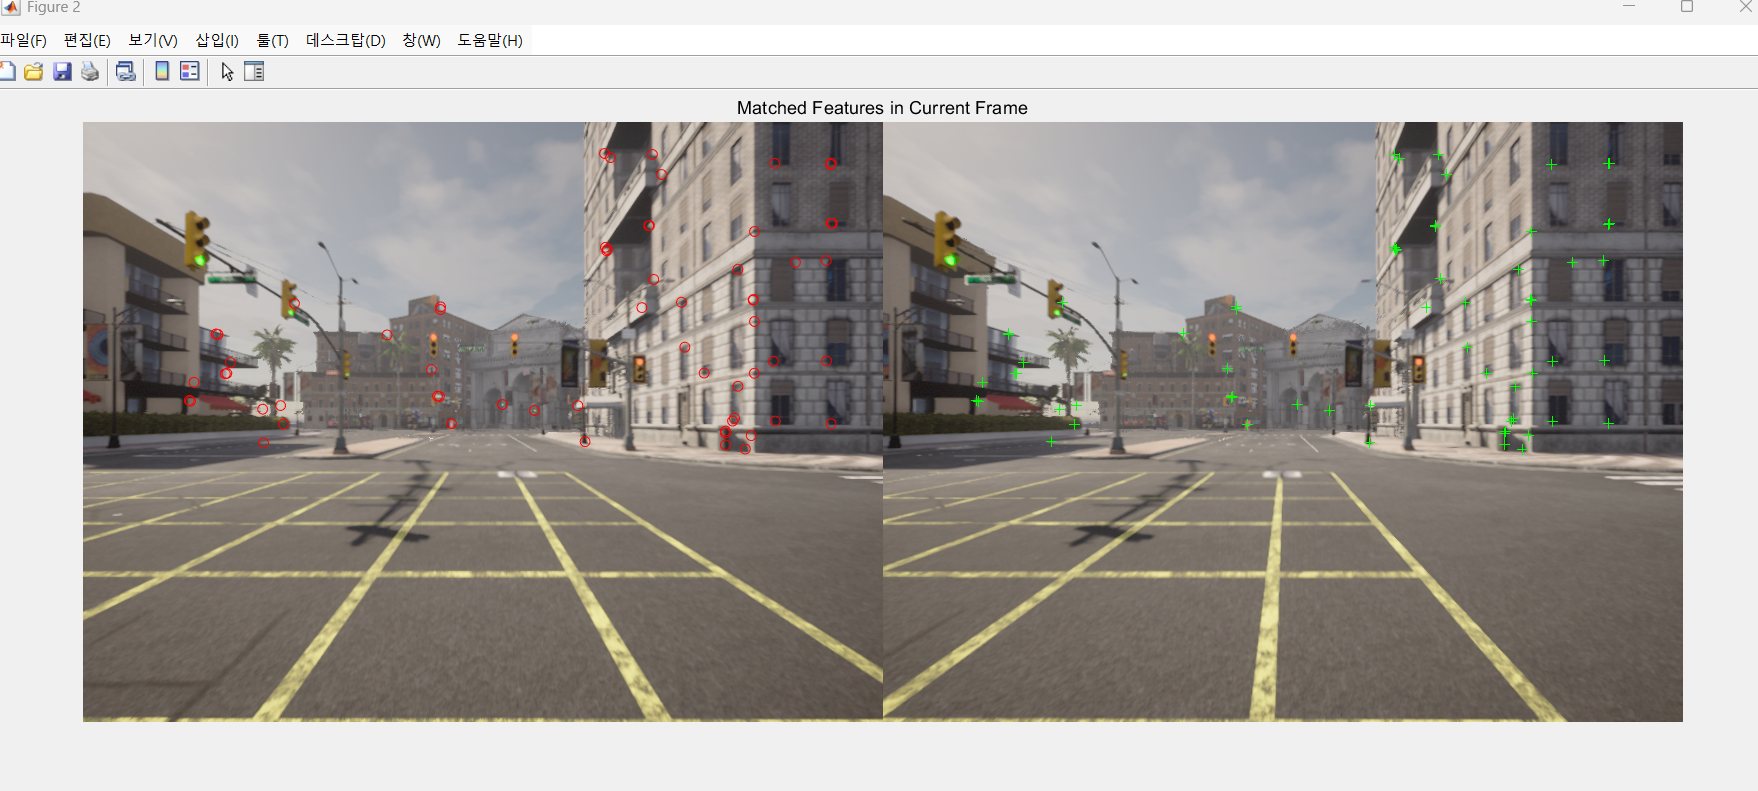
currFeaturesLeft, currFeaturesRight, currPointsLeft, currPointsRight, reprojectionMatrix, initialPose, disparityRange);3️⃣특징점 추출(키프레임 생성) 및 3D 맵 생성
⚠️helperVisualizeMatchedFeaturesStereo , helperVisualizeMotionAndStructureStereo 헬퍼함수 옮겨주기.
% Create an empty imageviewset object to store key frames
vSetKeyFrames = imageviewset;
% Create an empty worldpointset object to store 3-D map points
mapPointSet = worldpointset;
% Add the first key frame
currKeyFrameId = 1;
vSetKeyFrames = addView(vSetKeyFrames, currKeyFrameId, initialPose, Points=currPointsLeft,...
Features=currFeaturesLeft.Features);
% Add 3-D map points
[mapPointSet, stereoMapPointsIdx] = addWorldPoints(mapPointSet, xyzPoints);
% Add observations of the map points
mapPointSet = addCorrespondences(mapPointSet, currKeyFrameId, stereoMapPointsIdx, matchedPairs(:, 1));
% Update view direction and depth
mapPointSet = updateLimitsAndDirection(mapPointSet, stereoMapPointsIdx, vSetKeyFrames.Views);
% Update representative view
mapPointSet = updateRepresentativeView(mapPointSet, stereoMapPointsIdx, vSetKeyFrames.Views);
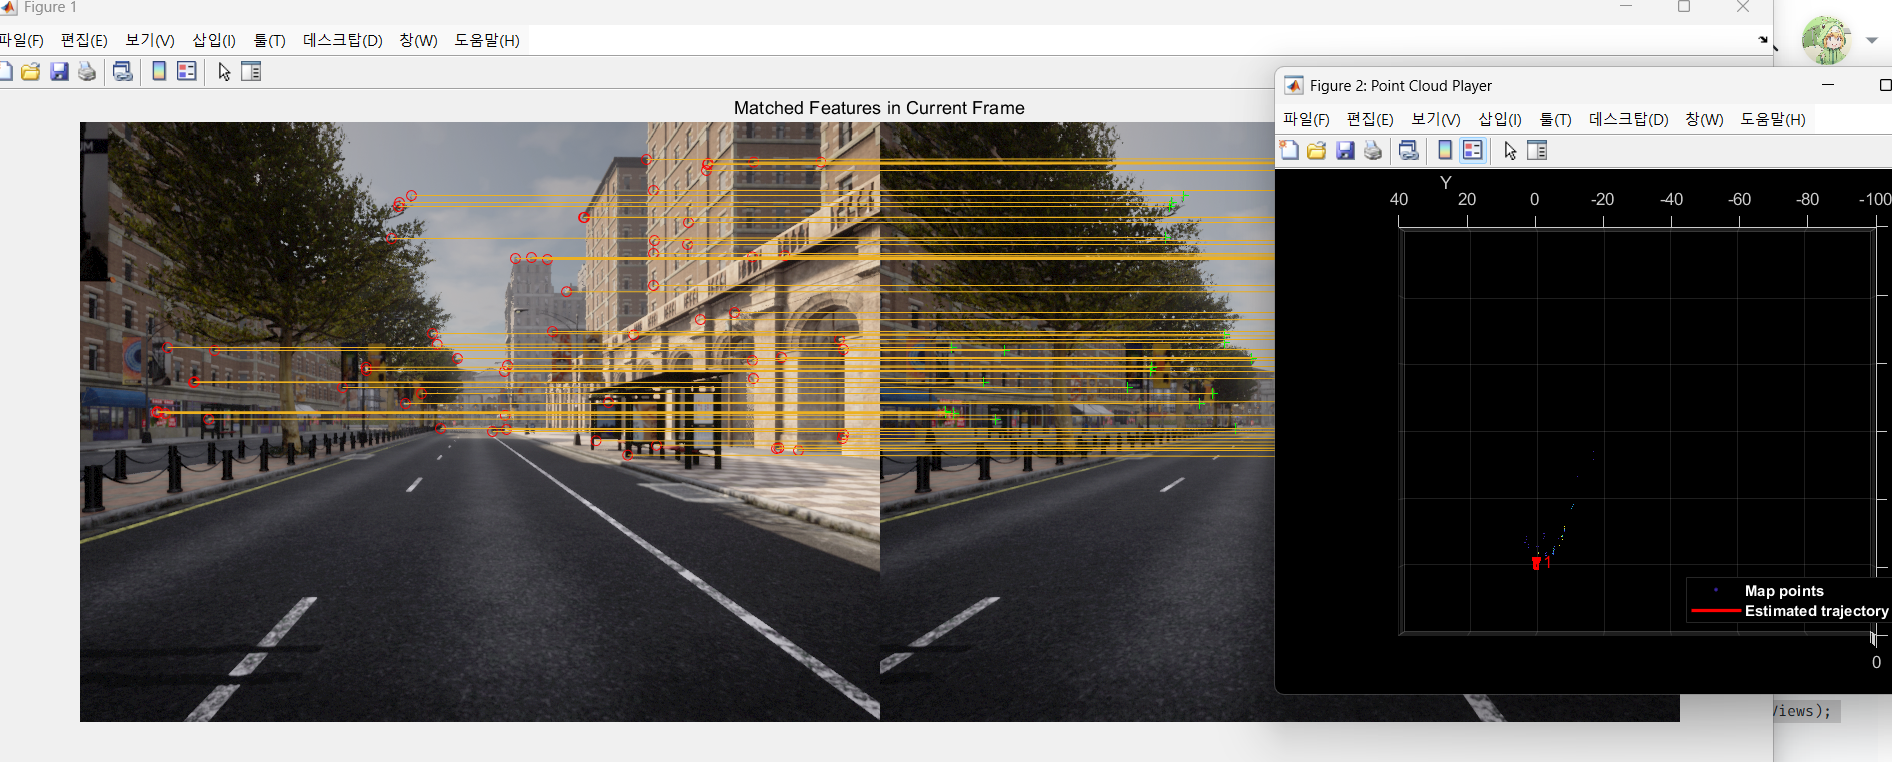
% Visualize matched features in the first key frame
featurePlot = helperVisualizeMatchedFeaturesStereo(currILeft, currIRight, currPointsLeft, ...
currPointsRight, matchedPairs);
% Visualize initial map points and camera trajectory
mapPlot = helperVisualizeMotionAndStructureStereo(vSetKeyFrames, mapPointSet);
% Show legend
showLegend(mapPlot);
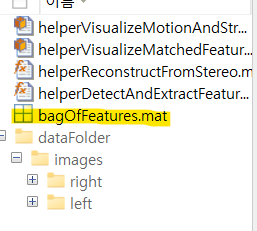
4️⃣ bag of Features 파일 만들기
🟢 기존 예제에서는 bof(루프클로저를 위한 시각적어휘 파일)을 제공했었다. 현재 우리는 커스텀 데이터셋이므로, 직접 만들어줘야한다. Matlab computer vision toolbox에 bof 형식과 규격이 나와있다(ORB특징점, bagOfFeaturesDBOW객체).
시간이 상당히 걸리는 작업이다.
% 스테레오 이미지 데이터 로드
leftImageDir  = "C:\Users\emili\OneDrive\문서\MATLAB\Examples\R2024b\rl\caRLA_stereo_test\dataFolder\images\left";
rightImageDir = "C:\Users\emili\OneDrive\문서\MATLAB\Examples\R2024b\rl\caRLA_stereo_test\dataFolder\images\right";

% 왼쪽 및 오른쪽 이미지 데이터 저장소 생성
imdsLeft  = imageDatastore(leftImageDir, 'FileExtensions', {'.jpg', '.png', '.jpeg', '.bmp', '.tif'});
imdsRight = imageDatastore(rightImageDir, 'FileExtensions', {'.jpg', '.png', '.jpeg', '.bmp', '.tif'});

% 왼쪽과 오른쪽 데이터셋을 하나로 합치기
imdsStereo = imageDatastore([imdsLeft.Files; imdsRight.Files]);

disp("스테레오 이미지 데이터셋 로드 완료!");

% Bag-of-Features 생성 (DBoW2 기반)
bag = bagOfFeaturesDBoW(imdsStereo);

disp("Bag-of-Features 학습 완료!");

% DBoW2 기반 BoW 객체를 .mat 파일로 저장
save("bagOfFeatures.mat", "bag");

disp("Bag-of-Features 저장 완료: bagOfFeatures.mat");

% 저장된 BoW 데이터 로드, .mat파일에서 bag로서 불러오는거임.
load("bagOfFeatures.mat", "bag");
5️⃣ bof데이터베이스 구축 및 루프클로져 생성
⚠️예제에서는 압축파일을 줬지만, 우리는 해당 파일을 규격에 맞게 만들 수 없다.
따라서 load를 통해 mat파일을 bag으로서 읽어와서 적용하면 된다.(이게 설명이 맞는지는 모른다. 근데 암튼 된다.)
예제와 코드가 다르니 주의하자.
% 저장된 BoW 데이터 로드, .mat파일에서 bag로서 불러오는거임.
load("bagOfFeatures.mat", "bag");
loopDatabase = dbowLoopDetector(bag);
% Add features of the first two key frames to the database
addVisualFeatures(loopDatabase, currKeyFrameId, currFeaturesLeft);
6️⃣Tracking 및 SLAM
% ViewId of the last key frame
lastKeyFrameId    = currKeyFrameId;

% Index of the last key frame in the input image sequence
lastKeyFrameIdx   = currFrameIdx;

% Indices of all the key frames in the input image sequence
addedFramesIdx    = lastKeyFrameIdx;

currFrameIdx      = 2;
isLoopClosed      = false;

% Main loop
isLastFrameKeyFrame = true;
while ~isLoopClosed && currFrameIdx <= numel(imdsLeft.Files)

    currILeft  = readimage(imdsLeft, currFrameIdx);
    currIRight = readimage(imdsRight, currFrameIdx);

    currILeftGray = im2gray(currILeft);
    currIRightGray = im2gray(currIRight);

    [currFeaturesLeft, currPointsLeft]    = helperDetectAndExtractFeatures(currILeftGray, scaleFactor, numLevels, numPoints);
    [currFeaturesRight, currPointsRight]  = helperDetectAndExtractFeatures(currIRightGray, scaleFactor, numLevels, numPoints);

    % Track the last key frame
    % trackedMapPointsIdx:  Indices of the map points observed in the current left frame
    % trackedFeatureIdx:    Indices of the corresponding feature points in the current left frame
    [currPose, trackedMapPointsIdx, trackedFeatureIdx] = helperTrackLastKeyFrame(mapPointSet, ...
        vSetKeyFrames.Views, currFeaturesLeft, currPointsLeft, lastKeyFrameId, intrinsics, scaleFactor);

    if isempty(currPose) || numel(trackedMapPointsIdx) < 30
        currFrameIdx = currFrameIdx + 1;
        continue
    end

    % Track the local map  and check if the current frame is a key frame.
    % localKeyFrameIds:   ViewId of the connected key frames of the current frame
    numSkipFrames     = 5;
    numPointsKeyFrame = 80;
    [localKeyFrameIds, currPose, trackedMapPointsIdx, trackedFeatureIdx, isKeyFrame] = ...
        helperTrackLocalMap(mapPointSet, vSetKeyFrames, trackedMapPointsIdx, ...
        trackedFeatureIdx, currPose, currFeaturesLeft, currPointsLeft, intrinsics, scaleFactor, ...
        isLastFrameKeyFrame, lastKeyFrameIdx, currFrameIdx, numSkipFrames, numPointsKeyFrame);

    % Match feature points between the stereo images and get the 3-D world positions
    [xyzPoints, matchedPairs] = helperReconstructFromStereo(currILeftGray, currIRightGray, currFeaturesLeft, ...
        currFeaturesRight, currPointsLeft, currPointsRight, reprojectionMatrix, currPose, disparityRange);

    % Visualize matched features in the stereo image
    updatePlot(featurePlot, currILeft, currIRight, currPointsLeft, currPointsRight, trackedFeatureIdx, matchedPairs);

    if ~isKeyFrame && currFrameIdx < numel(imdsLeft.Files)
        currFrameIdx = currFrameIdx + 1;
        isLastFrameKeyFrame = false;
        continue
    else
        [untrackedFeatureIdx, ia] = setdiff(matchedPairs(:, 1), trackedFeatureIdx);
        xyzPoints = xyzPoints(ia, :);
        isLastFrameKeyFrame = true;
    end

    % Update current key frame ID
    currKeyFrameId  = currKeyFrameId + 1;
     % Add the new key frame
    [mapPointSet, vSetKeyFrames] = helperAddNewKeyFrame(mapPointSet, vSetKeyFrames, ...
        currPose, currFeaturesLeft, currPointsLeft, trackedMapPointsIdx, trackedFeatureIdx, localKeyFrameIds);

    % Remove outlier map points that are observed in fewer than 3 key frames
    if currKeyFrameId == 2
        triangulatedMapPointsIdx = [];
    end

    mapPointSet = helperCullRecentMapPointsStereo(mapPointSet, ...
        trackedMapPointsIdx, triangulatedMapPointsIdx, stereoMapPointsIdx);

    % Add new map points computed from disparity
    [mapPointSet, stereoMapPointsIdx] = addWorldPoints(mapPointSet, xyzPoints);
    mapPointSet = addCorrespondences(mapPointSet, currKeyFrameId, stereoMapPointsIdx, ...
        untrackedFeatureIdx);

    % Create new map points by triangulation
    minNumMatches = 20;
    minParallax   = 0.35;
    [mapPointSet, vSetKeyFrames, triangulatedMapPointsIdx, stereoMapPointsIdx] = helperCreateNewMapPointsStereo( ...
        mapPointSet, vSetKeyFrames, currKeyFrameId, intrinsics, scaleFactor, minNumMatches, minParallax, ...
        untrackedFeatureIdx, stereoMapPointsIdx);

    % Local bundle adjustment
    [refinedViews, dist] = connectedViews(vSetKeyFrames, currKeyFrameId, MaxDistance=2);
    refinedKeyFrameIds = refinedViews.ViewId;

    % Always fix the first two key frames
    fixedViewIds = refinedKeyFrameIds(dist==2);
    fixedViewIds = fixedViewIds(1:min(10, numel(fixedViewIds)));

    % Refine local key frames and map points
    [mapPointSet, vSetKeyFrames, mapPointIdx] = bundleAdjustment(...
        mapPointSet, vSetKeyFrames, [refinedKeyFrameIds; currKeyFrameId], intrinsics, ...
        FixedViewIDs=fixedViewIds, PointsUndistorted=true, AbsoluteTolerance=1e-7,...
        RelativeTolerance=1e-16, Solver='preconditioned-conjugate-gradient', MaxIteration=10);

    % Update view direction and depth
    mapPointSet = updateLimitsAndDirection(mapPointSet, mapPointIdx, ...
        vSetKeyFrames.Views);

    % Update representative view
    mapPointSet = updateRepresentativeView(mapPointSet, mapPointIdx, ...
        vSetKeyFrames.Views);

    % Visualize 3-D world points and camera trajectory
    updatePlot(mapPlot, vSetKeyFrames, mapPointSet);

        % Check loop closure after some key frames have been created
    if currKeyFrameId > 50

        % Minimum number of feature matches of loop edges
        loopEdgeNumMatches = 50;

        % Detect possible loop closure key frame candidates
        [isDetected, validLoopCandidates] = helperCheckLoopClosure(vSetKeyFrames, currKeyFrameId, ...
            loopDatabase, currFeaturesLeft, loopEdgeNumMatches);

        isTooCloseView = currKeyFrameId - max(validLoopCandidates) < 100;
        if isDetected && ~isTooCloseView
            % Add loop closure connections
            [isLoopClosed, mapPointSet, vSetKeyFrames] = helperAddLoopConnectionsStereo(...
                mapPointSet, vSetKeyFrames, validLoopCandidates, currKeyFrameId, ...
                currFeaturesLeft, currPointsLeft, loopEdgeNumMatches);
        end
    end

    % If no loop closure is detected, add current features into the database
    if ~isLoopClosed
        addVisualFeatures(loopDatabase,  currKeyFrameId, currFeaturesLeft);
    end

    % Update IDs and indices
    lastKeyFrameId  = currKeyFrameId;
    lastKeyFrameIdx = currFrameIdx;
    addedFramesIdx  = [addedFramesIdx; currFrameIdx];
    currFrameIdx    = currFrameIdx + 1;
end % End of main loop
7️⃣Dense Reconstruction

% Create an array of pointCloud objects to store the 3-D world points
% associated with the key frames
ptClouds =  repmat(pointCloud(zeros(1, 3)), numel(addedFramesIdx), 1);

for i = 1: numel(addedFramesIdx)
    ILeft  = readimage(imdsLeft, addedFramesIdx(i));
    IRight = readimage(imdsRight, addedFramesIdx(i));

    % Reconstruct scene from disparity
    disparityMap = disparitySGM(im2gray(ILeft), im2gray(IRight), DisparityRange=disparityRange);
    xyzPoints    = reconstructScene(disparityMap, reprojectionMatrix);

    % Ignore the upper half of the images which mainly show the sky
    xyzPoints(1:floor(imageSize(1)/2), :, :) = NaN;

    % Ignore the lower part of the images which show the vehicle
    xyzPoints(imageSize(1)-50:end, :, :) = NaN;

    xyzPoints  = reshape(xyzPoints, [imageSize(1)*imageSize(2), 3]);

    % Get color from the color image
    colors = reshape(ILeft, [imageSize(1)*imageSize(2), 3]);

    % Remove world points that are too far away from the camera
    validIndex = xyzPoints(:, 3) > 0 & xyzPoints(:, 3) < 100/reprojectionMatrix(4, 3);
    xyzPoints  = xyzPoints(validIndex, :);
    colors     = colors(validIndex, :);

    % Transform world points to the world coordinates
    currPose   = optimizedPoses.AbsolutePose(i);
    xyzPoints  = transformPointsForward(currPose, xyzPoints);
    ptCloud    = pointCloud(xyzPoints, Color=colors);

    % Downsample the point cloud
    ptClouds(i) = pcdownsample(ptCloud, random=0.5);
end

% Concatenate the point clouds
pointCloudsAll = pccat(ptClouds);

% Visualize the point cloud
figure
ax = pcshow(pointCloudsAll,VerticalAxis="y", VerticalAxisDir="down");
xlabel('X')
ylabel('Y')
zlabel('Z')
title('Dense Reconstruction')

% Display the bird's eye view of the scene
view(ax, [0 0 1]);
camroll(ax, 90);
💡마무리
가상환경의 데이터로 SLAM을 해보았다.
UE의 ROADRUNNER로 커스텀맵을 만들어서 caRLA의 맵을 바꿔끼울수 있다고 한다.
음.. 차량을 너무 빨리 움직여서 그런가 slam이 잘 되지 않았다.
추후 다른 센서들도 차량에 달아서 그 정보들도 받아서 SLAM에 적용하여 보정을 하는것도 해보자.