react-calendar 설치하기
yarn add react-calendar
사용법
import React, { useState } from 'react';
import Calendar from 'react-calendar';

function ReactCalendar() {
  const [value, onChange] = useState(new Date()); // 초기값은 현재 날짜

  return (
    <div>
      <Calendar onChange={onChange} value={value} />
    </div>
  );
}
- 날짜를 클릭할 때마다 value가 해당 날짜로 변경된다.
스타일링 커스텀 하기
- React-Calendar의 styles를 import 하고
import 'react-calendar/dist/Calendar.css';
- 각 선택자를 사용해 기존의 스타일을 오버라이드한다.
(선택자는node_modules > react-calendar > dist > Calendar.css참고)

상단 내비게이션(년, 월 )
 .react-calendar__navigation {
    background: ${({ theme }) => theme.color.pink};
    border-bottom: 4px solid ${({ theme }) => theme.color.brown};
    height: 90px;
    border-radius: 20px 20px 0 0;

    span {
      font-size: 24px;
      font-weight: 600;
      color: ${({ theme }) => theme.color.brown};
    }
  }

  .react-calendar__navigation button:disabled {
    background-color: ${({ theme }) => theme.color.pink};
    border-radius: 20px 20px 0 0;
  }

  .react-calendar__navigation button:enabled:hover,
  .react-calendar__navigation button:enabled:focus {
    background-color: ${({ theme }) => theme.color.pink};
    border-radius: 20px 20px 0 0;
  }
월 달력 (내비게이션 제외)
 .react-calendar__month-view {
    padding: 12px 32px;
    abbr {
      // 텍스트
      color: ${({ theme }) => theme.color.brown};
      font-size: 16px;
      font-weight: 500;
    }
  }
요일
  .react-calendar__month-view__weekdays {
    abbr {
      // 텍스트 부분
      font-size: 18px;
      font-weight: 900;
    }
  }
일 (각 타일)
  .react-calendar__tile {
    text-align: center;
    height: 60px;
    display: flex;
    flex-direction: column;
    justify-content: flex-start;
    align-items: center;
  }
/*hover, focus, 선택됐을 시 */
.react-calendar__tile:enabled:hover,
  .react-calendar__tile:enabled:focus,
  .react-calendar__tile--active {
    background: ${({ theme }) => theme.color.blue};
    border-radius: 14px;
  }
현재 날짜
.react-calendar__tile--now {
    background: ${({ theme }) => theme.color.lime};
    border-radius: 14px;
  }
/*hover, focus 시 */
  .react-calendar__tile--now:enabled:hover,
  .react-calendar__tile--now:enabled:focus {
    background: ${({ theme }) => theme.color.blue};
    border-radius: 14px;
  }
`;
Calendar 속성
	return (
			...
		 <Calendar
            locale="en"
            onChange={onChange}
            value={value}
            next2Label={null}
            prev2Label={null}
            formatDay={(locale, date) => moment(date).format('D')}
            tileContent={addContent}
            showNeighboringMonth={false}
            onActiveStartDateChange={({ activeStartDate }) =>
              getActiveMonth(activeStartDate)
            }
          />
- locale : 언어 ('ko'도 가능)
- onChange : 선택에 따라 value 변경하는 함수 (setValue의 역할)
- value : 선택한 날짜 (
Date형태) - next2Label / prev2Label : 년 단위 이동 버튼
- formatDay : 날짜 형태 바꾸는 함수
- tileContent : 날짜 칸에 보여지는 콘텐츠
- showNeighboringMonth : 앞뒤 달의 이어지는 날짜 보여주기 여부
- onActiveStartDateChange : 활성화된(현재 보여지는) 년, 월, 일이 변경될 때마다 실행
(인자activeStartDate: 활성화된 년, 월, 일의 가장 첫 날짜)
기능 구현
날짜 형태 변환하기 (feat. moment)
- moment 사용해
Date형태의 날짜를YYYY-MM-DD의String으로 변환
import moment from 'moment';

export default function ReactCalendar() {
 const curDate = new Date(); // 현재 날짜
  const [value, onChange] = useState(curDate); // 클릭한 날짜 (초기값으로 현재 날짜 넣어줌)
  const activeDate = moment(value).format('YYYY-MM-DD'); // 클릭한 날짜 (년-월-일))
...
현재 보여지는 달 구하기
- 달력과 연동해 현재 보여지는 달의 일기 리스트를 보여줄 예정.
1) 현재 보여지는 달을 나타내는 State 생성(activeMonth)
2) 초기값으로는 현재 날짜의 달을 넣어줌
(monthOfActiveDate : value의 초기 값이 현재 날짜이므로 monthOfActiveDate는 현재 날짜를 'YYYY-MM' 형태로 변환한 것)
const monthOfActiveDate = moment(value).format('YYYY-MM');
const [activeMonth, setActiveMonth] = useState(monthOfActiveDate);
3) onActiveStartDateChange 속성의 값으로 getActiveMonth 함수를 줌
(react-calender에서 해당 속성의 인자로 제공하는 activeStartDate는 현재 보여지는 년, 월, 일의 가장 첫 날짜(Date 형태)
  <Calendar
       ...
       onActiveStartDateChange={({ activeStartDate }) =>
              getActiveMonth(activeStartDate)
            }
4) getActiveMonth는 받아온 인자(activeStartDate)에 따라 현재 보여지는 달(activeMonth)의 State를 변경하는 함수
  const getActiveMonth = (activeStartDate: moment.MomentInput) => {
    const newActiveMonth = moment(activeStartDate).format('YYYY-MM');
    setActiveMonth(newActiveMonth);
  };
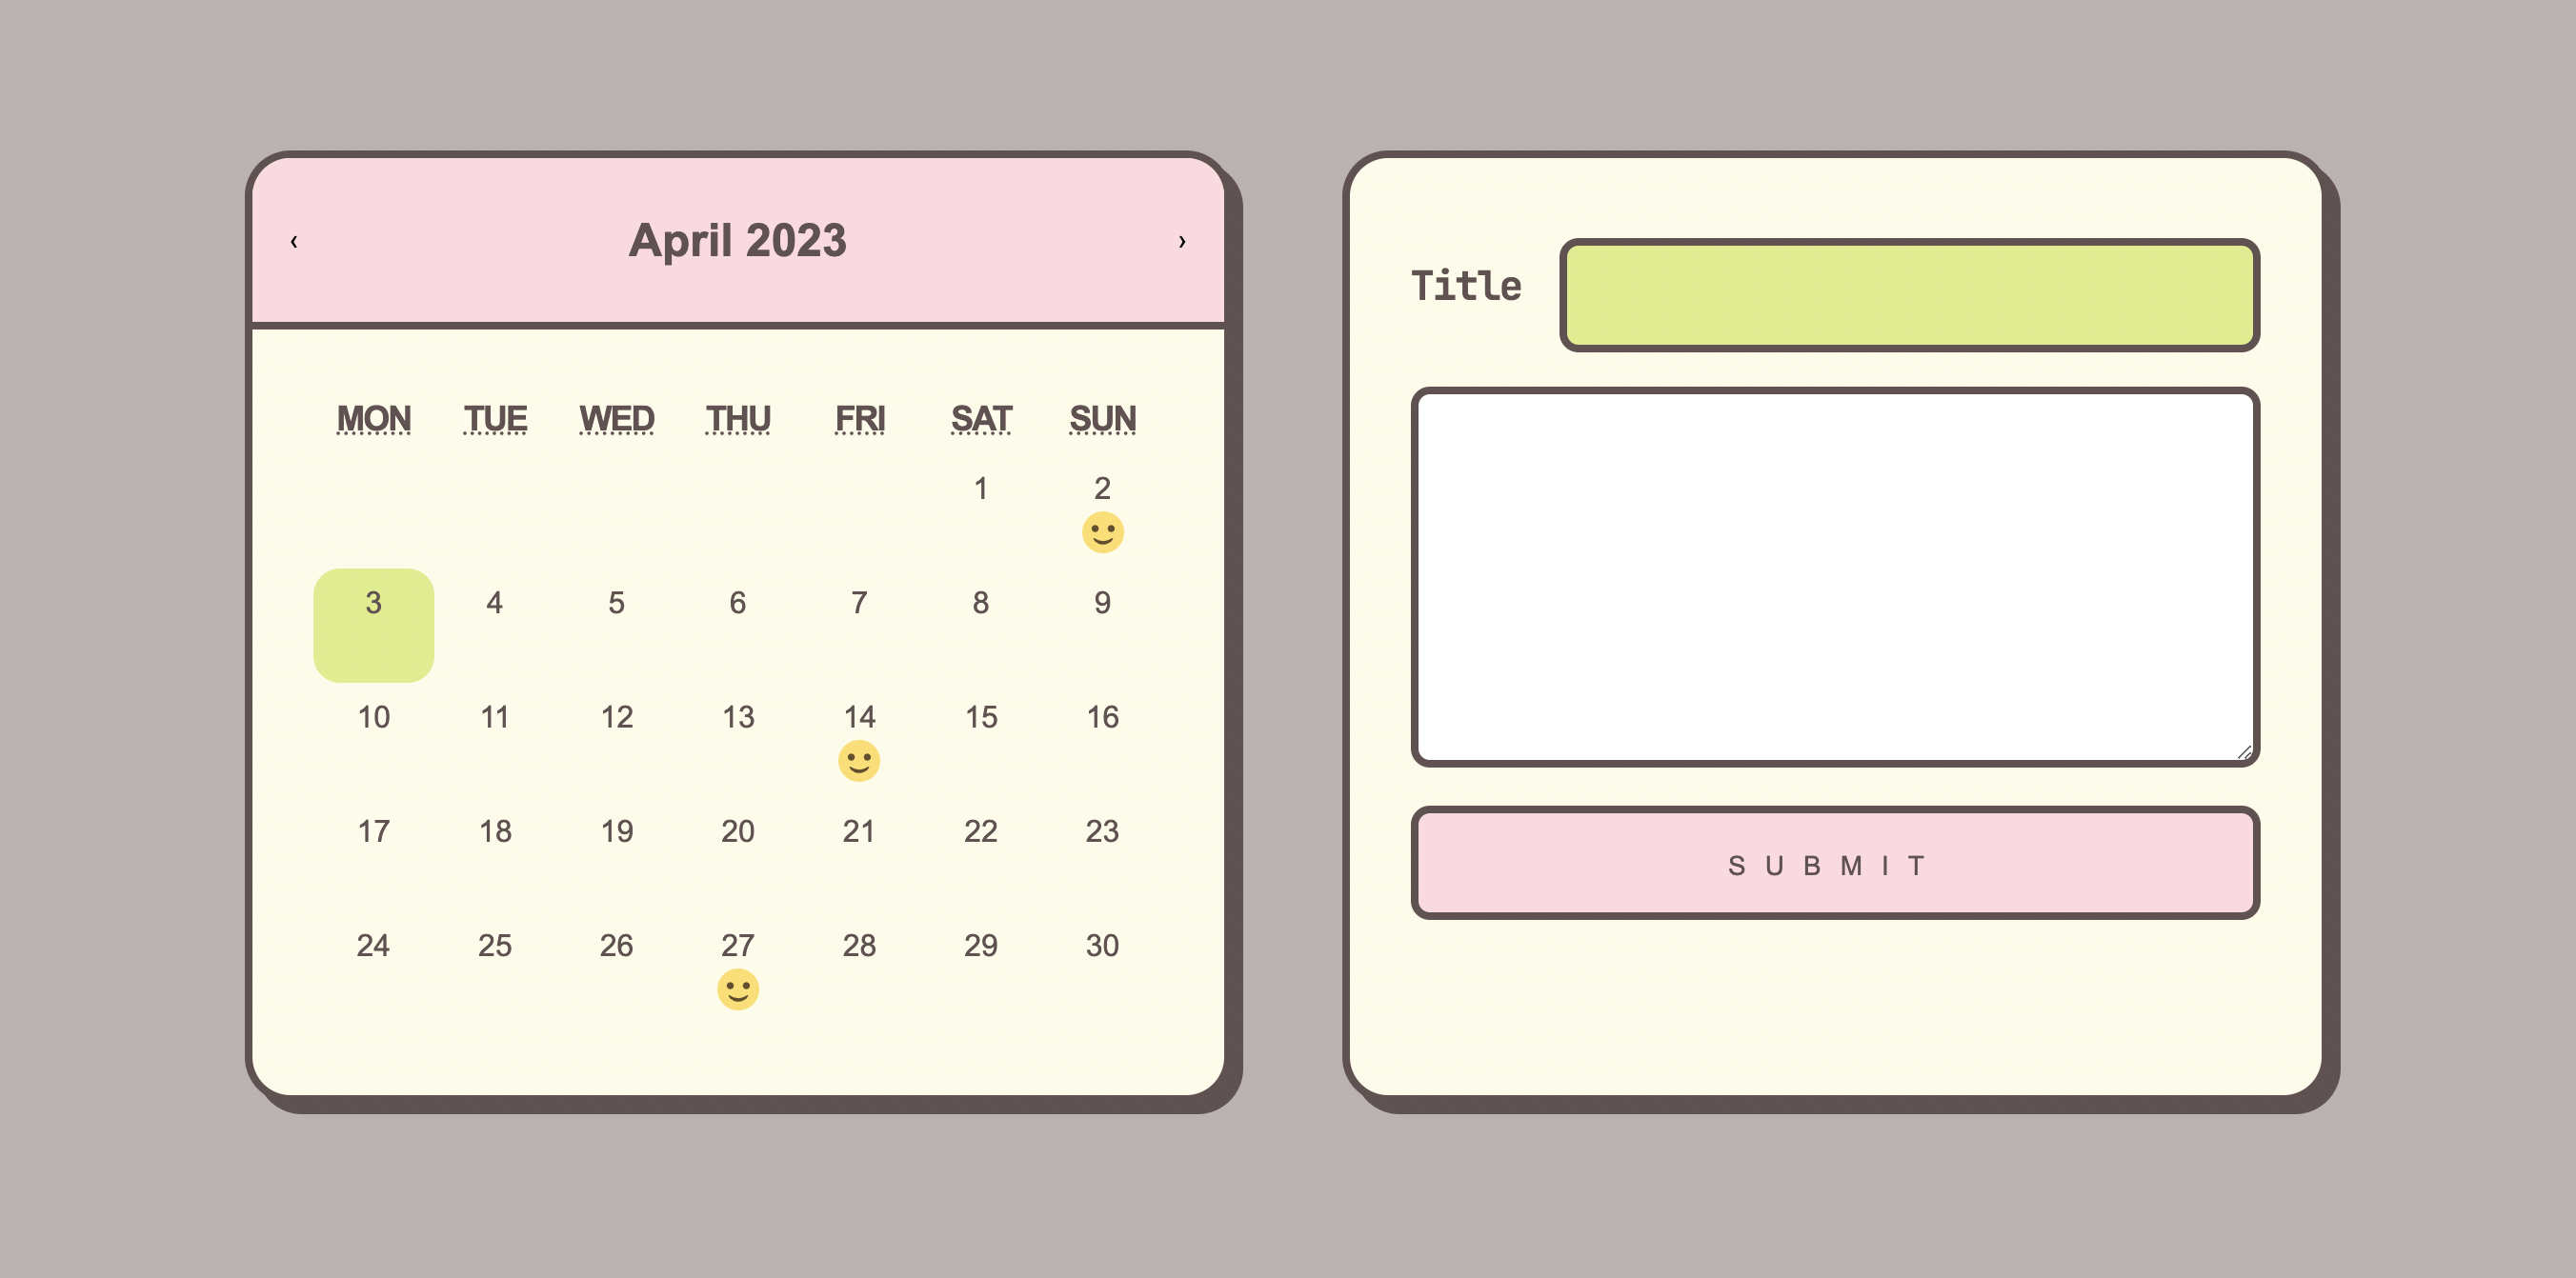
각 날짜에 컨텐츠 추가하기
- 각 날짜마다 addContent의 리턴값이 들어감
// 일기 작성 날짜 리스트
  const dayList = [
    '2023-03-10',
    '2023-03-21',
    '2023-04-02',
    '2023-04-14',
    '2023-04-27',
  ];

  // 각 날짜 타일에 컨텐츠 추가
  const addContent = ({ date }: any) => {
    // 해당 날짜(하루)에 추가할 컨텐츠의 배열
    const contents = [];

    // date(각 날짜)가  리스트의 날짜와 일치하면 해당 컨텐츠(이모티콘) 추가
    if (dayList.find((day) => day === moment(date).format('YYYY-MM-DD'))) {
      contents.push(
        <>
          {/* <div className="dot"></div> */}
          <Image
            src="emotion/good.svg"
            className="diaryImg"
            width="26"
            height="26"
            alt="today is..."
          />
        </>
      );
    }
    return <div>{contents}</div>; // 각 날짜마다 해당 요소가 들어감
  };


덕분에 캘린더를 조금 더 쉽게 구현할 수 있었습니다 ! 감사합니다 ~~