MNIST란?
손으로 쓰여진 숫자 데이터
우편물에 쓰여진 숫자를 자동으로 인식하고 싶어서 만들었다고 한다 (오... 신기)
링크는 여기
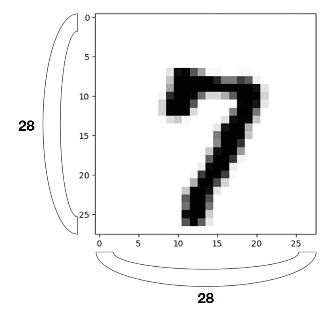
- 28x28, 1 channel gray 이미지
- 따라서 입력으로 들어가는 X의 크기가 28x28=784
- 파이토치에서는 view 함수를 이용하여 이미지를 784 크기로 바꿈
X = X.view(-1, 28 * 28)
Torchvision
들어가기에 앞서 torchvision을 설치해야 함
Torchvision: 유명한 datasets들(MNIST, Fashion-MNIST 같은)과 모델들(Alexnet, VGG, ResNet 등), transform, util들을 포함한 패키지
mnist_train = dsets.MNIST(root="MNIST_data/", train=True, transform=transforms.ToTensor(), dowuload=True)
mnist_test = dsets.MNIST(root="MNIST_data/", train=False, transform=transforms.ToTensor(), dowuload=True)
dsets.MNIST parameter 설명
- root: torchvision에 있는 dataset을 이용하여 MNIST를 불러옴
- train: True 라면 training set이, False 라면 test set 이 로드됨
- transform: MNIST 이미지를 불러올 때 어떤 transform을 적용해서 불러올 것인지
ToTensor를 통해서 img를 PyTorch 값으로 바꿈
(img: [0, 255], Height, Width, Channel 순서)
(torch: [0, 1], Channel, Width, Height 순서) - download: root에 MNIST 데이터가 존재하지 않는다면 다운로드함
이후 이 데이터를 torch.utils.DataLoader 함수를 이용하여 불러옴
data_loader = torch.utils.DataLoader(DataLoader=mnist_train, batch_size=batch_size, shuffle=True, drop_last=True)다른 것들은 다 직관적이라서 이해가 가는데 drop_last에 대해서 설명하자면
batch_size만큼 잘라서 불러올 때, 숫자가 맞지 않아서 남는 데이터들을 어떻게 처리할 것인지 정함
True라면, 그 데이터들은 사용하지 않음
이 data_loader를 for문을 이용하여 데이터를 불러옴
device = 'cuda' if torch.cuda.is_available() else 'cpu'
for epoch in range(training_epochs):
    for X, Y in data_loader:
        # reshape input image into [batch_size by 784]
        # label is not one-hot encoded
        X = X.view(-1, 28 * 28).to(device)
Y = Y.to(device)- X에는 MNIST image가 저장됨
원래 X의 크기는 (batch_size, 1 channel, 28 height, 28 width)인데
view를 이용하여 (batch_size, 784)로 바꿈 - Y는 label이 저장되며, [0, 9]까지의 값을 갖게 됨
- to(device)는 해당 데이터를 cpu 또는 gpu에 올려서 연산을 가능케 함
Epoch / Batch size / Iteration
- Epoch: traning에 대하여, 한 번의 forward pass 또는 backward pass
- Batch size: forward 또는 backward pass를 한 번 수행할 때 사용할 샘플의 개수
- Iteration: pass의 개수, batch를 학습에 몇 번 사용했는지
one pass = one forward pass + one backward pass
구현
이제 이것들을 Softmax Classifier를 이용하여 구현함
import torch
import torchvision.datasets as dsets
import torchvision.transforms as transforms
import matplotlib.pyplot as plt
import random

training_epochs = 15
batch_size = 100

mnist_train = dsets.MNIST(root="MNIST_data/", train=True, transform=transforms.ToTensor(), download=True)
mnist_test = dsets.MNIST(root="MNIST_data/", train=False, transform=transforms.ToTensor(), download=True)

data_loader = torch.utils.data.DataLoader(dataset=mnist_train,
                                          batch_size=batch_size,
                                          shuffle=True,
                                          drop_last=True)

device = 'cuda' if torch.cuda.is_available() else 'cpu'
# 입력이 784은 image, 출력은 0~9까지의 label
linear = torch.nn.Linear(784, 10, bias=True).to(device)

# define cost/loss & optimizer
# cross_entropy loss에서 softmax를 자동으로 계산해 주기 때문에,
# softmax에 대해서는 별도로 선언하지 않음
criterion = torch.nn.CrossEntropyLoss().to(device)
optimizer = torch.optim.SGD(linear.parameters(), lr=0.1)

for epoch in range(training_epochs):
    avg_cost = 0
    total_batch = len(data_loader)

    for X, Y in data_loader:
        # reshape input image into [batch_size by 784]
        # label is not one-hot encoded
        X = X.view(-1, 28 * 28).to(device)
        Y = Y.to(device)

        hypothesis = linear(X)
        cost = criterion(hypothesis, Y)

        optimizer.zero_grad()
        cost.backward()
        optimizer.step()

        avg_cost += cost / total_batch

    print('Epoch:', '%04d' % (epoch + 1), 'cost =', '{:.9f}'.format(avg_cost))

print('Learning finished')

# Test the model using test sets
with torch.no_grad(): # gradient를 계산하지 않음! 실수 방지
    X_test = mnist_test.test_data.view(-1, 28 * 28).float().to(device)
    Y_test = mnist_test.test_labels.to(device)

    prediction = linear(X_test)
    correct_prediction = torch.argmax(prediction, 1) == Y_test
    accuracy = correct_prediction.float().mean()
    print('Accuracy:', accuracy.item())

    # 여기 아래부턴 visualization
    # Get one and predict
    r = random.randint(0, len(mnist_test) - 1)
    X_single_data = mnist_test.test_data[r:r + 1].view(-1, 28 * 28).float().to(device)
    Y_single_data = mnist_test.test_labels[r:r + 1].to(device)

    print('Label: ', Y_single_data.item())
    single_prediction = linear(X_single_data)
    print('Prediction: ', torch.argmax(single_prediction, 1).item())

    plt.imshow(mnist_test.test_data[r:r + 1].view(28, 28), cmap='Greys', interpolation='nearest')
    plt.show()