실습 1 - apache2 배포
rapa@rapa:~/0823$ tree
.
├── test1
│   └── Dockerfile
└── test2
    └── docker-compose.yml

2 directories, 2 files
step 1) index.html 생성
rapa@rapa:~/0823/test1$ echo "hello" > index.htmlstep 2) Dockerfile 작성 (ubuntu, apache2)
rapa@rapa:~/0823/test1$ vi Dockerfile FROM ubuntu:18.04
RUN apt update
RUN apt -y install apache2
ADD index.html /var/www/html
EXPOSE 80 8080
CMD apache2ctl -DFOREGROUND- 웹서비스 데몬의 위치
이미지             웹 서비스 경로
----------------------------------------------
httpd             /usr/local/apache2/htdocs
nginx             /usr/share/nginx/html
centos+httpd      /var/www/html
ubuntu+nginx      /var/www/html
ubuntu+apache2 /var/www/html-
저장소
- public registry(docker hub) -> goyangyee/myweb:1.0 -> push(인증 정보 확인)
로그인 docker login - private registry -> 10.10.10.10:5000/myweb:1.0 -> push(인증 정보 확인)
로그인 docker login https://10.10.10.10 - local registry -> myweb:1.0 [repository name]:[tag]
- public registry(docker hub) -> goyangyee/myweb:1.0 -> push(인증 정보 확인)
-
Blue-Green Deployment

- 이전 버전을 blue 환경으로, 새 버전은 green 환경으로 부른다.
- You can enable features gradually one at a time on blue, leaving green on standby as a hot backup if a major problem arises.
- green은 hot standby로 대기하고 있다.
- 이미지의 태그를 color:blue, color:green과 같이 부여하여 rolling update를 구현할 수 있다.
https://www.redhat.com/ko/topics/devops/what-is-blue-green-deployment
https://www.flagship.io/blue-green-deployment-pros-and-cons/
https://www.quora.com/What-is-blue-green-deployment
step 3) 이미지 빌드
rapa@rapa:~/0823/test1$ docker build -t myweb:1.0
Successfully built a213a945cd88
Successfully tagged myweb:1.0- 생성 확인
rapa@rapa:~/0823/test1$ docker image ls
REPOSITORY                  TAG       IMAGE ID       CREATED          SIZE
myweb                       1.0       a213a945cd88   24 minutes ago   201MB
rapa@rapa:~/0823/test1$ docker image inspect a213a945cd88step 4) 이미지 배포
rapa@rapa:~/0823/test1$ docker container run -d \
> -p 8008:80 \
> --name myweb01 \
> myweb:1.0
aa6b96b2c5ba5265012cdbc8135b23f809e121c8910be3edc834eb6b5c2d6c2f
-> 8008 포트를 연다.
- step 5) 배포 확인
localhost:8001 접속

실습 2 - wordpress, db 배포
step 1) network, volume 생성
rapa@rapa:~/0823/test2$ docker network create testnetwork1
Error response from daemon: network with name testnetwork1 already exists
rapa@rapa:~/0823/test2$ docker volume create testvolume1
testvolume1
step 2) docker-compose.yml 작성 (wordpress, db)
rapa@rapa:~/0823/test2$ vi docker-compose.yml version: '3.8'
services:
wordpress:
image: wordpress
networks:
- testnetwork1
volumes:
- /home/rapa/0823/test2/html:/var/www/html # nfs 마운트
ports:
- "8881-8882:80"
links:
- db:mysql
depends_on:
- db
environment:
- WORDPRESS_DB_PASSWORD=test123
- WORDPRESS_DB_USER=root
- WORDPRESS_DB_NAME=testdb
db:
image: mysql:5.7
networks:
- testnetwork1
volumes:
- testvolume1:/var/lib/mysql # iSCSI 마운트(볼륨)
environment:
- MYSQL_ROOT_PASSWORD=test123
- MYSQL_DATABASE=testdb
networks:
testnetwork1:
external: true
volumes:
testvolume1:
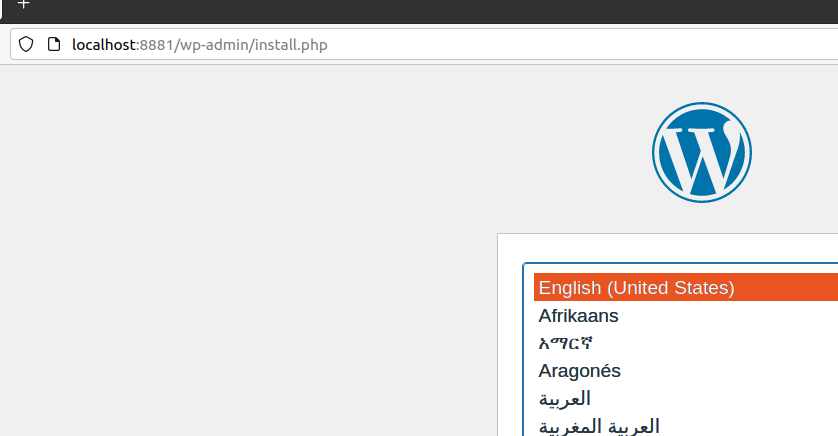
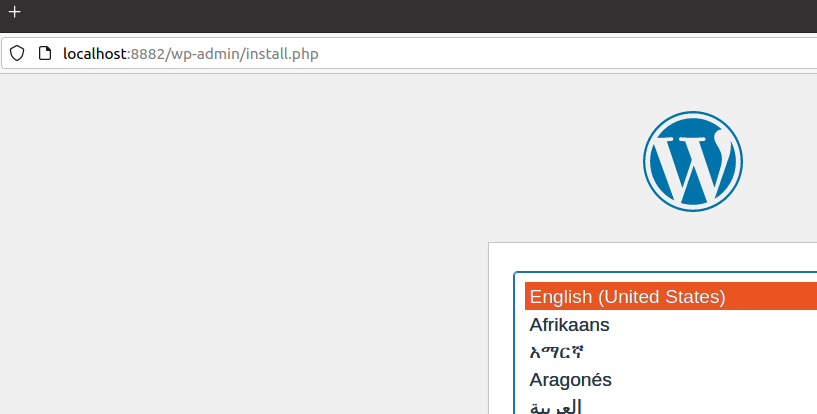
external: true-> 포트: 8881-8882
step 3) 배포
rapa@rapa:~/0823/test2$ dc up --scale wordpress=2 --scale db=2 -d
Creating test2_db_1 ... done
Creating test2_db_2 ... done
WARNING: The "wordpress" service specifies a port on the host. If multiple containers for this service are created on a single host, the port will clash.
Creating test2_wordpress_1 ... done
Creating test2_wordpress_2 ... done
-> scale을 통해 wordpress와 db를 두 개씩 생성
step 4) 확인
rapa@rapa:~/0823/test2$ dc ps
      Name                     Command               State                  Ports
-------------------------------------------------------------------------------------------------
test2_db_1          docker-entrypoint.sh mysqld      Up      3306/tcp, 33060/tcp
test2_db_2          docker-entrypoint.sh mysqld      Up      3306/tcp, 33060/tcp
test2_wordpress_1   docker-entrypoint.sh apach ...   Up      0.0.0.0:8882->80/tcp,:::8882->80/tcp
test2_wordpress_2   docker-entrypoint.sh apach ...   Up      0.0.0.0:8881->80/tcp,:::8881->80/tcp
-> wordpress와 db가 두 개 씩 생성되었다.
localhost:8881, 8882 접속
실습 준비 - Docker Swarm
구성 사항:
						    CPU  RAM   NIC(VMnet10)
manager(private-registry)    2    4    211.183.3.100
worker1	                     2    2    211.183.3.101
worker2                      2    2    211.183.3.102
worker3 2 2 211.183.3.103 - 실습 환경 구성 - hostname 변경
rapa@rapa:$ sudo hostnamectl set-hostname manager
Password:
rapa@rapa:$ su rapa
Password:
rapa@manager:$ - 실습 환경 구성 - 네트워크 (211.183.3.10X)
rapa@manager:~/0823/test2$ sudo vi /etc/netplan/01-network-manager-all.yaml # Let NetworkManager manage all devices on this system
network:
ethernets:
ens32:
addresses: [211.183.3.100/24]
gateway4: 211.183.3.2
nameservers:
addresses: [8.8.8.8, 168.126.63.1]
dhcp4: no
version: 2
# renderer: NetworkManagerrapa@manager:~/0823/test2$ sudo netplan apply 
-> VM workstation에서 VMnet10(NAT)으로 변경
- 실습 환경 구성 - hosts
rapa@manager:~$ sudo vi /etc/hosts211.183.3.100 manager
211.183.3.101 worker1
211.183.3.102 worker2
211.183.3.103 worker3 -> 위 호스트들 추가
- 통신 확인
rapa@manager:~$ ping worker1 -c 3
PING worker1 (211.183.3.101) 56(84) bytes of data.
64 bytes from worker1 (211.183.3.101): icmp_seq=1 ttl=64 time=0.562 ms
64 bytes from worker1 (211.183.3.101): icmp_seq=2 ttl=64 time=0.751 ms
64 bytes from worker1 (211.183.3.101): icmp_seq=3 ttl=64 time=1.00 ms

--- worker1 ping statistics ---
3 packets transmitted, 3 received, 0% packet loss, time 2030ms
rtt min/avg/max/mdev = 0.562/0.771/1.002/0.180 ms
rapa@manager:~$ ping worker2 -c 3
PING worker2 (211.183.3.102) 56(84) bytes of data.
64 bytes from worker2 (211.183.3.102): icmp_seq=1 ttl=64 time=0.995 ms
64 bytes from worker2 (211.183.3.102): icmp_seq=2 ttl=64 time=0.566 ms
64 bytes from worker2 (211.183.3.102): icmp_seq=3 ttl=64 time=0.699 ms

--- worker2 ping statistics ---
3 packets transmitted, 3 received, 0% packet loss, time 2027ms
rtt min/avg/max/mdev = 0.566/0.753/0.995/0.179 ms
rapa@manager:~$ ping worker3 -c 3
PING worker3 (211.183.3.103) 56(84) bytes of data.
64 bytes from worker3 (211.183.3.103): icmp_seq=1 ttl=64 time=0.593 ms
64 bytes from worker3 (211.183.3.103): icmp_seq=2 ttl=64 time=0.498 ms
64 bytes from worker3 (211.183.3.103): icmp_seq=3 ttl=64 time=0.984 ms

--- worker3 ping statistics ---
3 packets transmitted, 3 received, 0% packet loss, time 2037ms
rtt min/avg/max/mdev = 0.498/0.691/0.984/0.210 ms
take a look