middleware/auth.js
import jwt from "jsonwebtoken";
import config from "../config/index";
const { JWT_SECRET } = config;

const auth = (req, res, next) => {
  const token = req.header("x-auth-token");

  if (!token) {
    return res.status(401).json({ msg: "토큰 없음. 인증이 거부됨!!!" });
  }
  try {
    const decoded = jwt.verify(token, JWT_SECRET);
    req.user = decoded;
    next();
  } catch (e) {
    console.log(e);
    res.status(400).json({ msg: "토큰이 유효하지 않습니다" });
  }
};

export default auth;
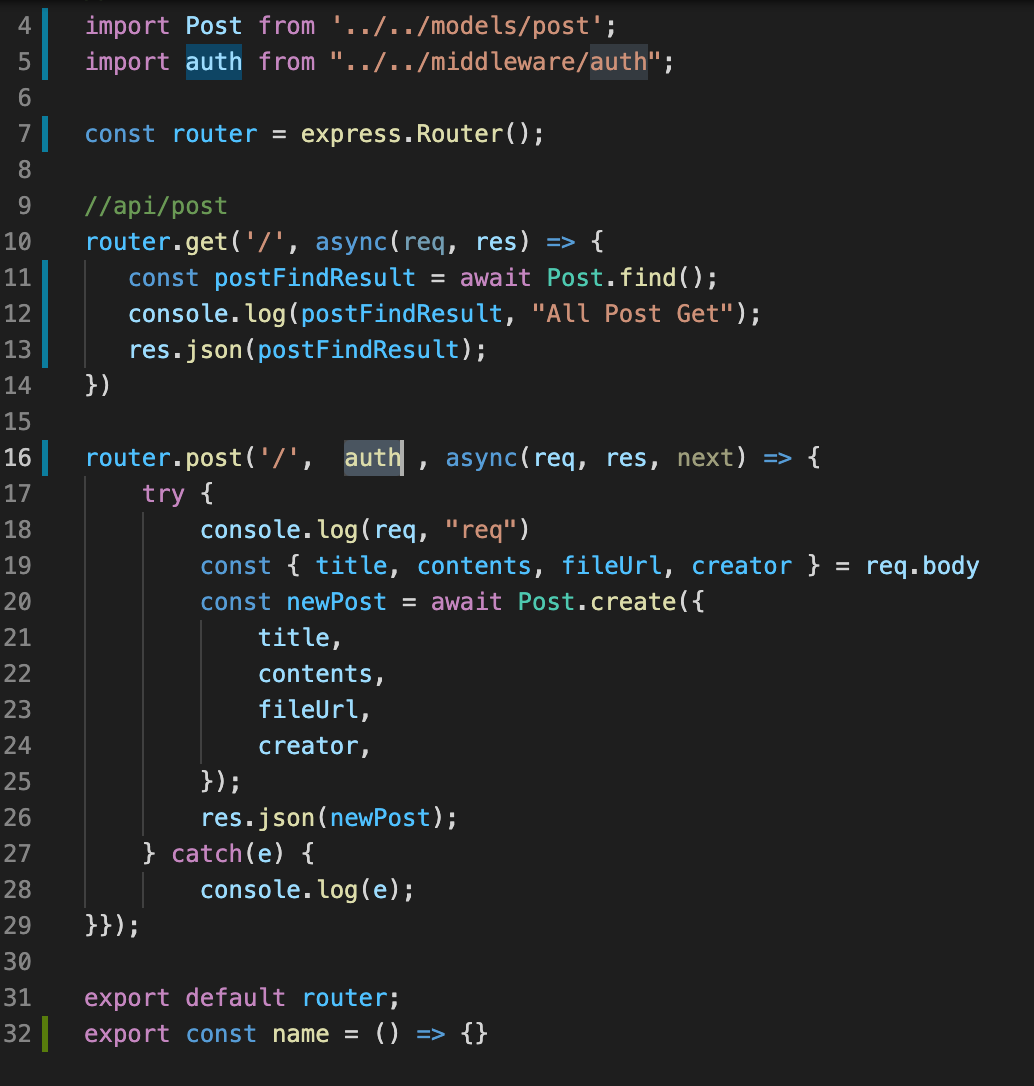
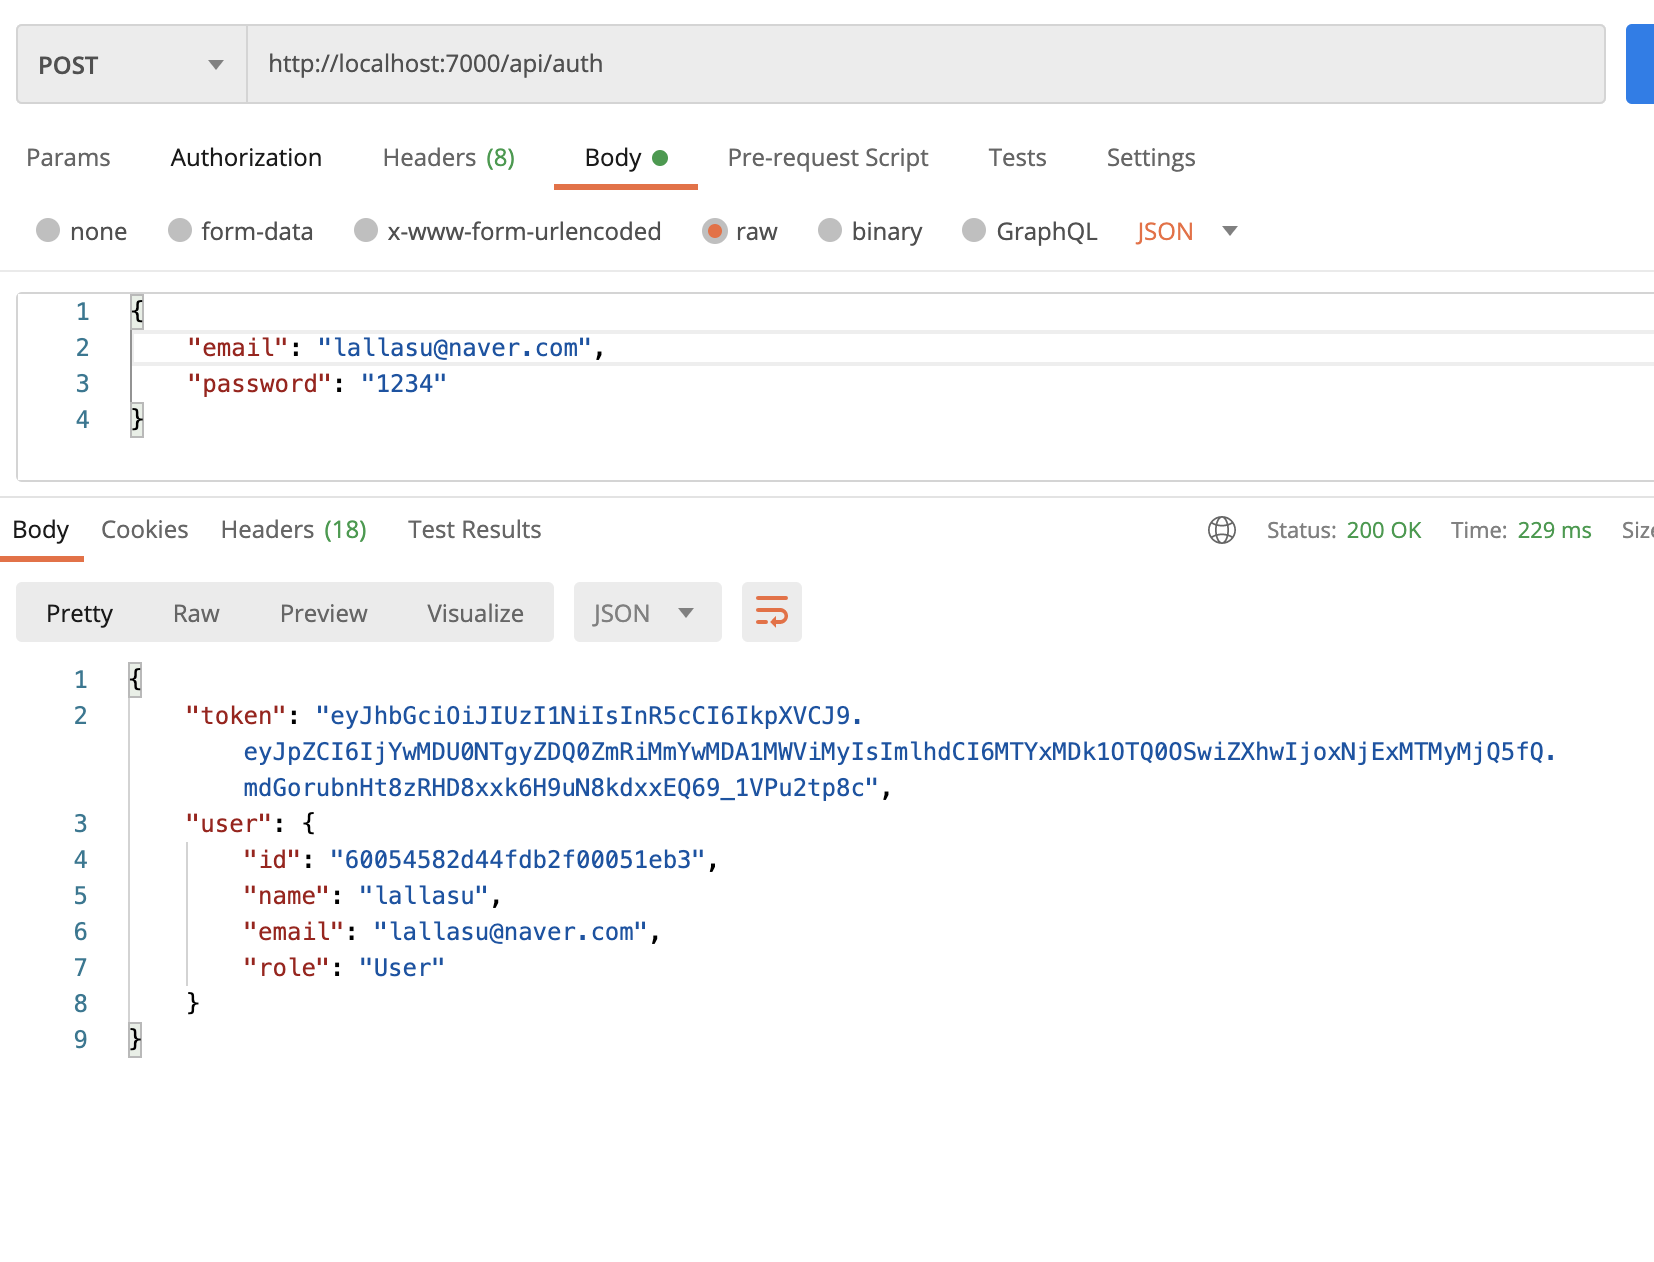
post.js 에 auth 를 추가한다 .
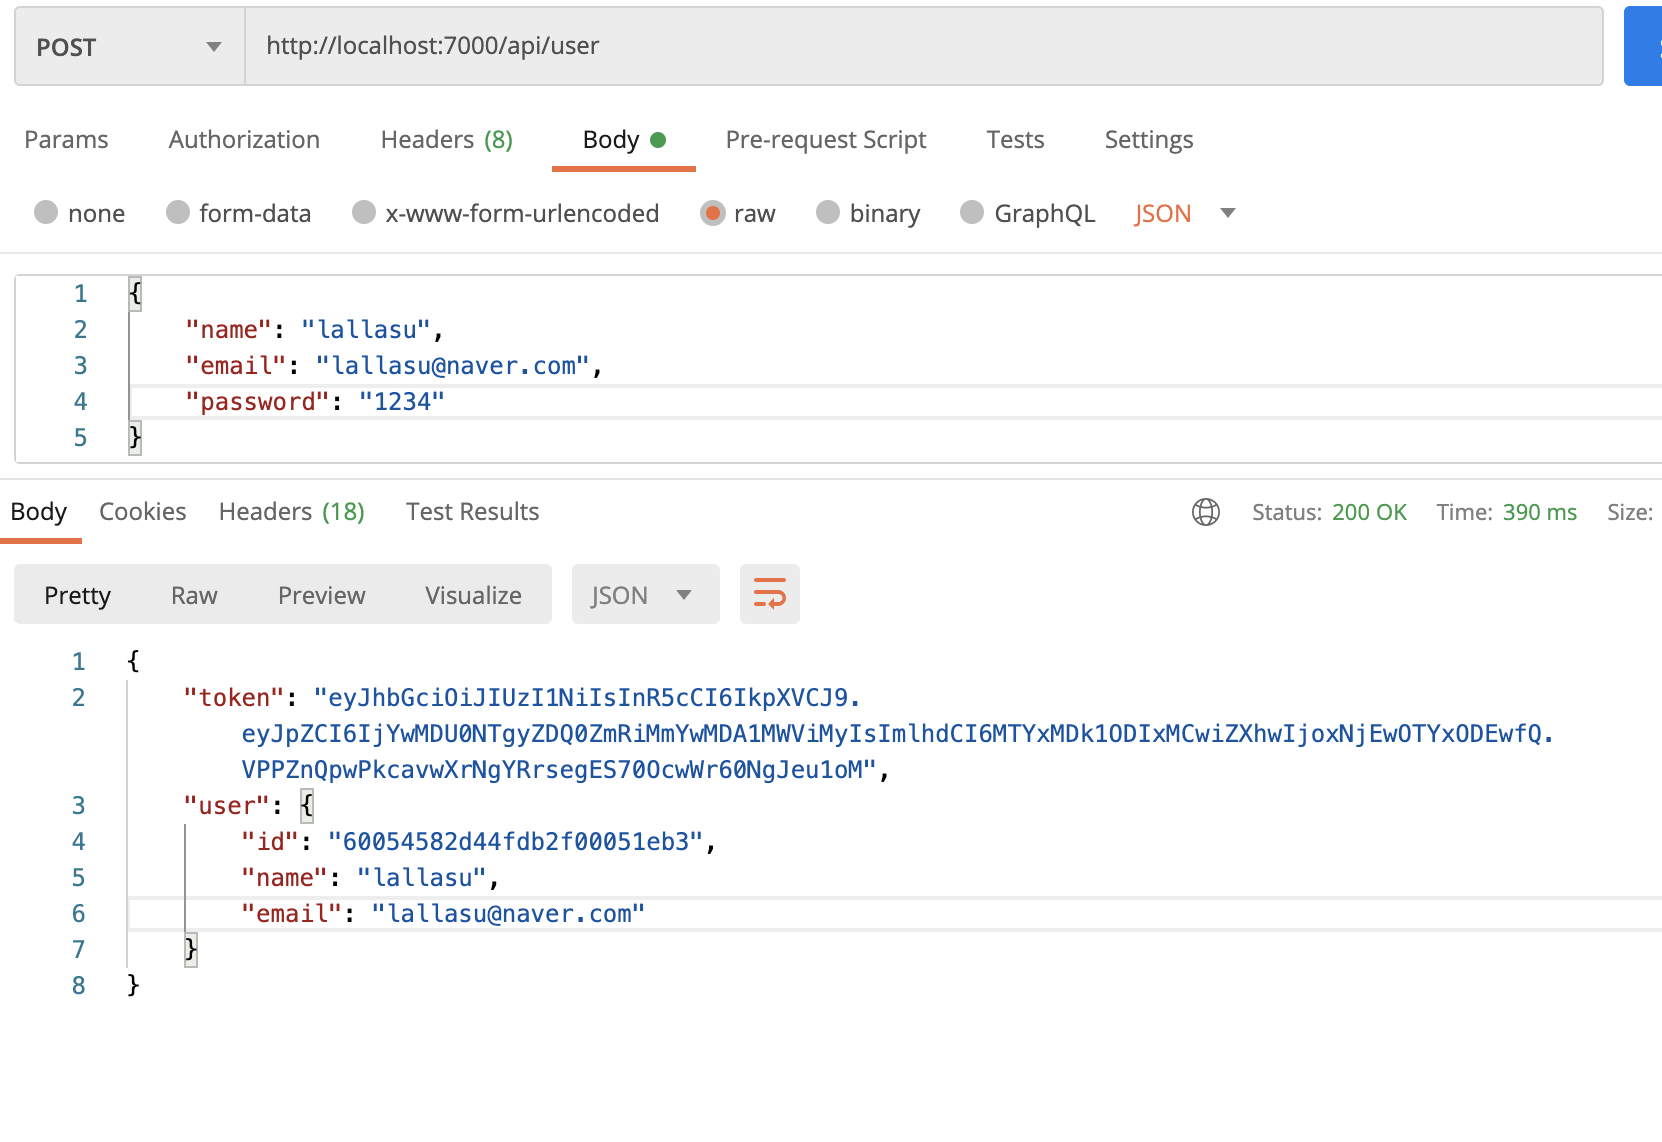
포스트맨에서 보면
1.이렇게 기존에 가입한 유저정보의 토큰을 복사해서
-

라고 적고,
.
. -

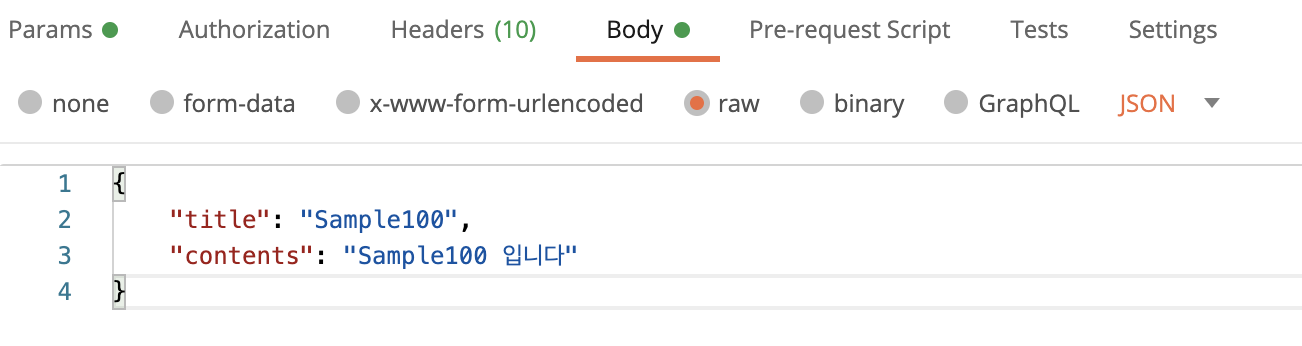
title contents를 예를 들어 이런식으로 넣으면
.
. -
.
. -
최종적으로
.
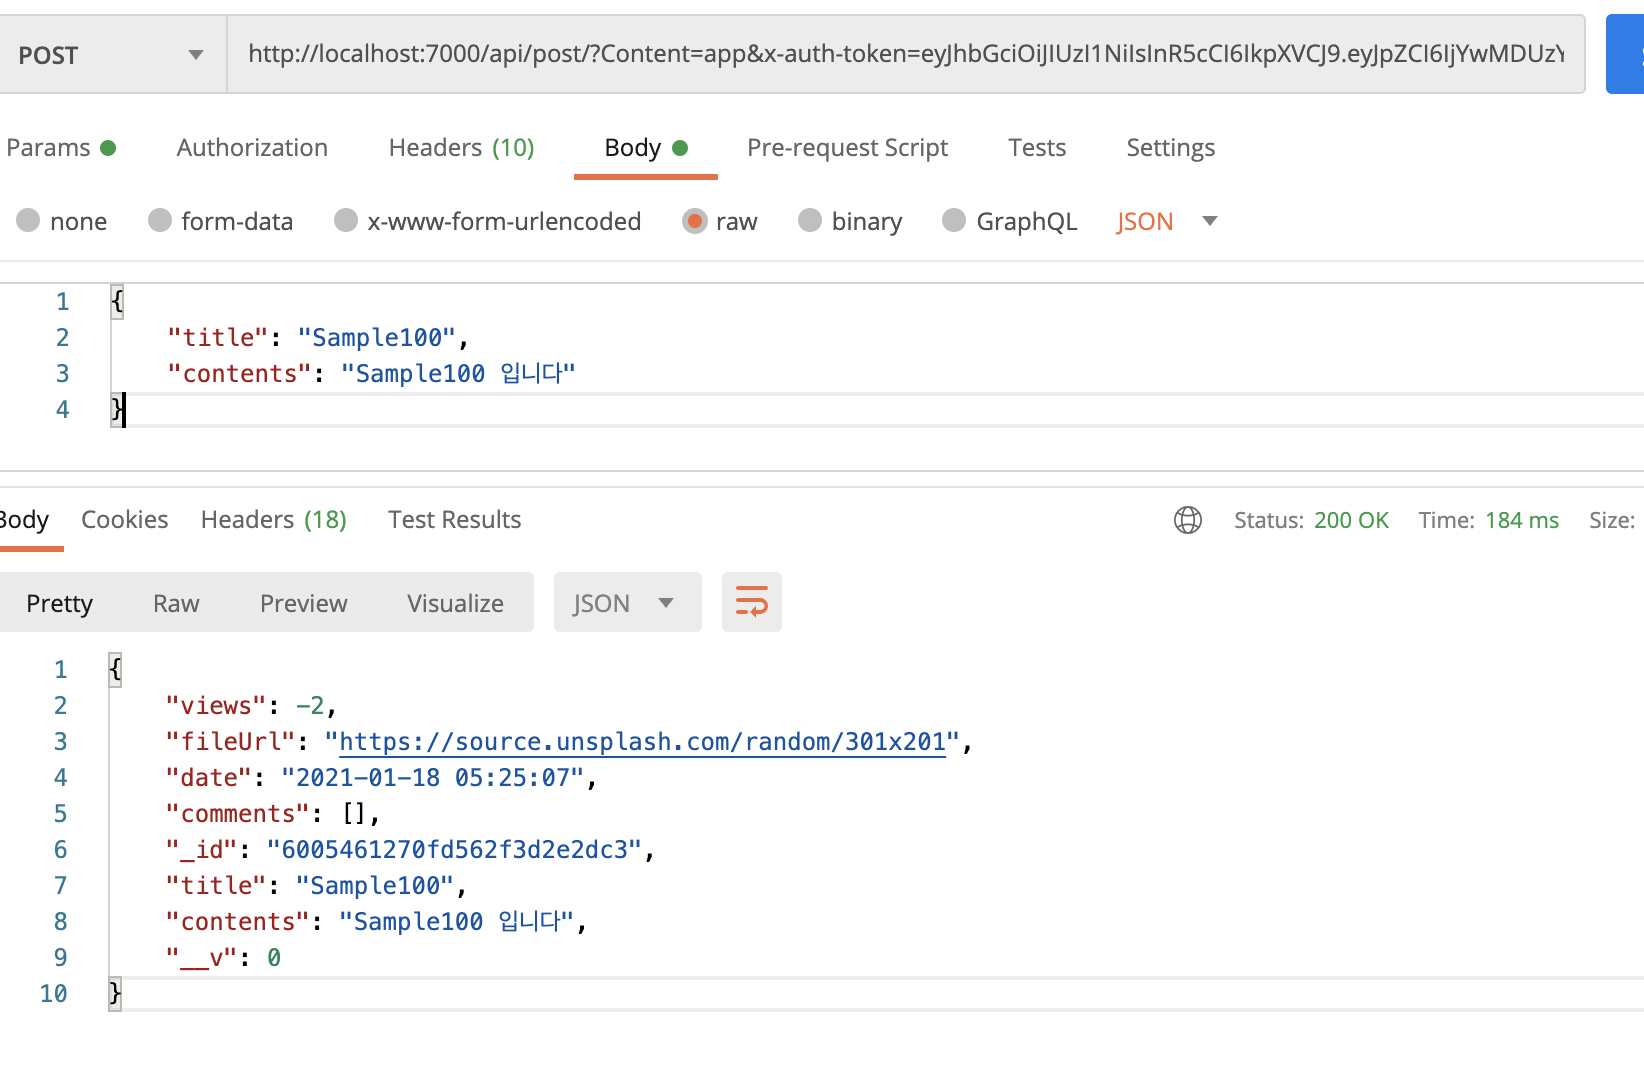
이렇게 title과 contents에 들어가는것을 확인 할 수 있다 !
/////////////
auth routes 만들기
server.js 에 app.use("/api/auth", authRoutes); 를 추가한다.
routes/api/auth.js
import express from "express";
import bcrypt from "bcryptjs";
import jwt from "jsonwebtoken";
import auth from "../../middleware/auth";
import config from "../../config/index";
const { JWT_SECRET } = config;
// Model
import User from "../../models/user";
const router = express.Router();
// @route POST api/auth
// @desc Auth user
// @access Public
router.post("/", (req, res) => {
const { email, password } = req.body;
// Simple Validation
if (!email || !password) {
return res.status(400).json({ msg: "모든 필드를 채워주세요" });
}
// Check for existing user 한명찾는다findOne
User.findOne({ email }).then((user) => {
if (!user) return res.status(400).json({ msg: "유저가 존재하지 않습니다" });
// Validate password
bcrypt.compare(password, user.password).then((isMatch) => {
if (!isMatch)
return res.status(400).json({ msg: "비밀번호가 일치하지 않습니다" });
jwt.sign(
{ id: user.id },
JWT_SECRET,
{ expiresIn: "2 days" },
(err, token) => {
if (err) throw err;
res.json({
token,
user: {
id: user.id,
name: user.name,
email: user.email,
role: user.role,
},
});
}
);
});
});
});
//리덕스사가로 처리할거기땜에 오로지 응답만 주어진다고 하면 서버에서 특별히 할건없고
//성공 메세지만 보내면 된다.
router.post("/logout", (req, res) => {
res.json("로그아웃 성공");
});
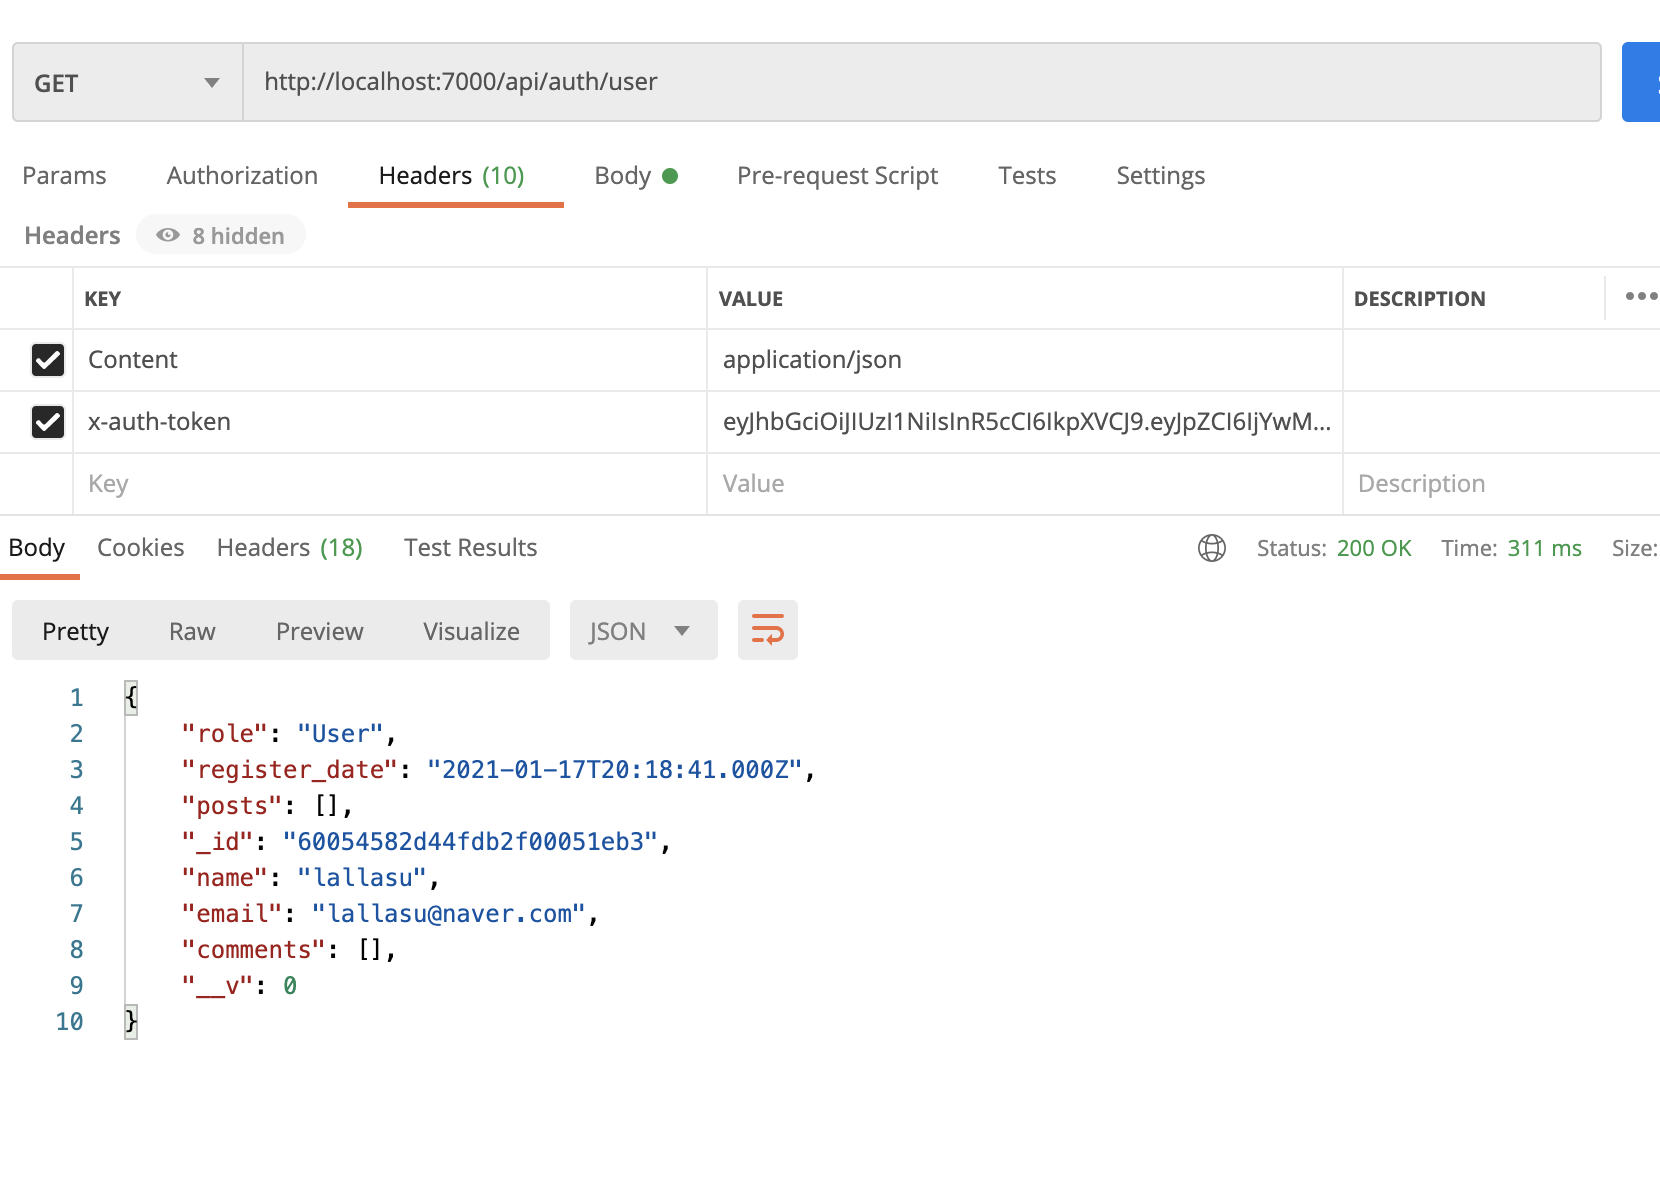
router.get("/user", auth, async (req, res) => {
try {
const user = await User.findById(req.user.id).select("-password");
if (!user) throw Error("유저가 존재하지 않습니다");
res.json(user);
} catch (e) {
console.log(e);
res.status(400).json({ msg: e.message });
}
});
export default router;
로그인 확인하기
기존 유저의 토큰을 넣어서 확인해보면

on the move 👉🏼 https://sjeong82.tistory.com/