achievemen
vue, typescript만 이용해 TodoList만들어 보겠습니다.
vue 파해치기

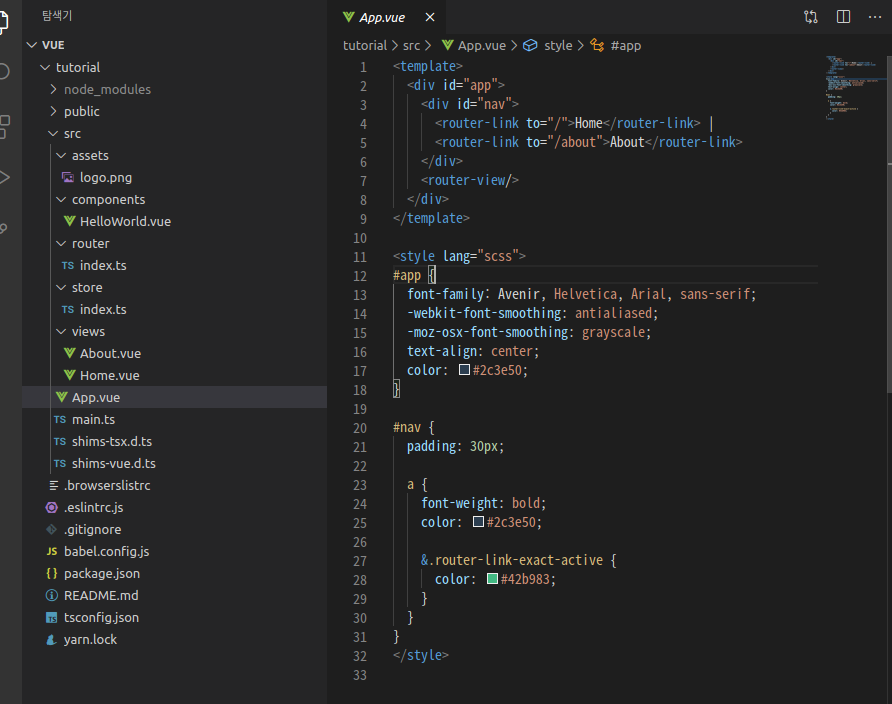
먼저 프로젝트를 보시면 App.vue에 template, style, script 태그들이 있는데 하나하나 설명해 보겠습니다
template는 HTML, css등의 마크업 속성과 뷰 인스턴스에서 정의한 데이터 및 로직들을 연결하여 사용자가 브라우저에서 볼 수 있는 형태의 html로 변환해주는 속성입니다.
style은 css등의 마크업 속성을 설정해 줄수 있는곳 입니다.
script는 HTML과 똑같이 js코드를 작성할수 있는 공간입니다.
이제 본격적으로 시작해 보겠습니다.
// Home.vue
<template>
  <div class="home">
    <HelloWorld />
  </div>
</template>
다음과 같이 사용하지 않는 코드를 지워줍니다.
디자인을 위해 element-ui를 함께 사용해 주겠습니다.
npm i element-ui -S//main.ts
import Vue from "vue";
import App from "./App.vue";
import router from "./router";
import store from "./store";
import Element from "element-ui";
import "element-ui/lib/theme-chalk/index.css";
Vue.use(Element);
//element-ui사용
new Vue({
router,
store,
render: (h) => h(App),
}).$mount("#app");
element-ui를 설치를 완료하고 main.ts에서 Vue.use를 통해 사용하게 되면 이제 이쁜 디자인의 버튼, form 등을 이용할수 있습니다.
아래 사이트에 가시면 더 많은 기능들이 있습니다. 한번 둘러보시고 마음에 드는걸 활용하시면 될것 같습니다.
https://element.eleme.io/#/en-US/component/layout
//HelloWorld.vue
<template>
  <el-card class="todo-container">
    <h2>Todo List</h2>
    <form>
      <el-input placeholder="Please input" v-model="input"></el-input>
      <el-button type="primary" @click="addTodo(input)">Add Todo</el-button>
    </form>
    <ul>
      <li class="todo-item" v-bind:key="index" v-for="(todo, index) in todos">
        <p class="text">{{ todo.text }}</p>
        <el-button
          v-if="todo.completed"
          @click="compelete(index)"
          class="complete completed"
        >Complete</el-button>
        <el-button v-else @click="compelete(index)" class="complete">Complete</el-button>
        <el-button @click="deleteTodo(index)" class="delete">Delete</el-button>
      </li>
    </ul>
  </el-card>
</template>
<script lang="ts">
import { Component, Vue } from "vue-property-decorator";

interface TodosType {
  text?: string;
  completed?: boolean;
}

@Component
export default class HelloWorld extends Vue {
  input?: string = "";

//method
  addTodo(text: string) {
    const todo = {
      text,
      component: false
    };
    this.todos.push(todo);
  }

  compelete(index: number) {
    this.todos[index].completed = !this.todos[index].completed;
  }

  deleteTodo(index: number) {
    this.todos.splice(index, 1);
  }

//data
  private todos: TodosType[] = [
    {
      text: "test-todo1",
      completed: false
    },
    {
      text: "test-todo2",
      completed: true
    },
    {
      text: "test-todo3",
      completed: false
    }
  ];
}
</script>

<style scoped lang="scss">
.todo-container {
  .el-input {
    width: 300px;
  }
  .complete.completed {
    background-color: #409eff;
  }
}
</style>
이렇게 타이핑 하시면 todoList가 완성되게 됩니다. 여기서 중요한 부분은
 <el-button
          v-if="todo.completed"
          @click="compelete(index)"
          class="complete completed"
        >Complete</el-button>
        <el-button v-else @click="compelete(index)" class="complete">Complete</el-button>
v-if를 통해 todo.completed의 값이 true,false 에 따라 보여주는 버튼이 달라지게 됩니다. 따로 로직을 추가하지 안아도 if문을 쉽게 사용할수 있다는 점이 장점인것 같습니다.
@click을 통해 compelete 메소드를 실행시켜 값을 변경시켜 줄수 있습니다.
여기까지 vue를 사용하여 TodoList를 만들어 보았습니다. 다음 게시글에서는 vuex를 사용하여 TodoList를 완성해 보겠습니다.
