72일차 내용 정리
요청 방식
GET
- GET 방식 요청 :
<a href = "/xxx">
POST
- POST 방식 요청 :
<form method="post">
-
DELETE -
PUT: 전체 수정 -
PATCH: 일부 수정
/clients?num=1 ⟷ /clients/1⭐ 폼 제출시
-
현재 위치 :
/clients/new -
요청 위치 :
POST /clients -
최종 위치 :
/clients/newor/clients/x
⭐ redirect 란
- 클라이언트가 웹 브라우저에게 새로운 요청을 하라고 강요
ClientController 에서 create 메소드 확인
new.html에서 폼 버튼을 제출 시 2개의 redirect 가 요청
@PostMapping("/clients")
public String create(@Valid ClientDto dto, BindingResult br, RedirectAttributes ra) {
	boolean hasError = br.hasErrors();
	if(hasError) {
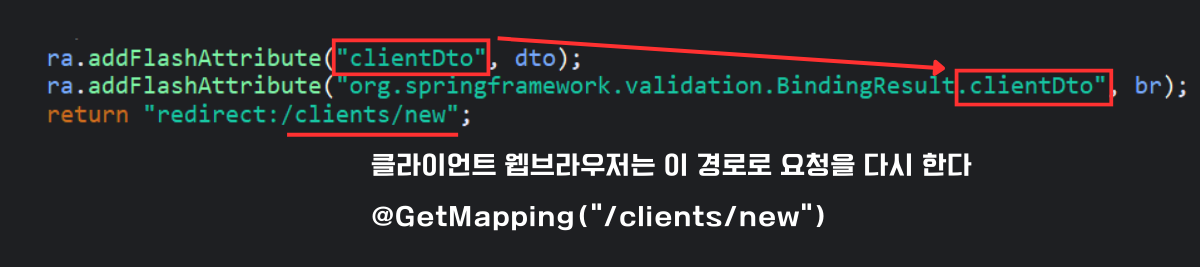
		ra.addFlashAttribute("clientDto", dto);
		ra.addFlashAttribute("org.springframework.validation.BindingResult.clientDto", br);
		return "redirect:/clients/new";
	}
	Long num = clientService.addClient(dto);
	return "redirect:/clients/"+num;
}
요청 흐름 순서도 (유효성 검증 포함)
[사용자 입력]
     ⭣
[POST /clients] ⭠ <form method="post"> from /clients/new
     ⭣
[ClientController.create()]
     │
     ├⭢ if 유효성 실패 (BindingResult.hasErrors)
     │     └── FlashAttributes 로 에러 정보 전달
     │     └── redirect:/clients/new
     │
     └⭢ if 유효성 통과
           └⟶ clientService.addClient(dto)
           └⟶ redirect:/clients/{id}
new.html 에서 검증 메세지 확인
<div class="container">
	<h3>새 Client 등록 양식</h3>
	<form th:action="@{/clients}" th:object="${clientDto}" method="post">
		<div class="mb-3">
			<label class="form-label" for="userName">userName <span class="text-danger">*</span></label>
			<input type="text" class="form-control" th:field="*{userName}" placeholder="이름 입력" />
			<small class="text-danger"
					th:if="${#fields.hasErrors('userName')}"
					th:errors="*{userName}">에러</small>
		</div>
		<div class="mb-3">
			<label class="form-label">생일 (선택)</label>
			<input type="date" th:field="*{birthday}" class="form-control" />
			<small class="form-text text-muted">나중에 입력 가능</small>
			<small class="text-danger"
					th:if="${#fields.hasErrors('birthday')}"
					th:errors="*{birthday}">에러</small>
		</div>
		<button class="btn btn-success" type="submit">등록</button>
	</form>
</div>- 폼의 기본 상태
<input type="text" class="form-control" placeholder="이름 입력" id="userName" name="userName" value=""/>- 최대 20글자를 초과해 작성 후 폼 버튼 전송한 상태
<input type="text" class="form-control" placeholder="이름 입력" id="userName" name="userName" value="안녕하세요이건테스트로최대20글자를초과해봅시다"/>
<small class="text-danger">이름은 최대 20글자 까지 가능합니다</small>
➜ userName 와 birthday 에 작성한 내용은 검증 후 dto 를 통해 전달
@DateTimeFormat
⚠️ userName 은 검증 조건을 불충족 시 적은 해당 값이 남아있지만 생일의 경우 초기화된다
➜ 웹브라우저가 해당 문자열을 인식하지 못해 초기화된다
<input type="date" class="form-control" id="birthday" name="birthday" value="25. 9. 27." />-
ClientDto 에
birthday필드에@DateTimeFormat어노테이션 추가input type="date"의 value 에th:value = "${birthday}"를
출력할 때 형식을 맞춰 주어야 한다- 사실 ClientDto 의
birthday라는 필드는LocalDate type이기 때문에 출력할 때 어떤 형식으로 출력할 지를 설정해야 웹 브라우저가
해당 날짜를 UI 에 제대로 표시할 수 있다
@DateTimeFormat(iso = DateTimeFormat.ISO.DATE)- 결과 확인
<input type="date" class="form-control" id="birthday" name="birthday" value="2025-09-27" />@PathVariable
client 상세보기
GET "/client/detail?num=x" ⟷ GET "/clients/x"
- ClientController 에
detail메소드 생성- 고객 정보 상세보기 요청 처리
@GetMapping("/clients/{num}")
public String detail(@PathVariable Long num, Model model) {
	model.addAttribute("clientDto", clientService.getClient(num));

	return "clients/detail";
}- detail.html 생성
<div class="container pt-4">
	<h3>고객 상세 정보</h3>
	<table class="table table-bordered" th:object="${clientDto}">
		<tbody>
			<tr>
				<th>번호</th>
				<td>[[*{num}]]</td>
			</tr>
			<tr>
				<th>이름</th>
				<td>[[*{userName}]]</td>
			</tr>
			<tr>
				<th>생일</th>
				<td th:text="*{#temporals.format(birthday, 'yy년 MM월 dd일')}"></td>
			</tr>
			<tr>
				<th>수정일</th>
				<td th:text="*{#temporals.format(updatedAt, 'yy년 MM월 dd일 HH:mm')}"></td>
			</tr>
			<tr>
				<th>등록일</th>
				<td th:text="*{createdAt}"></td>
			</tr>
		</tbody>
	</table>
</div>- ClientController 에
create메소드에 고객 정보를 성공적으로 저장했다는 메세지를 띄우기 위한RedirectAttribute코드 추가
ra.addFlashAttribute("message", dto.getUserName()+" 님의 정보 저장 완료");- new.html 에 메세지 출력 코드 추가 & 목록과 수정 링크 추가
<p th:if="${message}" class="alert alert-message" th:text="${message}"></p>

<div class="mt-3">
	<a th:href="@{/clients}" class="btn btn-secondary">목록으로</a>
	<a th:href="@{|/clients/${clientDto.num}/edit|}" class="btn btn-primary">수정</a>
</div>
client 수정 form 요청
GET "/client/edit" ⟷ GET "/clients/x/edit"
- ClientController 에
edit메소드 생성
@GetMapping("/clients/{num}/edit")
public String editForm(@PathVariable Long num, Model model) {
	// 수정 반영할 RedirectAttribute 정보를 가져올 수도 있다
	if(!model.containsAttribute("clientDto")) {
		model.addAttribute("clientDto", clientService.getClient(num));
	}
	return "clients/edit";
}- edit.html 생성
<div class="container" th:object="${clientDto}">
	<h3>고객 정보 수정 양식</h3>
	<form th:action="@{|/clients/*{num}|}" method="post">
		<input type="hidden" th:field="*{num}"/>
		<div class="mb-3">
			<label class="form-label" for="userName">이름</label>
			<input class="form-control" type="text" th:field="*{userName}"/>
          	<small class="text-danger"
					th:if="${#fields.hasErrors('userName')}"
					th:errors="*{userName}">에러</small>
		</div>
		<div class="mb-3">
			<label class="form-label" for="birthday">생일</label>
			<input class="form-control" type="date" th:field="*{birthday}"/>
          	<small class="text-danger"
					th:if="${#fields.hasErrors('birthday')}"
					th:errors="*{birthday}">에러</small>
		</div>
		<button class="btn btn-primary" type="submit">수정 확인</button>
		<button class="btn btn-secondary" type="reset">취소</button>
	</form>
</div>- 결과 확인
<input type="hidden" id="num" name="num" value="4"/>
<input class="form-control" type="text" id="userName" name="userName" value="하하"/>
<input class="form-control" type="date" id="birthday" name="birthday" value="2025-09-01"/>
client 수정 반영 요청
POST "/client/update" ⟷ POST "/clients/x"
- ClientController 에
update메소드 생성
@PostMapping("/clients/{num}")
public String update(@PathVariable Long num,
		@Valid ClientDto dto, BindingResult br, RedirectAttributes ra) {
	boolean hasError = br.hasErrors();
	if(hasError) {
		ra.addFlashAttribute("clientDto", dto);
		ra.addFlashAttribute("org.springframework.validation.BindingResult.clientDto", br);
		// 수정 폼으로 다시 리다일렉트
		return "redirect:/clients/"+num+"/edit";
	}
	// 수정 반영


	ra.addFlashAttribute("message", dto.getUserName()+" 님의 정보 수정 완료");
	return "redirect:/clients/"+num;
}- ClientService 인터페이스에
update메소드 생성- 전체 수정 (이름과 생일)
void update(ClientDto dto);- ClientServiceImpl 에 추상 메소드 오버라이드
@Transactional
@Override
public void update(ClientDto dto) {
	// 번호에 해당하는 entity 를 가져와서
	Client entity = clientRepo.findById(dto.getNum()).get();
	// 이름과 생일을 수정
	entity.setUserName(dto.getUserName());
	entity.setBirthday(dto.getBirthday());
}- ClientController 에
update메소드에 수정 반영 코드 추가
clientService.update(dto);JPA 실습: Dept & Emp
@ManyToOne
여러 개의 엔티티가 하나의 엔티티에 연결되는 관계(N:1)
관계 유형별 어노테이션 정리
| 관계 유형 | 설명 | JPA 어노테이션 |
|---|---|---|
| 1:1 | 한 엔티티가 다른 한 엔티티와 연결될 때 | @OneToOne |
| 1:N | 한 엔티티가 여러 엔티티를 가질 때 | @OneToMany : 1쪽 / @ManyToOne : N쪽 |
| N:M | 여러 엔티티가 서로 여러 엔티티와 연결될 때 | @ManyToMany |
@JoinColumn
관계를 맺을 때 외래키(Foreign Key) 컬럼을 직접 지정하는 어노테이션
- Dept 객체 생성
@Setter
@Getter
@Builder
@AllArgsConstructor
@NoArgsConstructor
@Entity
public class Dept {
	@Id
	private Integer deptno;
	private String dname;
	private String loc;
}- Emp 객체 생성
Emp 객체 하나는 사원 한 명의 정보를 가지고 있다
Dept 객체 하나는 부서 하나의 정보를 가지고 있다
Emp 객체 안에 있는 Dept 객체는 Emp 객체가 가지고 했는 해당 사원의 부서 정보를
가지게 하고 싶다
➜ name="deptno" 는 Emp 테이블의 칼럼명을 결정한다
➜ referencedColumnName = "deptno" Dept 테이블의 어떤 칼럼을 참조할지 결정한다 (생략 시 자동을 @Id 칼럼 참조)
@Setter
@Getter
@Builder
@AllArgsConstructor
@NoArgsConstructor
@Entity
public class Emp {
	@Id
	private Integer empno;
	private String ename;
	private String job;
	private Integer mgr;
	private LocalDate hiredate;
	private Double sal;
	private Double comm;

    @ManyToOne
	@JoinColumn(name="deptno", referencedColumnName="deptno")
	private Dept dept;
}- EmpRepository 인터페이스 생성
public interface EmpRepository extends JpaRepository<Emp, Integer>{
	// 사원 이름에 대해서 오름차순 정렬된 결과를 리턴하는 메소드 추가
	public List<Emp> findAllByOrderByEnameAsc();
}- application.properties 에
ddl-auto를update로 변경
spring.jpa.hibernate.ddl-auto=update- application.properties 에 DB 연결을 Oracle로 접속 변경
spring.datasource.driver-class-name=oracle.jdbc.driver.OracleDriver
spring.datasource.url=jdbc:oracle:thin:@localhost:1521:xe
spring.datasource.username=scott
spring.datasource.password=TIGER- Spring09JpaApplication 에
EmpRepository객체 주입 & select 작업
@Autowired
   \EmpRepository empRepo;

// EmpRepository 객체를 이용해서 select 작업하기
List<Emp> empList = empRepo.findAllByOrderByEnameAsc();
for(Emp tmp : empList) {
	System.out.println(tmp.getEname()+"|"+tmp.getDept().getDeptno()+"|"+tmp.getDept().getDname());
}ALLEN|30|SALES
BLAKE|30|SALES
CLARK|10|ACCOUNTING
FORD|20|RESEARCH
JAMES|30|SALES
JONES|20|RESEARCH
KING|10|ACCOUNTING
MARTIN|30|SALES
MILLER|10|ACCOUNTING
SMITH|20|RESEARCH
TURNER|30|SALES
WARD|30|SALESReact
React
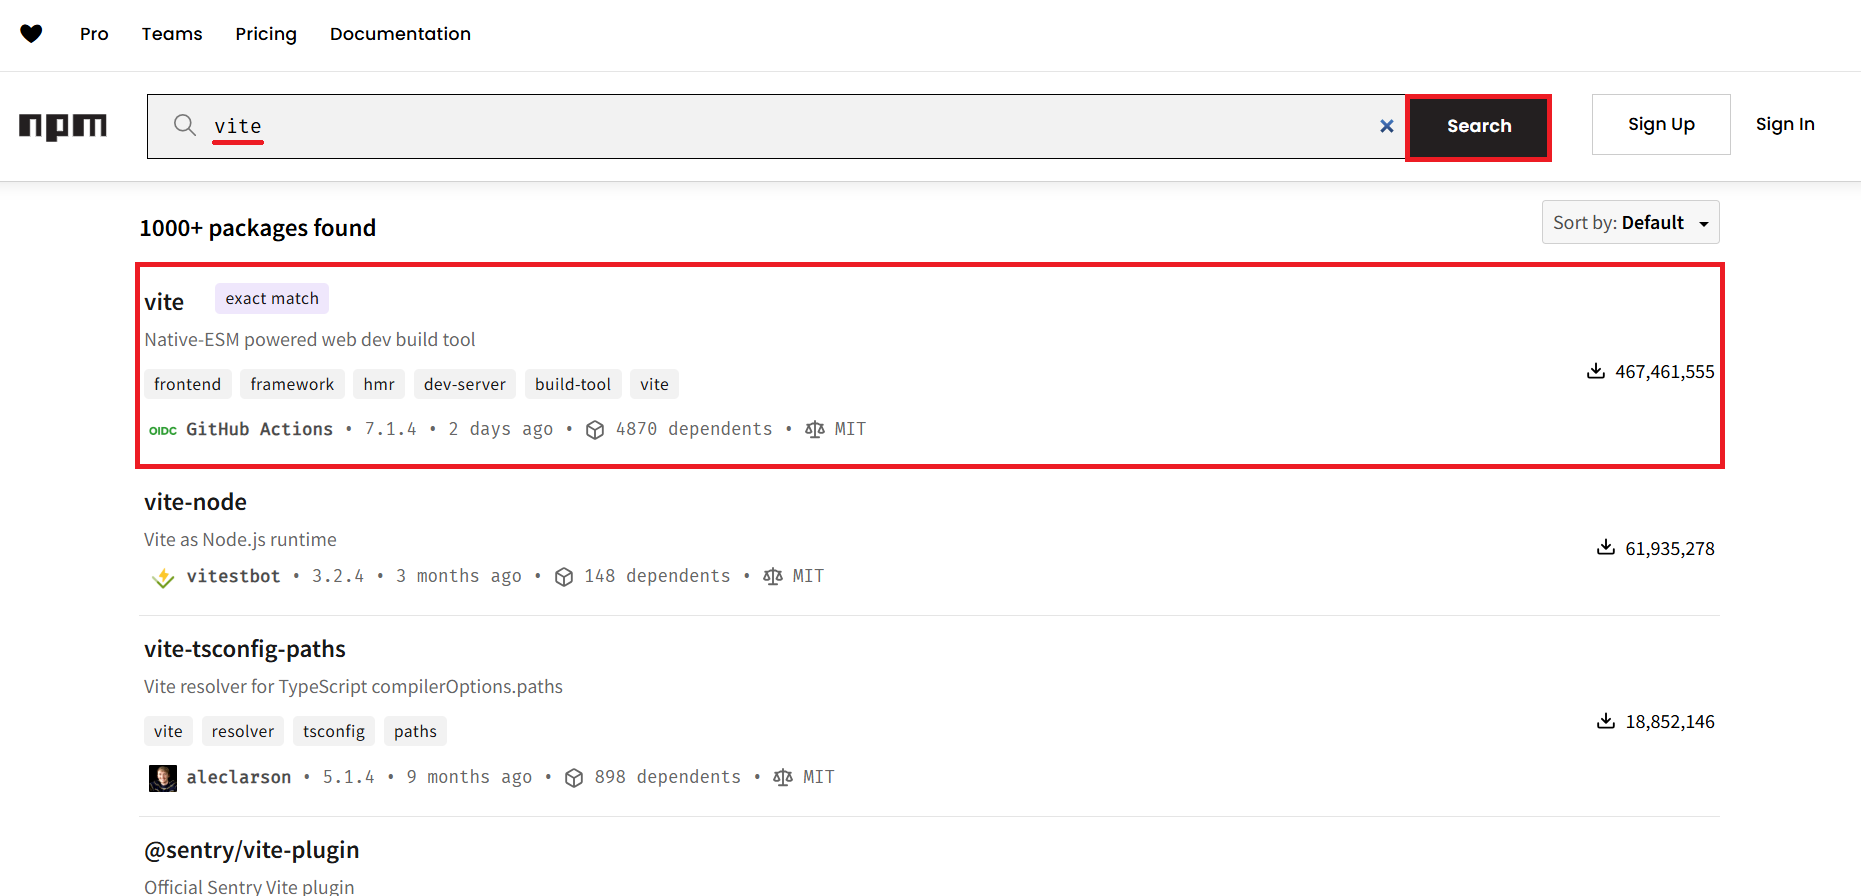
- node js 응용 프로그램을 검색해서 설치를 도와주는 site
-
vite 검색
-
npm i vite복사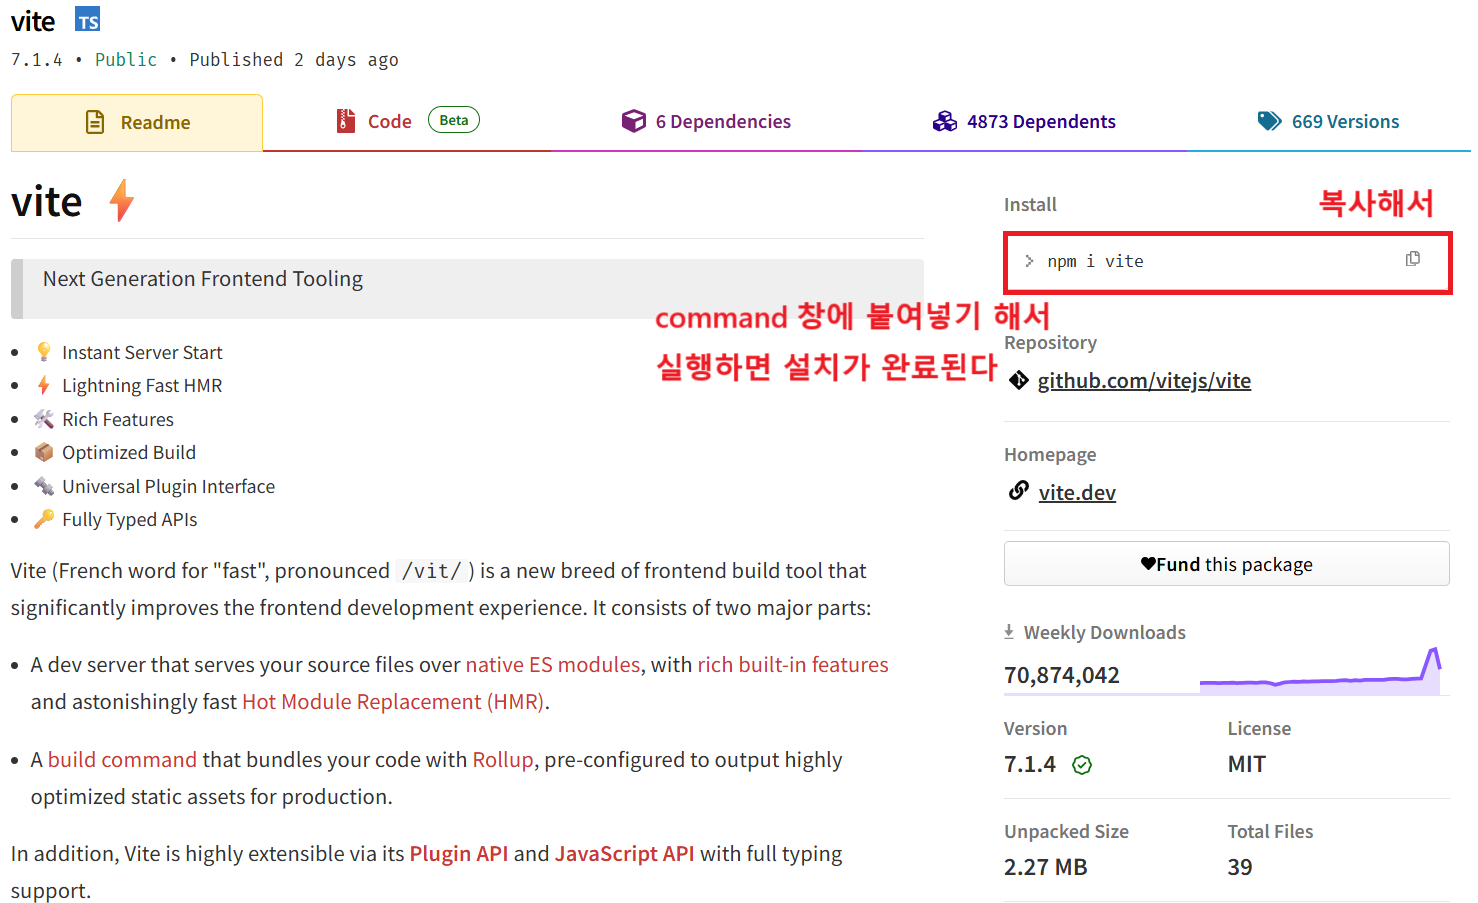
-
CMD 창에서
npm i vite입력
- npm : node package manager (node js app 을 관리하는 app)
- i : install 의 약자
- vite : 설치할 패키지의 이름
C:\Users\USER> npm i vite- react 폴더 생성 후 그 안에서 터미널 실행
C:\playground\reactnpm create vite hello-app입력
hello-app: vite 프로젝트의 이름 (마음대로 지을 수 있다)
C:\playground\react>npm create vite hello-app
Need to install the following packages:
create-vite@7.1.1
Ok to proceed? (y)-
y입력 후 Enter -
아래쪽 화살표를 이용해서
React선택 후 Enter
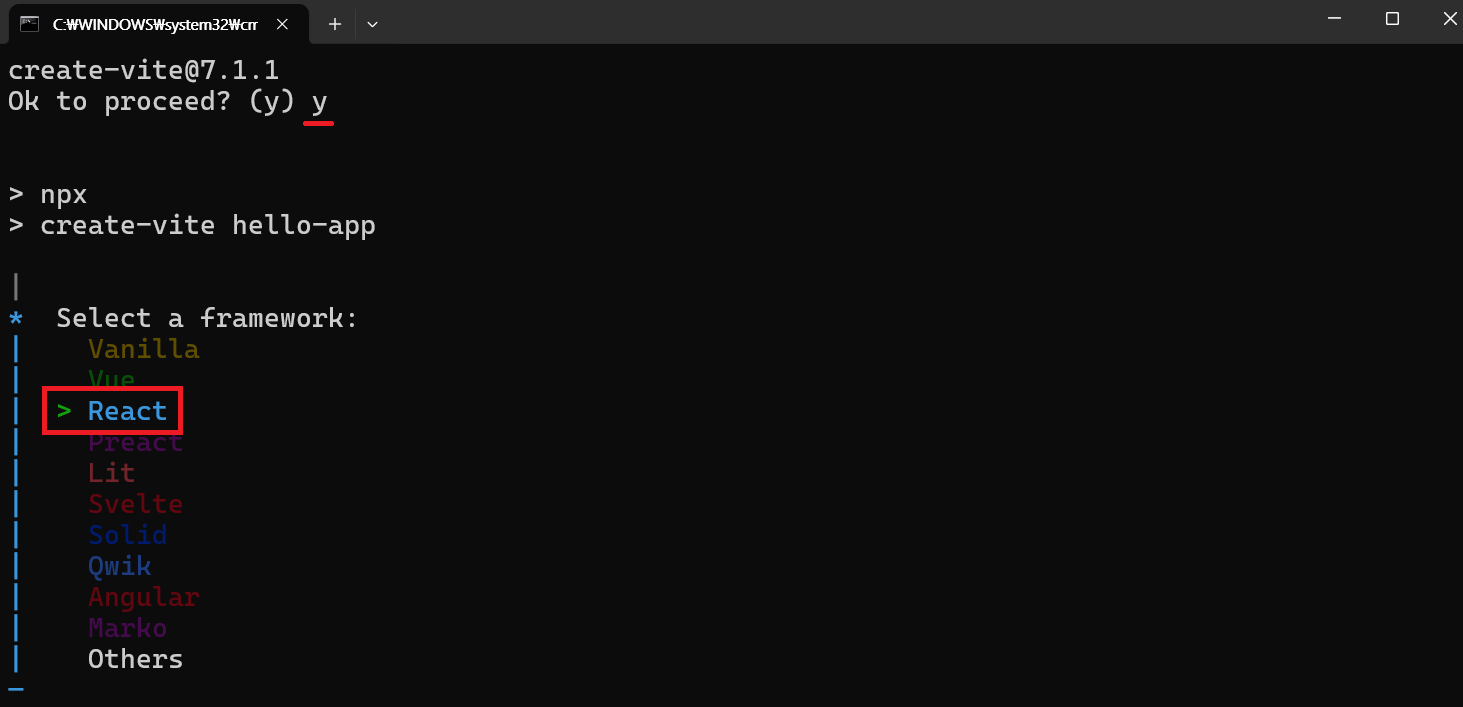
javascript선택 후 Enter
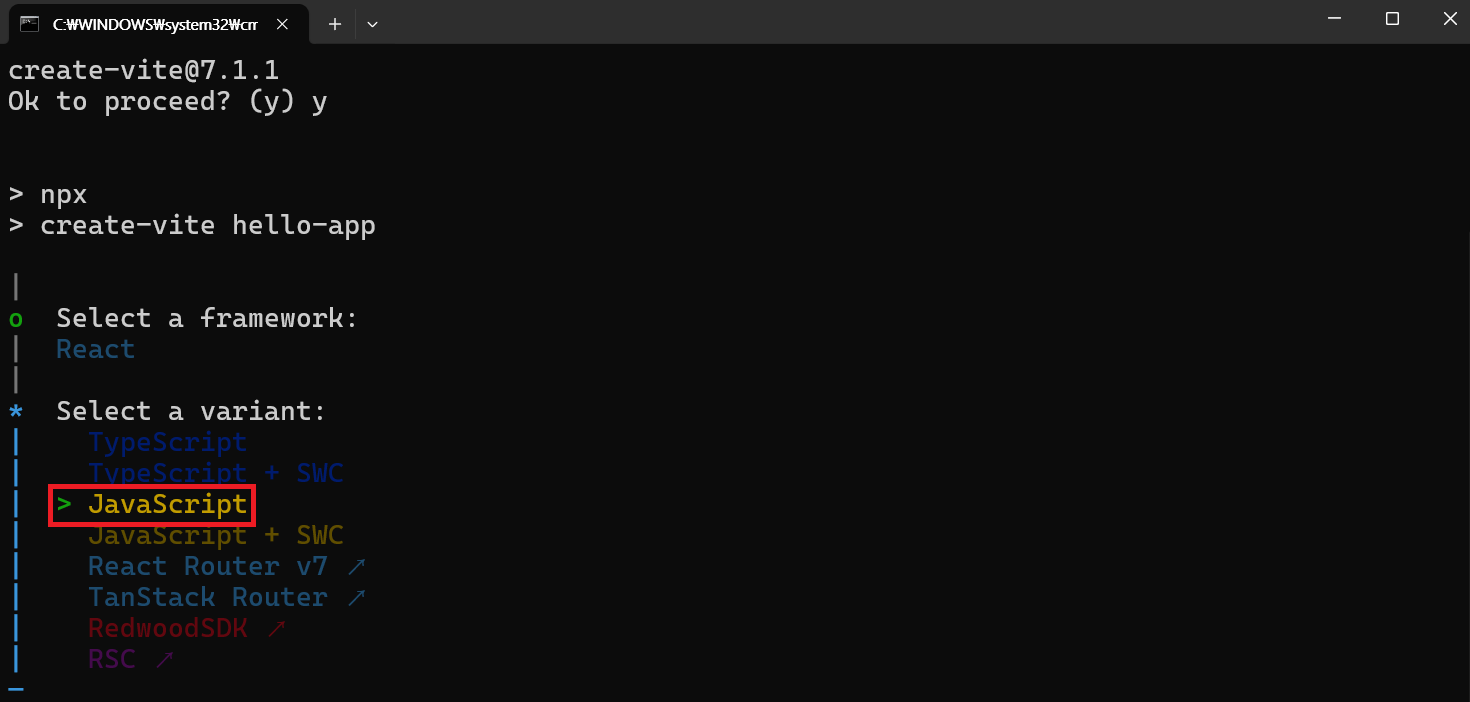
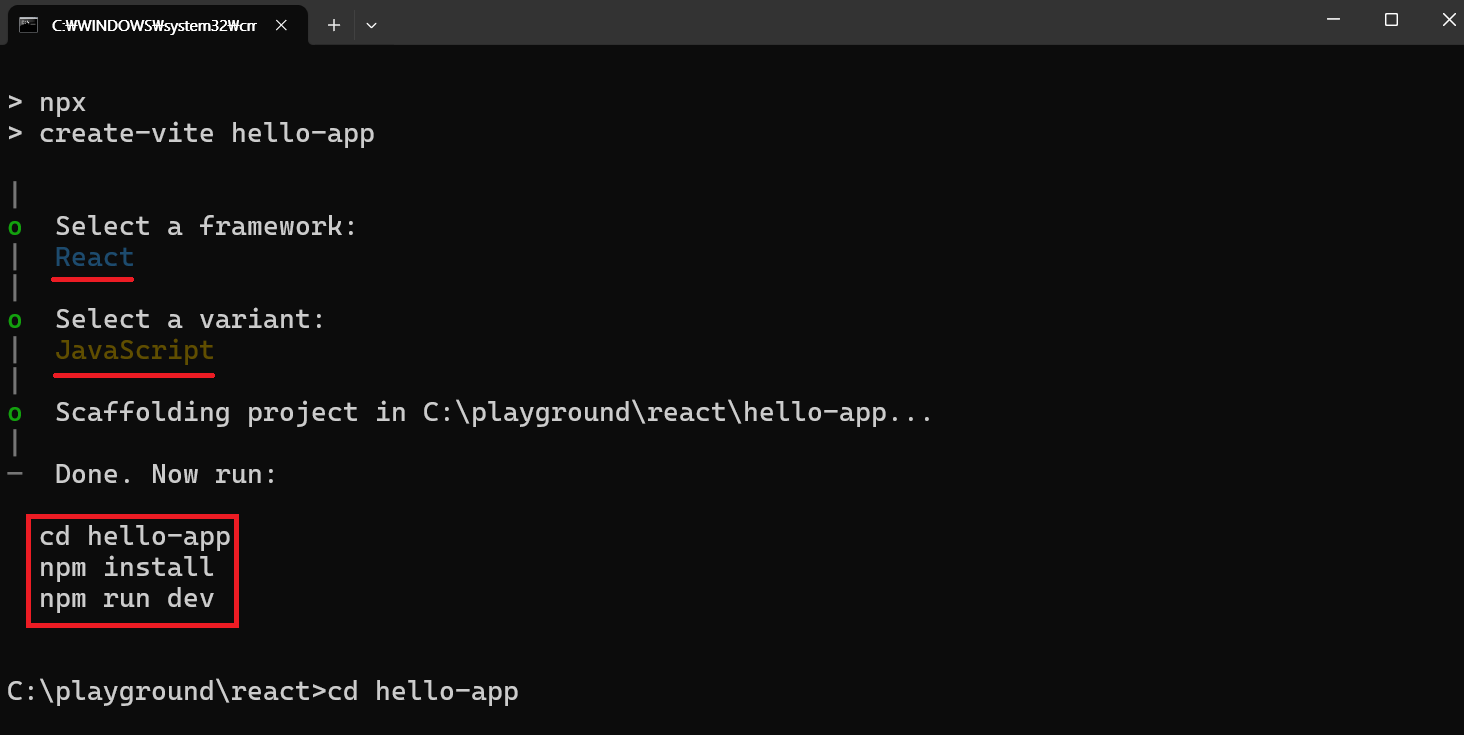
cd hello-app: 만들어진 hello-app 폴더로 이동npm install: 의존 package 설치npm run dev: react 개발 서버 시작 시키기
cd hello app&npm install&npm run dev입력
C:\playground\react>cd hello-app

C:\playground\react\hello-app>npm install

added 152 packages, and audited 153 packages in 3m

33 packages are looking for funding
  run `npm fund` for details

found 0 vulnerabilities

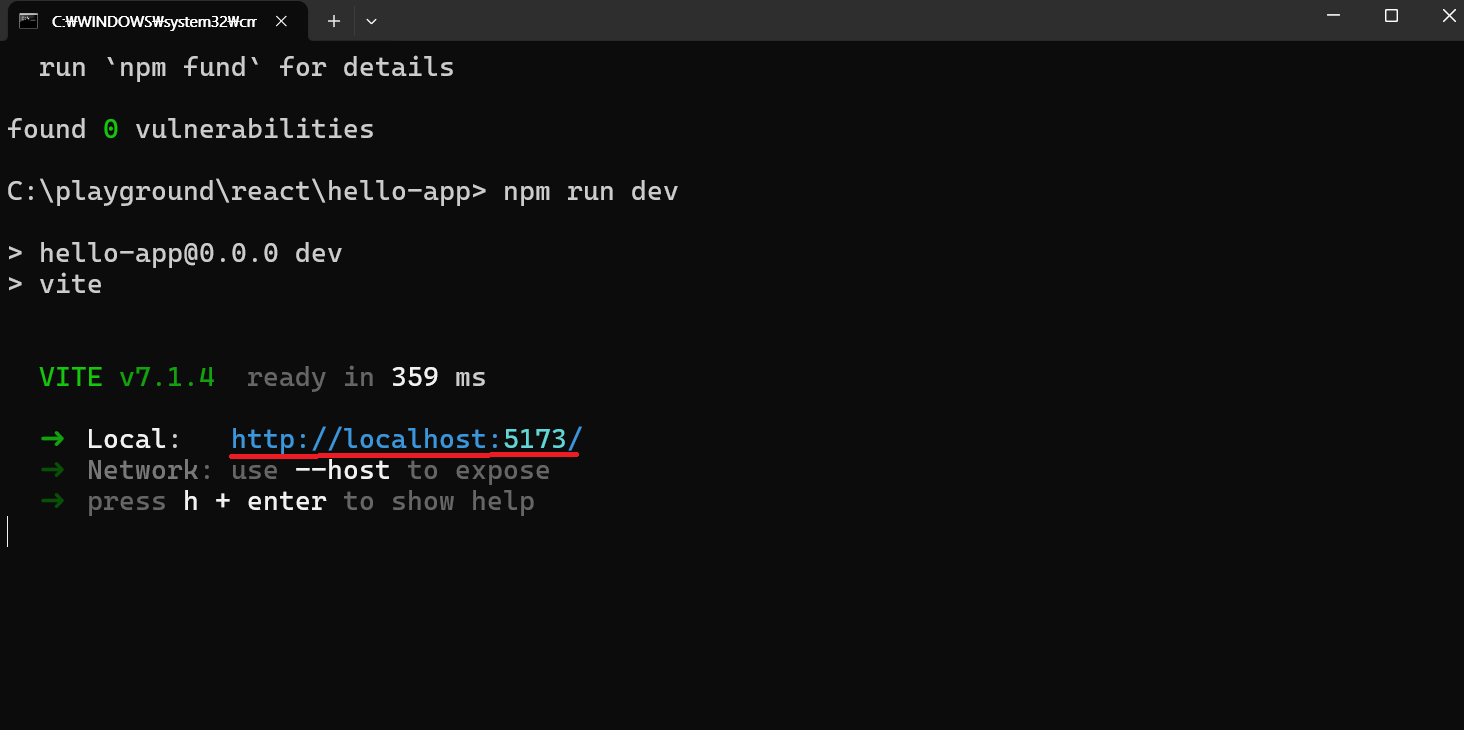
C:\playground\react\hello-app> npm run dev

> hello-app@0.0.0 dev
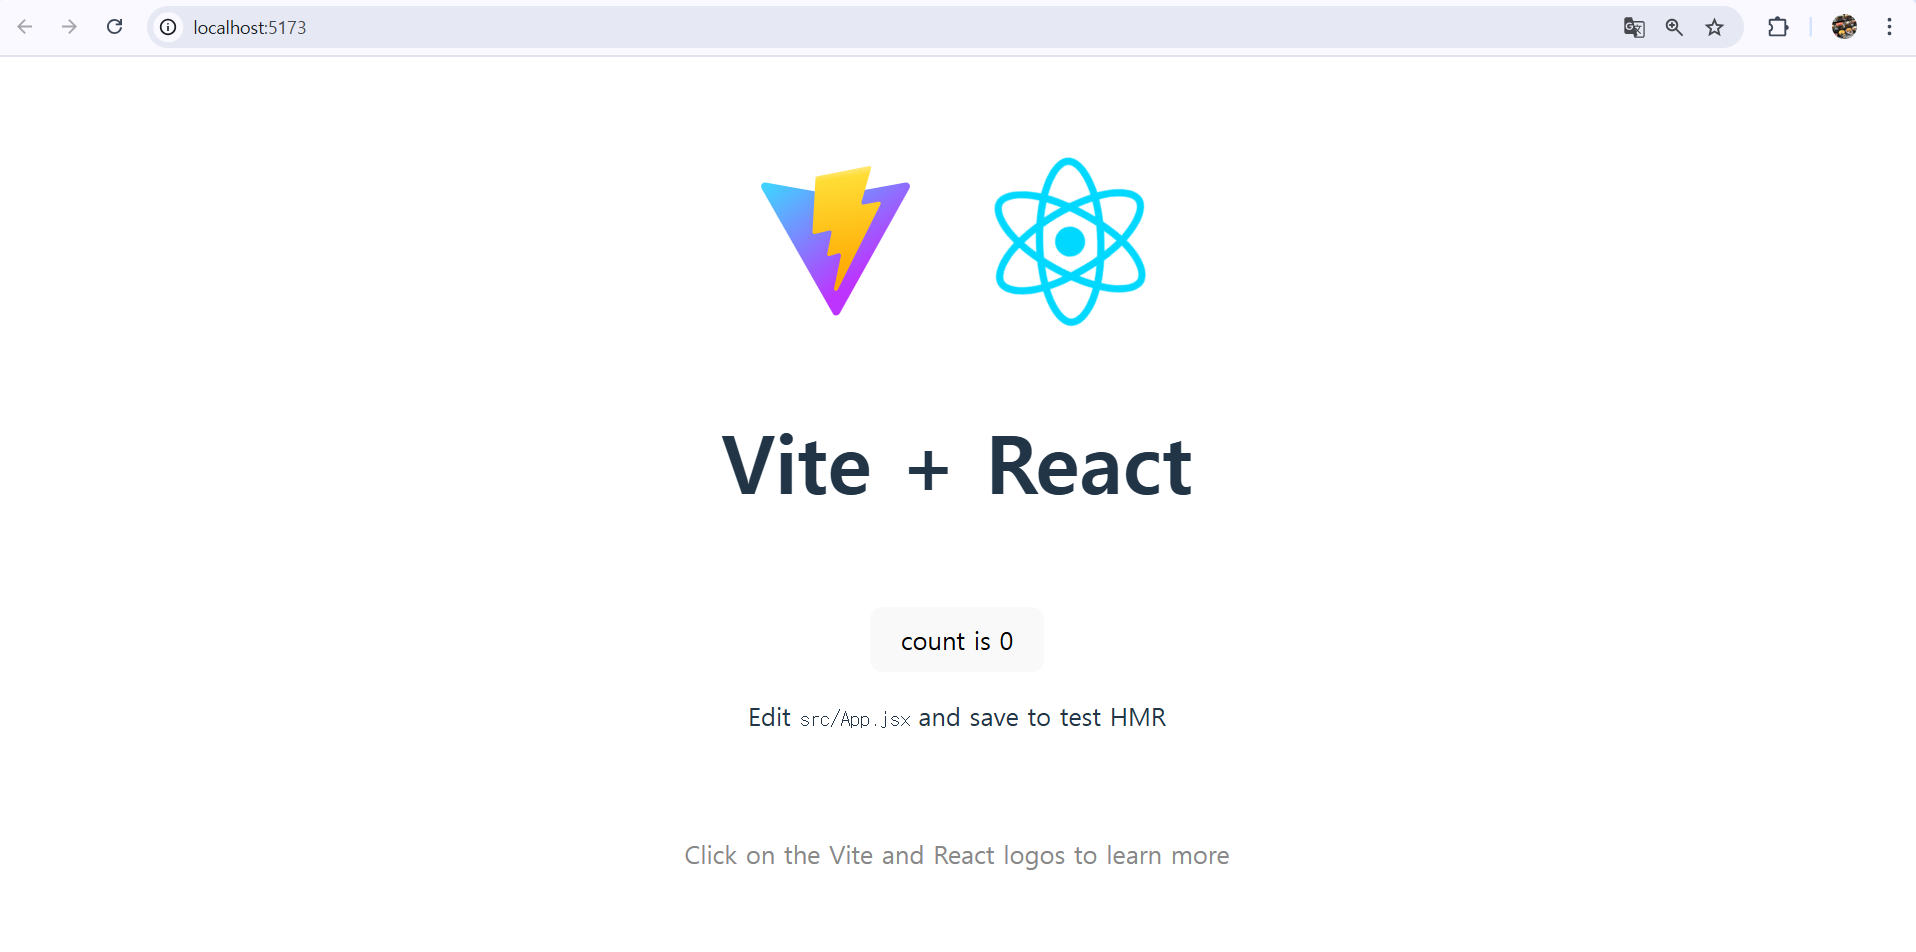
> vite- 해당 링크에 ctrl 누른 상태에서 클릭
- Ctrl 키를 누른 상태에서 해당 링크를 클릭하면 웹 브라우저가 실행되면서 화면을 볼 수 있다
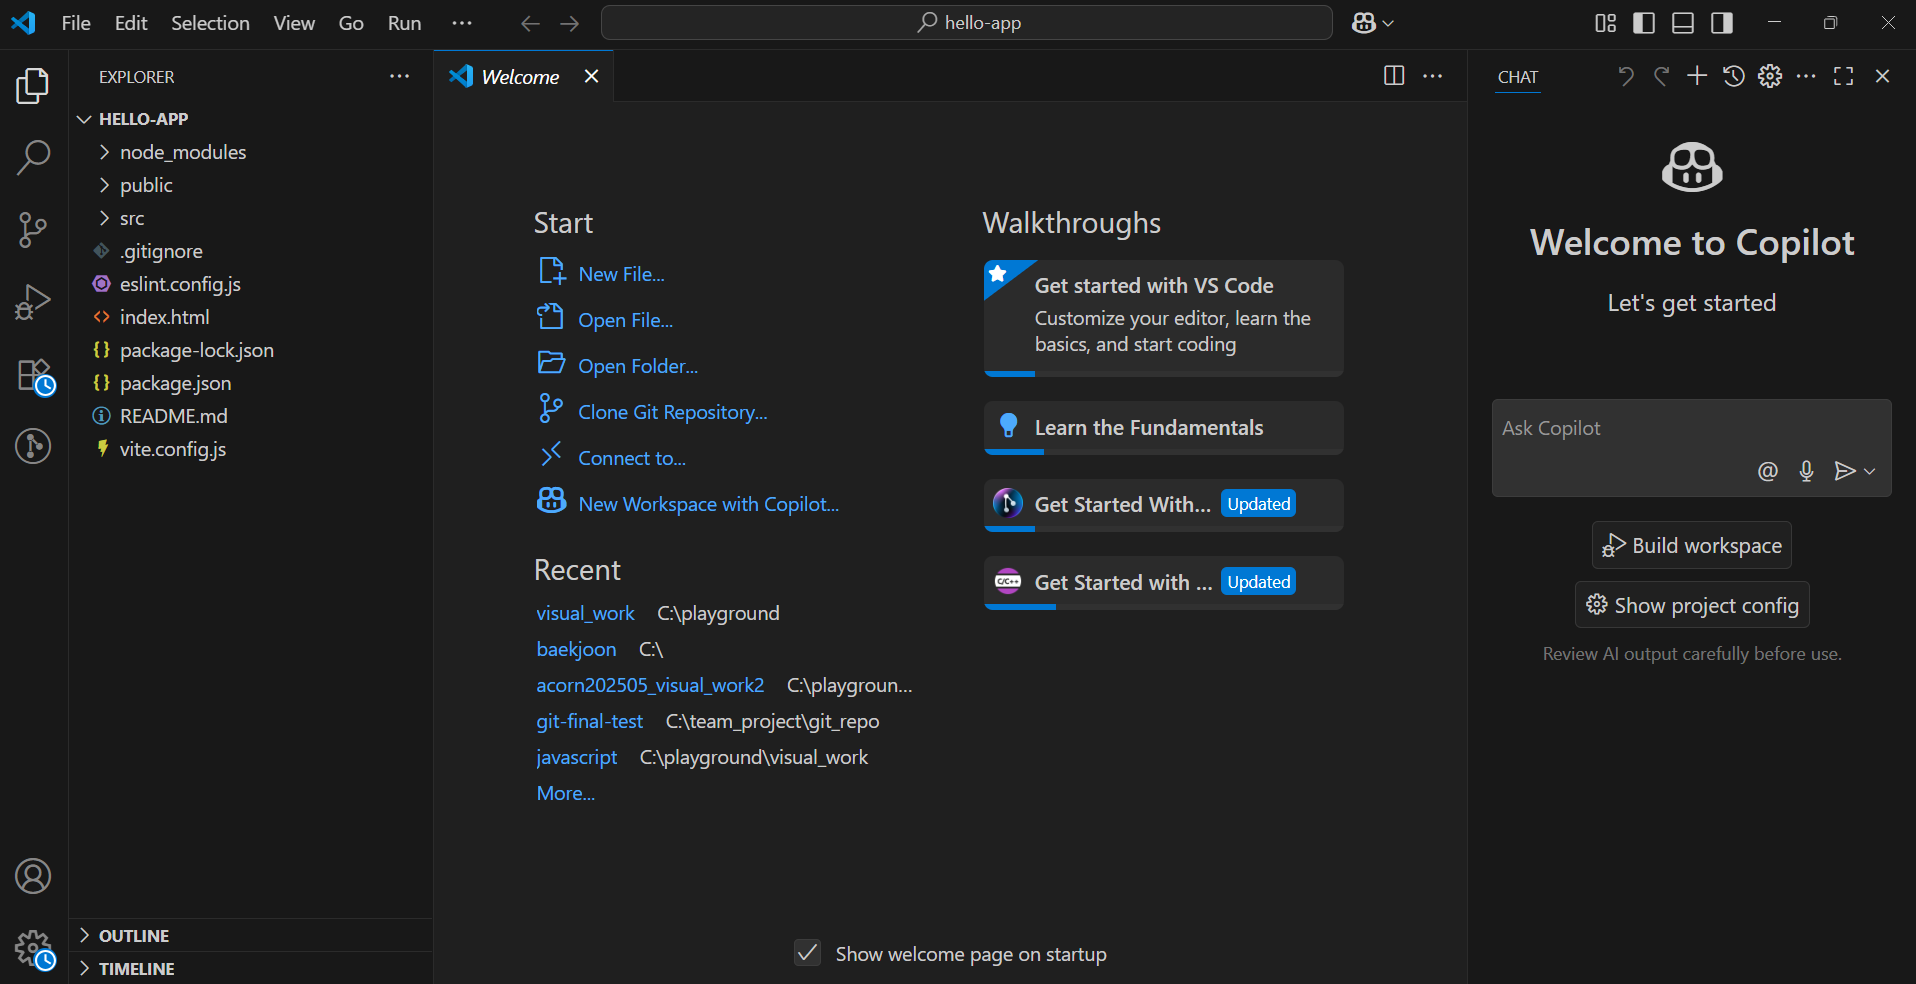
11.react 폴더 안에 만들어진 hello-app 으로 VSCODE 열기
- node js 로 만든 vite 를 이용해서 구성된 react js 개발 환경
jsx
javascript + xml(html)
- App.jsx 열기
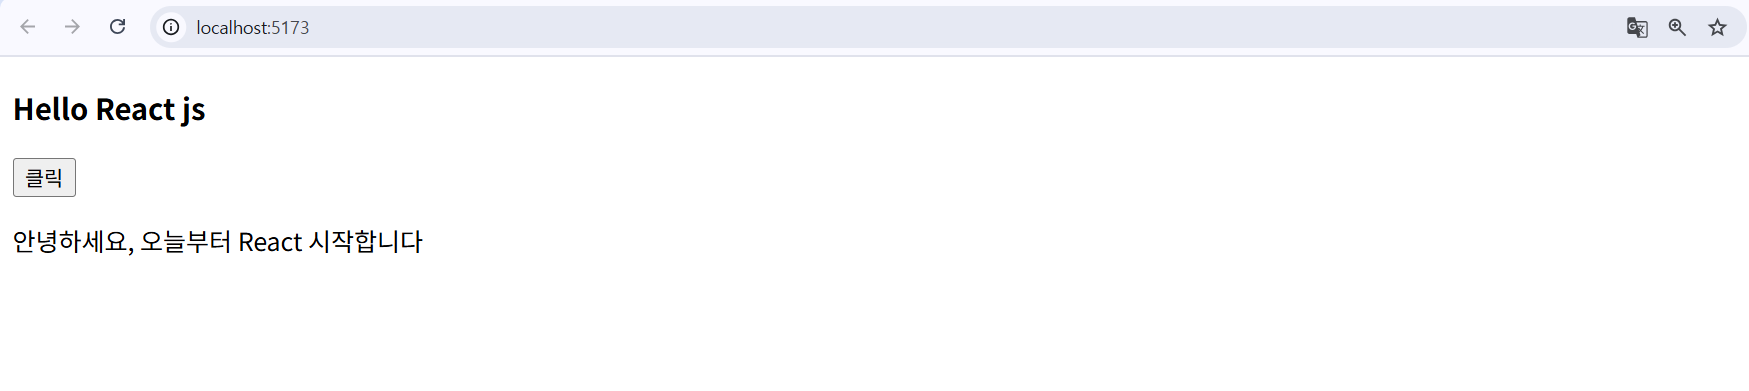
- 원래 안의 내용 지우고 h3 요소 코드 추가
function App() {
  const [count, setCount] = useState(0)
  const message = "안녕하세요, 오늘부터 React 시작합니다";
  return (
    <>
      <h3>Hello React js</h3>
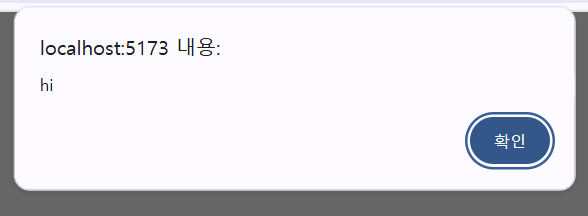
      <button onClick={()=>{
        alert("hi");
      }}>클릭</button>
      <p>{message}</p>
    </>
  )
}
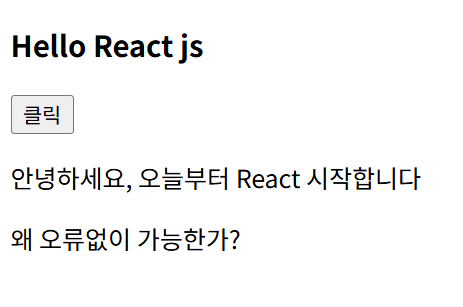
- js 영역에 p 요소 추가 후 해당 메세지 화면에 출력
function App() {
  const [count, setCount] = useState(0)
  const message = "안녕하세요, 오늘부터 React 시작합니다";
  const p1 = <p>왜 오류없이 가능한가?</p>;
  return (
    <>
      <h3>Hello React js</h3>
      <button onClick={()=>{
        alert("hi");
      }}>클릭</button>
      <p>{message}</p>
      {p1}
    </>
  )
}
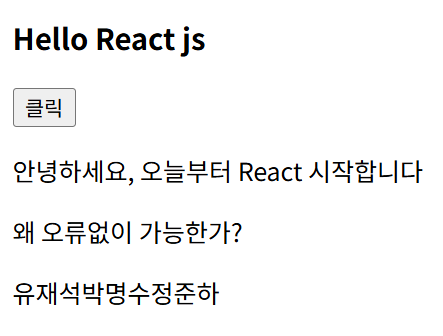
- 배열 출력
- 자동으로 반복문이 실행되면서 랜더링
function App() {
  const [count, setCount] = useState(0)
  const message = "안녕하세요, 오늘부터 React 시작합니다";
  const p1 = <p>왜 오류없이 가능한가?</p>;
  const names = ["유재석", "박명수", "정준하"];
  return (
    <>
      <h3>Hello React js</h3>
      <button onClick={()=>{
        alert("hi");
      }}>클릭</button>
      <p>{message}</p>
      {p1}
      <p>{names}</p>
    </>
  )
}
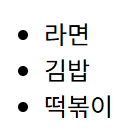
- 배열에 여러 개의 li 요소 추가 후 출력
function App() {
  const foods = [
      <li>라면</li>,
      <li>김밥</li>,
      <li>떡볶이</li>
  ];
  return (
    <>
      <ul>{foods}</ul>
    </>
  )
}
- App2.jsx 파일 생성
export default function App2(){
    return <>
        <h1>App2.jsx 파일</h1>

    </>
}- main.jsx 에서
App2로 변경
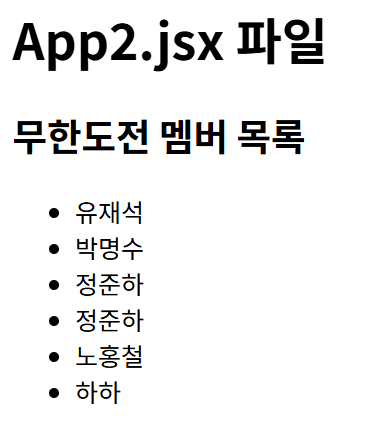
import App from './App2.jsx'- 배열 목록
li요소에 출력
export default function App2(){
    // 원격지 서버로부터 받아오 데이터라고 가정하자
    const names = ["유재석", "박명수", "정준하", "정준하", "노홍철" ,"하하"];
    // 위의 data 를 이용해서 <li> 요소 안에 이름이 출력된 배열 얻어내기
    const list1 = [];
    for(let i=0; i<names.length; i++){
        // names 배열의 i 번째 item 을 얻어내서
        const item = names[i];
        // <li> 요소로 감싸서 배열에 추가한다
        list1.push(<li>{item}</li>);
    }
    return <>
        <h1>App2.jsx 파일</h1>
        <h2>무한도전 멤버 목록</h2>
        <ul>
            {list1}
        </ul>
    </>

}
map( )
-
App2.jsx 에
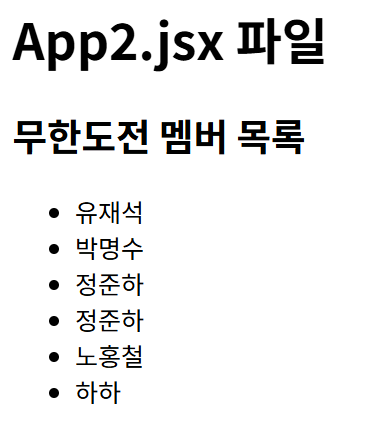
map()함수 코드 추가- names 배열을 이용해서 jsx 배열을 한 줄 coding 으로 얻어낼 수 있다
export default function App2(){
    // 원격지 서버로부터 받아온 데이터라고 가정하자
    const names = ["유재석", "박명수", "정준하", "정준하", "노홍철" ,"하하"];
    const list2 = names.map(item => <li>{item}</li>)
    return <>
        <h1>App2.jsx 파일</h1>
        <h2>무한도전 멤버 목록</h2>
        <ul>
            {list2}
        </ul>
        <ul>
            {names.map(item => <li>{item}</li>)}
        </ul>
    </>

}
export default function App2(){
    // 원격지 서버로부터 받아온 데이터라고 가정하자
    const names = ["유재석", "박명수", "정준하", "정준하", "노홍철" ,"하하"];
    const list2 = names.map(item => <li>{item}</li>)
    return <>
        <h1>App2.jsx 파일</h1>
        <h2>무한도전 멤버 목록</h2>
        <ul>
            {names.map(item => <li>{item}</li>)}
        </ul>
    </>

}
useState( )
-
App3.jsx 파일 생성
useState: function typeuseState( ): array type 이 해당 위치에 return
import { useState } from "react";

export default function App3(){

    let text = "클릭해 보세요";

    // 상태값을 관리해 보자
    const [state, setState] = useState("눌러 보세요");

    return <>
        <h1>state(상태값) 관리하기</h1>
        <button onClick={()=>{
            text = "clicked";
        }}>{text}</button>
        <button onClick={()=>{
            setState("clicked!");
        }}>{state}</button>
    </>
}
배열의 구조 분해 할당 문법
let nums = [10, 20];

let a = nums[0];
let b = nums[1];
   	  vs
let [a,b] = nums;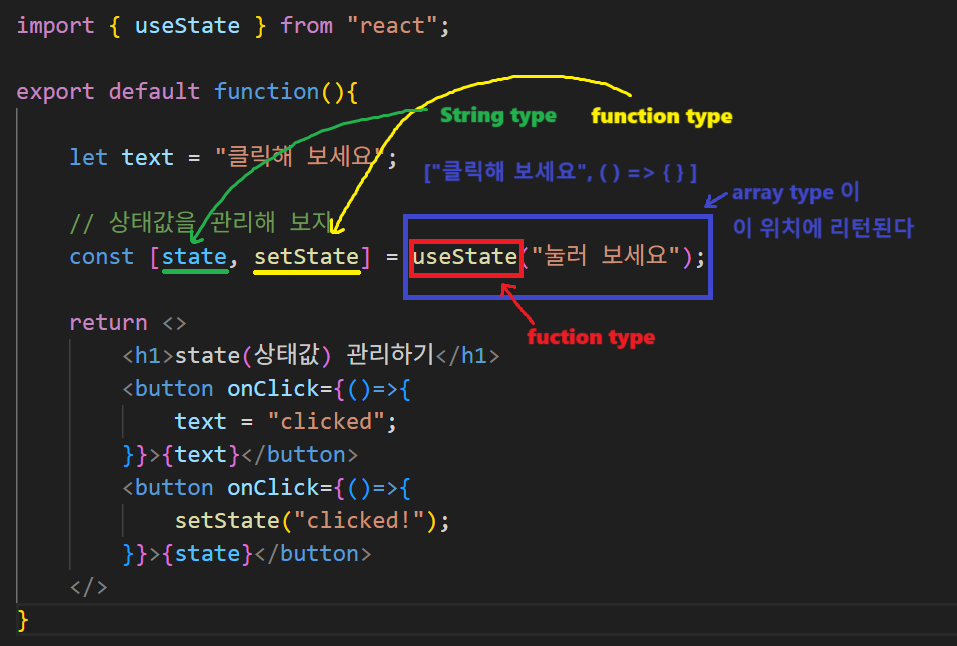
useState( ) 함수 설명
- useState( ) 함수는 import 해야 사용할 수 있다
- useState( ) 함수는 배열을 리턴한다
- userState(초기값) 함수를 호출하면서 관리할 초기값을 전달한다
  (전달 안 하면 초기값 : undefiend)
- useState( ) 함수는 배열[ ] 을 리턴한다
- 리턴한 배열의 0번 방에는 처음에는 전달한 초기값이 들어 있고
- 리턴한 배열의 1번 방에는 상태값을 변경할 때 사용하는 함수가 들어 있다
- 특정 시점에 상태값을 변경하는 함수를 호출하면서 새로운 상태값을 전달하면
  App3( ) 함수가 다시 호출된다
- 그러면 useState( ) 가 리턴하는 배열의 0번 방에는 위에서 전달한
  새로운 상태값이 들어 있다
- 베열의 1번 방에는 최초와 동일하게 상태값을 변경하는 함수가 들어 있다
- App3( ) 함수에서 리턴하는 jsx 객체로 UI 가 업데이트 된다
- 리턴하는 jsx 객체의 내용 중에 새로운 상태값을 사용하는 부분이 있으면
그 부분의 UI 가 변경되는 원리이다- 클릭할 때 마다 숫자 1씩 증가 (10 초과 시 0 으로 reset)
import { useState } from "react";

export default function App3(){

    const [count, setCount] = useState(0);

    return <>
        <h1>state(상태값) 관리하기</h1>
        <button onClick={()=>{
            if(count === 9){
                setCount(0);
            } else{
                setCount(count +1);
            }
        }}>{count}</button>
    </>
}- 배열에 있는 이모티콘을 버튼 클릭 시 순서대로 출력
import { useState } from "react";

export default function App3(){

    // 이모지의 인덱스 값으로 사용할 값을 상태값으로 관리한다 (초기값 = 0)
    const [index, setIndex] = useState(0);
    const MOODS = ["😐","🙂","😄","🤩","🥱","😴"];
    // 버튼을 눌렀을 때 호출될 함수를 미리 만들어 두고 아래에서 활용한다
    const clicked = ()=>{
        if(index == 5){
            setIndex(0);
        } else{
            setIndex(index + 1);
        }
    }

    return <>
        <h1>state(상태값) 관리하기</h1>
        <button onClick={clicked}>{MOODS[index]}</button>
    </>
}
Object
⚠️ 상태값 하나로 3개를 관리하는 방법은?
-
상태값을 하나의 Object 로 만든다
-
App4.jsx 파일 생성
import { useState } from "react";

export default function App4(){
    let text = "클릭해 보세요";

    // data 는 object 이다
    const [data, setData] = useState({
        state : "눌러 보세요",
        count : 0,
        index : 0
    });

    const MOODS = ["😐","🙂","😄","🤩","🥱","😴"];
    const clicked = ()=>{
        if(data.index == 5){
            setData({
                ...data,
                index:0
            });
        } else{
            setData({
                ...data,
                index:data.index+1
            });
        }
    }

    return <>
        <h1>state(상태값) 관리하기</h1>
        <button onClick={()=>{
            text = "clicked";
        }}>{text}</button>
        <button onClick={()=>{
            setData({
                ...data,
                state:"clicked"
            });
        }}>{data.state}</button>
        <button onClick={()=>{
            if(data.count === 9){
                setData({
                    ...data,
                    count:0
                });
            } else{
                setData({
                    ...data,
                    count:data.count+1
                });
            }
        }}>{data.count}</button>
        <button onClick={clicked}>{MOODS[data.index]}</button>
    </>
}