기본요소 채우기
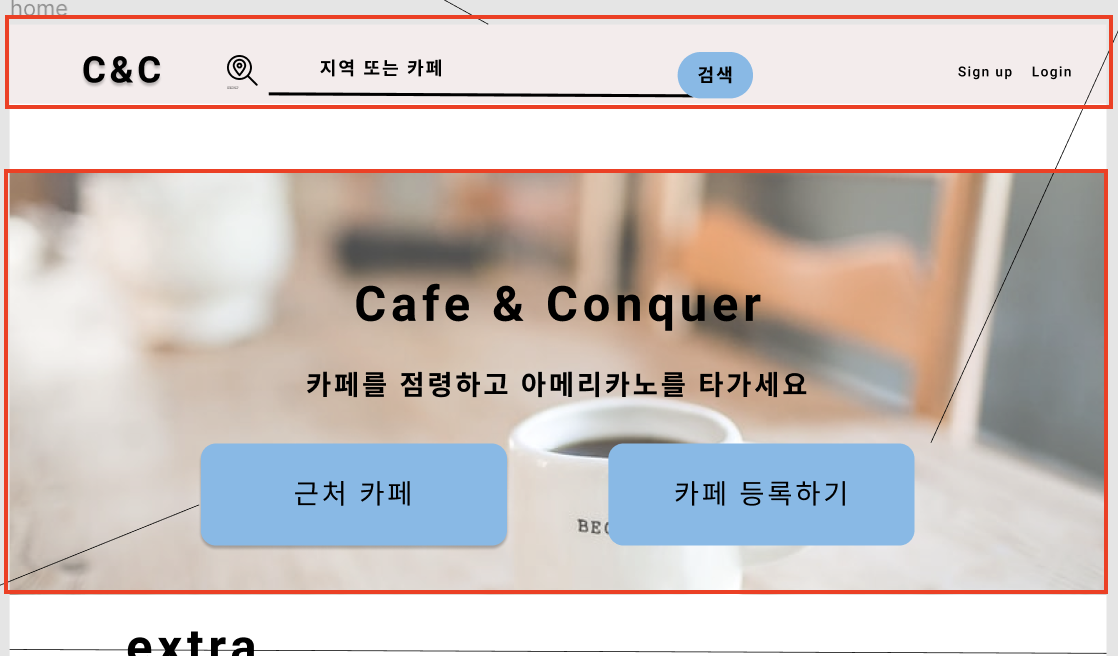
가장 기본적으로 '로고', '검색바', '검색버튼', '사인업', '로그인' 이라는 요소들이 필요한 상황입니다.
단순하게 기능만 채워 넣어 보겠습니다.
styled-components 파트
import styled from "styled-components";

const MainFrame = styled.div`
  position: absolute;
  top: 0;
  left: 0;
  width: 100%;
  height: 100px;
  background-color: lightgray;
  border: 1px solid black;
`;

const Logo = styled.a`
  position: relative;
  top: 18%;
  left: 3%;
  font-family: Monospace, Helvetica, sans-serif;
  position: absolute;
  font-size: 3.4rem;
  text-decoration: none;
`;

const SearchFrame = styled.div`
  position: relative;
  top: 10%;
  left: 25%;
  width: 50%;
  height: 70px;
  /* border: 1px solid black; */
`;

const Search = styled.input.attrs({
  placeholder: "지역 또는 카페 탐색하기",
  type: "text"
})`
  position: relative;
  top: 20%;
  width: 70%;
  padding-left: 45px;
  height: 44px;
  border: 0px;
  border: 3px solid #ff7f00;
  font-size: 18px;
  color: #ff7f00;
  background: url(https://s3-ap-northeast-1.amazonaws.com/dcicons/new/images/web/common/search@2x.png)
    no-repeat left;
  background-size: 40px;
  outline: none;

  &:focus {
    border-color: blue;
  }
`;

const Button = styled.button.attrs({})`
  position: relative;
  top: 15%;
  width: 40px;
  height: 50px;
`;

const TopMenuFrame = styled.div`
  position: absolute;
  top: 35%;
  left: 70%;
  height: 30px;
  width: 25%;
  /* border: 1px solid black; */
  text-align: center;
`;
Header function 파트
const Header = () => {
return (
<MainFrame>
<Logo>C&C</Logo>
<SearchFrame>
<Search />
<Button>탐색</Button>
</SearchFrame>
<TopMenuFrame>
<a style={{ padding: "10px" }}>sign</a>
<a style={{ padding: "10px" }}>login</a>
</TopMenuFrame>
</MainFrame>
);
};
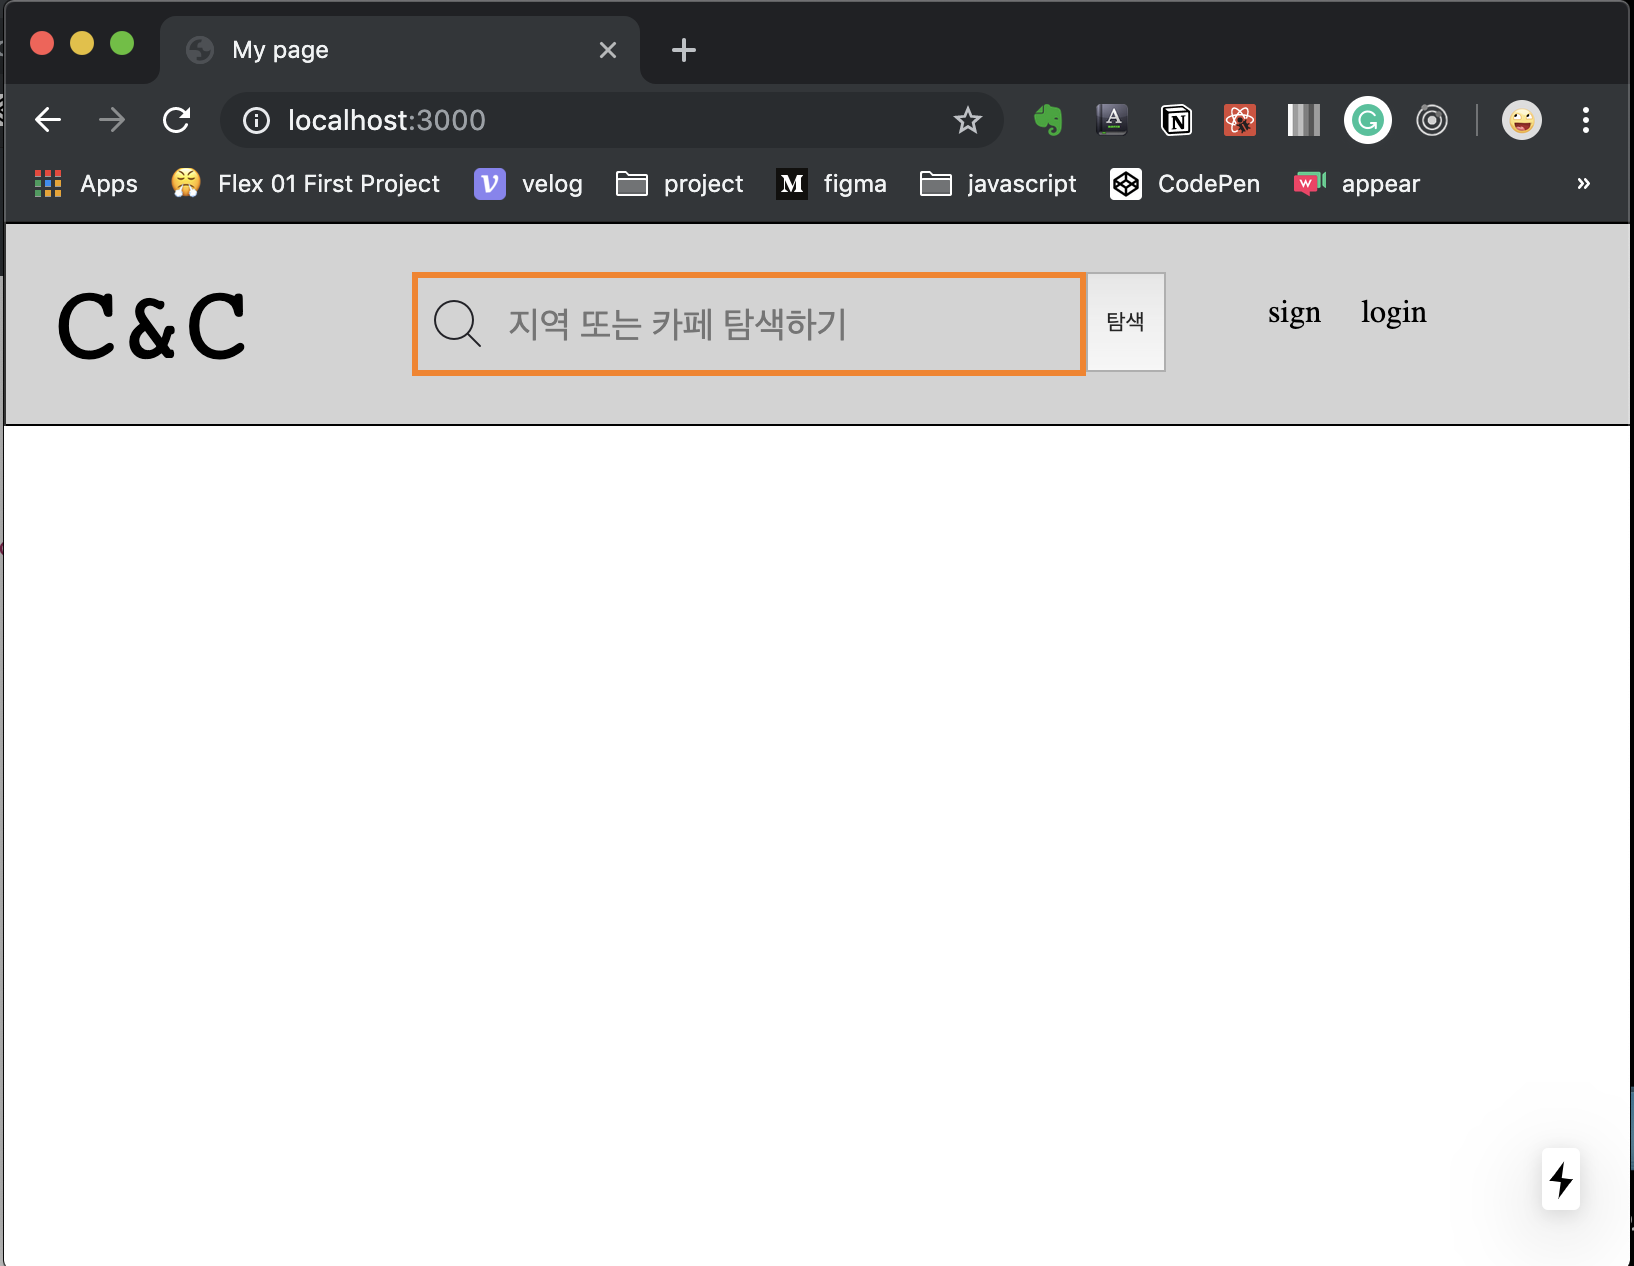
export default Header;코드 작성시 이런 기본적인 형태의 헤더가 완성됩니다.
기능추가
input 기능 추가
아래 링크를 참고하셔도 좋습니다.
https://www.youtube.com/watch?v=Ea-yjv6CFbs&list=PL7jH19IHhOLOagok7uFWKlOleLF64grb6&index=5
- react와 useState를 import
import React, { useState } from "react";- useInput 함수를 만들어 주기
const useInput = initialValue => {
  const [value, setValue] = useState(initialValue);
  const onChange = event => {
    // Destructuring assignment
    // evnt.target.value
    const {
      target: { value }
    } = event;
    setValue(value);
  };
  return { value, onChange };
};- Header에서 useInput을 사용해 보기
const Header = () => {
  const useSearchBar = useInput("");
  // useSearch {value: "", onChange: f onChange(event)}
  return (
    <MainFrame>
      <Logo>C&C</Logo>
      <SearchFrame>
    // value="", onChange={onChange} 형태로 들어갑니다.
        <Search {...useSearchBar}/>
        <Button>탐색</Button>
      </SearchFrame>
      <TopMenuFrame>
        <a style={{ padding: "10px" }}>sign</a>
        <a style={{ padding: "10px" }}>login</a>
      </TopMenuFrame>
    </MainFrame>
  );
};
정확하게 알고, 제대로 사용하자
👍