디자인 (WPFBasic)
코드 (WPFBasic)
<Window x:Class="_025_WPFBasic.MainWindow"
xmlns="http://schemas.microsoft.com/winfx/2006/xaml/presentation"
xmlns:x="http://schemas.microsoft.com/winfx/2006/xaml"
xmlns:d="http://schemas.microsoft.com/expression/blend/2008"
xmlns:mc="http://schemas.openxmlformats.org/markup-compatibility/2006"
xmlns:local="clr-namespace:_025_WPFBasic"
mc:Ignorable="d"
Title="MainWindow" Height="450" Width="500">
<Grid x:Name="grid1" Background="Orange">
<TextBlock
TextAlignment="Center"
VerticalAlignment="Center"
FontWeight="Bold"
FontSize="72"
Foreground="Navy"
FontFamily="나눔고딕"
MouseDown="TextBlock_MouseDown">
Hello World!
</TextBlock>
</Grid>
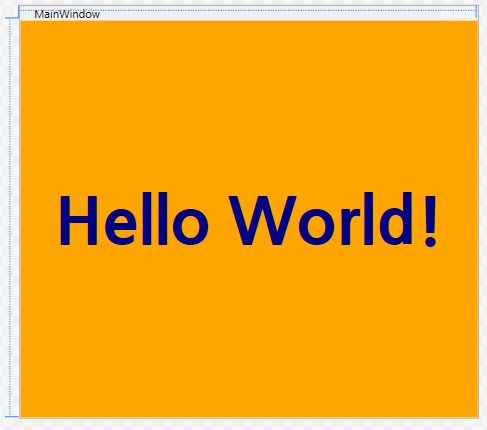
</Window>Title="MainWindow" Height="450" Width="500" 은
창의 제목은 MainWindow, 창의 높이 450, 너비는 500으로 설정됨.
TextAlignment="Center" 를 통해 중앙 정렬,
VerticalAlignment="Center" 를 통해 수직 중앙 정렬,
FontWeight="Bold" 는 글씨의 굵기를 굵게,
FontSize="72" 는 폰트의 크기를 72로,
Foreground="Navy" 를 글자의 색을 네이비로,
FontFamily="나눔고딕" 를 폰트의 종류를 나눔고딕,
MouseDown="TextBlock_MouseDown" 로 클릭 이벤트로 설정한 것이다.
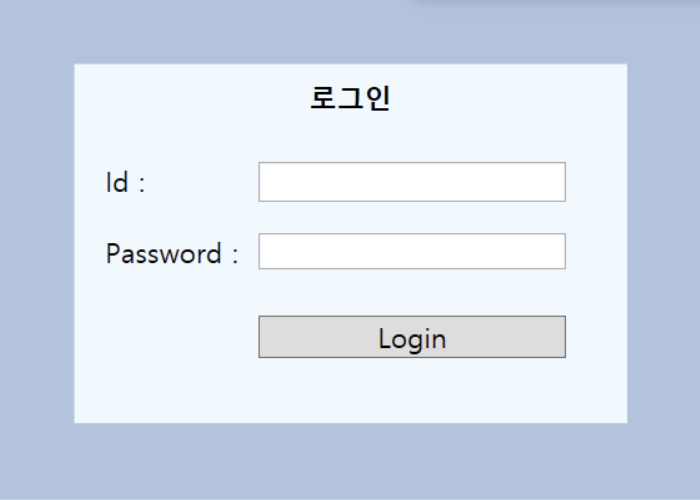
결과 (WPFBasic)

디자인 (grid)
코드 (grid)
<Window x:Class="_026_grid.MainWindow"
xmlns="http://schemas.microsoft.com/winfx/2006/xaml/presentation"
xmlns:x="http://schemas.microsoft.com/winfx/2006/xaml"
xmlns:d="http://schemas.microsoft.com/expression/blend/2008"
xmlns:mc="http://schemas.openxmlformats.org/markup-compatibility/2006"
xmlns:local="clr-namespace:_026_grid"
mc:Ignorable="d"
Title="MainWindow" Height="450" Width="400">
<Grid>
<Grid.RowDefinitions>
<RowDefinition/>
<RowDefinition/>
<RowDefinition/>
</Grid.RowDefinitions>
<Button Margin="20 20 20 10" Grid.Row="0" FontSize="30">1</Button> <!--Margin 값 순서는 좌상우하-->
<Button Margin="20 10" Grid.Row="1" FontSize="30">2</Button> <!--값 2개만 넣어도 똑같이 20 10 20 10 형태로 값이 적용됨 -->
<Button Margin="20 10 20 20" Grid.Row="2" FontSize="30">3</Button>
</Grid>
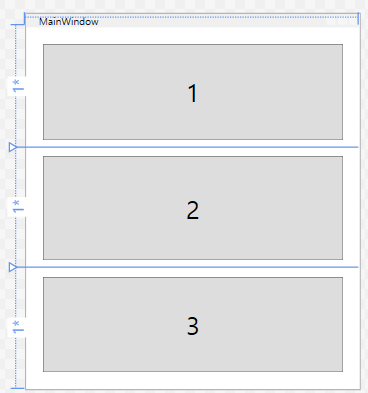
</Window><Grid.RowDefinitions>
</Grid.RowDefinitions>
로 그리드를 나누었다. <Row~ion/>을 통해 수직 그리드로 설정했다.
Margin을 통해 버튼의 바깥 여백을 설정할 수 있다. 왼쪽/위/오른쪽/아래 순으로 설정할 수 있다.
Grid.Row로 Grid를 하나씩 지정할 수 있다.
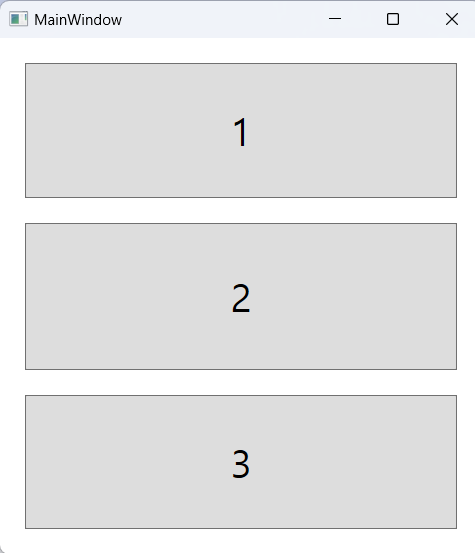
결과 (grid)
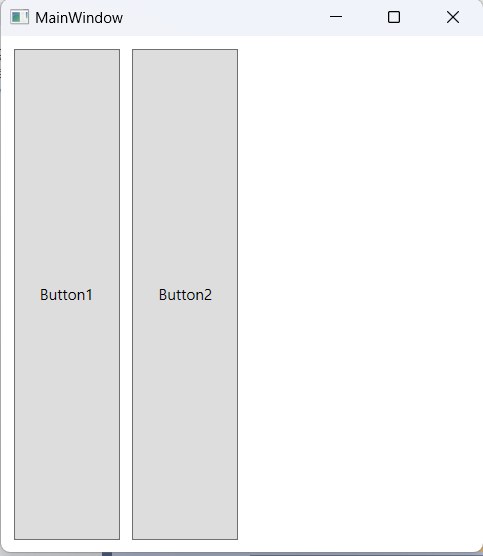
디자인 (stackPanel)
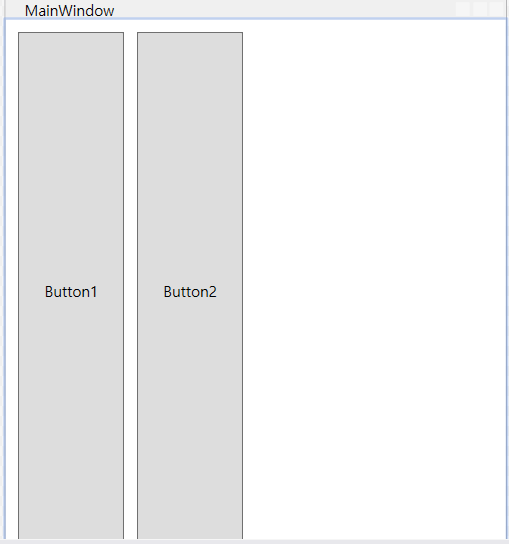
코드 (stackPanel)
<Window x:Class="_027_stackPanel.MainWindow"
        xmlns="http://schemas.microsoft.com/winfx/2006/xaml/presentation"
        xmlns:x="http://schemas.microsoft.com/winfx/2006/xaml"
        xmlns:d="http://schemas.microsoft.com/expression/blend/2008"
        xmlns:mc="http://schemas.openxmlformats.org/markup-compatibility/2006"
        xmlns:local="clr-namespace:_027_stackPanel"
        mc:Ignorable="d"
        Title="MainWindow" Height="450" Width="400">
    <StackPanel Orientation="Horizontal">
        <Button Padding="20" Margin="10 10 5 10">Button1</Button>
        <Button Padding="20" Margin="5 10 10 10">Button2</Button>
    </StackPanel>
</Window>
StackPanel은 요소들을 수평이나 수직으로 쌓아 올린다.
Orientation="Horizontal"을 통해 수직으로 설정함.
결과 (stackPanel)
디자인 (Login)
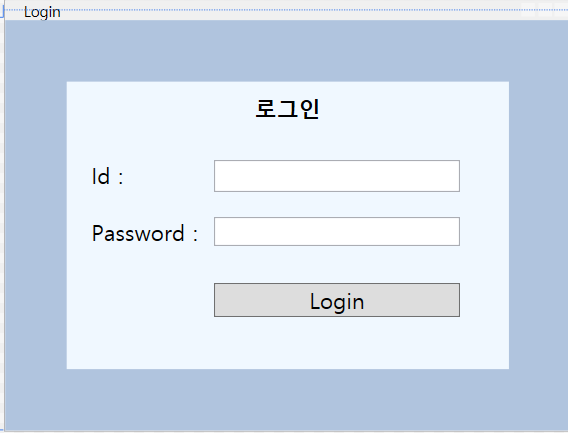
코드 (Login)
<Window x:Class="_028_Login.MainWindow"
        xmlns="http://schemas.microsoft.com/winfx/2006/xaml/presentation"
        xmlns:x="http://schemas.microsoft.com/winfx/2006/xaml"
        xmlns:d="http://schemas.microsoft.com/expression/blend/2008"
        xmlns:mc="http://schemas.openxmlformats.org/markup-compatibility/2006"
        xmlns:local="clr-namespace:_028_Login"
        mc:Ignorable="d"
        Title="Login" Height="350" Width="460">
    <Grid Background="LightSteelBlue">
        <StackPanel Margin="50" Background="AliceBlue">
            <TextBlock Text="로그인" HorizontalAlignment="Center"
	      FontSize="18" FontWeight="Black"
                       Padding="10"/>
            <StackPanel Orientation="Horizontal" Margin="20 20 20 10">
                <TextBlock Text="Id : "
                           HorizontalAlignment="Right"
                           FontSize="18" MinWidth="100" />
                <TextBox FontSize="18" MinWidth="200"/>
            </StackPanel>
            <StackPanel Orientation="Horizontal" Margin="20 10 20 10">
                <TextBlock Text="Password : "
                           HorizontalAlignment="Right"
                           FontSize="18" MinWidth="100"/>
                <PasswordBox MinWidth="200"/>
            </StackPanel>
            <StackPanel Orientation="Horizontal">
                <TextBlock MinWidth="100"/>
                <Button x:Name="btnLogin" Content="Login" Margin="20"
                    FontSize="18"
                    MinWidth="200"/>
            </StackPanel>
        </StackPanel>
    </Grid>
</Window>
Background="AliceBlue"로 창의 색을 설정했다.
Content="Login" 로 버튼의 내용을 설정했다.
결과 (Login)