
이번 시간에는 lighthouse와 firebase를 이용하여, 이미지 사이즈를 어떻게 최적화하면 좋을지 알아보도록 하자.
[React] 성능최적화 1편 - Lighthouse란?
Lighthouse의 개념 및 사용법에 대해서는 앞 전 글을 참고해주면 이해가 빠를듯하다.
1. 이미지 사이즈 최적화 전🙅🏻♂️
그림 1-1)
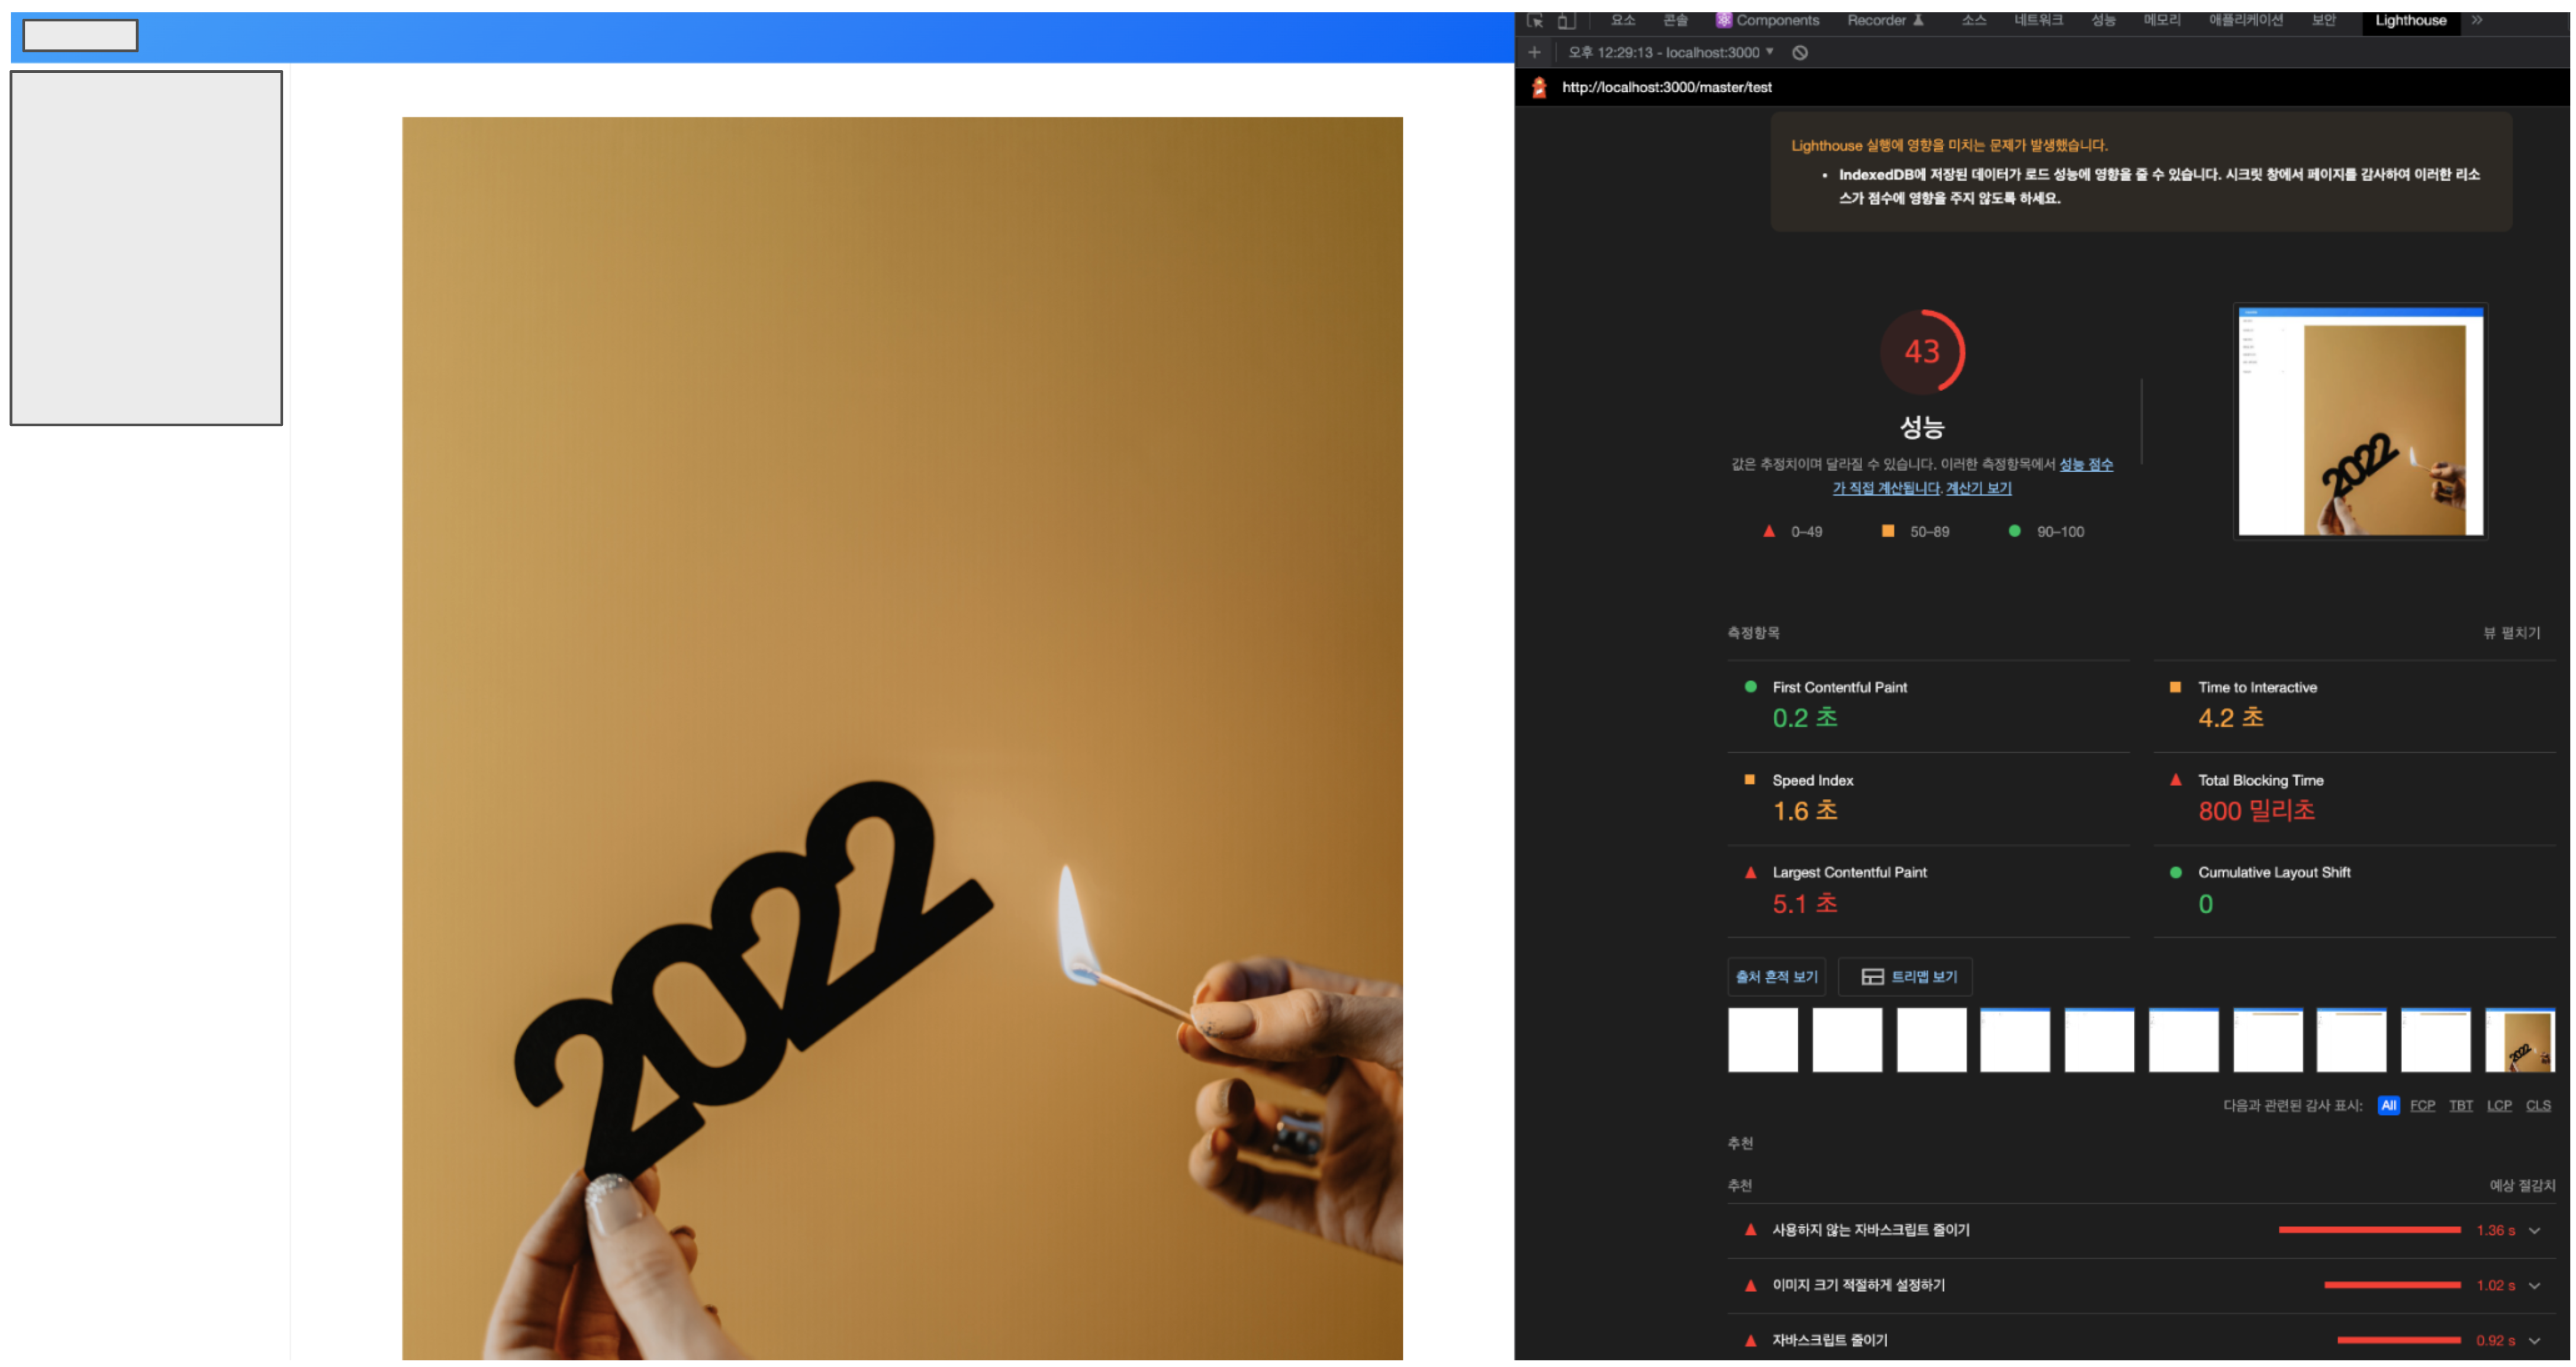
firebase를 이용하여 이미지 원본을 업로드하고, 불러오는 웹페이지를 임의로 구현해보았다.
그림 1-1에서 보이는거처럼 Lighthouse로 검사했을때, 해당 웹페이지의 점수는 43점으로 굉장히 낮은 점수를 받았다.
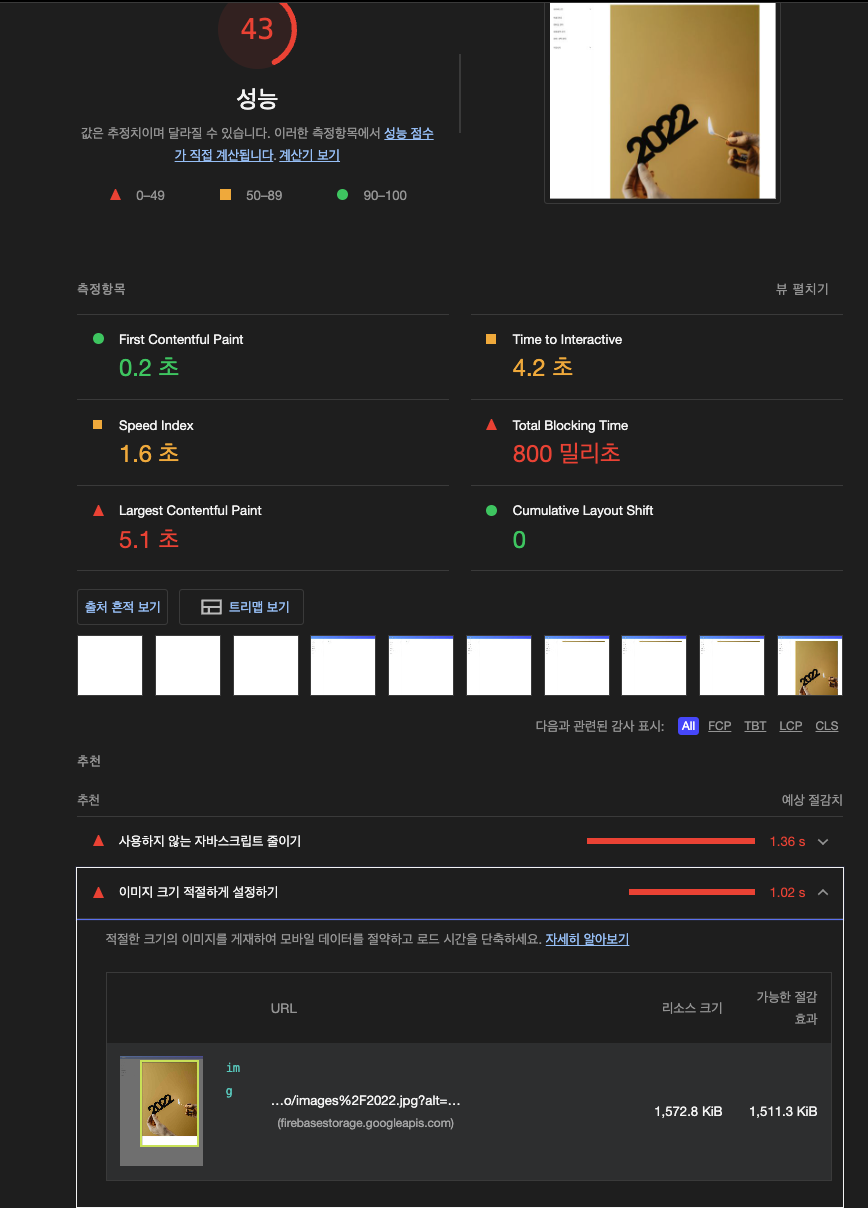
여기서 추천(Opportunities) 섹션의 이미지 크기 적절하게 설정하기를 클릭하면, 이미지를 적절한 시이즈로 사용하도록 제안한다.
펼쳐서 내용을 살펴보면, 어떤 이미지가 적절하지 않은 사이즈인지, 리스트로 보여주고, 검사 결과에서 제안하는 방법대로 이미지를 적정한 사이즈로 변경하면 대략 얼만큼 줄일수 있다고 알려주고 1.02초 단축할 수 있다고 한다.
그렇다면 이 이미지 사이즈는 어떻게 줄일수 있을까?
현재 이미지는 원본자체를 업로드 하였기 때문에 이미지 리사이즈(resize)를 통하여 압축할 수 있다.
우리는 대표적인 이미지 압축 라이브러리인 browser-image-compression를 사용할 것이다.
module install
npm i browser-image-compression
yarn add browser-image-compression
module import
import imageCompression from "browser-image-compression";
이미지 리사이즈 함수
 const [imageUpload, setImageUpload] = useState(null);
  const [uploadPreview, setUploadPreview] = useState([]);


  const handleImageCompress = async (e) => {
    let file = e.target?.files[0];
    const options = {
      maxSizeMB: 0.2, // 이미지 최대 용량
      maxWidthOrHeight: 1920, // 최대 넓이(혹은 높이)
      useWebWorker: true,
    };

    try {
      const compressedFile = await imageCompression(file, options);
      setImageUpload(compressedFile);
      const promise = imageCompression.getDataUrlFromFile(compressedFile);
      promise.then((result) => {
        setUploadPreview(result);
      });
    } catch (error) {
      console.log(error);
    }
  };
옵션의 값들은 아래와 같다.
const options: Options = {
  maxSizeMB: number,            // (default: Number.POSITIVE_INFINITY)
  maxWidthOrHeight: number,     // compressedFile will scale down by ratio to a point that width or height is smaller than maxWidthOrHeight (default: undefined)
                                // but, automatically reduce the size to smaller than the maximum Canvas size supported by each browser.
                                // Please check the Caveat part for details.
  onProgress: Function,         // optional, a function takes one progress argument (percentage from 0 to 100)
  useWebWorker: boolean,        // optional, use multi-thread web worker, fallback to run in main-thread (default: true)

  signal: AbortSignal,          // options, to abort / cancel the compression

  // following options are for advanced users
  maxIteration: number,         // optional, max number of iteration to compress the image (default: 10)
  exifOrientation: number,      // optional, see https://stackoverflow.com/a/32490603/10395024
  fileType: string,             // optional, fileType override e.g., 'image/jpeg', 'image/png' (default: file.type)
  initialQuality: number,       // optional, initial quality value between 0 and 1 (default: 1)
  alwaysKeepResolution: boolean // optional, only reduce quality, always keep width and height (default: false)
}
이미지 업로드 함수
  const onUpload = () => {
    if (imageUpload === null) return;
    const imageRef = ref(storage, `images/${imageUpload.name}`);
    // `images === 폴더이름/파일이름
    uploadBytes(imageRef, imageUpload).then((snapshot) => {
      console.log('snapshot>>', snapshot);
    });
  };
이렇게 라이브러리를 사용하여 압축을 하게 되면
Blob {
 lastModified: 1671783642584
 name: "2022.jpg"
 size: 128156
 type: "image/jpeg"
}
이렇게 Blob 형식으로 나오게 된다.
Blob(Binary Large Object)은 JavaScript에서 이미지, 사운드, 비디오와 같은 멀티미디어 데이터를 다룰 때 사용,
File 객체도 name과 lastModifiedDate 속성이 포함된 Blob 객체
이미지 업로드 전체 코드
import React, { useState } from 'react';
import { ref, uploadBytes } from 'firebase/storage';
import imageCompression from 'browser-image-compression';
import { Image } from 'antd';
import { storage } from '../../../../firebase';

function AddNoticePage() {
  const [imageUpload, setImageUpload] = useState(null);
  const [uploadPreview, setUploadPreview] = useState([]);

  const onUpload = () => {
    if (imageUpload === null) return;
    const imageRef = ref(storage, `images/${imageUpload.name}`);
    // `images === 폴더이름/파일이름
    uploadBytes(imageRef, imageUpload).then((snapshot) => {
      console.log('snapshot>>', snapshot);
    });
  };

  const handleImageCompress = async (e) => {
    let file = e.target?.files[0];
    const options = {
      maxSizeMB: 0.2, // 이미지 최대 용량
      maxWidthOrHeight: 1920, // 최대 넓이(혹은 높이)
      useWebWorker: true,
    };

    try {
      const compressedFile = await imageCompression(file, options);
      setImageUpload(compressedFile);
      const promise = imageCompression.getDataUrlFromFile(compressedFile);
      promise.then((result) => {
        setUploadPreview(result);
      });
    } catch (error) {
      console.log(error);
    }
  };

  return (
    <div>
      <Image
        width={200}
        height={200}
        src={uploadPreview}
      />
      <div>
        <input type="file" accept="image/*" onChange={handleImageCompress} />
        <button onClick={onUpload}>업로드</button>
      </div>
    </div>
  );
}

export default AddNoticePage;
그렇다면 이제 이미지 사이즈를 압축했을때 결과를 확인해볼까?
특정 이미지를 불러오는 코드는 아래와 같다.
import React, { useEffect, useState } from 'react';
import { ref, getDownloadURL } from 'firebase/storage';
import { storage } from '../../../../firebase';
import { ColFlexComponent, SizedComponent } from 'common';

function TestPage() {
  const [imageUrl, setImageUrl] = useState([]);
  const imageListRef = ref(storage, 'images/20223.jpg');

  useEffect(() => {
    getDownloadURL(imageListRef).then((url) => {
      setImageUrl([url]);
    });
  }, []);

  return (
    <SizedComponent margin={[0]}>
      <ColFlexComponent style={{ gap: '40px' }}>
        <img
          src={`${imageUrl}`}
          alt={'사진'}
        />
      </ColFlexComponent>
    </SizedComponent>
  );
}

export default TestPage;
2. 이미지 사이즈 최적화 후🙆🏻♂️
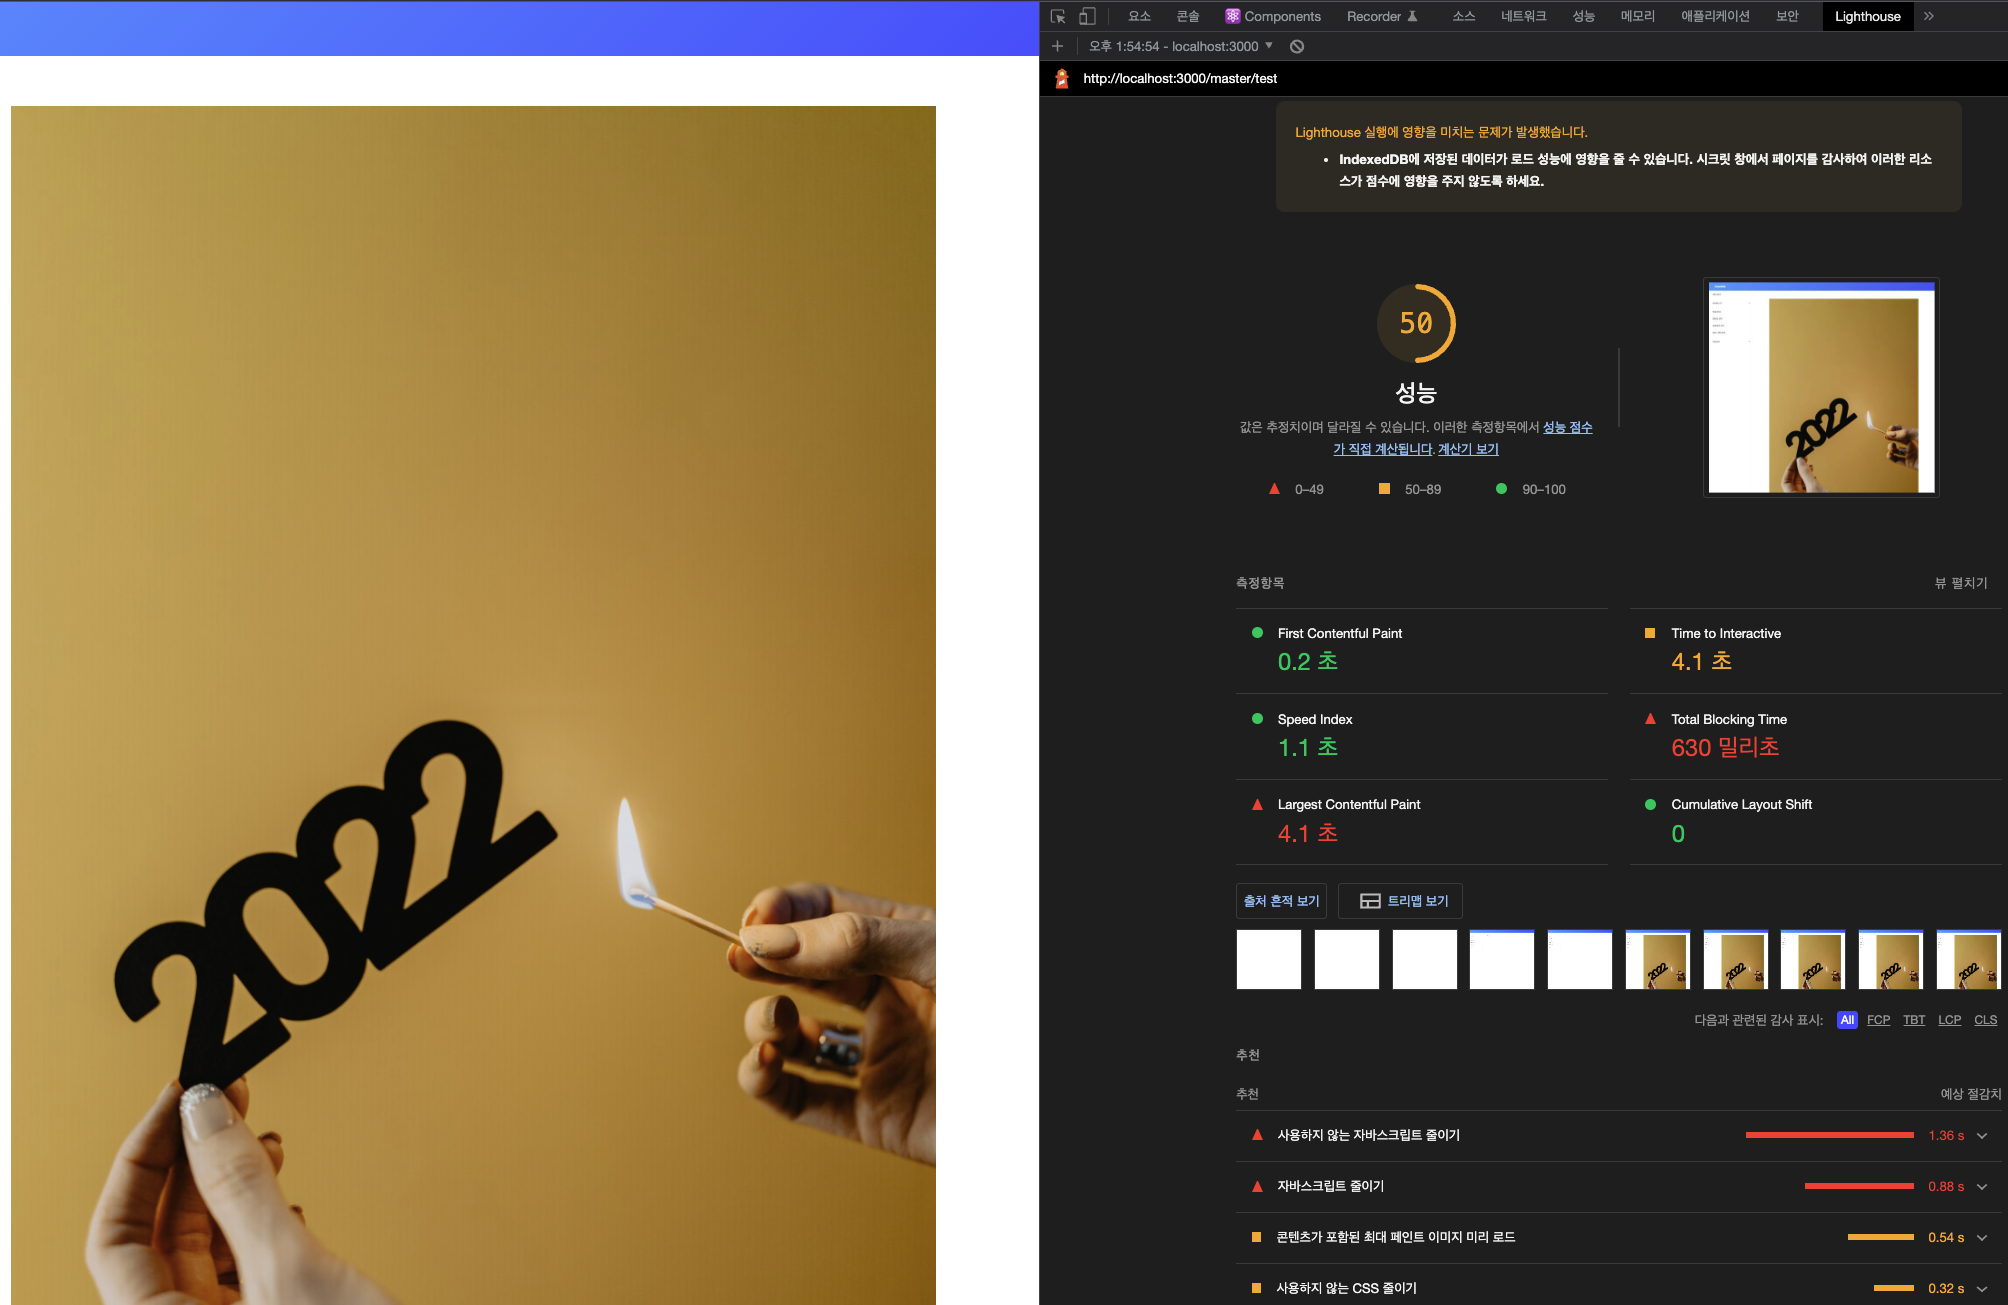
최적화 전에는 43점 이었는데, 이미지 사이즈 최적화 후 점수가 50점이 되었다.
무엇보다 추천(Opportunities) 섹션의 이미지 크기 적절하게 설정하기가 더이상 보이지 않는다.
이렇게 이미지 사이즈를 압축하여, 최적화하는 법 한가지를 배워보았다.
다음에는 다른 방법으로 이미지 사이즈 최적화 하는 법을 배워보고자 한다.
