교육 정보
- 교육 명: 경기미래기술학교 AI 교육
- 교육 기간: 2023.05.08 ~ 2023.10.31
- 오늘의 커리큘럼:
머신러닝
(7/17 ~ 7/28)- 강사: 이현주, 이애리 강사님
- 강의 계획:
1. 머신러닝
이미지 처리
KNN을 활용한 다중 출력 분류기(multi-output classifier)
-
사용 라이브러리 skimage
-
이미지 가져오기
import numpy as np
import matplotlib.pyplot as plt

# 이미지
from skimage.io import imread # 이미지 읽어오기
from skimage.transform import resize # 이미지 크기 조절

url = 'https://github.com/dknife/ML/raw/main/data/Proj1/40/'

imgR, imgC, channel = 24, 24, 3
images = []

# img01.jpg 부터 img40.jpg까지 40개의 이미지 읽어와서
# resize하고 images 리스트에 담는다
for i in range(40):
  file = url+ 'img{0:02d}.jpg'.format(i+1)
  img = imread(file)
  img = resize(img, (imgR, imgC, channel))
  images.append(img)

# 이미지 플롯 함수 정의
def plot_images(nRow, nCol, img):
    fig = plt.figure()
    fig, ax = plt.subplots(nRow, nCol, figsize = (nCol,nRow))
    for i in range(nRow):
        for j in range(nCol):
          if nRow <= 1:
            axis = ax[j]
          else:
            axis = ax[i,j]
          axis.get_xaxis().set_visible(False)
          axis.get_yaxis().set_visible(False)
          axis.imshow(img[i*nCol + j])

# 불러왔던 이미지 plot
# 4행,10열로 이미지 보여주기
plot_images(4, 10, images)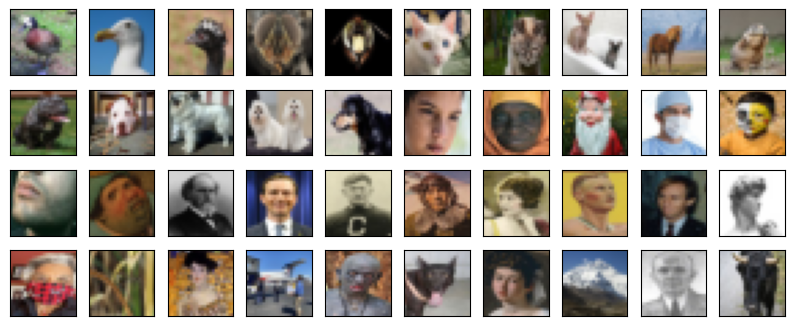
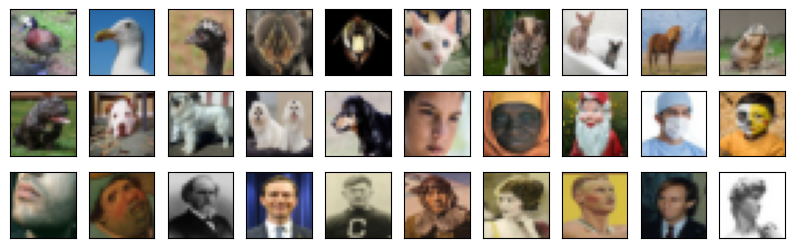
- train test split
# training data와 test data 분리 - 정답 레이블로 사용됨
X_train = np.array(images[:30])
X_test = np.array(images[30:])

plot_images(3, 10, X_train)
plot_images(1, 10, X_test)

- 입력 데이터 준비 - 난수를 생성하여 잡음이 있는 입력 데이터를 생성
# 잡음이 있는 입력 데이터를 만든다
# X_train_noisy 생성
X_train_noisy = X_train + np.random.randn(len(X_train), imgR, imgC, channel) * 0.1
X_train_noisy = np.clip(X_train_noisy, 0, 1) # 0보다 작으면 0, 1보다 크면 1

# X_test_noisy 생성
X_test_noisy = X_test + np.random.randn(len(X_test), imgR, imgC, channel) * 0.1
X_test_noisy = np.clip(X_test_noisy, 0, 1)

# 잡음이 추가된 이미지들을 확인해 본다
plot_images(3,10, X_train_noisy)
plot_images(1,10, X_test_noisy)

- 분류기 입출력 데이터 형식에 맞춰 훈련하기
- 사이킷런의 k-nn 분류기는 이미지와 같은 2차원 이상의 데이터도 1차원 벡터 데이터로 취급
- 입력 이미지 배열을 (이미지 수, 이미지 픽셀 수) 형태로 변형 ==> reshape()
# 1차원 바꿈
X_train_noisy_flat = X_train_noisy.reshape(-1, imgR * imgC * channel)

X_train_flat = np.array(X_train.reshape(-1, imgR * imgC * channel)*255, dtype=np.uint)

# 잡음 이미지를 입력으로 깨끗한 이미지를 정답으로 분류기를 훈련시켜 보자
from sklearn.neighbors import KNeighborsClassifier

knn = KNeighborsClassifier()
knn.fit(X_train_noisy_flat, X_train_flat)

# 잡음 이미지를 넣어서 예측

denoised_result = knn.predict(X_train_noisy_flat)
denoised_result = denoised_result.reshape(-1, imgR, imgC, channel)
plot_images(3,10, denoised_result)

# 정답 출력
plot_images(3,10, X_train)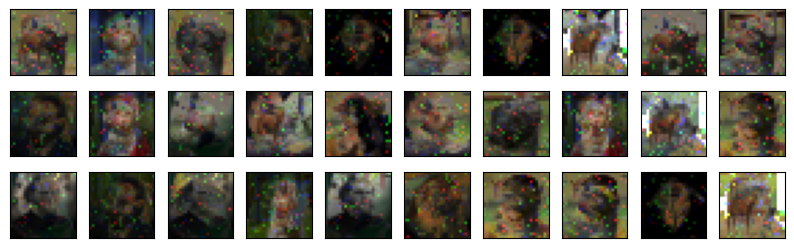

→ 30개의 이미지로 훈련해서는 제대로 된 픽셀 예측이 어려움
- 데이터 변형을 통해 데이터 수 증가
- 잡음 추가해서 잡음데이터를 여러 개 생성
n_augmentation = 100 # 데이터를 증강시켜 덧붙이는 횟수
X_train_noisy_aug = X_train + np.random.rand(len(X_train), imgR, imgC, channel) * 0.2
y_label = np.array(X_train *255, dtype = np.uint) # 정답 깨끗한 이미지
y = y_label

print(X_train_noisy.shape)
for i in range(n_augmentation): # 이미지가 30*101=3030장으로 늘어남
  noisy_data = X_train + np.random.rand(len(X_train), imgR, imgC, channel) * 0.2
  X_train_noisy_aug = np.append(X_train_noisy_aug, noisy_data, axis = 0 )
  y = np.append(y, y_label, axis = 0 )

X_train_noisy_aug = np.clip(X_train_noisy_aug, 0, 1)
print(X_train_noisy_aug.shape, y.shape)

# 슬라이싱을 이용해서 같은 데이터에 잡음을 추가한 이미지들이
# 얼마나 다양하게 생성이 되었는지 확인해보자
plot_images(1,10, X_train_noisy_aug[0:300:30])
plot_images(1,10, X_train_noisy_aug[25:300:30])

- 증가된 데이터로 훈련 및 예측
# 늘어난 데이터를 1차원 데이터로 변환시킨 후 훈련을 시켜보자
X_train_noisy_aug_flat = X_train_noisy_aug.reshape(-1, imgR*imgC*channel)
y_flat = y.reshape(-1, imgR*imgC*channel)

knn.fit(X_train_noisy_aug_flat, y_flat)

# 잡음이 포함된 X_noisy_flat 이미지를 kNN 알고리즘을 이용하여 잡음을 제거
denoised_result = knn.predict(X_train_noisy_flat)
denoised_result = denoised_result.reshape(-1, imgR,imgC,channel)

# 잡음 이미지
plot_images(3, 10, X_train_noisy)
# 복원된 이미지
plot_images(3, 10, denoised_result)
# 정답 이미지
plot_images(3, 10, X_train)

- 일반화 능력 검증
- 0에서 20 사이의 난수 정수를 하나 구한 뒤 깨끗한 이미지가 담겨 있는 배열 X에서 이미지 10개를 추출, 여기에 표준편차가 0.4인 강한 잡음으로 데이터 생성하여 예측
rndidx = np.random.randint(0, 20)
data = X_train[rndidx: rndidx+10] + np.random.randn(10, imgR,imgC, channel) * 0.4
data = np.clip(data, 0, 1)
data_flat = data.reshape(-1,imgR*imgC*channel )

# 예측을 실시한다
denoised = knn.predict(data_flat)

# 결과로 얻은 배열을 이미지로 다시 변환한다
denoised = denoised.reshape(-1, imgR, imgC, channel)
denoised = np.clip(denoised, 0, 255)

# 결과 이미지를 확인해 본다
plot_images(1, 10, data)
plot_images(1, 10, denoised )

- 훈련되지 않은 데이터 테스트
# 훈련에 사용된 적이 없었던 X_test 이미지로 예측

denoised = knn.predict(X_test_noisy.reshape(-1, imgR*imgC*channel ))
denoised = denoised.reshape(-1, imgR, imgC, channel)

# 잡음 이미지
plot_images(1, 10, X_test_noisy)
# 복원된 이미지
plot_images(1, 10, denoised)
# 정답 이미지
plot_images(1, 10, X_test)


- 데이터 증강으로 일반화 능력 향상
### 이미지 데이터를 증강시키기 ####

# 케라스의 ImageDataGenerator 사용 ==> 회전, 확대축소, 기울이기, 상하좌우반전을 해줌
# https://keras.io/api/preprocessing/image/

from keras.preprocessing.image import ImageDataGenerator

image_generator = ImageDataGenerator(
    rotation_range = 360,
    zoom_range=0.1,
    shear_range=0.1,
    width_shift_range =0.1,
    height_shift_range =0.1,
    horizontal_flip=True,
    vertical_flip=True
)

# 깨끗한 이미지를 담고 있는 X를 이용해 증강된 레이블 데이터를 담고 있을 y_aug 생성
# 이 y_aug를 가지고 데이터 증강시킨다
y_aug = X_train.reshape(-1, imgR, imgC, channel)

# flow()메소드에 원본 이미지 데이터를 집어 넣어서 반복자(iterator)를 생성해서 이미지를 반복 생성
it = image_generator.flow(y_aug)

# 이미지의 개수가 nData에 저장된다
nData = y_aug.shape[0]
print(nData)

# y_aug에 잡음을 섞어 x_aug를 만든다
X_aug = y_aug + np.random.randn(nData, imgR, imgC, channel) * 0.1

# 데이터 증강
# 이 작업을 500번 반복

n_augmentation = 500
for _ in range(n_augmentation):
  new_y = it.next()
  new_X = new_y + np.random.randn(nData, imgR, imgC, channel) * 0.1
  y_aug = np.append(y_aug, new_y, axis =0 )
  X_aug = np.append(X_aug, new_X, axis =0 )


y_aug = np.array(y_aug * 255, dtype = np.uint)
y_aug = y_aug.reshape(-1, imgR, imgC, channel)
X_aug = X_aug.reshape(-1, imgR, imgC, channel)

y_aug = np.clip(y_aug, 0, 255)
X_aug = np.clip(X_aug, 0, 1)

plot_images(3, 10, y_aug[30:])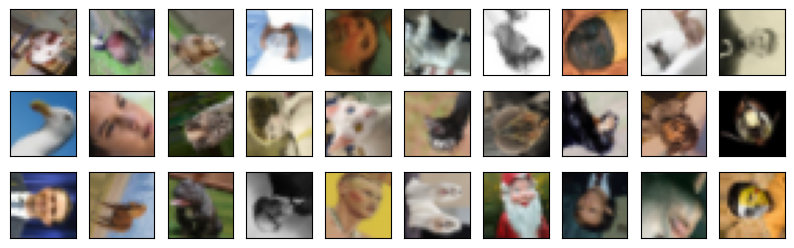
- 새로 학습 및 예측
# 학습하기 위해서 이미지를 1차원으로 펼친다
X_aug_flat = X_aug.reshape(-1, imgR*imgC*channel)
y_aug_flat = y_aug.reshape(-1, imgR*imgC*channel)
# 학습
knn.fit(X_aug_flat, y_aug_flat)

denoised = knn.predict(X_test_noisy.reshape(-1, imgR* imgC*channel))
denoised = denoised.reshape(-1, imgR, imgC, channel)
# 검증데이터
plot_images(1, 10, X_test_noisy)
# 예측 결과
plot_images(1, 10, denoised )
# 실제 결과
plot_images(1, 10, X_test )


:D