100 days of swiftui: 38
https://www.hackingwithswift.com/100/swiftui/38
퀴즈 통해서 짚은 점
- UUID는 이미 Codable을 만족한다.
- onDelete() modifier는 ForEach에만 적용할 수 있다.
- UUID는 무조건 고유하진 않지만 아주 높은 확률로 고유하다.
- JSON은 JavaScript Object Notation이다.
challenge
One of the best ways to learn is to write your own code as often as possible, so here are three ways you should try extending this app to make sure you fully understand what’s going on.
- Use the user’s preferred currency, rather than always using US dollars.
- Modify the expense amounts in ContentView to contain some styling depending on their value – expenses under $10 should have one style, expenses under $100 another, and expenses over $100 a third style. What those styles are depend on you.
- For a bigger challenge, try splitting the expenses list into two sections: one for personal expenses, and one for business expenses. This is tricky for a few reasons, not least because it means being careful about how items are deleted!
solution
1. 통화를 선택할 수 있게 하기
Picker에서 원하는 통화를 선택하면 number formatter의 locale이 변경되고, 값을 통화에 맞는 code로 보여주도록 설정했다.
코드 파일
https://github.com/treesofgroo/Ios-IExpense/commit/833a920deb9a838d7d1ad1a71afd64851f424620
https://github.com/treesofgroo/Ios-IExpense/commit/ad592da5f0061da1bee684d9eebf74a7af3f5dd7
❗️picker에 onChange를 설정하여 @State인 number formatter의 locale을 수정했음에도 화면상 바로 반영이 되지 않는다. 관련 값은 모두 로드될 수 있게 @State로 설정했기에, 바로 반영이 되지 않는 이유를 모르겠다.
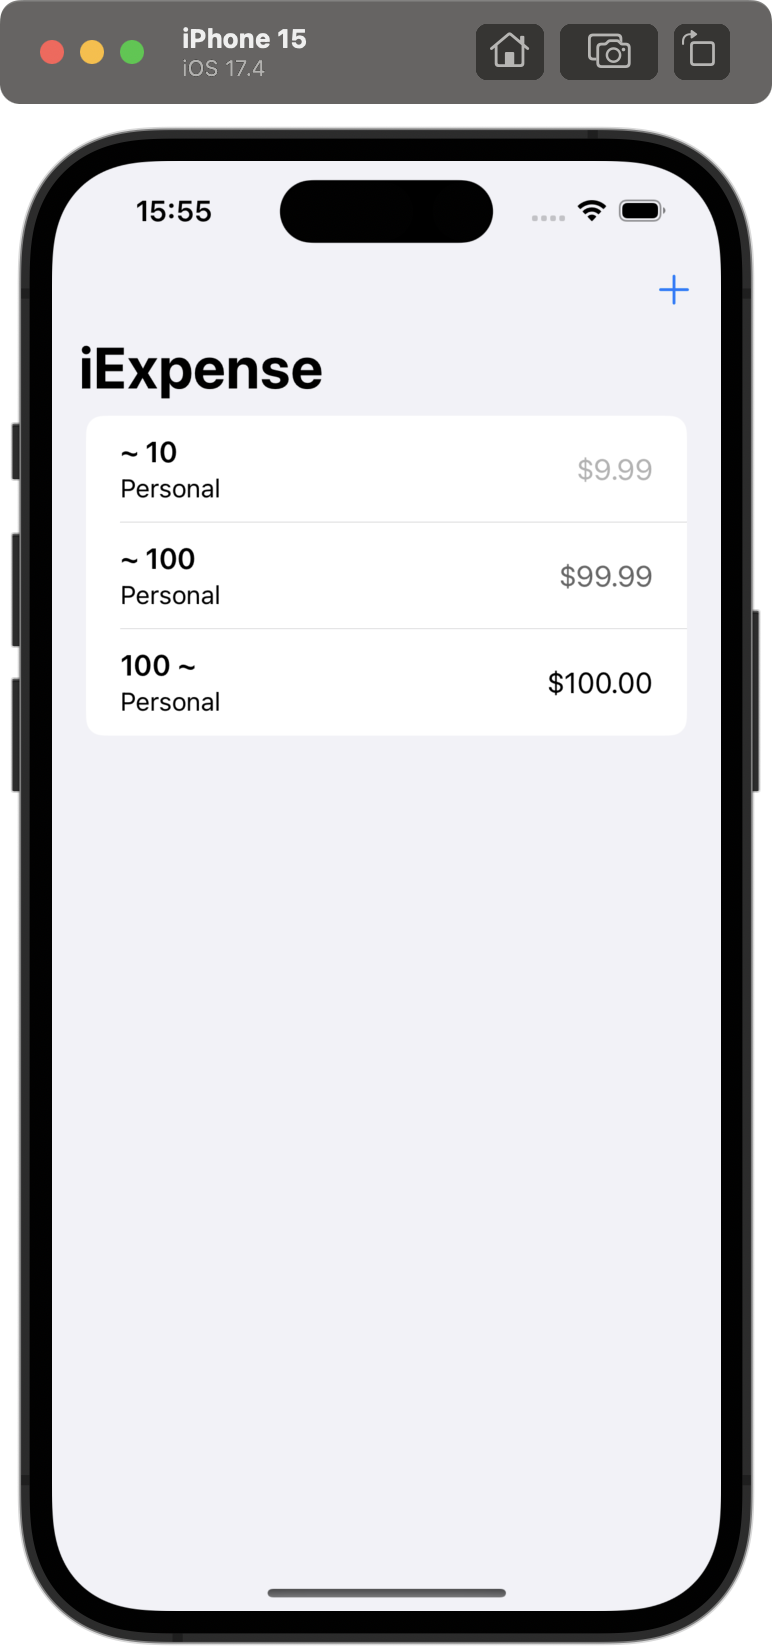
2. 값에 따라 스타일링 하기
amount의 값에 따라 검정색의 opacity를 달리 설정했다.
코드 파일
https://github.com/treesofgroo/Ios-IExpense/commit/e56d2343ef2721c5b23be0d3e34765551cc81079
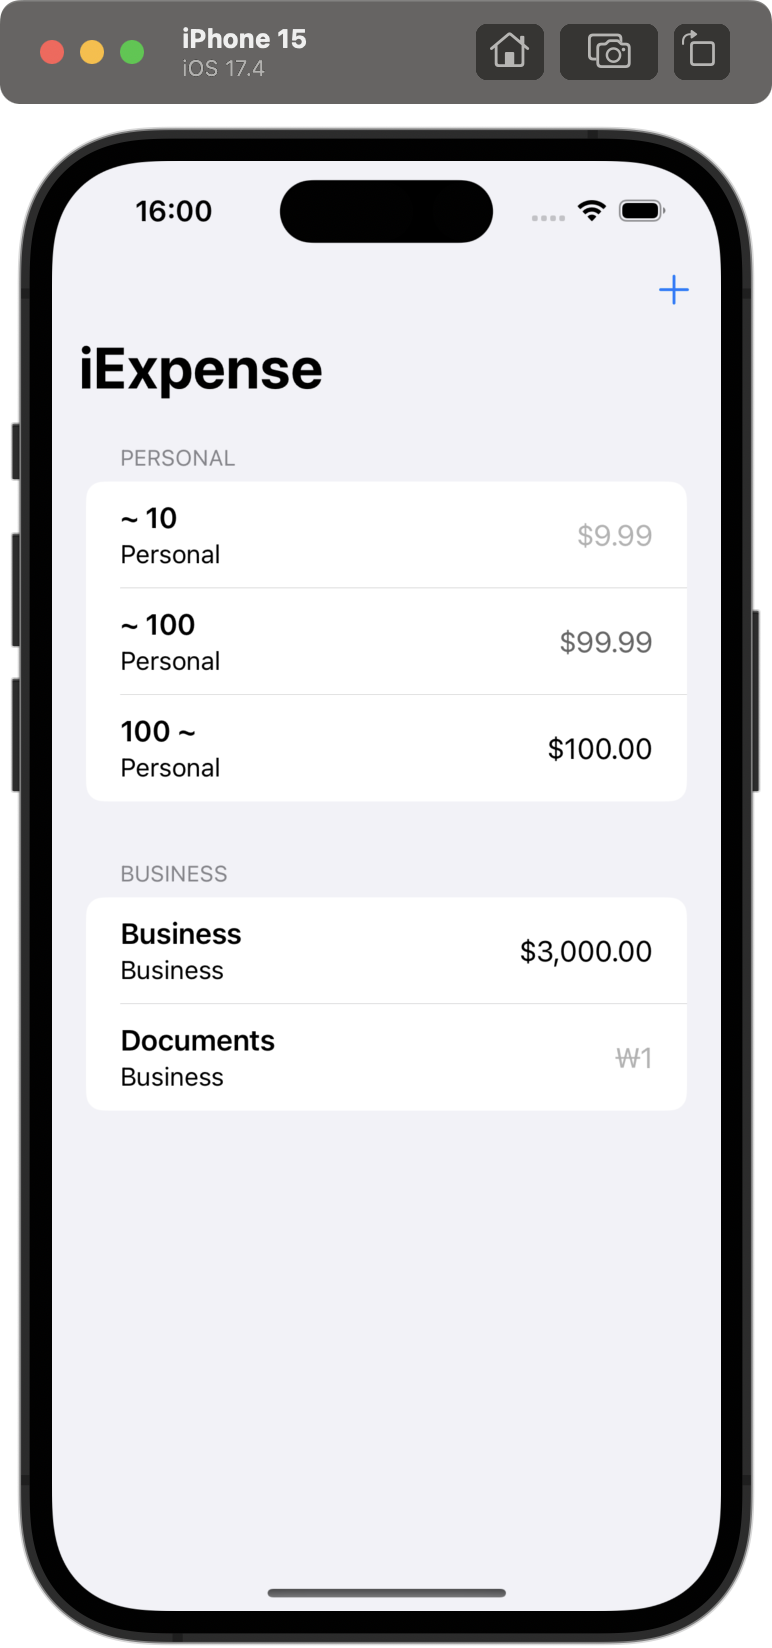
3. personal과 business 항목 구분하여 목록 보이기
ForEach 안에서 Expense의 type을 하나씩 비교하며 각 항목에 따라 리스트를 보여주도록 설정했다.
코드 파일
https://github.com/treesofgroo/Ios-IExpense/commit/e349aab755e17ad66391a484f794f6c9bf57cbb3
