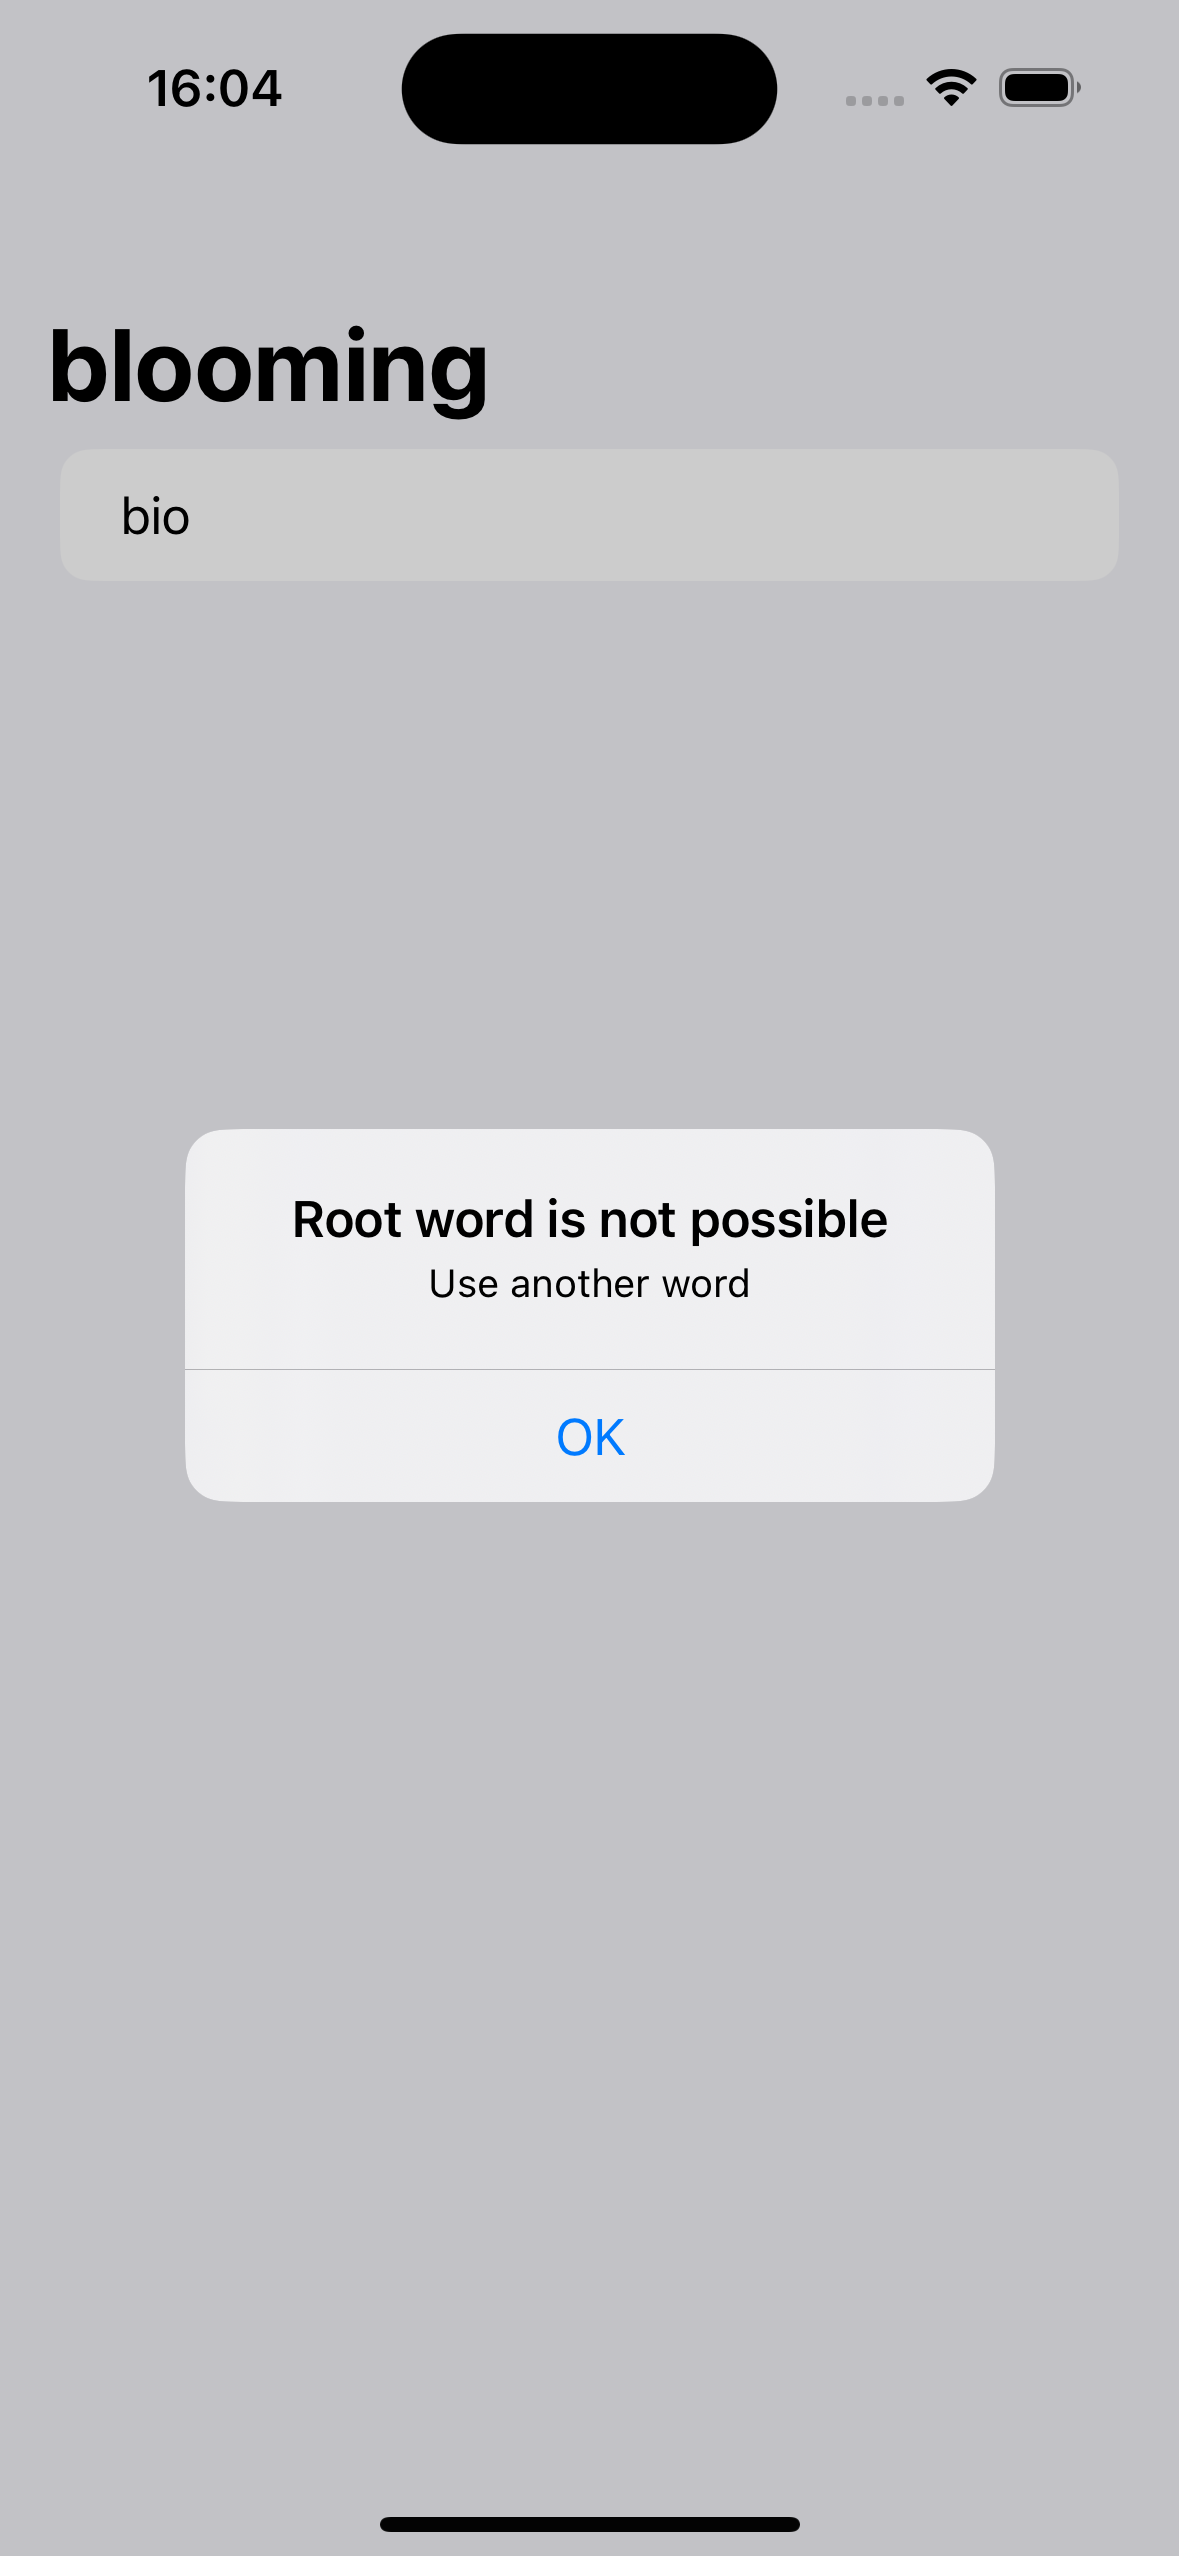
100 days of SwiftUI
1.0, 1: 시작

SwiftUI의 기본 하드스킬을 배우고자 100일 챌린지를 시작한다.How to Become an iOS Developer in 2021https://www.hackingwithswift.com/articles/230/how-to-become-an-ios-de
2.checkpoint 1: Celsius to Fahrenheit
100 days of swiftui: checkpoint 1https://www.hackingwithswift.com/quick-start/beginners/checkpoint-1celsius를 상수에 저장하고 이에 대응하는 fahrenheit 계산하고 두 값
3.2: simple data types 2
100 days of SwiftUI https://www.hackingwithswift.com/100/swiftui/2 Boolean true, false 값만 가진다. 그리고 Int와는 달리 사칙연산 +, -, *, /는 사용하지 못하고 not인 !를 사용할 수
4.3: complex data types 1
100 days of swiftui: 3https://www.hackingwithswift.com/100/swiftui/3위처럼 같은 데이터 타입의 데이터 그룹이 배열이다. 1 ~ 3줄처럼 빈 배열을 선언할 수 있고, fruits처럼 직접 값을 입력하여 정의할
5.4: complex data types 2
100 days of swiftuihttps://www.hackingwithswift.com/100/swiftui/4swift에서는 데이터 형태를 지정하는 방법이 두 가지가 있다. type inference: example1에 String 값을 직접 입력하여
6.checkpoint 2: print numbers of the array
checkpoint 2https://www.hackingwithswift.com/quick-start/beginners/checkpoint-2This time the challenge is to create an array of strings, then wri
7.5: conditions
100 days of swiftui: 5https://www.hackingwithswift.com/100/swiftui/5위처럼 다양하게 if 조건문을 사용할 수 있다. String끼리 부등호로 비교하면 알파벳 순서를 기준으로 참 거짓 여부를 리턴한다. 예시로
8.6: loops
100 days of swiftui: 6 https://www.hackingwithswift.com/100/swiftui/6 for for loop를 통해 in 뒤의 범위만큼 반복문을 실행할 수 있다. 범위는 1...5 1부터 5까지, 리스트 colors의 요소만큼
9.checkpoint 3: fizz buzz
100 days of swiftui: checkpoint 3https://www.hackingwithswift.com/quick-start/beginners/checkpoint-3The problem is called fizz buzz, and has been
10.7: functions 1
100 days of swiftui: 7https://www.hackingwithswift.com/100/swiftui/7이렇게 특정 명령을 실행하는 함수를 만들어 여러 번 활용할 수 있다.예:코드 파일https://github.com/soaringw
11.8: functions 2
100 days of swiftui: 8https://www.hackingwithswift.com/100/swiftui/8함수의 매개변수를 인수로 입력받게 할 수도 있고, 인수를 입력받지 못할 때를 대비해 기본값을 설정하는 방법도 있다.결과:코드 파일https
12.checkpoint 4: find Square root
100 days of swiftui: checkpoint 4https://www.hackingwithswift.com/quick-start/beginners/checkpoint-4Write a function that accepts an integer from
13.9: closures
100 days of swiftui: 9 https://www.hackingwithswift.com/100/swiftui/9
14.checkpoint 5
100 days of swiftui: checkpoint 5https://www.hackingwithswift.com/quick-start/beginners/checkpoint-5With closures under your belt, it’s time to t
15.10: structs
100 days of swiftui: 10https://www.hackingwithswift.com/100/swiftui/10같은 구조를 가지는 데이터를 struct를 통해 만들 수 있다.예시로 바뀌지 않는 팀 소속을 가지고 있고, 변동하는 목숨을 가진 구조체
16.11: structs 2

100 days of swiftui: 11https://www.hackingwithswift.com/100/swiftui/11사과를 저장하거나 꺼내서 먹을 수 있는 냉장고를 다음 예시로 설정했다.결과:그러나 위의 예시는 Refrigerator의 멤버 변수인 a
17.checkpoint 6: Car struct
100 days of swiftui: checkpoint 6https://www.hackingwithswift.com/quick-start/beginners/checkpoint-6create a struct to store information about a
18.12: classes
100 days of swiftui: 12https://www.hackingwithswift.com/100/swiftui/12class는 strut처럼 특정 속성을 모은 구조라고 할 수 있다. 그 속성에 대해 접근 지정자, property observer, i
19.checkpoint 7: Animal class
100 days of swiftui: checkpoint 7https://www.hackingwithswift.com/quick-start/beginners/checkpoint-7Your challenge is this: make a class hierarch
20.13: protocol and extensions
100 days of swiftui: 13 https://www.hackingwithswift.com/100/swiftui/13 Protocol protocol은 내가 이해하기론 규칙을 만족해야 하는 struct 같다. 예시로 commute() 함수가 있다. 이
21.checkpoint 8: protocol Building
100 days of swiftui: checkpoint 8https://www.hackingwithswift.com/quick-start/beginners/checkpoint-8Your challenge is this: make a protocol that
22.14: Optionals
100 days of swiftui: 14https://www.hackingwithswift.com/100/swiftui/14값을 지닐 수도 있고 안 지닐 수도 있는 타입이다. 예로 아래 sentence는 String 값을 지닐 수도 있고 값이 없는 nil일
23.checkpoint 9: return a random number from an array
100 days of swiftui: checkpoint 9https://www.hackingwithswift.com/quick-start/beginners/checkpoint-9Your challenge is this: write a function that
24.15: review and optional try
100 days of swiftui: 15https://www.hackingwithswift.com/100/swiftui/15오늘은 여태 배운 것을 다시 리뷰하는 시간이었다.100 days of swiftui: How to handle function fail
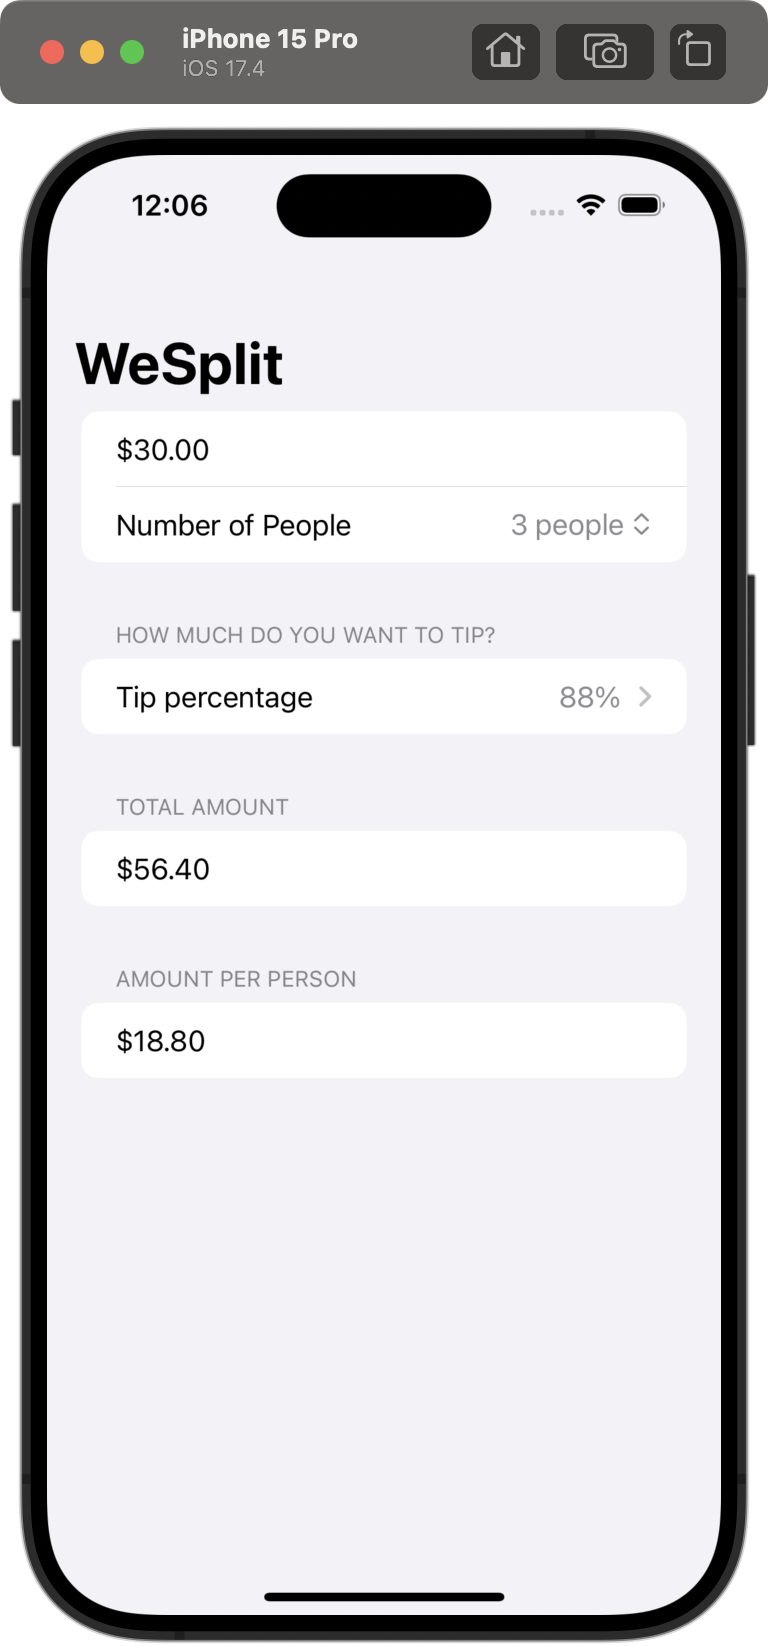
25.16: project 1, part one
100 days of swiftui: 16https://www.hackingwithswift.com/100/swiftui/16오늘 구현한 View 사진코드 파일https://github.com/soaringwave/Ios-WeSplit/commit/f
26.17: project 1, part 2
100 days of swiftui: project 1, part 2 https://www.hackingwithswift.com/100/swiftui/17 TextField with value TextField currency keyboard Keyboard St
27.18: project 1, part 3
100 days of swiftui: 18https://www.hackingwithswift.com/100/swiftui/18Add a header to the third section, saying “Amount per person”Add another se
28.19: Time conversion
100 days of swiftui: challenge https://www.hackingwithswift.com/100/swiftui/19 challenge You need to build an app that handles unit conversions: user
29.20: project 2, part 1

100 days of swiftui: 20https://www.hackingwithswift.com/100/swiftui/20오늘은 다양한 View를 만들었다. 사진과 함께 코드를 기록한다.코드 파일https://github.com/treesofgro
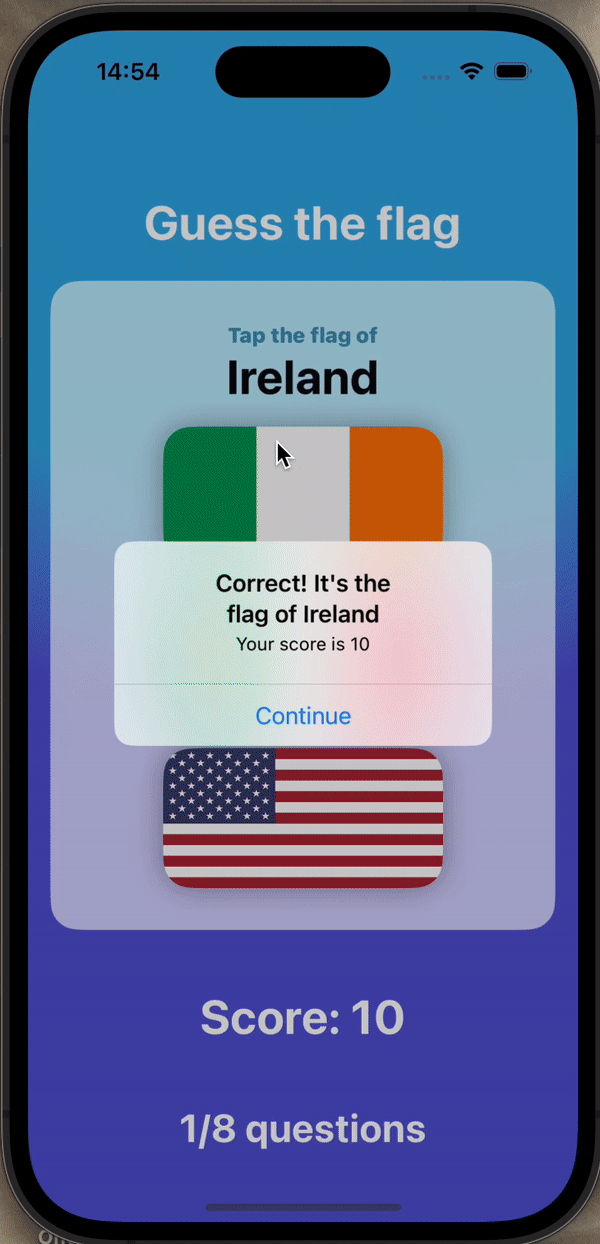
30.21: project 2, part 2
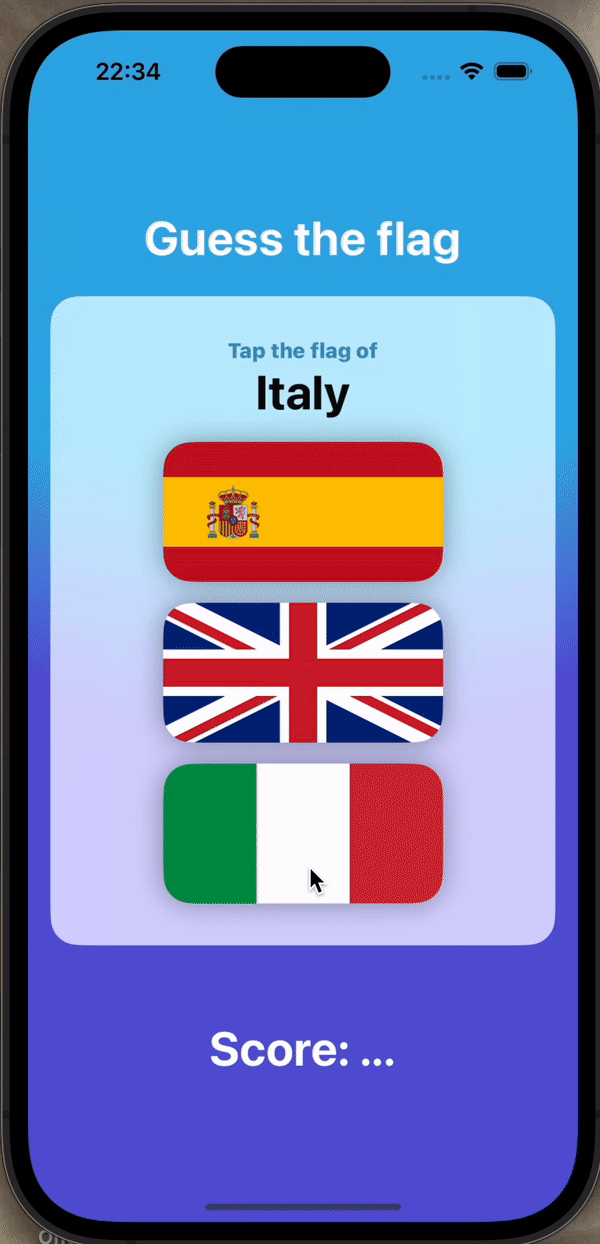
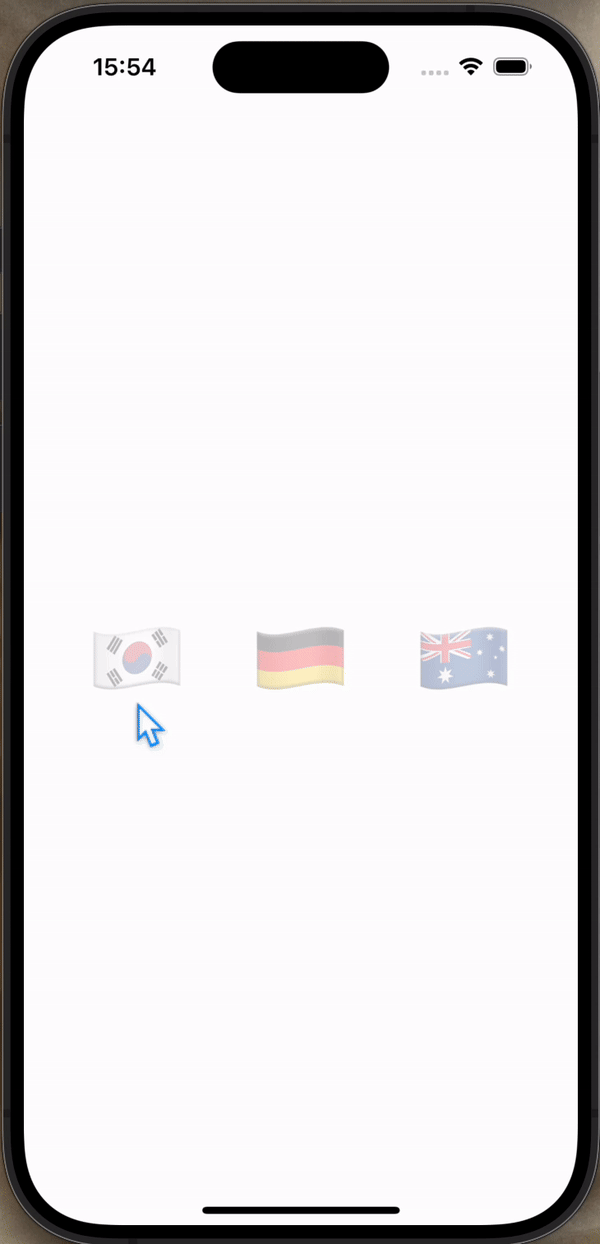
100 days of swiftui: 21https://www.hackingwithswift.com/100/swiftui/21어제 수업 응용해서 오늘 만든 앱랜덤으로 세 국기를 보여준다.세 국가 중 특정 국가의 깃발을 선택할 수 있다.특정 국가의 깃발을 올바르
31.22: project 2, part three
100 days of swiftui: 22https://www.hackingwithswift.com/100/swiftui/22Here are three ways you should try extending this app to make sure you full
32.23: poject 3, part 1

Struct
33.24: project 3, part 2
100 days of swiftui: 24https://www.hackingwithswift.com/100/swiftui/24Go back to project 1 and use a conditional modifier to change the total amo
34.25: guess rock, scissors, paper
100 days of swiftui: 25 https://www.hackingwithswift.com/100/swiftui/25 challenge So, very roughly: Each turn of the game the app will randomly pick
35.26: BetterRest, part 1

100 days of swiftui: 26https://www.hackingwithswift.com/100/swiftui/26\+/-를 눌러 값을 변경할 수 있는 Stepper가 있다.formatted()를 통해 소숫점이 존재할 때만 보여줄 수 있다.코드 파일
36.27: BetterRest, part 2
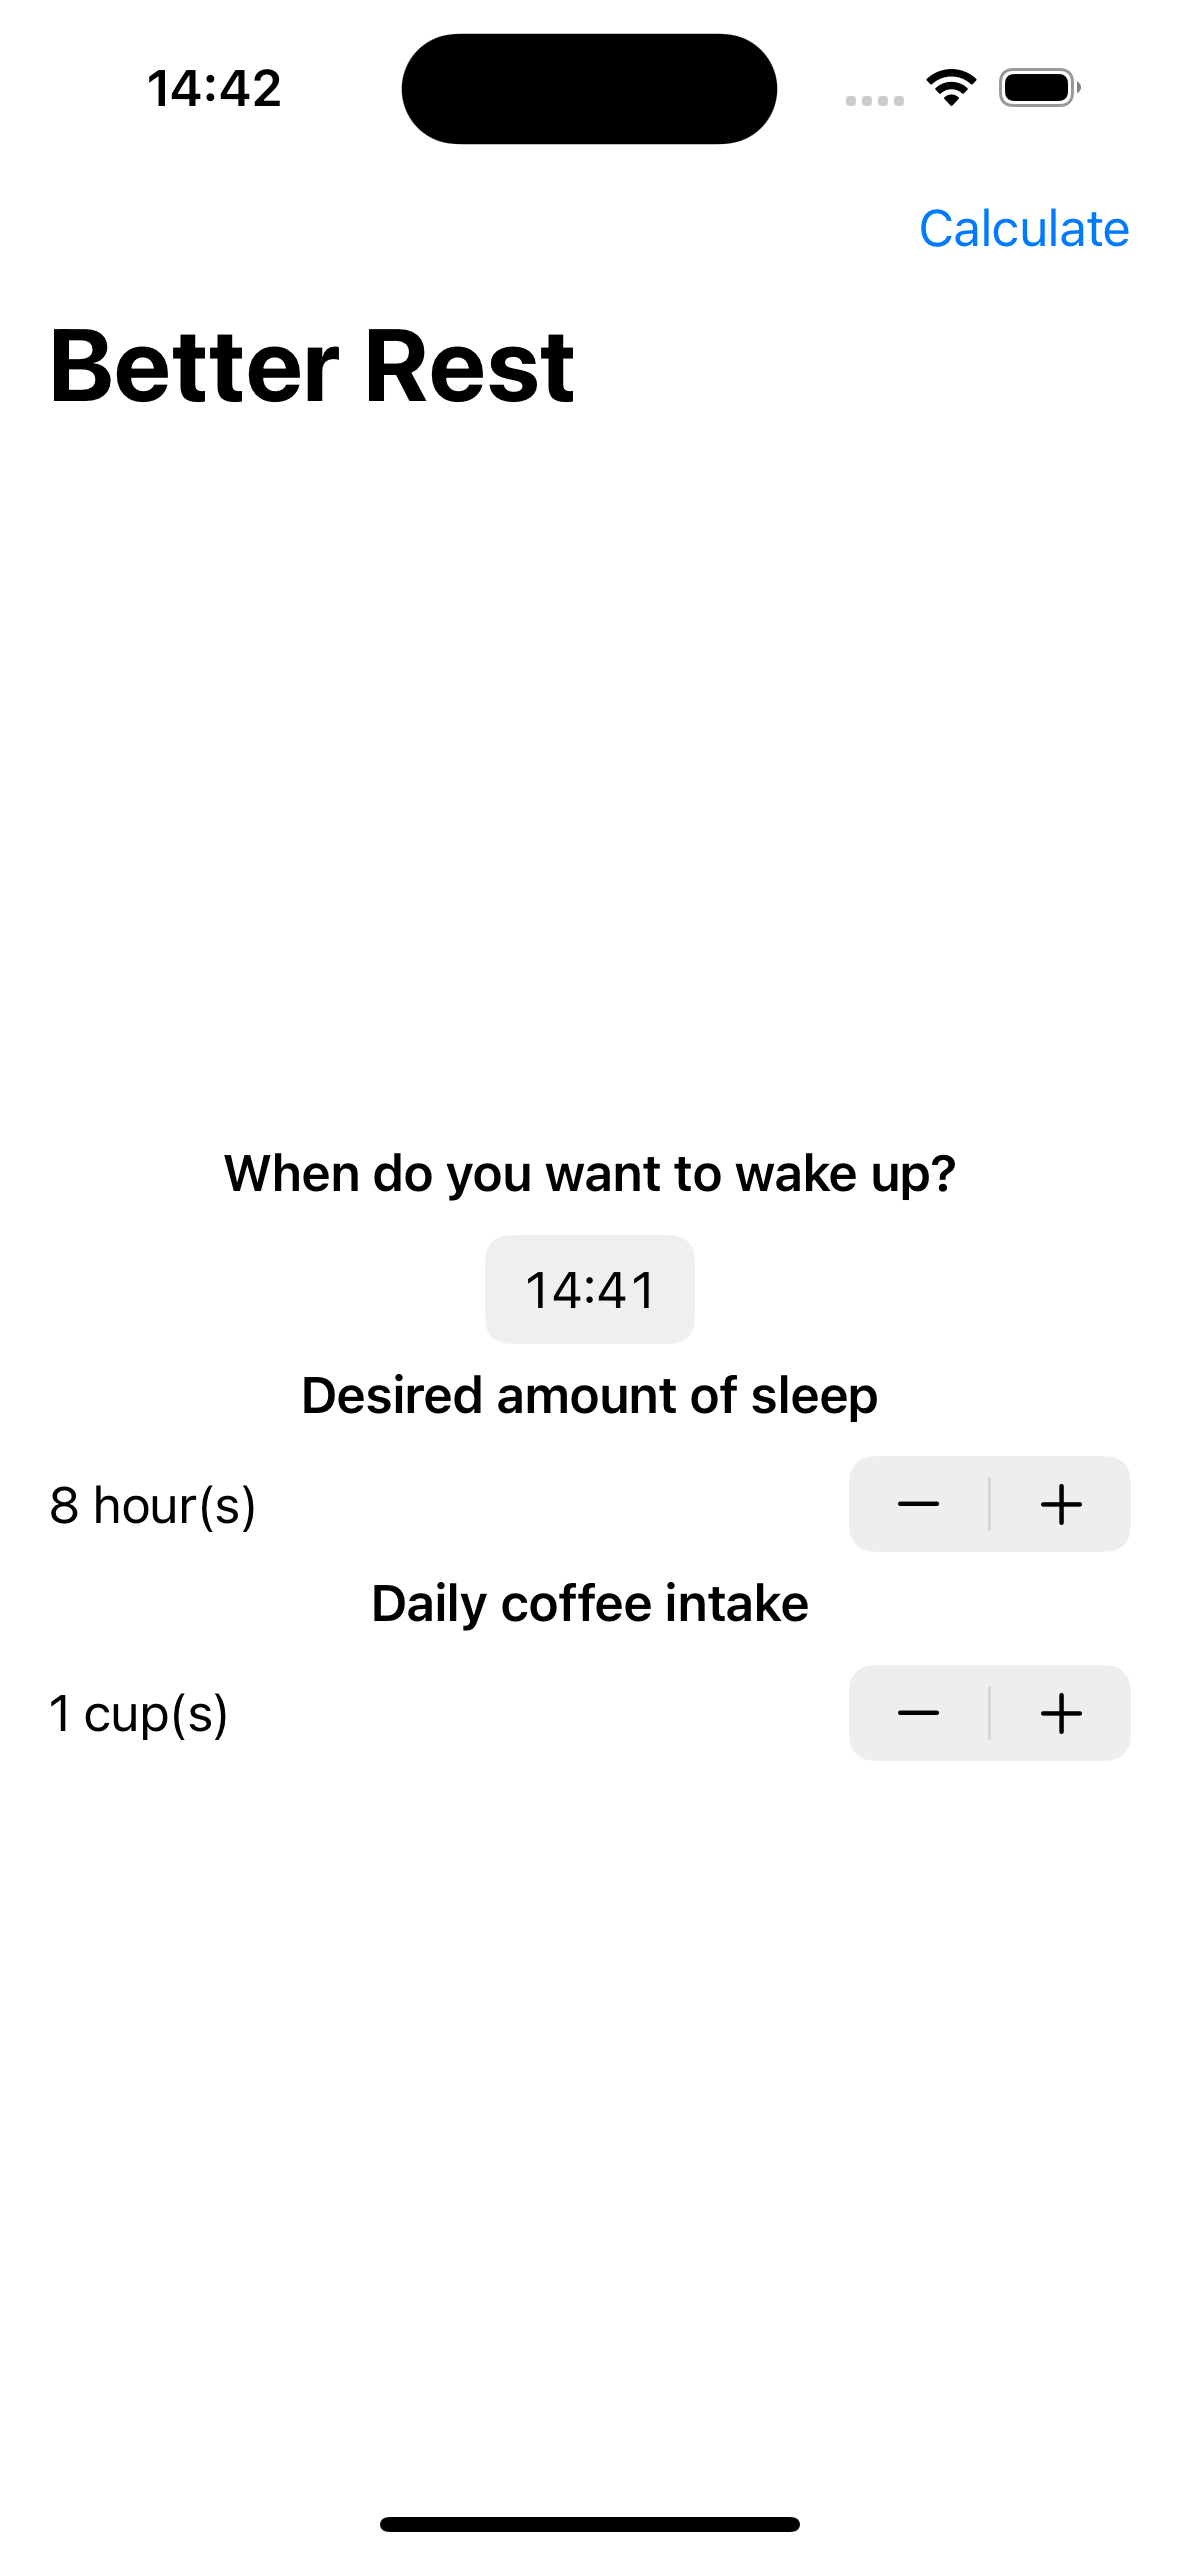
100 days of swiftui: 27https://www.hackingwithswift.com/100/swiftui/27DatePicker, Stepper, toolbar로 필요한 입력을 받을 수 있도록 설정했다.코드 파일https://githu
37.28: BetterRest, part 3
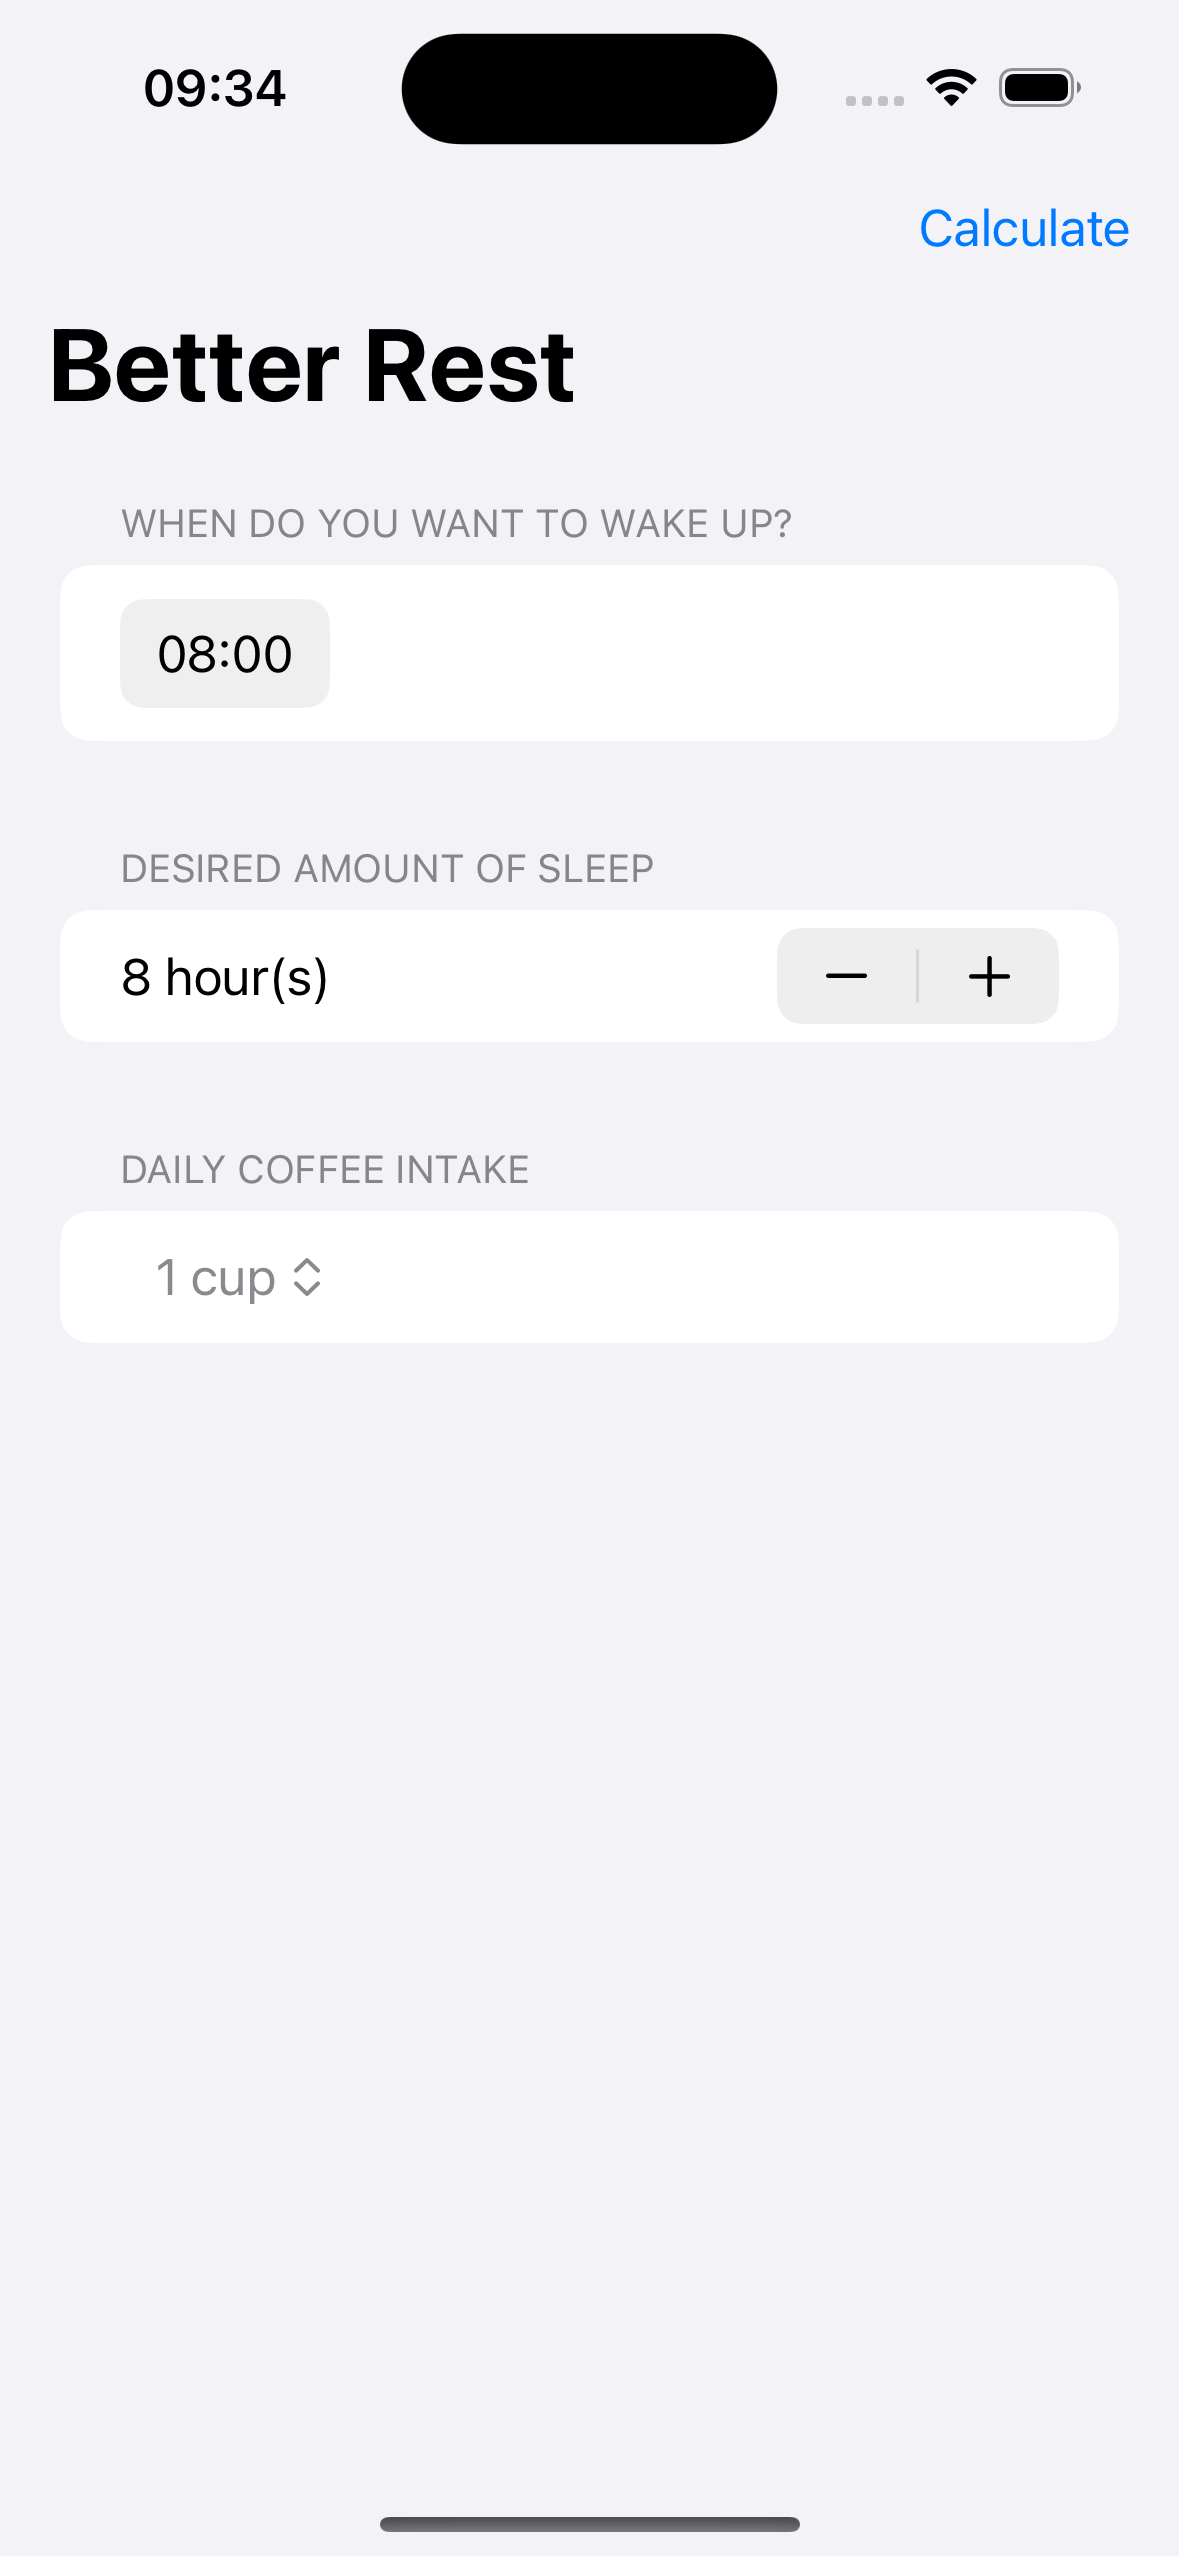
100 days of swiftui: 28https://www.hackingwithswift.com/100/swiftui/28Replace each VStack in our form with a Section, where the text view is the
38.29: WordScramble, part 1
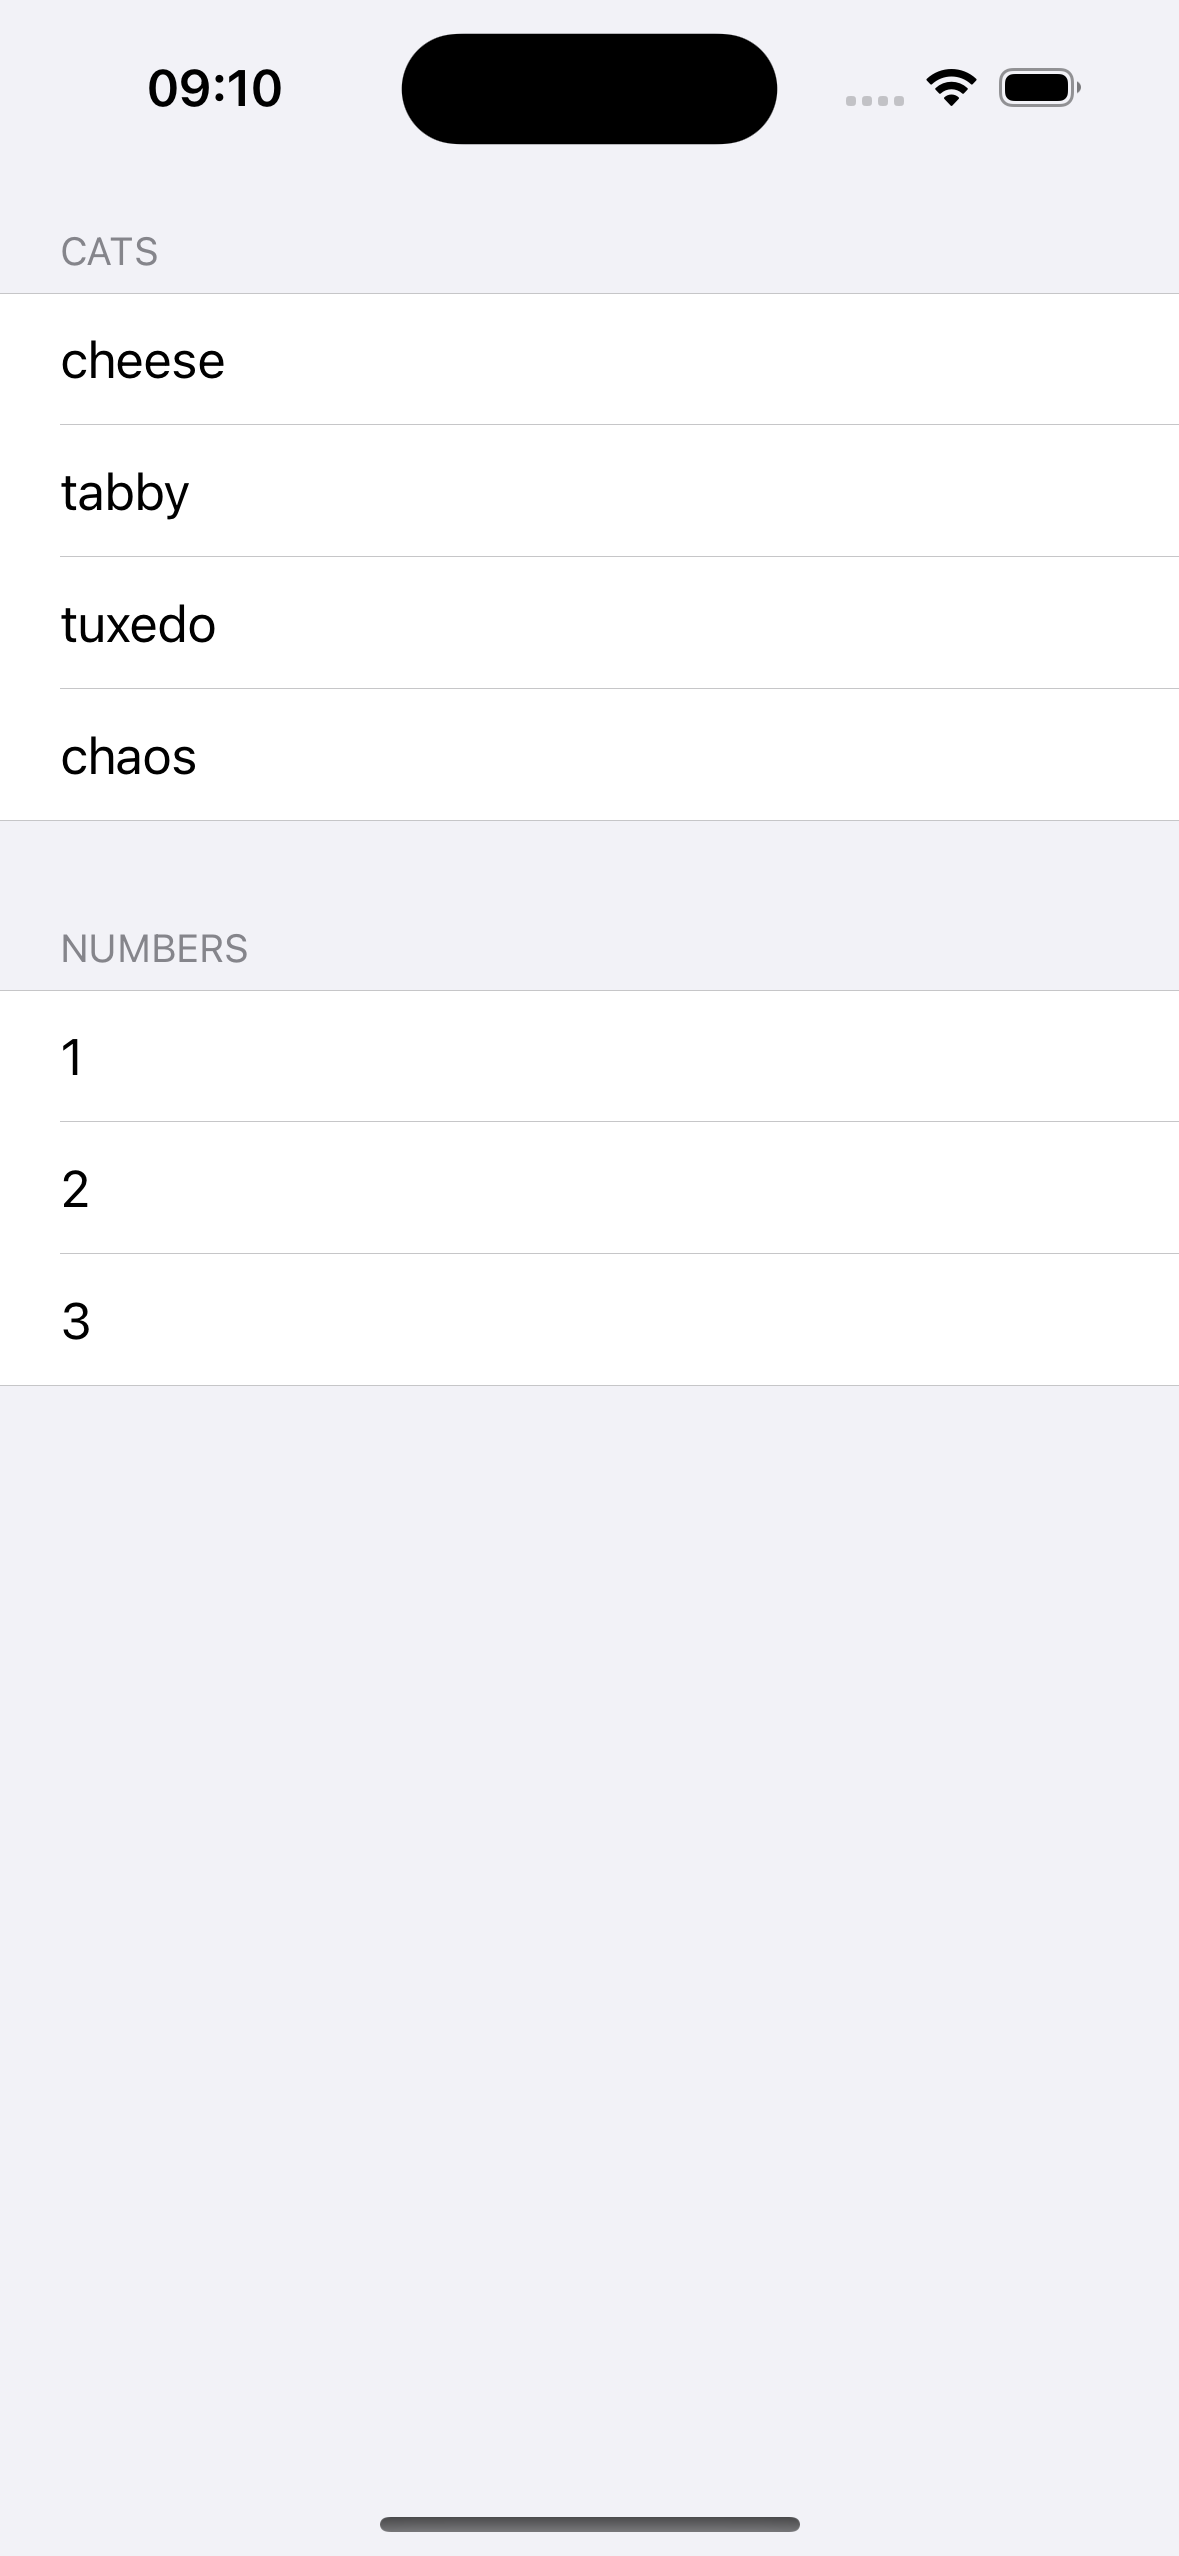
100 days of swiftui: 29https://www.hackingwithswift.com/100/swiftui/29List는 Form과 같은 테마를 가지고 있고 요소들을 목록으로 나타낸다. 그리고 아래 사진처럼 스타일을 지정할 수 있다.또는 ForE
39.30: WordScramble, part 2
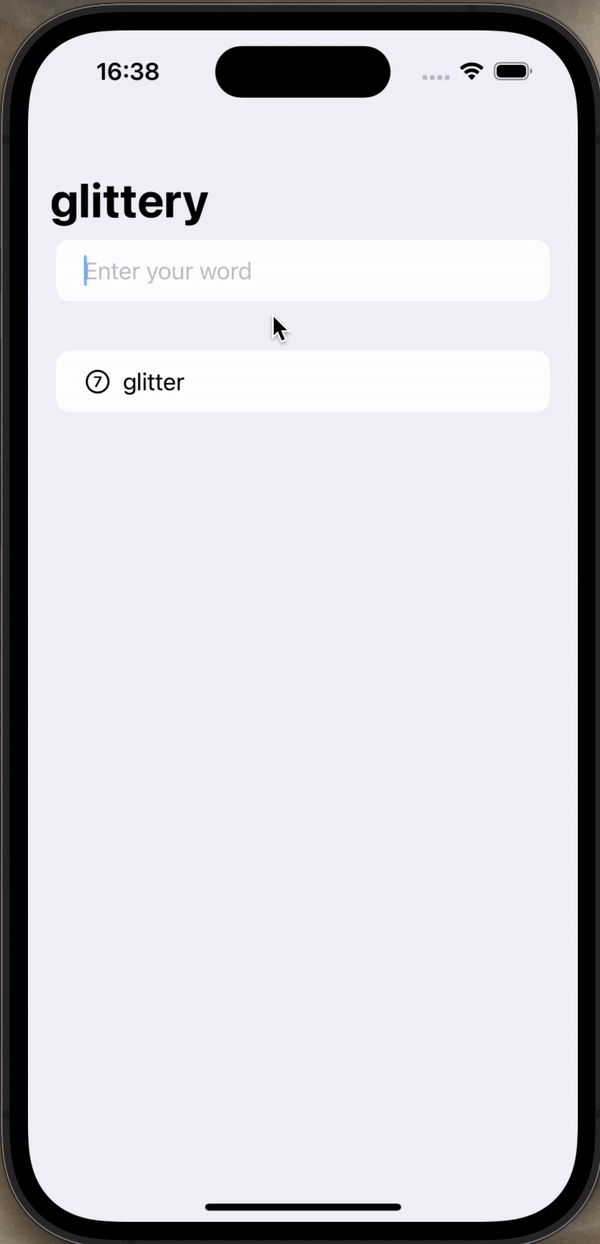
100 days of swiftui: 30 https://www.hackingwithswift.com/100/swiftui/30 List 설정하기 TextField로 단어를 입력받고 그 단어를 List로 보여주는 View이다. .onSubmit()을 이용해서 Te
40.31: WorldScramble, part 3
100 days of swiftui: 31https://www.hackingwithswift.com/100/swiftui/31Disallow answers that are shorter than three letters or are just our start
41.32: Animations, part 1
100 days of swiftui: 32 https://www.hackingwithswift.com/100/swiftui/32 animation Double 값을 이용해서 View의 크기와 형태를 변경하고 이를 애니메이션으로 연결할 수 있다. scaleEffect
42.33: Animations, part 2
100 days of swiftui: 33https://www.hackingwithswift.com/100/swiftui/33animation도 modifier이기 때문에 순서가 중요하다. 어떤 순서로 적용했는지, 어떤 것들을 적용했는지에 따라 달리 표현할 수
43.34: Animations, part 3
100 days of swiftui: 34https://www.hackingwithswift.com/100/swiftui/34When you tap a flag, make it spin around 360 degrees on the Y axis.Make the
44.36: IExpense, part 1
100 days of swiftui: 36 struct with @State struct의 경우 변화가 있을 때마다 새로운 instance를 만든다. 그리고 swift가 빠르게 변경된 요소를 화면에 반영한다. class with @Observable 각 속성의 변화
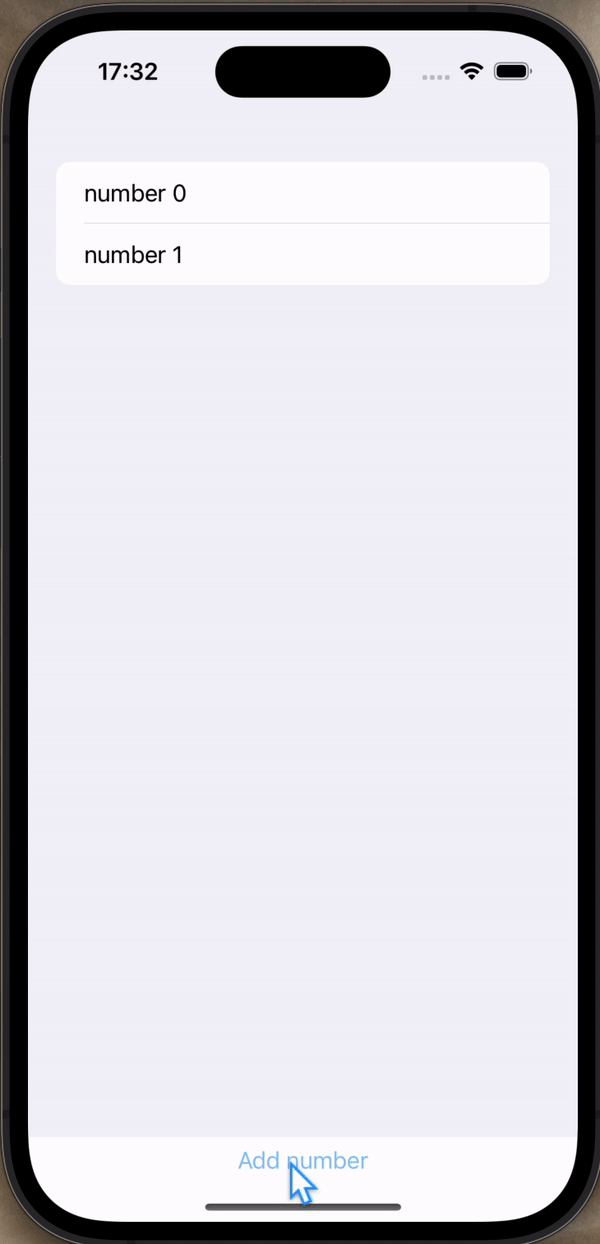
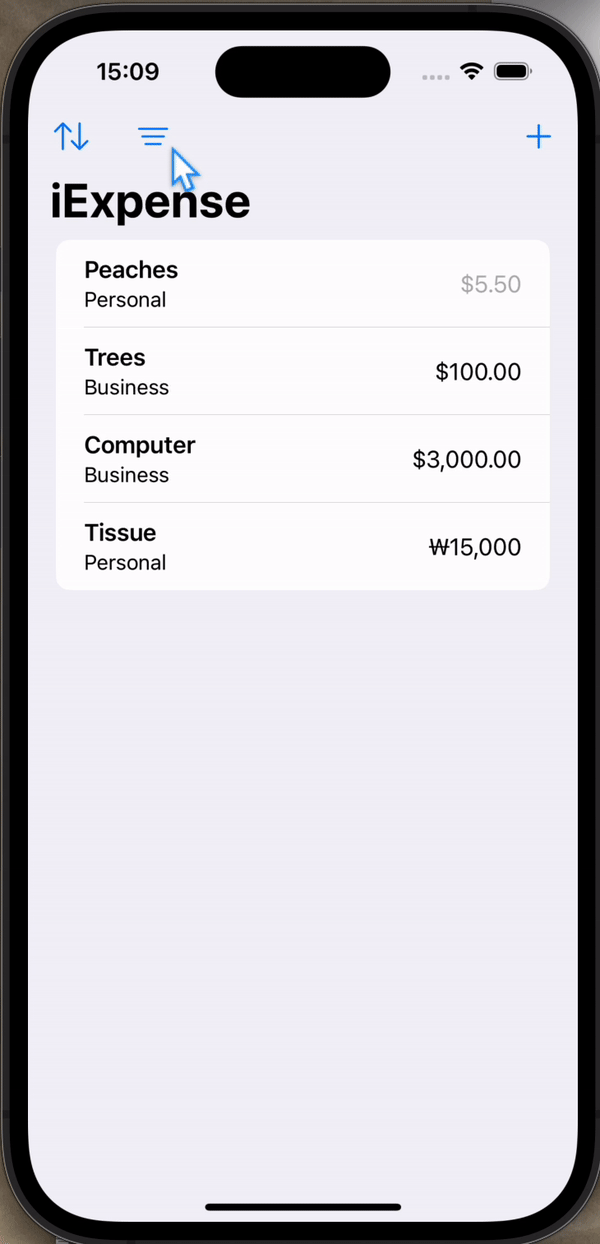
45.37: IEpense, part 2
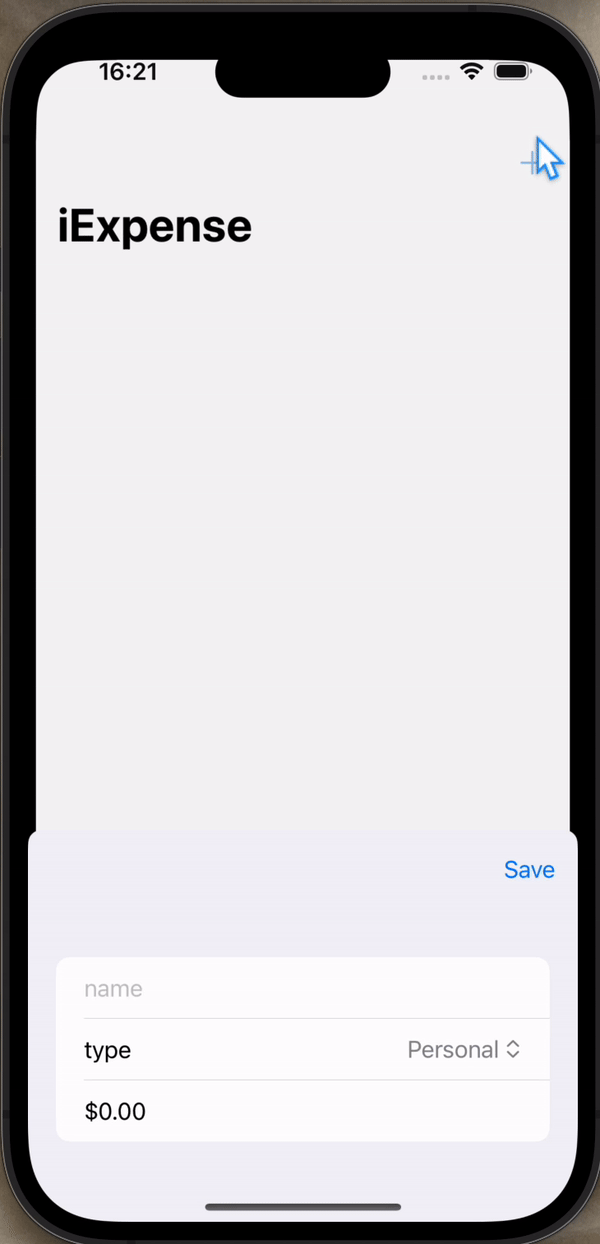
100 days of swiftui: 37https://www.hackingwithswift.com/100/swiftui/37제목, 종류, 값을 입력하여 지출 내역 목록을 작성할 수 있는 앱을 만들었다. 아래는 구현하면서 기억할 만한 배운 점을 작성했다.UUI
46.38: IExpense, part 3
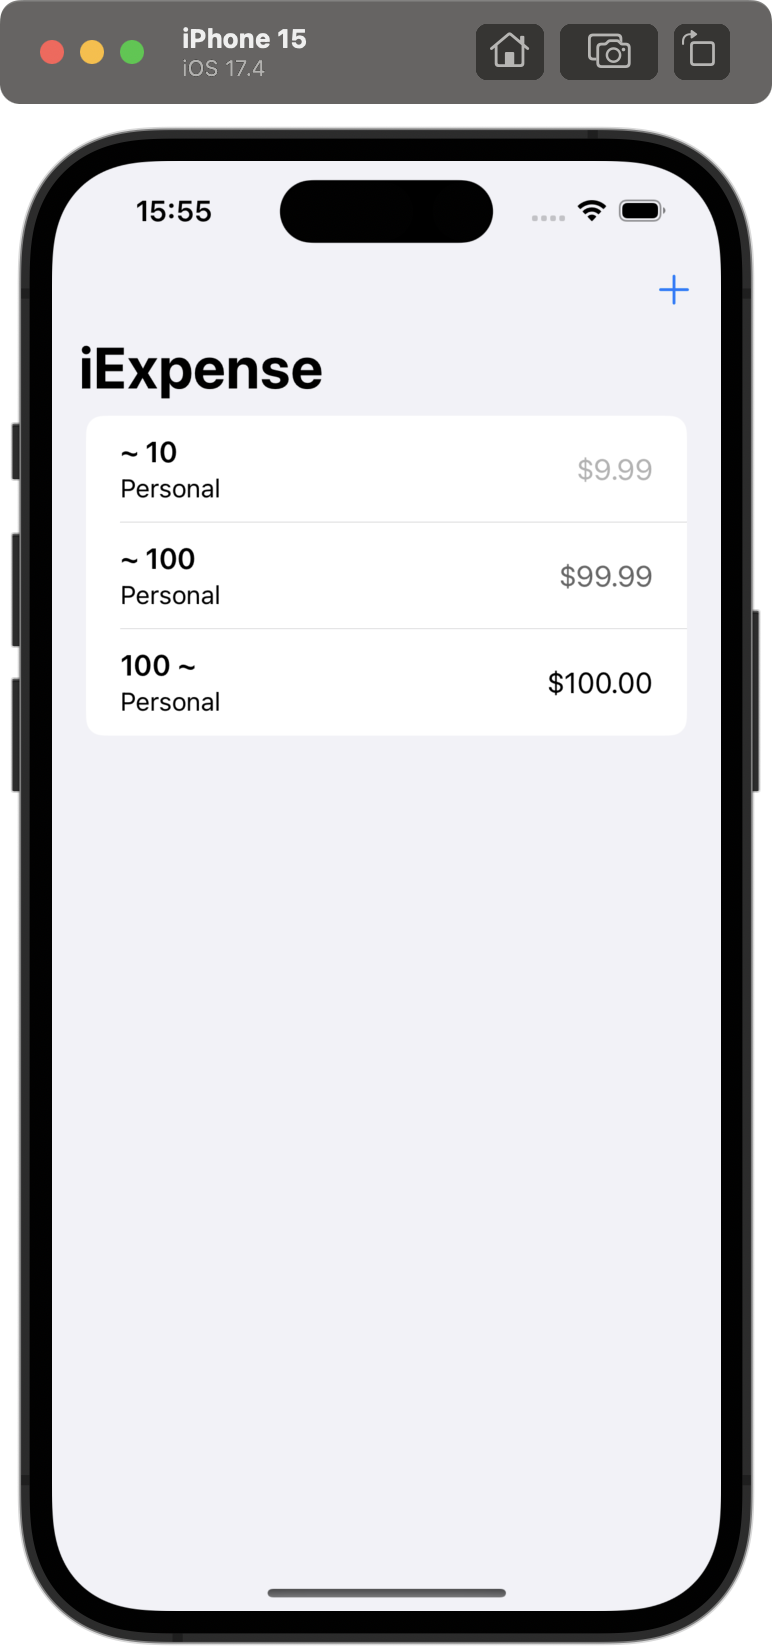
100 days of swiftui: 38https://www.hackingwithswift.com/100/swiftui/38퀴즈 통해서 짚은 점UUID는 이미 Codable을 만족한다.onDelete() modifier는 ForEach에만 적용할 수 있다.U
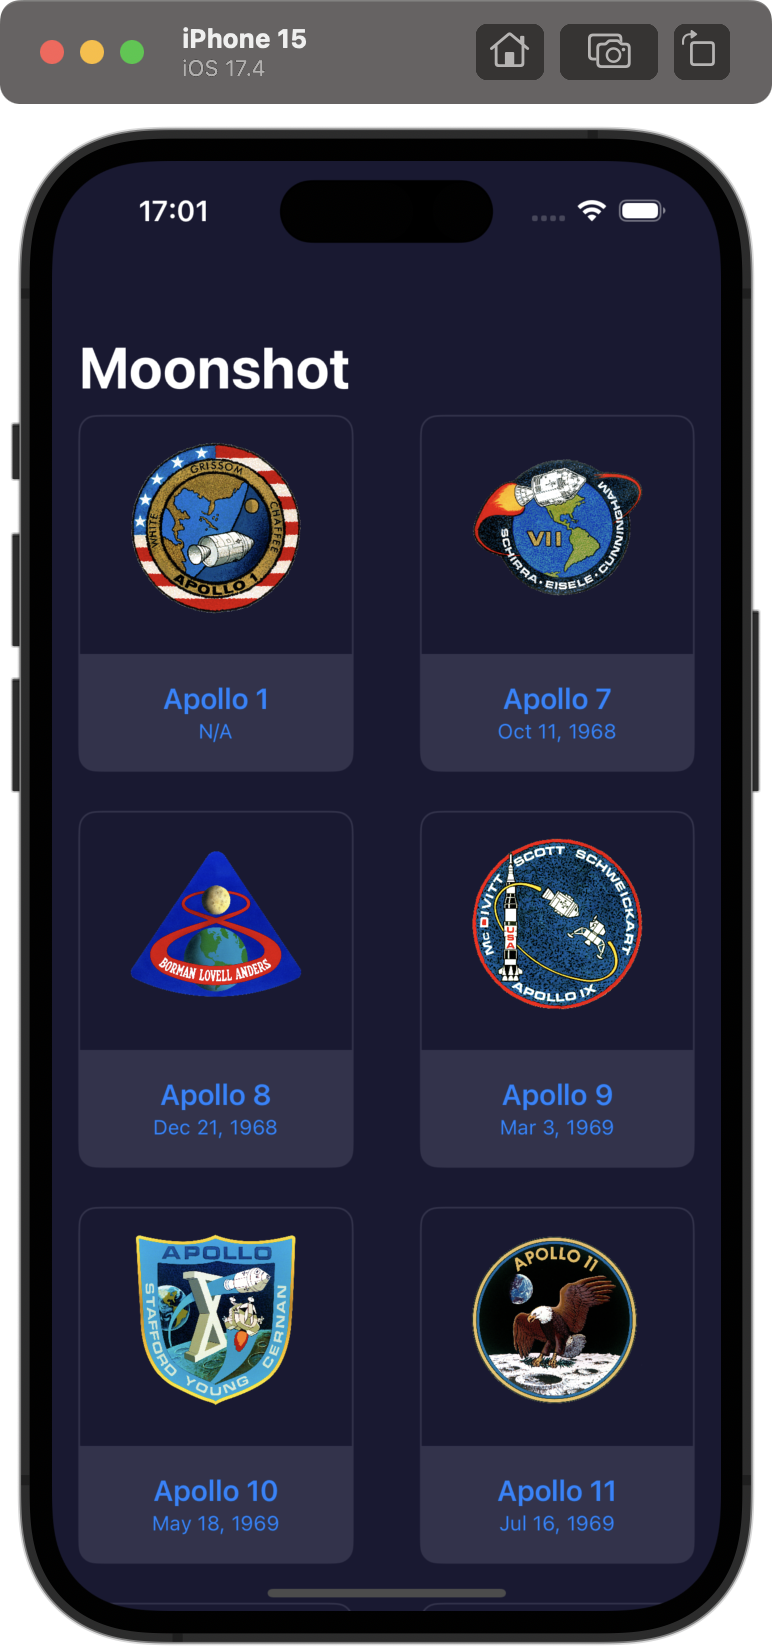
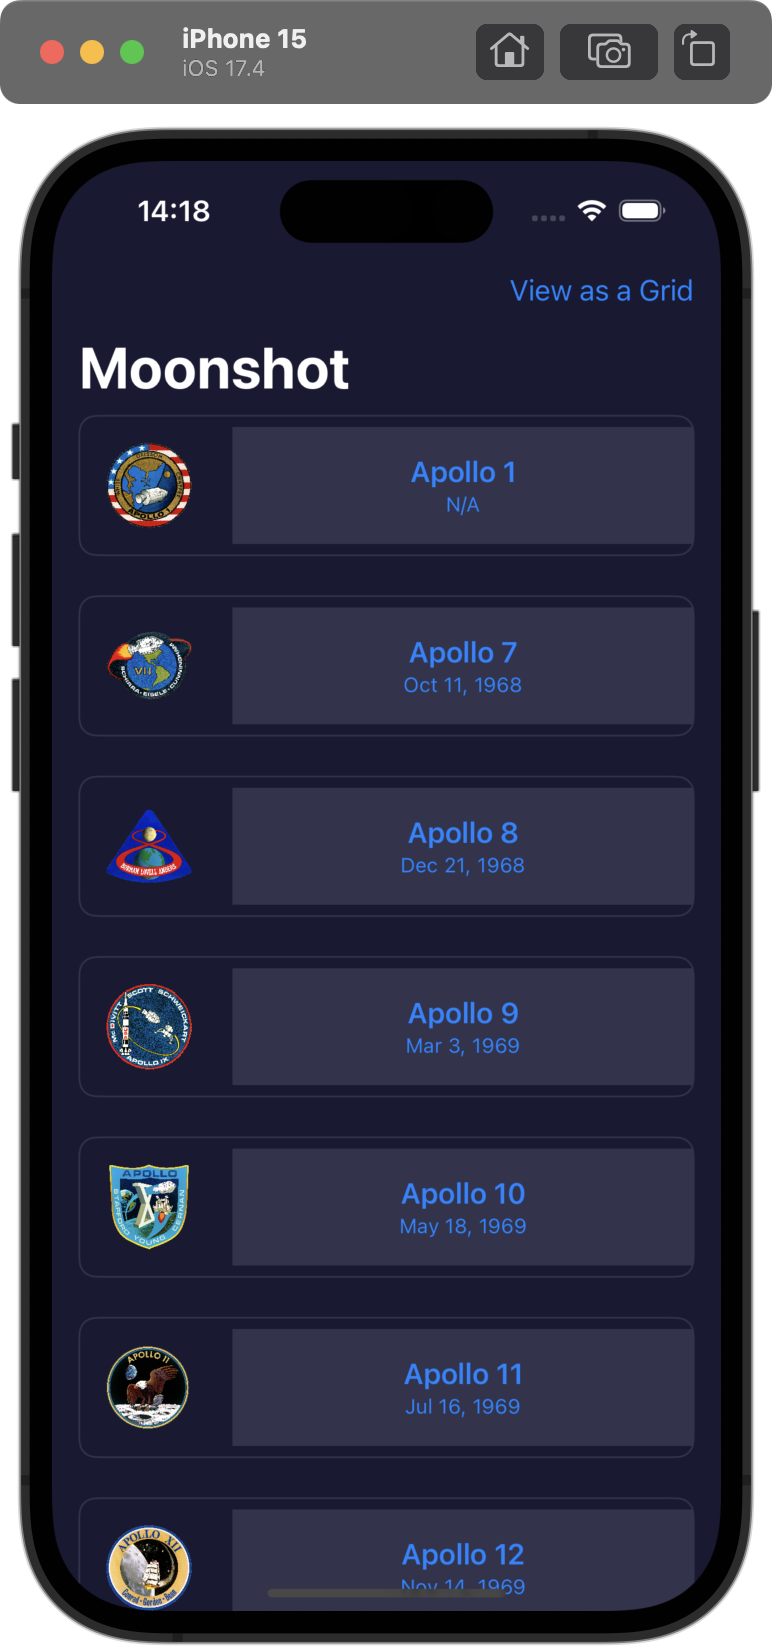
47.39: Moonshot, part 1
100 days of challenge: https://www.hackingwithswift.com/100/swiftui/39아기다리 고기다리던 챌린지를 하러 왔다. 요즘 일이 많아서 챌린지를 매일 하지 못했다.위 사진들을 resizable 특성과 동일한 fr
48.40: Moonshot, part 2
100 days of challenge: 40이번 강의에서 json 파일을 불러와서 decode하고, 이 정보를 화면에 나타내었다. 처음 배우기도 했고 금방 익힐 수 없어 코드를 따라 작성한 것이 많다. 그 중 기억하고 싶은 것을 기록한다.이번 프로젝트에서는 astro
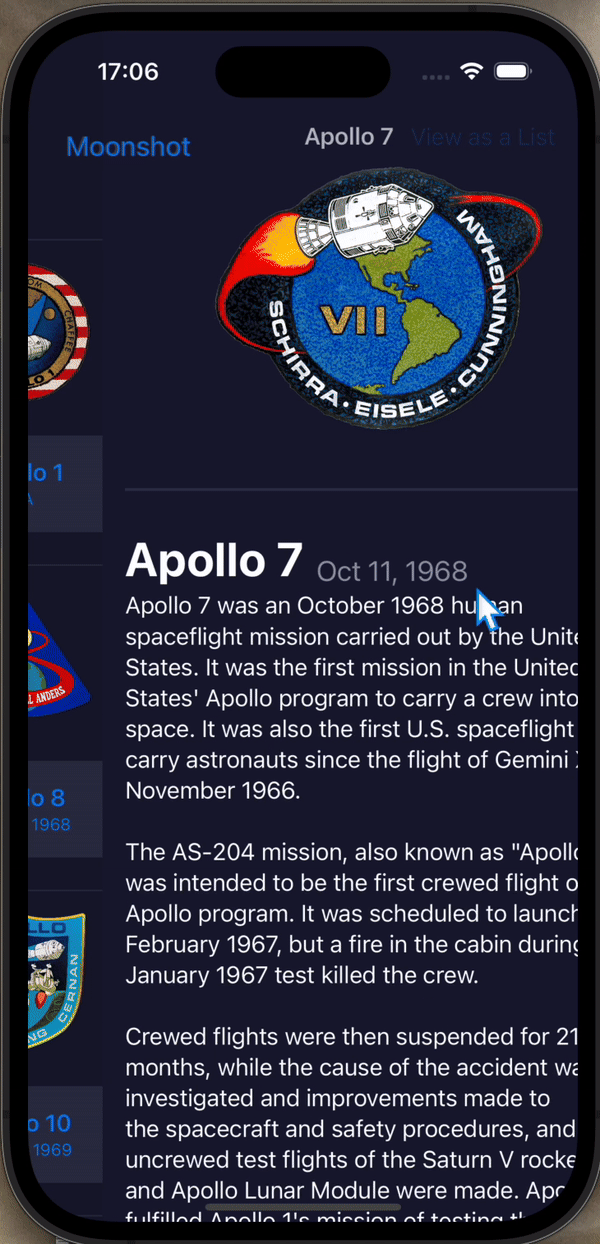
49.41: Moonshot, part 3
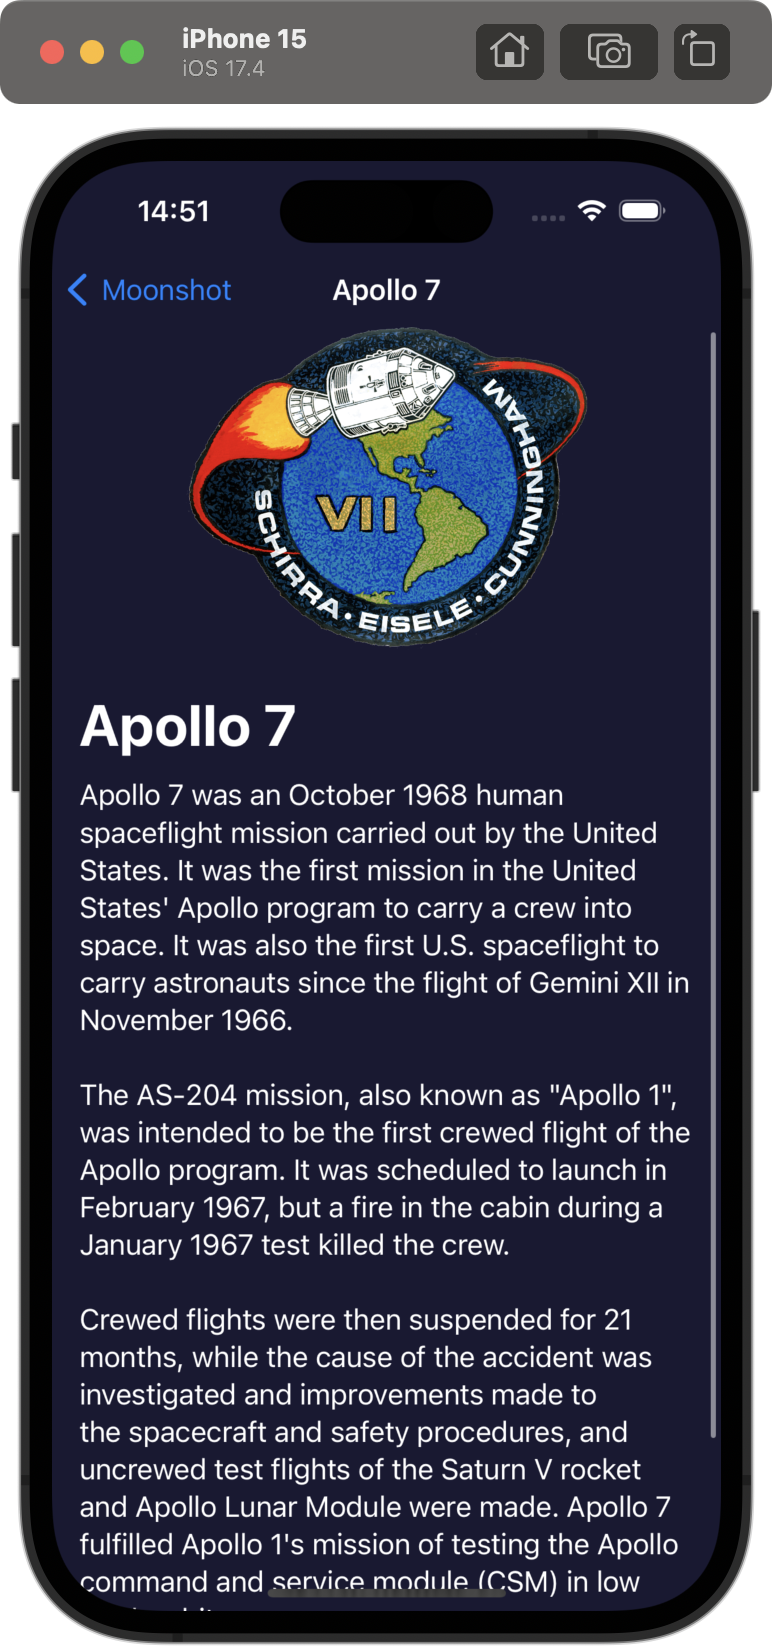
100 days of swiftui: 41메인 화면에서 각 미션을 클릭하면 볼 수 있는 MissionView를 만들었다. 이 중 짚을 점은, NavigationTitle을 뒤로 가기 버튼과 동일한 선상에 작은 글씨로 넣을 수 있다.그리고 미리보기(Preview)할 때
50.42: Moonshot, part 4
100 days of swiftui: 42Add the launch date to MissionView, below the mission badge. You might choose to format this differently given that more space
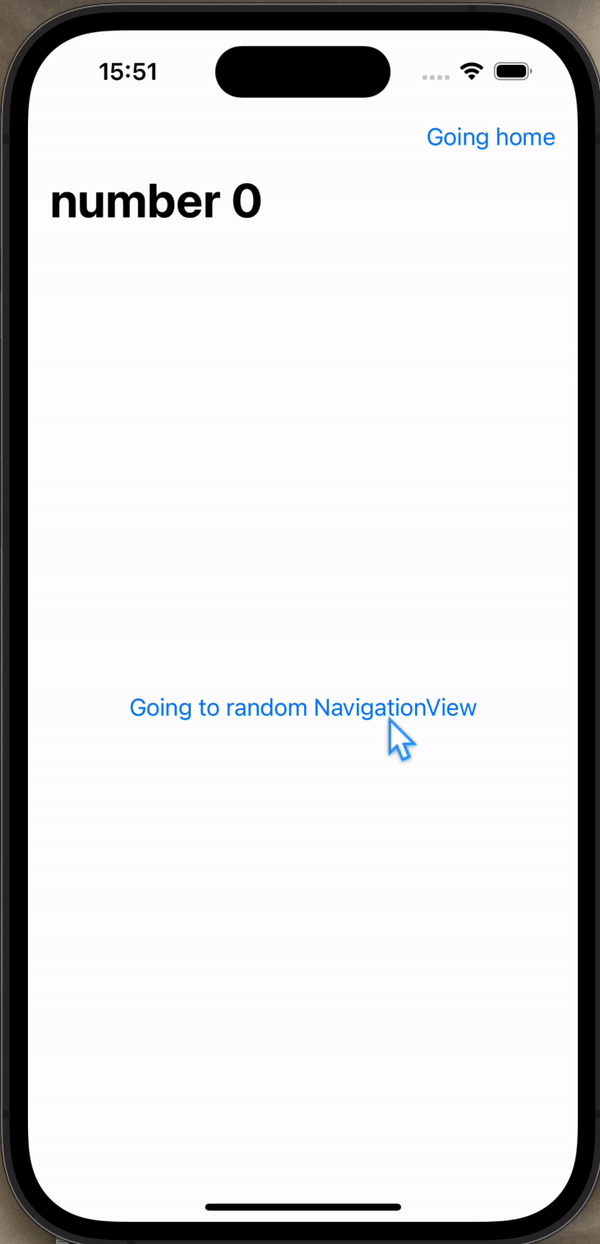
51.43: NavigationLink, part 1
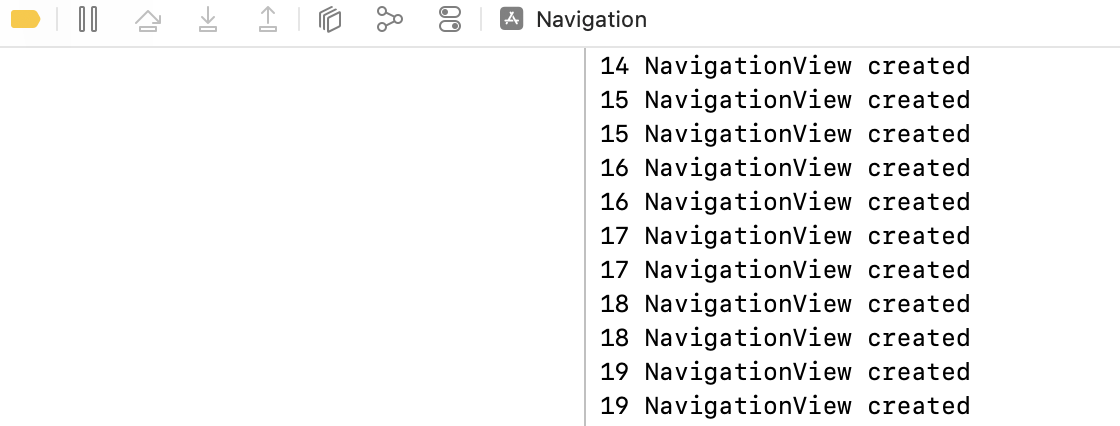
100 days of swiftui: 43위와 같이 생성될 때 문장을 출력하는 NavigationView를 만들어서 List 안에 NavigationLink를 나타냈다. build를 통해 아래의 터미널 창을 확인할 수 있다.위를 보면 알 수 있다싶이, View에 들어가
52.44: Navigation, part 2
100 days of swiftui: 44Navigation의 path를 임의로 설정해서 화면과 화면을 이동시킬 수 있다.깃헙 링크NavigationPath를 사용해 single path에 다른 데이터 타입의 path를 함께 이용할 수 있다.아래 예시는 Int와 Str
53.45: Navigation, part 3
100 days of swiftui: 45 Navigationbar 스타일 설정하기 Navigationbar의 배경, 제목 스타일, 보여줌 여부 등을 다양하게 설정할 수 있다. 예로 .navigationTitle은 dark 모드에서 white, light 모드에서
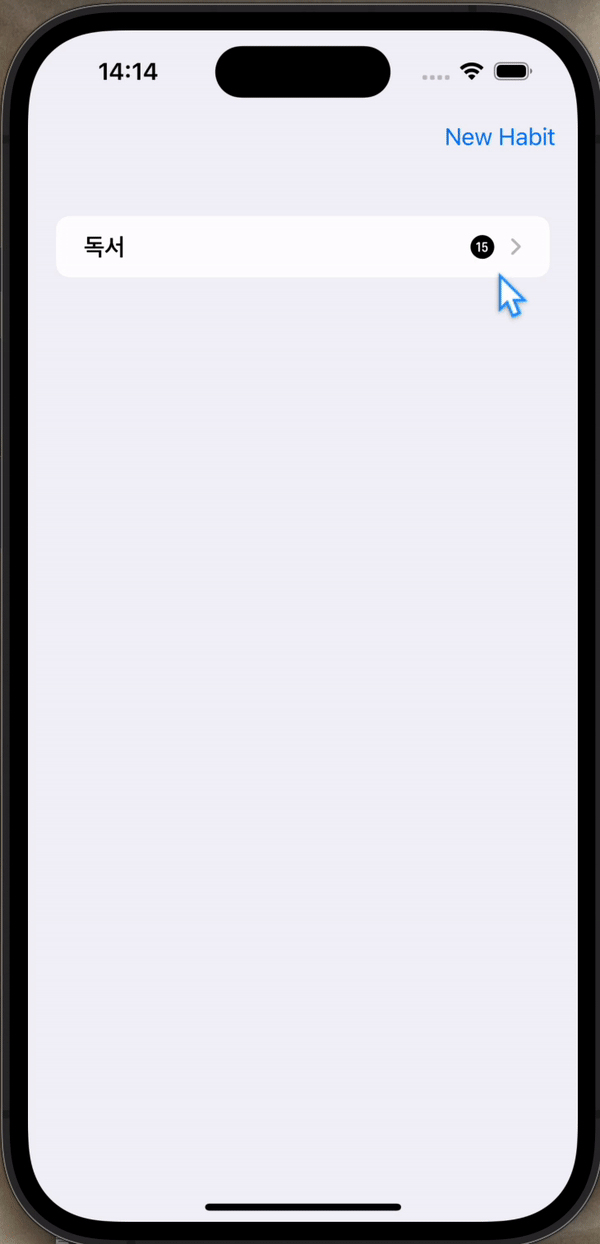
54.47: Milestone of Projects 7-9
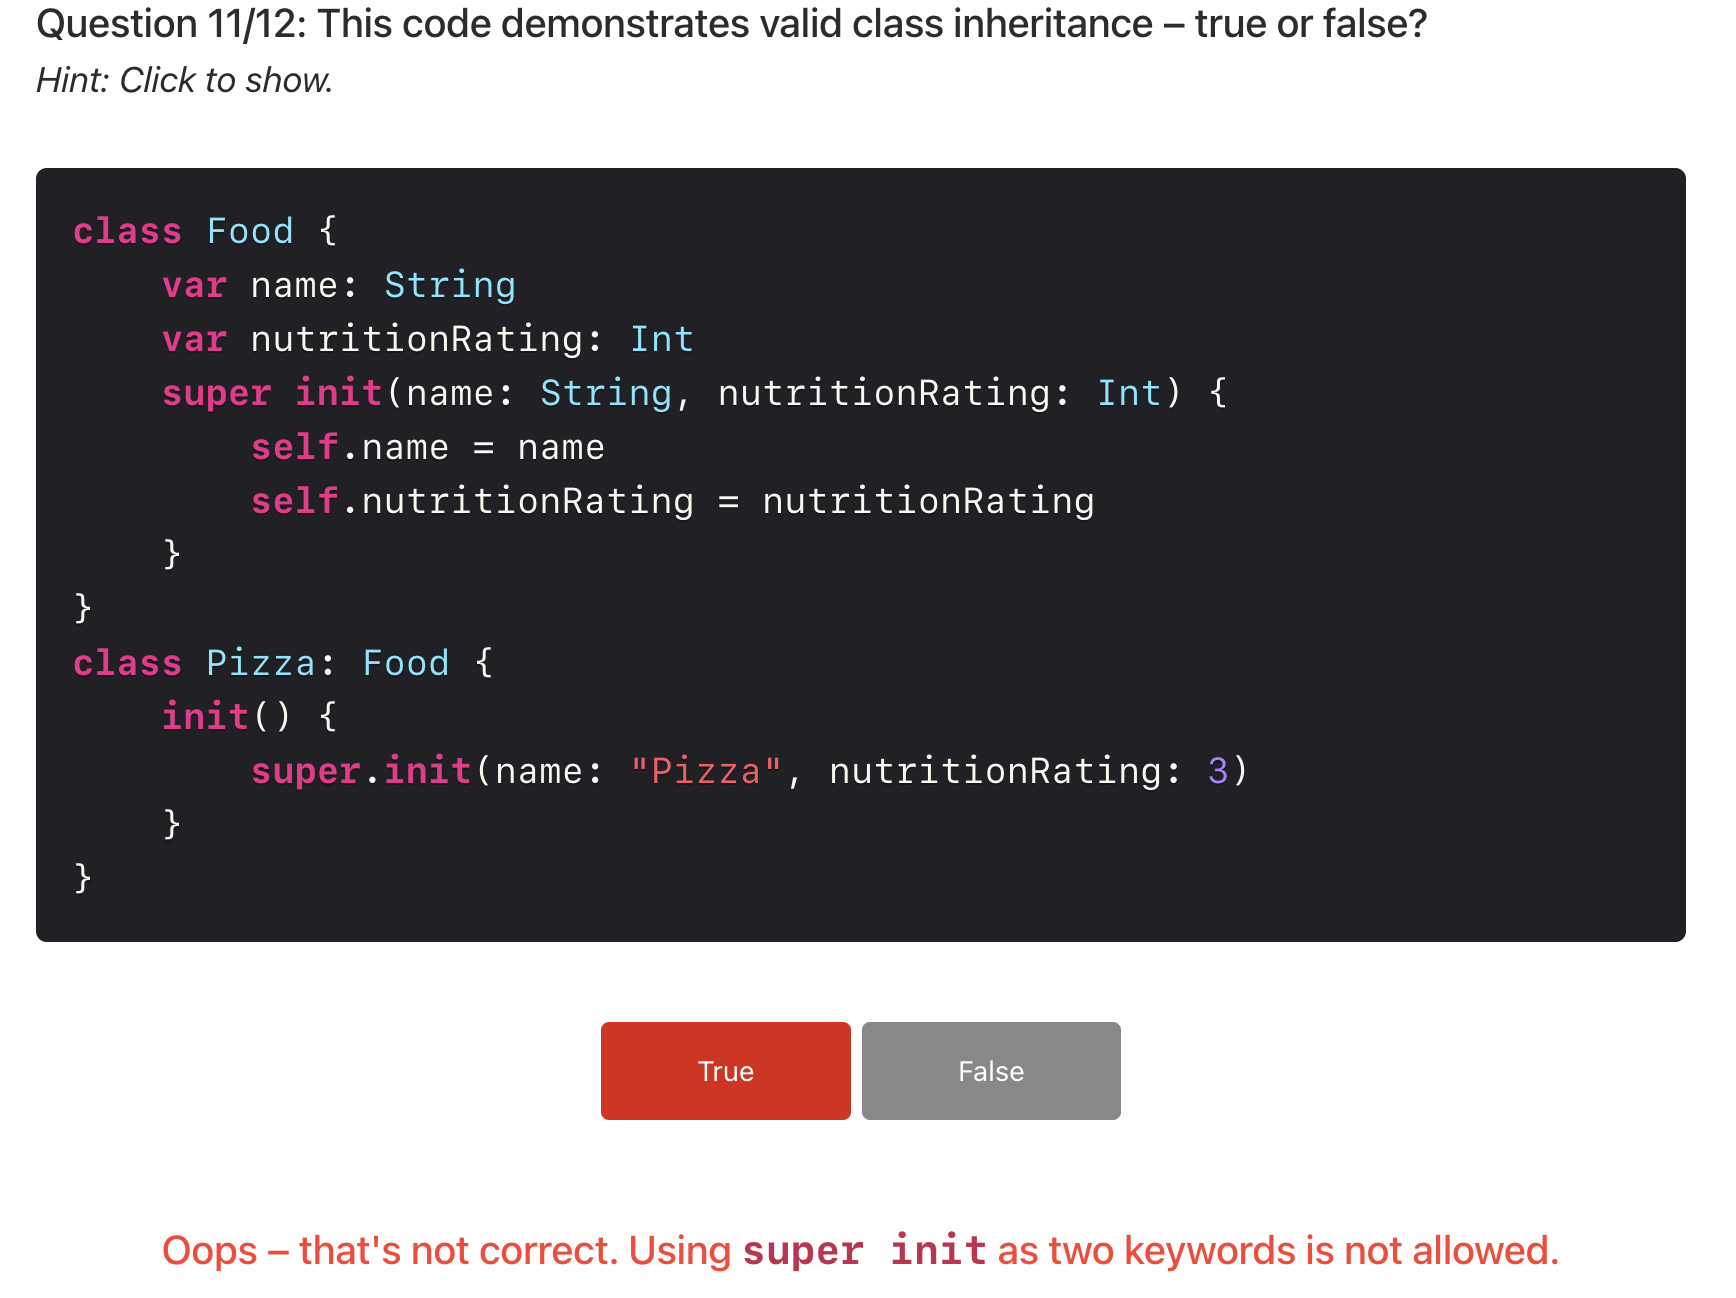
100 days of swifui: 47 Challenge This time your goal is to build a habit-tracking app, for folks who want to keep track of how much they do certain t
55.46: Navigation, part 4
100 days of swiftui: 46 challenge Change project 7 (iExpense) so that it uses NavigationLink for adding new expenses rather than a sheet. (Tip: The d
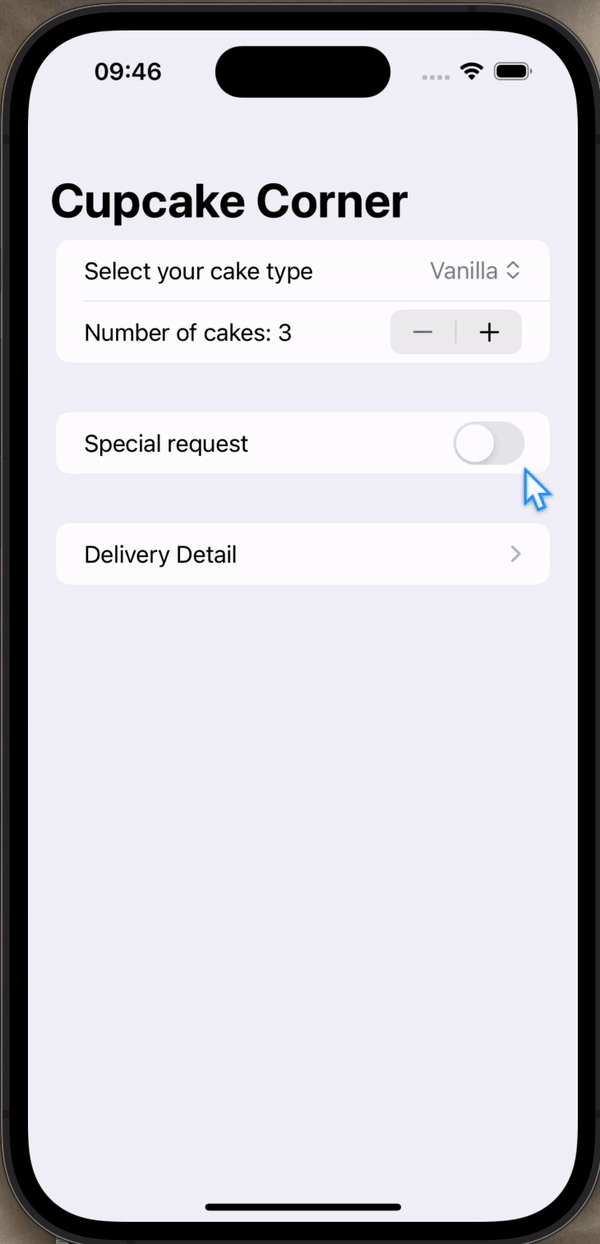
56.49: CupcakeCorner, part 1
100 days of swiftui: 49swiftui에서 데이터를 불러오려면 먼저 불러올 데이터의 형태를 틀로 만들어야 한다. 예로 노래를 불러오기 위해서 노래의 정보를 Result, 그리고 그의 배열 형태인 Response를 만들어줬다.깃헙 링크url에서 데이터를
57.50: CupcakeCorner, part 2

100 days of swiftui: 50
58.51: CupcakeCorner, part 3
100 days of swiftui: 51CupcakeCorner 앱의 경우 한 주문에서 주문시키는 상품과 주소를 입력한다. 그래서 하나의 @Observable인 Order 인스턴스를 활용한다. 이때 OrderView, AddressView에서 하나의 인스턴스를 가지고
59.52: CupcakeCorner, part 4
100 days of swiftui: 52Our address fields are currently considered valid if they contain anything, even if it’s just only whitespace. Improve the vali
60.35: Milestone: Projects 4-6
100 days of swiftui: 35 https://www.hackingwithswift.com/100/swiftui/35 challenge Your goal is to build an “edutainment” app for kids to help them pr
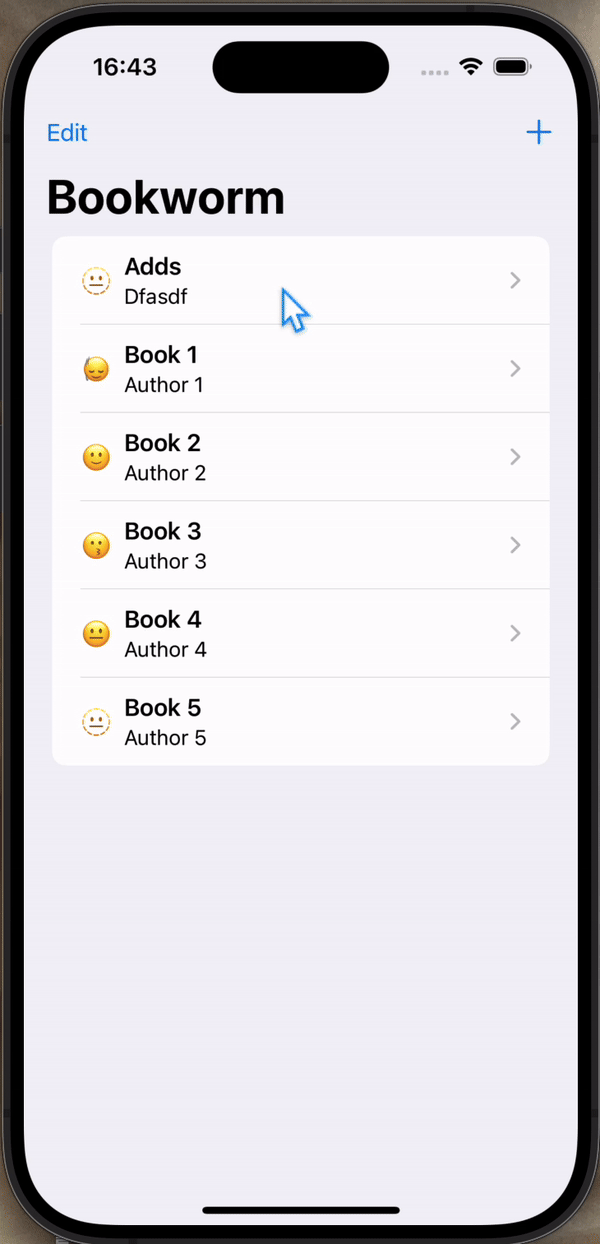
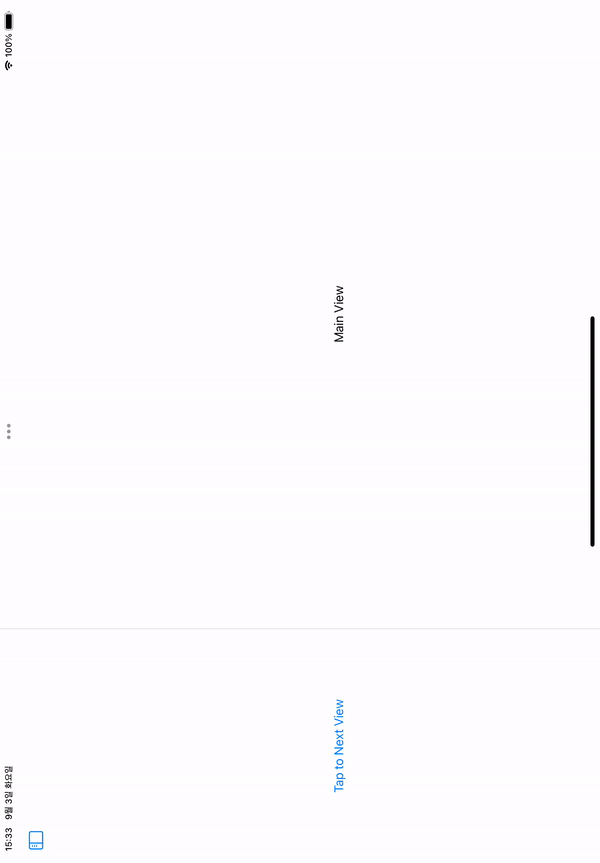
61.53: Bookworm, part 1
100 days of swiftui: 53bind의 뜻은 묶다라는 의미로, swift에서는 데이터를 엮는 것이라고 표현할 수 있다. 예시로 MainView와 DetailView에서 동일한 데이터를 사용하고, DetailView에서 데이터를 수정한다고 하자. 그러면 Ma
62.54: Bookworm, part 2
100 days of swiftui: 54
63.55: Bookworm, part 3
100 days of swiftui: 55swiftData에 저장된 데이터를 인수로 활용하는 View에서 preview를 설정하기 위해선 정해진 절차가 필요하다. 아래는 예시로 modelContext에 저장된 Book을 인수로 받는 DetailView의 Preview를
64.56: Bookworm, part 4
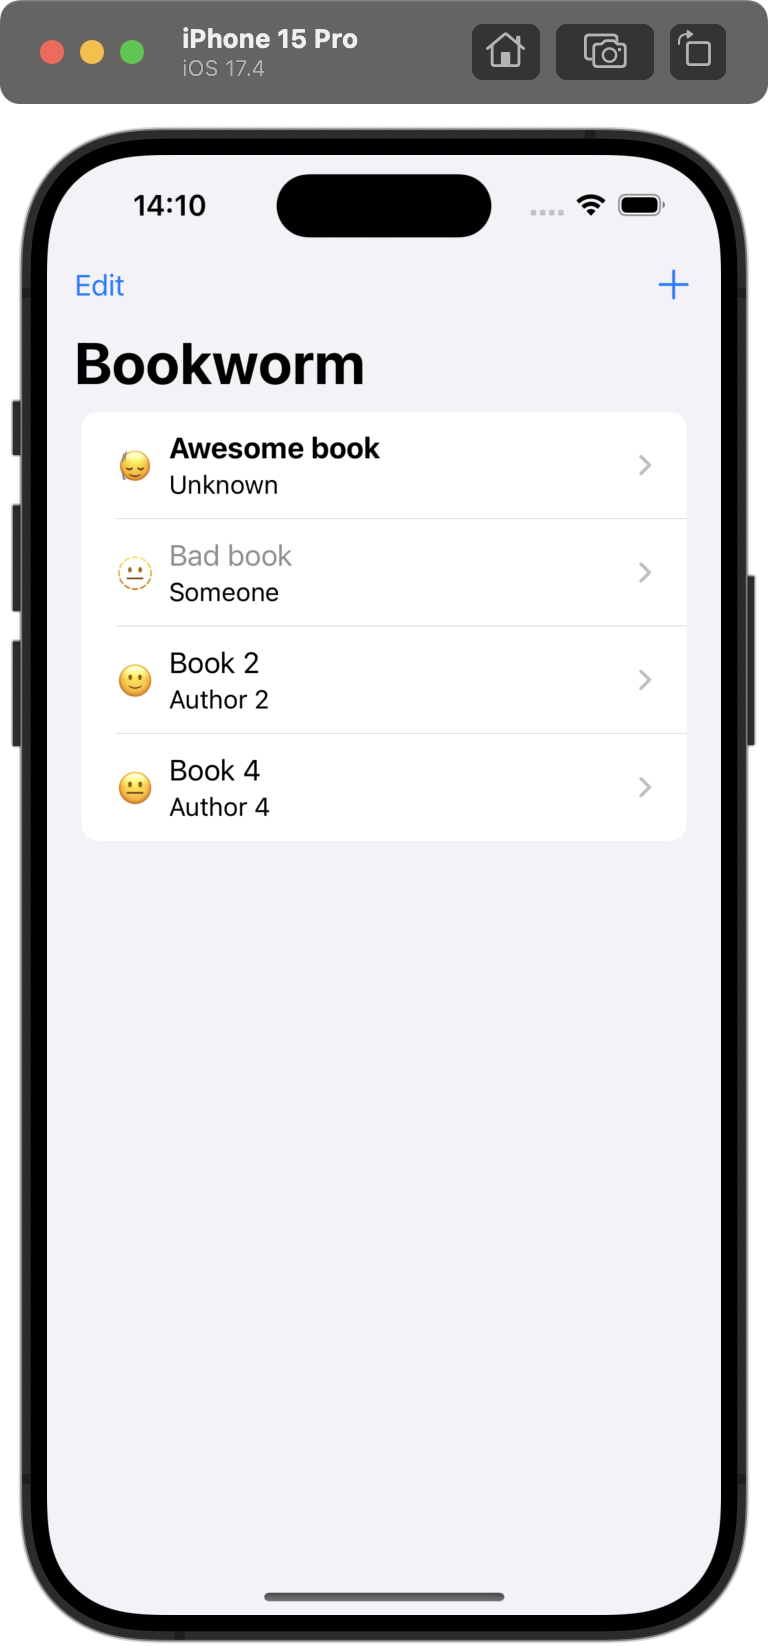
100 days of swiftui: 56Right now it’s possible to select no title, author, or genre for books, which causes a problem for the detail view. Please fix
65.57: SwiftData, part 1
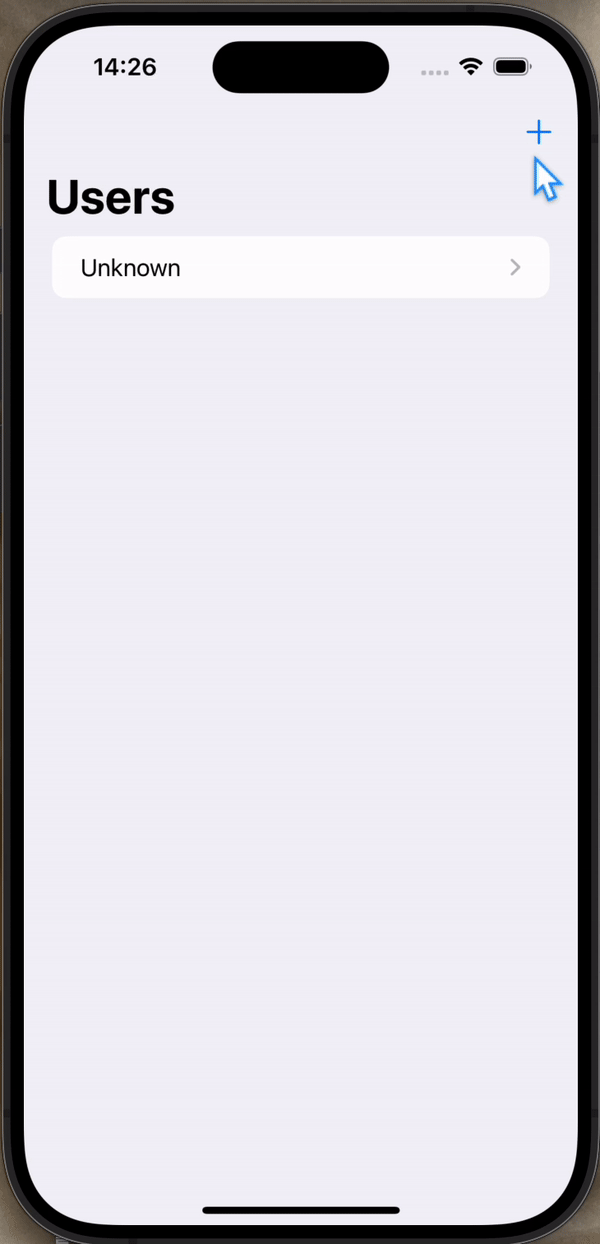
100 days of swiftui: 57User 모델을 만들고, 만들어진 User의 인스턴스를 수정할 수 있는 EditUserView를 만들고, ContentView에서 새로운 user를 생성하고 EditUserView로 이동할 수 있도록 설정했다.깃헙 링크예:nam
66.58: SwiftData, part 2
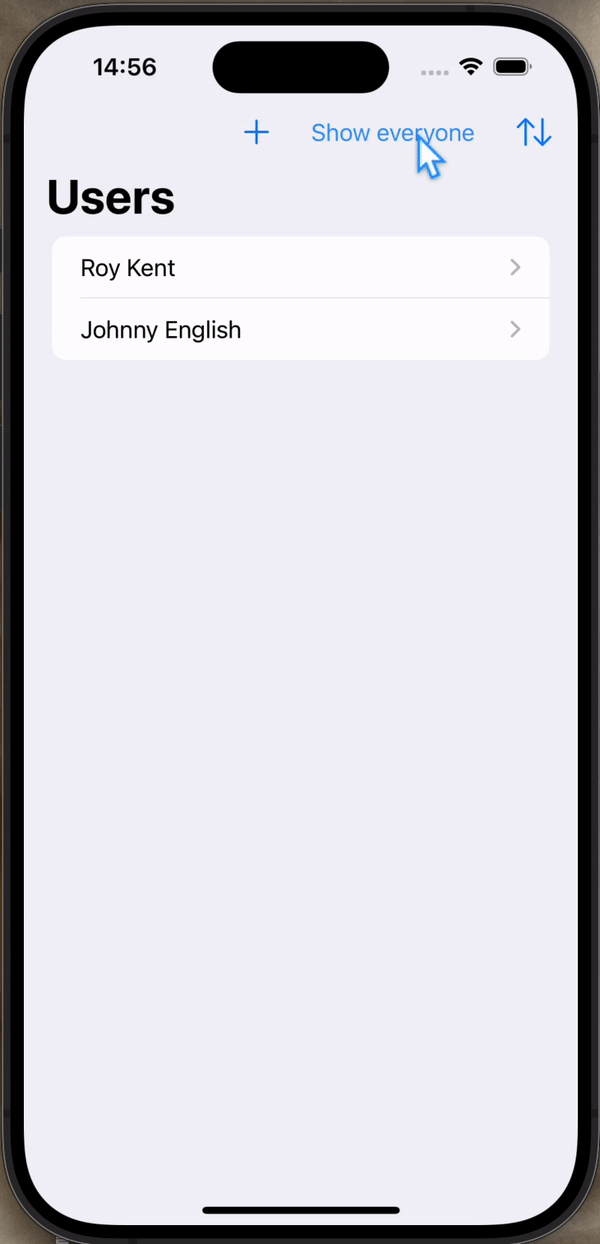
100 days of swiftui: 58User를 filter하여 특정 사용자만 보이게 하거나, sort하여 순서를 조정하여 보여줄 수도 있다.먼저 UsersView를 만들어 List에서 user들을 나열한다. 그리고 users는 initializer를 통해 정의한다
67.59: SwiftData, part 3
100 days of swiftui: 59All three of these challenges relate to you upgrade project 7, iExpense:Start by upgrading it to use SwiftData.Add a customizab
68.60: Milestone of project 10 - 12

100 days of swiftui: Milestone: Projects 10-12It’s time for you to build an app from scratch, and it’s a particularly expansive challenge today: your
69.61: Time for SwiftData
Time for SwiftDataYes, your job today is to expand your app so that it uses SwiftData. Your boss just emailed you to say the app is great, but once th
70.62: Instafilter, part 1
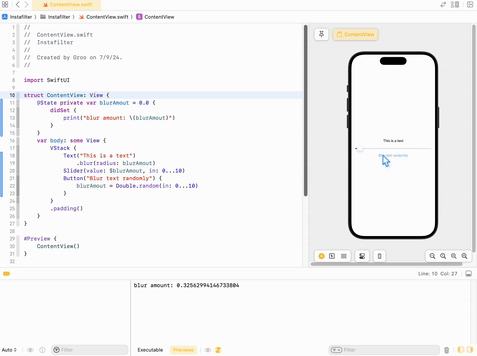
Project 13, part 1아래처럼 @State인 변수 blurAmout 값을 slider로 조절하고 이를 텍스트에 적용하는 예시가 있다.문제는 blurAmount가 변할 때마다 print하도록 설정했으나, 버튼과 달리 slider에서 변경할 때는 실행되지 않는다
71.63: Instafilter, part 2
Project 13, part 2Core Image는 이미지 조작을 위한 Apple의 프레임워크이다. 선명하게 하기, 흐림 효과, 비네팅, 픽셀화 등을 적용하여 기존 이미지를 변경해준다.그러나 Core Image는 SwiftUI에도, UIKit에도 잘 통합되지 않는다고
72.64: Instafilter, part 2
Project 13, part 3PhotosPicker를 이용해서 사용자로부터 사진을 입력받을 수 있다.혹은 다음처럼 배열로 설정해서 복수의 이미지를 입력받을 수도 있다.아래 코드처럼 최대 선택 개수, 허용 사진 형태, label 등을 설정할 수 있다.깃헙 링크Shar
73.65: Instafilter, part 4
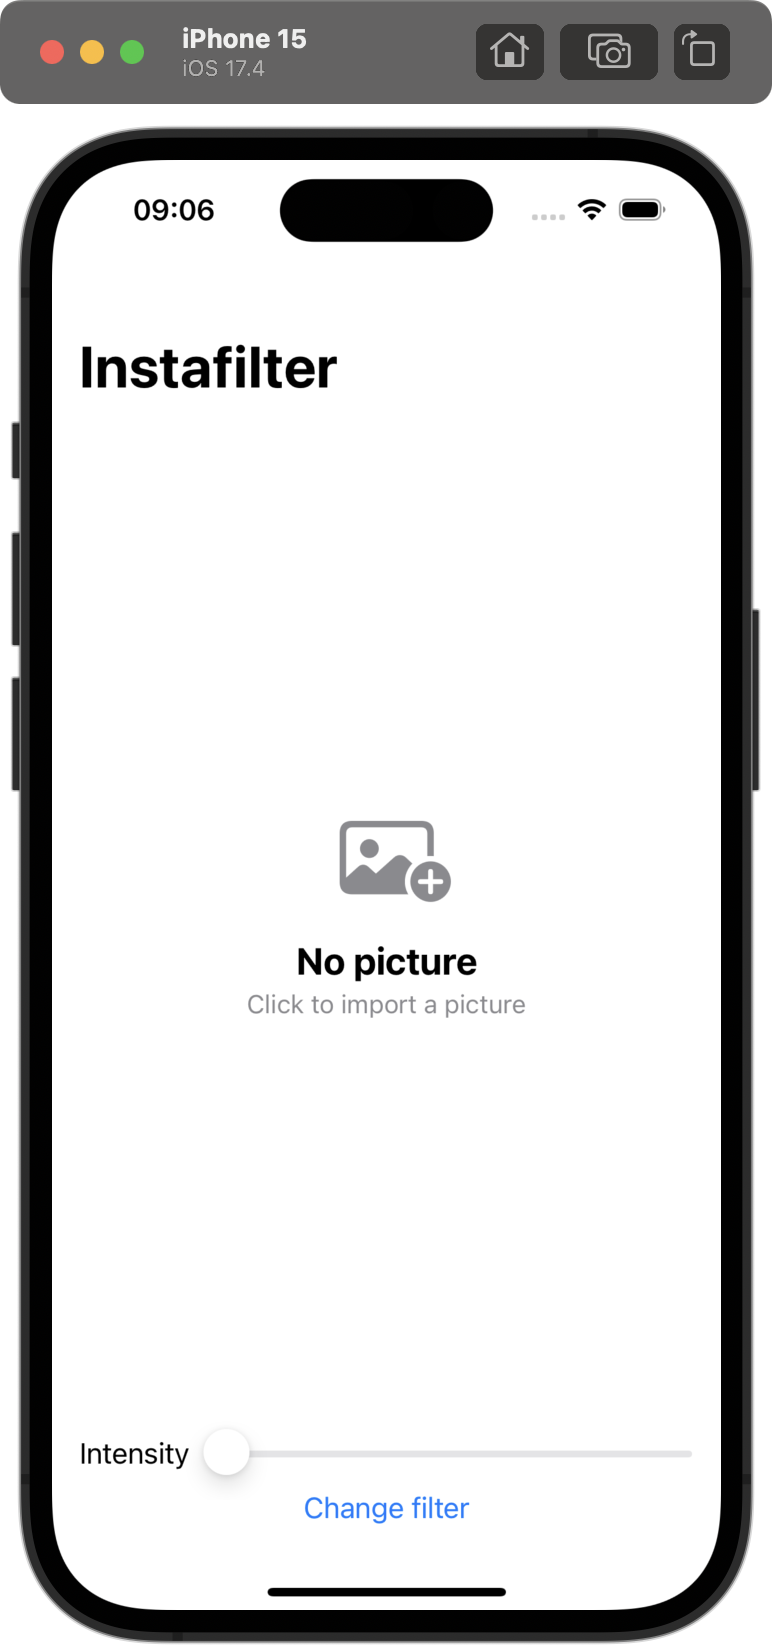
Project 13, part 4기본 UI의 틀을 미리 잡아두었다.깃헙 링크
74.66: Instafilter, part 5
Project 13, part 5필터를 ConfirmationDialog에서 선택하고, 선택한 필터로 설정하고, 필터의 값을 사진에 적용시켰다.깃헙 링크여러 필터를 적용할 때 적용해야 하는 값이 다른데(intensity, scale, radius 등), 이를 input
75.67: Instafilter, part 7
Project 13, part 6Try making the Slider and Change Filter buttons disabled if there is no image selected.Experiment with having more than one slider,
76.68: BucketList, part 1
Project 14, part 1 Int, String 등의 배열은 .sorted()를 통해 자동으로 정렬할 수 있다. operator overloading write and read data directly
77.69: BucketList, part 2

Project 14, part 2MapKit으로 지도를 나타낼 수 있다. 기본적으로는 아래 코드를 이용해 지도를 나타내고 지도 위의 핀을 나타내거나 위치를 설정하는 등의 방법을 아래에 차차 설명한다.mapStyle: 기본 / .hybrid / .imagery💡 또 i
78.70: BucketList, part 3

Project 14, part 3먼저 시작 위치를 지정하여 Map을 화면에 나타낸다. 그리고 탭을 인식하기 위해 .onTapGesture를 설정하고 클릭된 position을 출력한다.사진에서 확인할 수 있듯이 Map이 아닌 스크린의 좌표가 출력된다.지도 상의 위치를 읽
79.71: BucketList, part 4
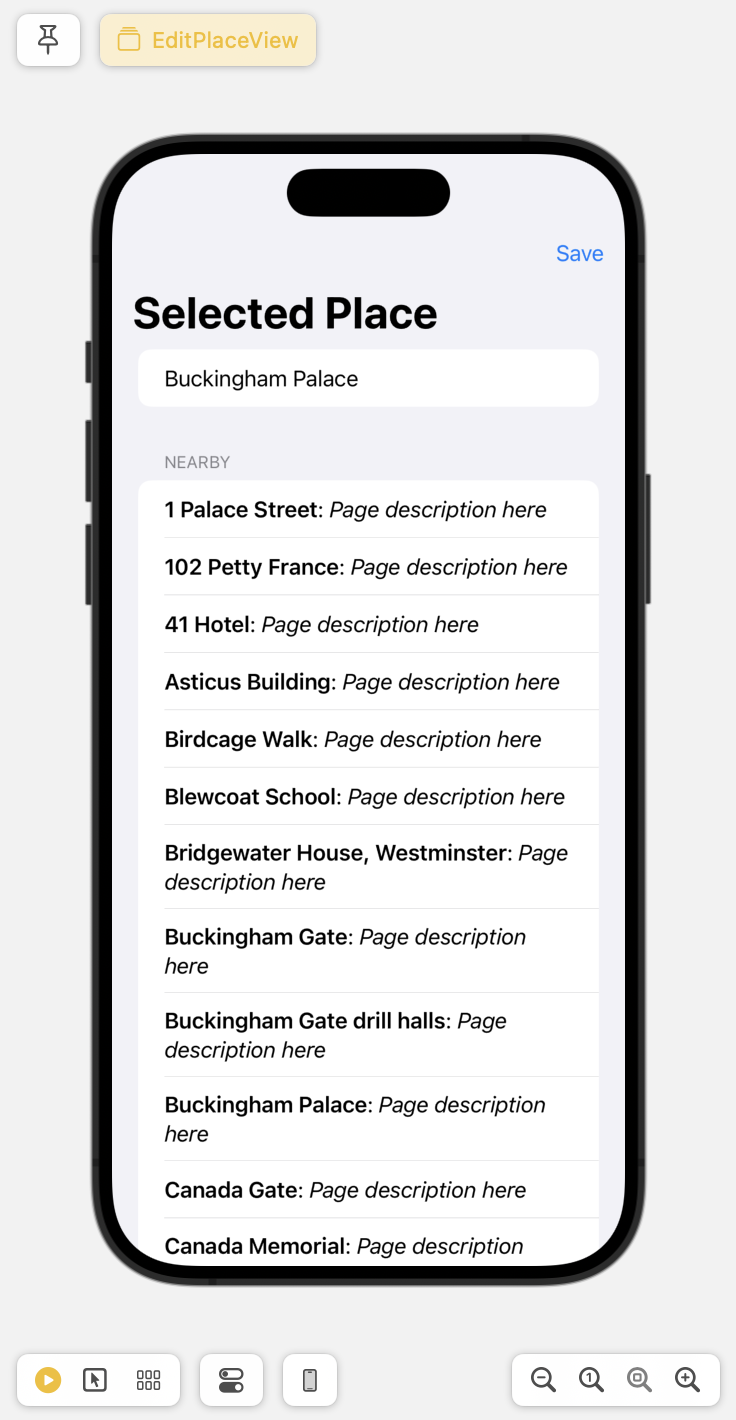
Project 14, part 4https://gist.github.com/twostraws/aa18008c3dd3997e133aa92bde2ad8c7 이 페이지의 url을 이용해서 wikipedia의 정보를 불러와 선택한 장소 근처의 결과를 화면에 나타냈다.
80.72: BucketList, part 5

Project 14, part 5MVVM은 Model View View-Model의 약자로써 간단히 레이아웃과 로직을 분리하는 것을 의미한다고 이해했다. 이번 강의에서는 ContentView.swift의 로직을 ContentView-ViewModel.swift로 옮기는
81.73: BucketList, part 6
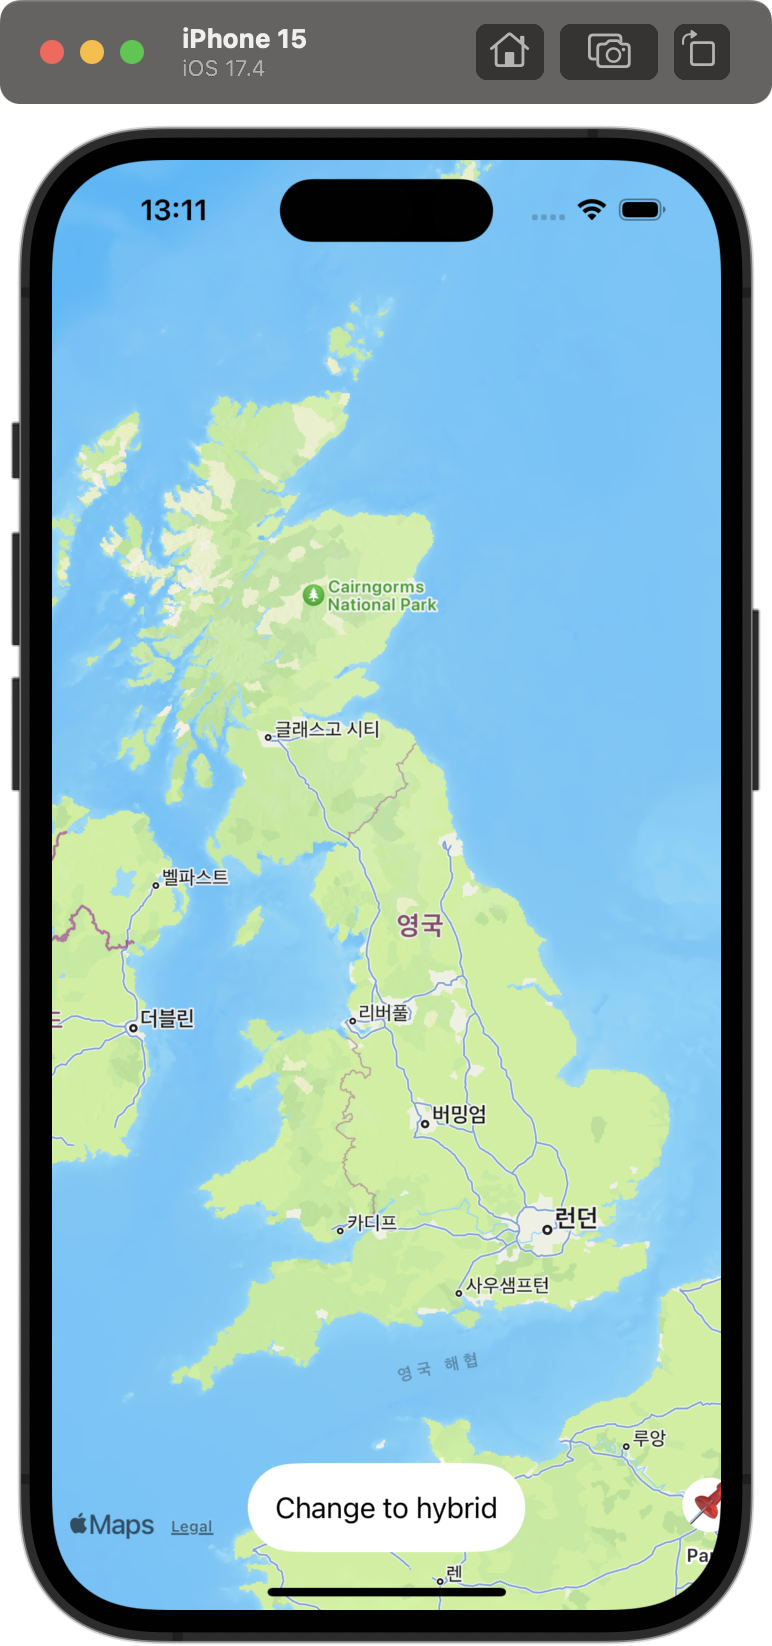
Project 14, part 6Allow the user to switch map modes, between the standard mode and hybrid.Our app silently fails when errors occur during biometric a
82.74: Accessibility, part 1
Project 15, part 1 VoiceOver를 위한 Image의 label 설정하기 먼저 깃헙 링크 깃헙 링크 깃헙 링크 [깃헙 링크](https://github.com/treesofgroo/SwiftUI-with-HWS/comm
83.75: Accessibility, part 2
Project 15, part 2 Voice input 설정하기 Voice control를 이용할 때 사용자가 더 편하게 다른 옵션으로도 input할 수 있도록 설정할 수 있다. 예시로 "Tap to print message" 버튼이지만, "print", "prin
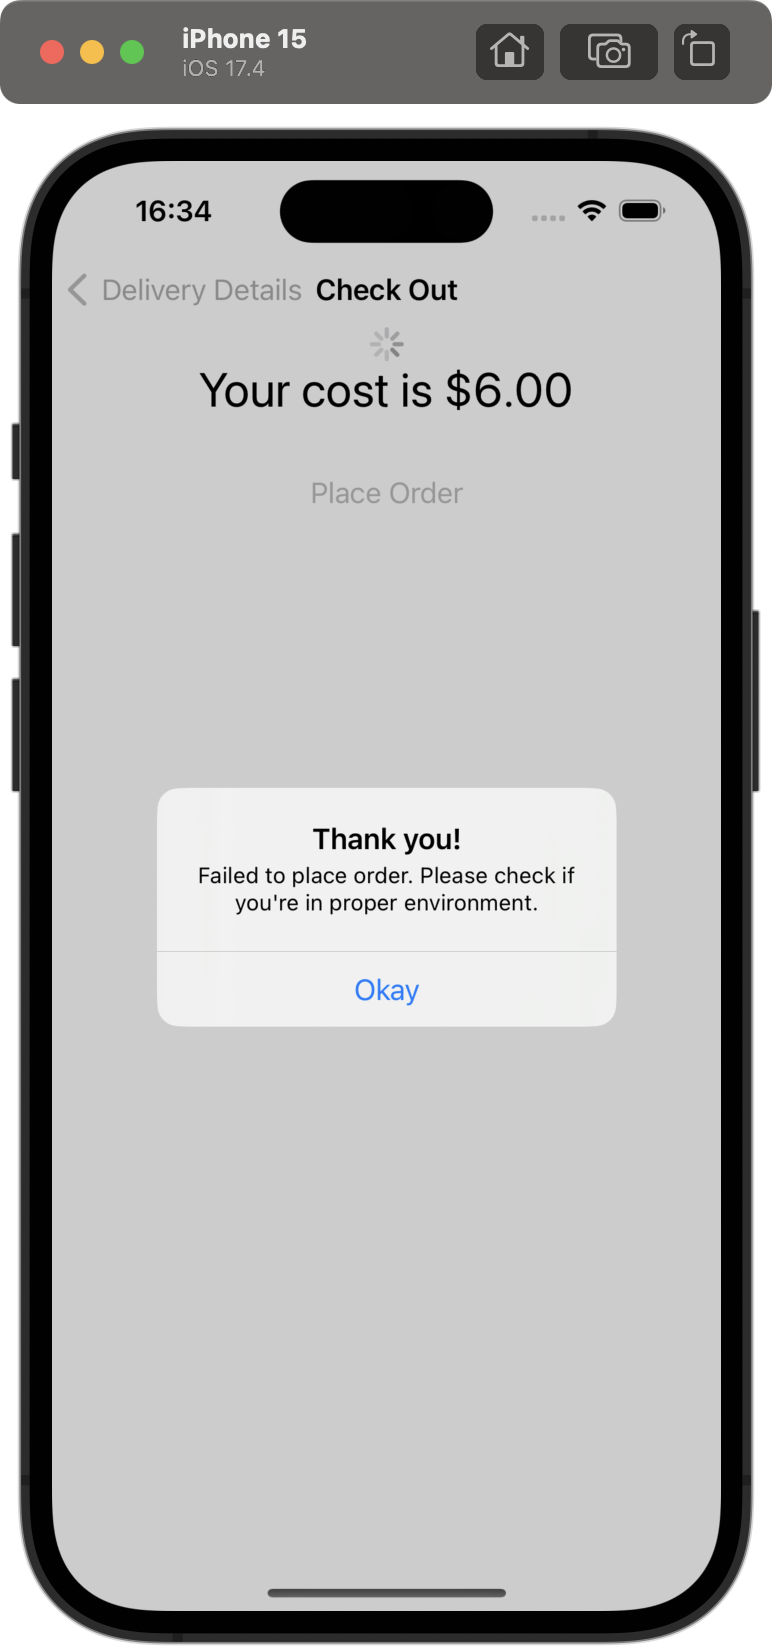
84.76: Accessibility, part 3
Project 15, part 3The check out view in Cupcake Corner uses an image and loading spinner that don’t add anything to the UI, so find a way to make the
85.77: Milestone of Projects 13-15
Milestone: Projects 13-15 challenge Use PhotosPicker to let users import a photo from their photo library. Detect when a new photo is imported, and
86.78: Time for MapKit
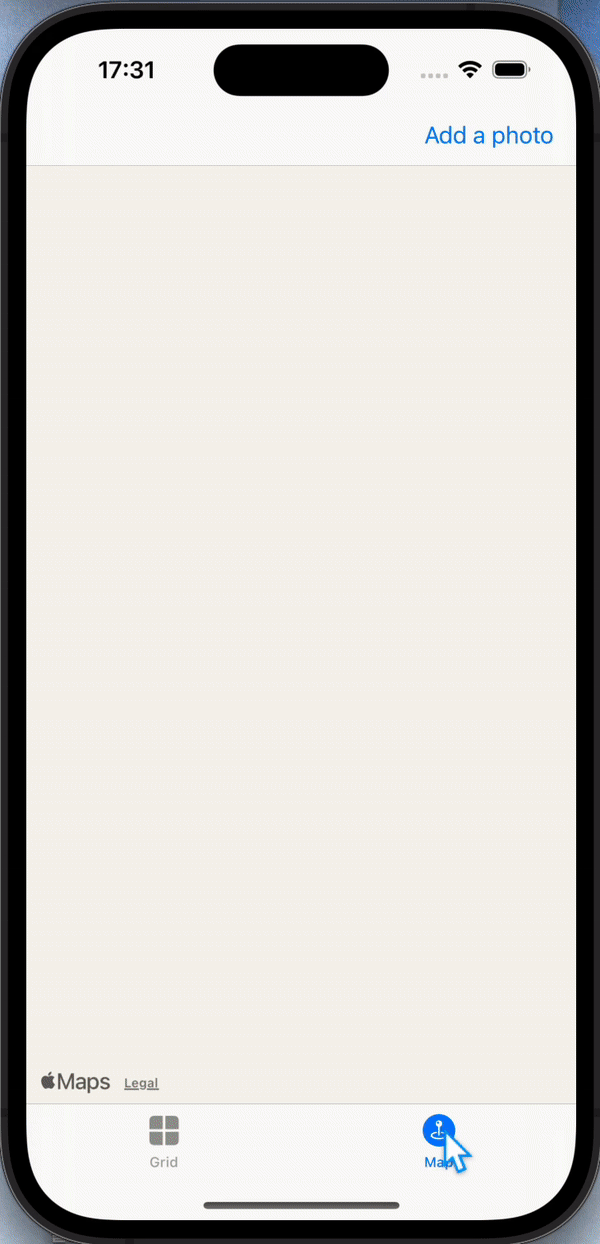
Time for MapKitBut your boss has come in and demanded a new feature: when you’re viewing a picture that was imported, you should show a map with a pin
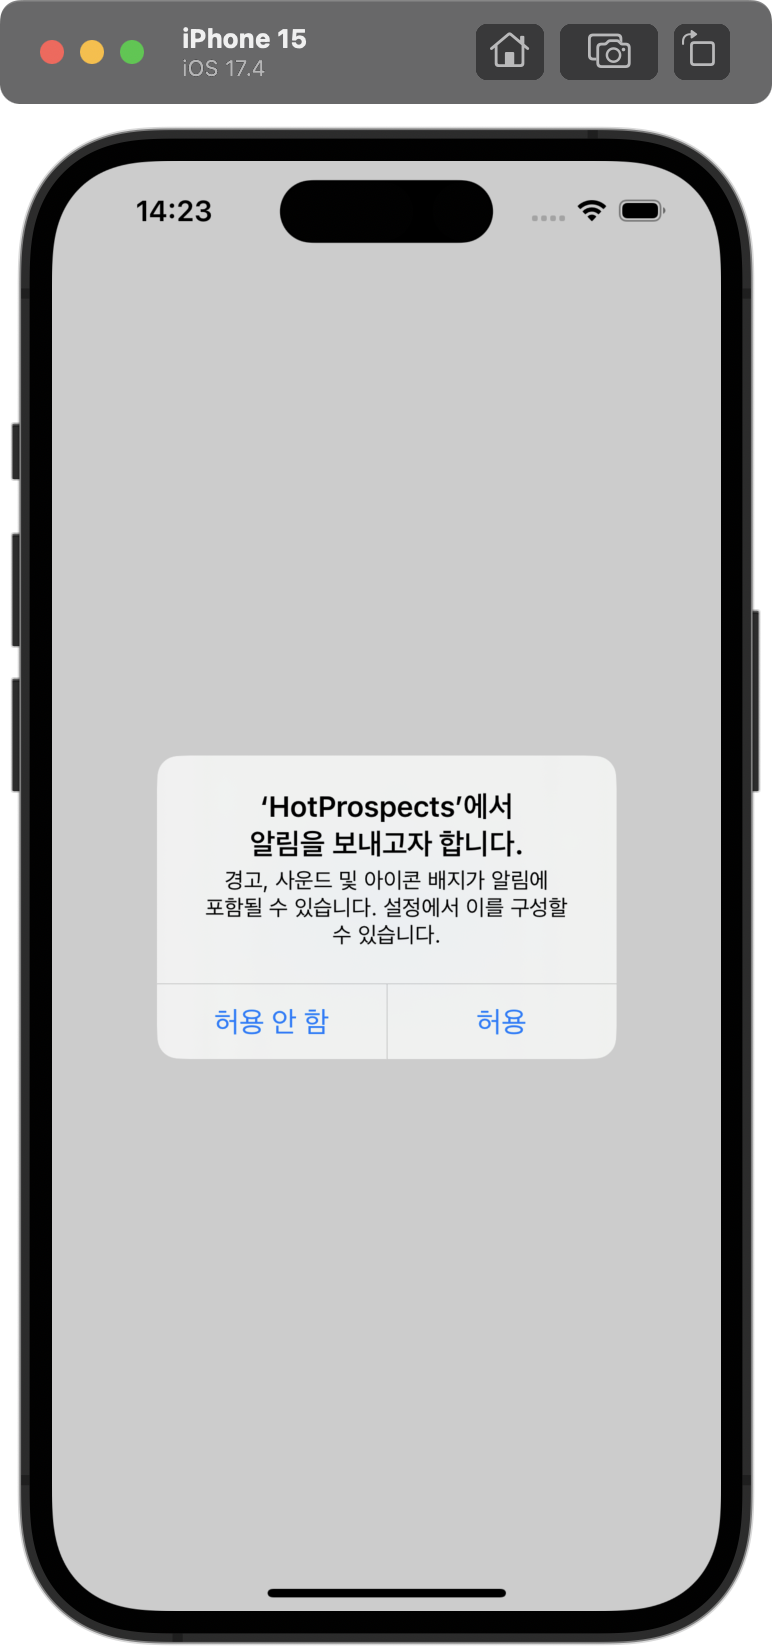
87.79: HotProspects, part 1
Project 16, part 1List에 selection을 설정하고 요소를 클릭하면 선택할 수 있다. 다중 선택은 Set<String>?으로 설정할 수 있다.깃헙 링크💡 다만, 한 번의 탭으로는 list에서 한 요소만 클릭되기 때문에 두 손가락으로 swipe
88.80: HotProspects, part 2
Project 16, part 2swift에는 성공한 것은 string으로, 실패하면 error로 캡슐화해서 전달되는 타입인 Result가 있다. 먼저 url로부터 정보를 불러오는 함수 fetchReadings()가 있다.이를 Task 안으로 수정하여 Result로 반
89.81: HotProspects, part 3
Project 16, part 3 swipeActions List의 row를 좌, 우로 스와이프했을 때 특정 행동을 할 수 있도록 설정할 수 있다. 깃헙 링크
90.82: HotProspects, part 4
Project 16, part 4TabView를 아래처럼 4가지의 아이템(뷰)로 설정했다.깃헙 링크Prospect 모델을 만들어 swiftData에 저장했다.깃헙 링크filterType에 따라 화면에서 보여주는 Prospect이 다르다. 그래서 initializer를
91.83: Hotprospects, part 5
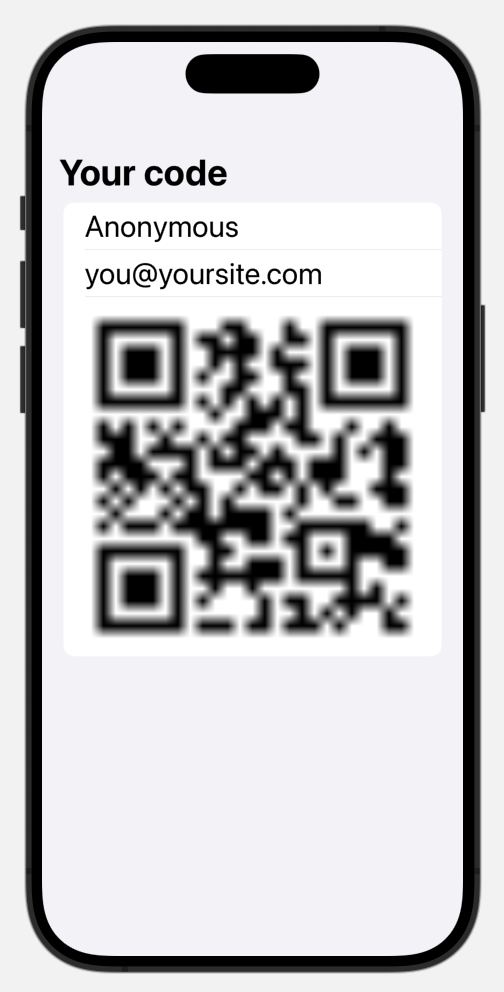
Project 16, part 5CoreImage를 통해 qrcode를 uiImage로 생성할 수 있다.아래처럼 내용을 데이터화해서 이미지로 변환하여 나타낼 수 있다.깃헙 링크💡 qr code 사진이 확장되면서 보간법이 적용되는데, .interpolation()으로
92.84: HotProspects, part 6
Project 16, part 6먼저 qr code 사진을 클릭하면 사진을 저장할 수 있도록 Privacy - Photo Library Additions Usage Description의 허가 요청을 설정해야 한다.깃헙 링크그리고 ShareLink를 설정해서 이미지를
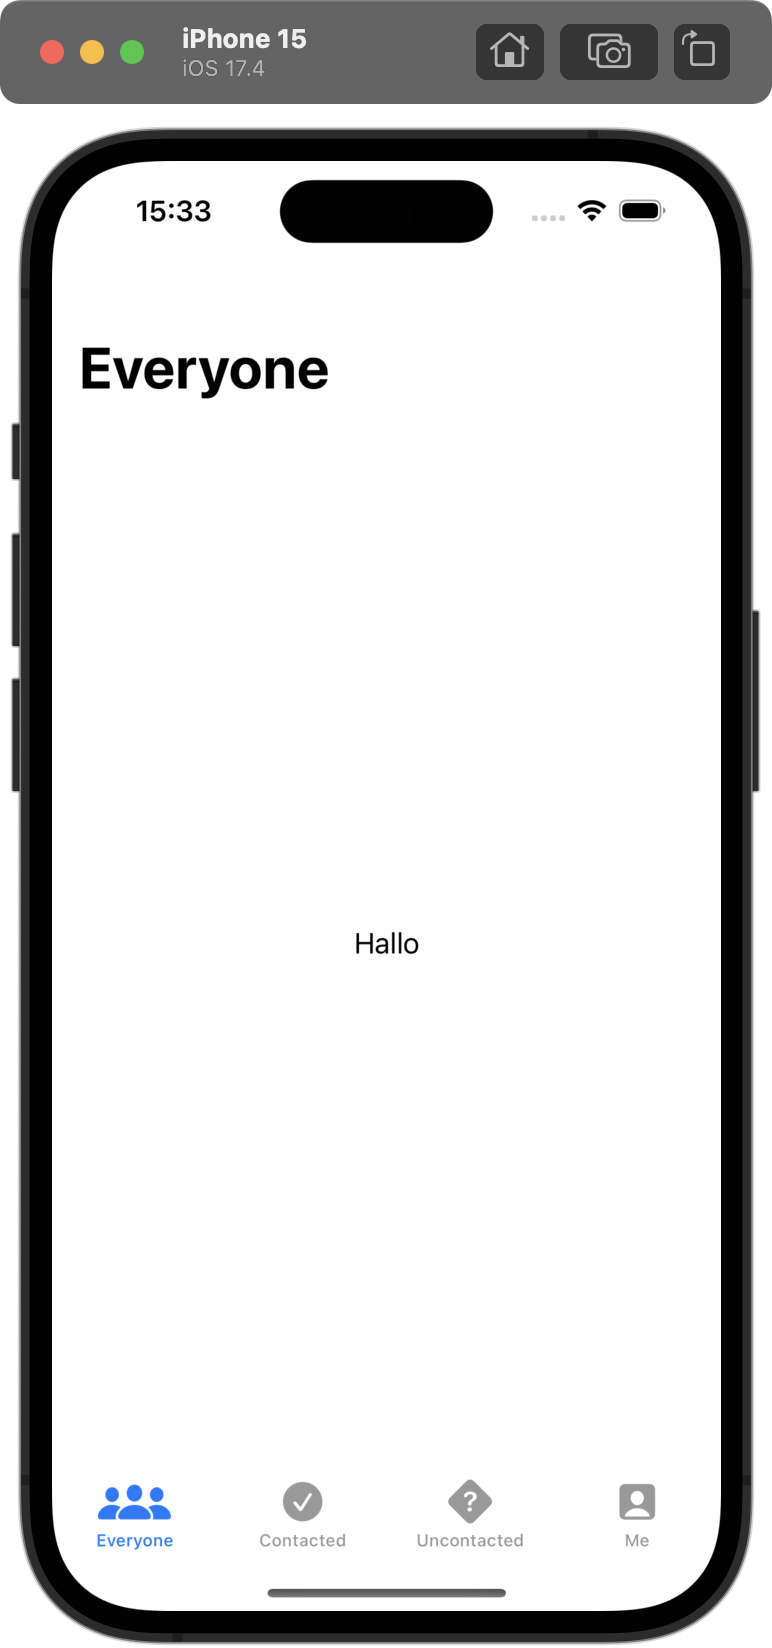
93.85: HotProspects, part 7
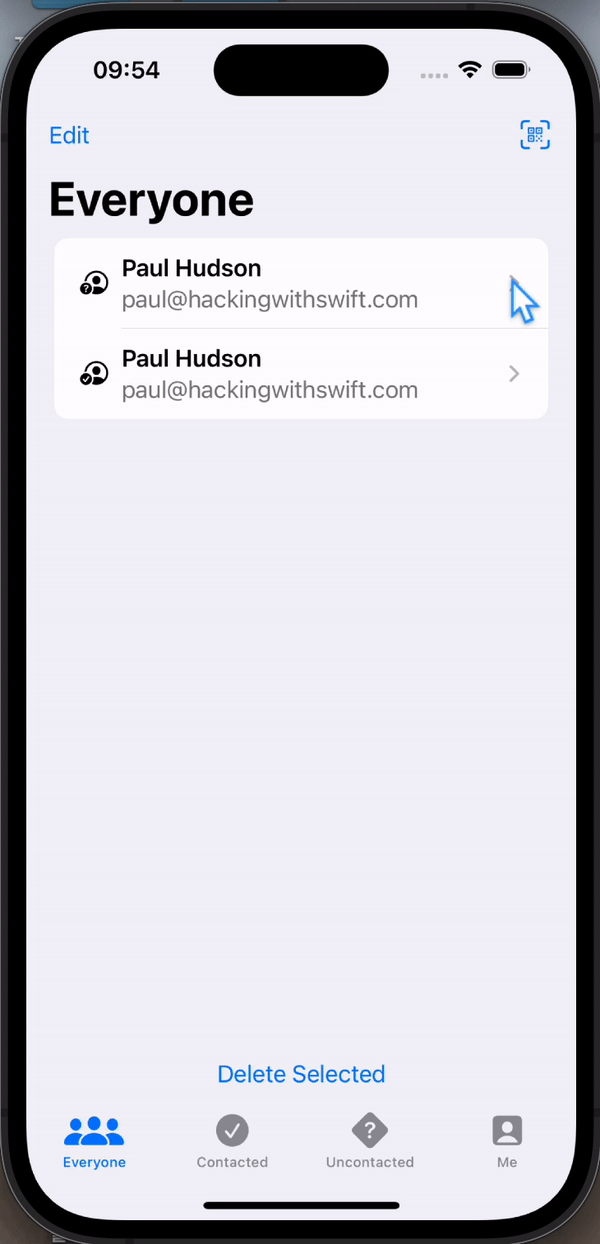
Project 16, part 7 challenge Add an icon to the “Everyone” screen showing whether a prospect was contacted or not. Add an editing screen, so users
94.86: Flashzilla, part 1

Project 17, part 1view를 어떻게 누르냐(gesture)에 따라서 다른 동작을 설정할 수 있다.깃헙 링크그리고 RotationGesture, MagnifyGesture를 이용해 View에 적용할 수도 있다.직접 해보니 .gesture에 한 제스쳐만 적용
95.87: Flashzilla, part 2
Project 17, part 2
96.88: Flashzilla, part 3
Project 17, part 3프로젝트의 info에서 supported interface orientations에서 portrait을 삭제하고, Deployment info에서 iphone orientation의 portrait 체크 박스를 해제하여 가로 모드를 기본
97.89: Flashzilla, part 4
Project 17, part 4 swipe 방향에 따라 다르게 표현하기 카드를 왼쪽 혹은 오른쪽으로 넘길 때 카드 색을 다르게 표현해서 다른 의미를 지님을 보여줄 수 있다. 커밋 링크 그러나! 색맹인 사용자를 위해 색상이 아닌 다른 요소로 구분하기 모드에서 색
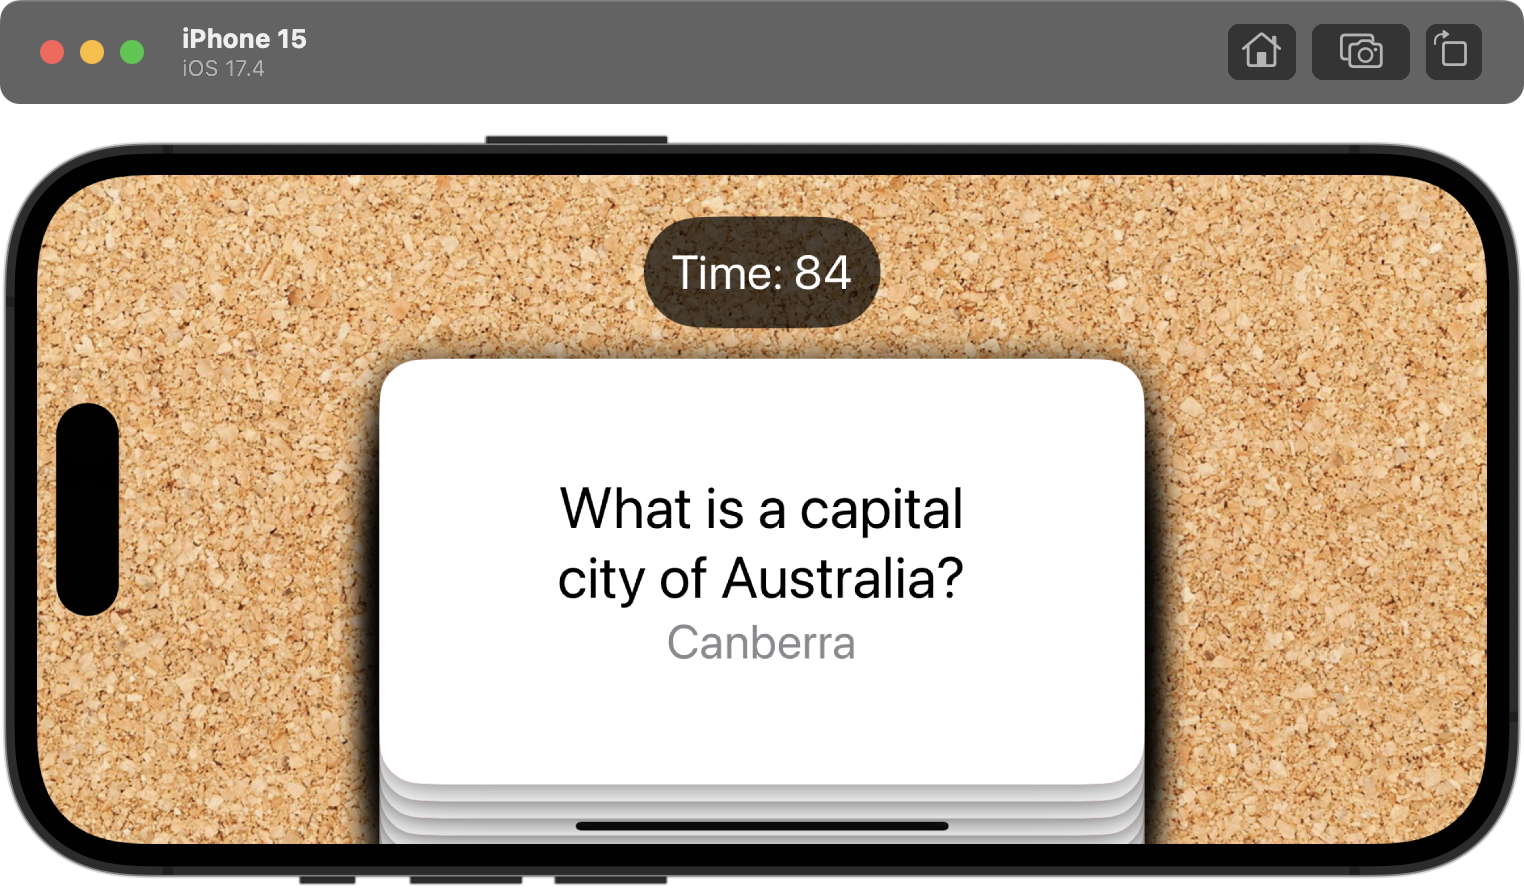
98.90: Flashzilla, part 5
[Project 17, part 5 ](https://www.hackingwithswift.com/100/swiftui/90) 개선하기 제일 위의 카드만 swipe할 수 있도록 설정하기 제일 위의 카드를 제외하고 다른 카드는 swipe할 수 없도록 설정했다. 커
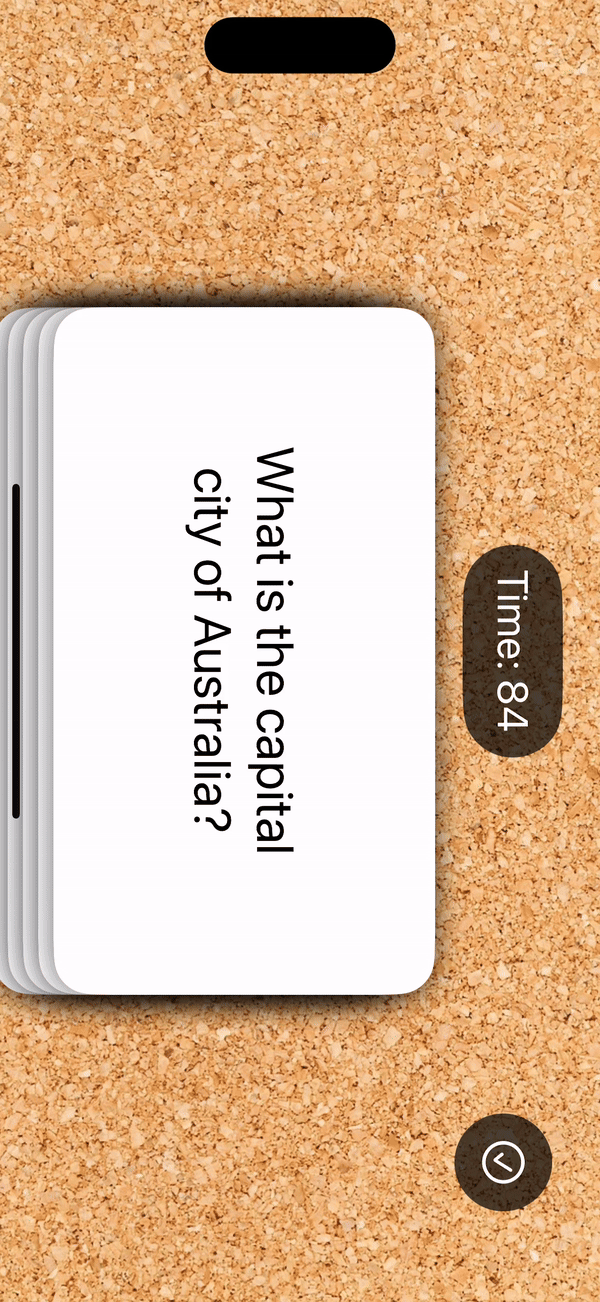
99.91: Flashzilla, part 6
Project 17, part 6The sequenced(before:) modifier lets us create chains of gestures.Timers pause in the background by defaultStruct initializers can c
100.92: LayoutAndGeometry, part 1
Project 18, part 1 Layout ContentView의 크기는 body의 크기 text는 background의 child가 된다
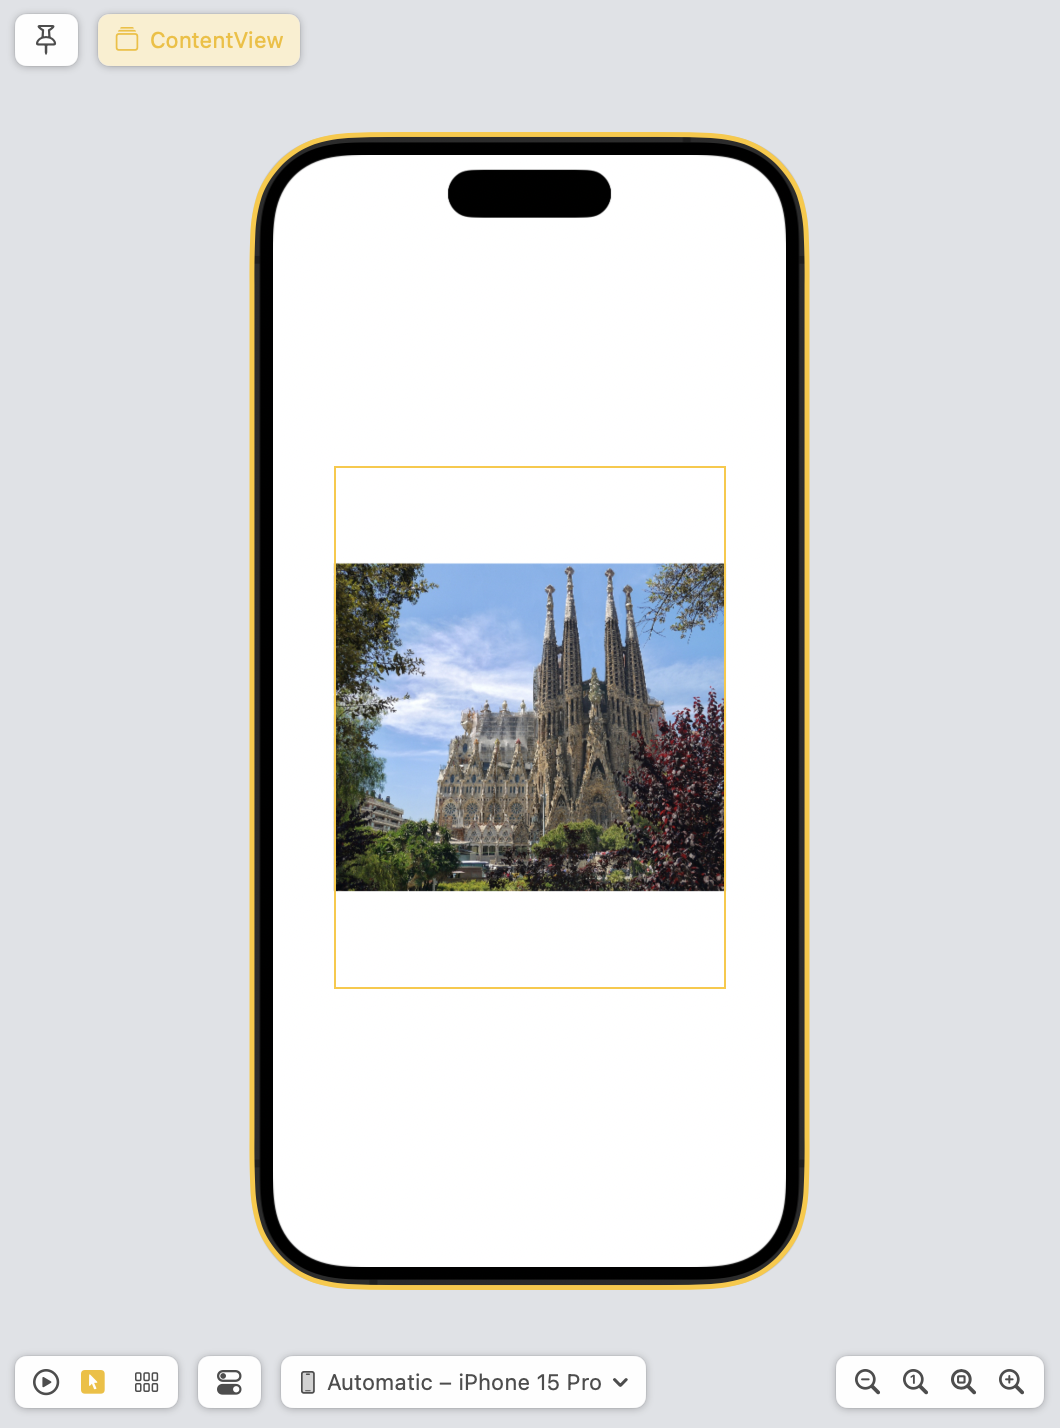
101.93: LayoutAndGeometry, part 2
Project 18, part 2 GeometryReader로 이미지 크기 조절하기 GeometryReader로 가능한 영역에서 비율대로 크기를 조절할 수 있다. 예시로 아래 사진은 이미지가 존재 가능한 영역(스크린 전체)의 가로에서 30% 크기로 지정된 모습이다.
102.94: LayoutAndGeometry, part 3
[Project 18, part 3 ](https://www.hackingwithswift.com/100/swiftui/94) 퀴즈 기록 When creating a custom alignment guide we must provide a default value.
103.95: Milestone of 16-18
Milestone: Projects 16-18map(), filter(), compactMap()이 예시이다. 예시로 아래 코드가 있다.2의 경우 filter를 사용해서 상수로 evens를 간단히 설정할 수 있다.거기에 더해 compactMap()은 nil을 제외하고
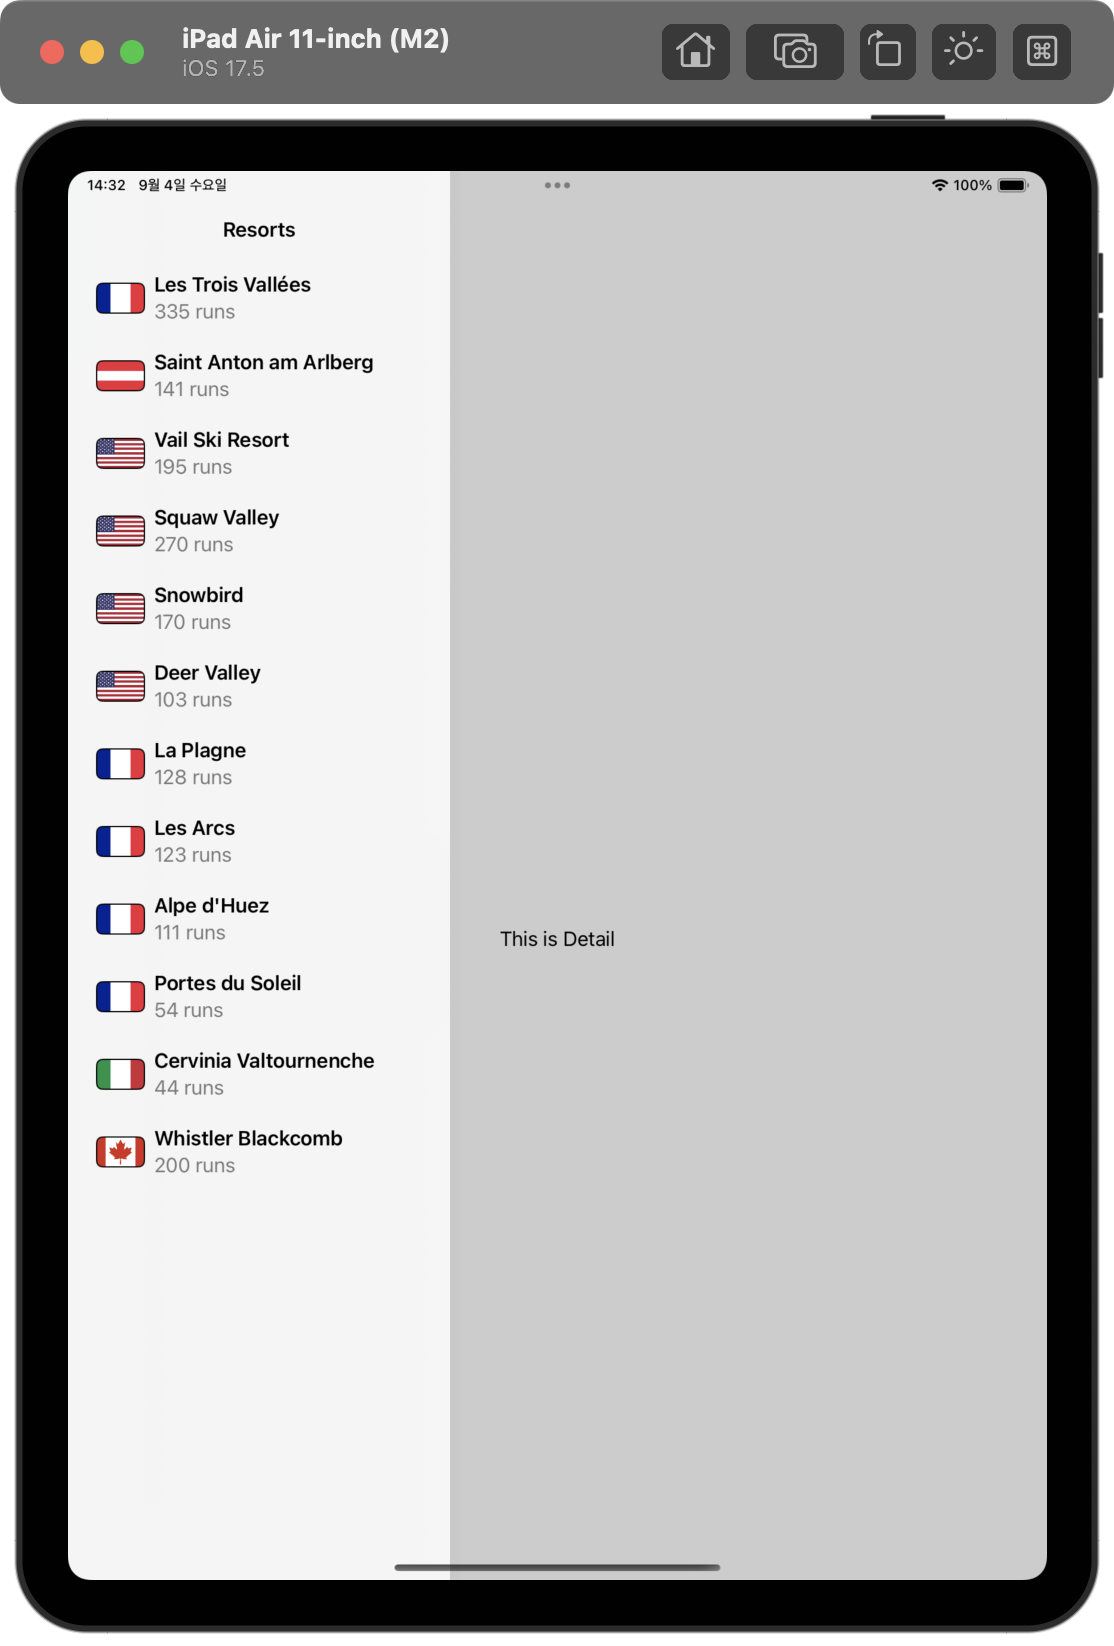
104.96: SnowSeeker, part 1
Project 19, part 1ipad는 iphone보다 더 넓은 화면을 활용할 수 있는 장점이 있다. 더 넓은 화면에서 잘 사용할 수 있는 컴포넌트 중에 NavigationSplitView가 있다.이렇게 가로 모드에서 기본적으로 사이드바에서 볼 수 있고, 세로 모드
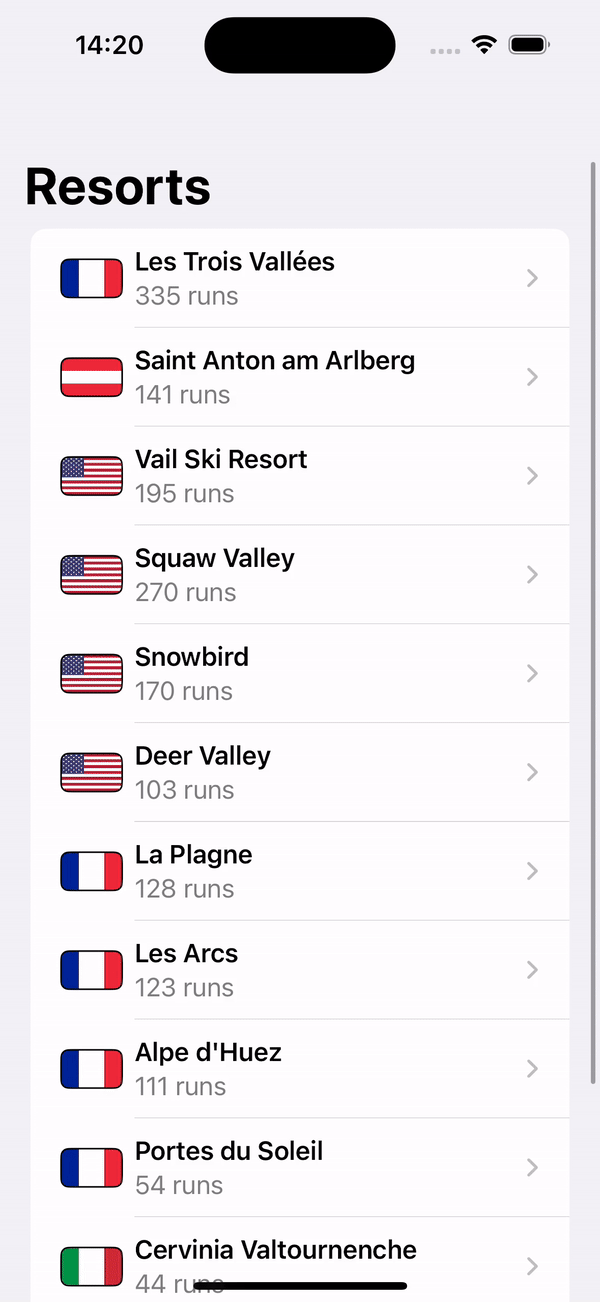
105.97: SnowSeeker, part 2
Project 19, part 2본격적으로 resorts.json 파일에서 정보를 불러올 구조체 Resort를 설정했다. json 파일은 Bundle에서 불러와 decode할 수 있도록 extension으로 설정했다.커밋 링크그리고 불러온 resorts를 Navigat
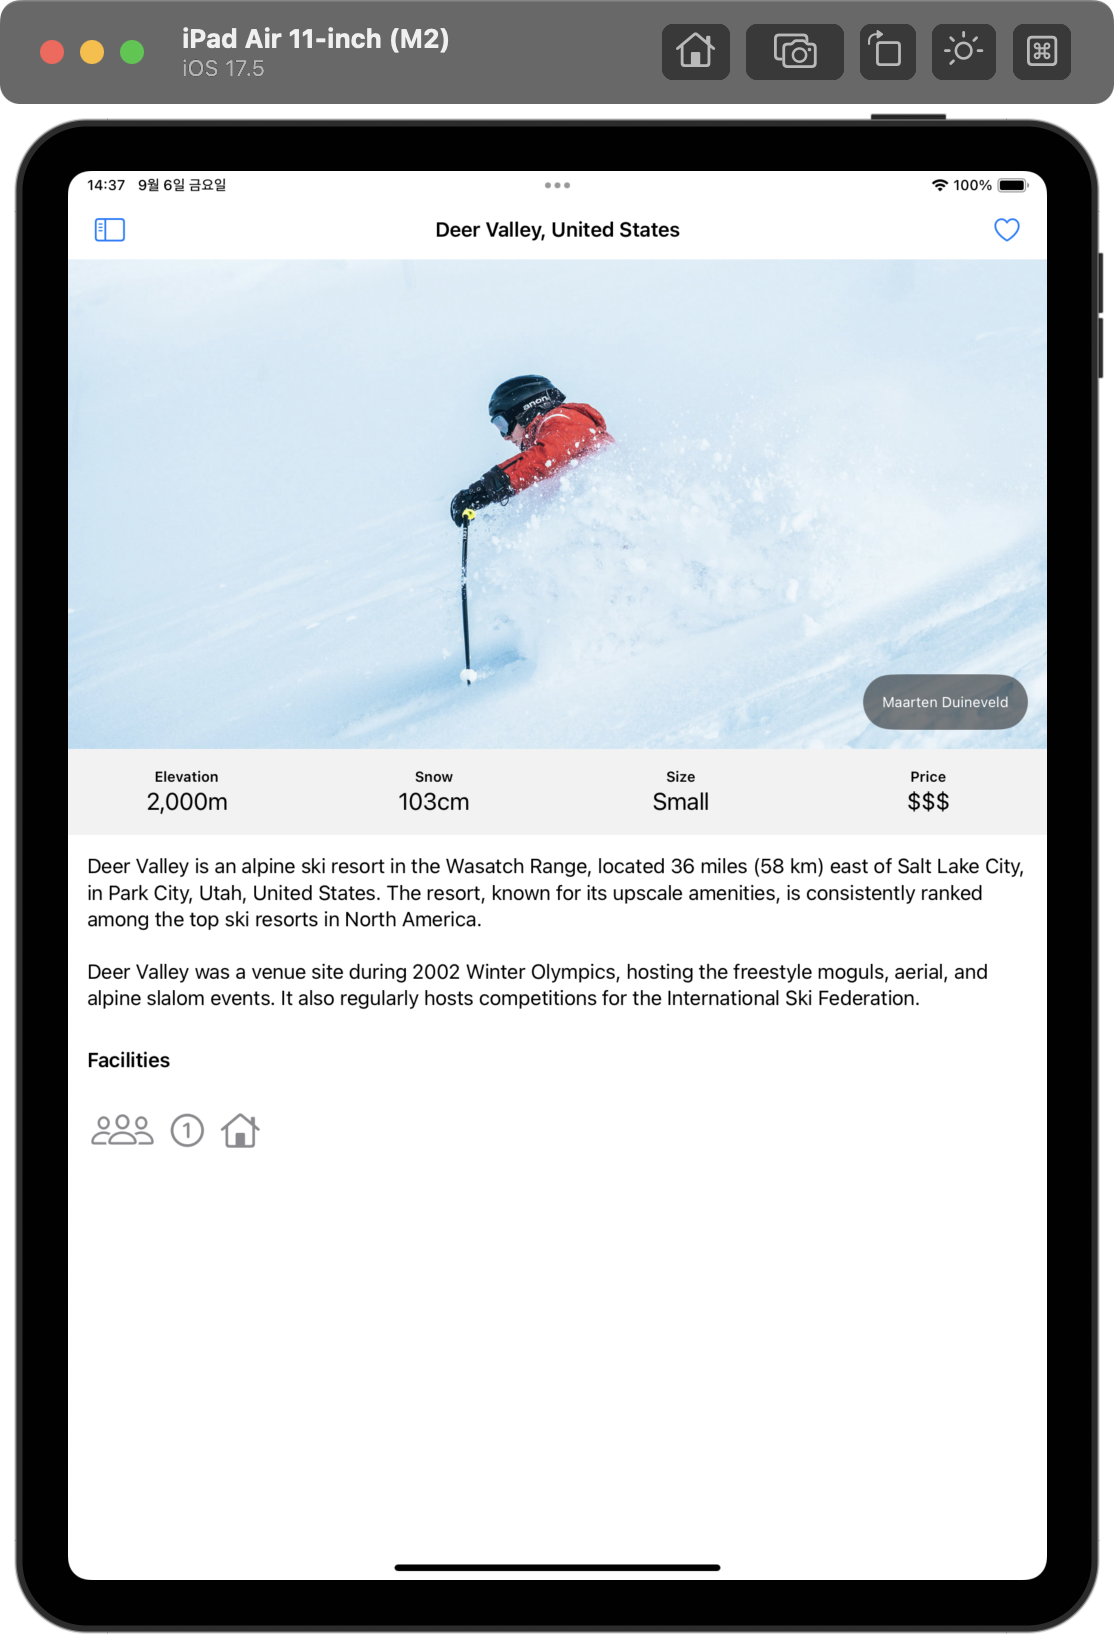
106.98: SnowSeeker, part 3
Project 19, part 3searchText를 만들어서 해당 텍스트를 포함하는 resorts만 필터를 거쳐 보여주도록 설정했다.커밋 링크ResortView의 SkiDetailsView, ResortDetailsView를 디바이스의 가로, 세로, 텍스트 크기에 따
107.99: SnowSeeker, part 4
Project 19, part 4One static let property can reference another in the same type. Be careful not to make a reference chain by accident, because it can
108.100: Final exam
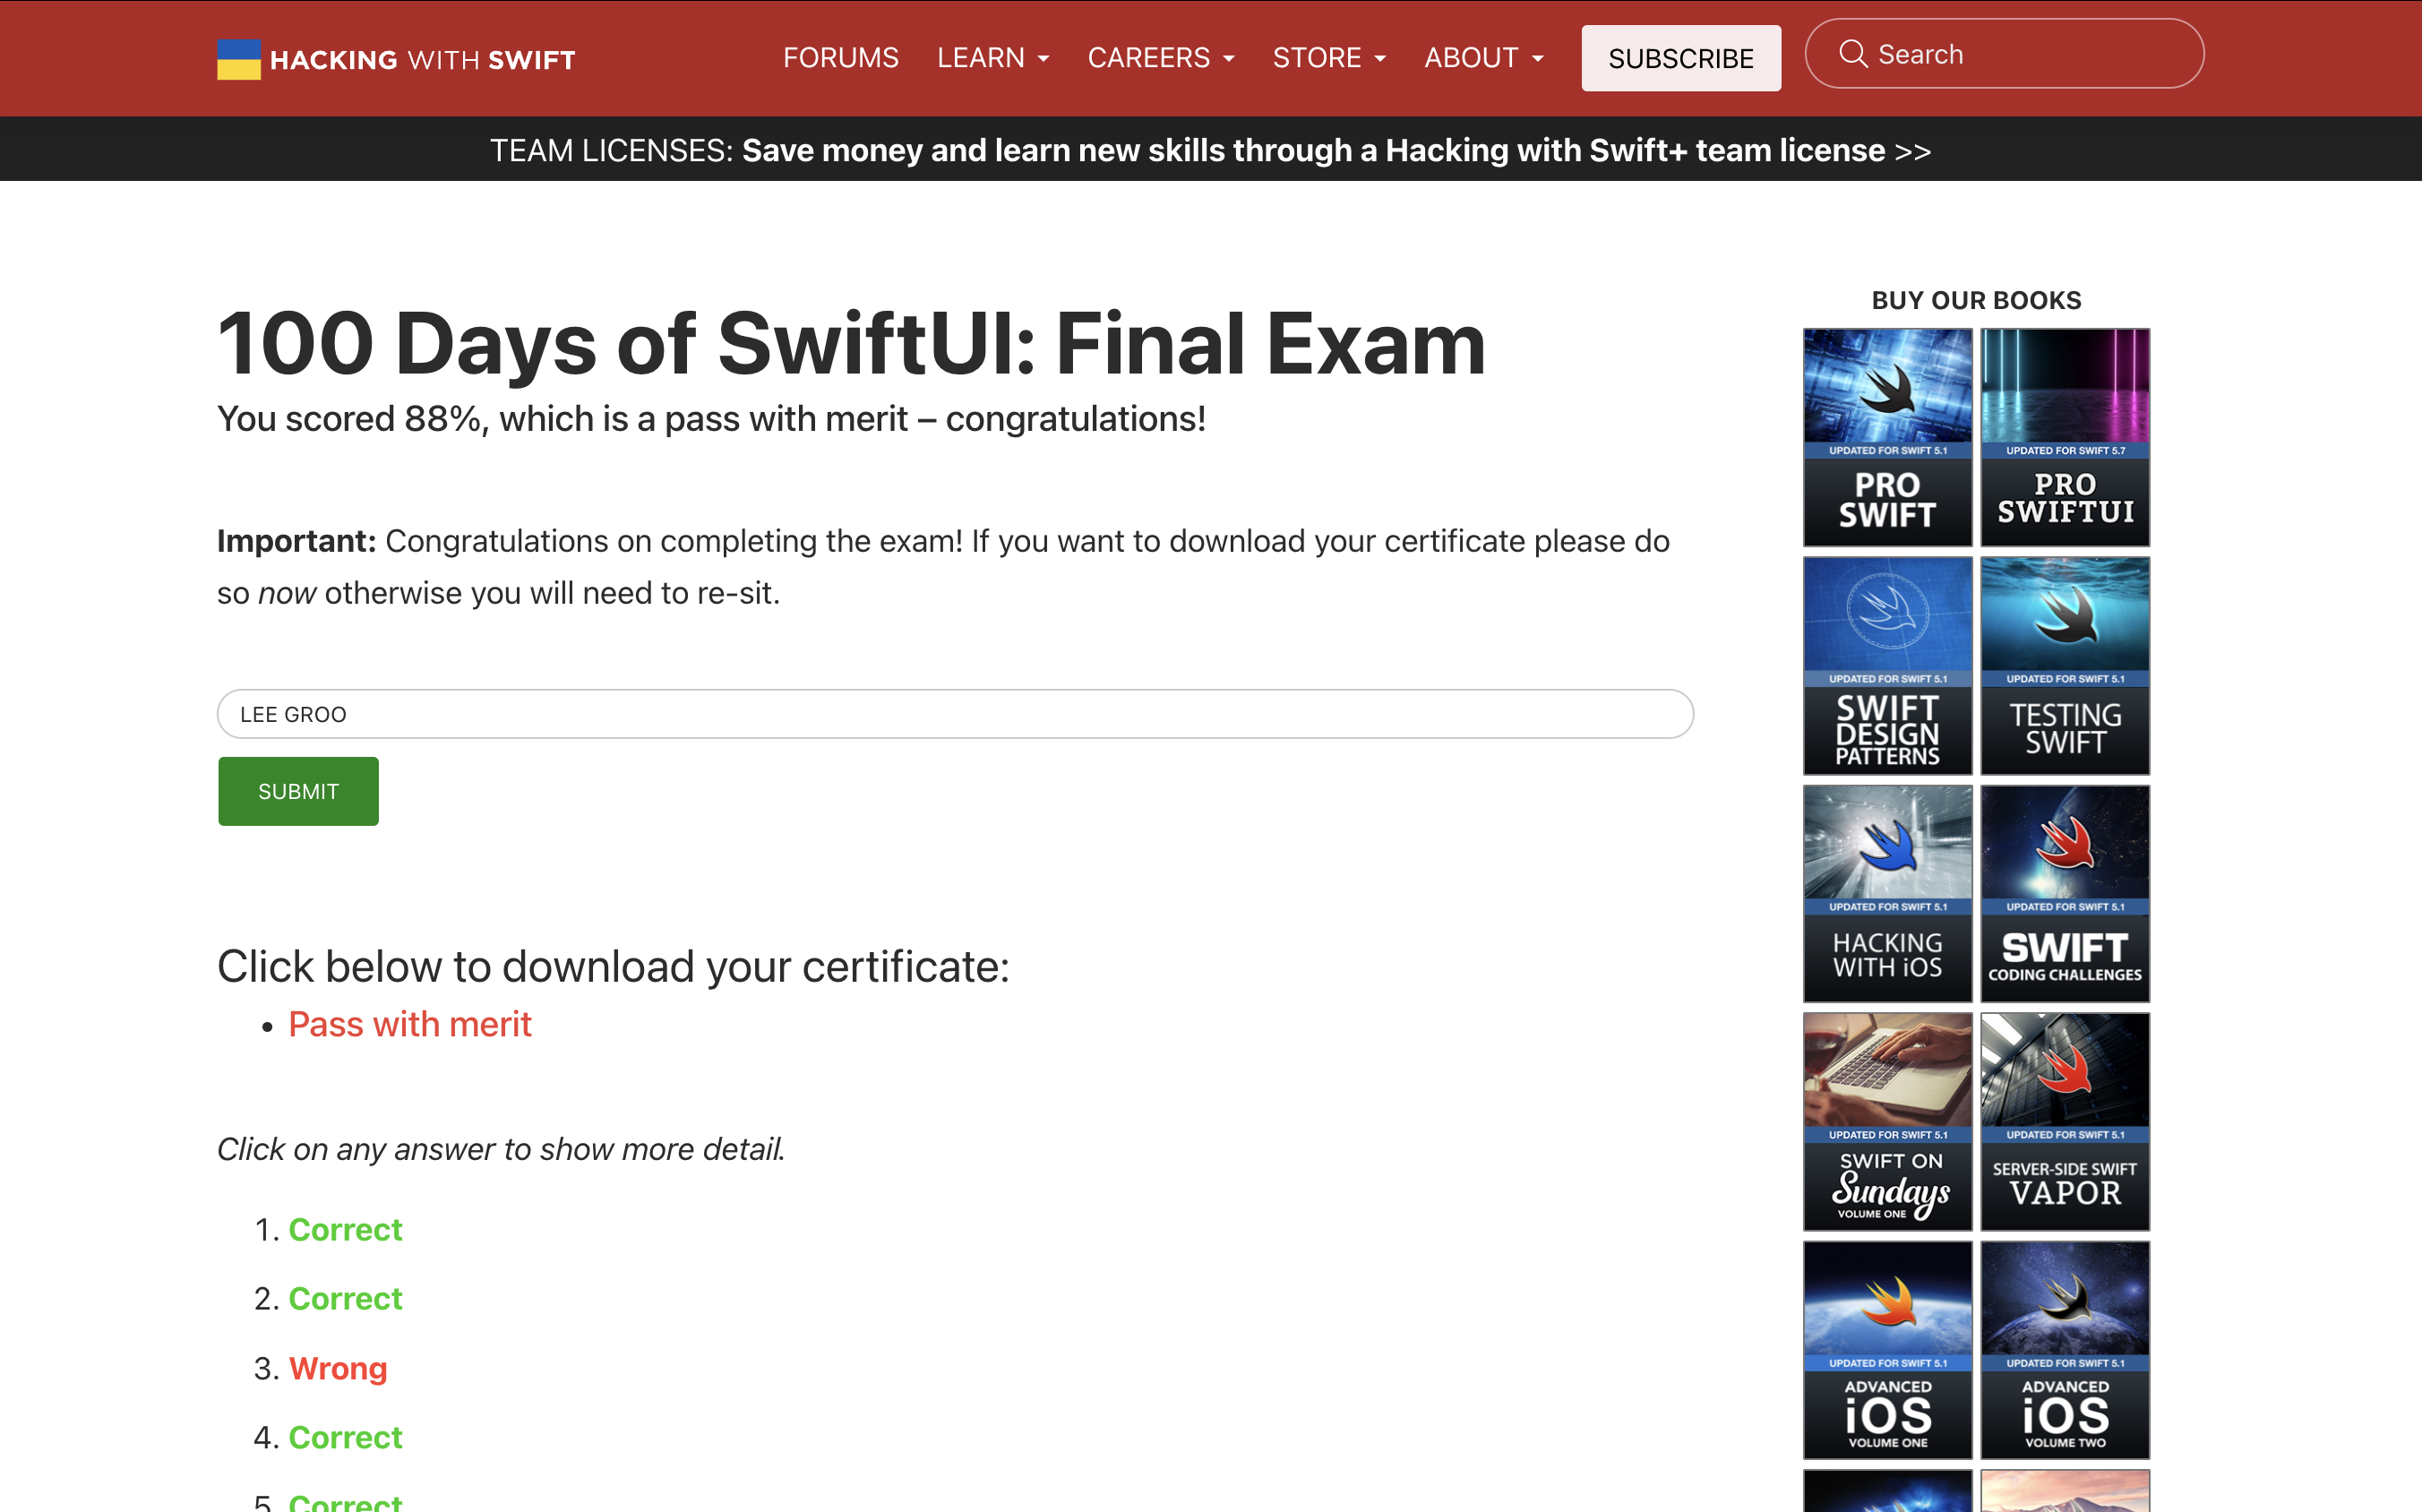
Final examRounded rectangles and capsules are different shapes.Properties wrapped in @Environment must have a value before the view is shown. If their