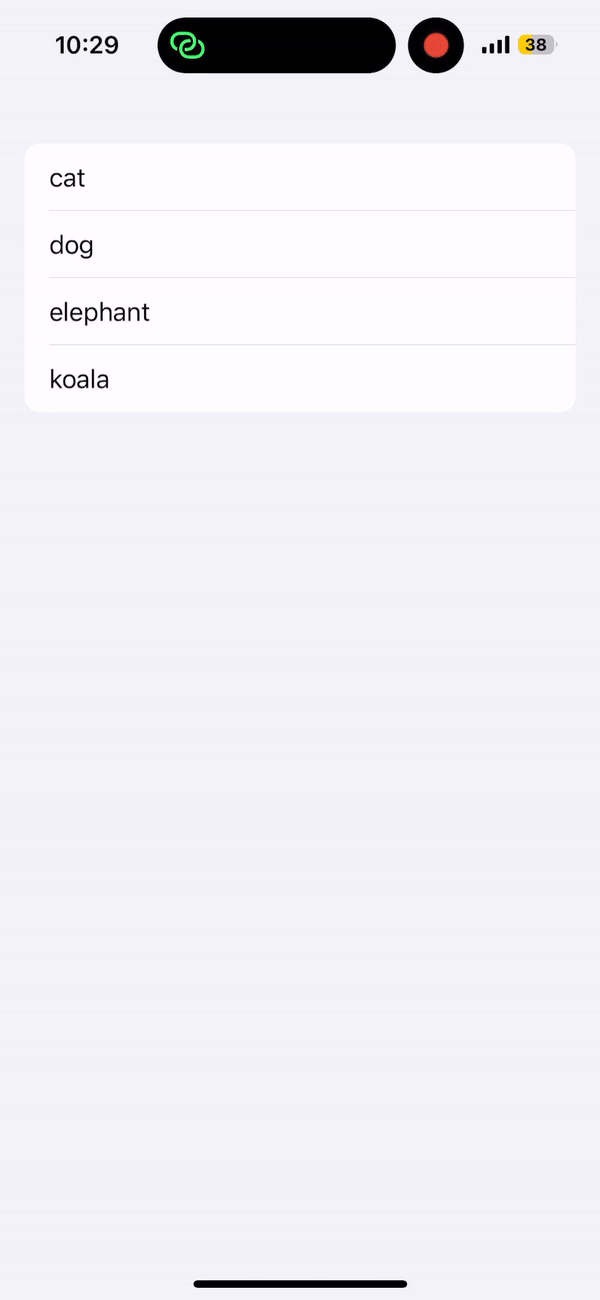
List에서 요소 선택하기
List에 selection을 설정하고 요소를 클릭하면 선택할 수 있다.
@State private var selection: String?
let animals = ["cat", "dog", "elephant", "koala"]
var body: some View {
VStack {
List(animals, id: \.self, selection: $selection) { animal in
Text(animal)
}
if let selection {
Text("your selection: \(selection)")
}
}
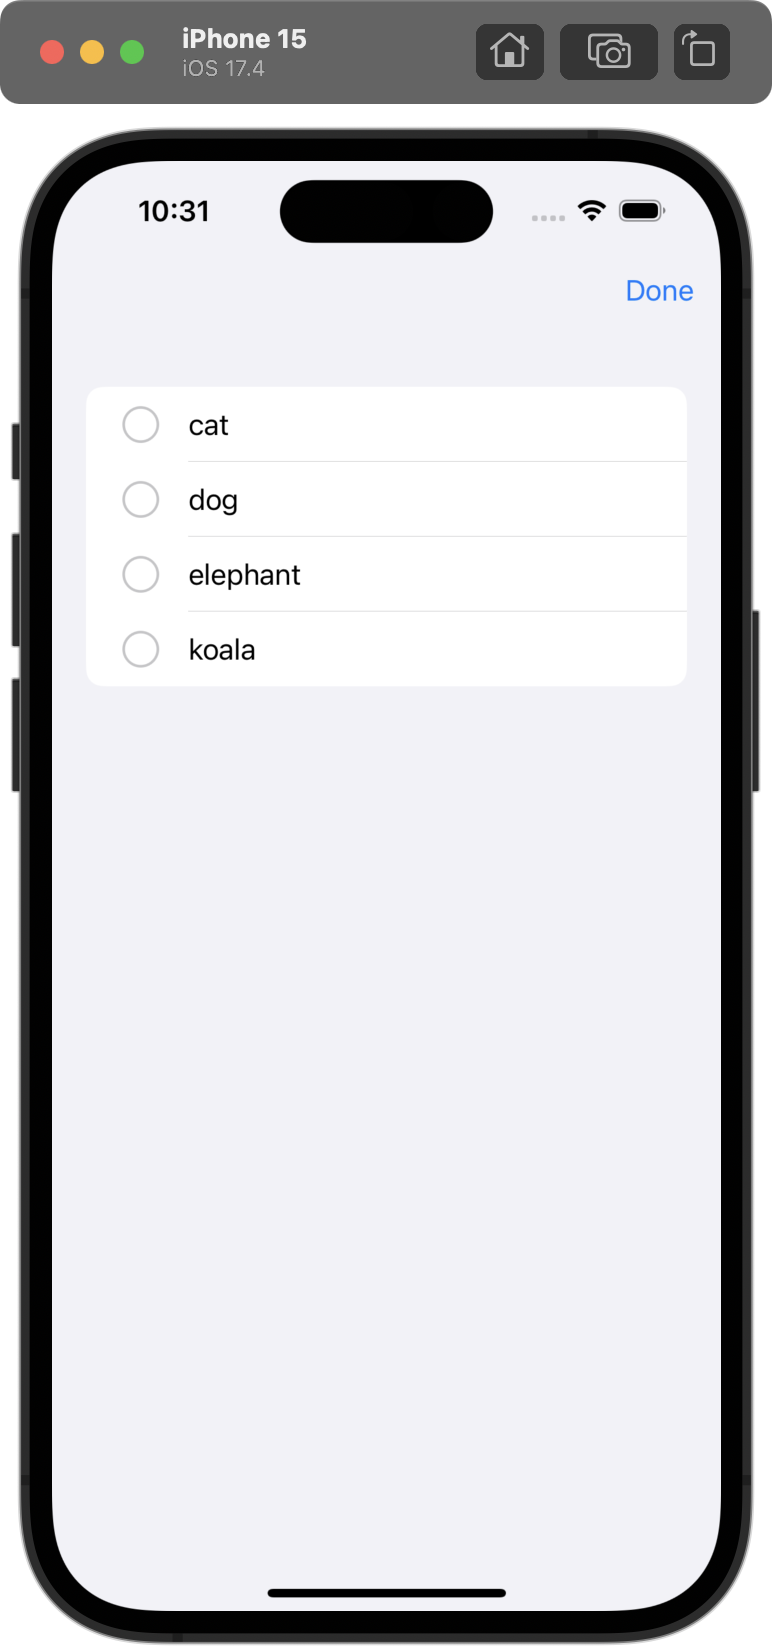
}다중 선택은 Set<String>?으로 설정할 수 있다.
        NavigationStack{
            VStack {
                List(animals, id: \.self, selection: $selection) { animal in
                    Text(animal)
                }
                if selection.isEmpty == false {
                    Text("your selection: \(selection)")
                }
            }
            .toolbar {
                EditButton()
            }
        }
💡 다만, 한 번의 탭으로는 list에서 한 요소만 클릭되기 때문에 두 손가락으로 swipe해야 한다. 이를 모르는 사용자도 많고 가시적으로 보여주기 위해서 EditButton()을 사용하면 좋다.
TabView
TabView를 통해 NavigationLink처럼 연관 있지 않는 페이지 간의 이동을 간편하게 나타낼 수 있다.
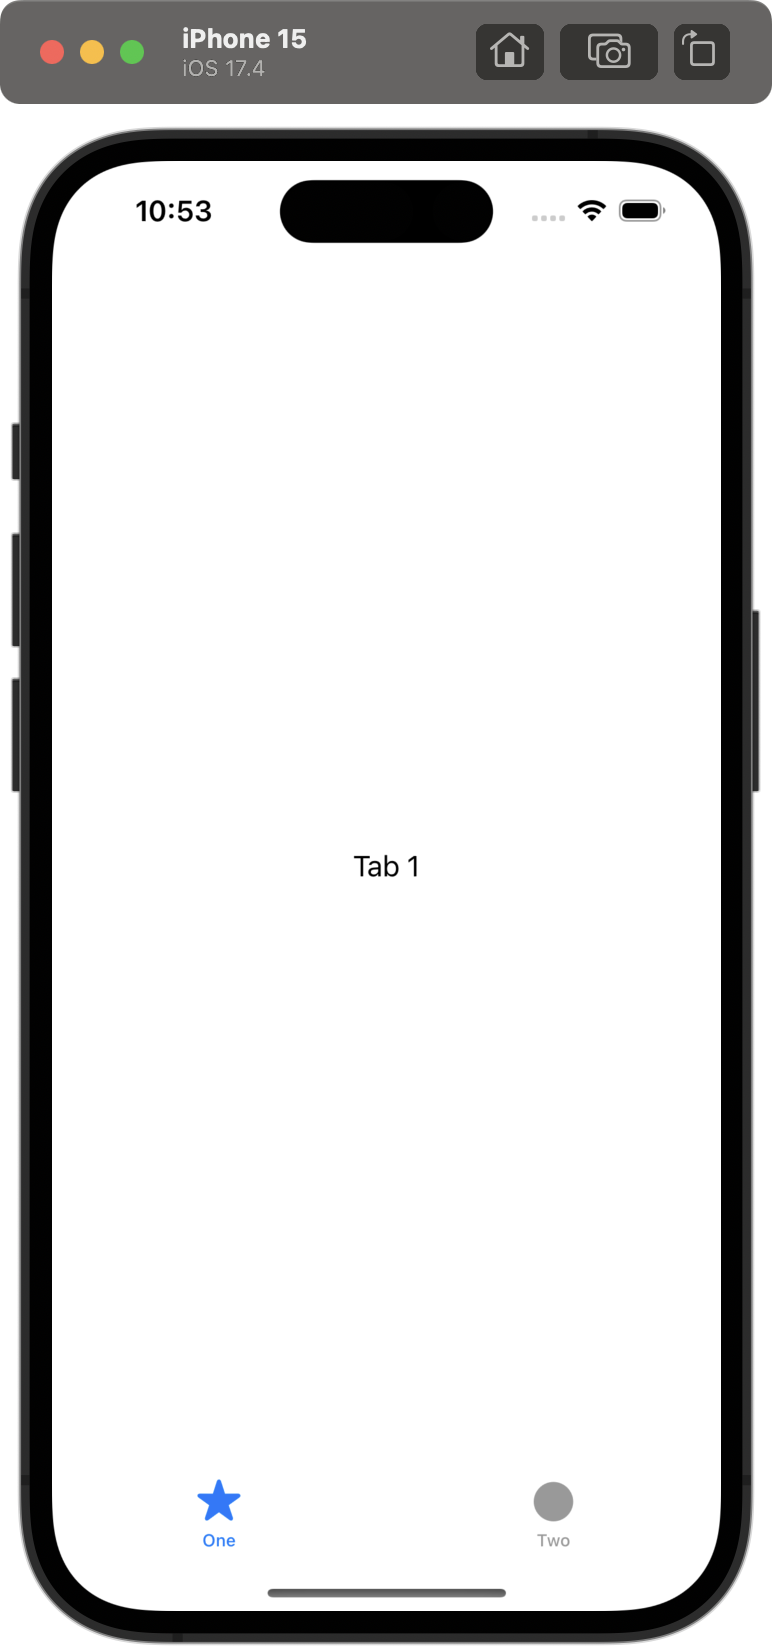
        TabView {
            Text("Tab 1")
                .tabItem {
                    Label("One", systemImage: "star")
                }
            Text("Tab 2")
                .tabItem {
                    Label("Two", systemImage: "circle")
                }
        }
뿐만 아니라 View 내의 요소로 현재 보이는 Tab을 설정할 수도 있다. 예시로 아래는 Button을 클릭하면 1 혹은 2 Tab으로 이동할 수 있다.
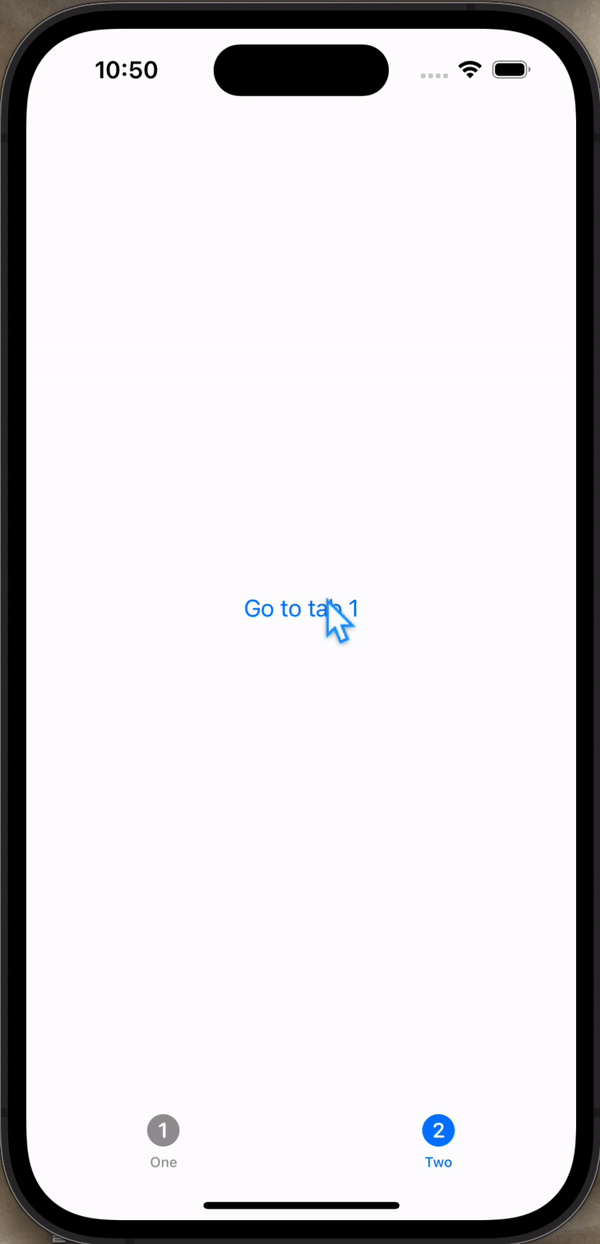
해당 View가 어떤 탭인지는 .tag로 설정하면 되고, @State인 selectedTab을 원하는 대로 설정하면 된다. 확인해보니 문자열로 설정해도 되고, 정수로 설정해도 된다.
    @State private var selectedTab = 1
    var body: some View {
        TabView(selection: $selectedTab) {
            Button("Go to tab 2") {
                selectedTab = 2
            }
            .tabItem {
                Label("One", systemImage: "1.circle")
            }
            .tag(1)
            Button("Go to tab 1") {
                selectedTab = 1
            }
            .tabItem {
                Label("Two", systemImage: "2.circle")
            }
            .tag(2)
        }
    }
계속 해보자