Gestures
- view를 어떻게 누르냐(gesture)에 따라서 다른 동작을 설정할 수 있다.
            Text("Double Tap")
                .onTapGesture(count: 2) {
                    print("double tap")
                }
            Text("Long Press")
                .onLongPressGesture {
                    print("long pressed")
                }
            Text("Long Press at least 3 seconds")
                .onLongPressGesture {
                    print("long pressed for 3 sec")
                } onPressingChanged: { inProgress in
                    print("in progress: \(inProgress)")
                }
- 그리고 RotationGesture, MagnifyGesture를 이용해 View에 적용할 수도 있다.

직접 해보니 .gesture에 한 제스쳐만 적용 가능했고, 영상보다는 훨씬 영향이 크게 적용됐다.
            Text("Text")
                .font(.largeTitle)
                .rotationEffect(currentValue + finalValue)
                .gesture(
                    RotateGesture()
                        .onChanged { value in
                            currentValue += value.rotation
                        }
                        .onEnded { value in
                            finalValue += currentValue
                            currentValue = Angle.zero
                        }
)- 그리고 제스쳐의 우선 순위나 동시에 실행되게 설정할 수 있다.
        VStack(spacing: 30) {
            Text("Text")
                .onTapGesture {
                    print("text 1")
                }
                Text("Text")
                .highPriorityGesture(
                    TapGesture()
                        .onEnded {
                            print("text 2")
                        }
                )
        }
        .padding()
        .simultaneousGesture(
            TapGesture()
                .onEnded {
                    print("vstack")
                }
)만약 Text에 .onTapGesture가 설정되어 있고 그 Text가 있는VStack에 .highPriorityGesture가 설정되어 있으면, .highPriorityGesture가 실행된다.
또 .simultaneousGesture를 설정하면 앞 gesture와 동시에 실행된다. 이렇게 따로 우선 순위나 동시에 설정되게 한 것이 아니라면 상위 view의 gesture 설정에 따라 실행된다.
- 마지막으로 드래그를 이용해 dragGesture도 설정할 수 있다.
.allowsHitTesting(), .contentShape(.rect)로 보완하기
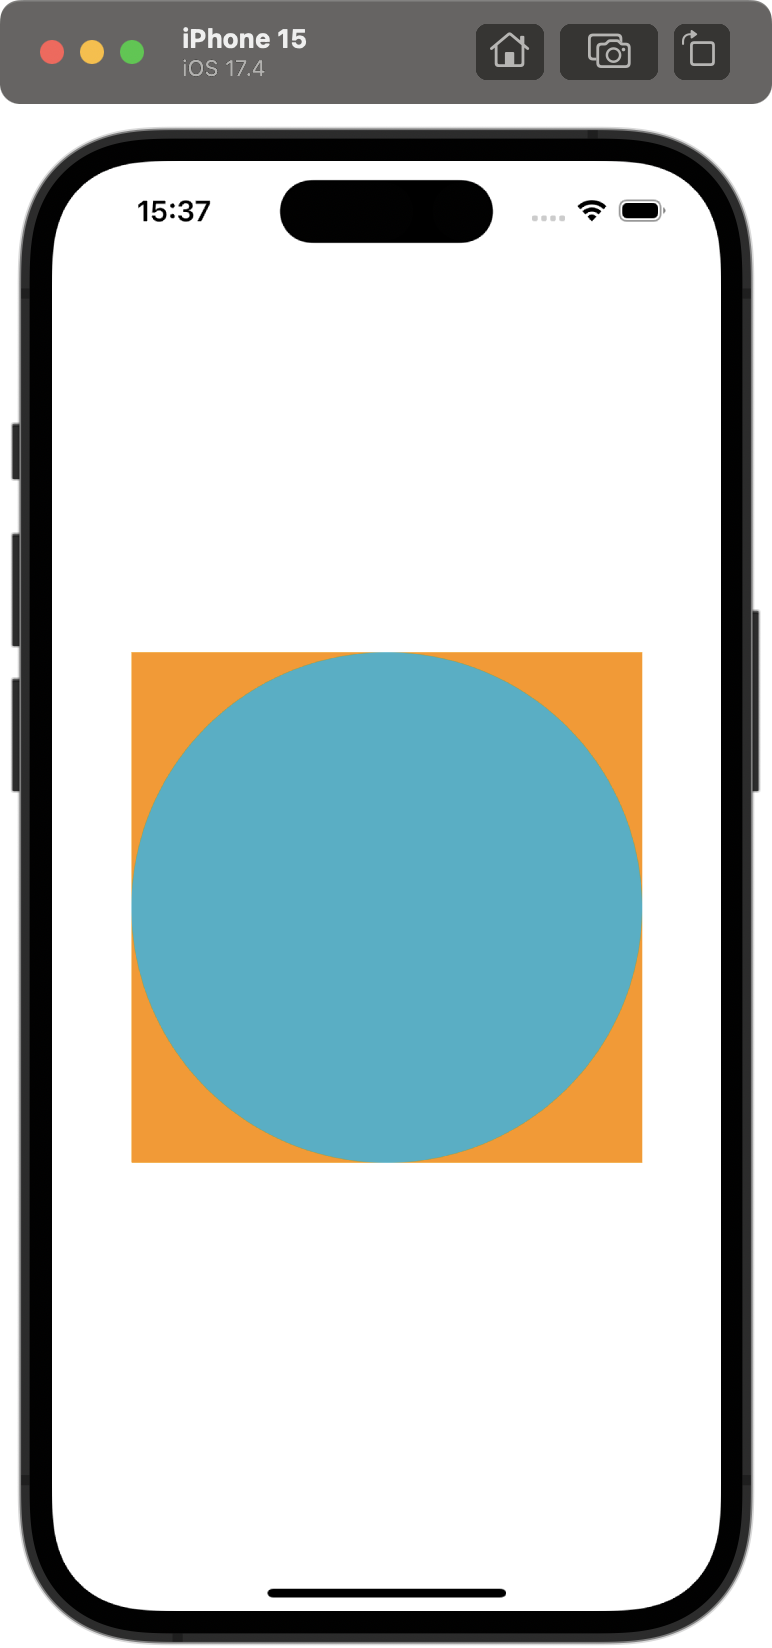
        ZStack {
            Rectangle()
                .foregroundColor(.orange)
                .frame(width: 300, height: 300)
                .onTapGesture {
                    print("rectangle")
                }
            Circle()
                .foregroundColor(.teal)
                .frame(width: 300, height: 300)
                .onTapGesture {
                    print("circle")
                }
        }
크기가 같은 원과 네모가 ZStack에 순서대로 배치된 상황이다.
1. 동그라미를 클릭했는데 동그라미가 존재하지 않는 것처럼 네모의 gesture를 실행하고 싶다면,
Circle을 .allowsHitTesting(false)를 설정하면 된다.
            Circle()
                .foregroundColor(.teal)
                .frame(width: 300, height: 300)
                .allowsHitTesting(false)
                .onTapGesture {
                    print("circle")
                }
2. 네모 영역을 클릭해도 동그라미의 gesture를 실행하고 싶다면,
Circle을 .contentShape(.rect)를 설정하면 된다. 그러면 View의 실제 프로그래밍 상의 모양은 네모가 되어, 주황색 네모의 영역까지 동그라미의 영역으로 설정된다.
            Circle()
                .foregroundColor(.teal)
                .frame(width: 300, height: 300)
                .contentShape(.rect)
                .onTapGesture {
                    print("circle")
                }
💡 이는 VStack 안에 다른 View를 설정하고 gesture를 감지할 때 이용하면 좋다.
        VStack {
            Text("hallo")
                .background(.orange)
            Spacer().frame(height: 100)
            Text("hola")
                .background(.orange)
        }
        .onTapGesture {
            print("vstack")
}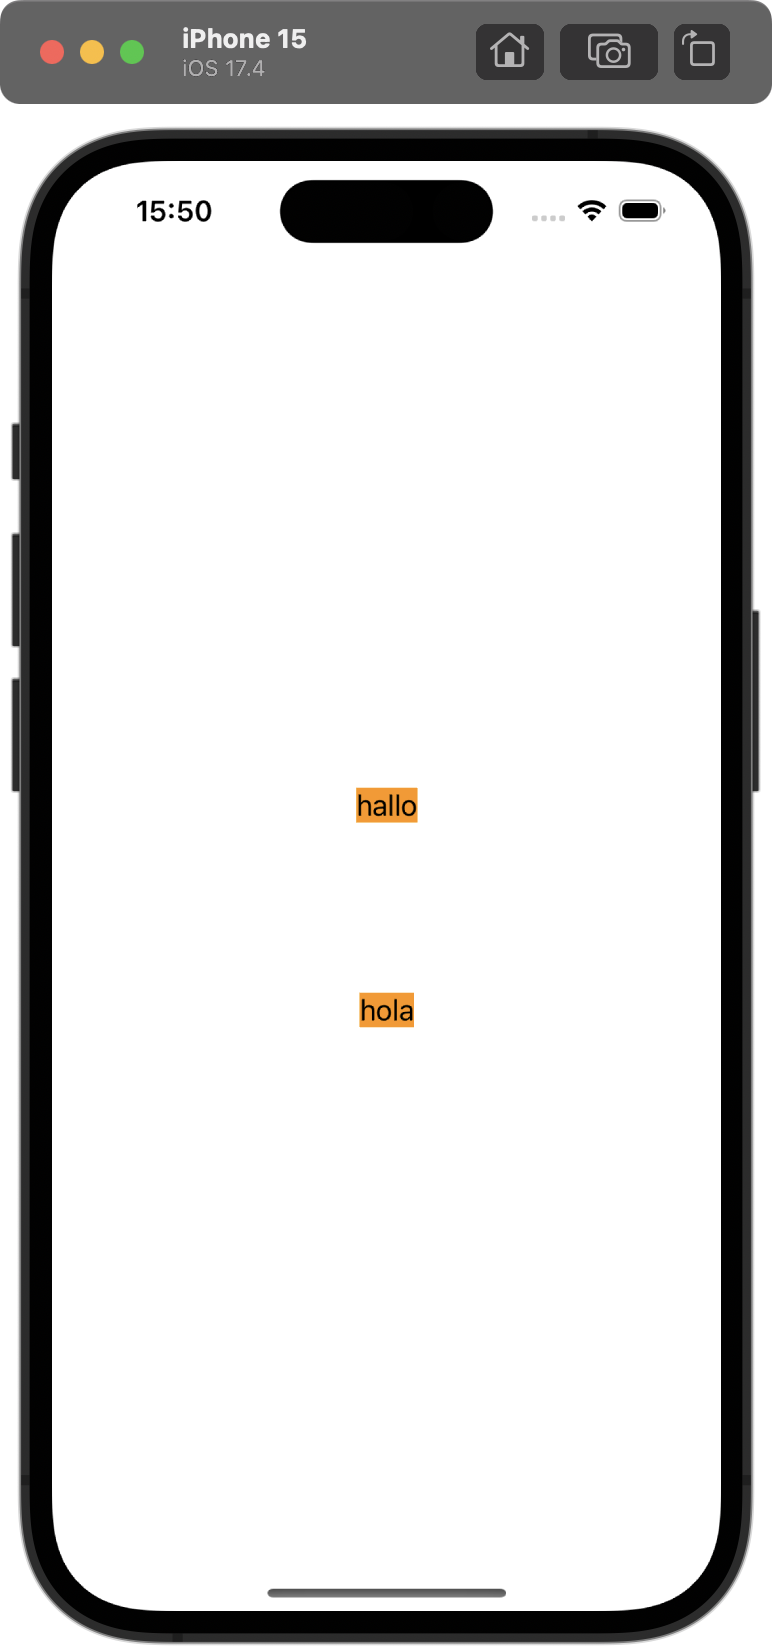 | 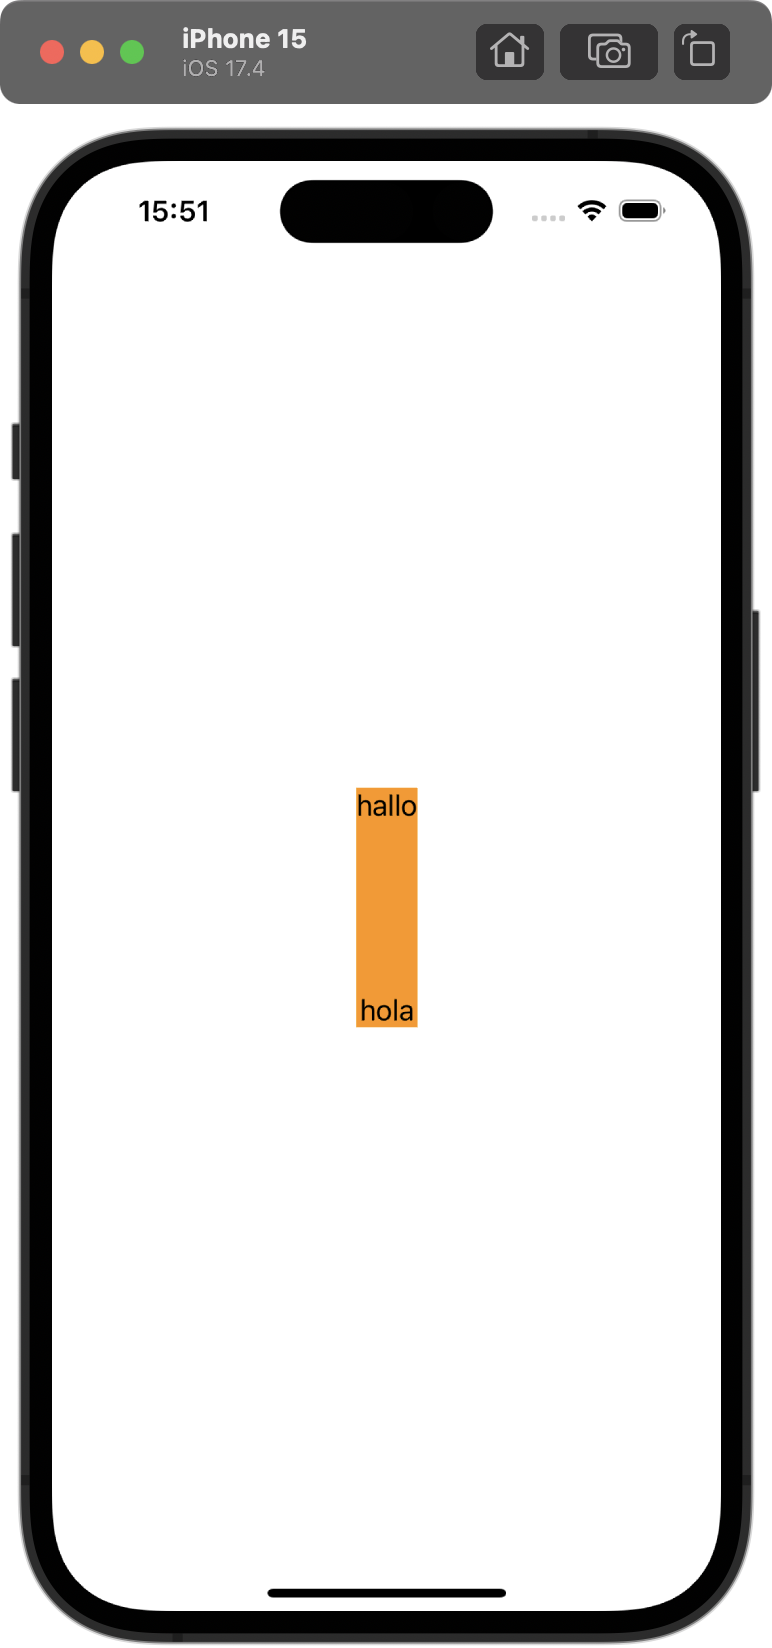 |
|---|
gesture를 감지하는 영역을 이미지의 주황색으로 표현했다. 만약 위의 코드대로라면 text를 클릭해야지만 감지되지만, VStack에 .contentShape(.rect)을 설정하면 오른쪽처럼 감지 영역이 늘어난다.

계속 해보자