NavigationSplitView
ipad는 iphone보다 더 넓은 화면을 활용할 수 있는 장점이 있다. 더 넓은 화면에서 잘 사용할 수 있는 컴포넌트 중에 NavigationSplitView가 있다.
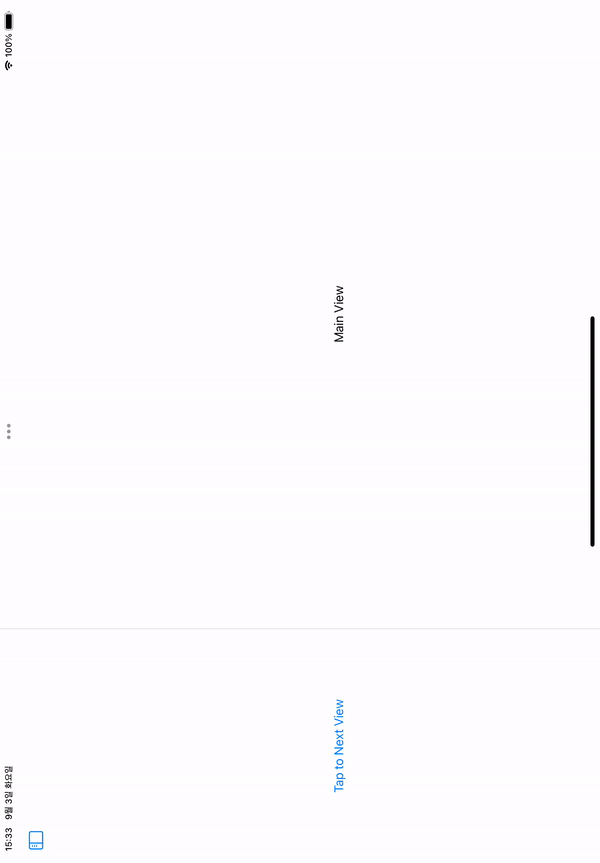
이렇게 가로 모드에서 기본적으로 사이드바에서 볼 수 있고, 세로 모드에서는 버튼을 통해 사이드바로 꺼낼 수 있다. 또한 primary view의 navigationlink를 자동으로 secondary view로 로드한다.
struct ContentView: View {
    var body: some View {
        NavigationSplitView {
            NavigationLink("Tap to Next View") {
                Text("Next View")
            }
        } detail: {
            Text("Main View")
        }
    }
}
columnVisibility를 .all로 설정해서 모드에 상관없이 사이드바를 기본적으로 보여줄 수 있다.
        NavigationSplitView(columnVisibility: .constant(.all)) {
            NavigationLink("Tap to Next View") {
                Text("Next View")
            }
        } detail: {
            Text("Main View")
        }
        .navigationSplitViewStyle(.balanced)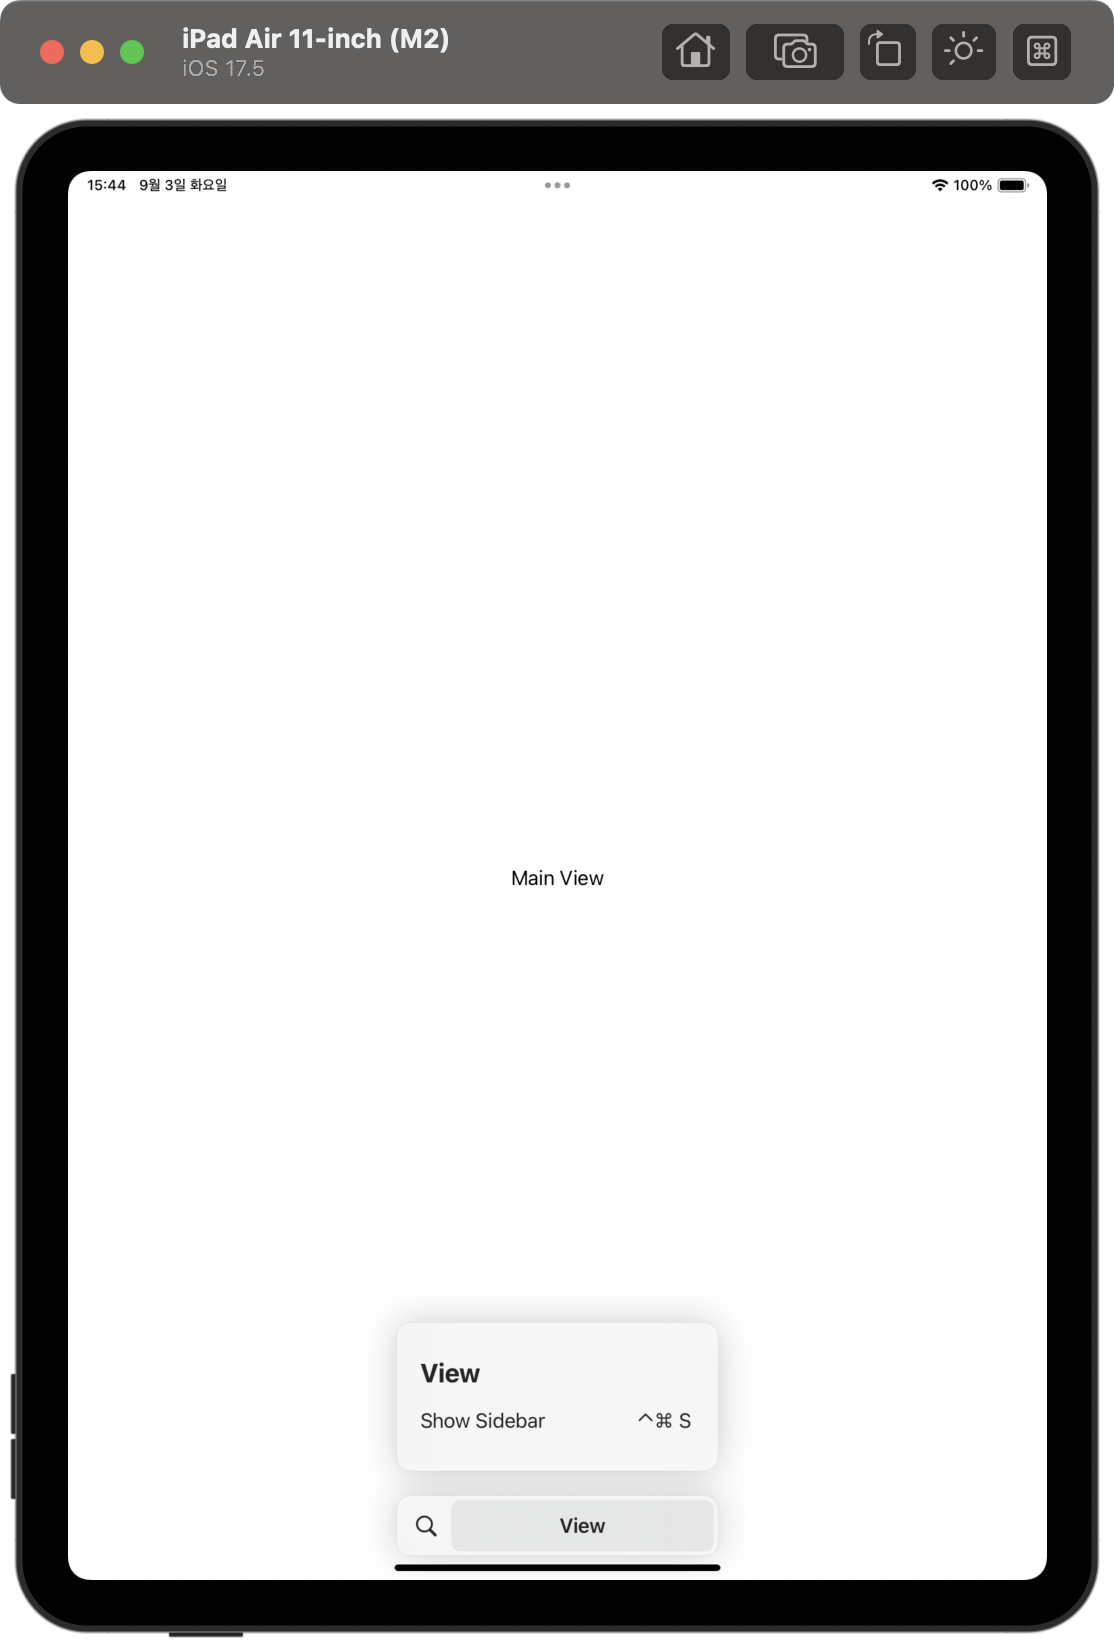
.hidden으로 사이드바를 가릴 수도 있다. 대신 사이드바를 꺼낼 수 있는 토글 버튼도 안 보인다.
		// ...
        } detail: {
            Text("Main View")
                .toolbar(.hidden, for: .navigationBar)
}sheet(), alert()를 optional과 함께 사용하기
간단한 예시로 optional인 user를 nil로 선언하고, 버튼을 누르면 인스턴스가 생성되면서 sheet()와 alert()에 나타낼 수 있다.
struct User: Identifiable {
    let id = "Unknown"
}

struct ContentView: View {
    @State private var user: User? = nil
    var body: some View {
        Button("Tap to create User") {
            user = User()
        }
        .sheet(item: $user, content: { user in
            Text(user.id)
        })
    }
}
struct ContentView: View {
@State private var user: User? = nil
@State private var isShowingAlert = false
var body: some View {
Button("Tap to create User") {
user = User()
isShowingAlert = true
}
.alert("Hallo", isPresented: $isShowingAlert, presenting: user) { user in
Text(user.id)
}
}
}💡 추가로 .presentationDetents로 sheet의 크기를 조정할 수 있다.
            Text(user.id)
.presentationDetents([.medium, .large])Group을 활용해서 스크린의 상황에 따라 다르게 배치하기
Group으로 배치하고 싶은 View들을 Group으로 묶어두고 상황에 따라 다르게 배치할 수 있다.
아래는 horizontalSizeClass에 따라 TextView를 V 혹은 HStack으로 나타냈다.
struct TextView: View {
    var body: some View {
        Group {
            Text("하나: One, Eins, Uno")
            Text("둘: Two, Zwei, Dos")
            Text("셋: Three, Drei, Tres")
        }
        .font(.title)
    }
}

struct ContentView: View {
    @Environment(\.horizontalSizeClass) var horizontalSizeClass
    var body: some View {
        if horizontalSizeClass == .compact {
            VStack {
                TextView()
            }
        } else {
            HStack {
                TextView()
            }
        }
    }
}❗️ 참고로 찾아보니 가능한 horizontal space를 계산하는 거라서 위의 예시에서는 가로/세로 모드에서도 모두 VStack이다.
horizontalSizeClass https://developer.apple.com/documentation/swiftui/environmentvalues/horizontalsizeclass
💡 추가로 ViewThatFits로 화면에서 가능한 공간에 적합한(fit) 요소를 우선으로 보여줄 수 있다.
ViewThatFits {
    Rectangle()
        .frame(width: 500, height: 200)

    Circle()
        .frame(width: 200, height: 200)
}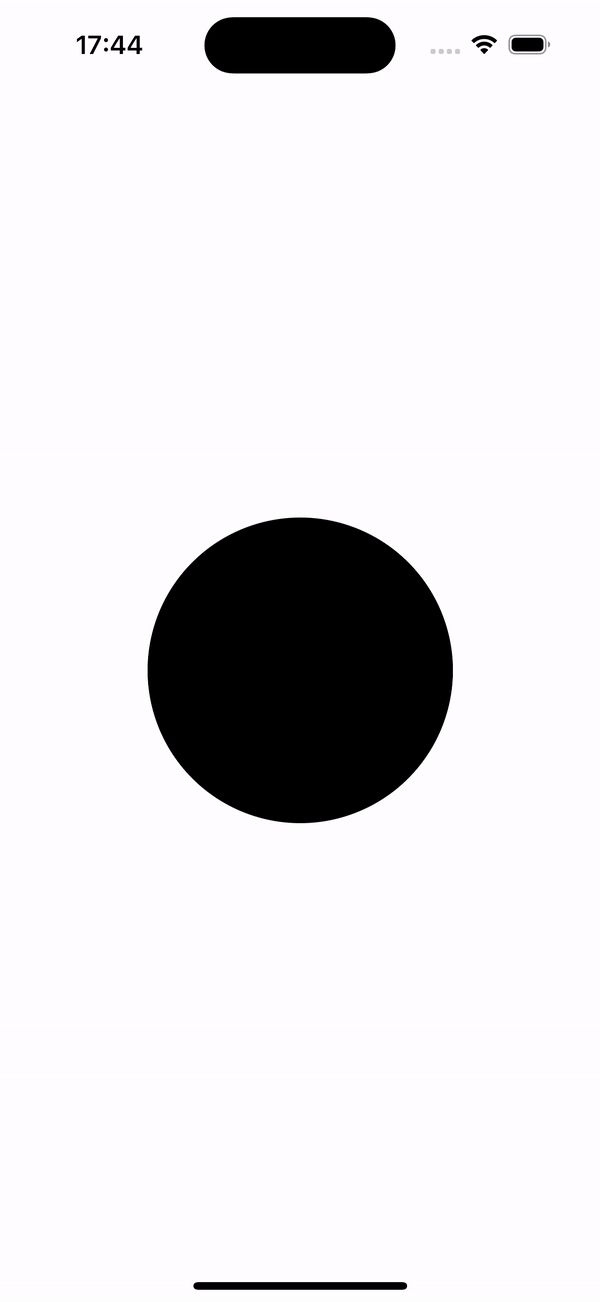
세로 모드일 때 width가 Rectangle은 휴대폰의 가로 길이보다 커서 Circle을 보여주고, 가로 모드일 때 width가 세로 길이에서 가능한 Rectangle을 보여준다.
Searchable
.searchable()에 State인 text를 기반으로 View의 요소를 검색할 수 있다.
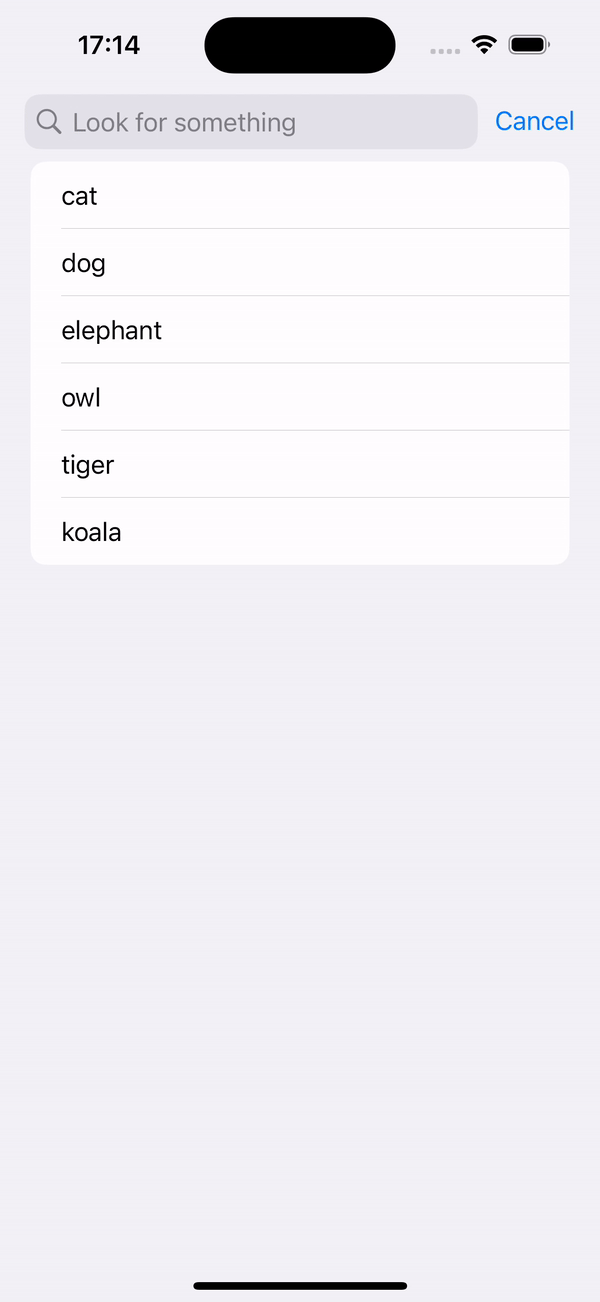
struct ContentView: View {
    @State private var searchText = ""
    let animals = ["cat", "dog", "elephant", "owl", "tiger", "koala"]
    var filteredAnimals: [String] {
        if searchText.isEmpty {
            return animals
        } else {
            return animals.filter { $0.localizedStandardContains(searchText) }
        }
    }

    var body: some View {
        NavigationStack {
            List(filteredAnimals, id: \.self) { animal in
                Text(animal)
            }
            .searchable(text: $searchText, prompt: "Look for something")
        }
    }
}❗️ NavigationStack 안에서 이뤄져야 한다!
@Observable을 environment로 공유하기
아래 코드가 있다.
@Observable
class Player {
    var name = "Anonymous"
    var highScore = 0
}

struct ScoreView: View {
    var player: Player
    var body: some View {
        Text("Your high score: \(player.highScore)")
    }
}

struct ContentView: View {
    @State private var player = Player()
    var body: some View {
        VStack {
            ScoreView(player: player)
        }
    }
}
여기에서 player를 여러 뷰에서 공유하고 싶다면 아래 과정을 거치면 된다.
- player를 인자가 아니라 .environment로 전달하여 Environment로 사용한다. 이는 @Observable이라서 가능하다. 객체가 Environment로 배치되면 모든 하위 뷰에서 객체를 읽을 수 있다고 한다.
- 하지만 위를 binding할 경우에는 문제가 생긴다. 예시로 stepper에서
player의highScore값을 바인딩하려고 하면 에러가 난다. 이를 해결하기 위해서 로컬에서player의 속성을 복사하여 사용할 수 있도록 바인딩으로 감싸는 것이다.
struct ScoreView: View {
    @Environment(Player.self) var player
    var body: some View {
        @Bindable var player = player
        Stepper("Your high score: \(player.highScore)", value: $player.highScore)
    }
}

struct ContentView: View {
    @State private var player = Player()
    var body: some View {
        VStack {
            ScoreView()
        }
        .environment(player)
    }
}